Biocoded Administration Guide
Login to Dashboard
Tip
By default web dashboard is accessible on management port of the server https://[your-server]:38443/admin/ System administrator can change this to another port or handle.
Warning
Web dashboard is available only if administrator has configured and enabled the module.
Warning
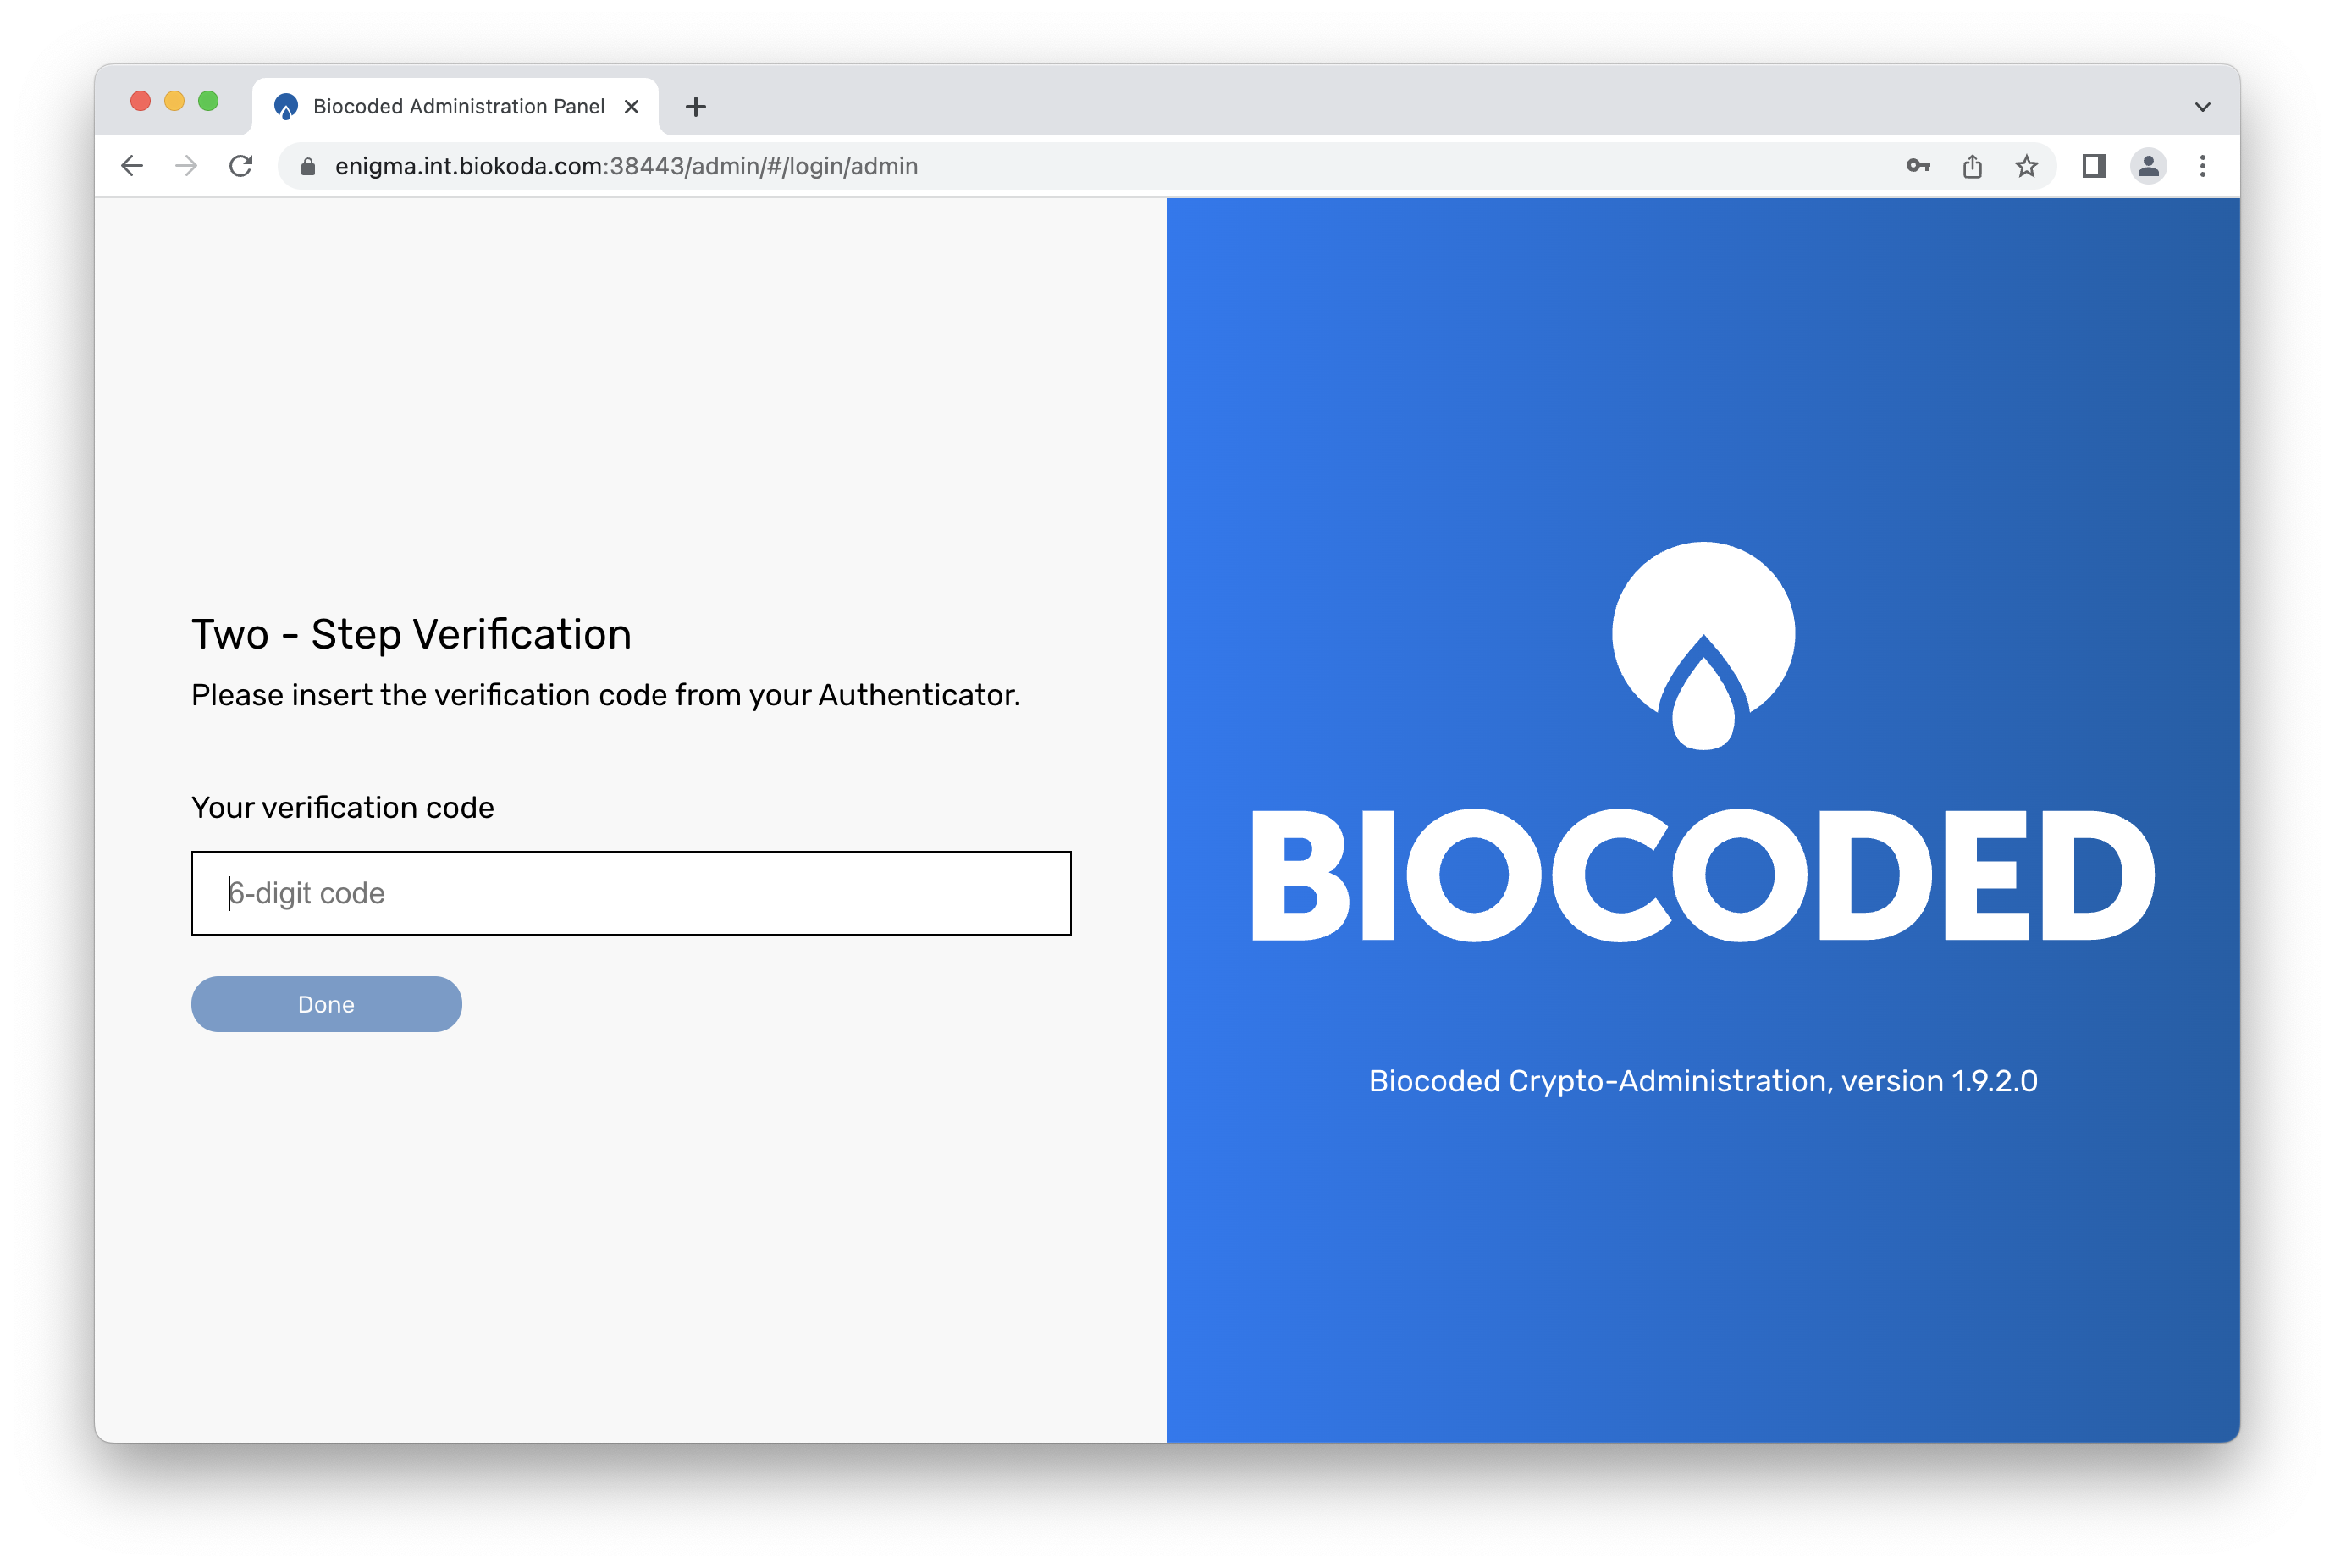
An authentication code can be obtained after you enter your TOTP auth code from admin profile into authenticator application, which generates time-limited codes. Yubikey 2FA is can be enabled similarly by setting a yubikey code (generated by your Yubikey).
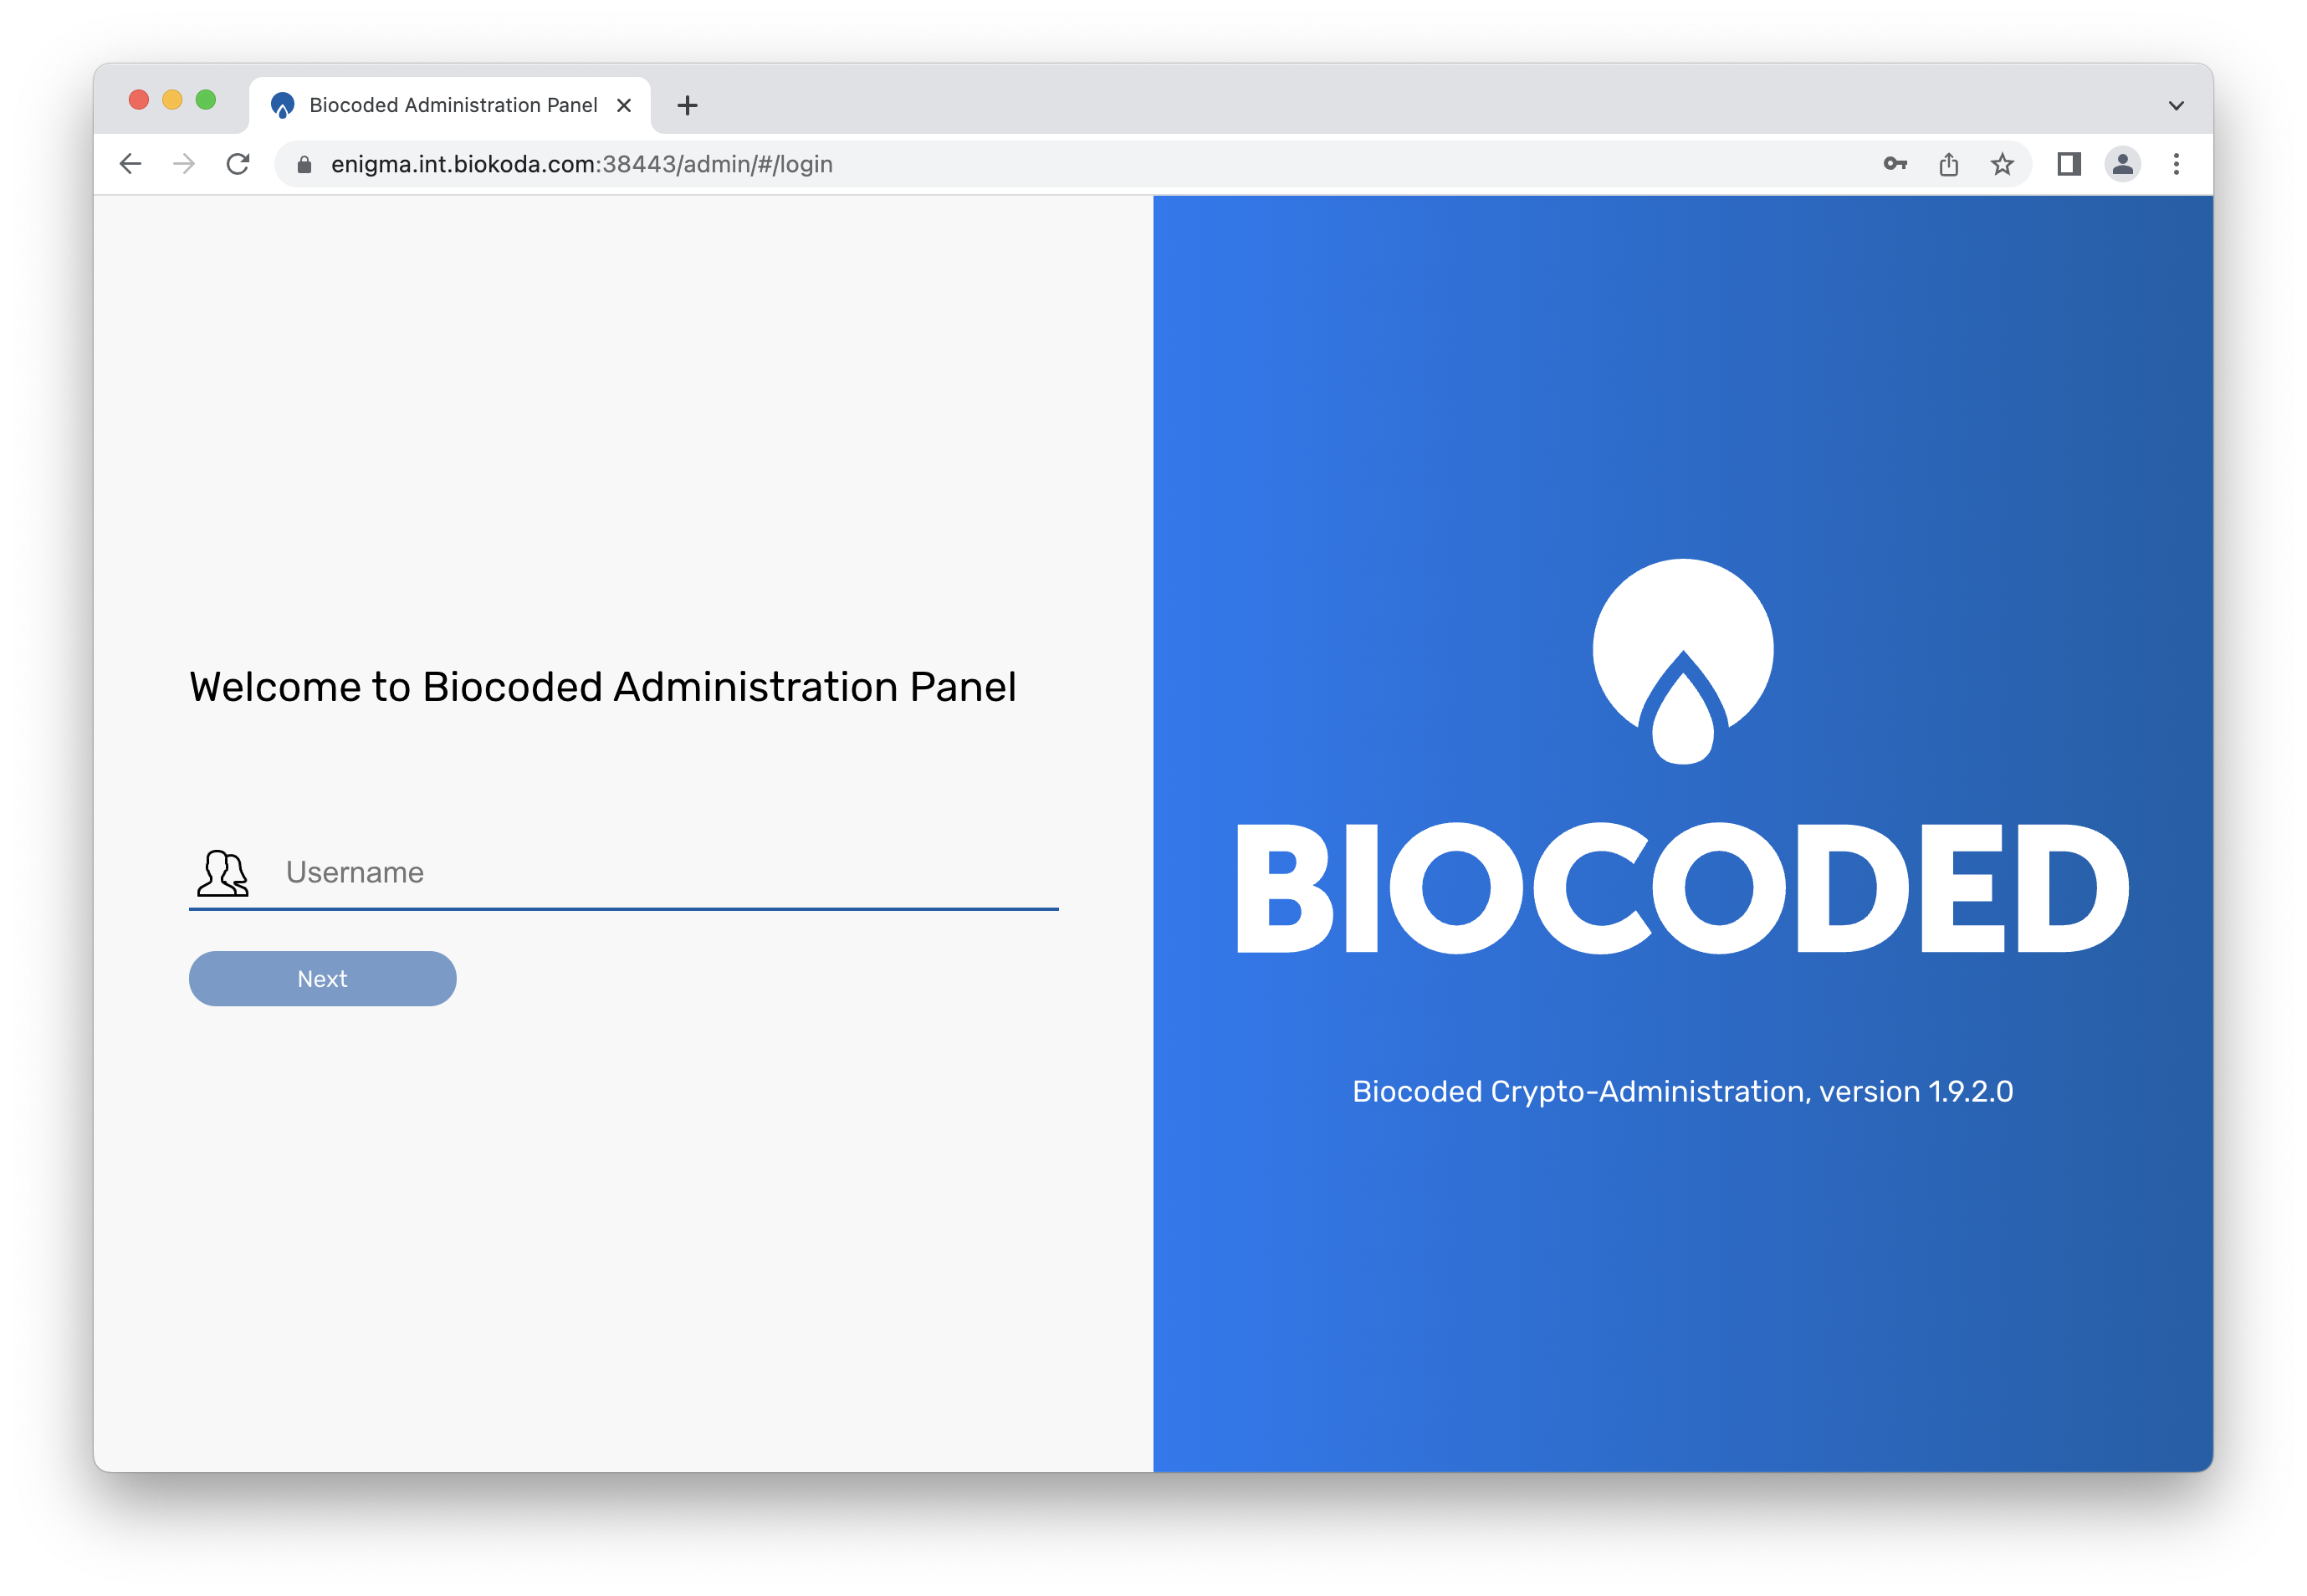
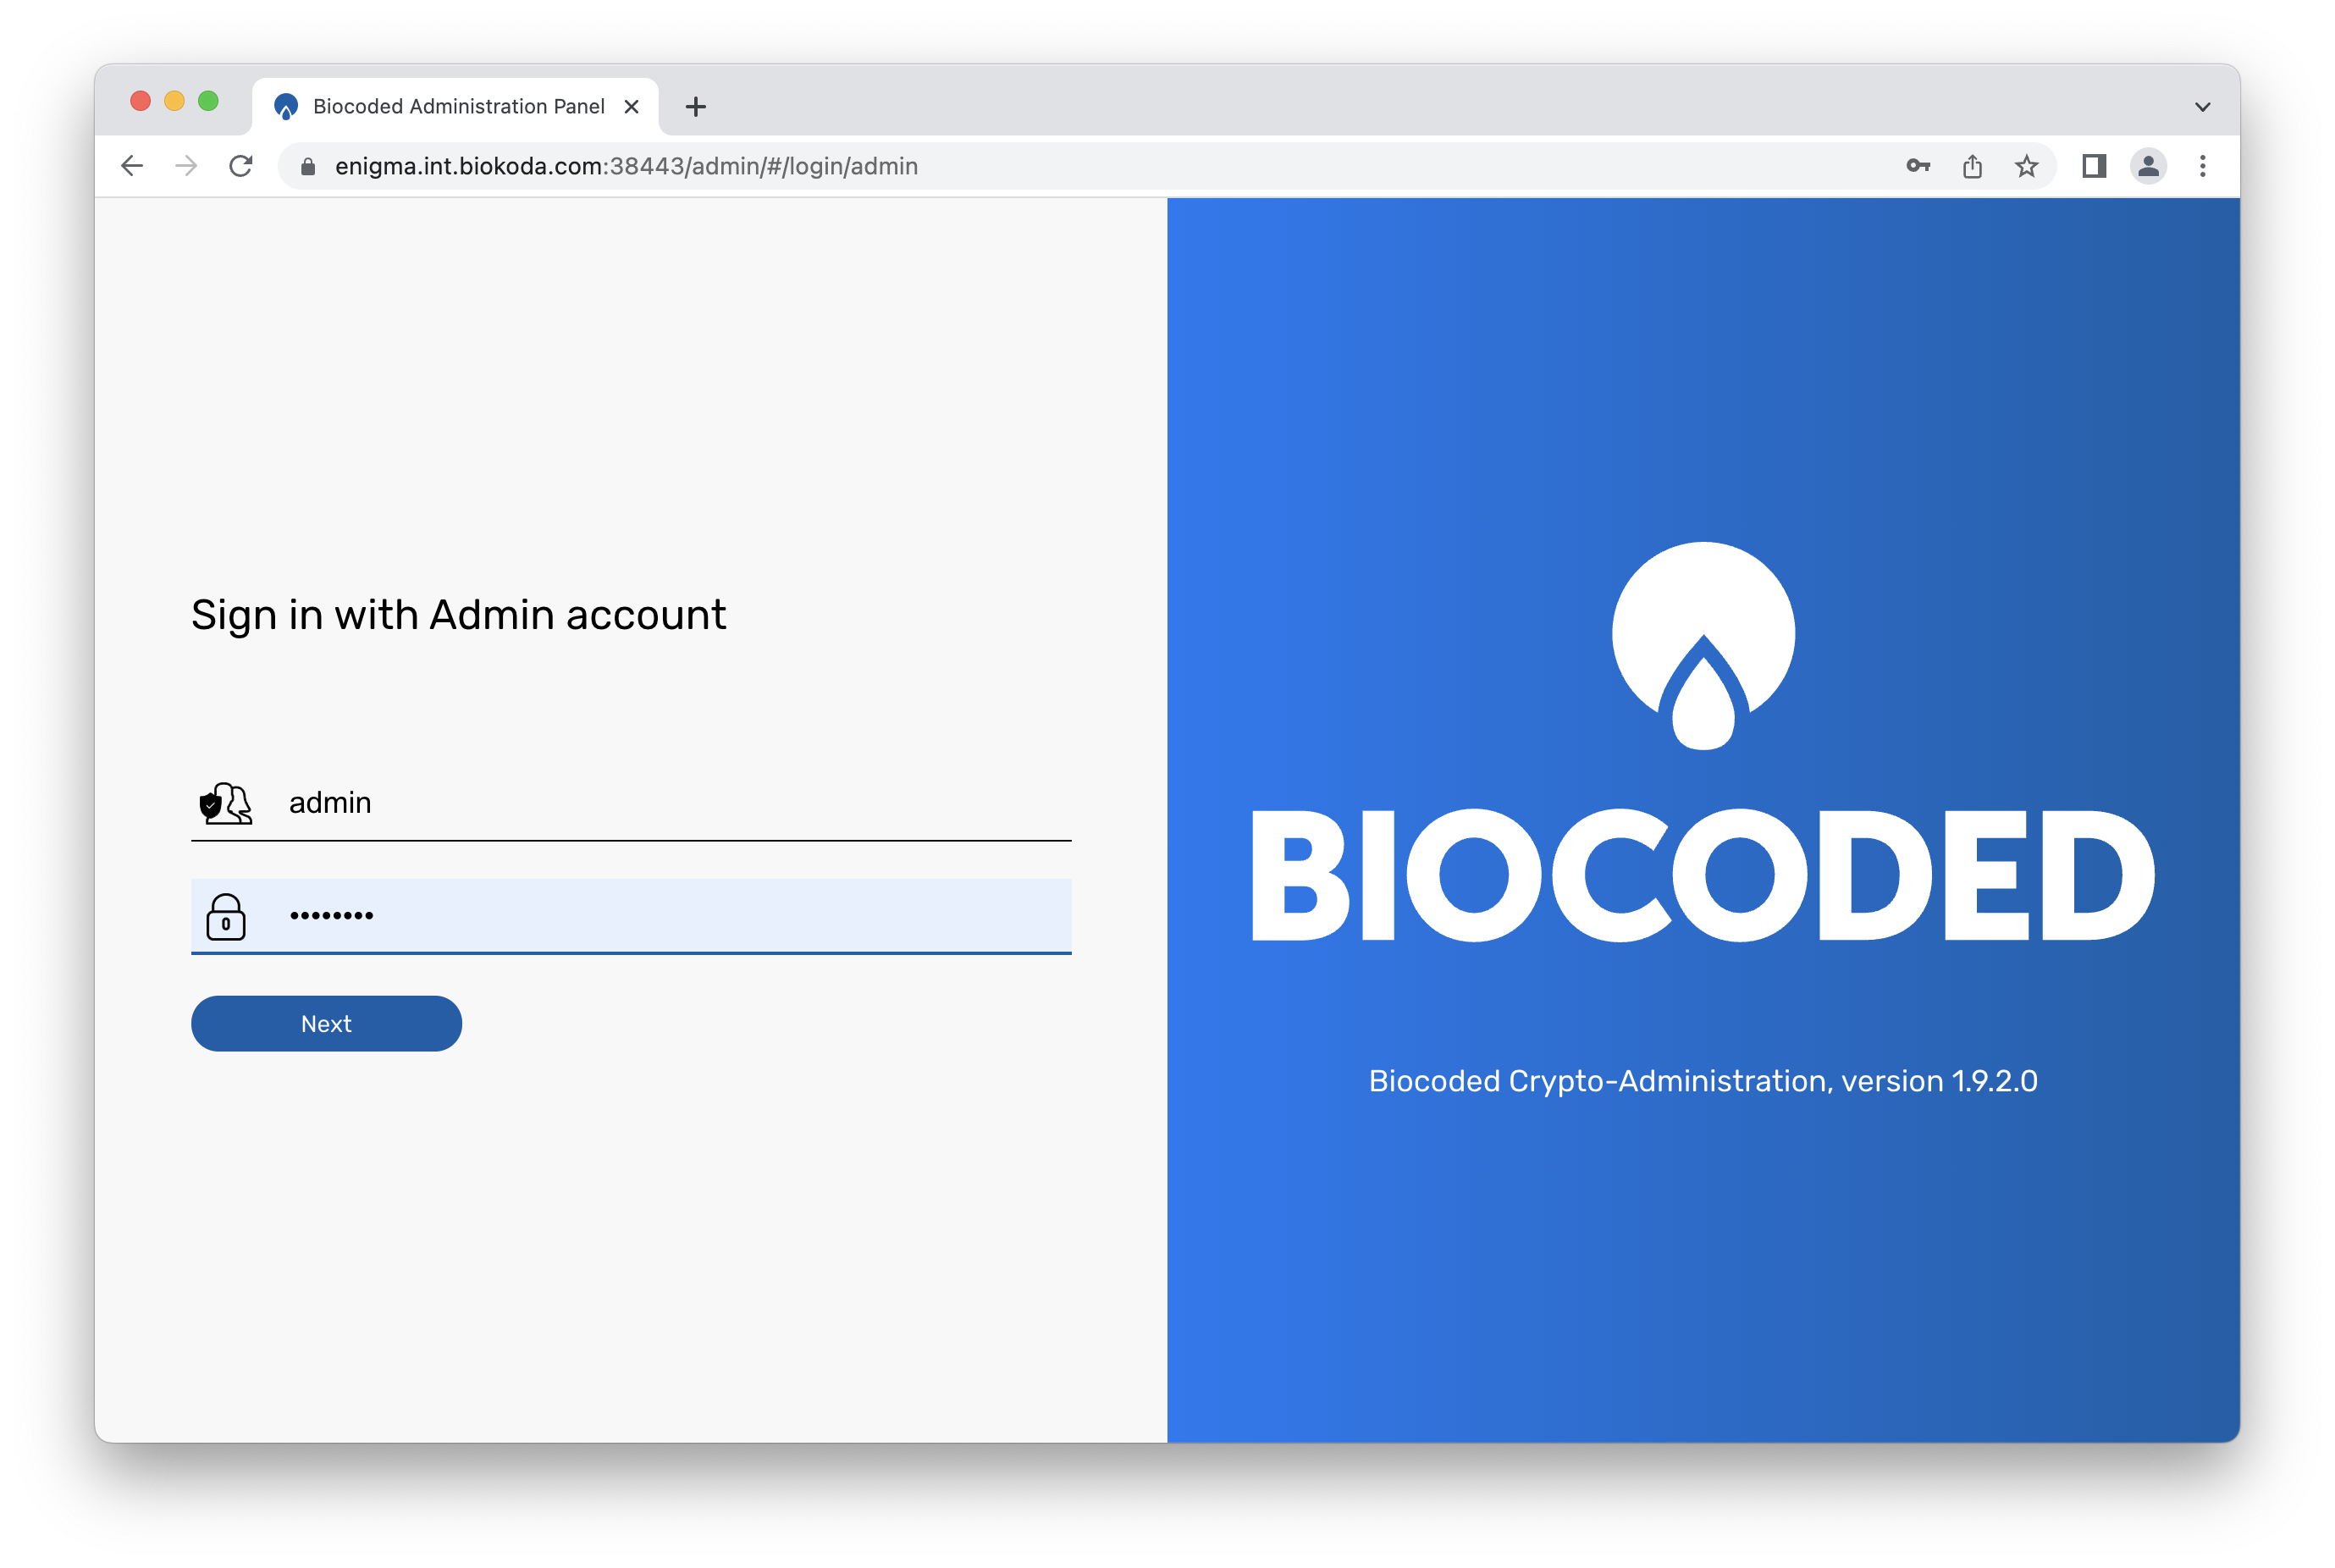
After visiting the web administration URL, a log in screen appears, where admins can enter their administration username, password and two-factor authentication code, if authentication mode "Password with TOTP 2FA" is enabled for this admin account. If "Password with Yubikey 2FA" is enabled, you will need to enter your Yubikey authentication code. Authentication mode can be changed in "Admins" tab. If it is set to password only, an authentication code is not required.
Dashboard
After logging in, the Biocoded Administration Panel Dashboard appears, containing system summary about the server, including device statistics, server uptime, the numbers of users, groups, links, recent threats, unactivated devices, locked devices, client install password (for installing applications) and two graphs displaying relayed messages and calls.
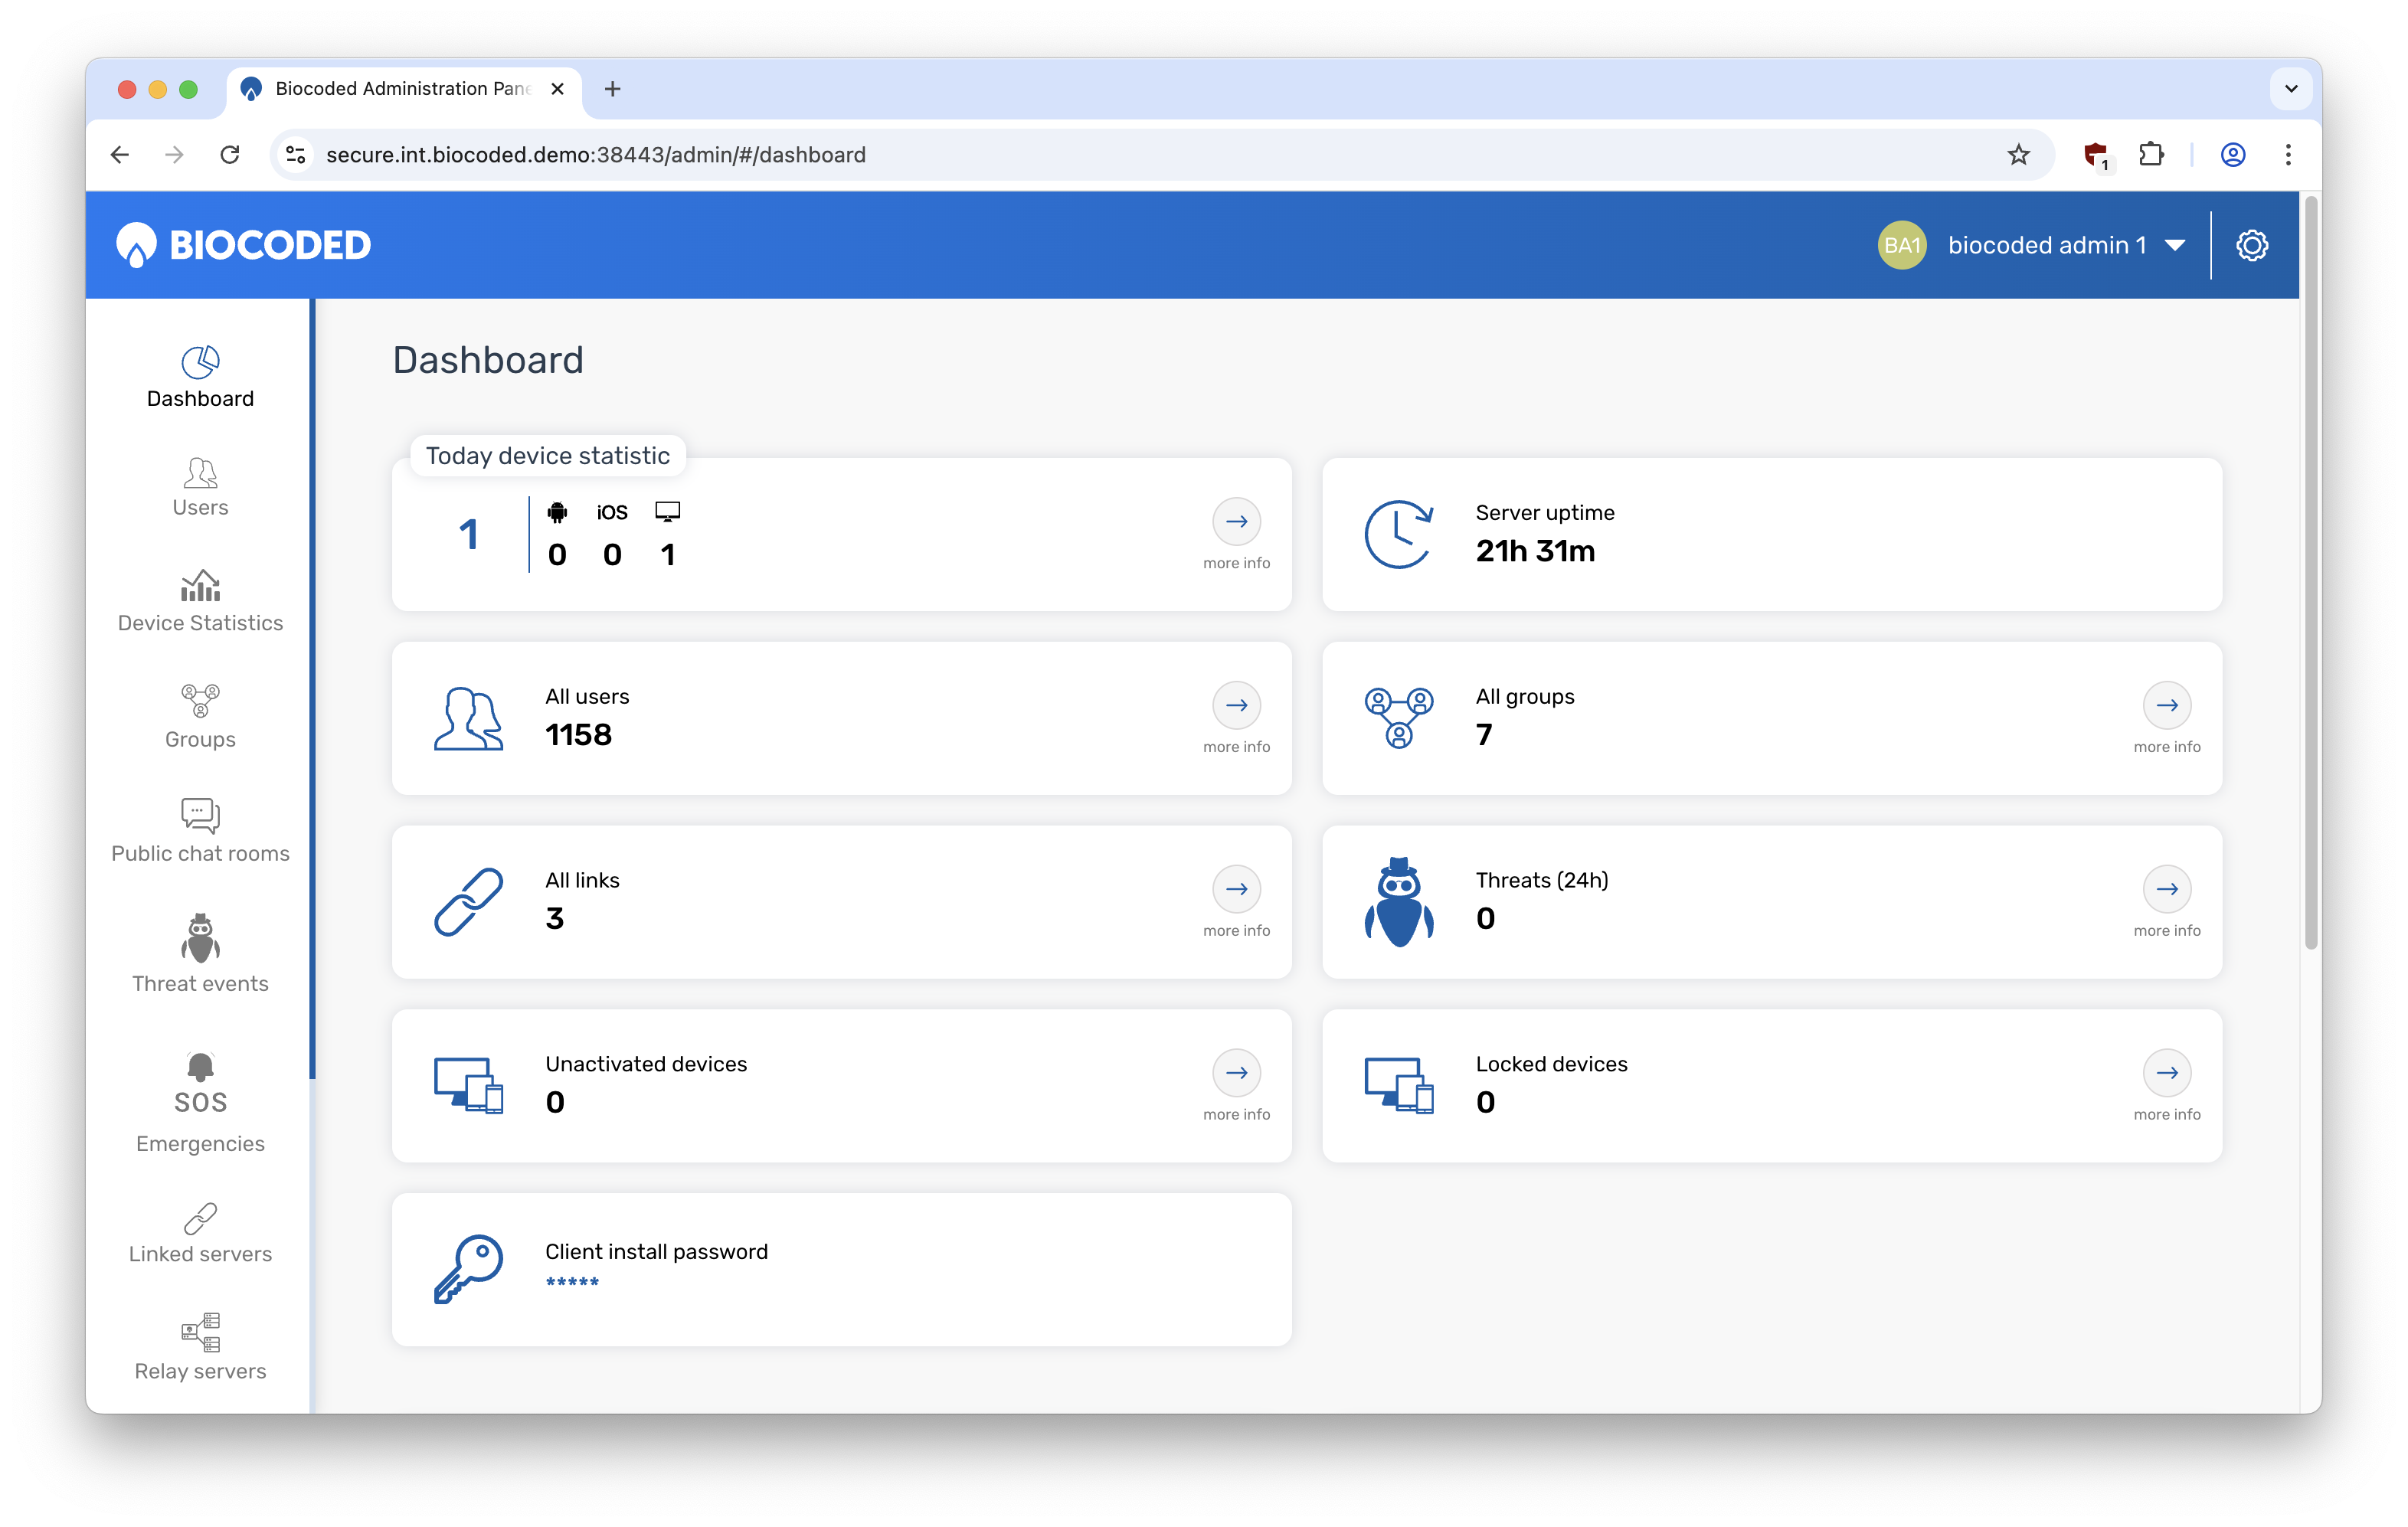
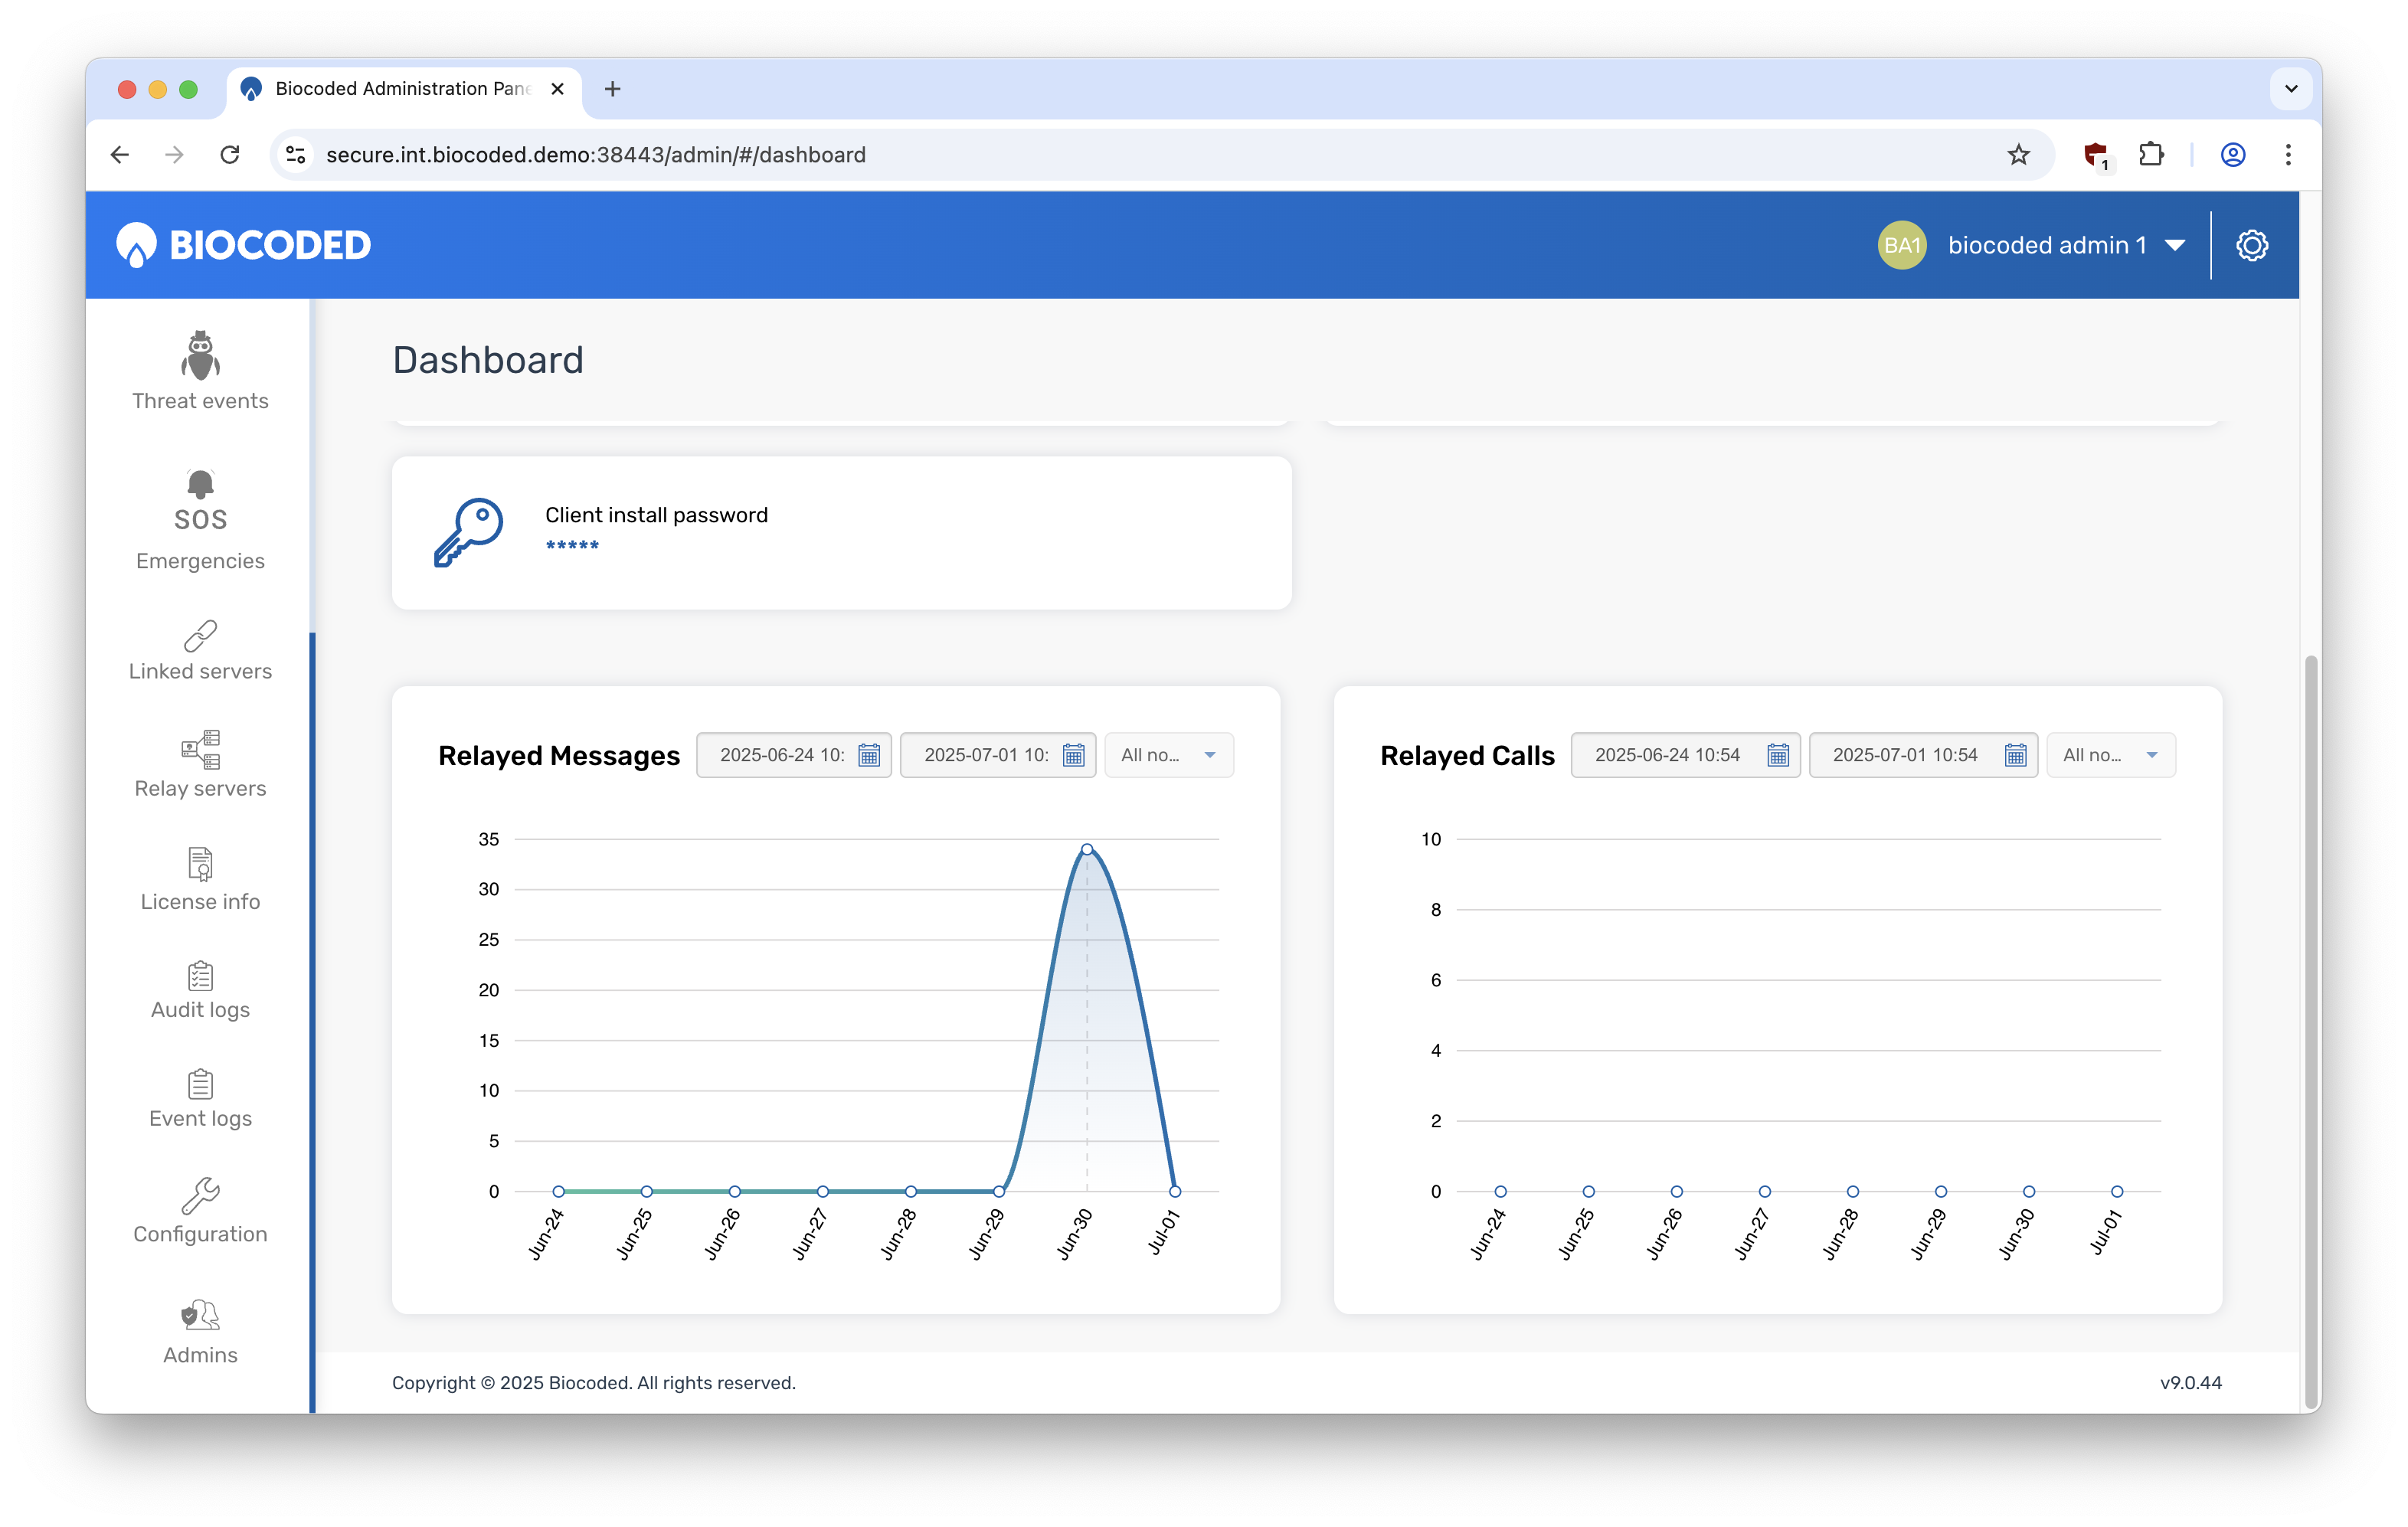
Clicking on "more info" redirects the admin to a corresponding tab listed on the left side of the page. The list of tabs includes:
- Dashboard - this page,
- Users - a list of Biocoded users registered on this server,
- Device statistics - an overview of number of devices per platform, installed Biocoded versions and operating system versions,
- Groups - groups that connect users,
- Public chat rooms - existing public chat rooms,
- Threat events - events that could jeopardise the server's safety,
- Emergencies - a list of triggered emergency signal broadcasts,
- Linked servers - other servers connected to this one,
- Relay servers - additional servers for routing messages,
- License info - information about the server's license and it's validity,
- Audit logs - server activity logs,
- Event logs - call, message and crash logs,
- Configuration - various server settings including password policies,
- Admins - a list of administrators for this administration panel.
In the top right corner, the admin's profile can be viewed and managed.
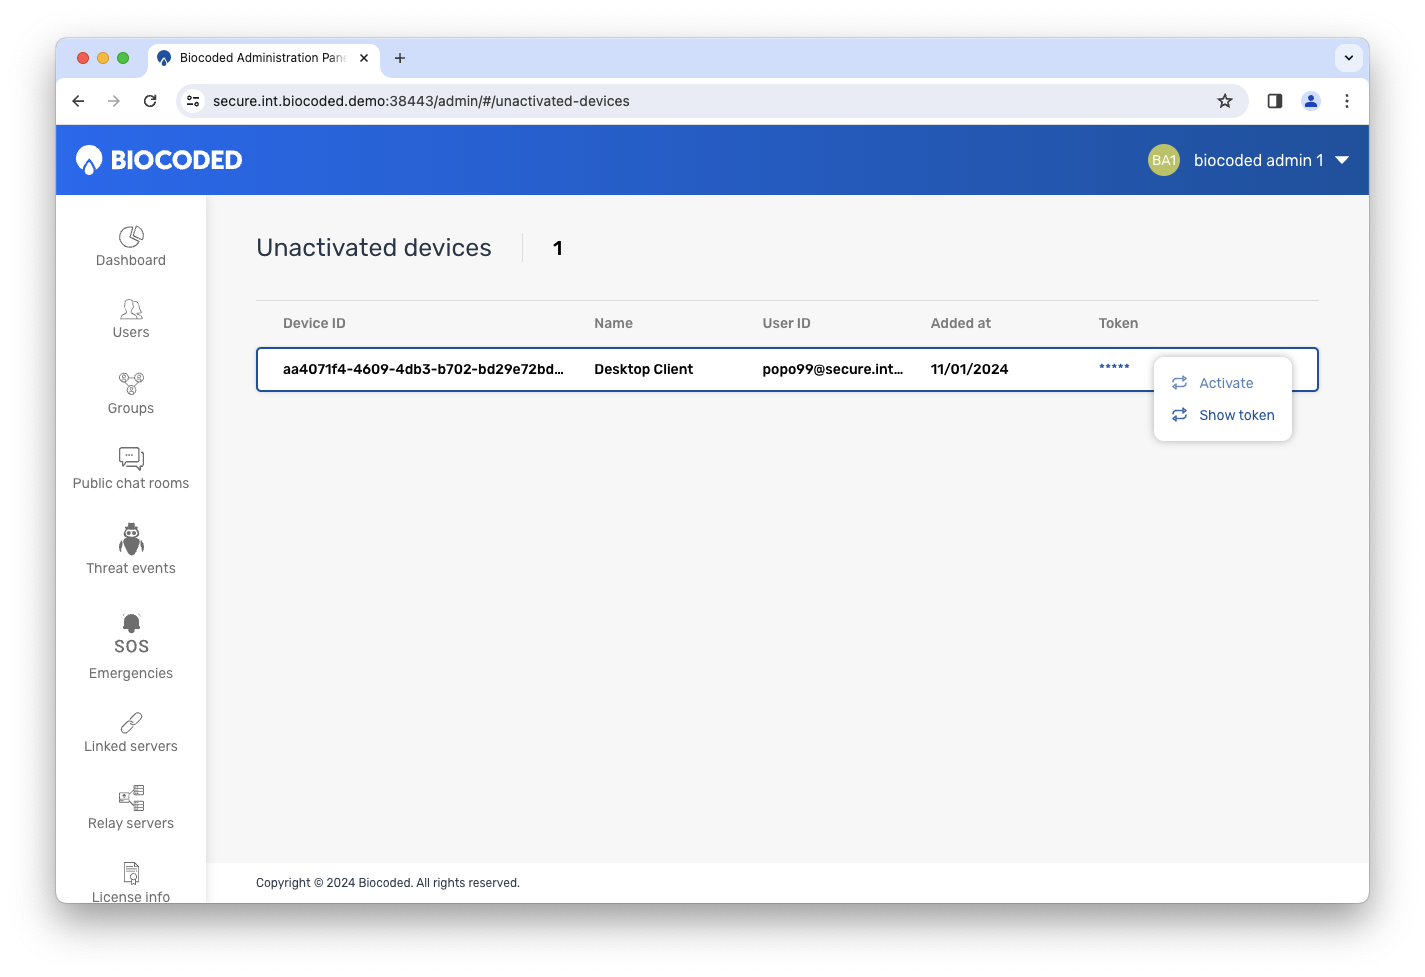
A click on unactivated devices shows a list of unactivated devices, offering the options to show the token used while logging in and the option to manually activate the selected device.
Selecting locked devices opens a list of devices that were put into lockdown mode after some unsuccessful login attempts (if there are any). Admins can unlock the devices and view recently unlocked devices by clicking "Show unlocked devices".
Admin profile
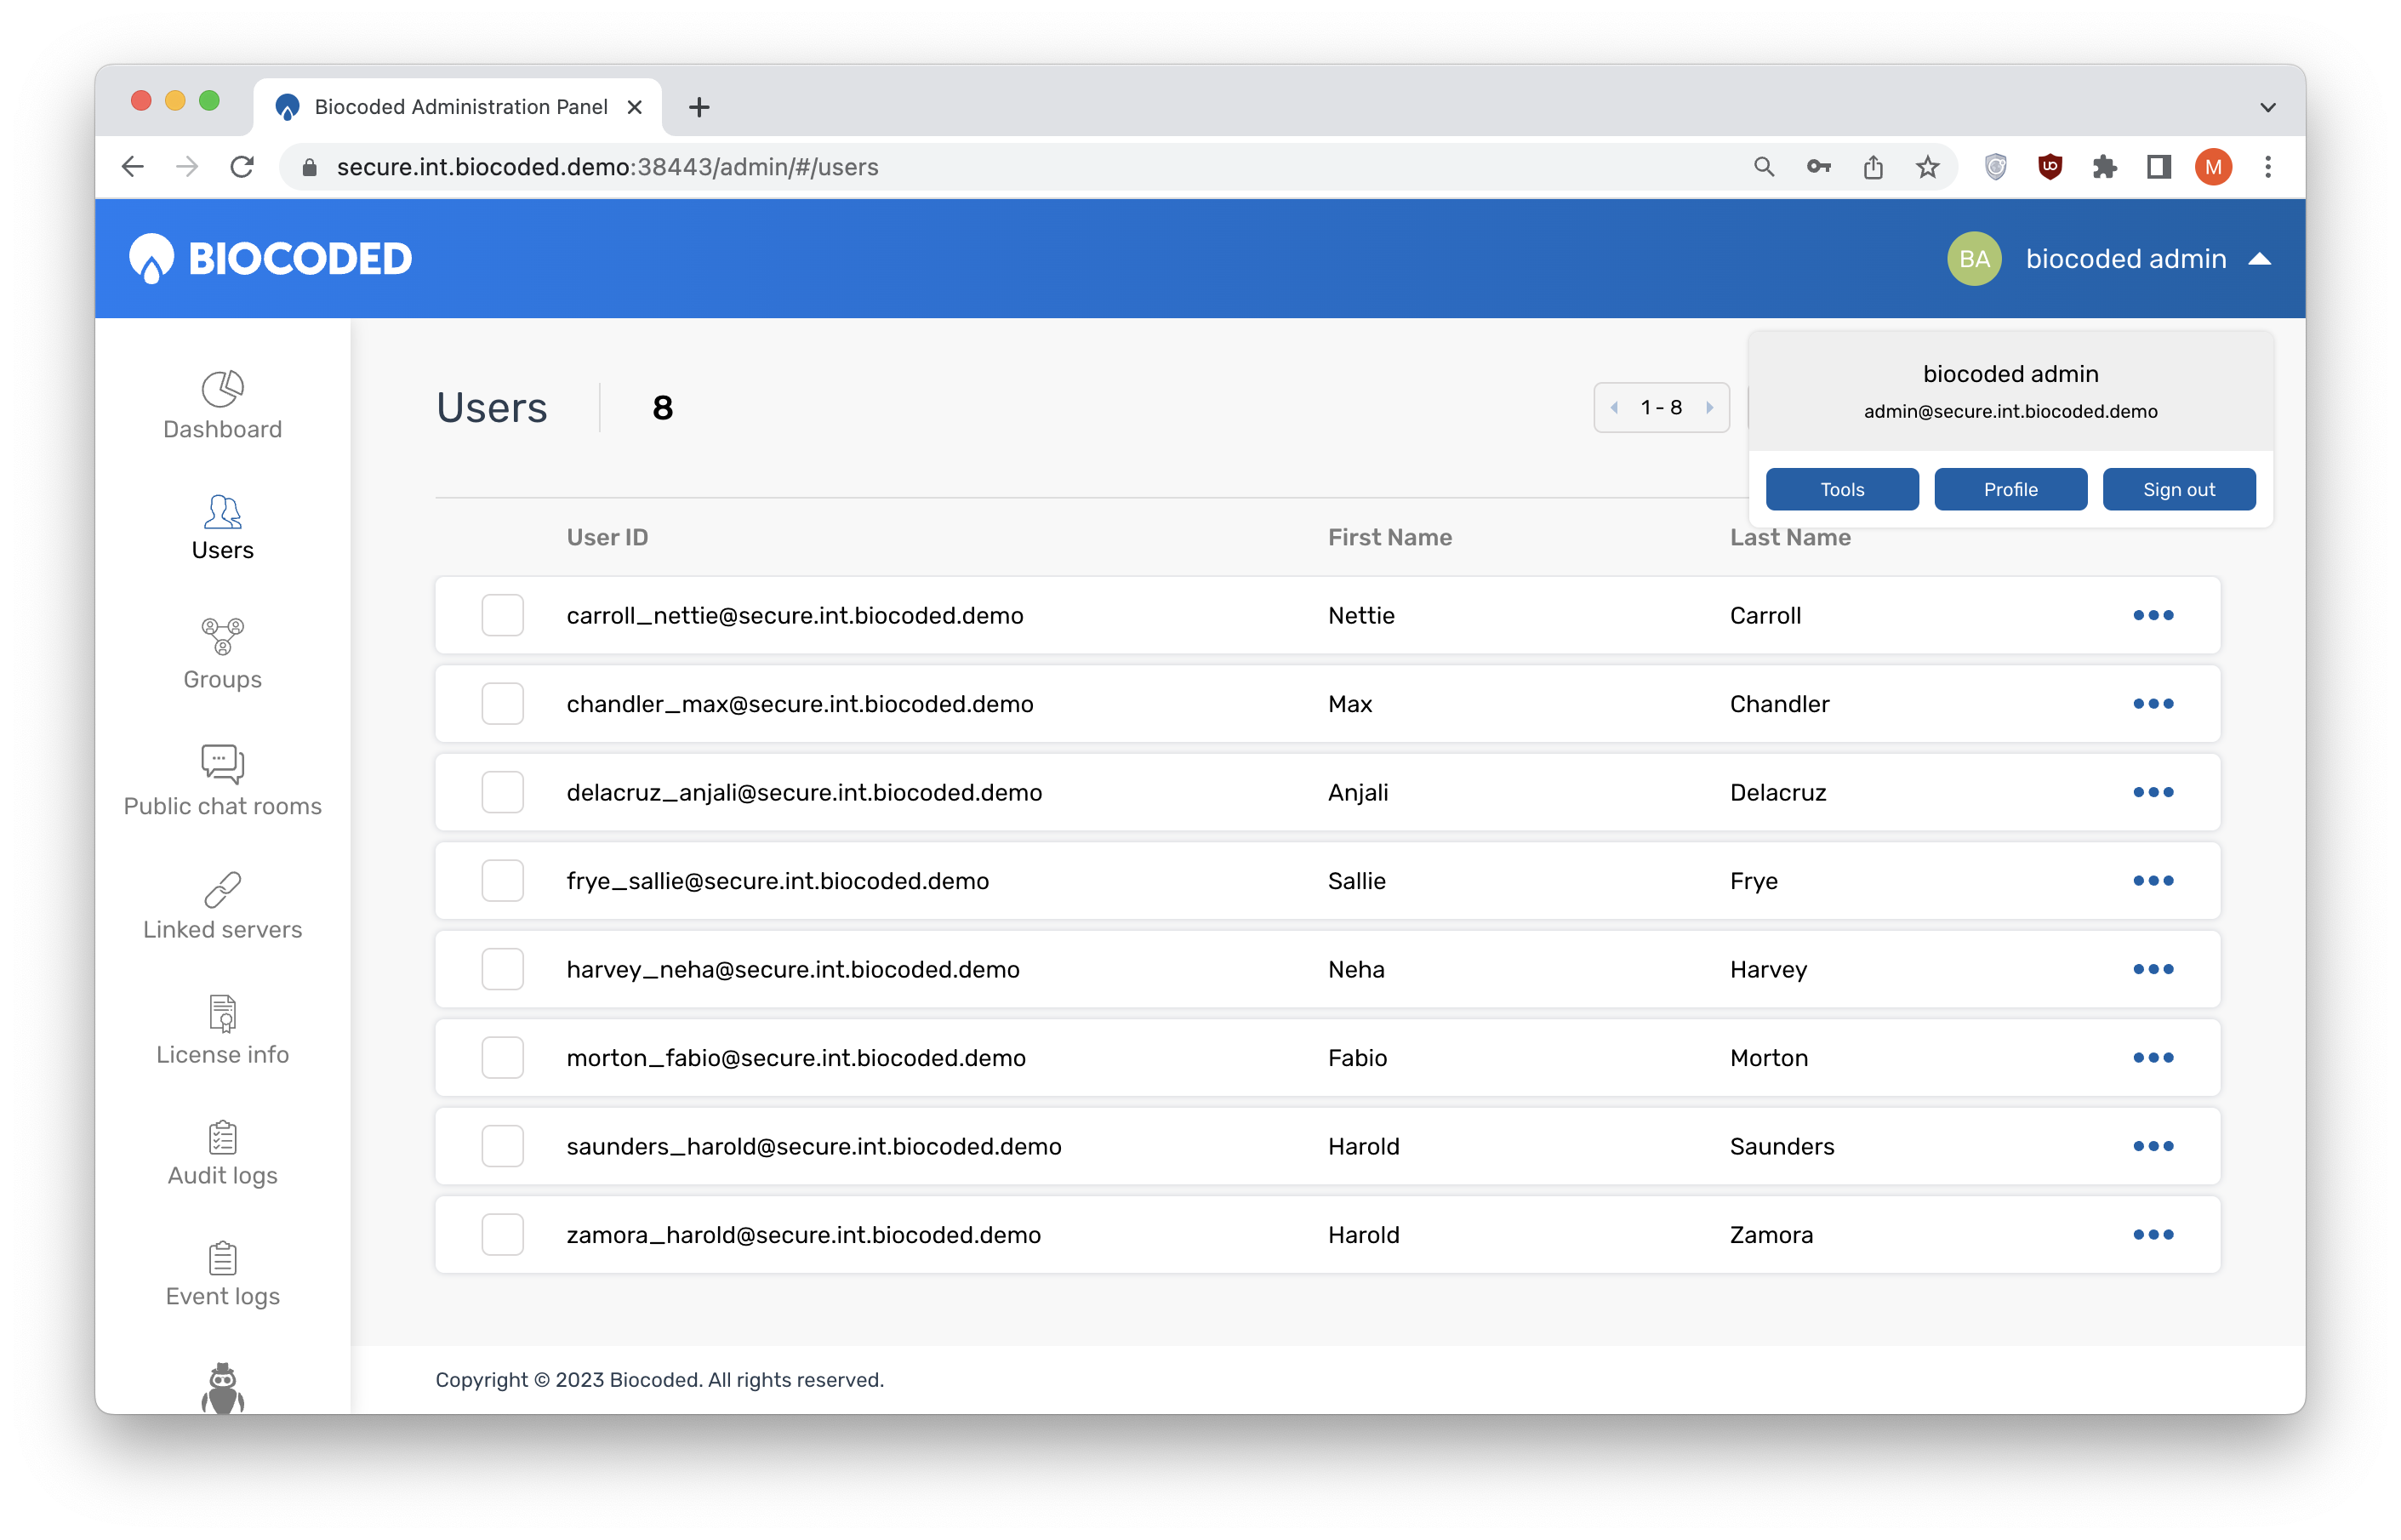
While viewing any tab, admin's profile can be found on the top right part of the page. Clicking it displays the administrator's name, last name, ID and some options:
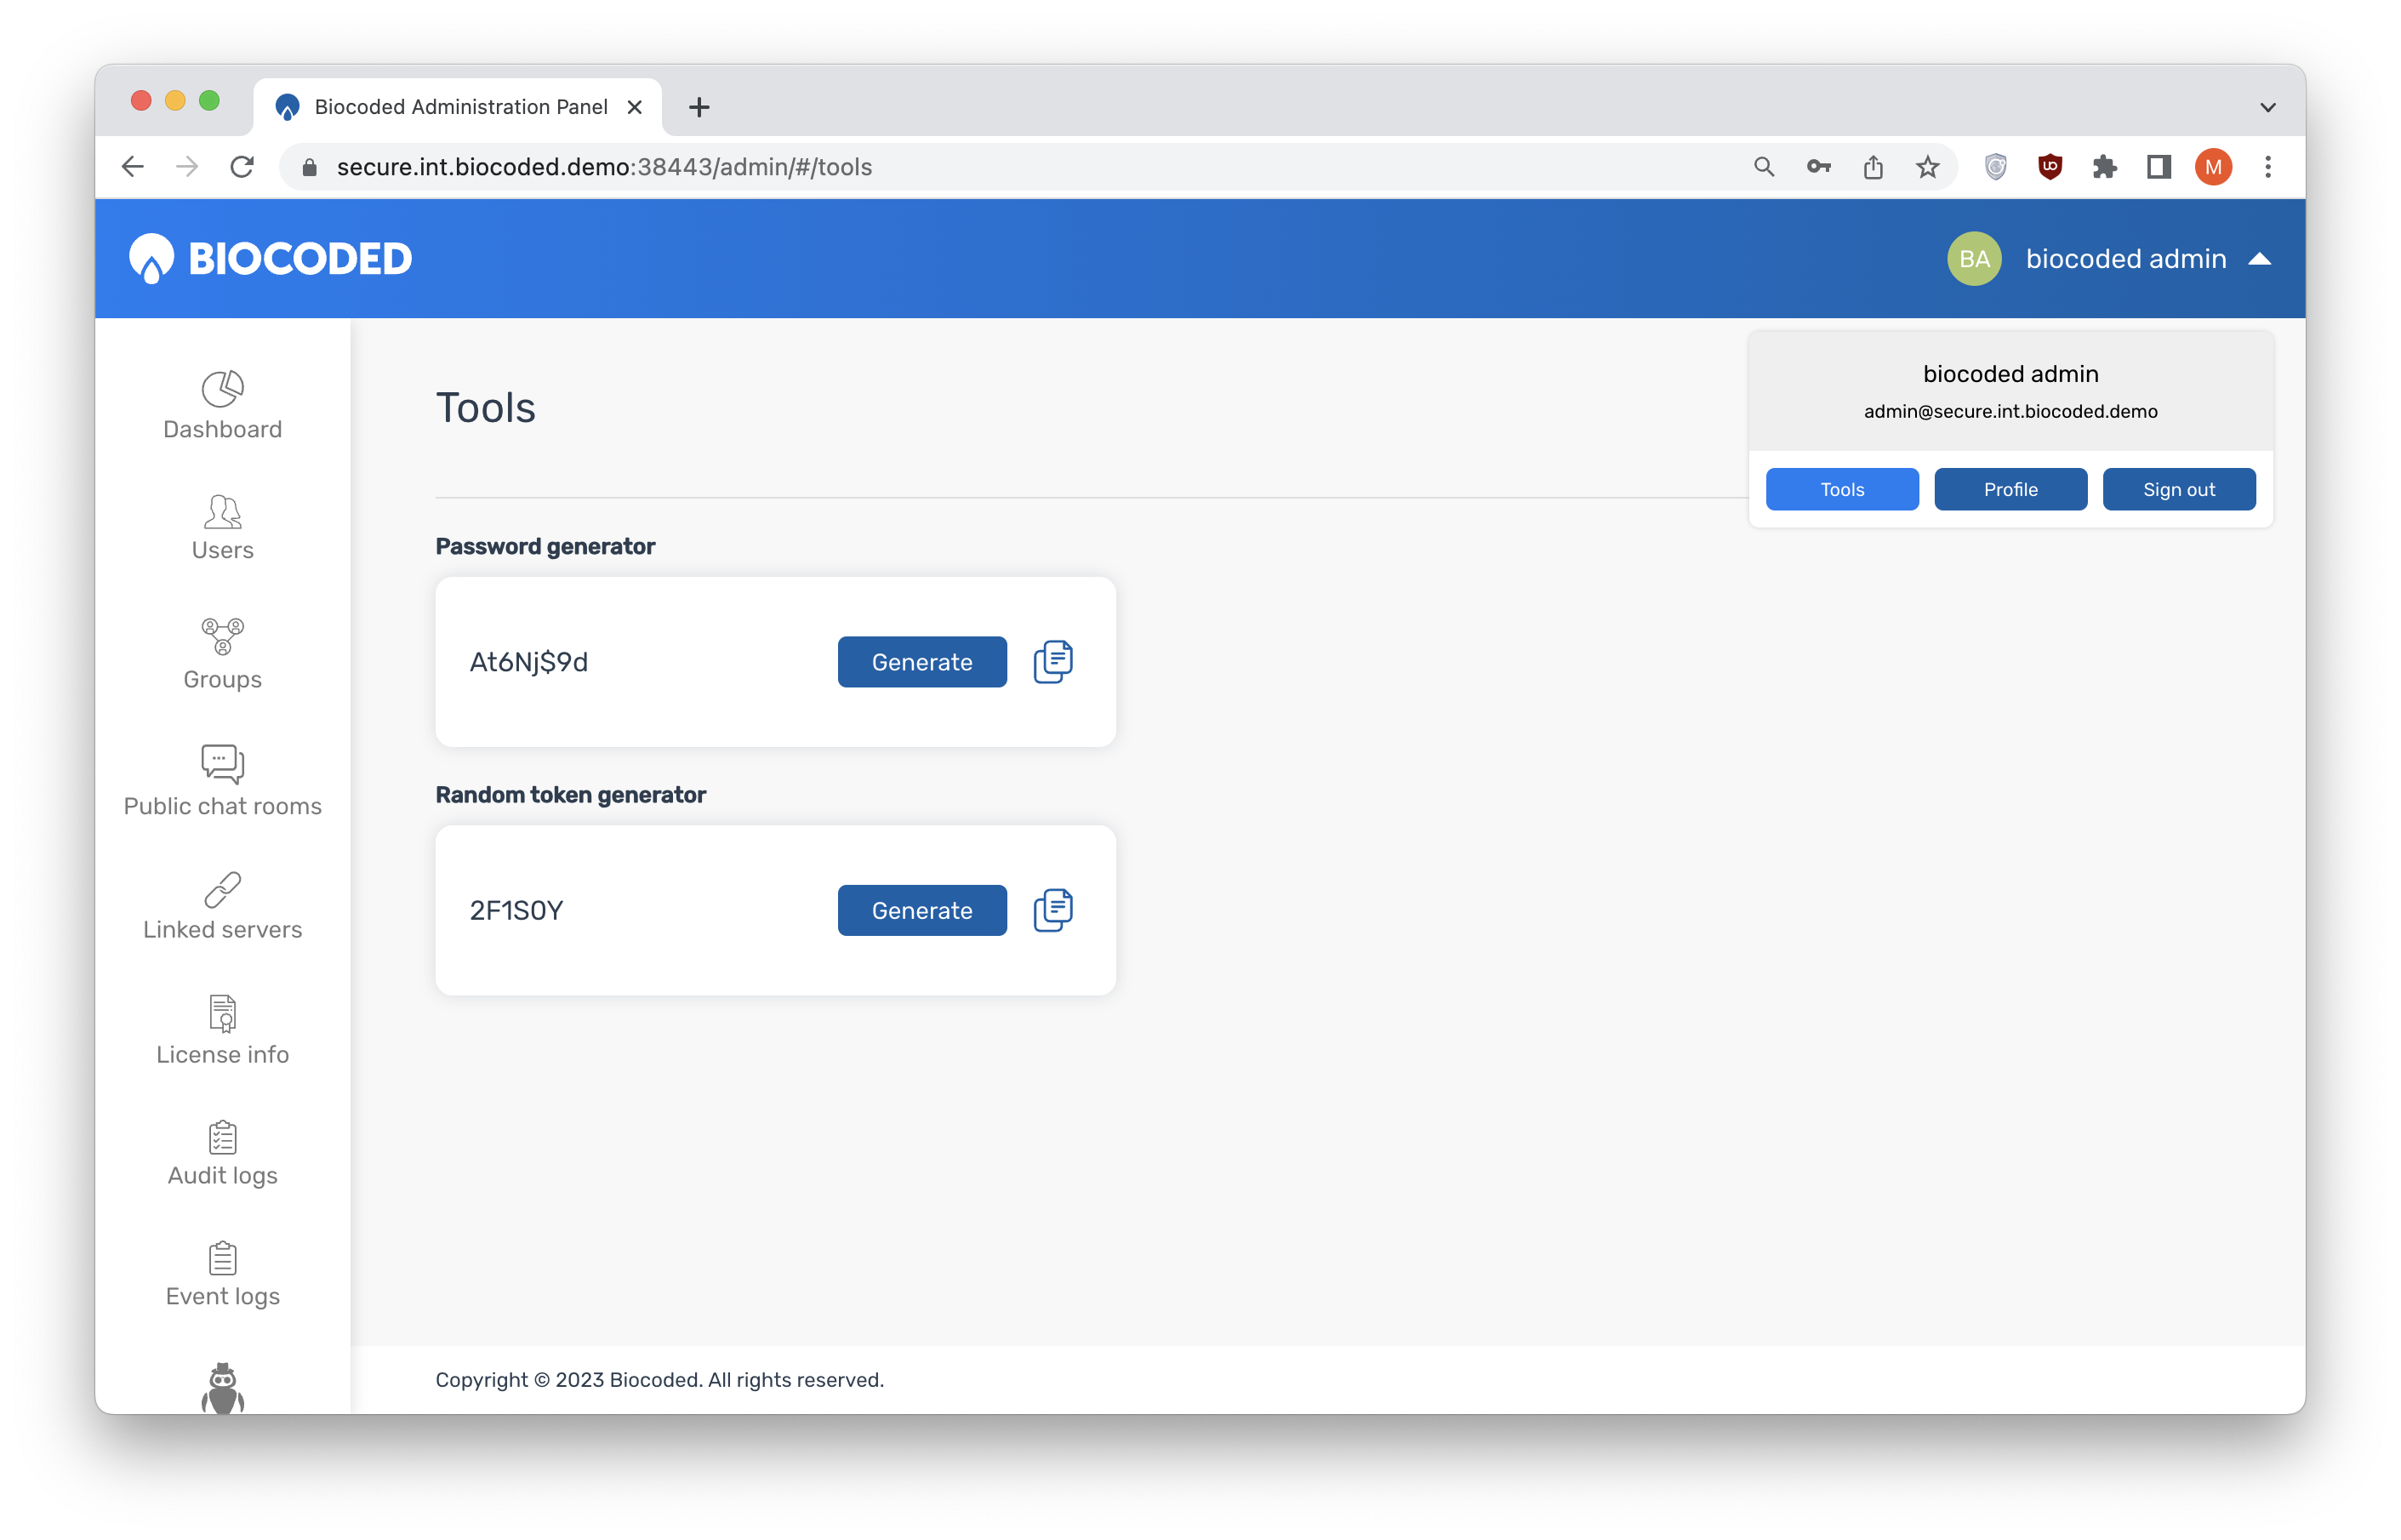
- Tools - displays some useful tools, like random password and token generator,
- Profile - shows the admin profile (which can also be accessed from "Admins" tab),
- Sign out - log out from admin account.
Admin profile tools
A list of useful tools for server administrators, like password generator and random token generator. Generated passwords or tokens can be copied with  , re-generation can be triggered by clicking on "Generate".
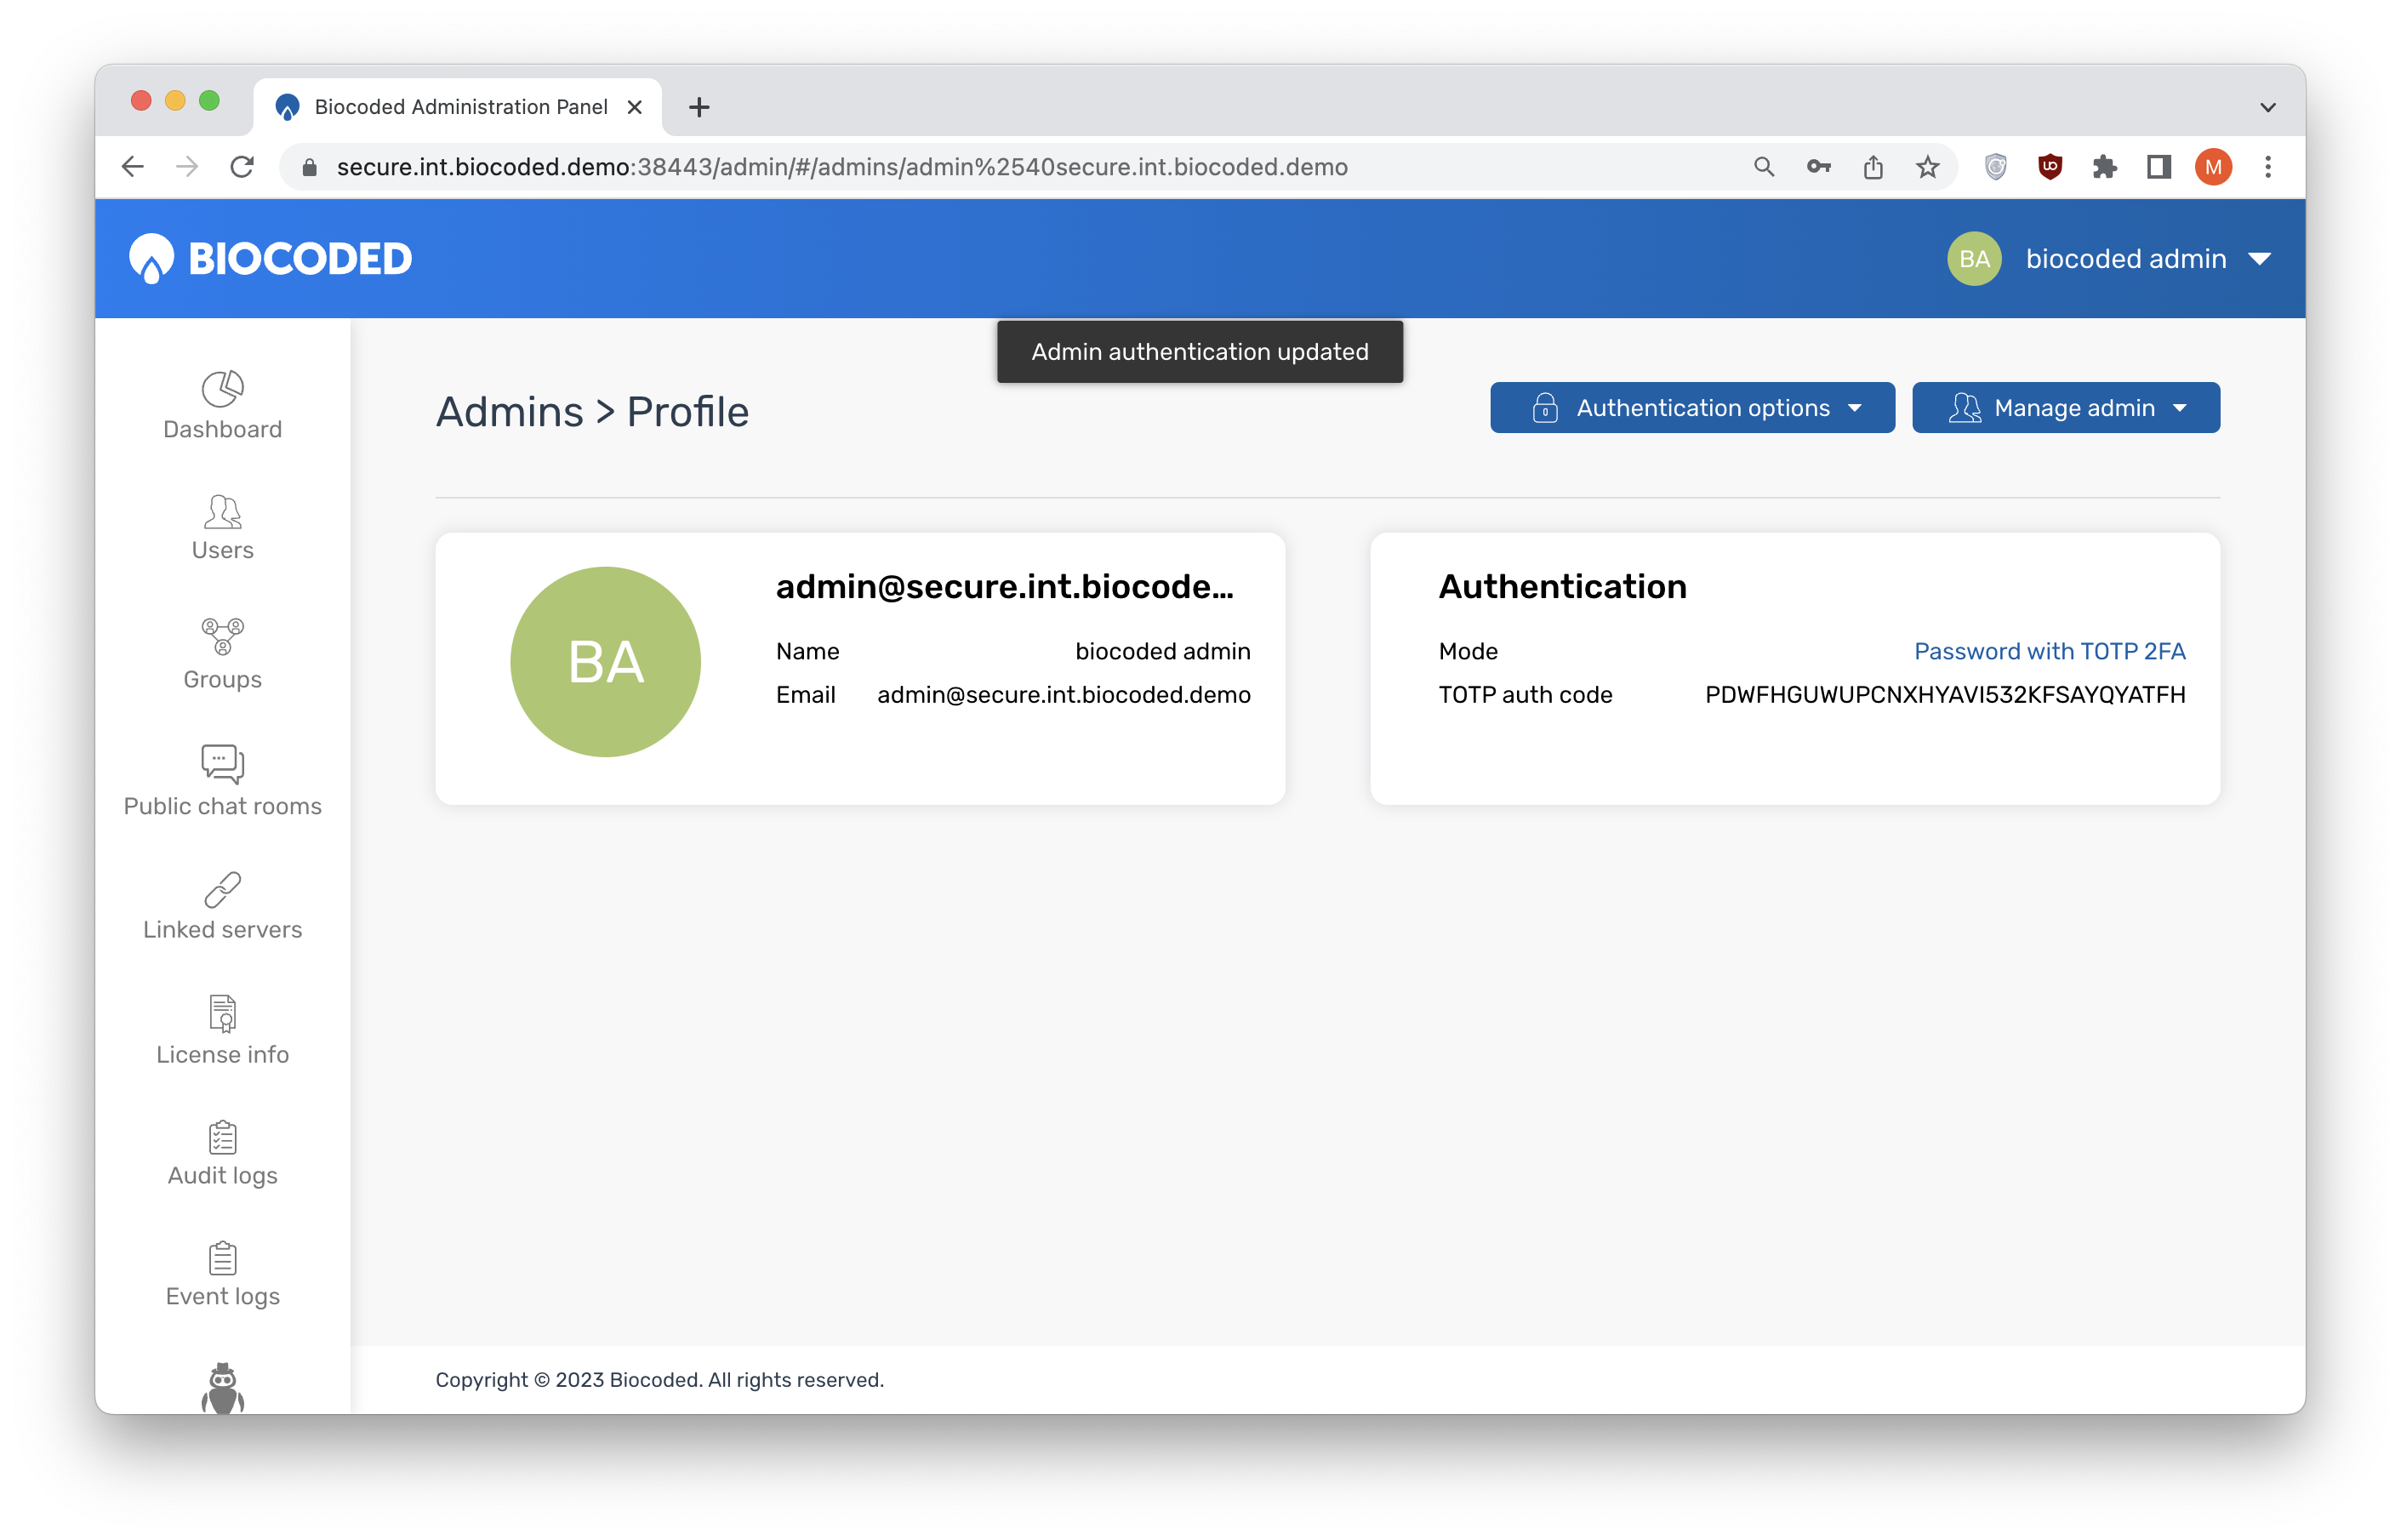
View admin profile
Viewing the profile of a server administrator shows their username, name, surname, email and some authentication parameters like authentication mode and, if password with TOTP 2FA (Time-based One-Time Passwords Two Factor Authentication) is selected, a TOTP auth code or similar for Yubikey authentication mode.
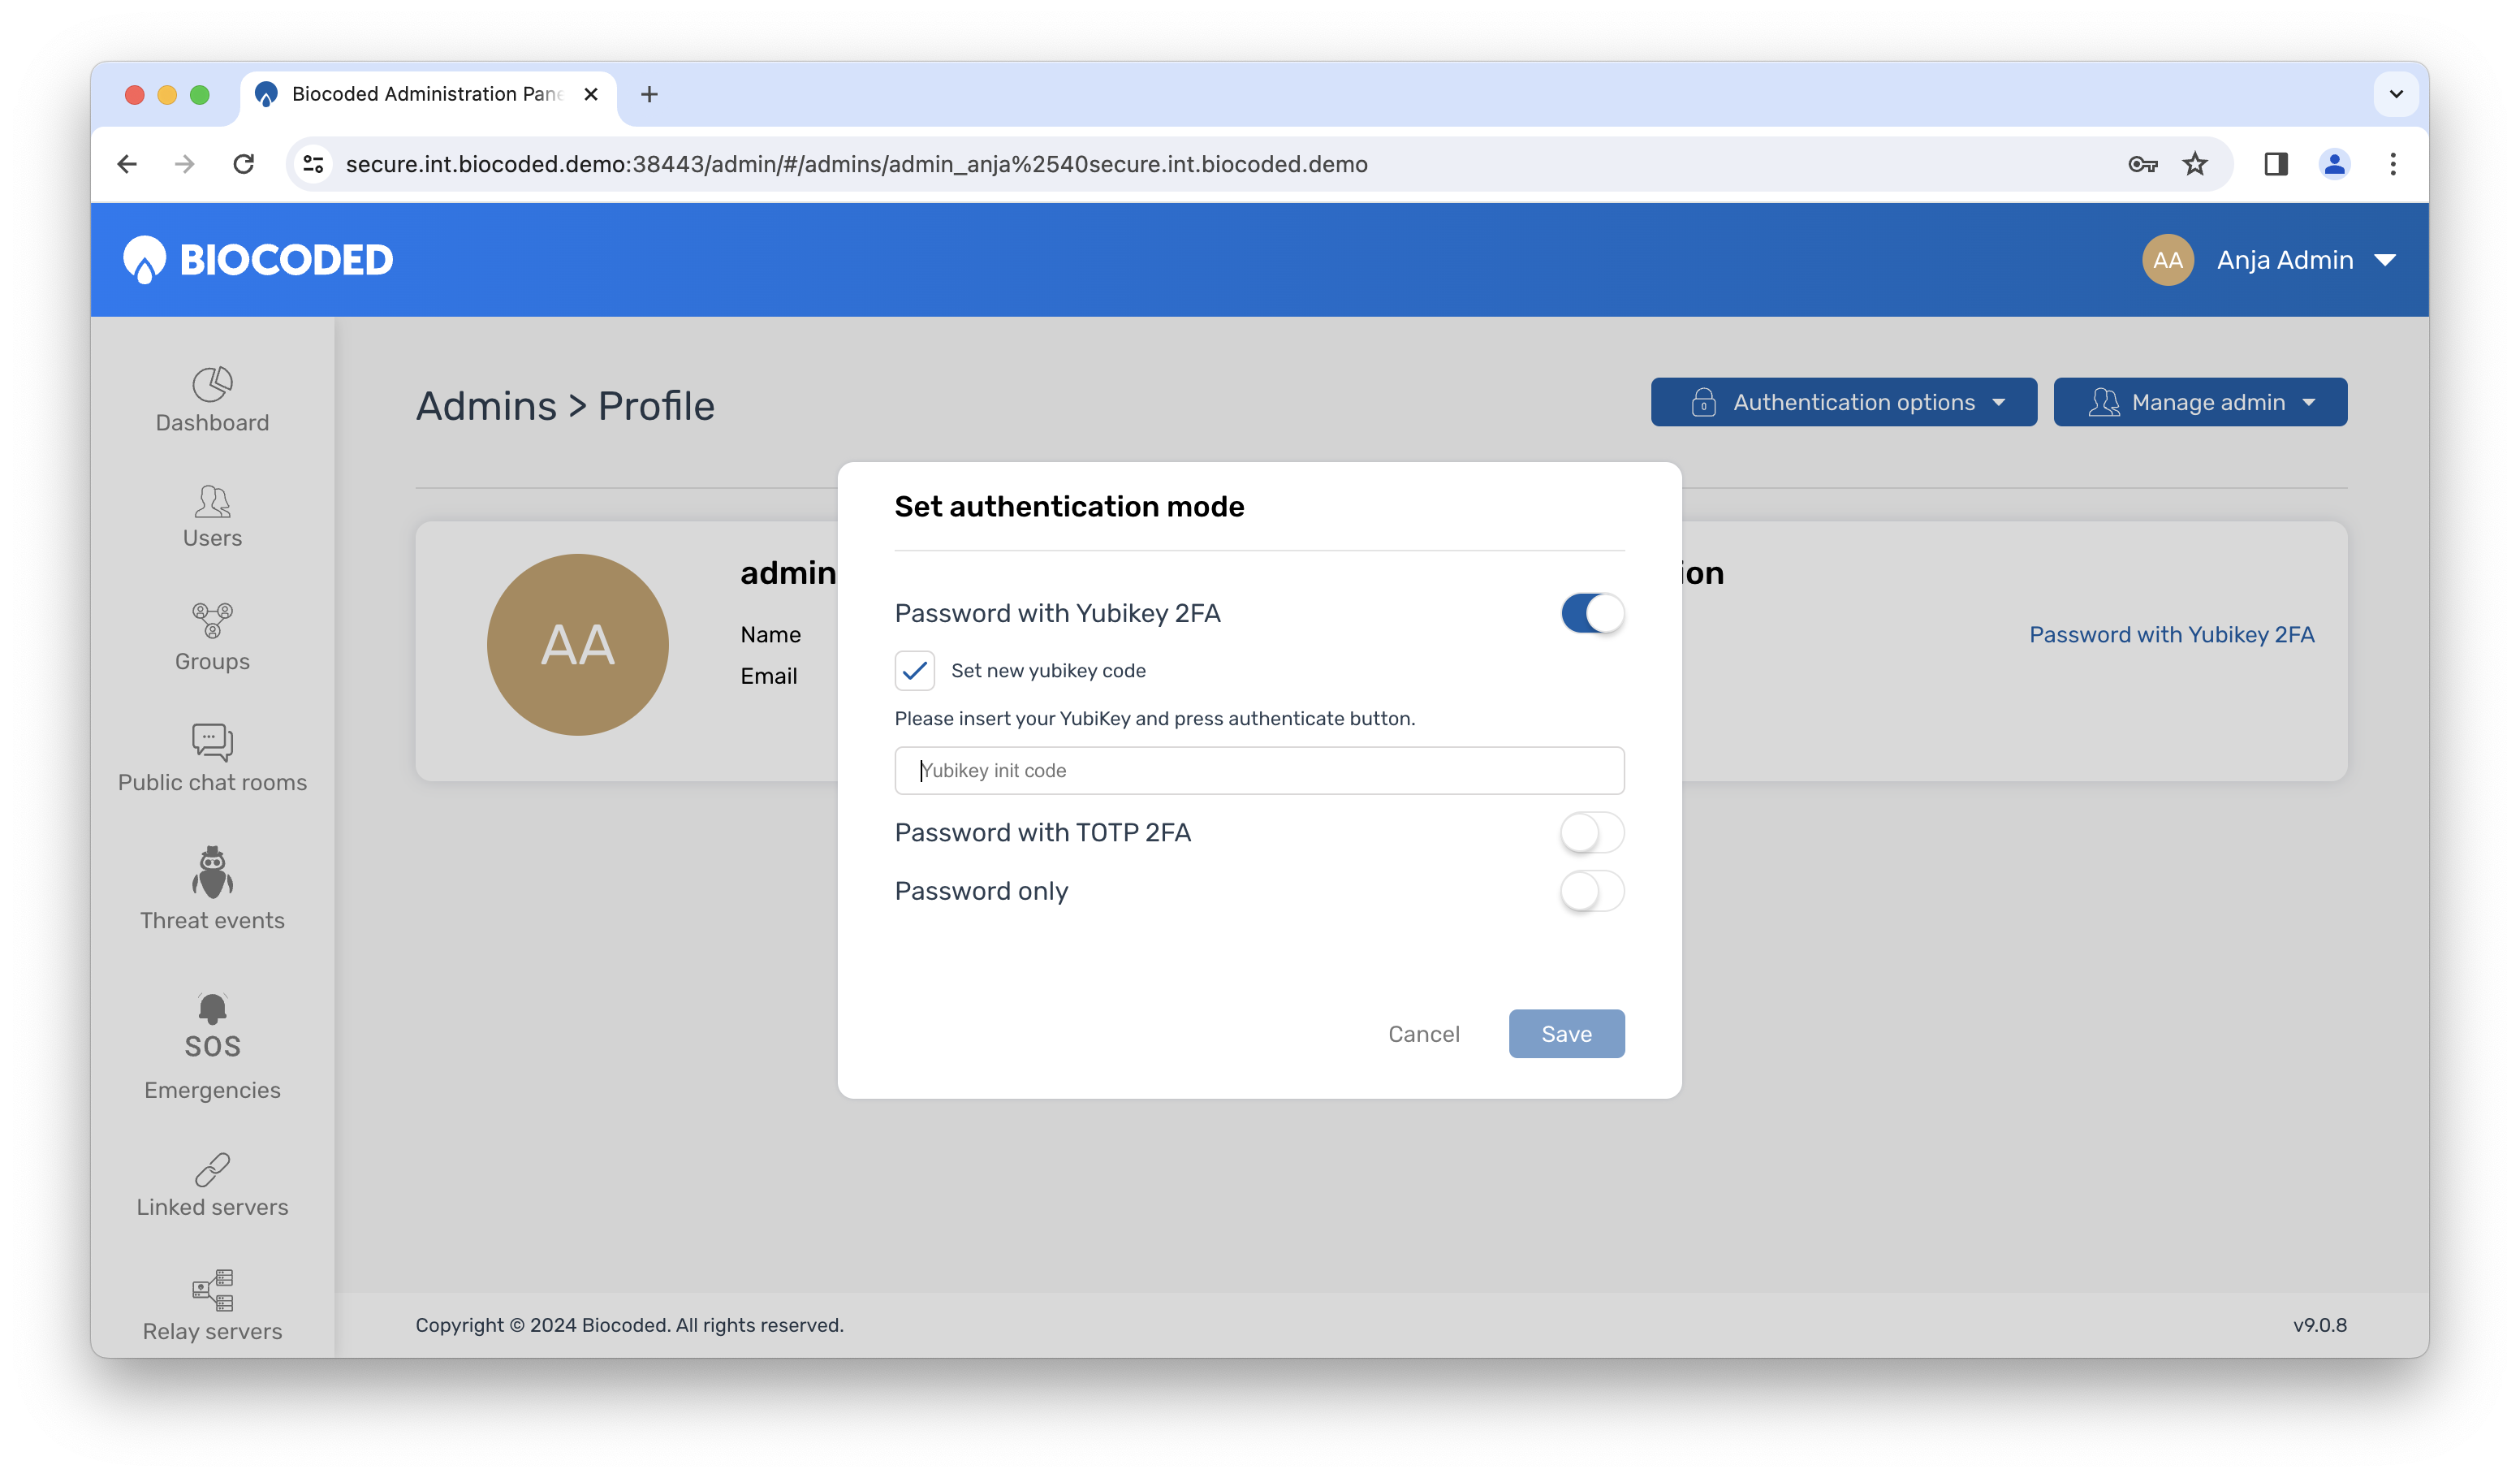
Tap on authentication mode setting value to change it. There are three available modes: Password only, Password with TOTP 2FA and Password with Yubikey 2FA which can be turned on by clicking on the switch next to the desired value. A new TOTP code can be generated by selecting the check box next to "Generate new TOTP code". Yubikey can be connected as a 2FA mode by clicking on switch and entering the user's Yubikey init code.
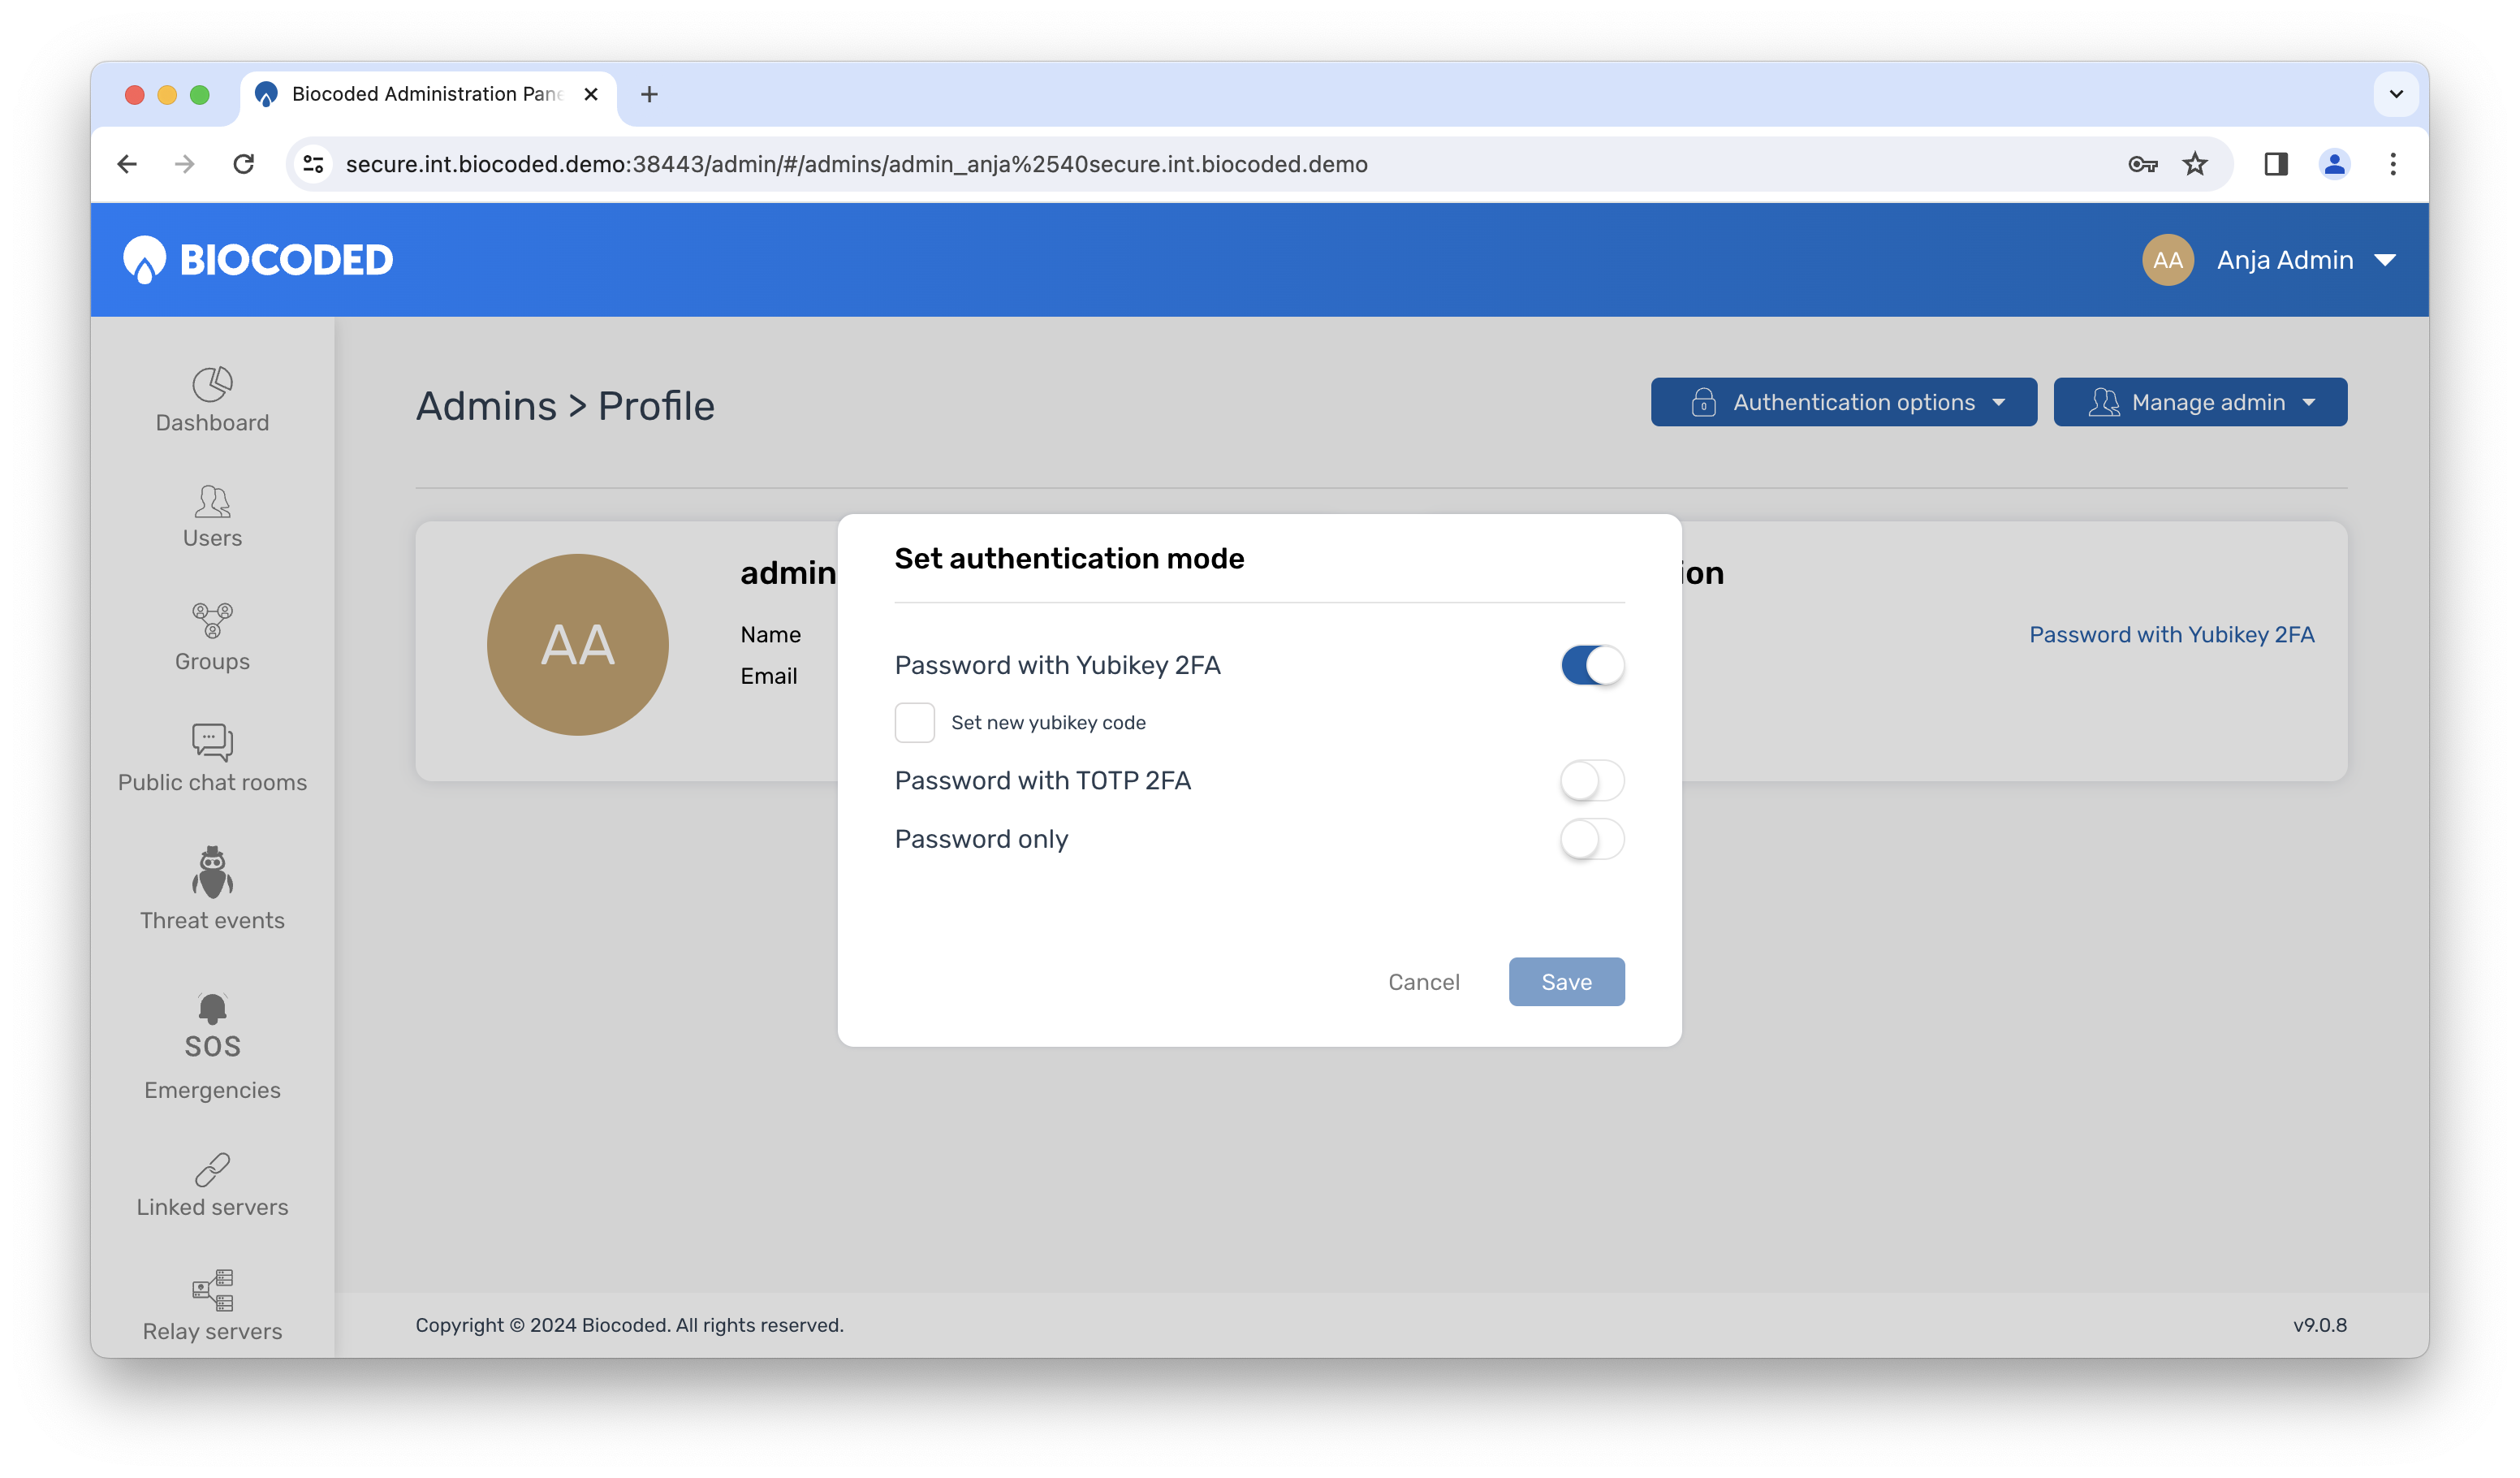
A new Yubikey can be connected by selecting Set new Yubikey code.
Above the admin profile data, Authentication options and Manage admin options can be found.
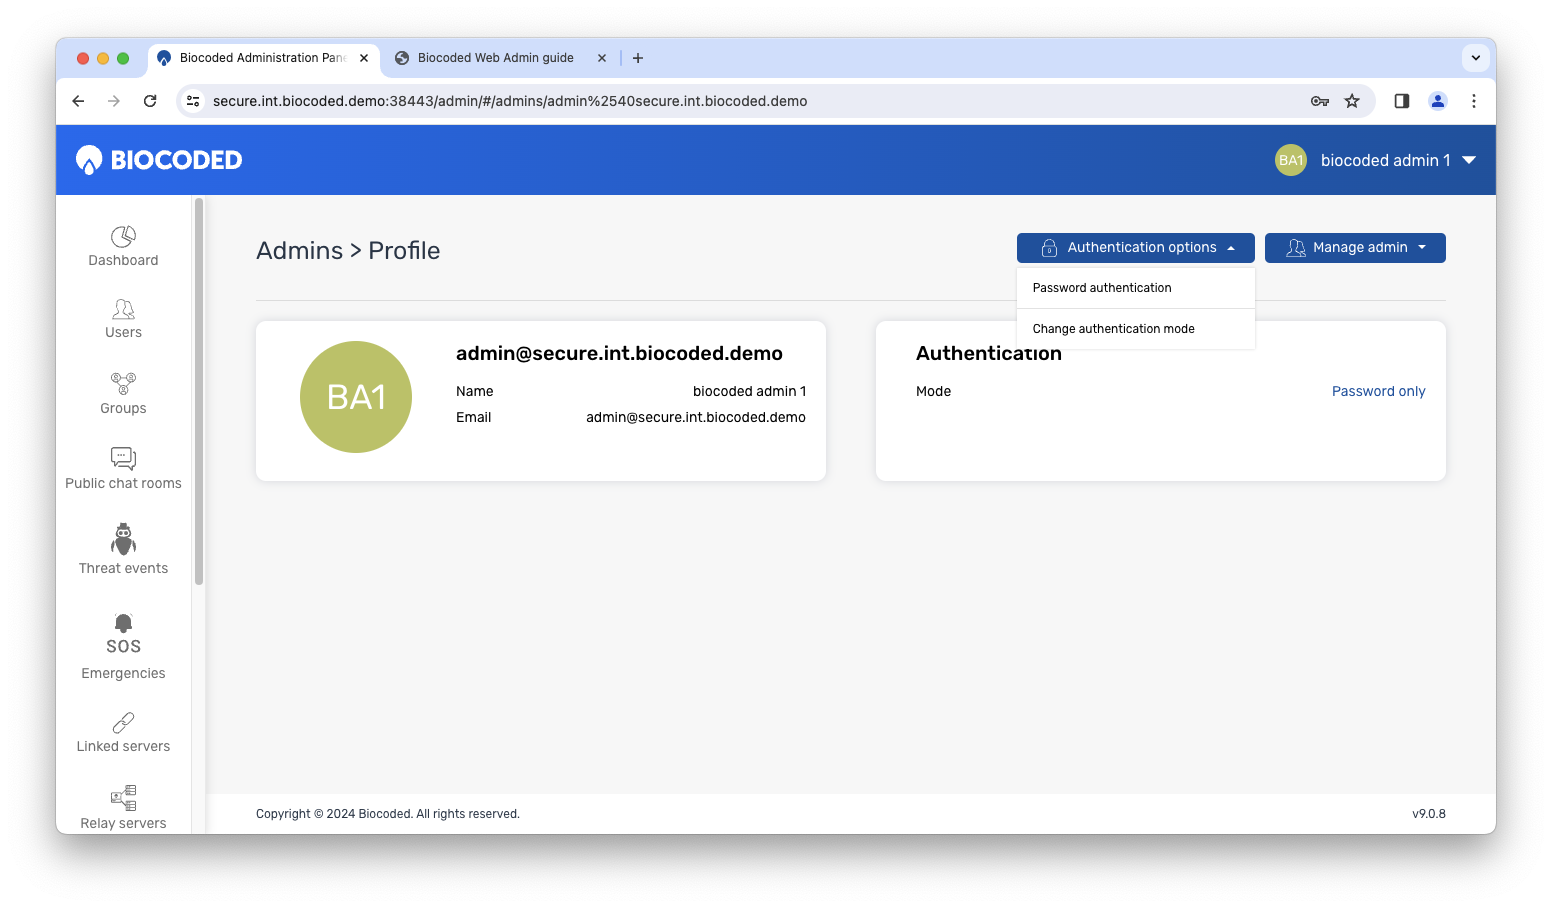
Clicking on "Authentication options" shows the option to change password authentication, which opens a popup where the admin account password can be changed. Change authentication mode shows a popup where authentication mode can be changed.
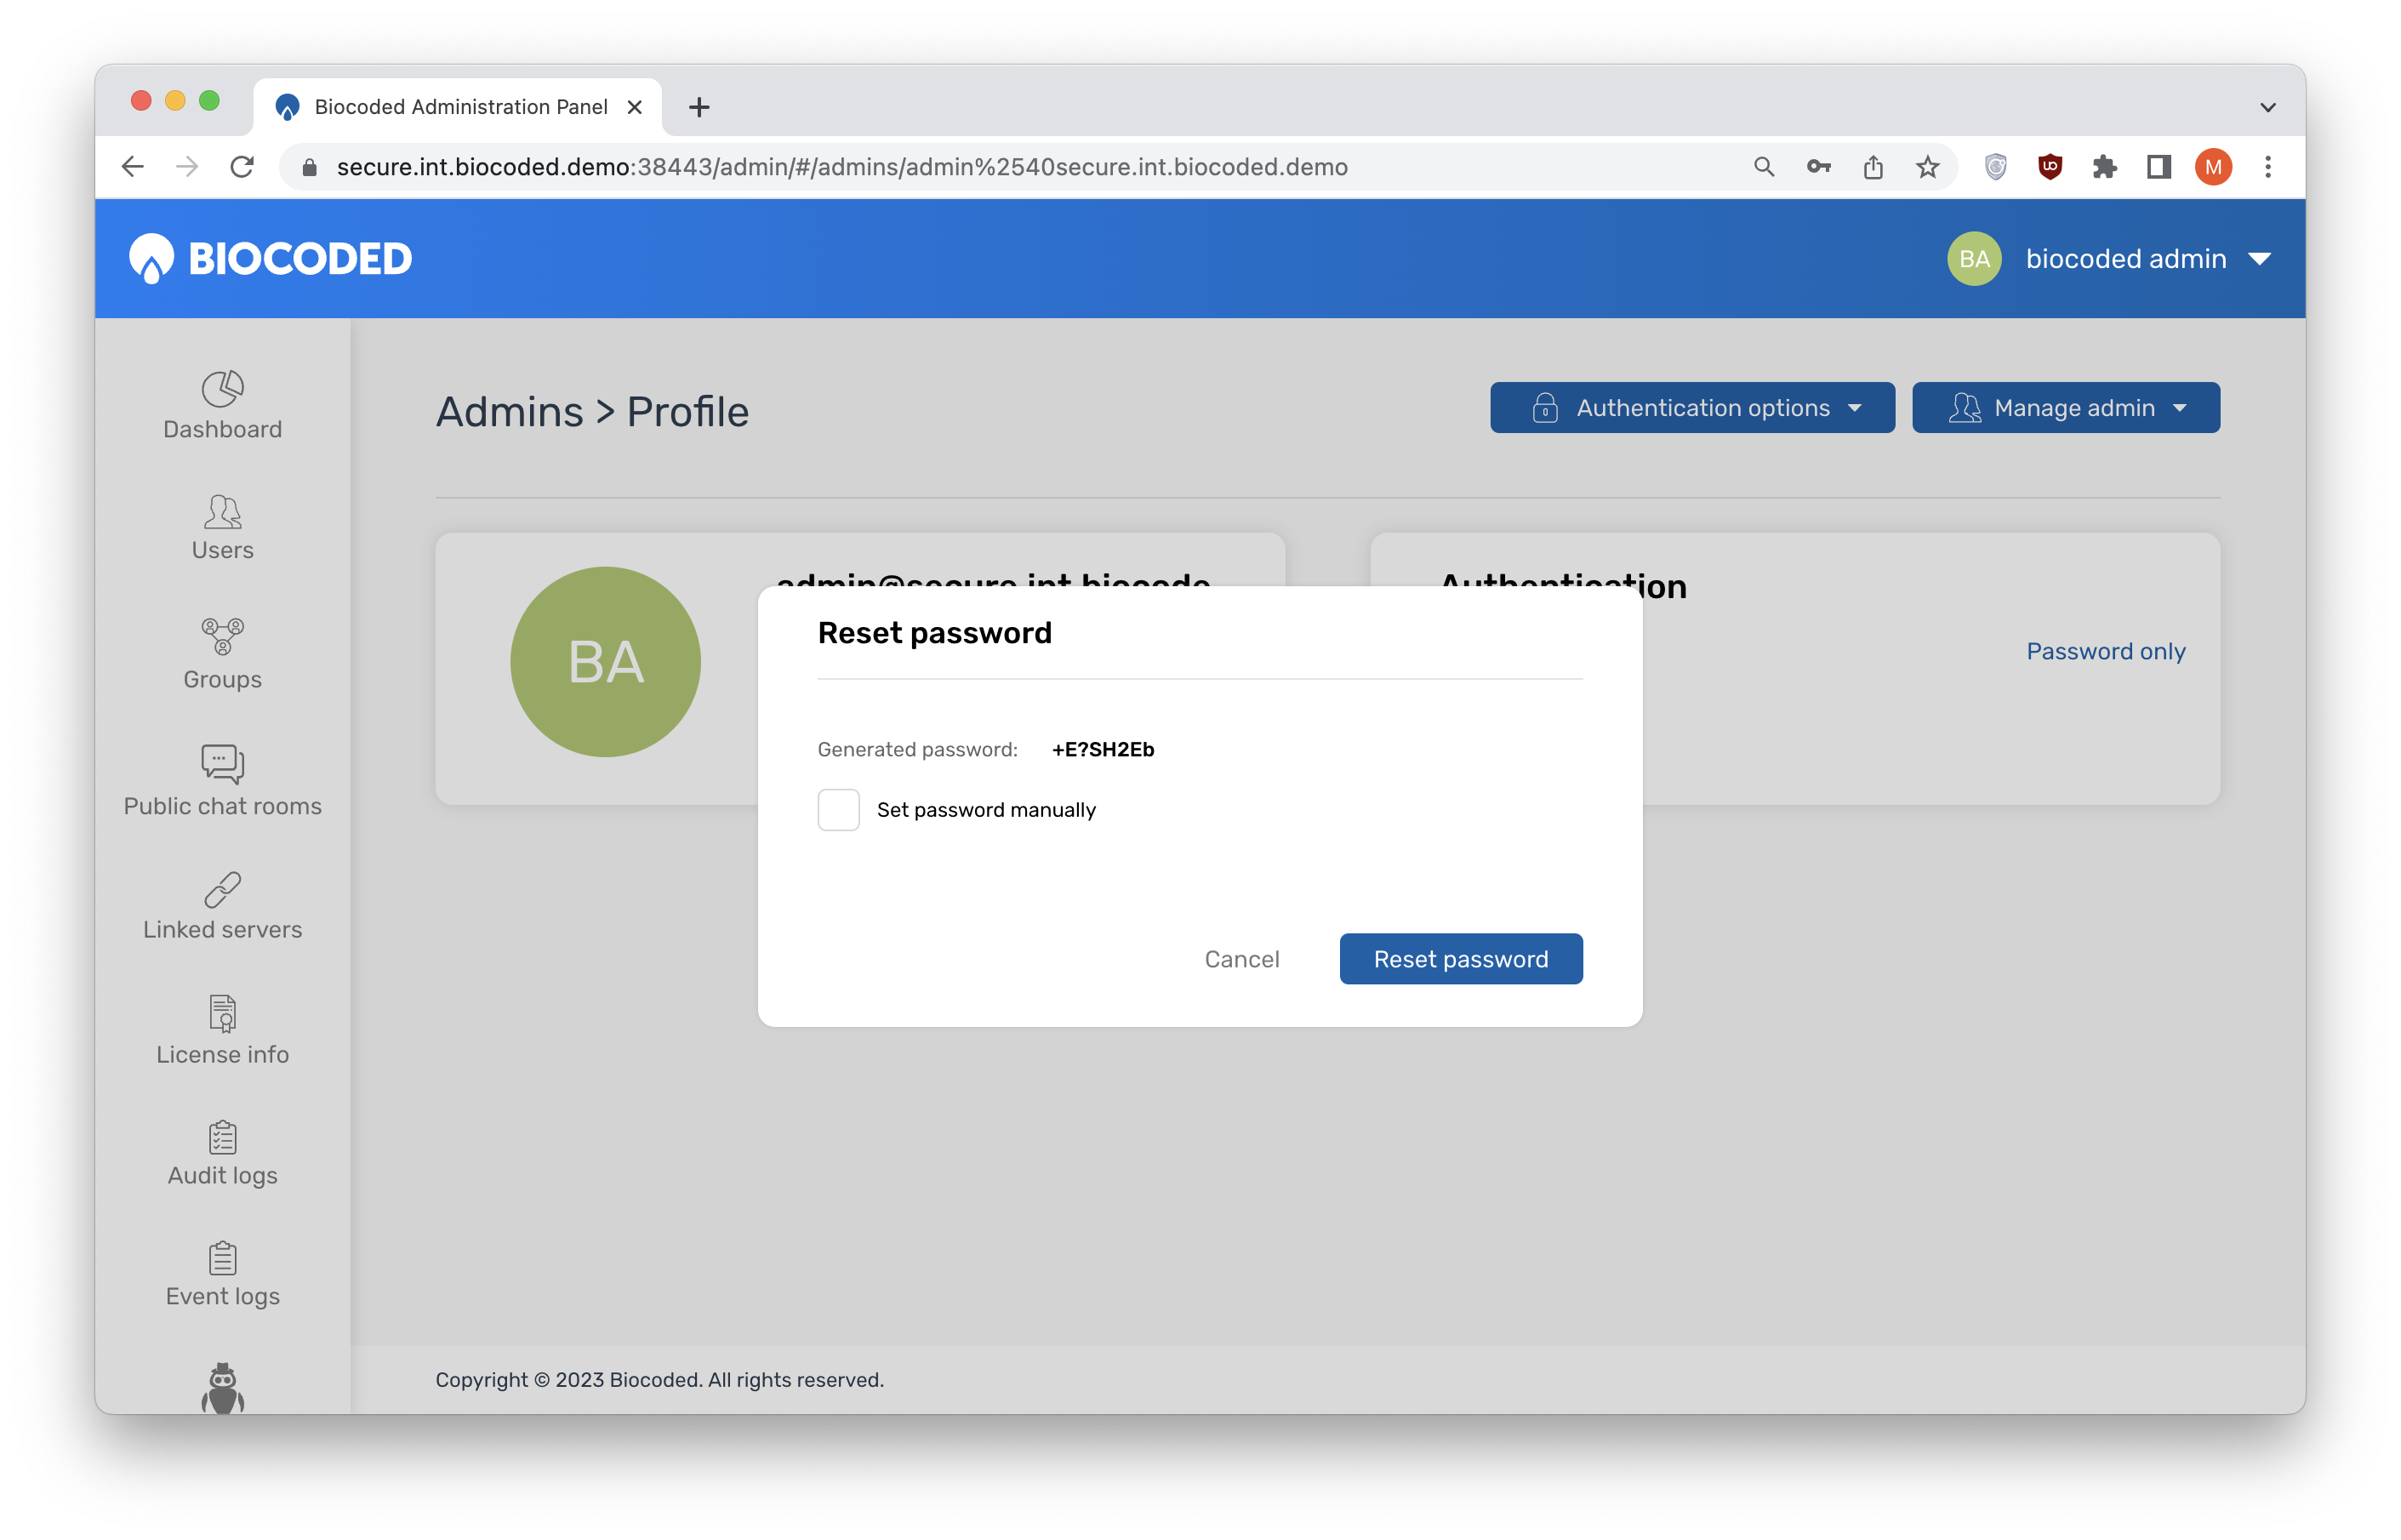
Password reset
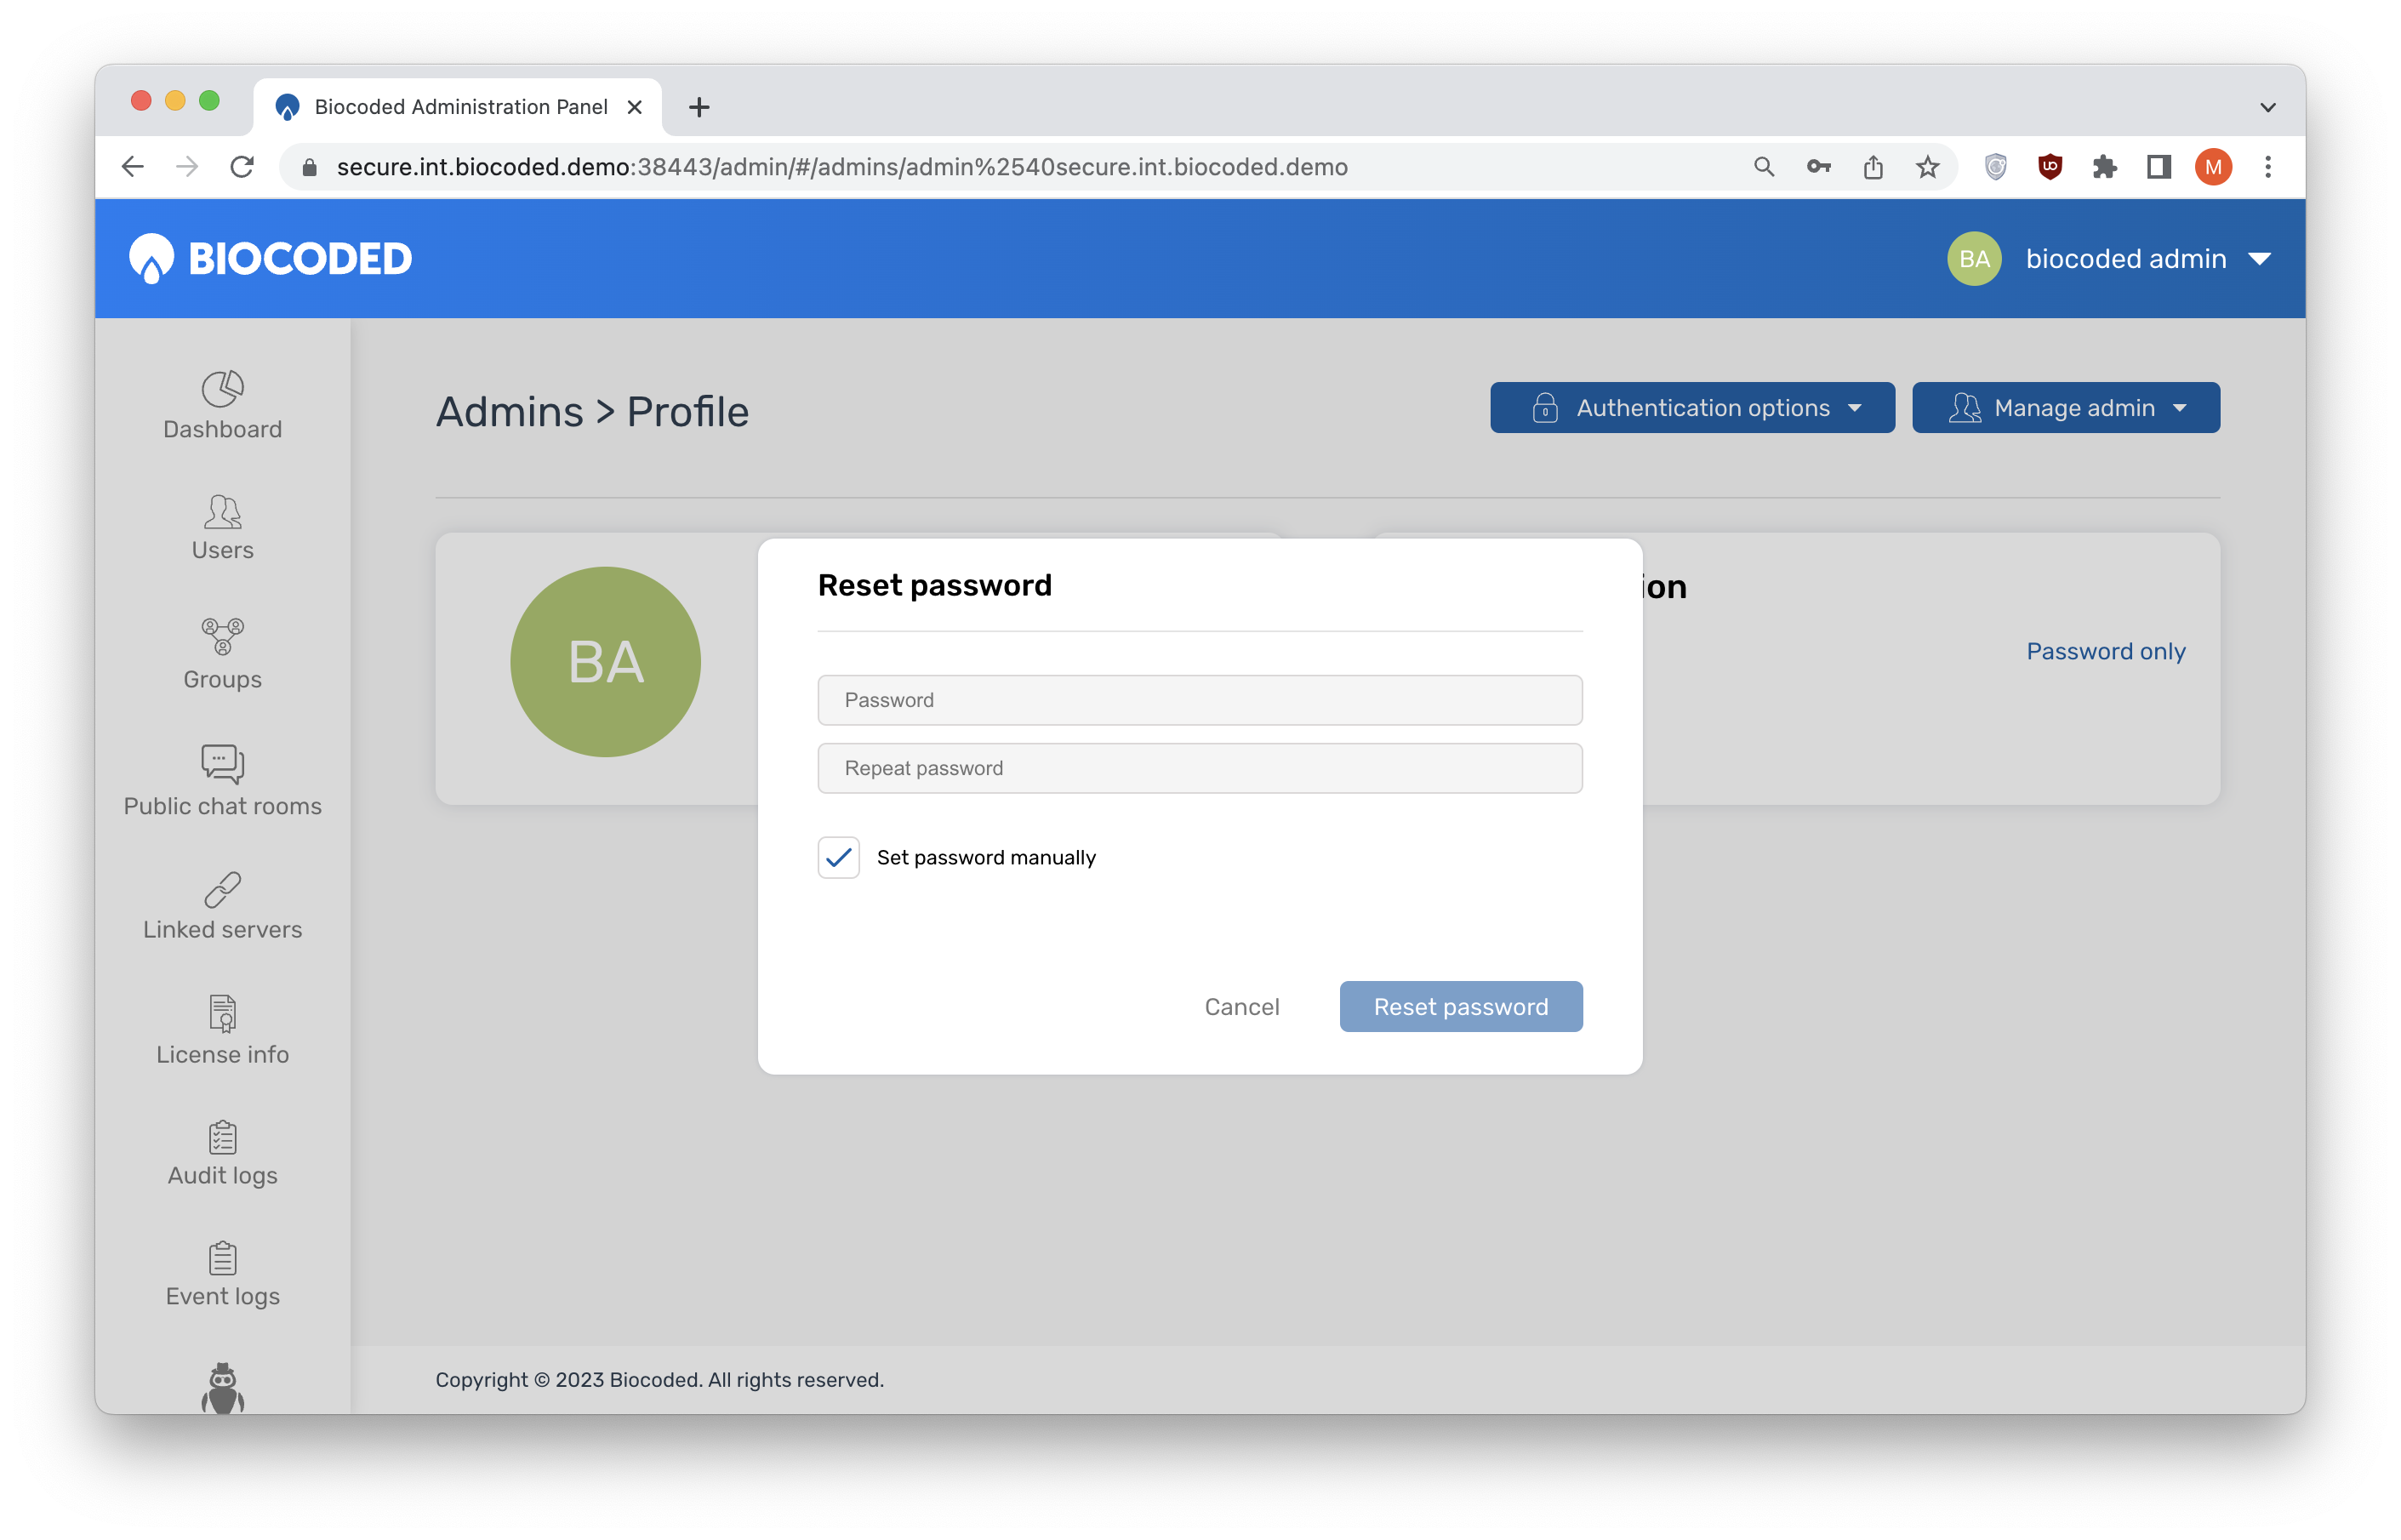
When changing a password, the administrator can chose between a generated password or a manually set password.
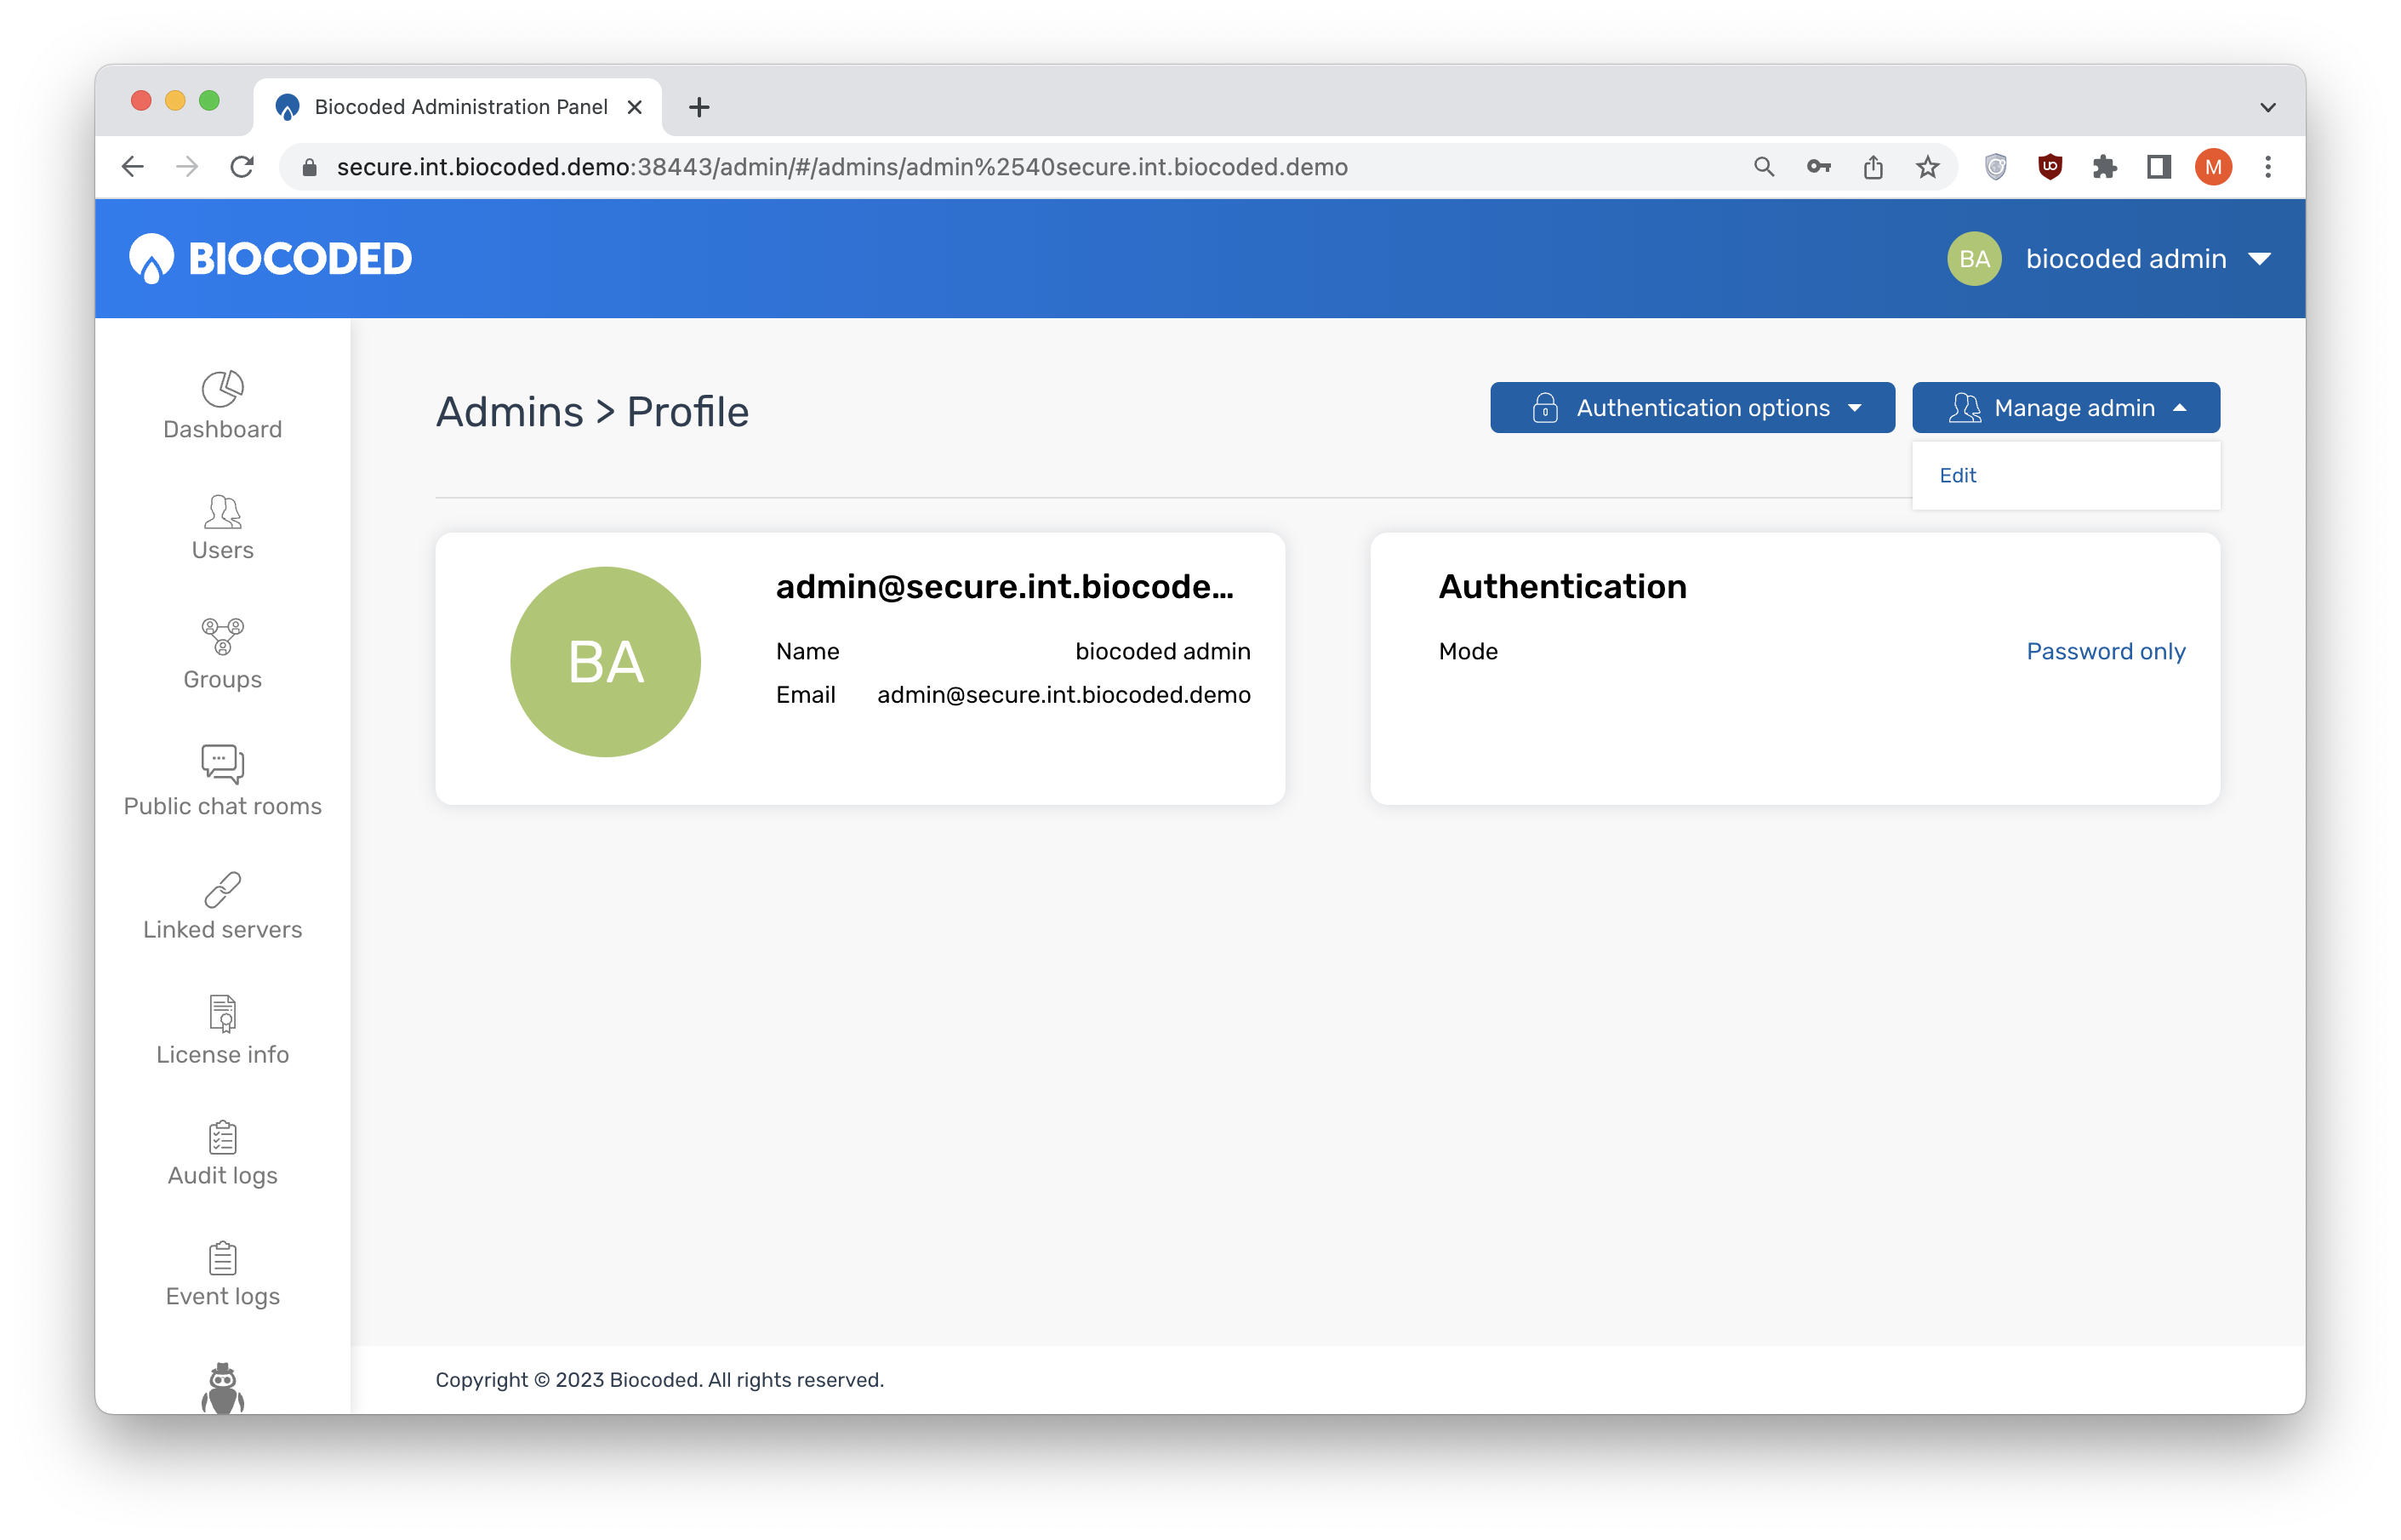
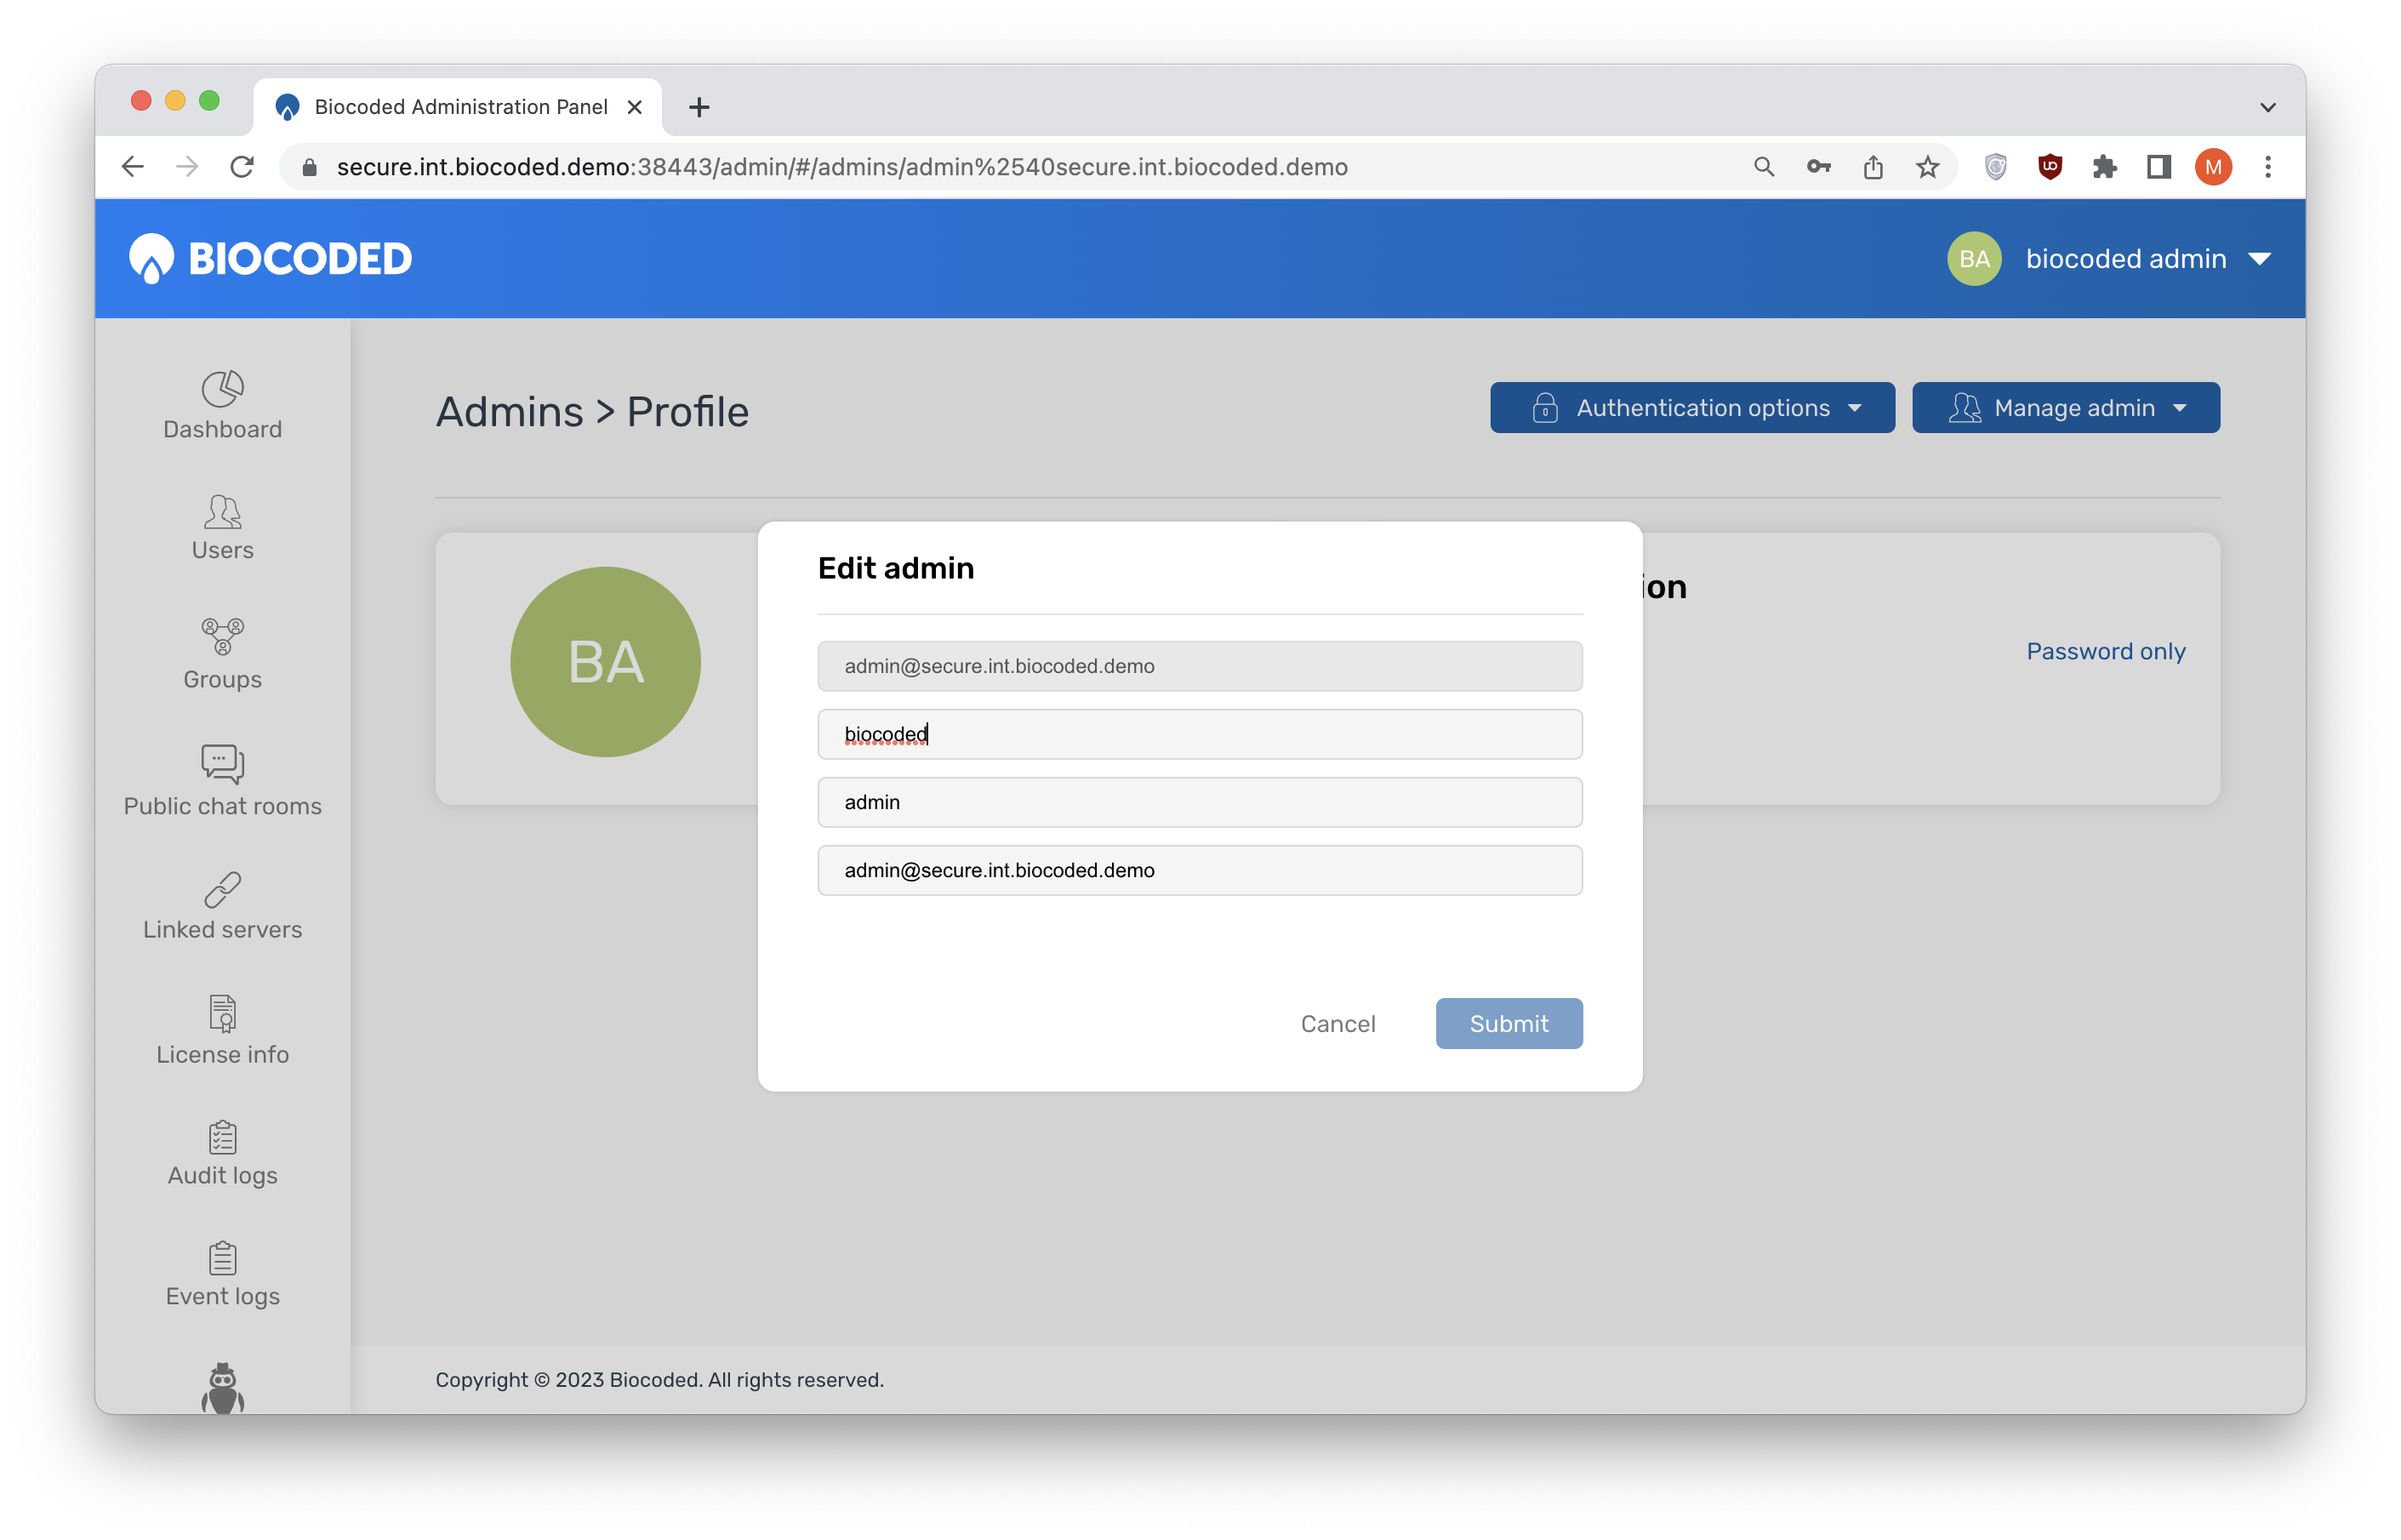
While still viewing the admin's profile, clicking on "Manage admin" offers the option to Edit the profile data like the name, last name and email. When viewing the profile of an admin different from the one currently logged in, an additional option to Delete admin is offered. The deletion will have to be confirmed in a popup.
Users
Selecting "Users" tab shows a list of users registered on this server setup. Clicking on left and right arrow  shows more contacts and typing something in "Search" box filters the list. These functionalities can be found on most tabs.
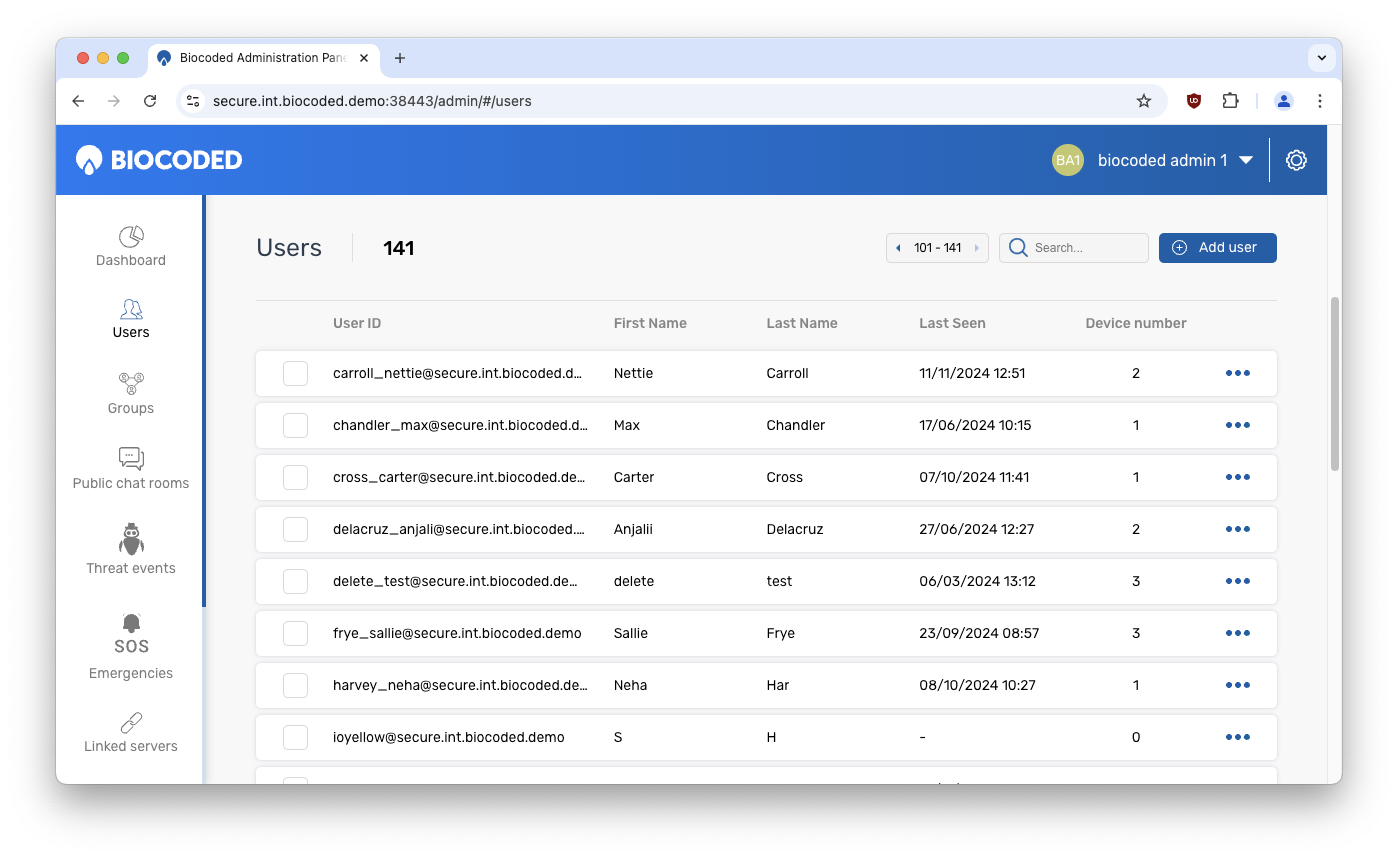
Each user listing consists of user ID, first name, last name, last seen date and number of devices.
More options and user settings can be accessed by clicking on a user and viewing their profile or by clicking on  .
.
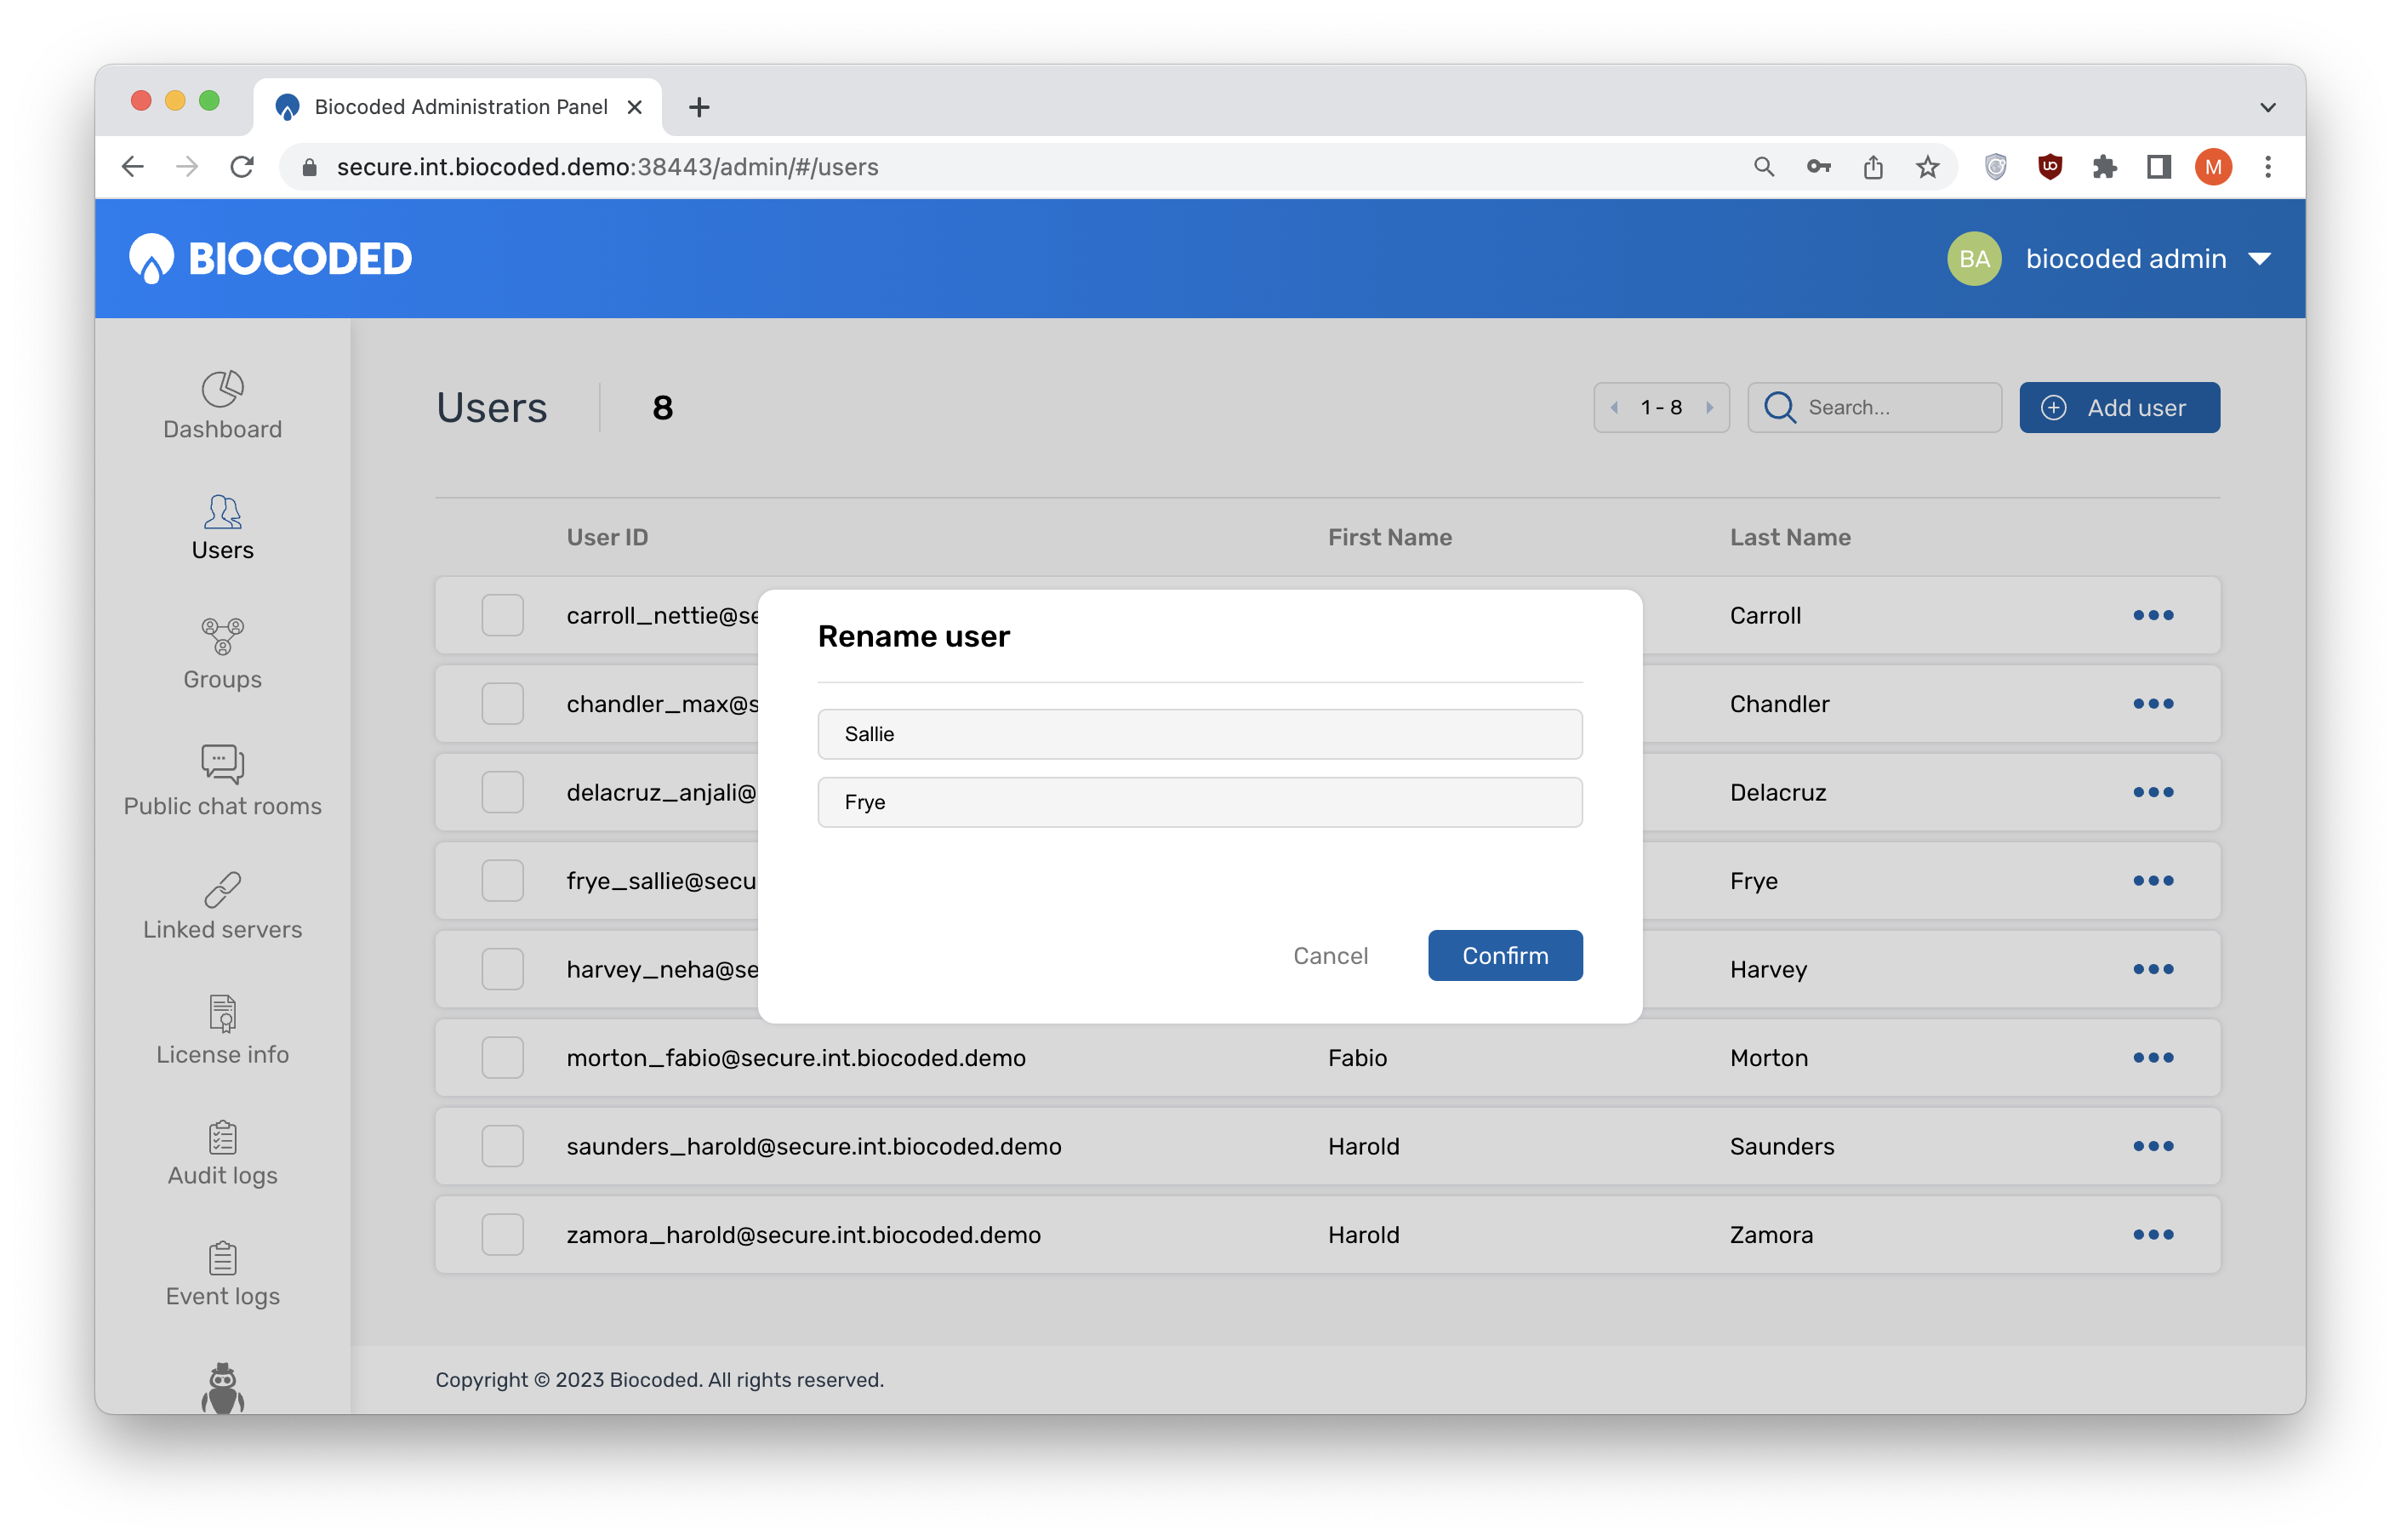
The latter shows the following options:
- Rename - set a new first or last name for the user,
- Delete - delete the user account (confirmation is needed),
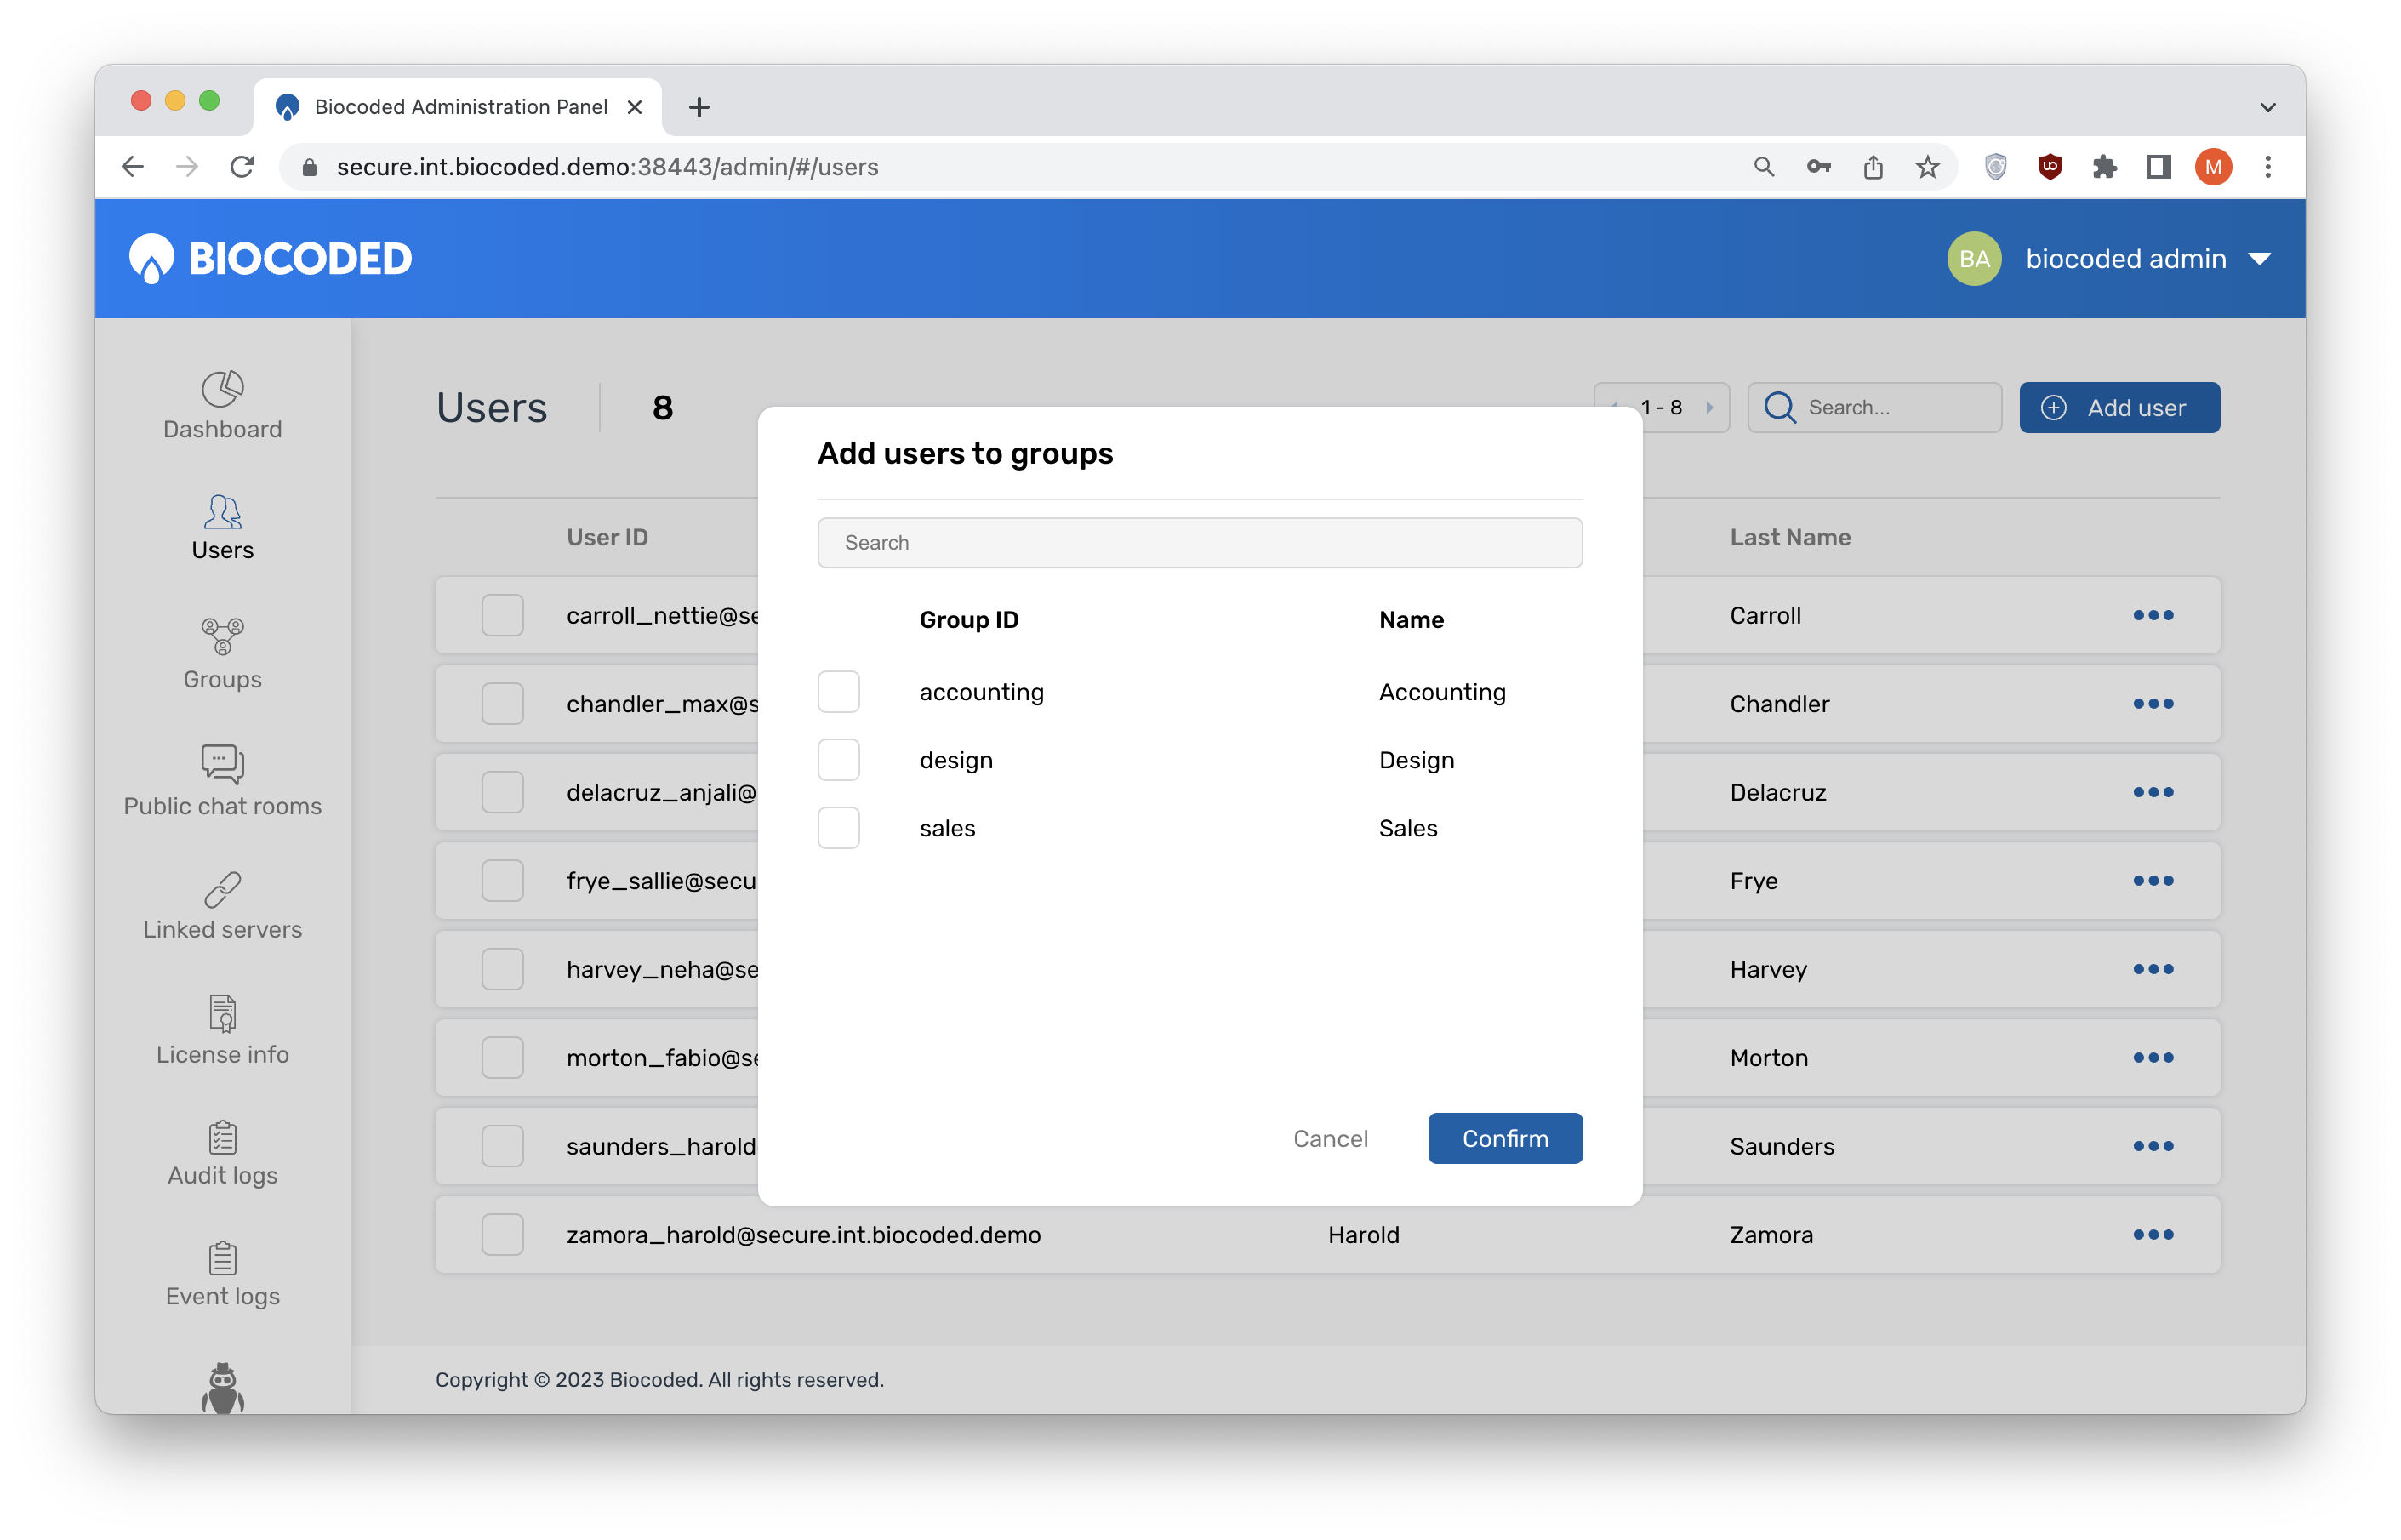
- Add to group - add to an existing user group, connecting the user with all existing members of the group via the address book,
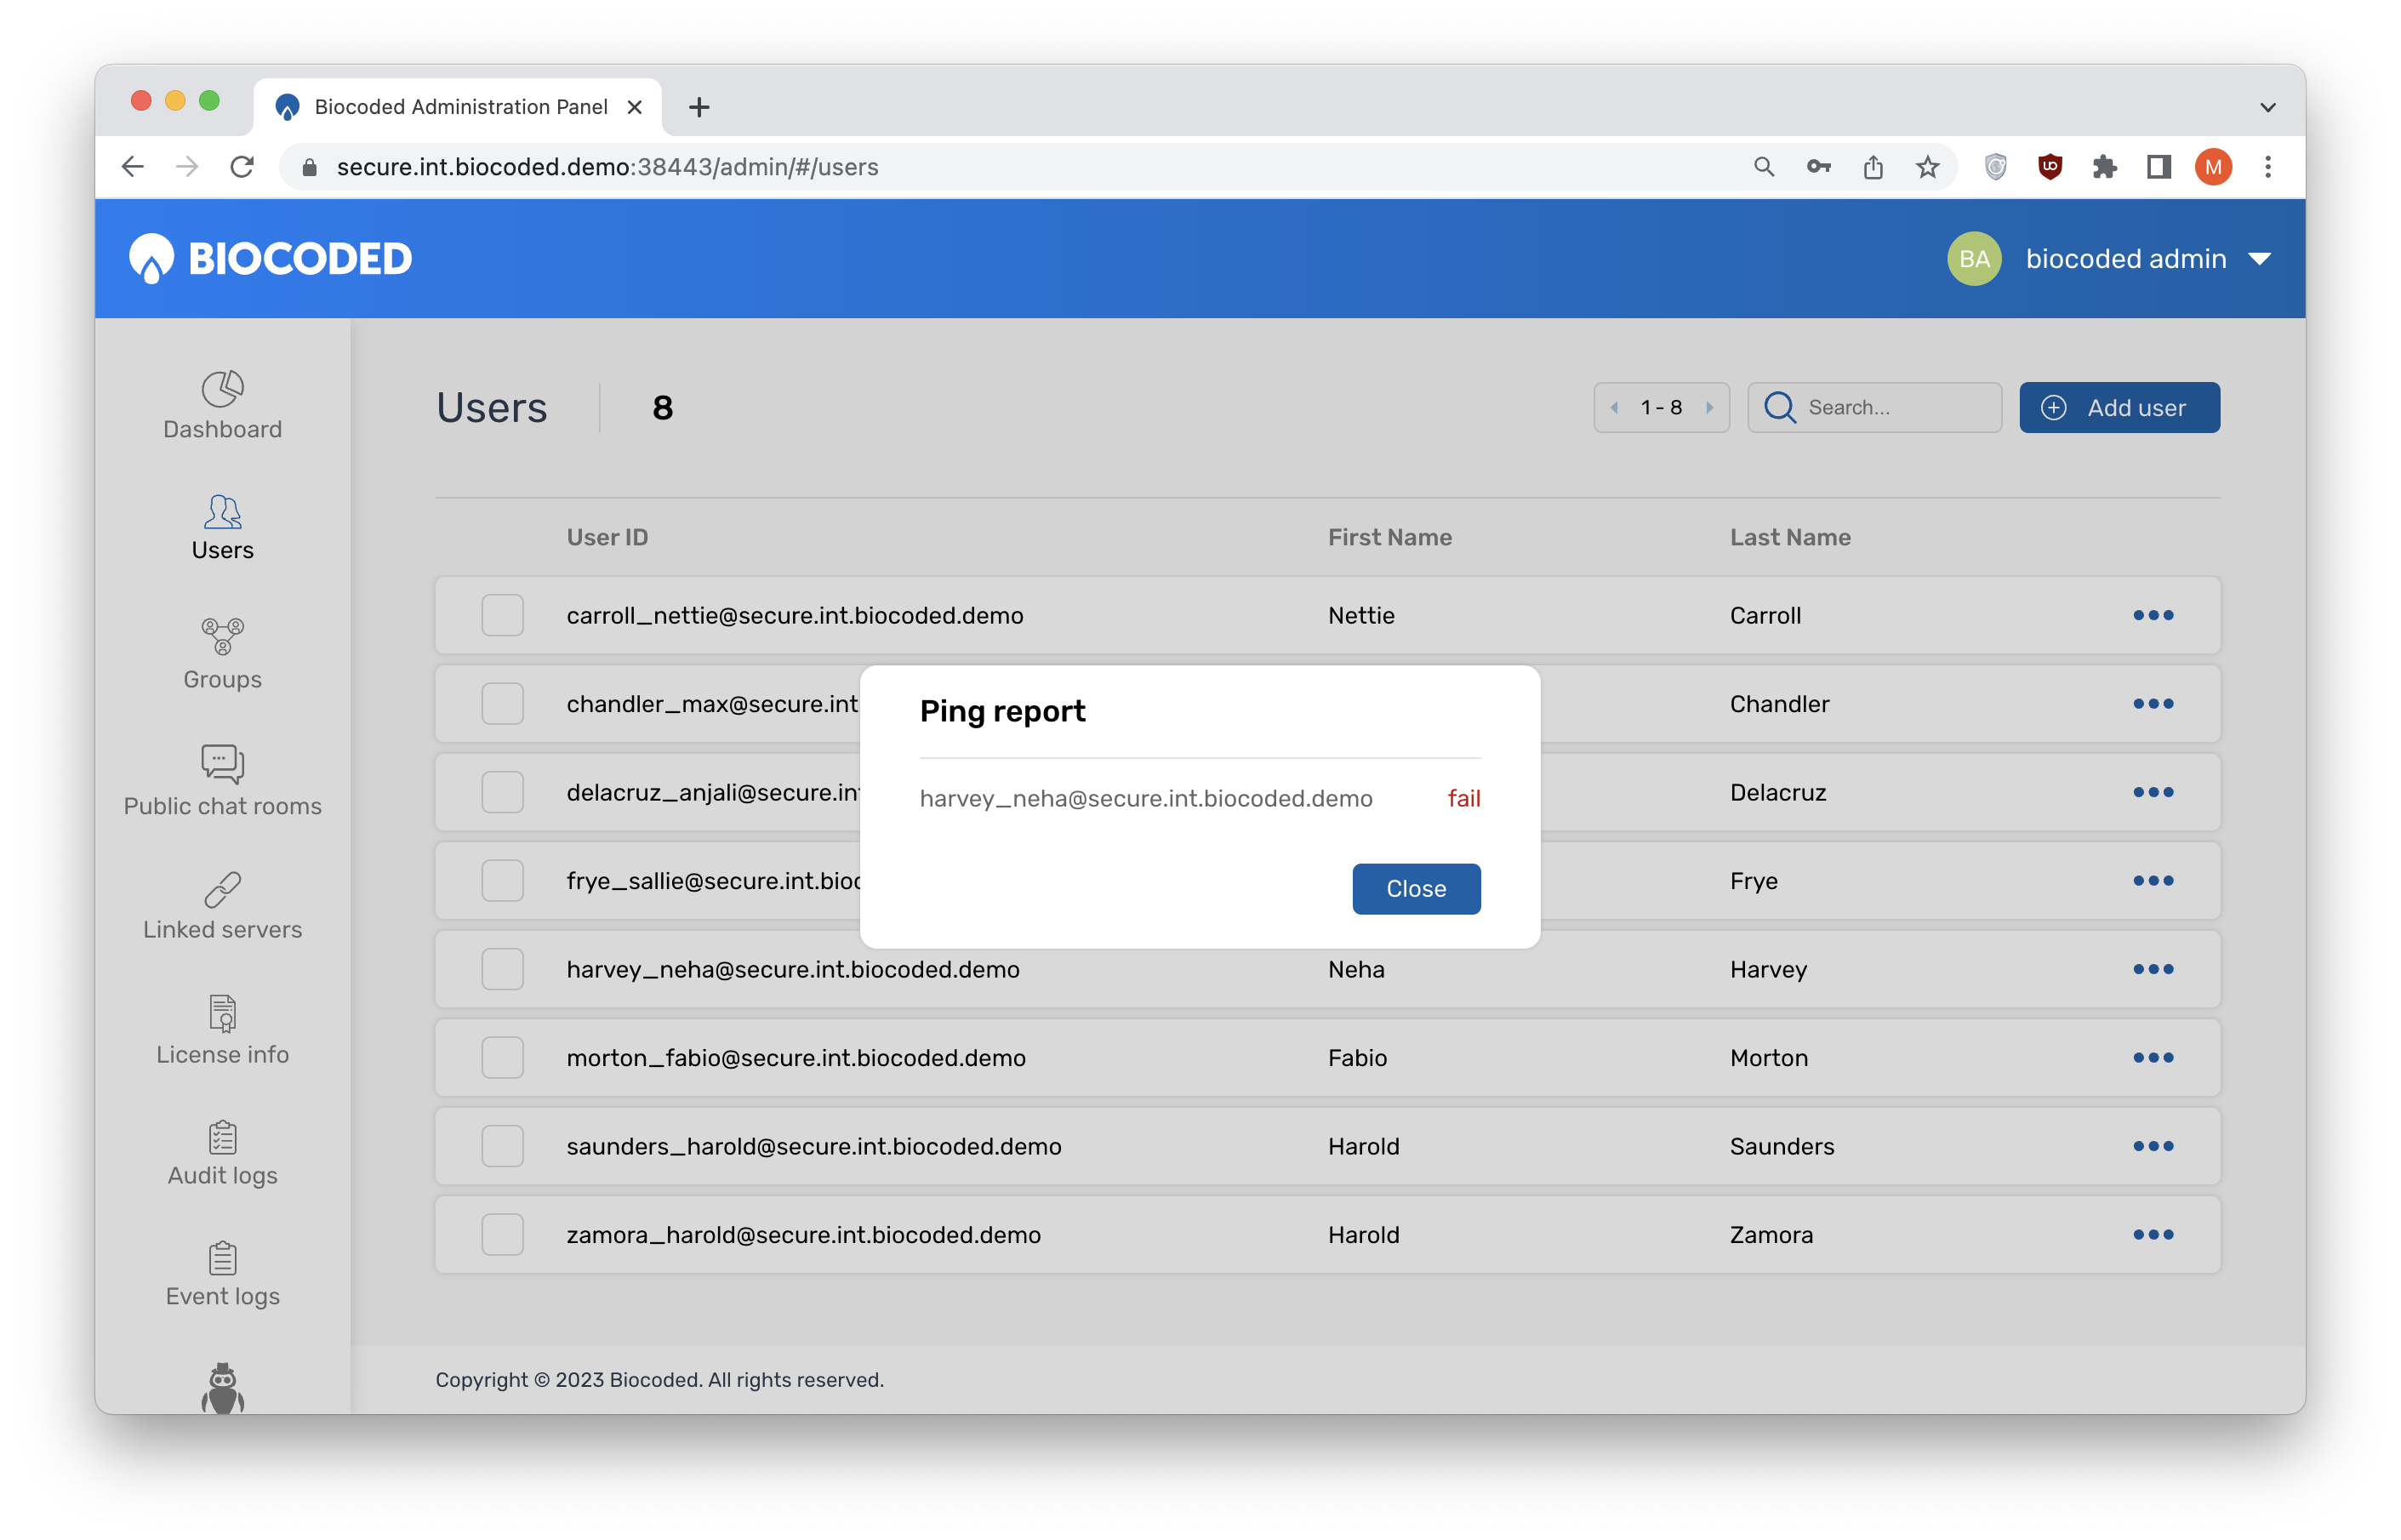
- Ping - send a signal to the user account, checking if the user has logged in and activated their account. If that is not the case, the ping report will fail.
Rename
Add to group
Ping
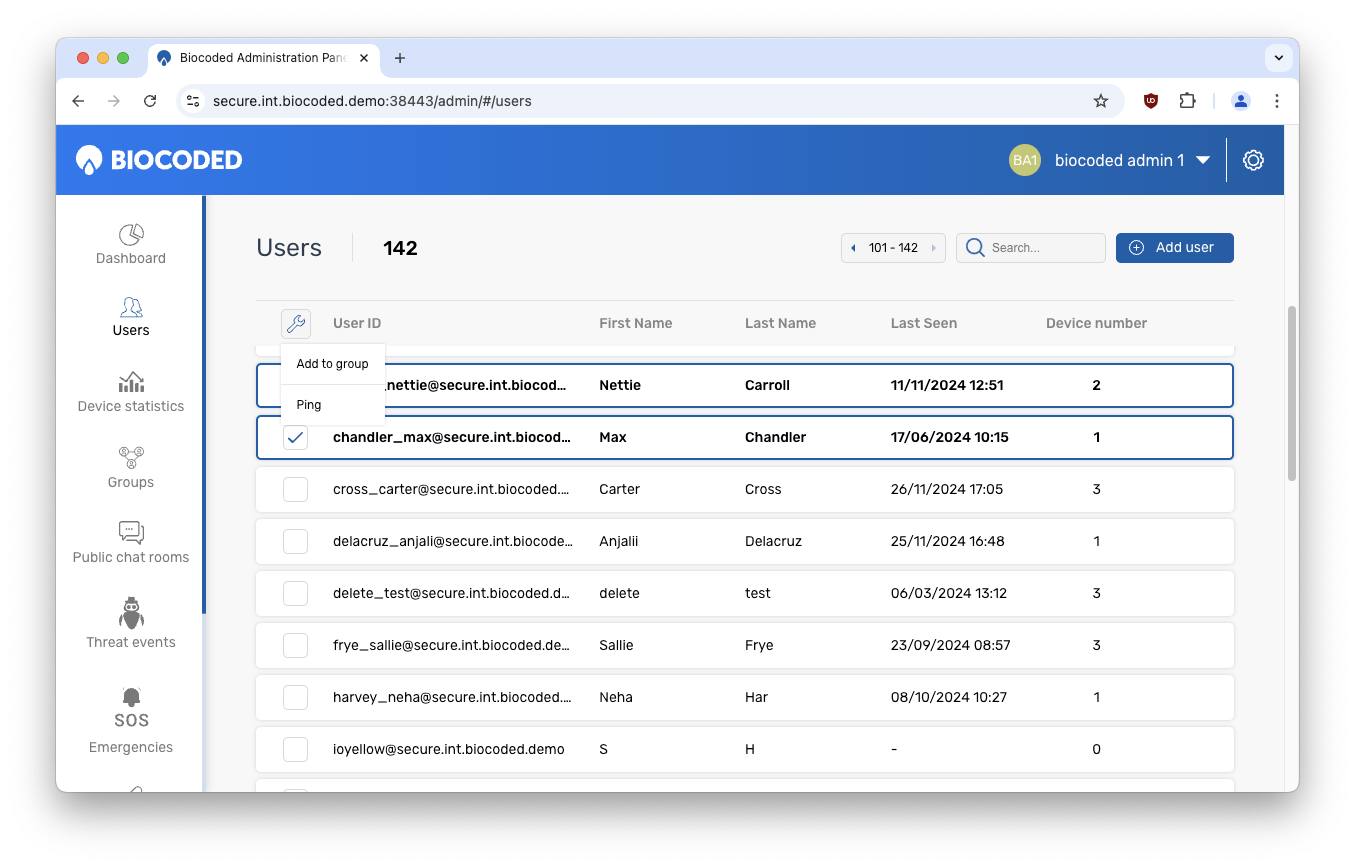
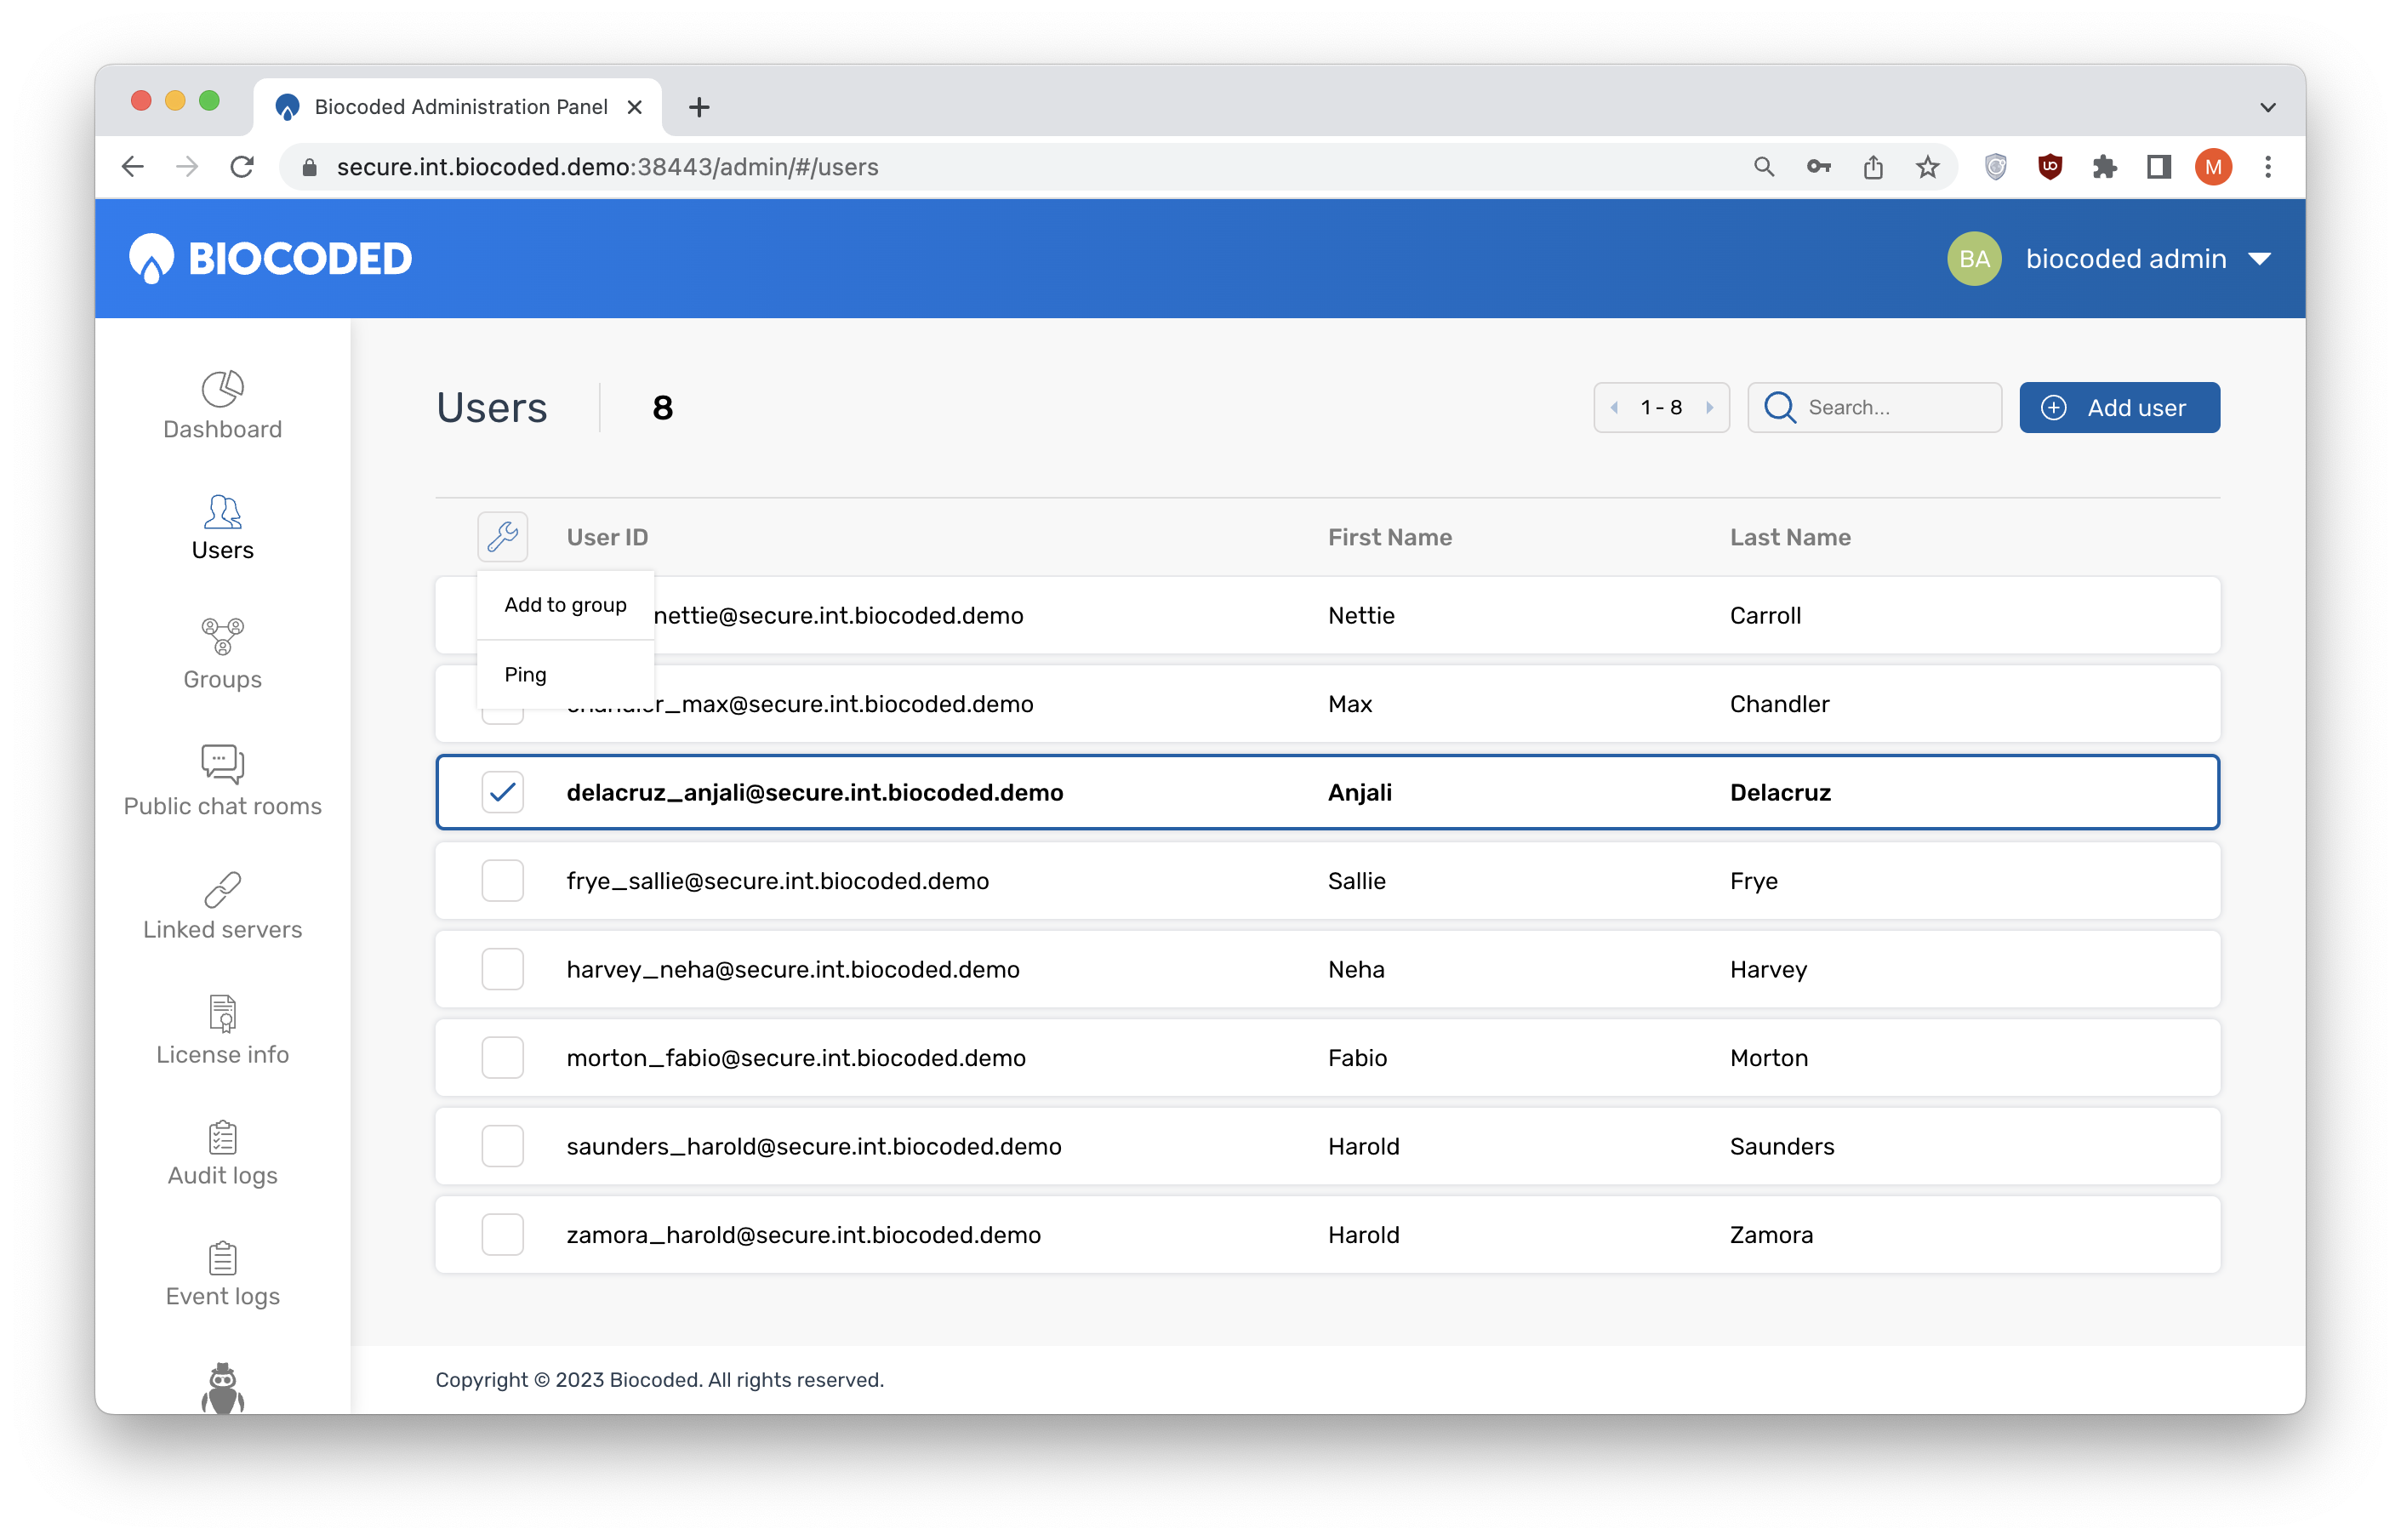
Selecting the check box next to a user listing offers editing options shown by clicking on  . Multiple users can be selected and the options are:
- Add to group,
- Ping.
Adding a user
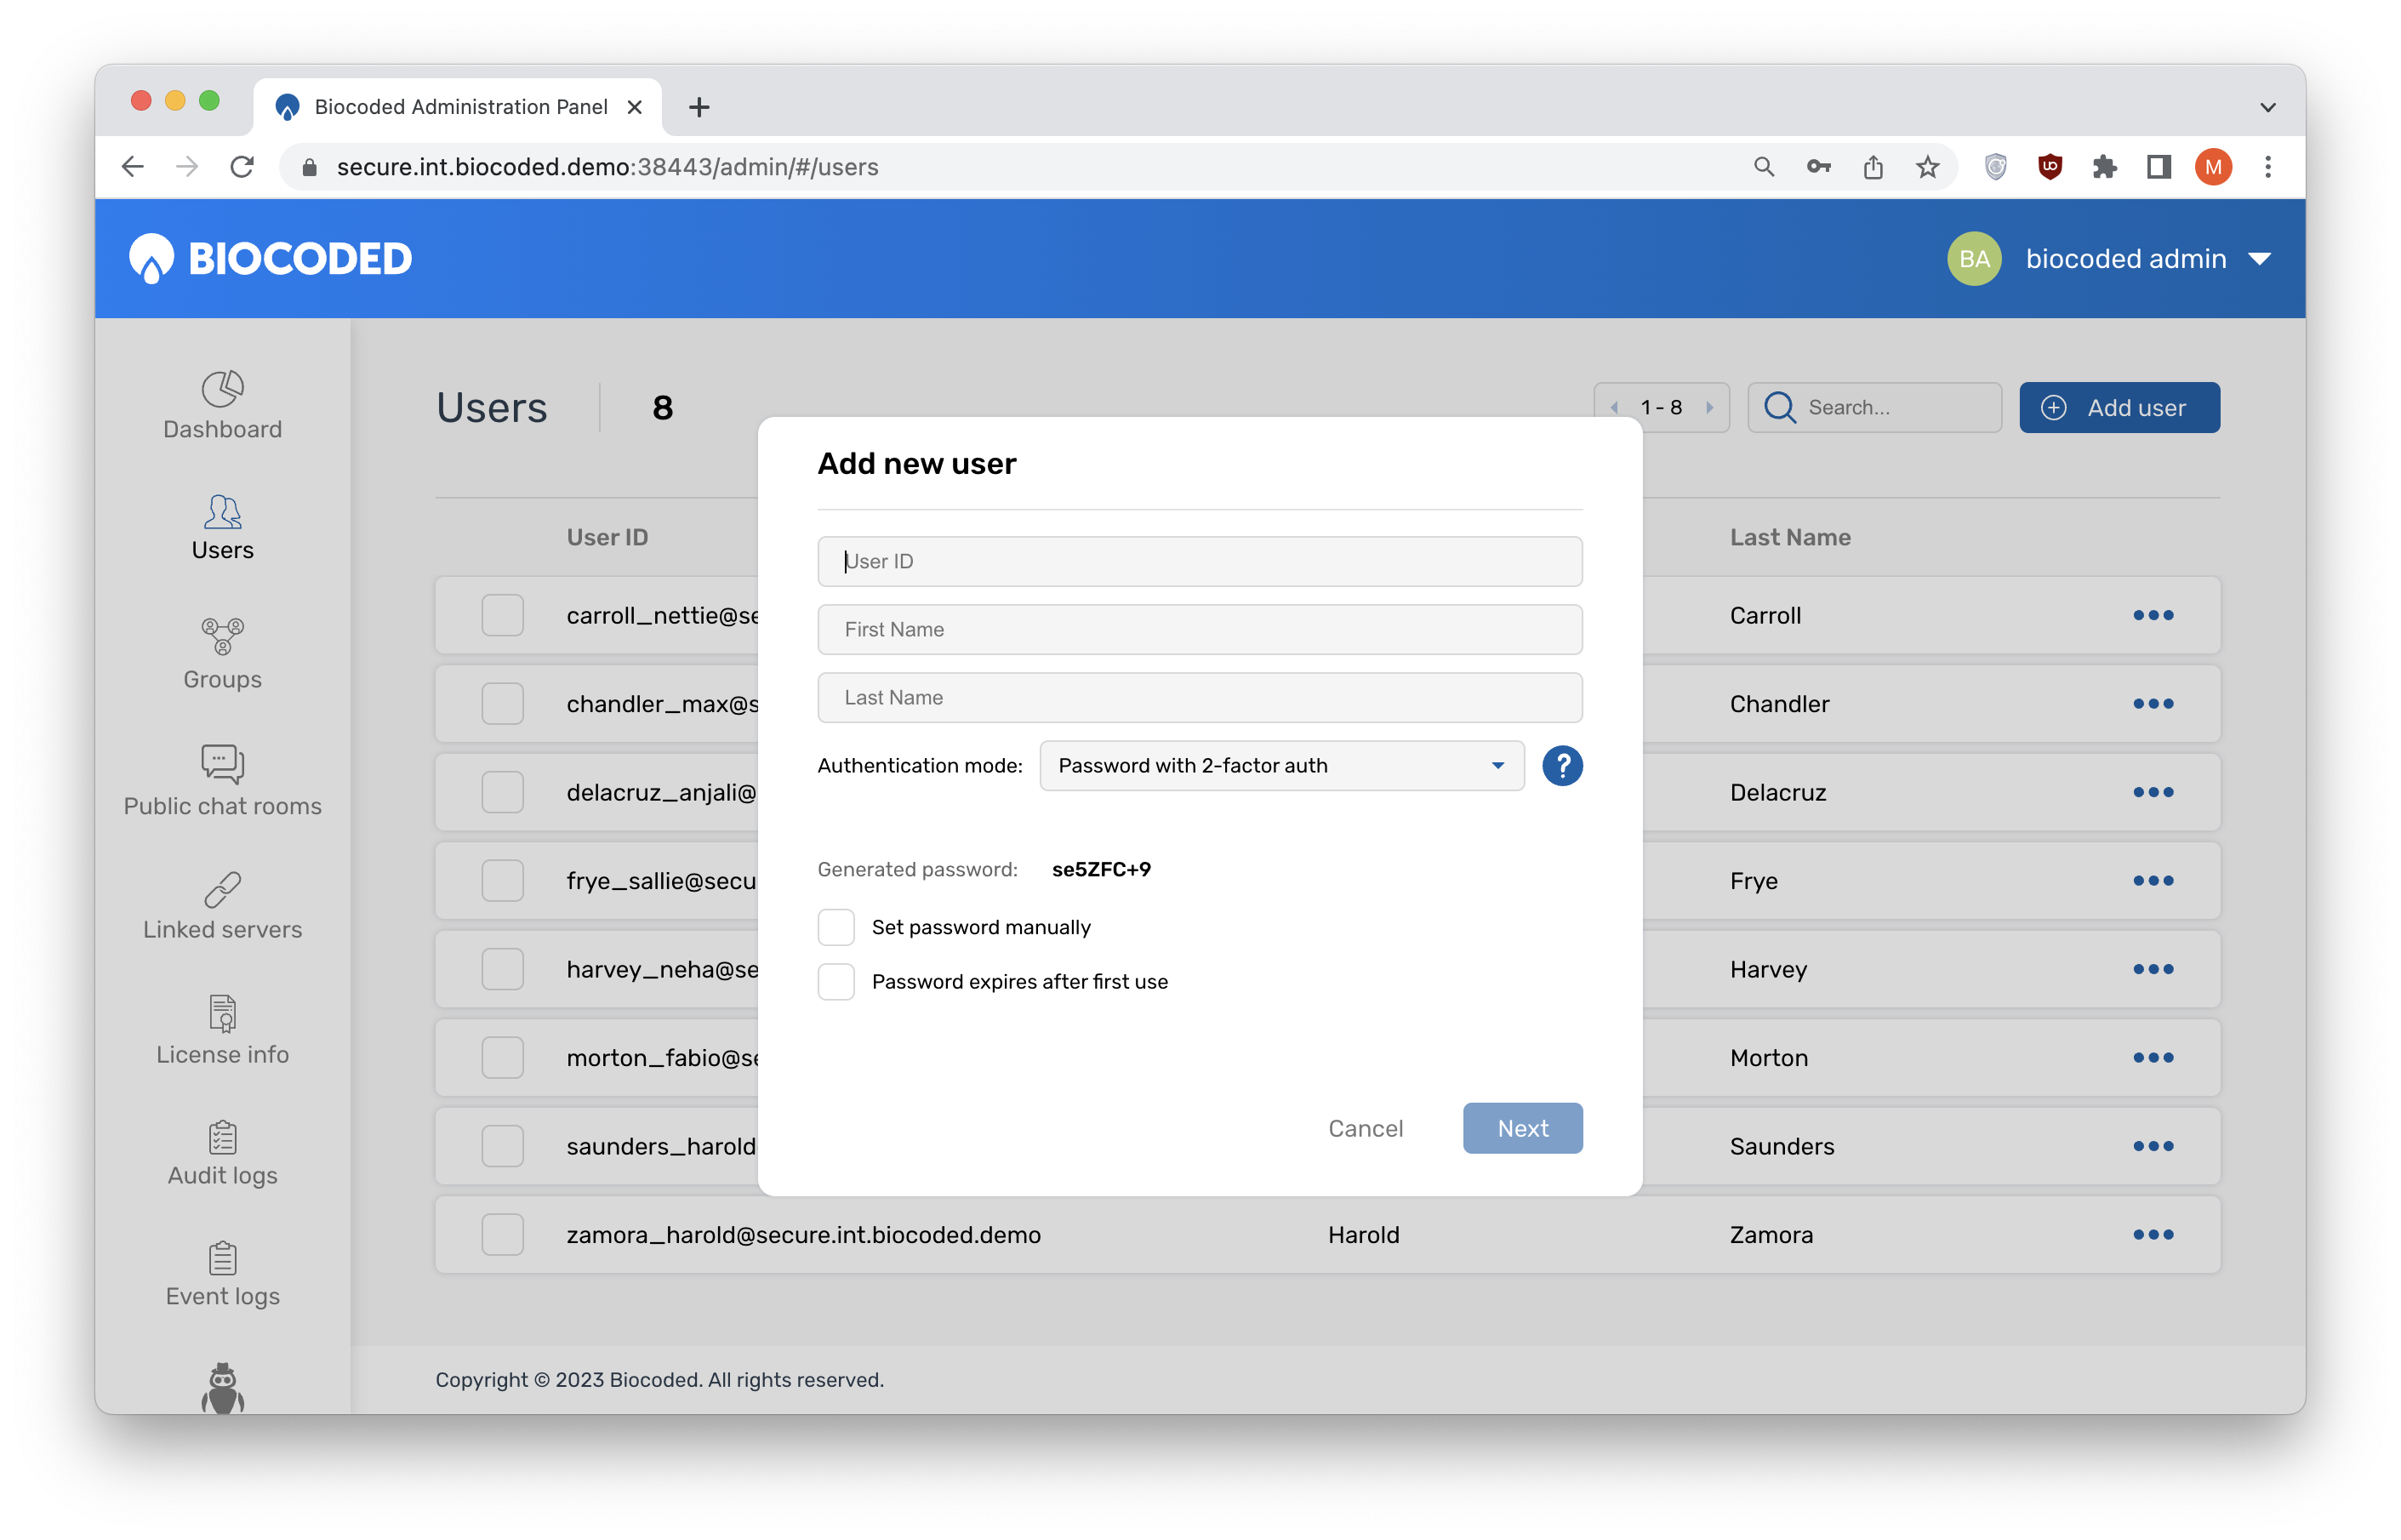
To add a new user, click on "Add user". A popup appears, requesting a new user ID, first and last name. User IDs can contain only lowercase letters (a-z), numbers (0-9), underscores (_), dots(.) and dashes(-).
You also have the option to select an authentication mode, choosing between "Password with 2-factor auth" and "Password-less authentication".
When selecting "Password with 2-factor auth", a password is generated for the user, that they can use to log in. If you select the check box next to "Password expires after first use", the user will have to set a new password after logging in the first time. You can also choose to "Set password manually", which will allow you to choose the password the user will use. At first log in on a new device, the device will have to be activated with an activation code (described further in this document).
If "Password-less authentication" is selected, a QR code or a log in link will have to be generated for the user to be able to sign in and use their account. This can be done after creating the user, so while viewing the user profile, select "Authentication options" (described further in this document).
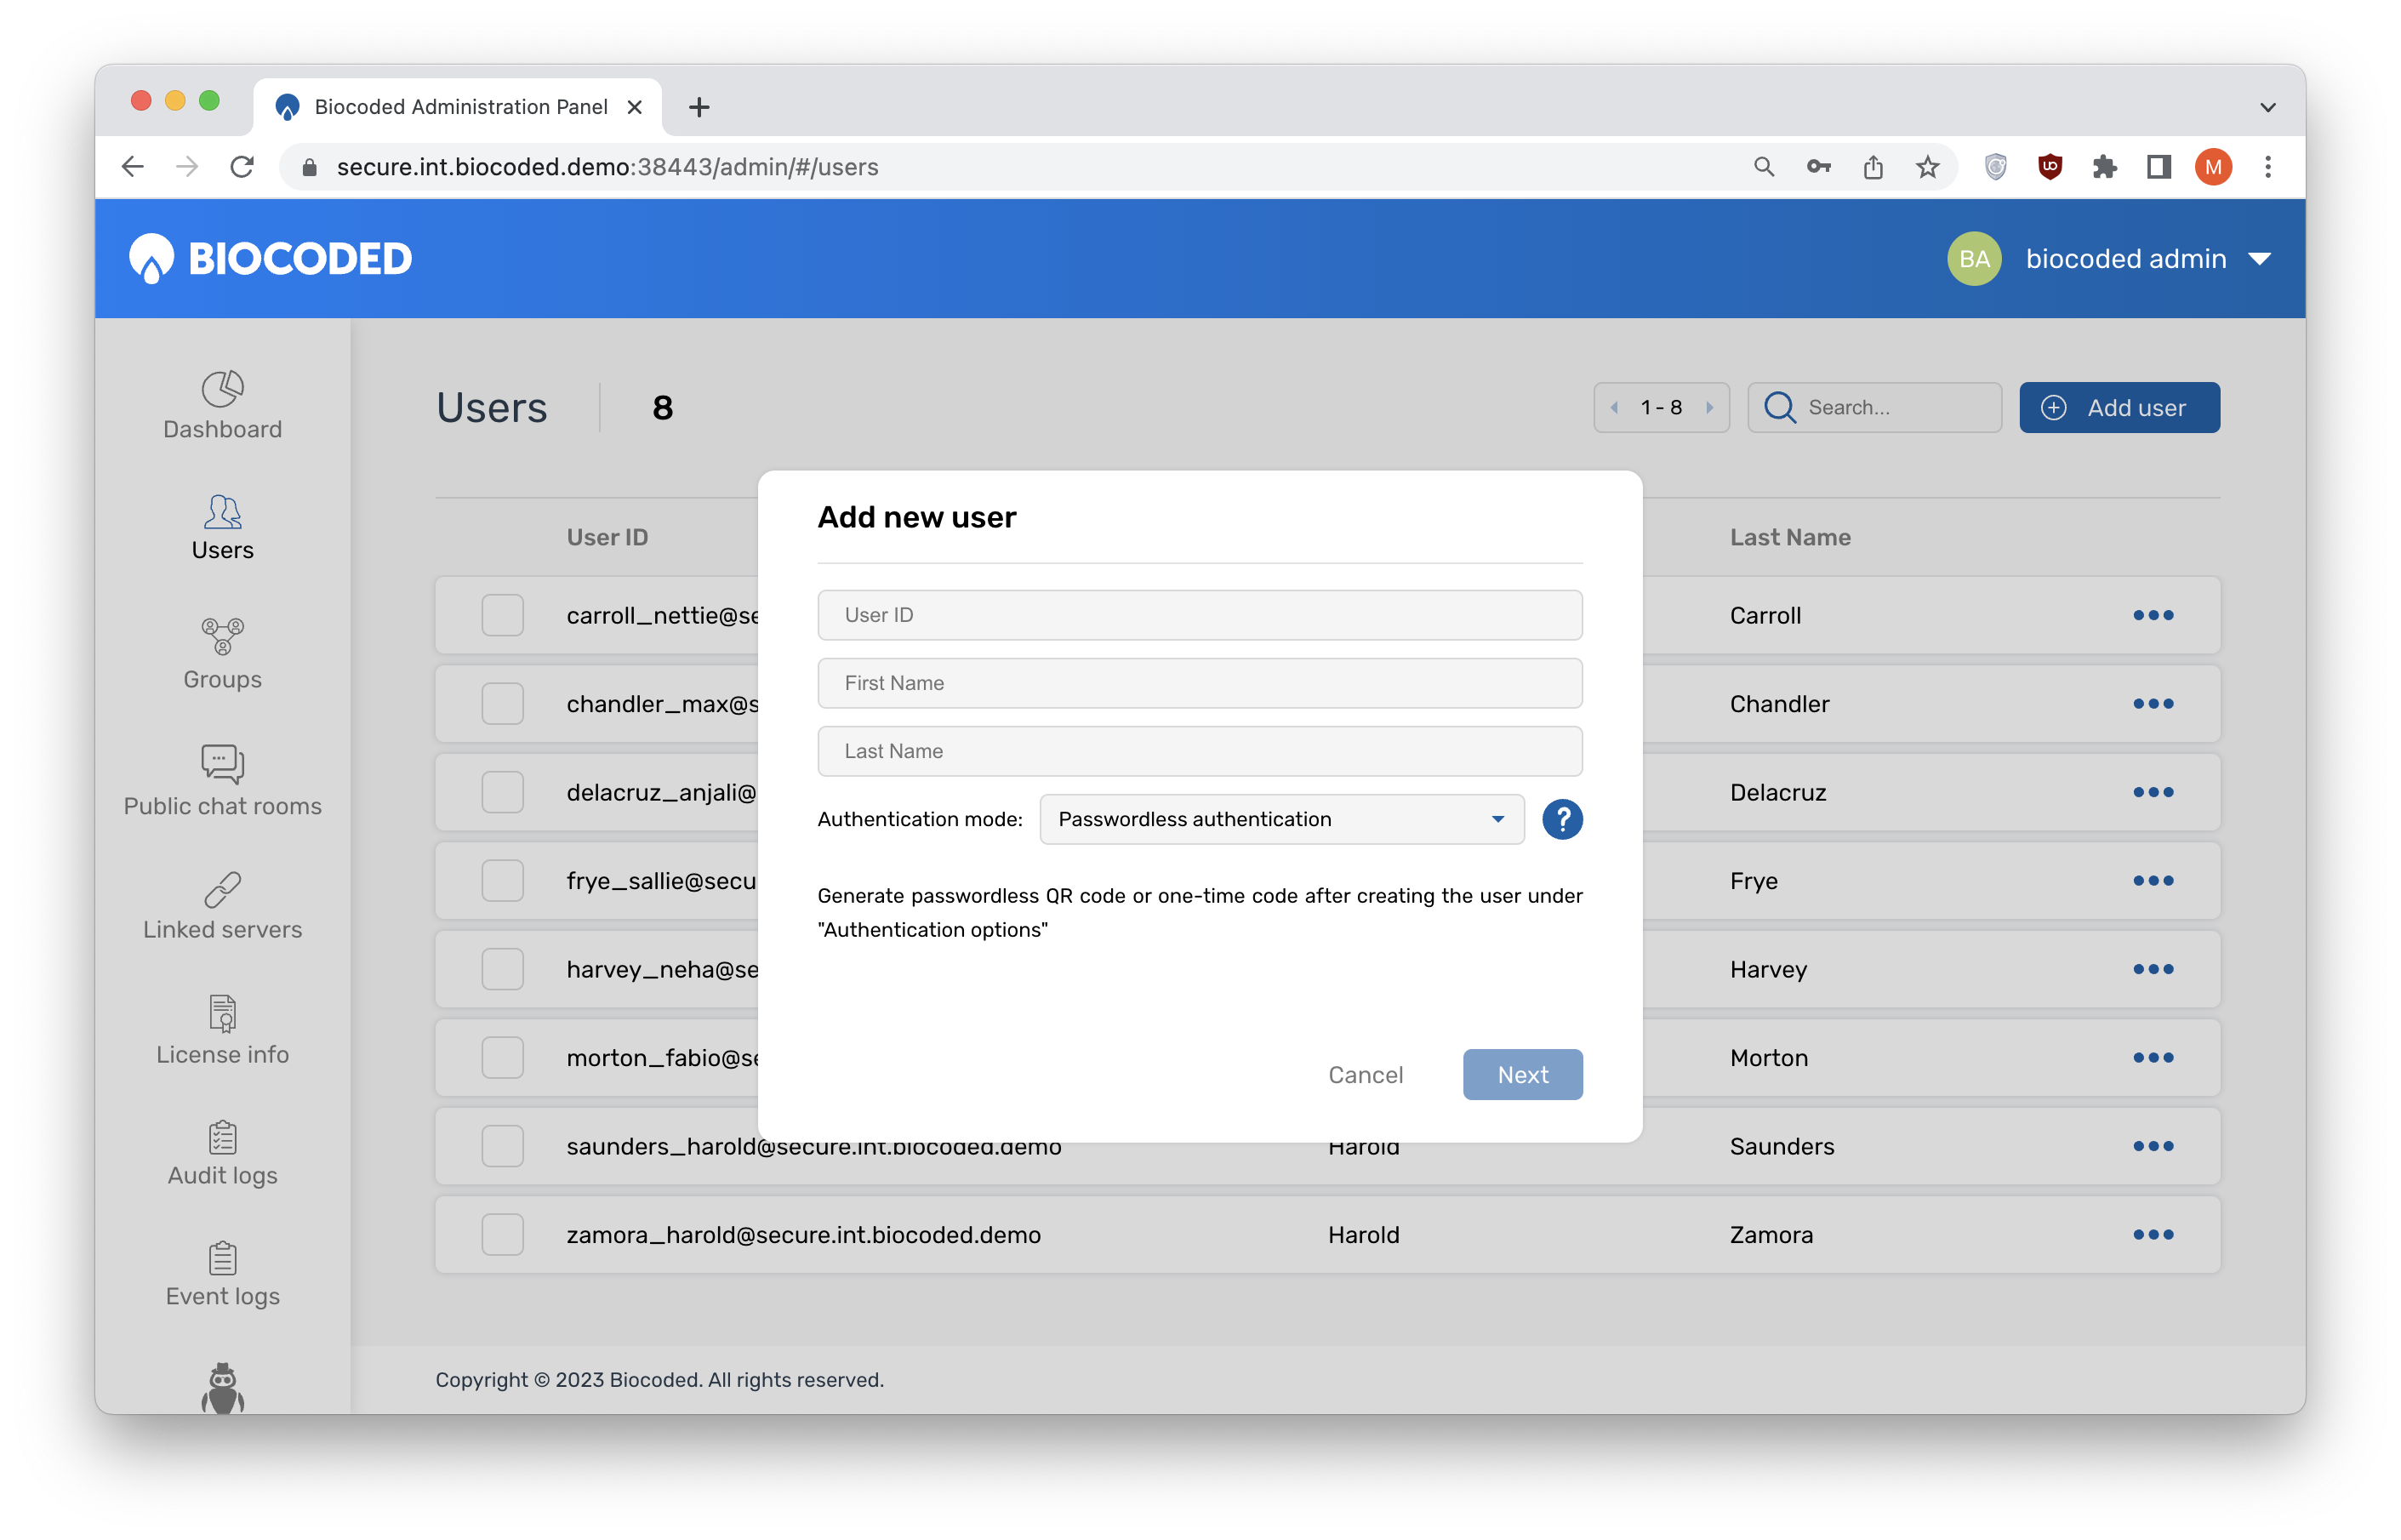
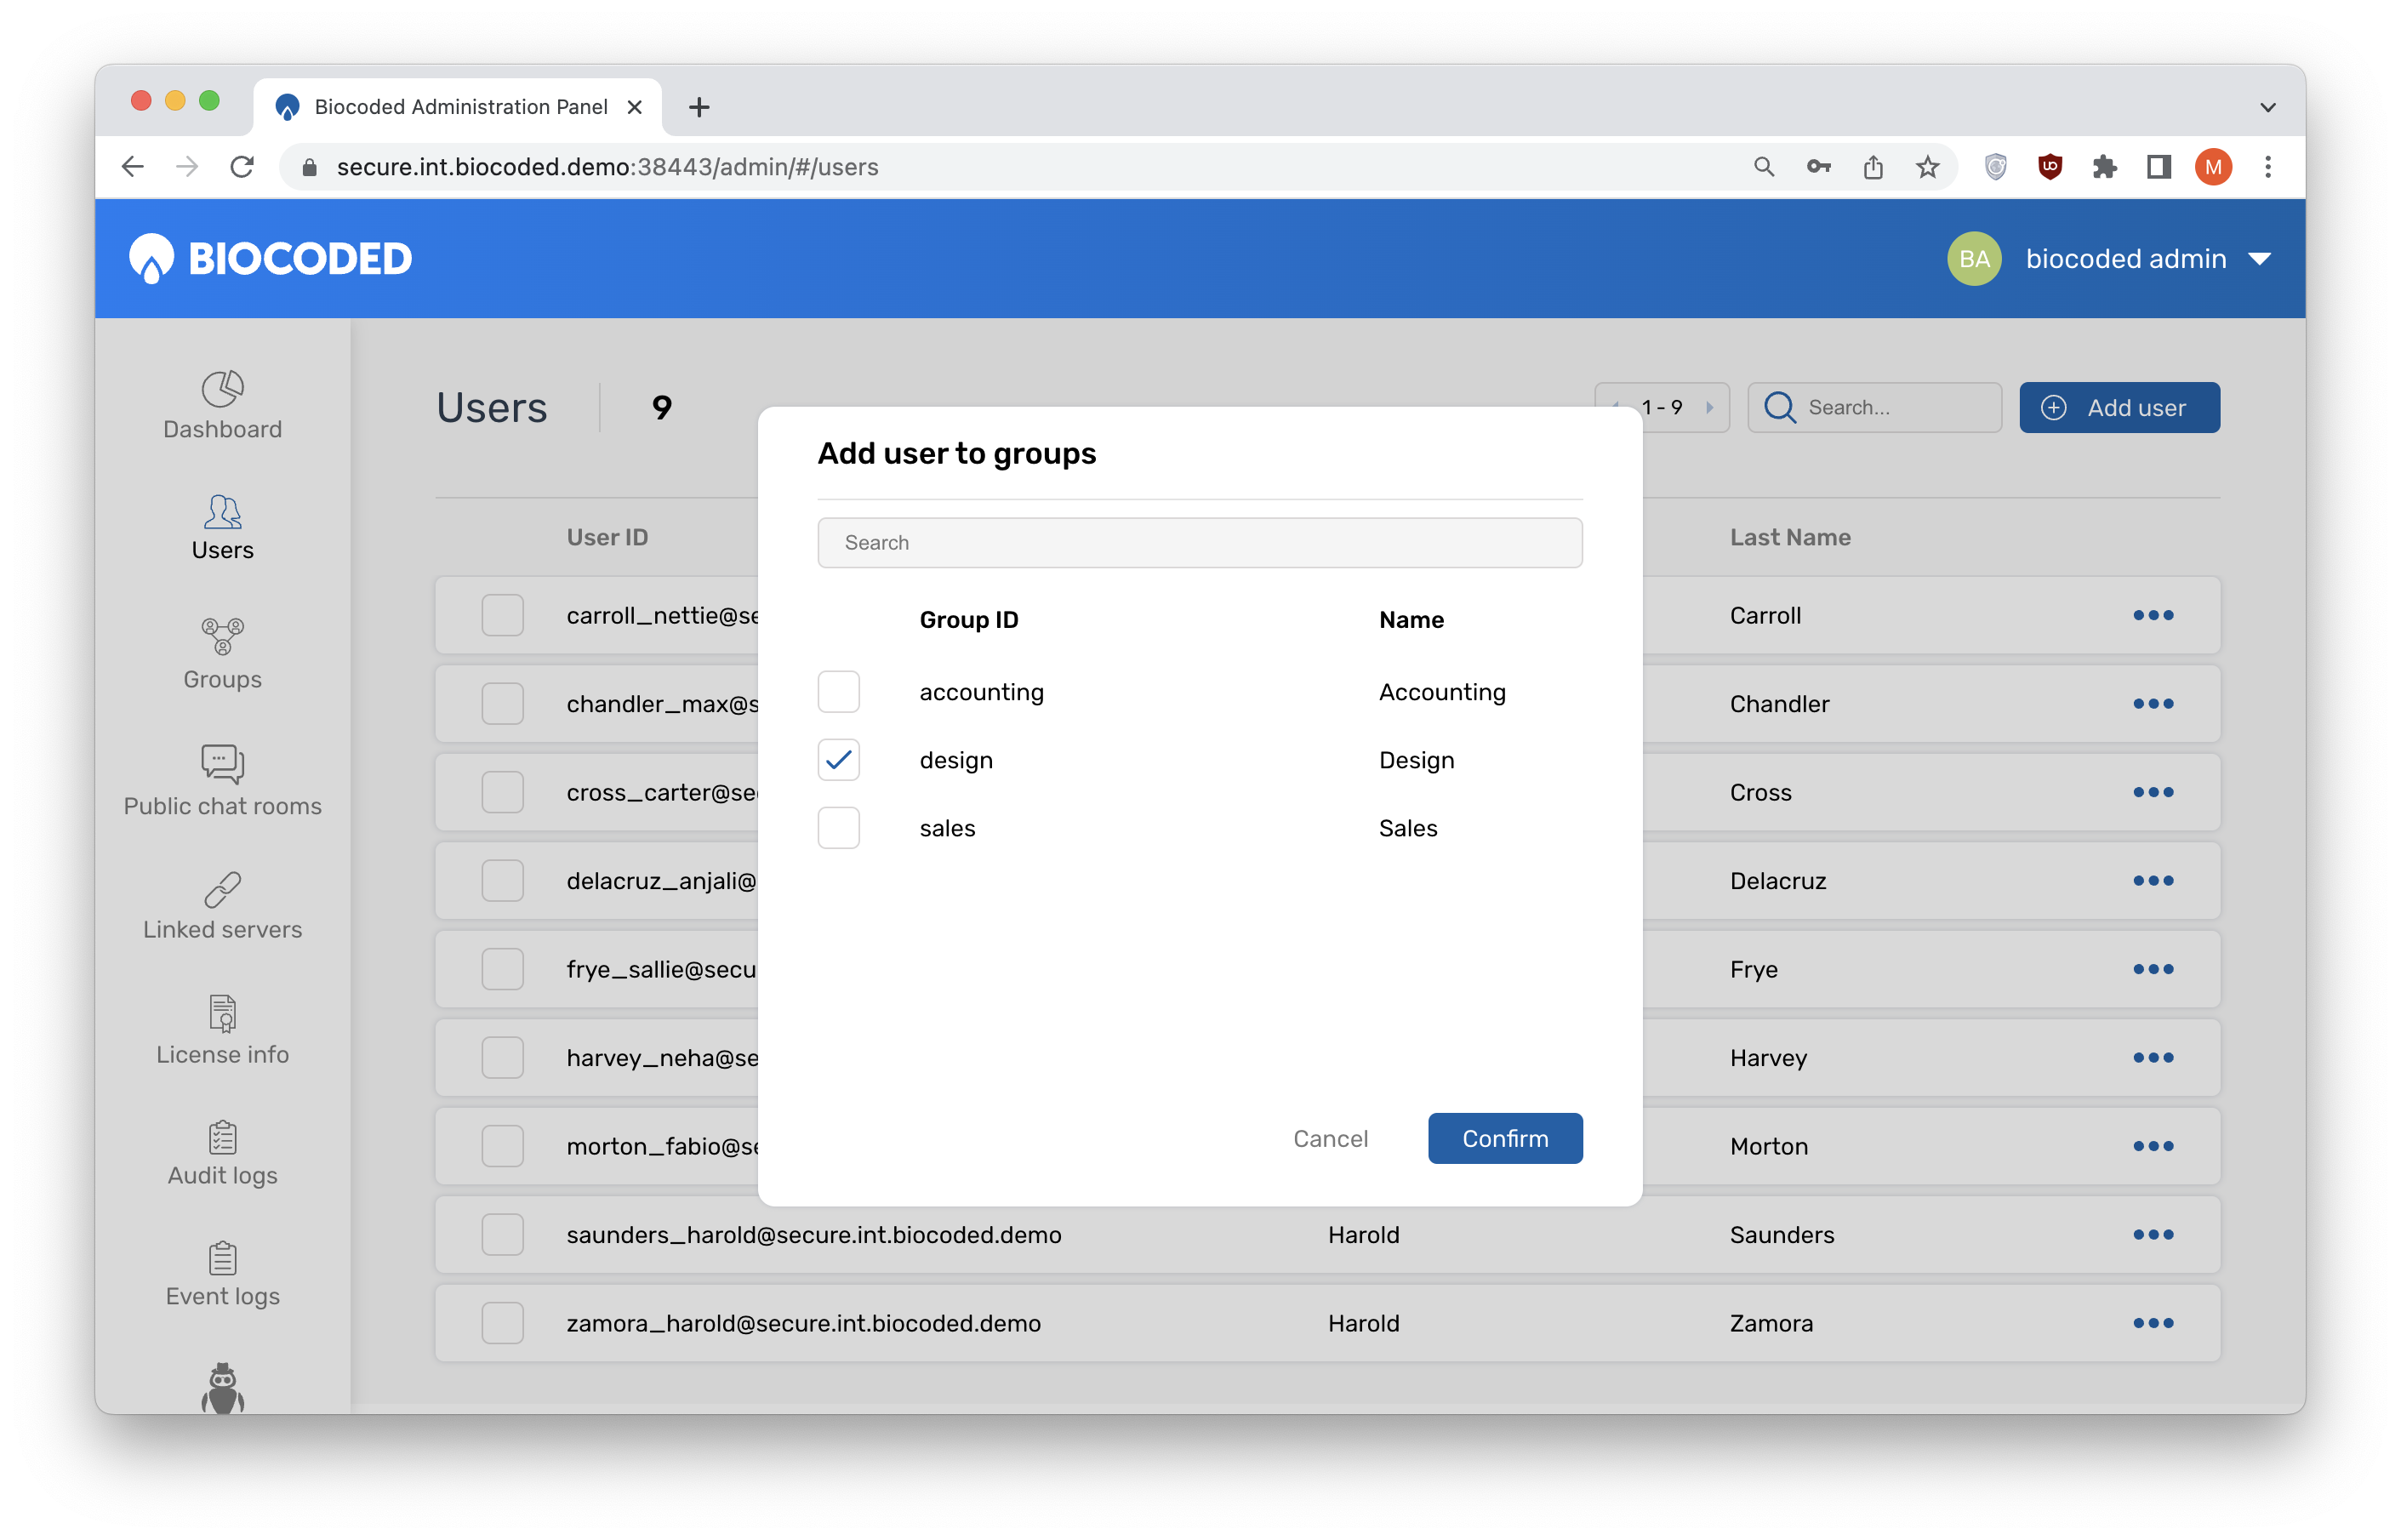
When all user parameters are set, click on "Next", revealing a new window, where you can add the user to an existing group. This can be changed after profile creation when visiting "Users" tab.
User profile
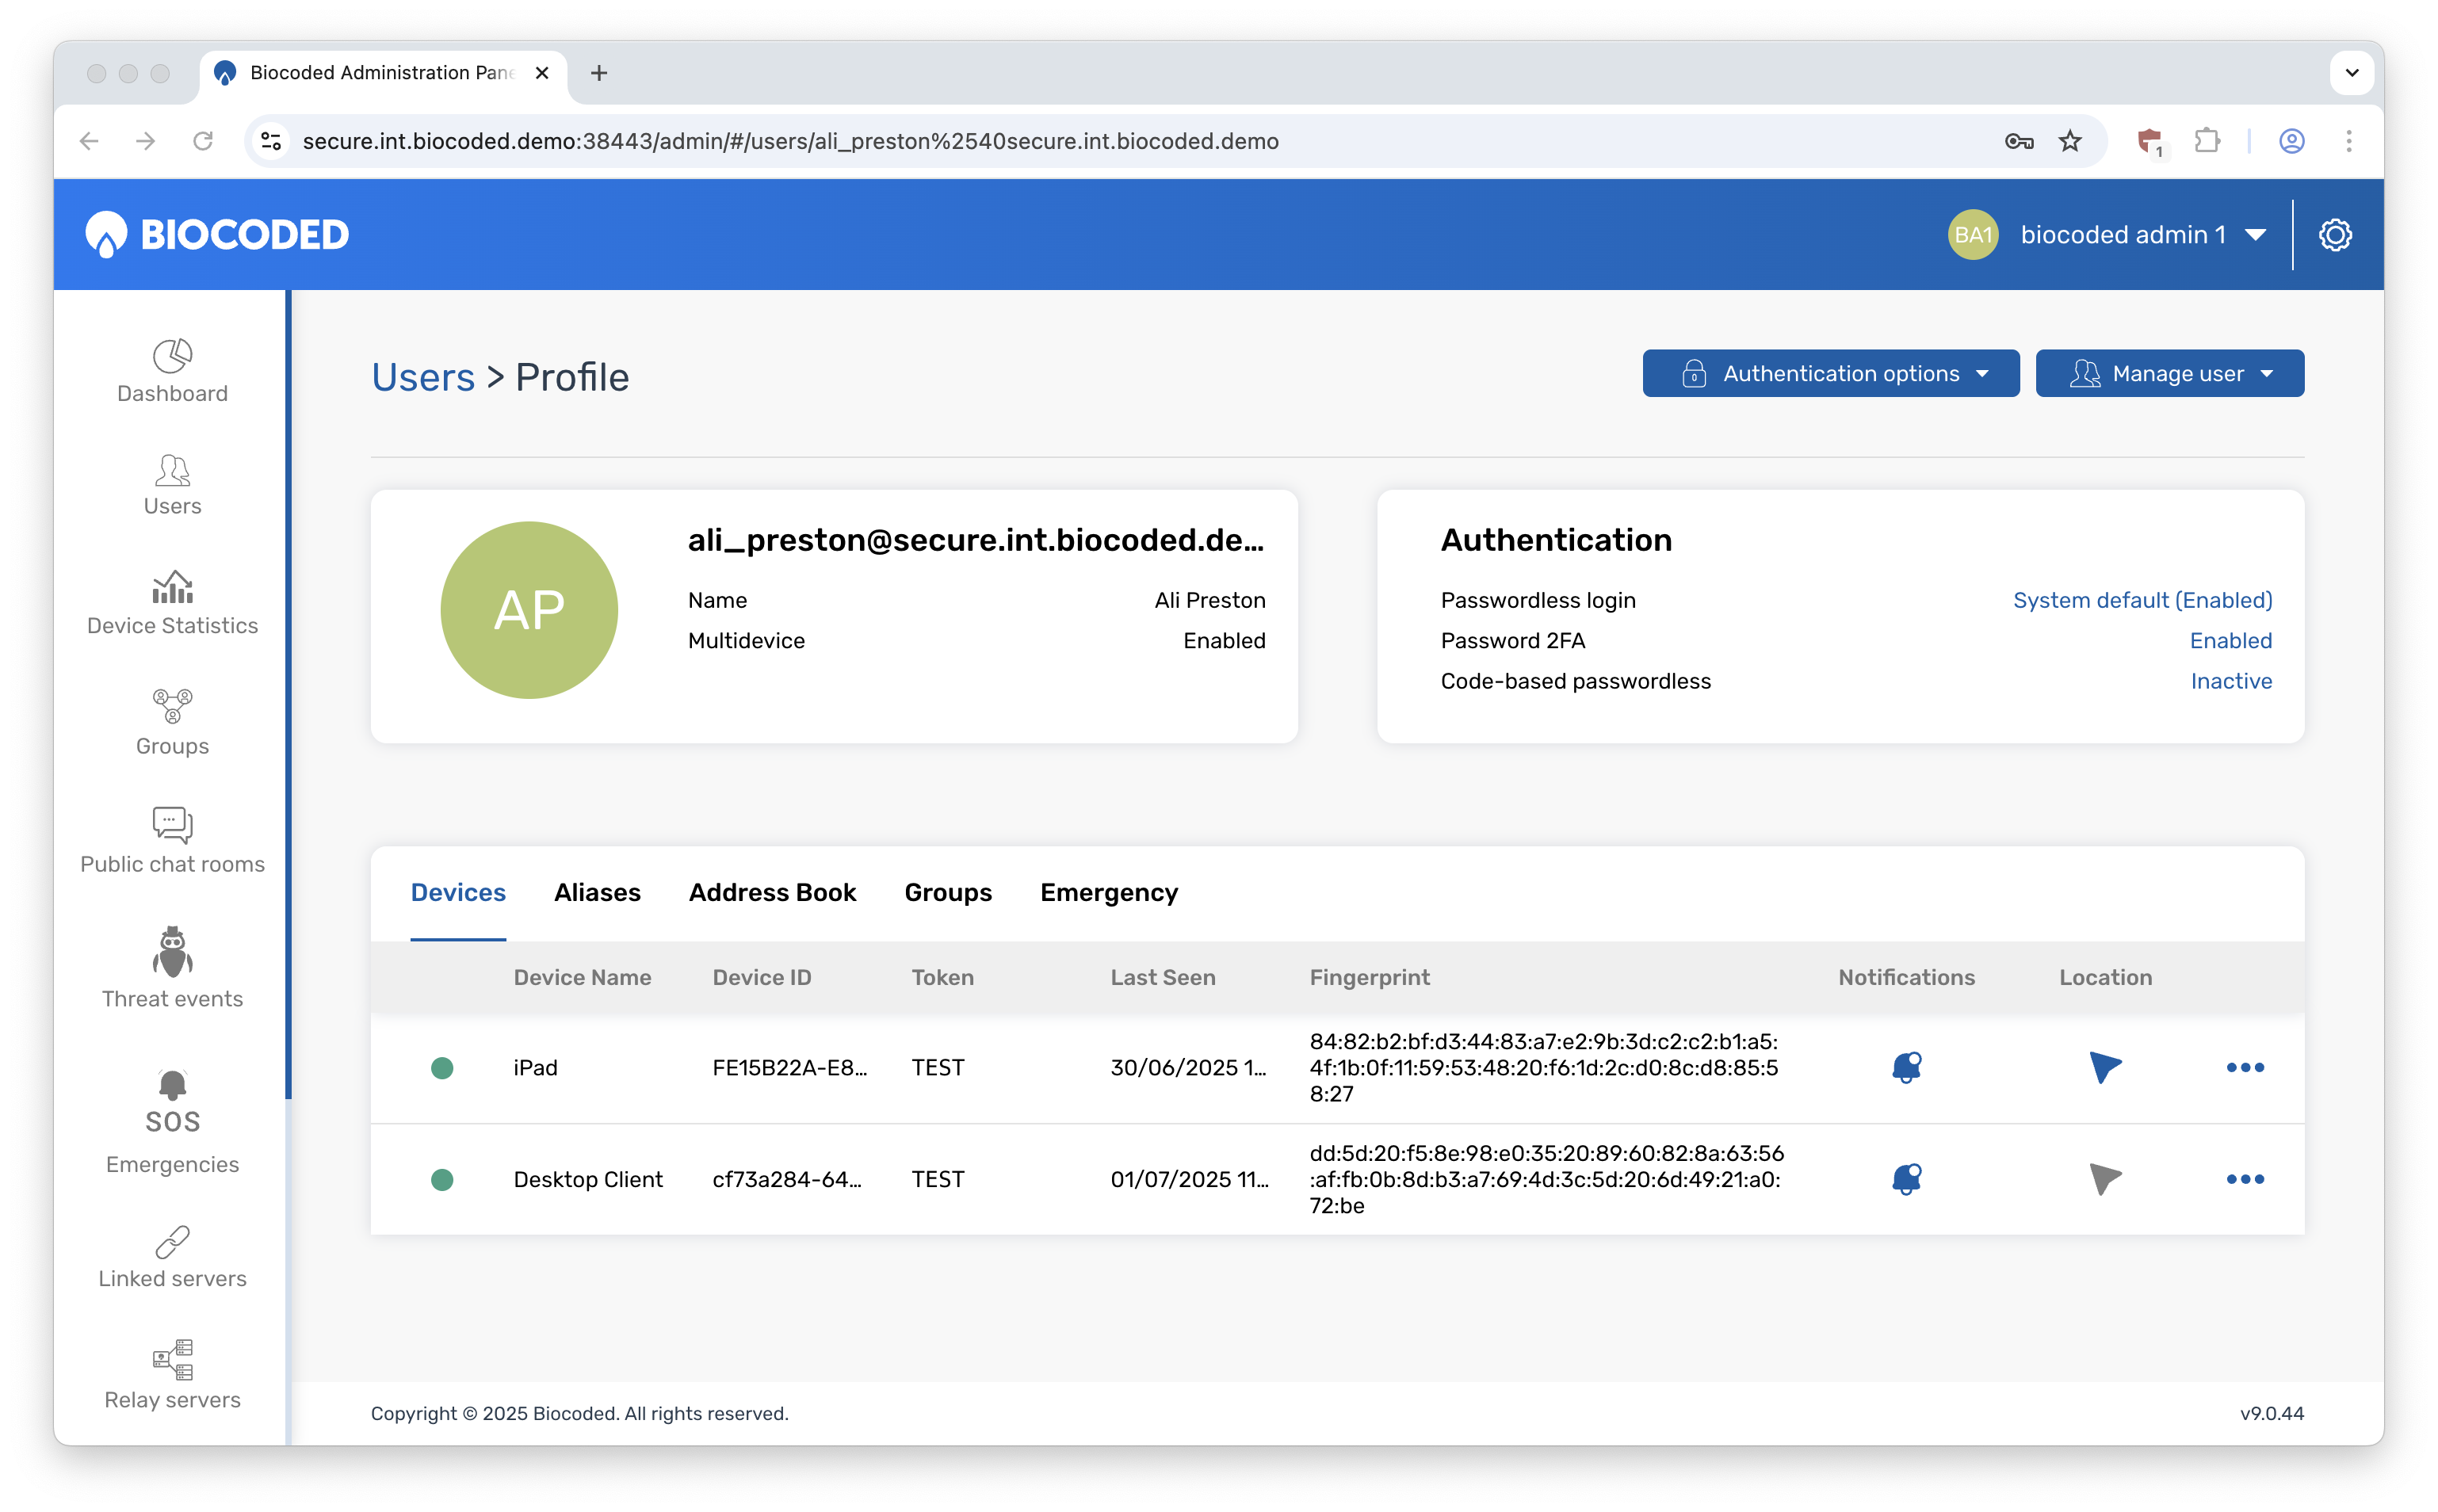
A click on a listing in "Users" tab opens the user's profile. It consists of the user's ID, first and last name. It also shows if the user has multi-device mode turned on and some authentication settings including "Password-less login", "Password 2FA" and "Code-based password-less". If a custom activation token has been set for this user, it will be displayed under "Pre-set activation token" (how to set it is explained further in the document).
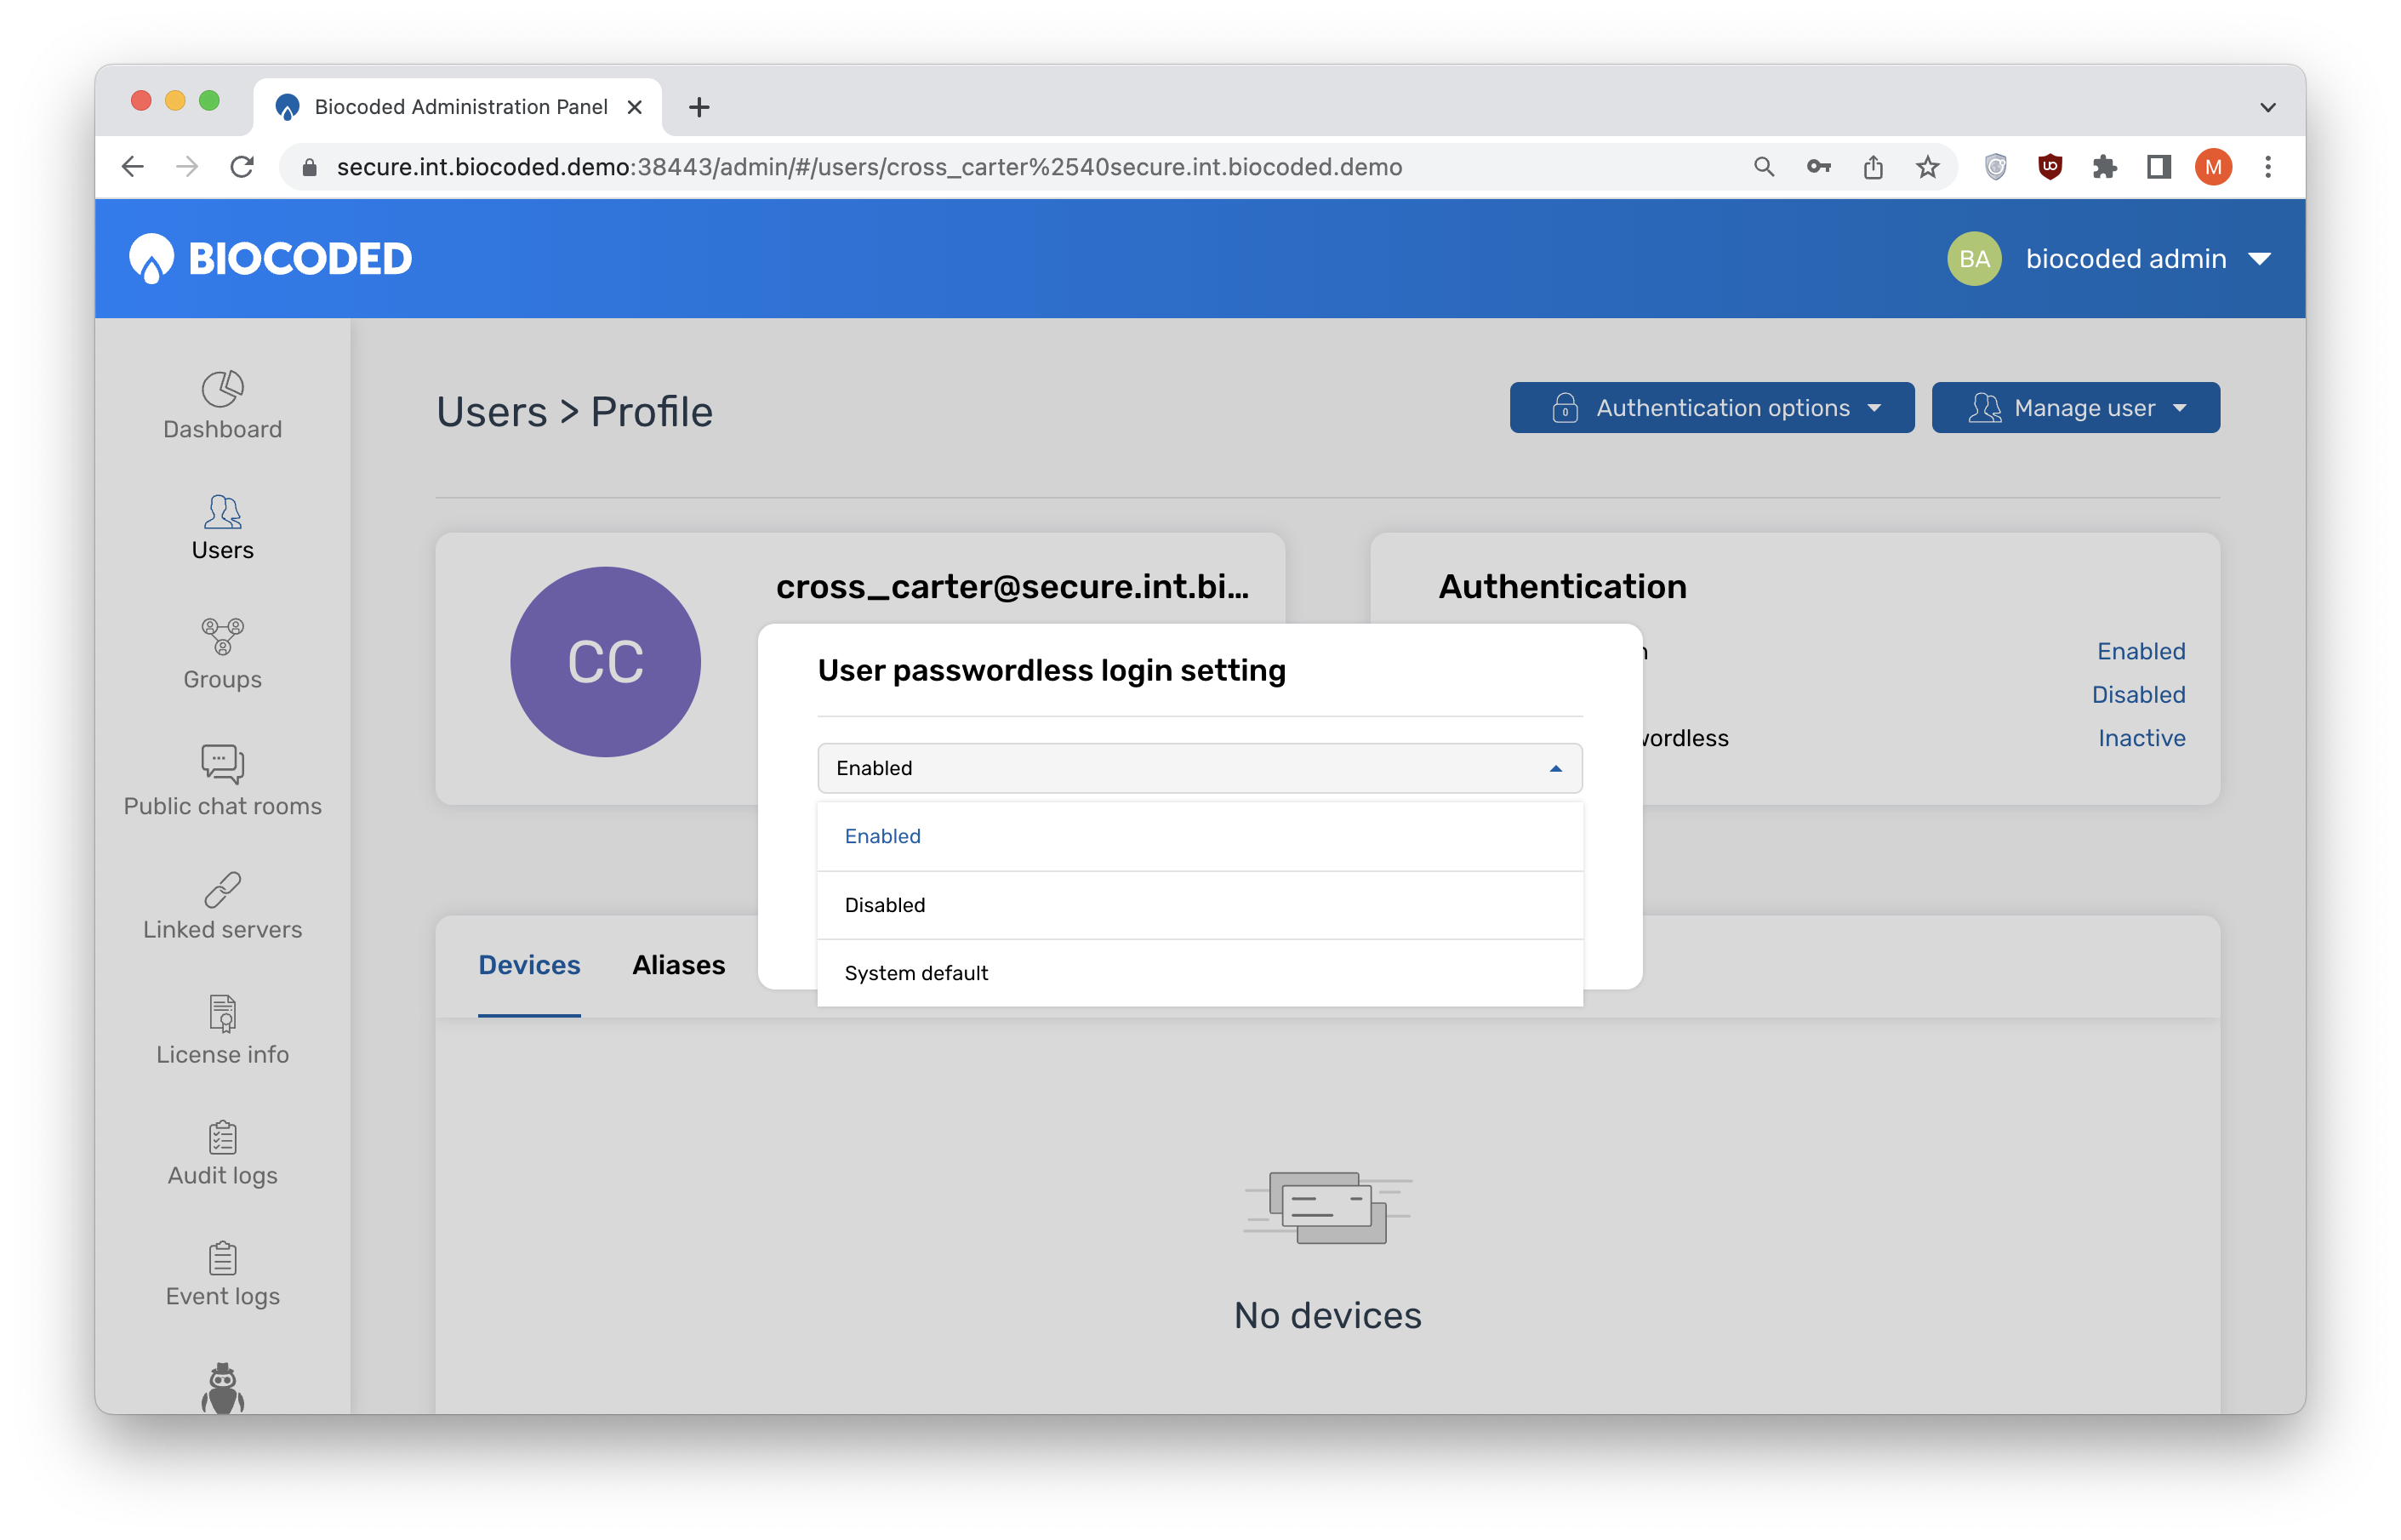
If Password-less login is selected, you have the option to select between "Enabled", "Disabled" and "System default", which is the default server setting.
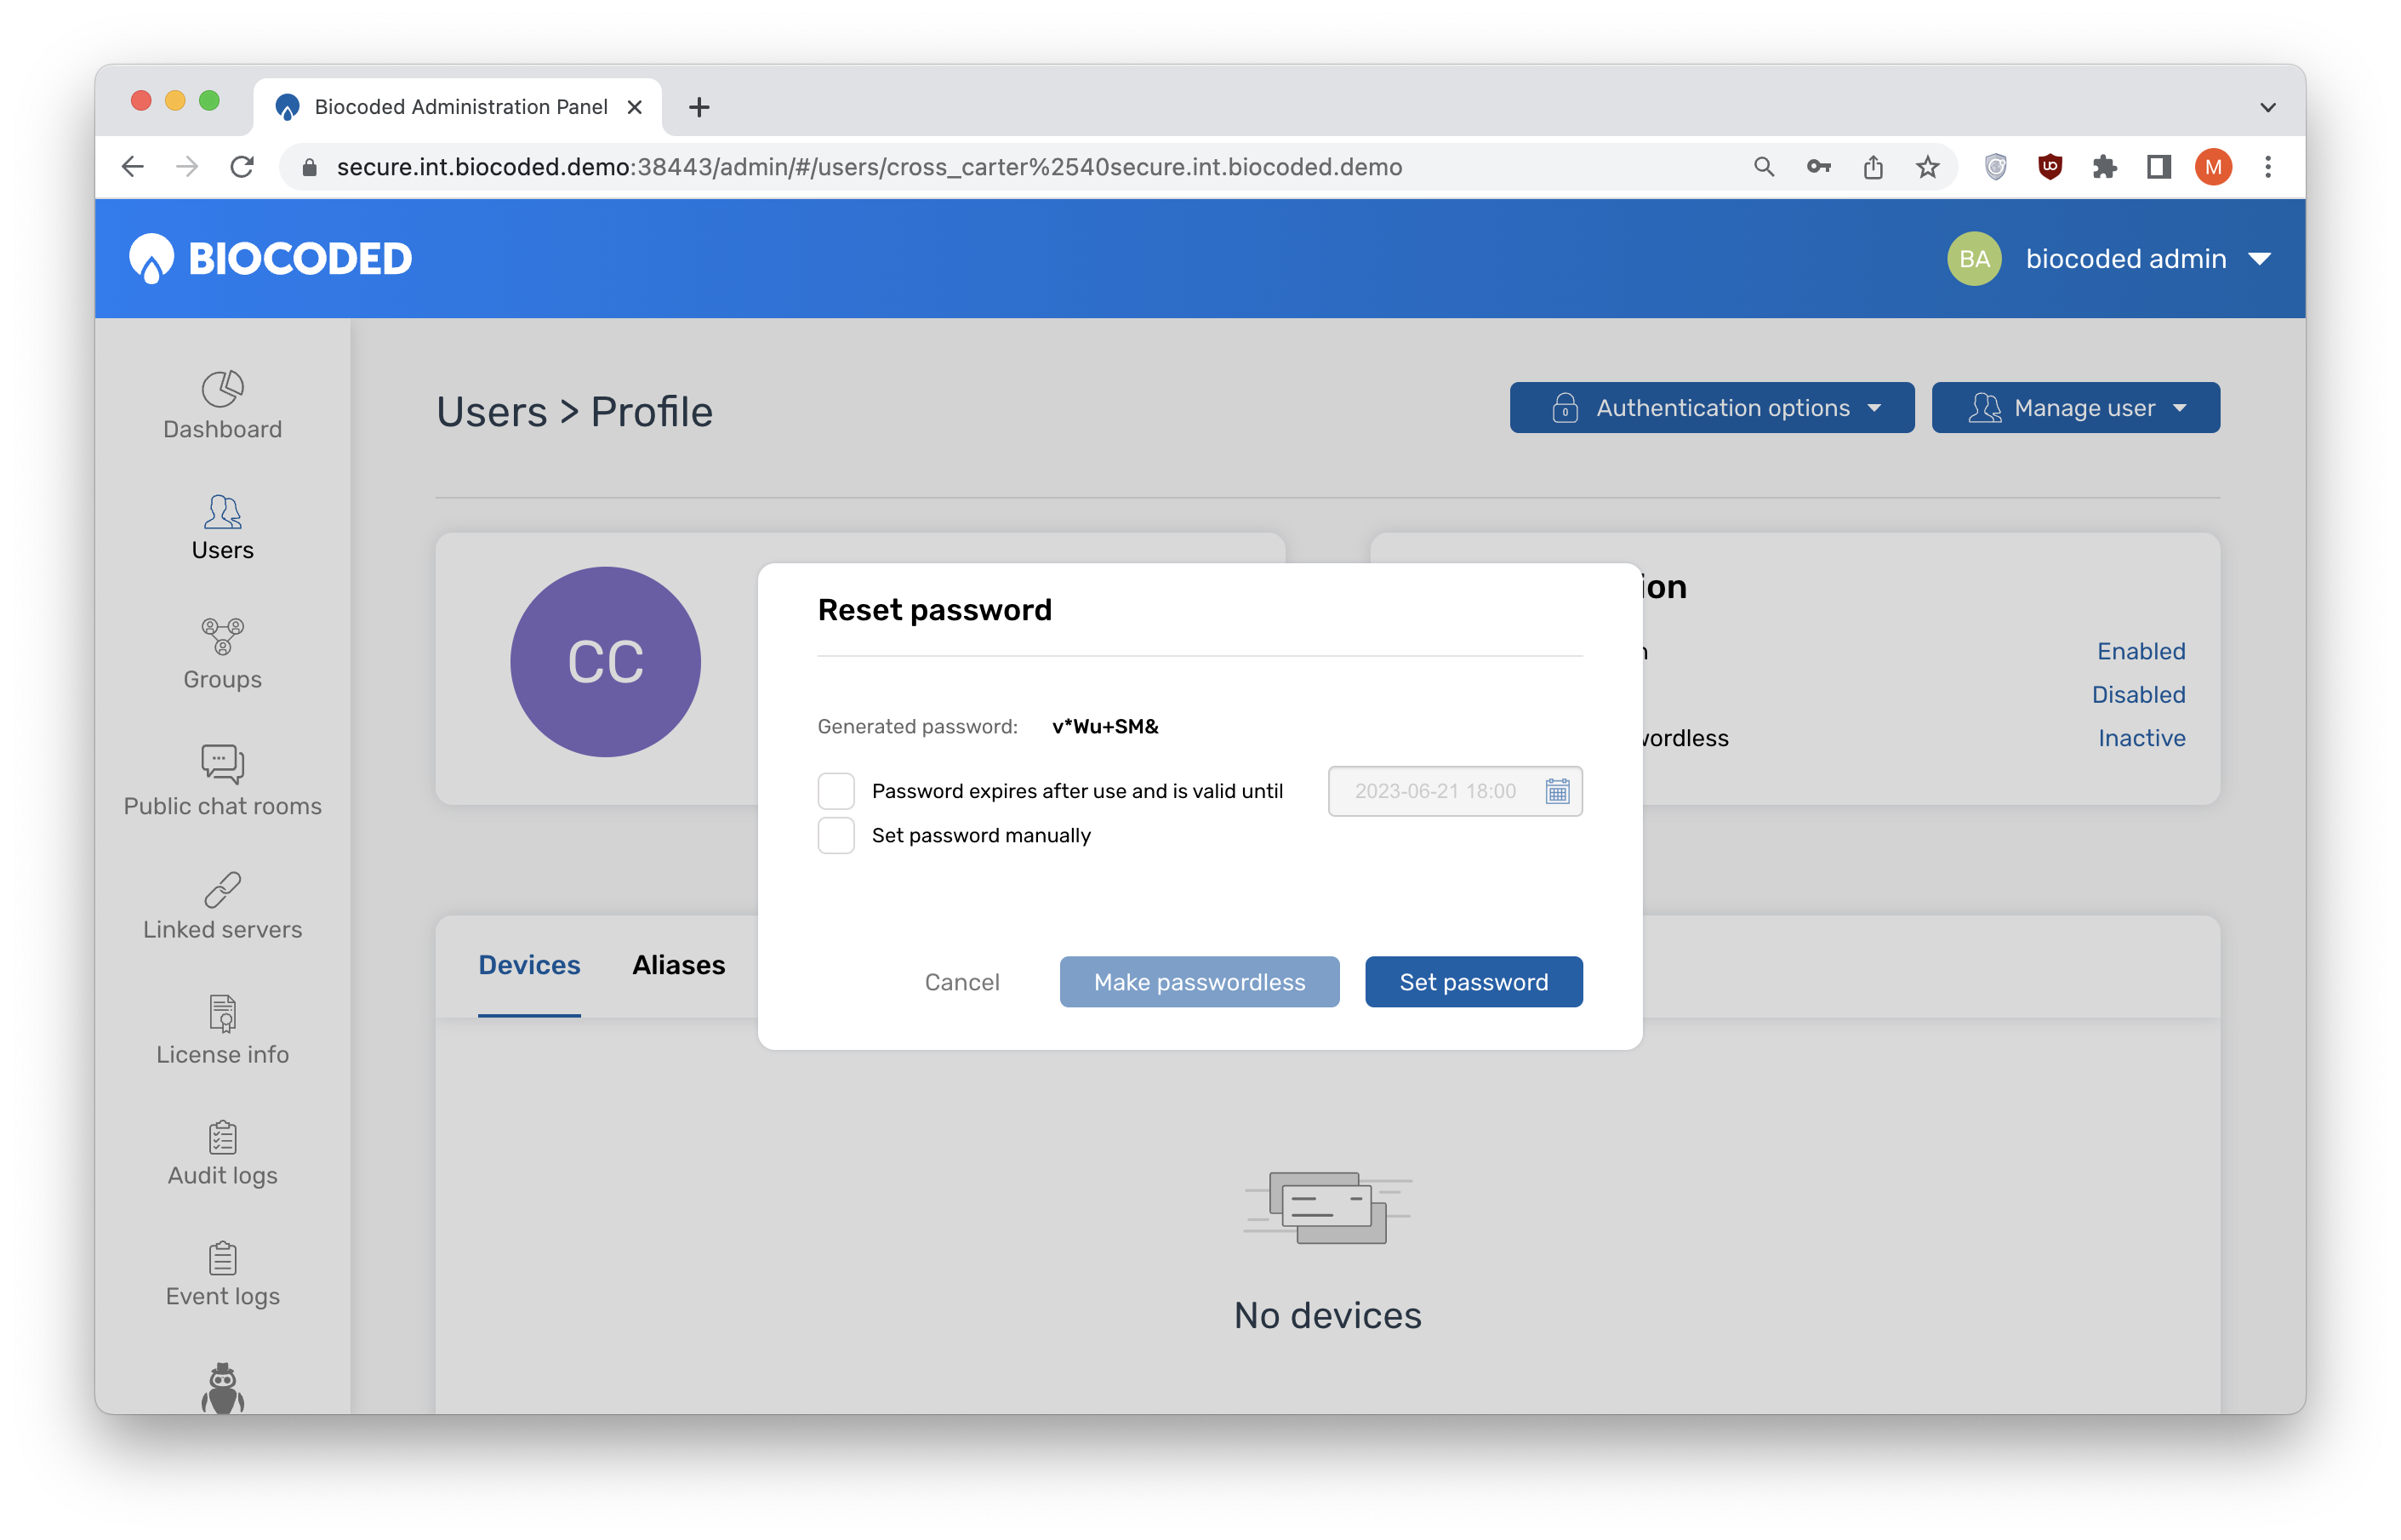
If you select "Password 2FA", you can reset or change the password for this specific user. An expiration time for the new password can also be selected.
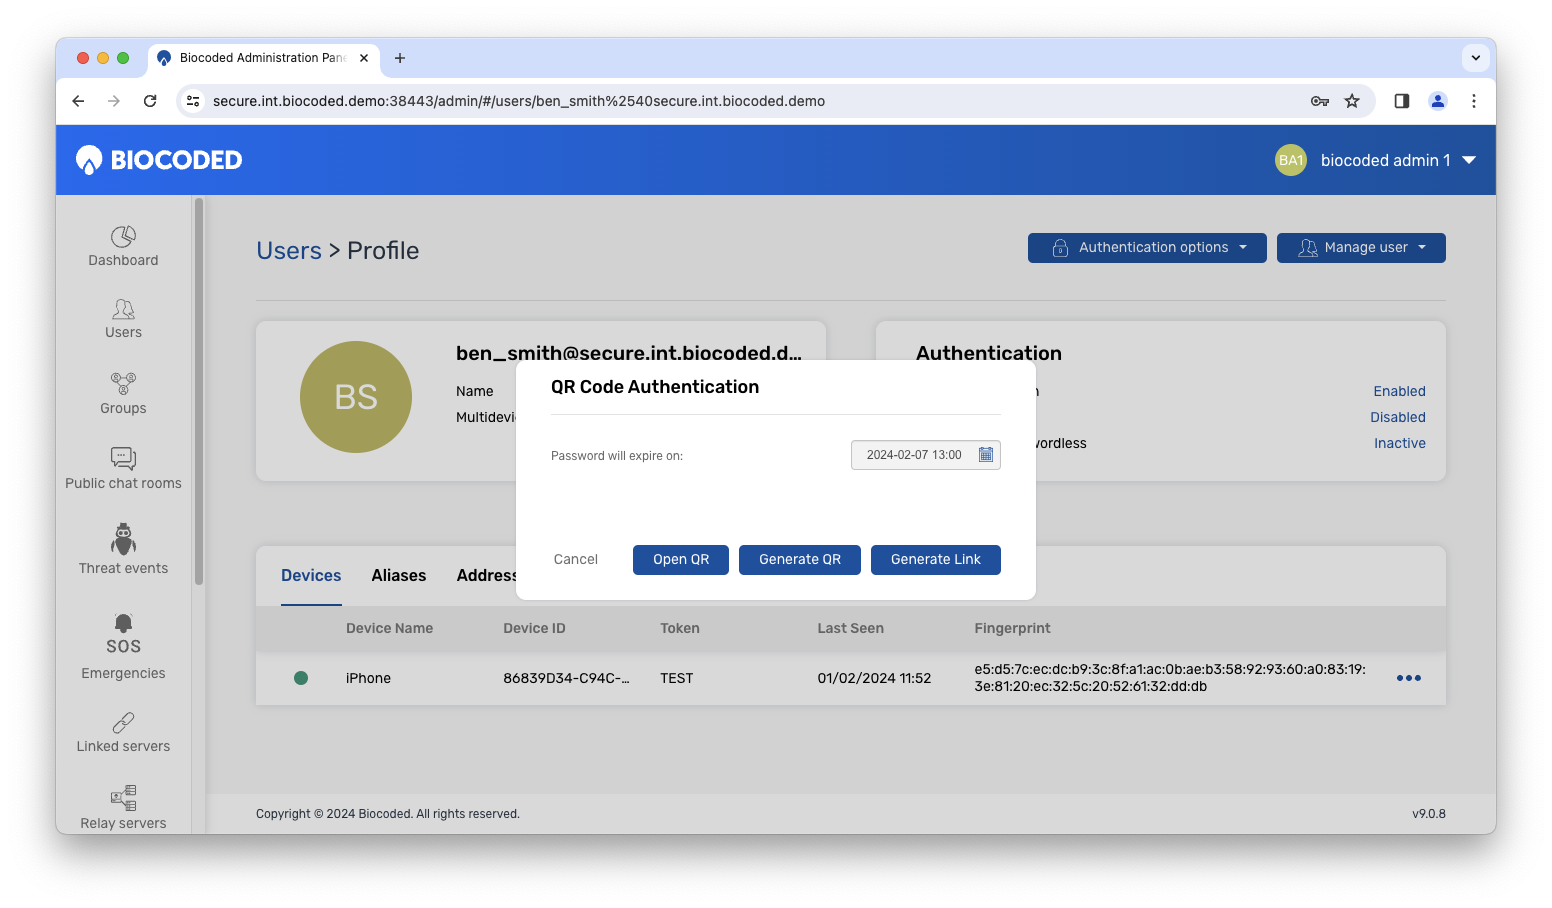
"Code-based password-less" offers the option to "Generate QR" code or "Generate Link" for logging in password-less users. This is the only way they can log in. An expiration time is also set for the login data, which disables the user's login with the generated link or QR code after the selected time passes. "Open QR" shows the generated QR code.
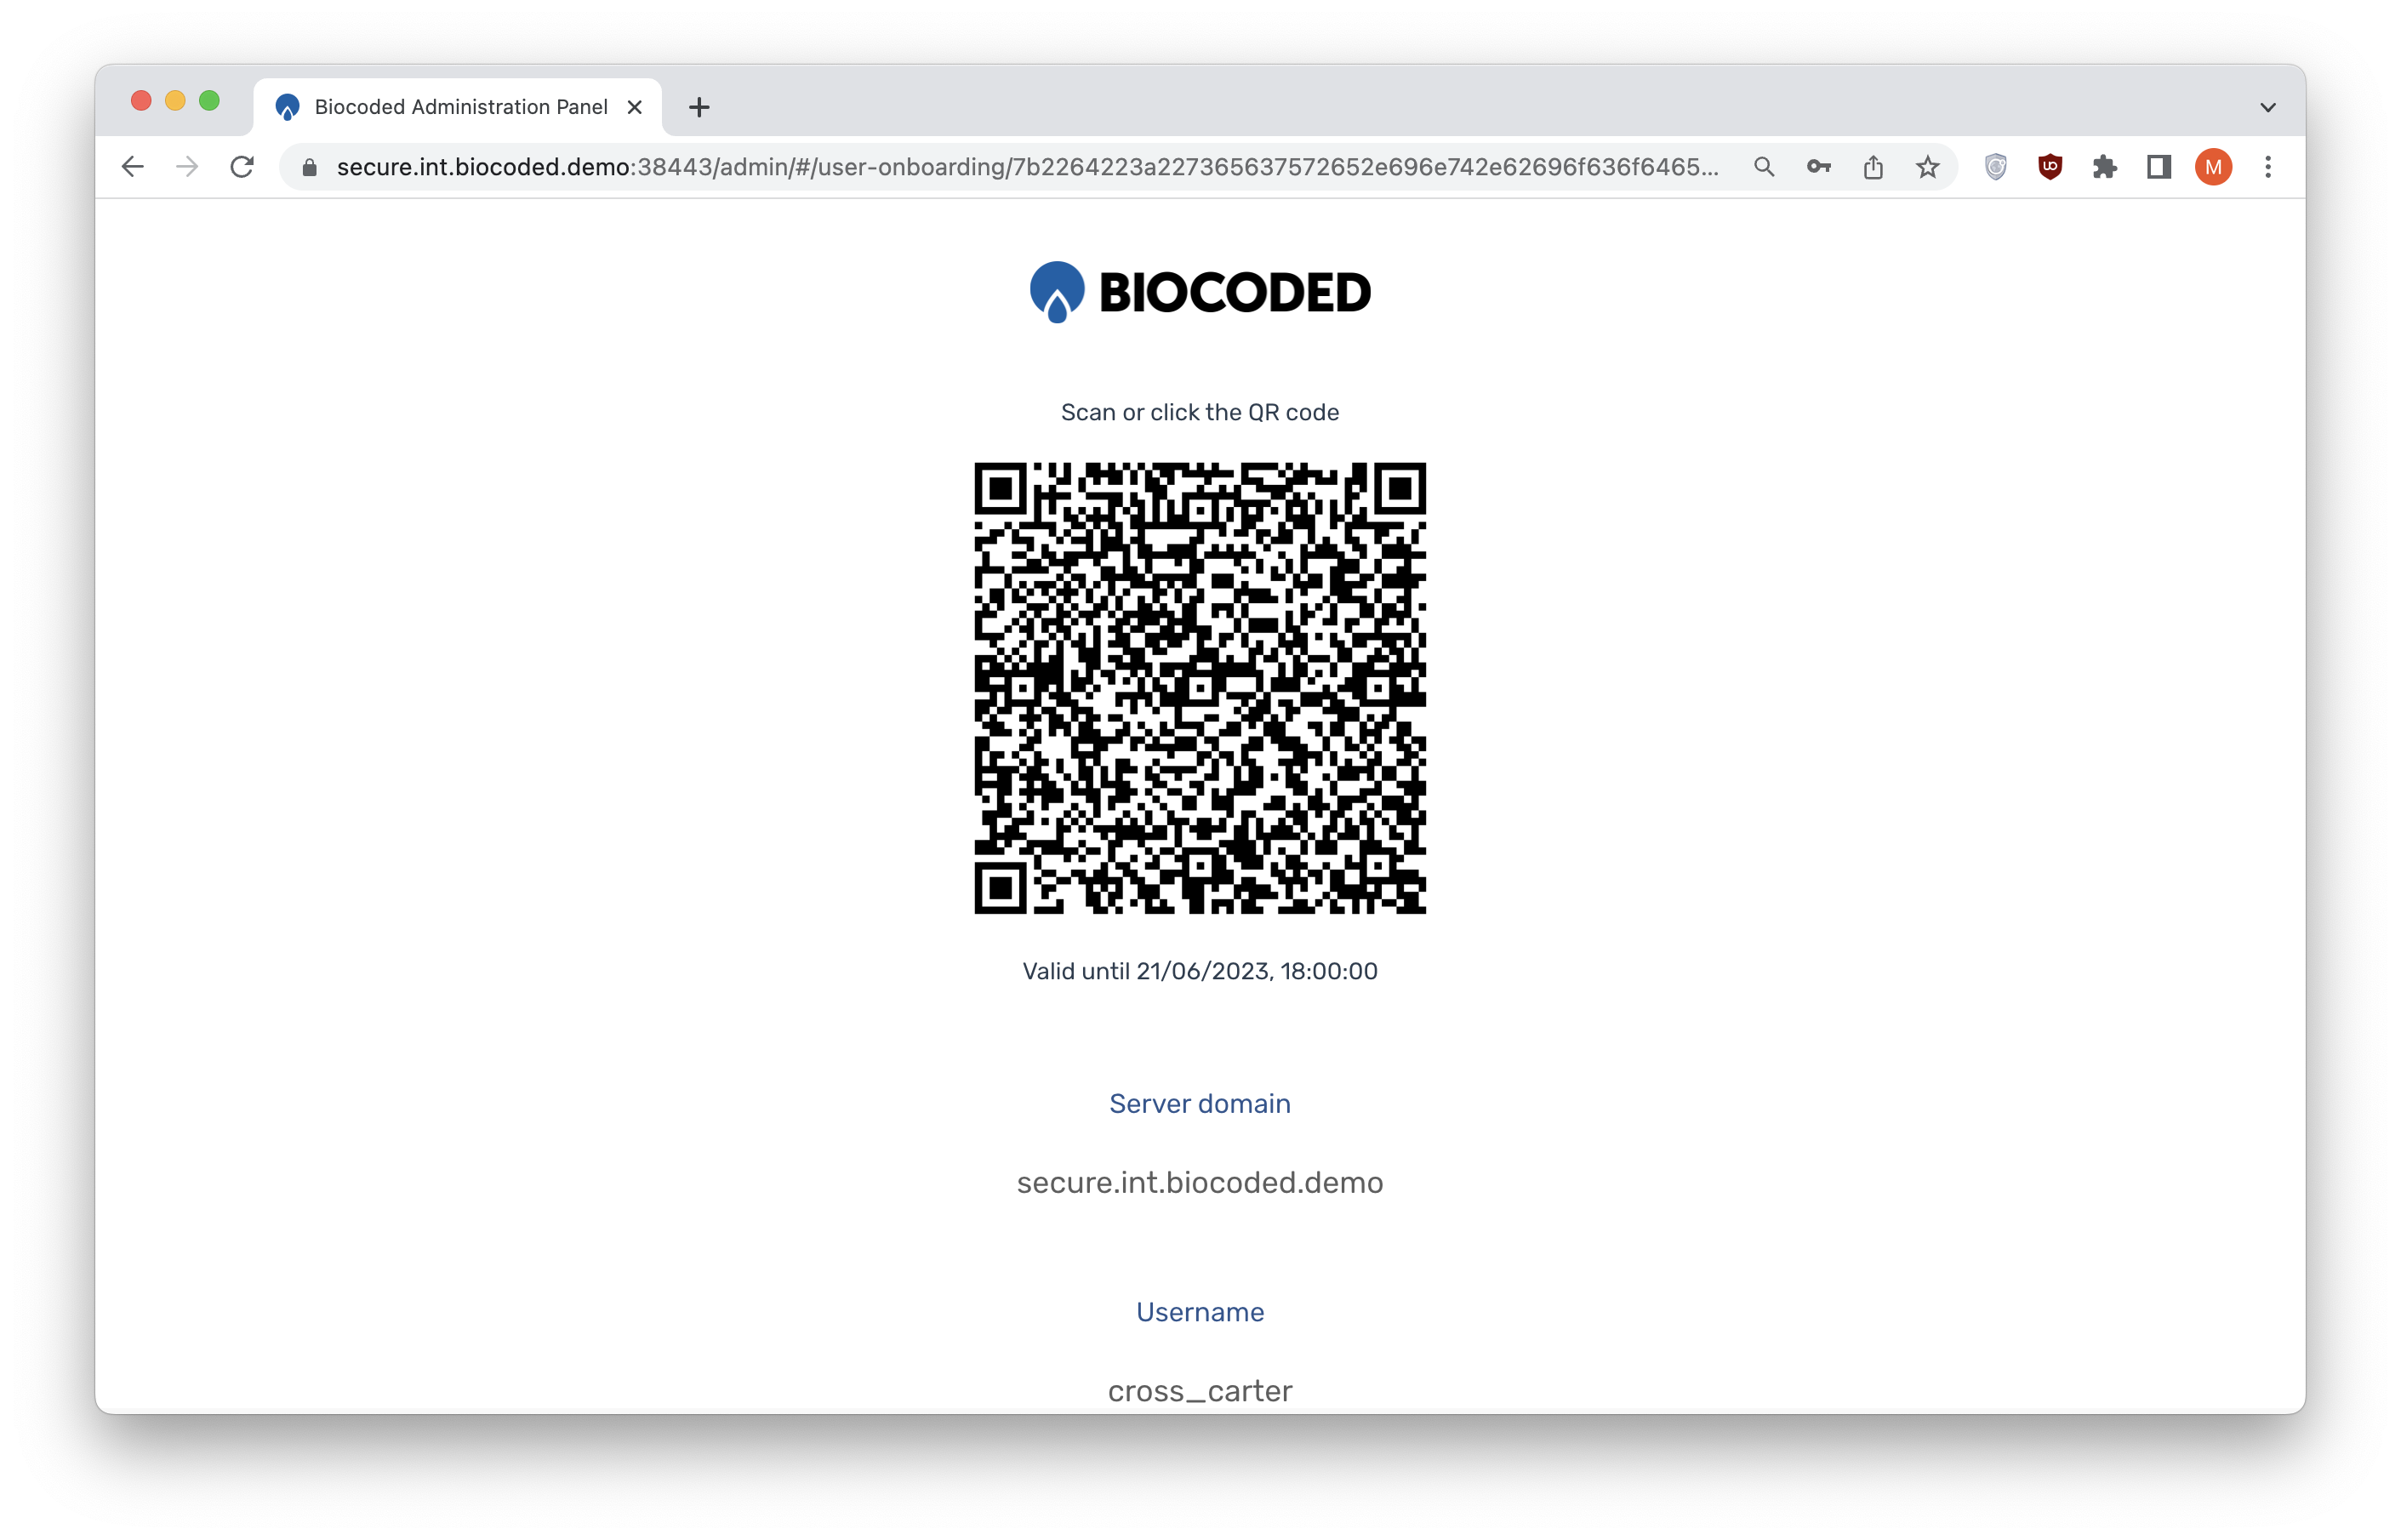
Generated QR code
The generated QR code can be scanned, downloaded or printed. This page also contains the user's log in data and code expiration time.
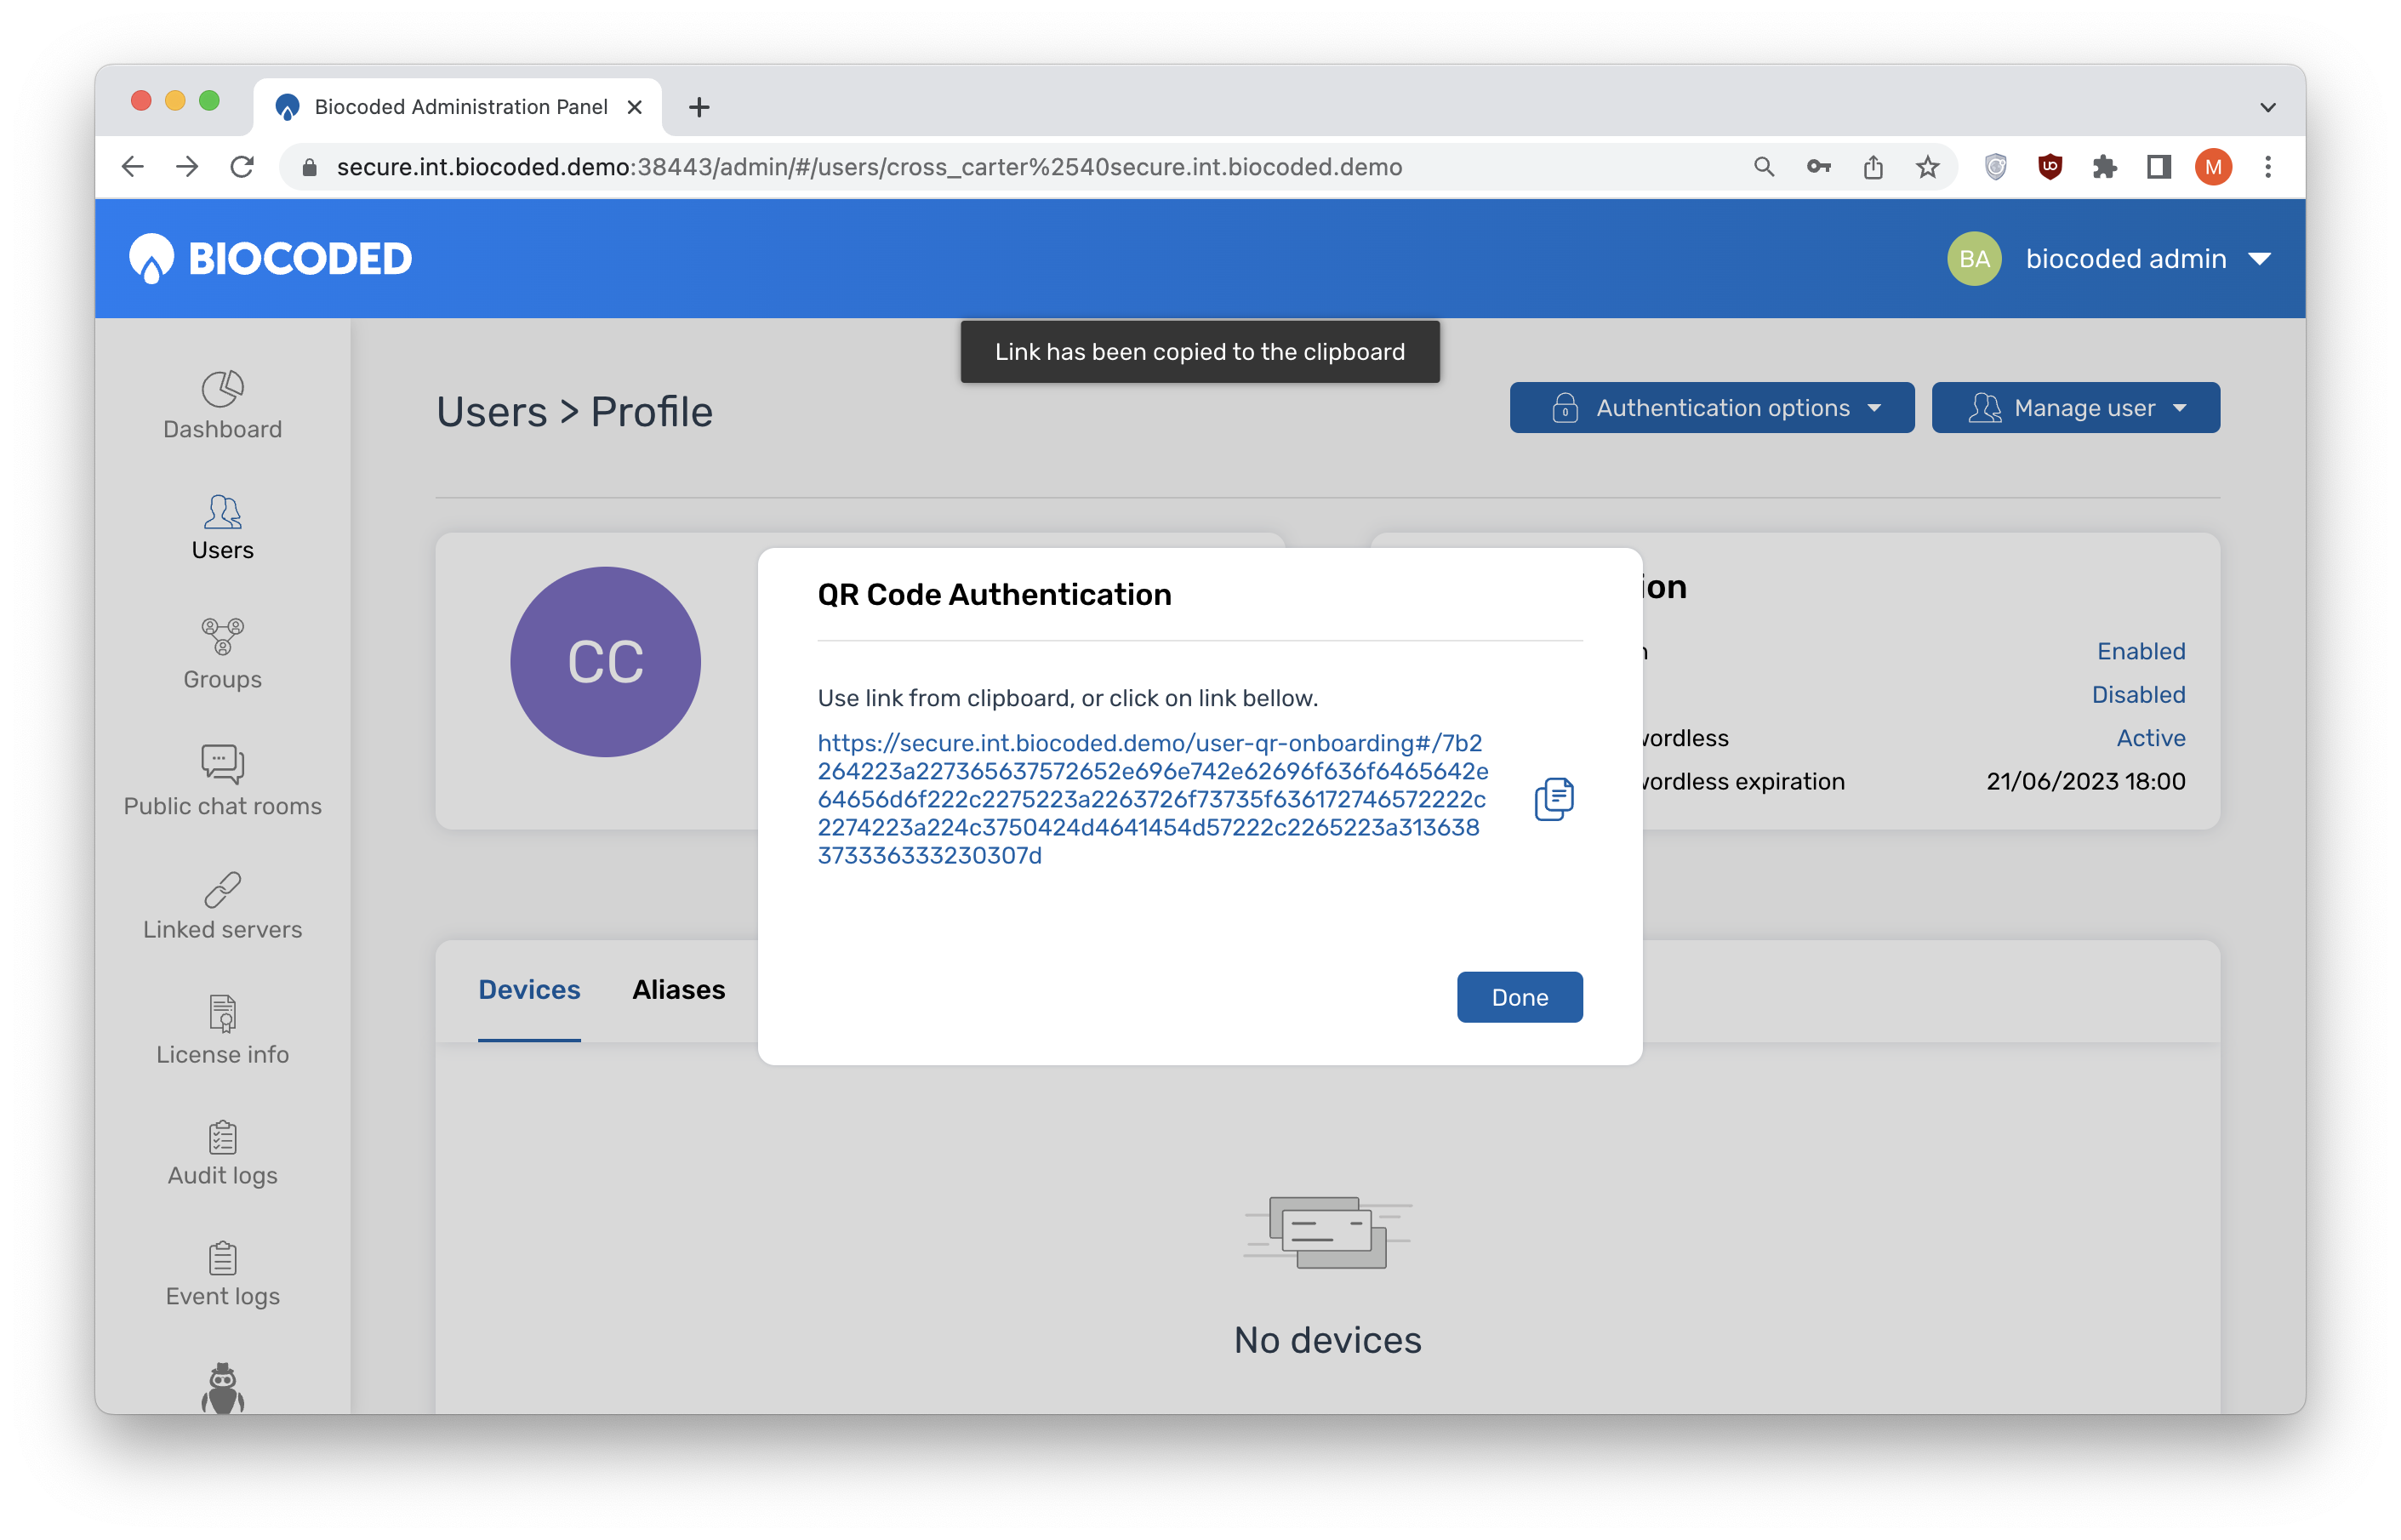
Generated log in link
This link can be copied by clicking on and sent to the user.
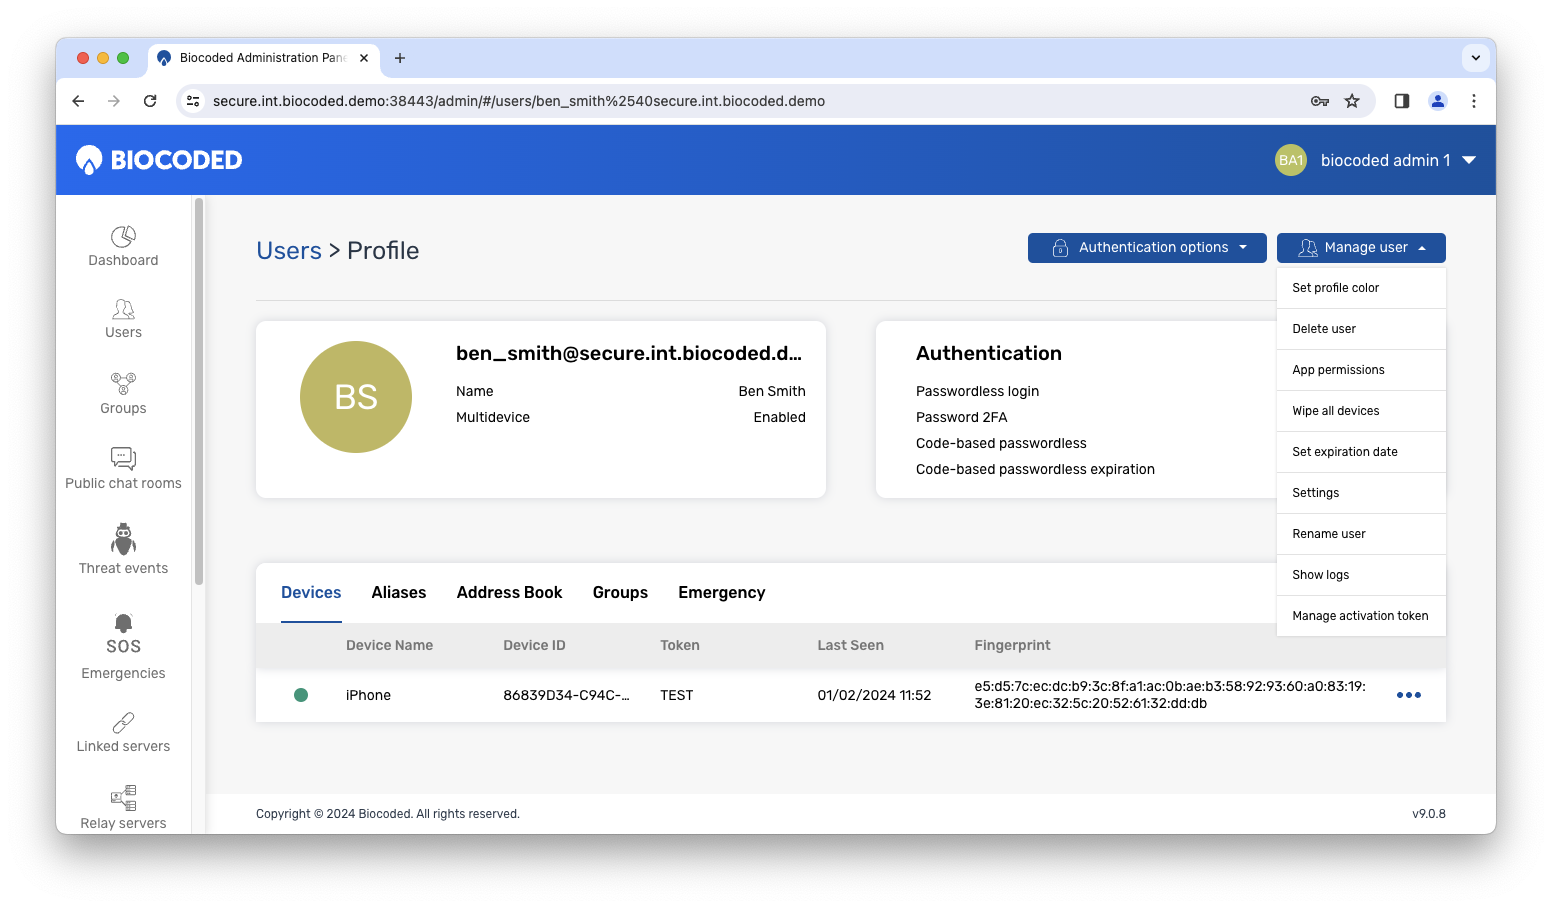
Manage user shows user management options including:
- Set profile color - set the color of user's avatar.
- Delete user - remove user from database.
- App permissions - modify what functionalities the user will be able to use.
- Wipe all devices - remove the data from all user's devices.
- Set expiration date - automatically remove the user from database on a set date.
- Settings - turn on the options to use direct push notifications when available and enable multiple device usage for user.
- Rename user - change first and last name of user.
- Show logs - displays a list of user-sent log files on server.
- Manage activation token - the option to turn on a static device activation token for this user. It can be generated or custom set by admin.
App permissions
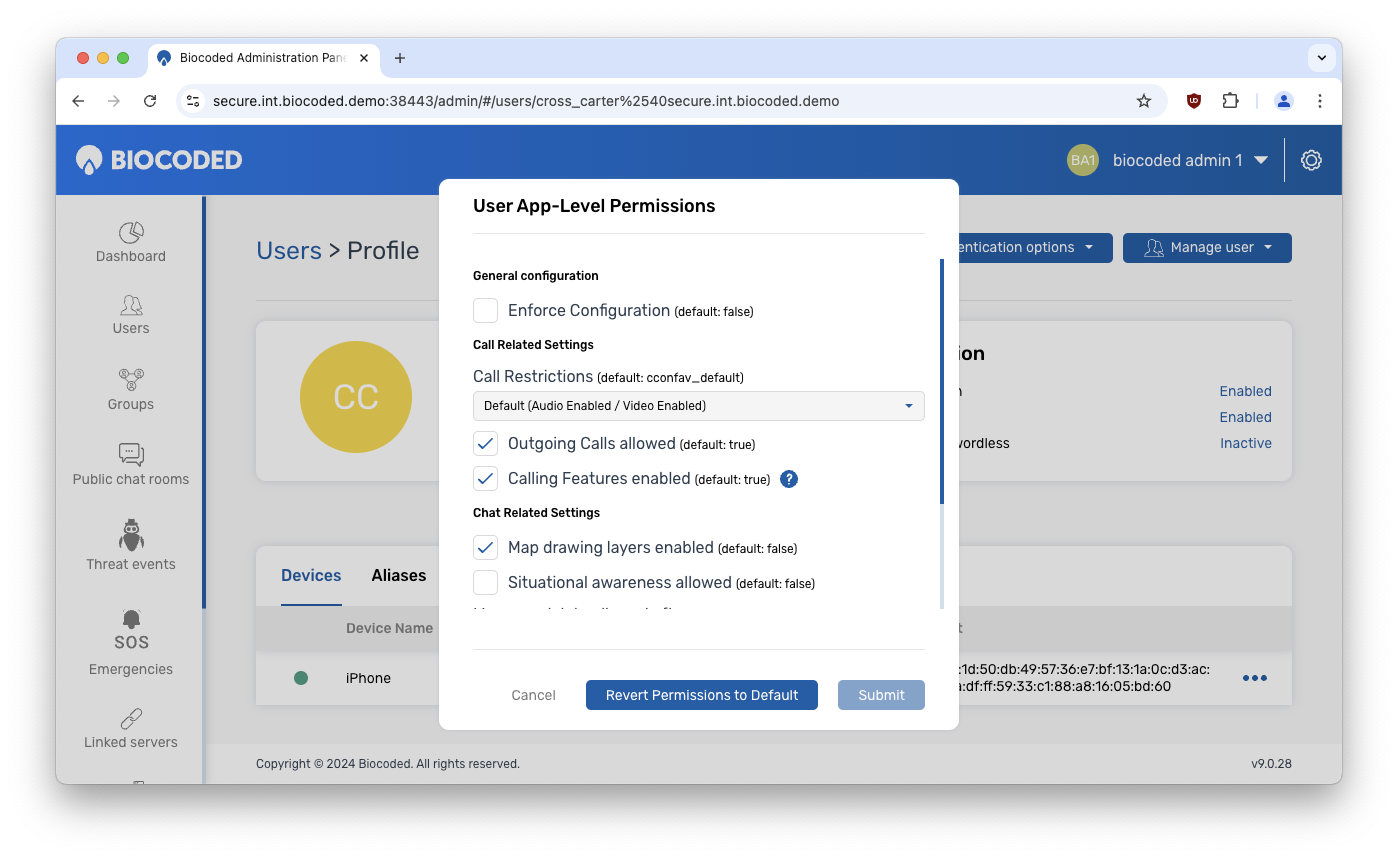
Change the default permissions users have when using Biocoded. Choose between:
- Enforce configuration - enable the configuration you have set.
-
Call related settings:
- Call restrictions - choose to enable (or disable) audio and/or video calls.
- Outgoing calls allowed - enable outgoing calls.
- Calling features enabled - enable outgoing and incoming calls.
-
Chat related settings:
- Map drawing layers - enable drawing map layers (lines, shapes and pins) in chats.
- Situational awareness allowed - enables sending and receiving situational awareness requests.
- Message delete allowed after age - Users will be able to delete a message after this period passes (enter number of seconds).
- Edit message allowed - User has the option to edit sent messages.
- Live location sharing allowed - User is able to share their live location to chats.
- Location sharing allowed - User is able to share a selected location to chats.
- Expiration messages allowed - User can turn on expiration for sent messages in chats.
- Remote message delete allowed - Users see the option "Delete for all" for sent messages.
- Local message delete allowed - Users see the option "Delete for me" for sent and received messages.
- Public chatroom creation allowed - Users have the option to create a public chatroom.
- Private chatroom creation allowed - Users have the option to create a private chatroom.
- Groupchat creation allowed - Users have the option to create a group chat.
-
Security related settings:
- Self provision enabled - User is able to log in to a new device with a QR code generated in Biocoded settings on their current device.
- Disable screenshot prevention enabled - User is shown the option "Disable screenshot protection" in Settings - Privacy.
- Auto delete content features allowed - User has the option to go to Settings - Privacy and turn on autodelete for messages after a timeperiod.
- Data wipe feature allowed - Users can go to Settings - Privacy and Settings - Accounts - My Devices to "Reset data" on selected device.
User Devices
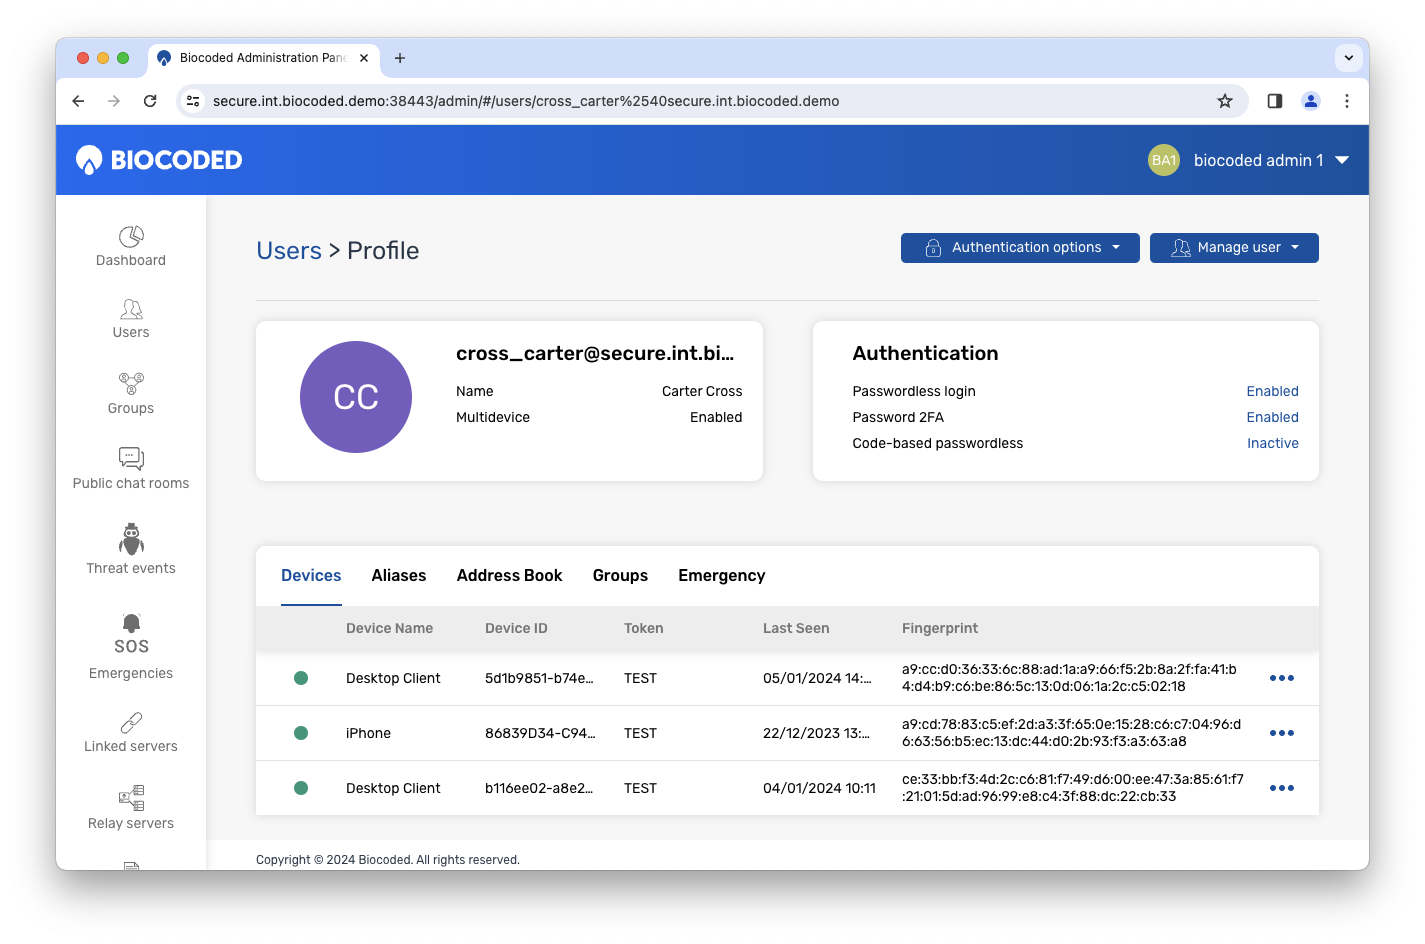
When a user logs in and activates a device, it is listed under "Devices". This includes the device name, device ID, the token used for device activation, last seen timestamp and the device's fingerprint. Notifications availability and location info (availability, permission and precision) is also shown per device.
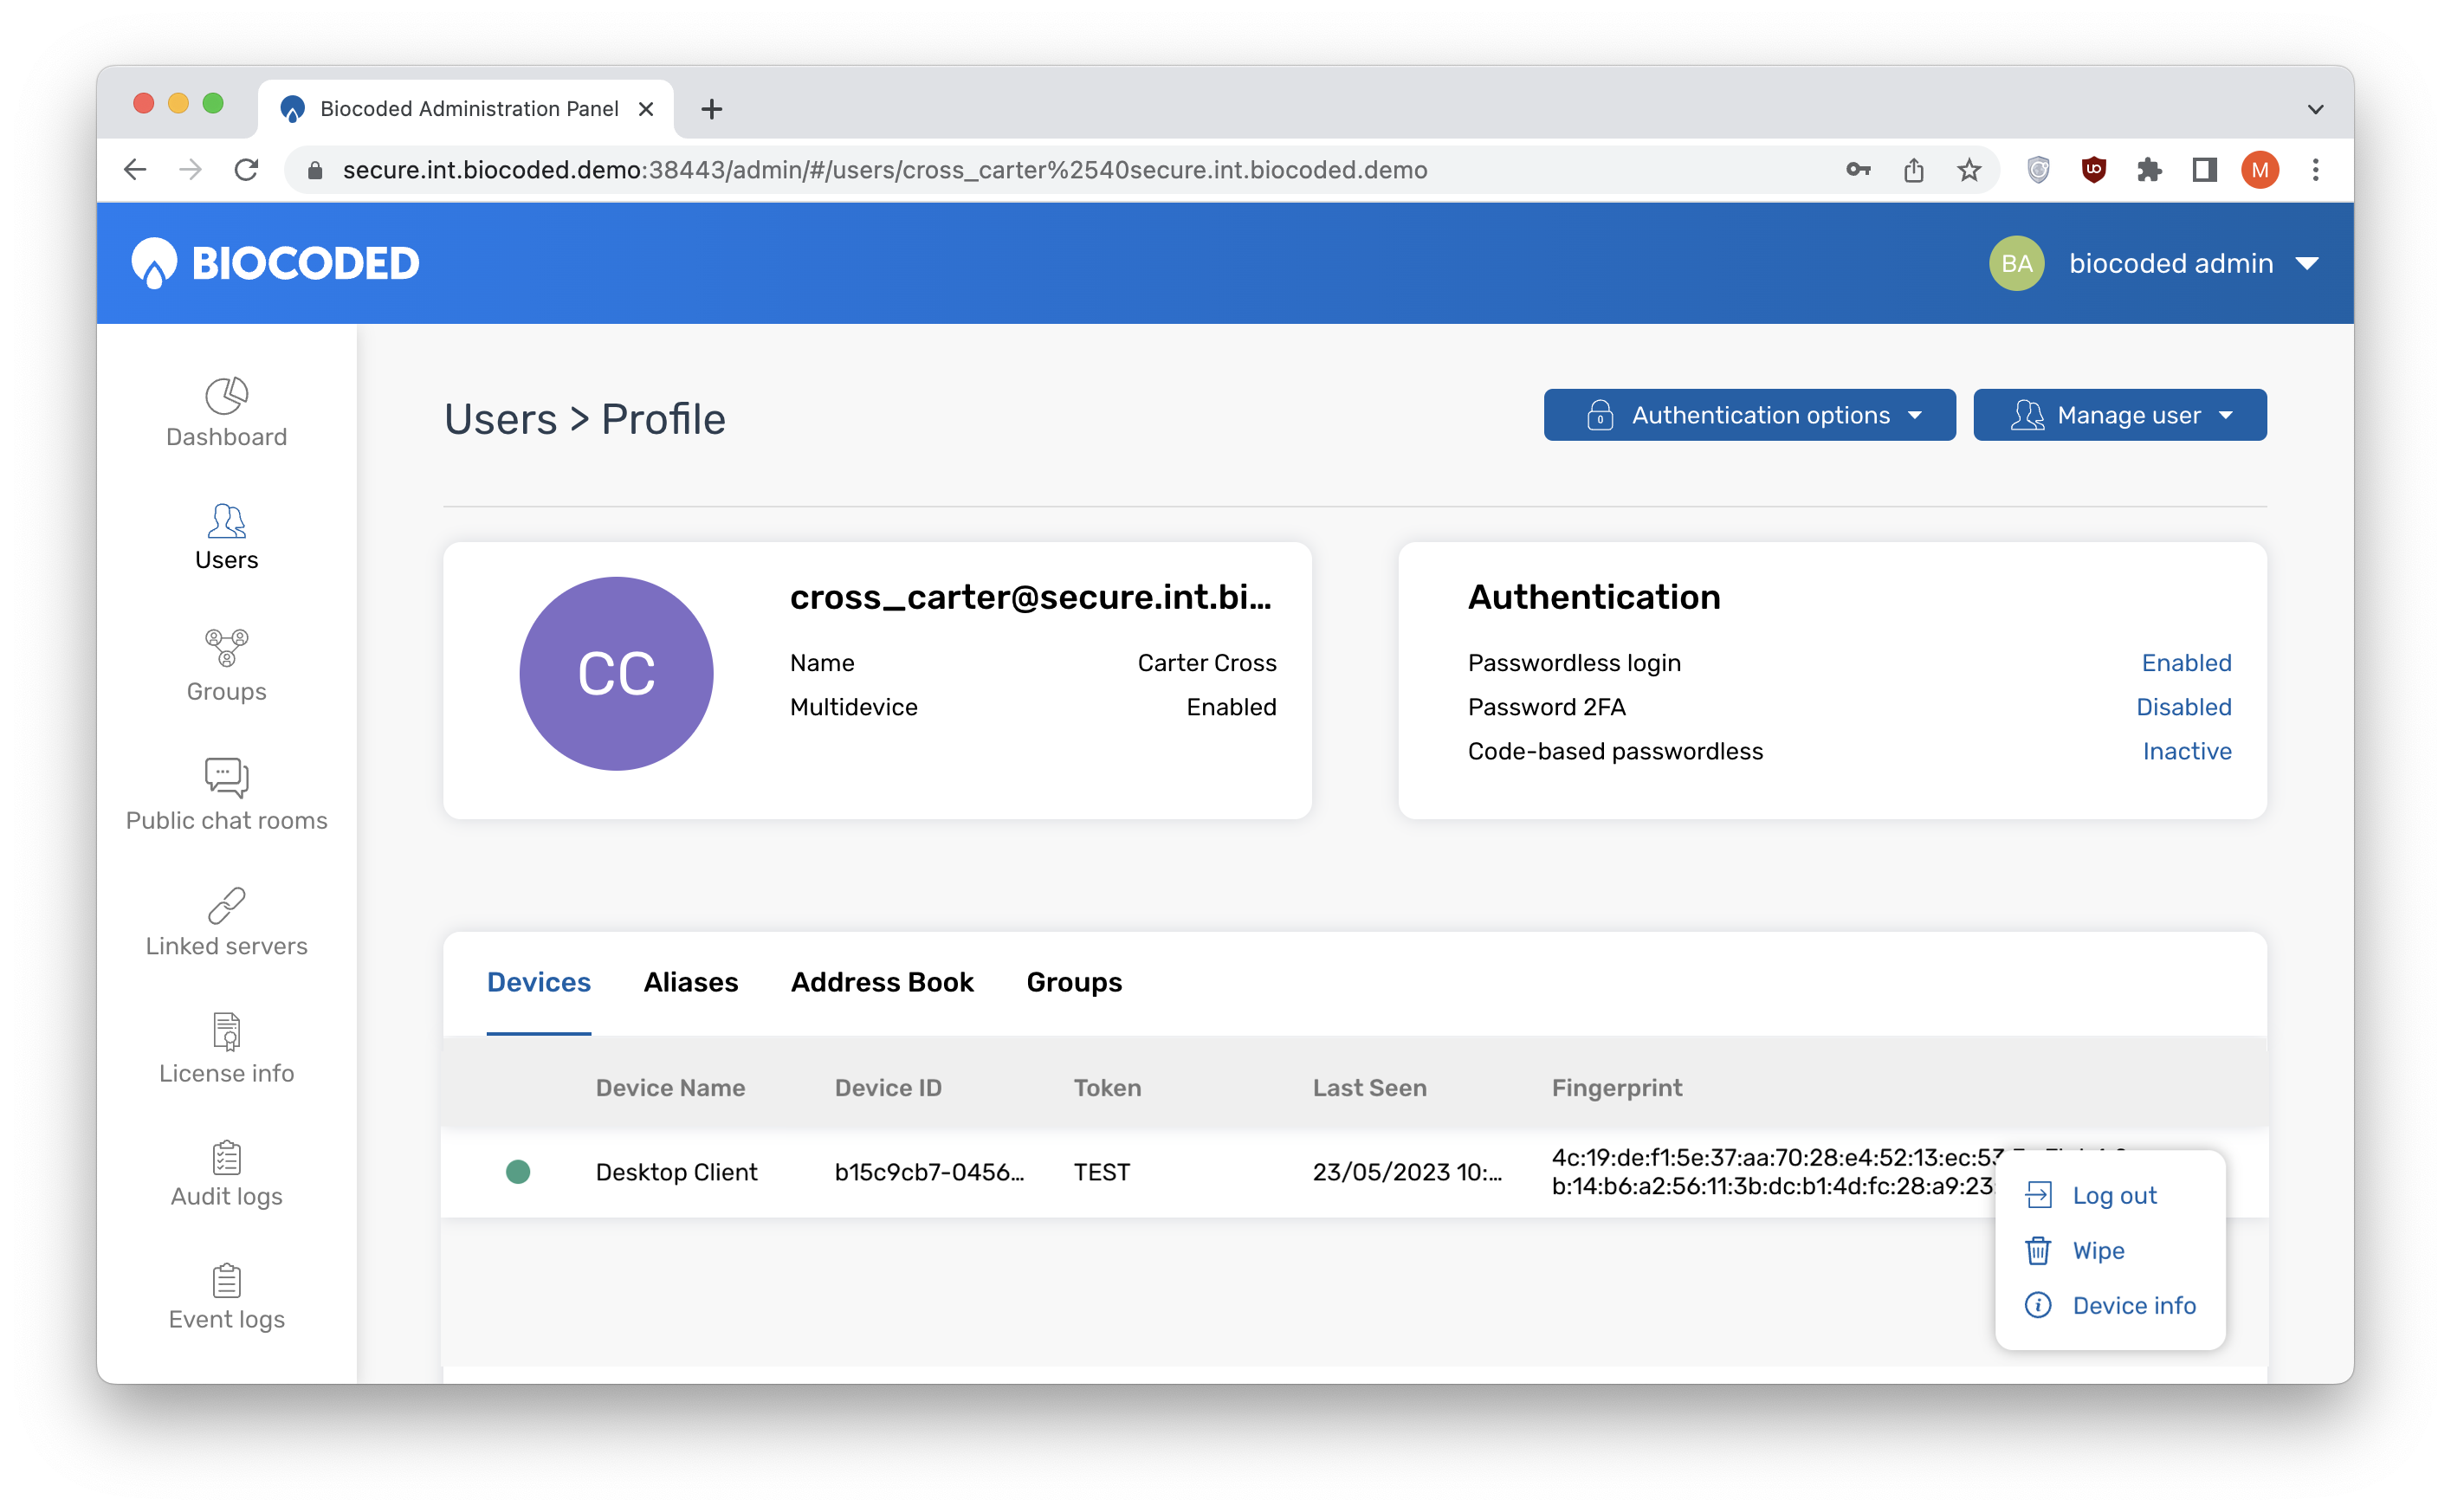
Clicking on next to a device, shows device options including:
-
"Log out" - remotely logs the user out on the selected device (confirmation is required by entering a generated token displayed on screen). User will have to re-enter their password to use this device again.
-
"Wipe" - remotely wipes all user data from the device, requiring a new log in and device activation in order to use Biocoded again.
-
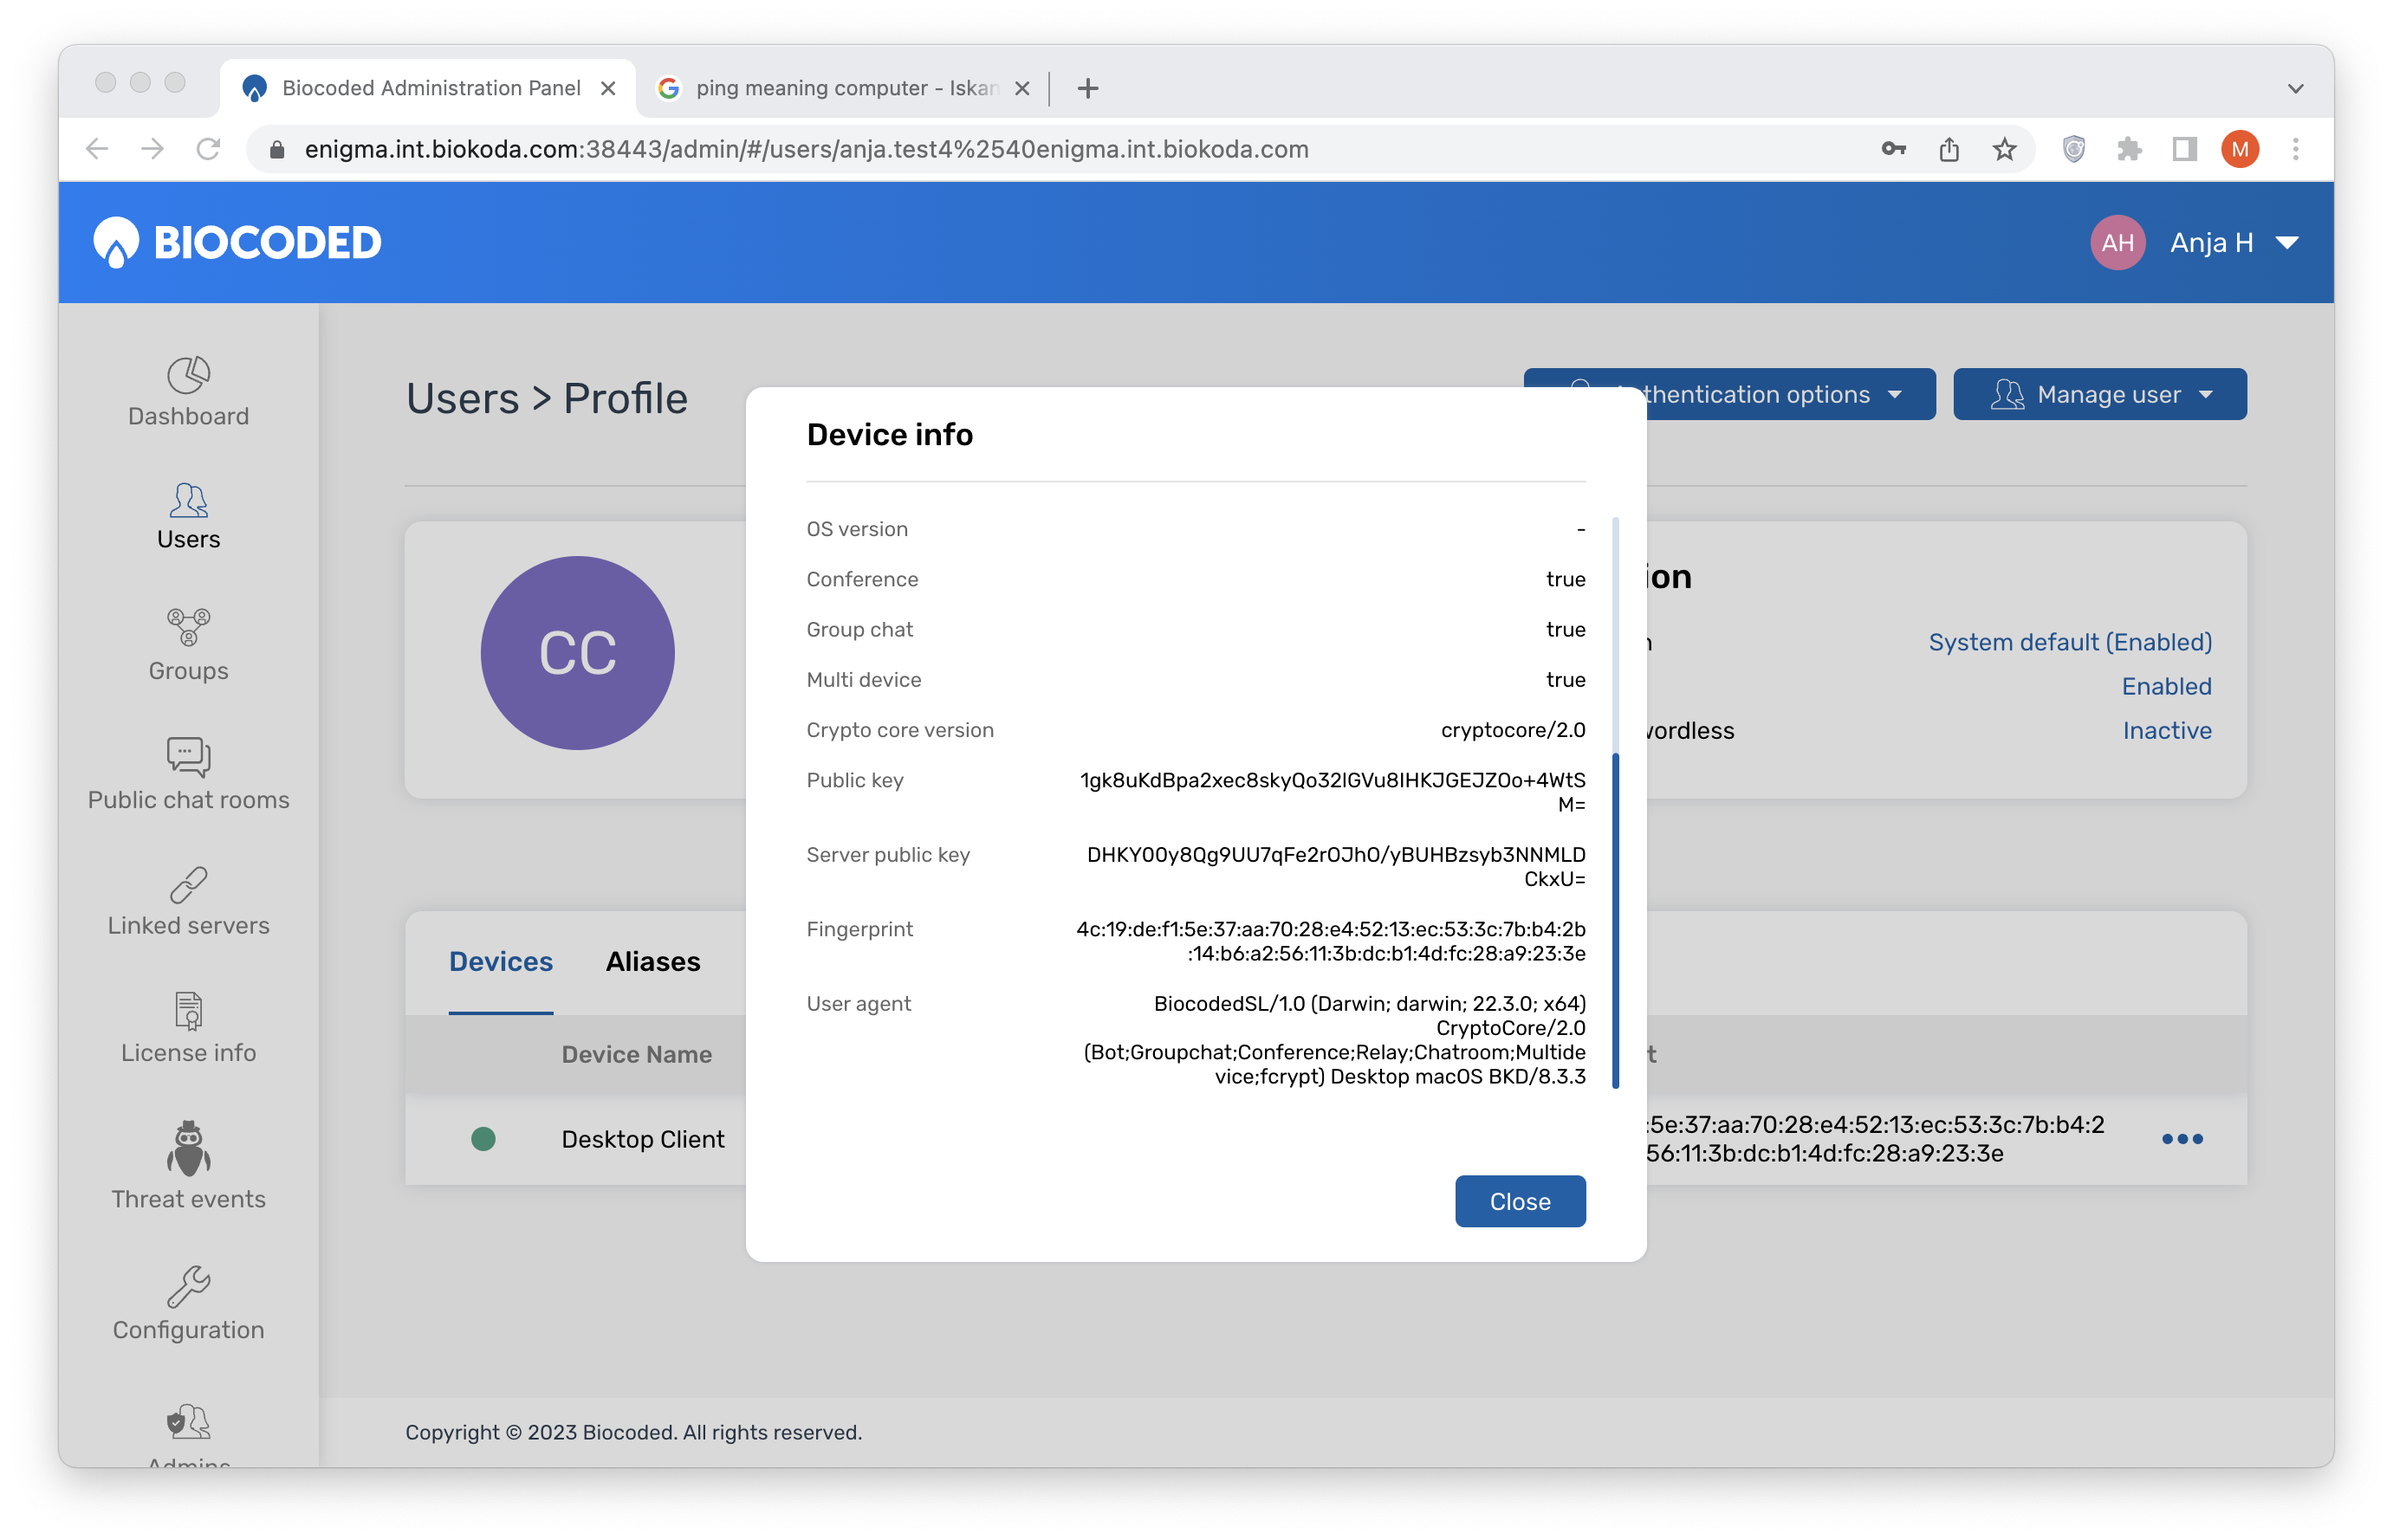
"Device info" - shows various information about the selected device.
User's device info
Various information about selected device including:
- Status
- App ID
- Name
- Device ID
- Token
- Last seen
- App version
- OS
- OS version
- Conference
- Group chat
- Multi device
- Crypto core version
- Public key
- Server public key
- Fingerprint
- User agent
User Aliases
User aliases can be viewed and added under "Aliases". User aliases are synonyms associated with this user, like their phone number, email address or another descriptive identifier. They are displayed by type.
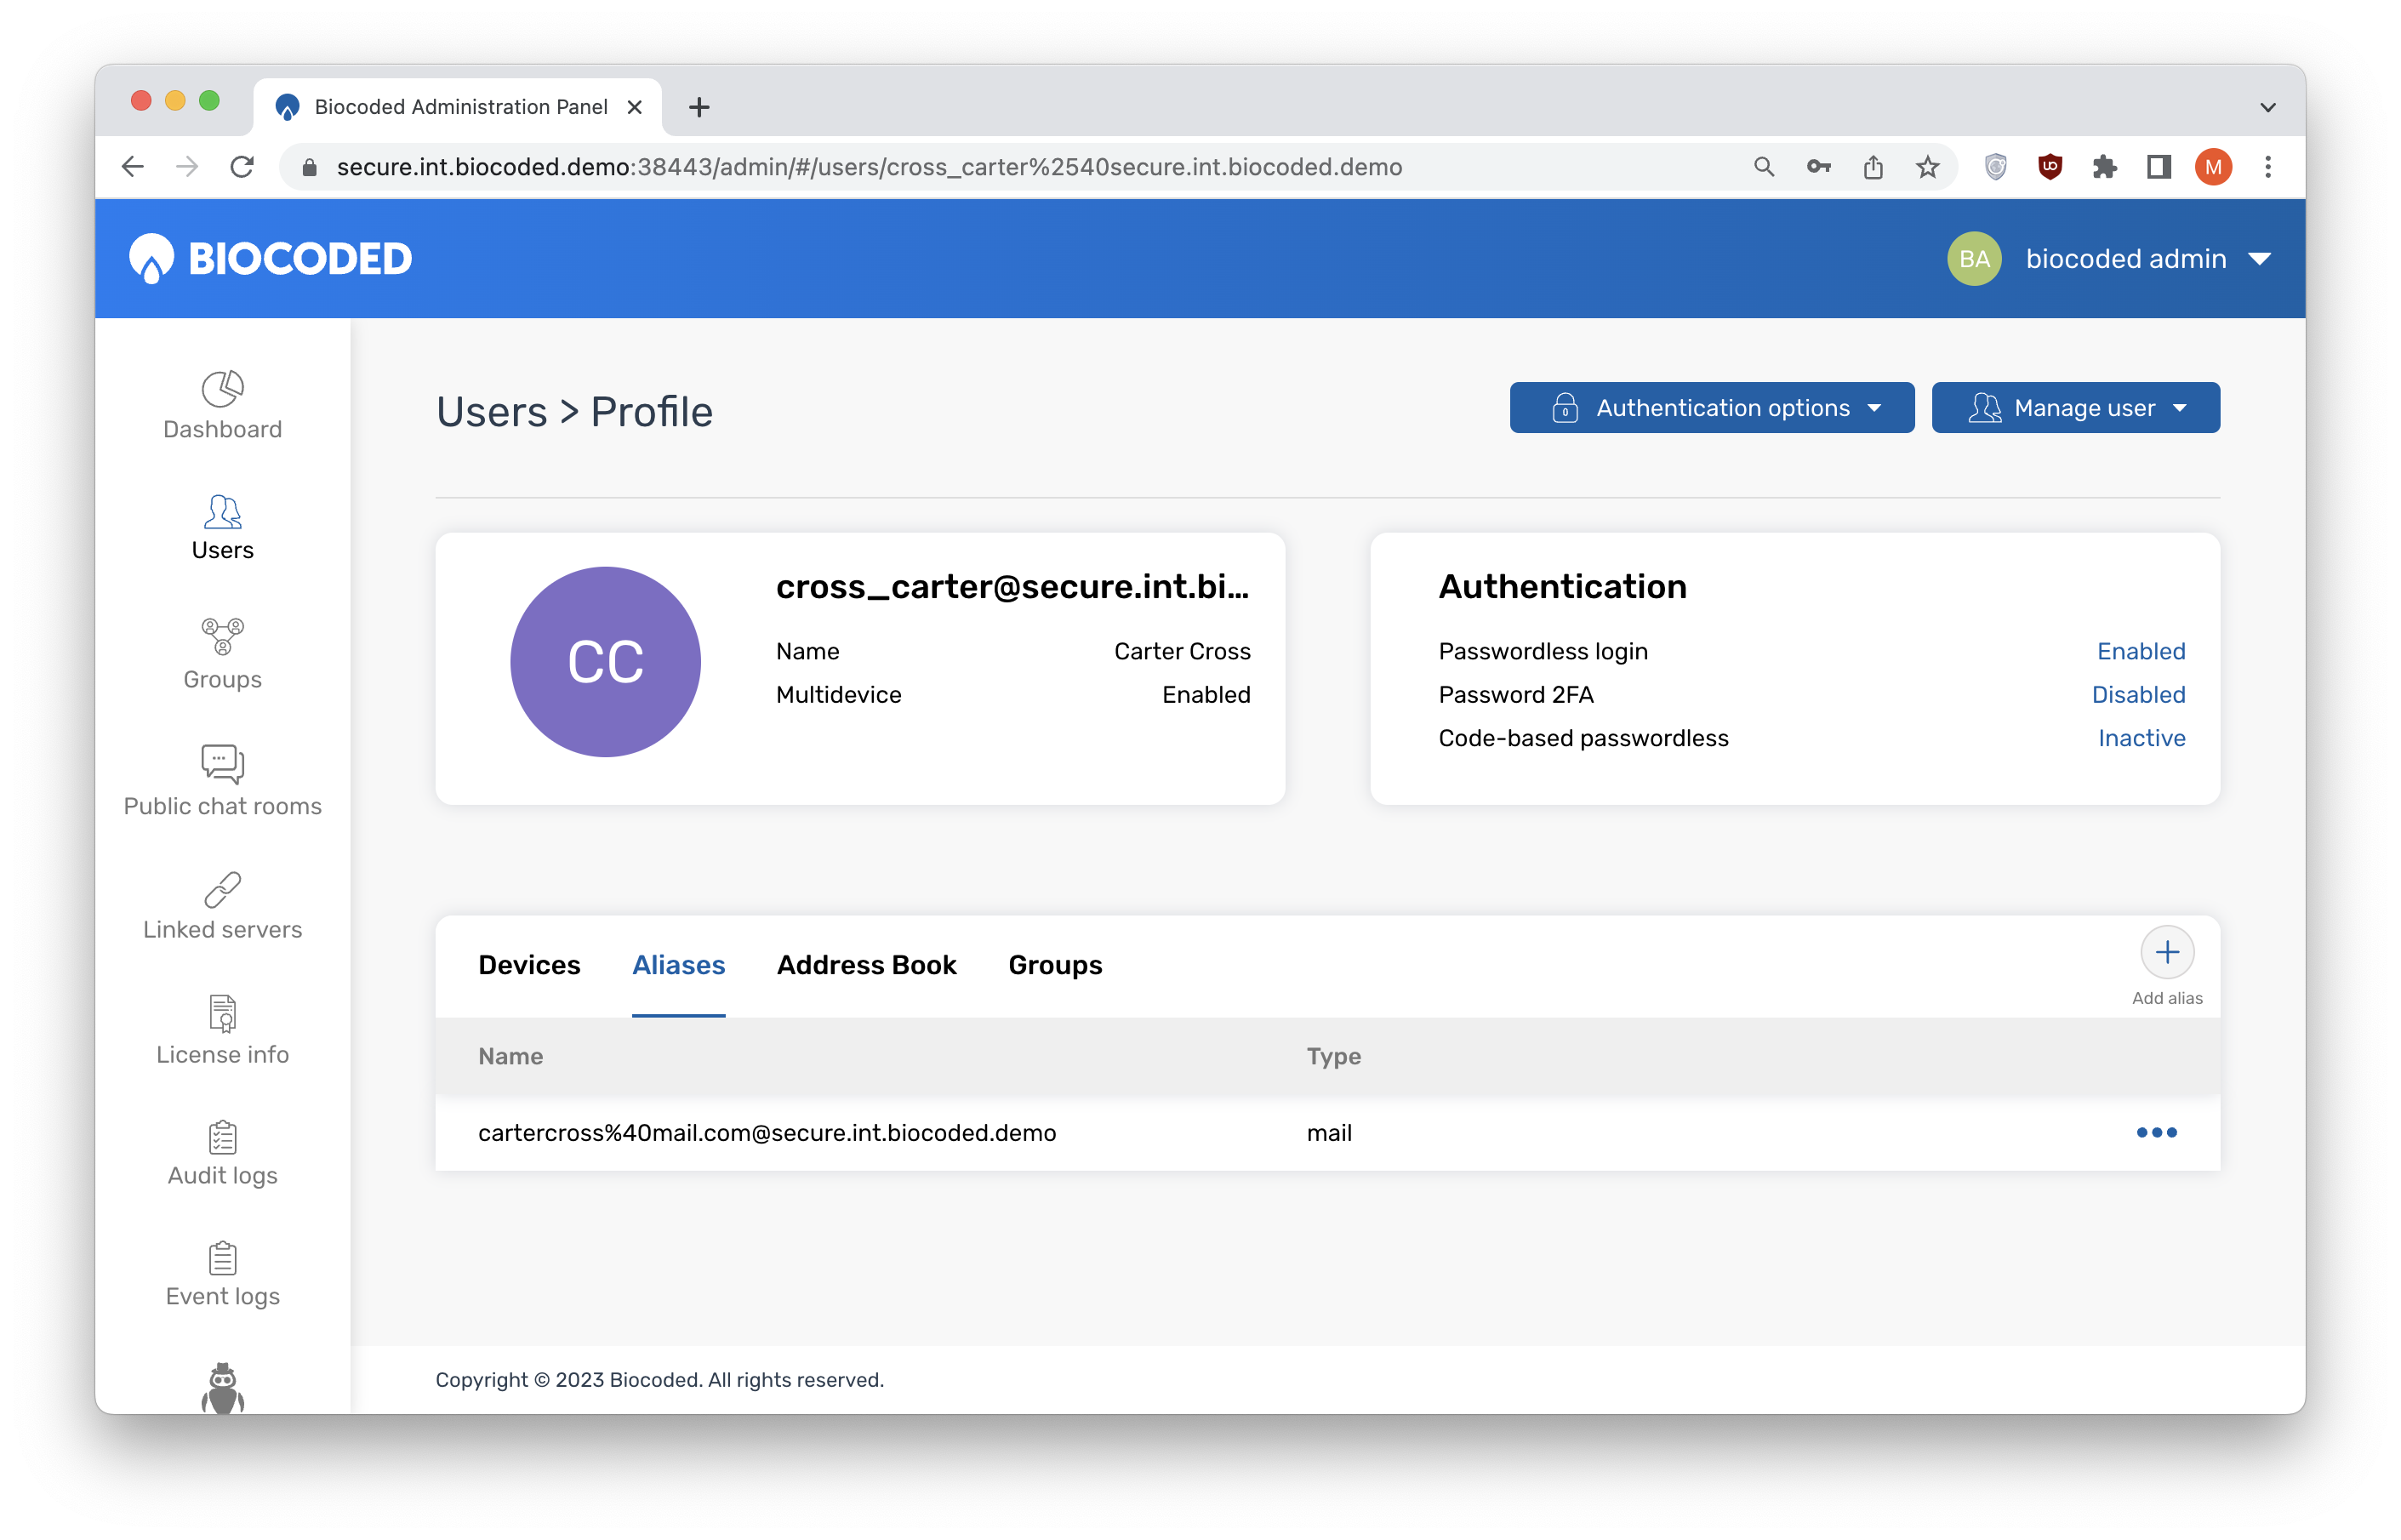
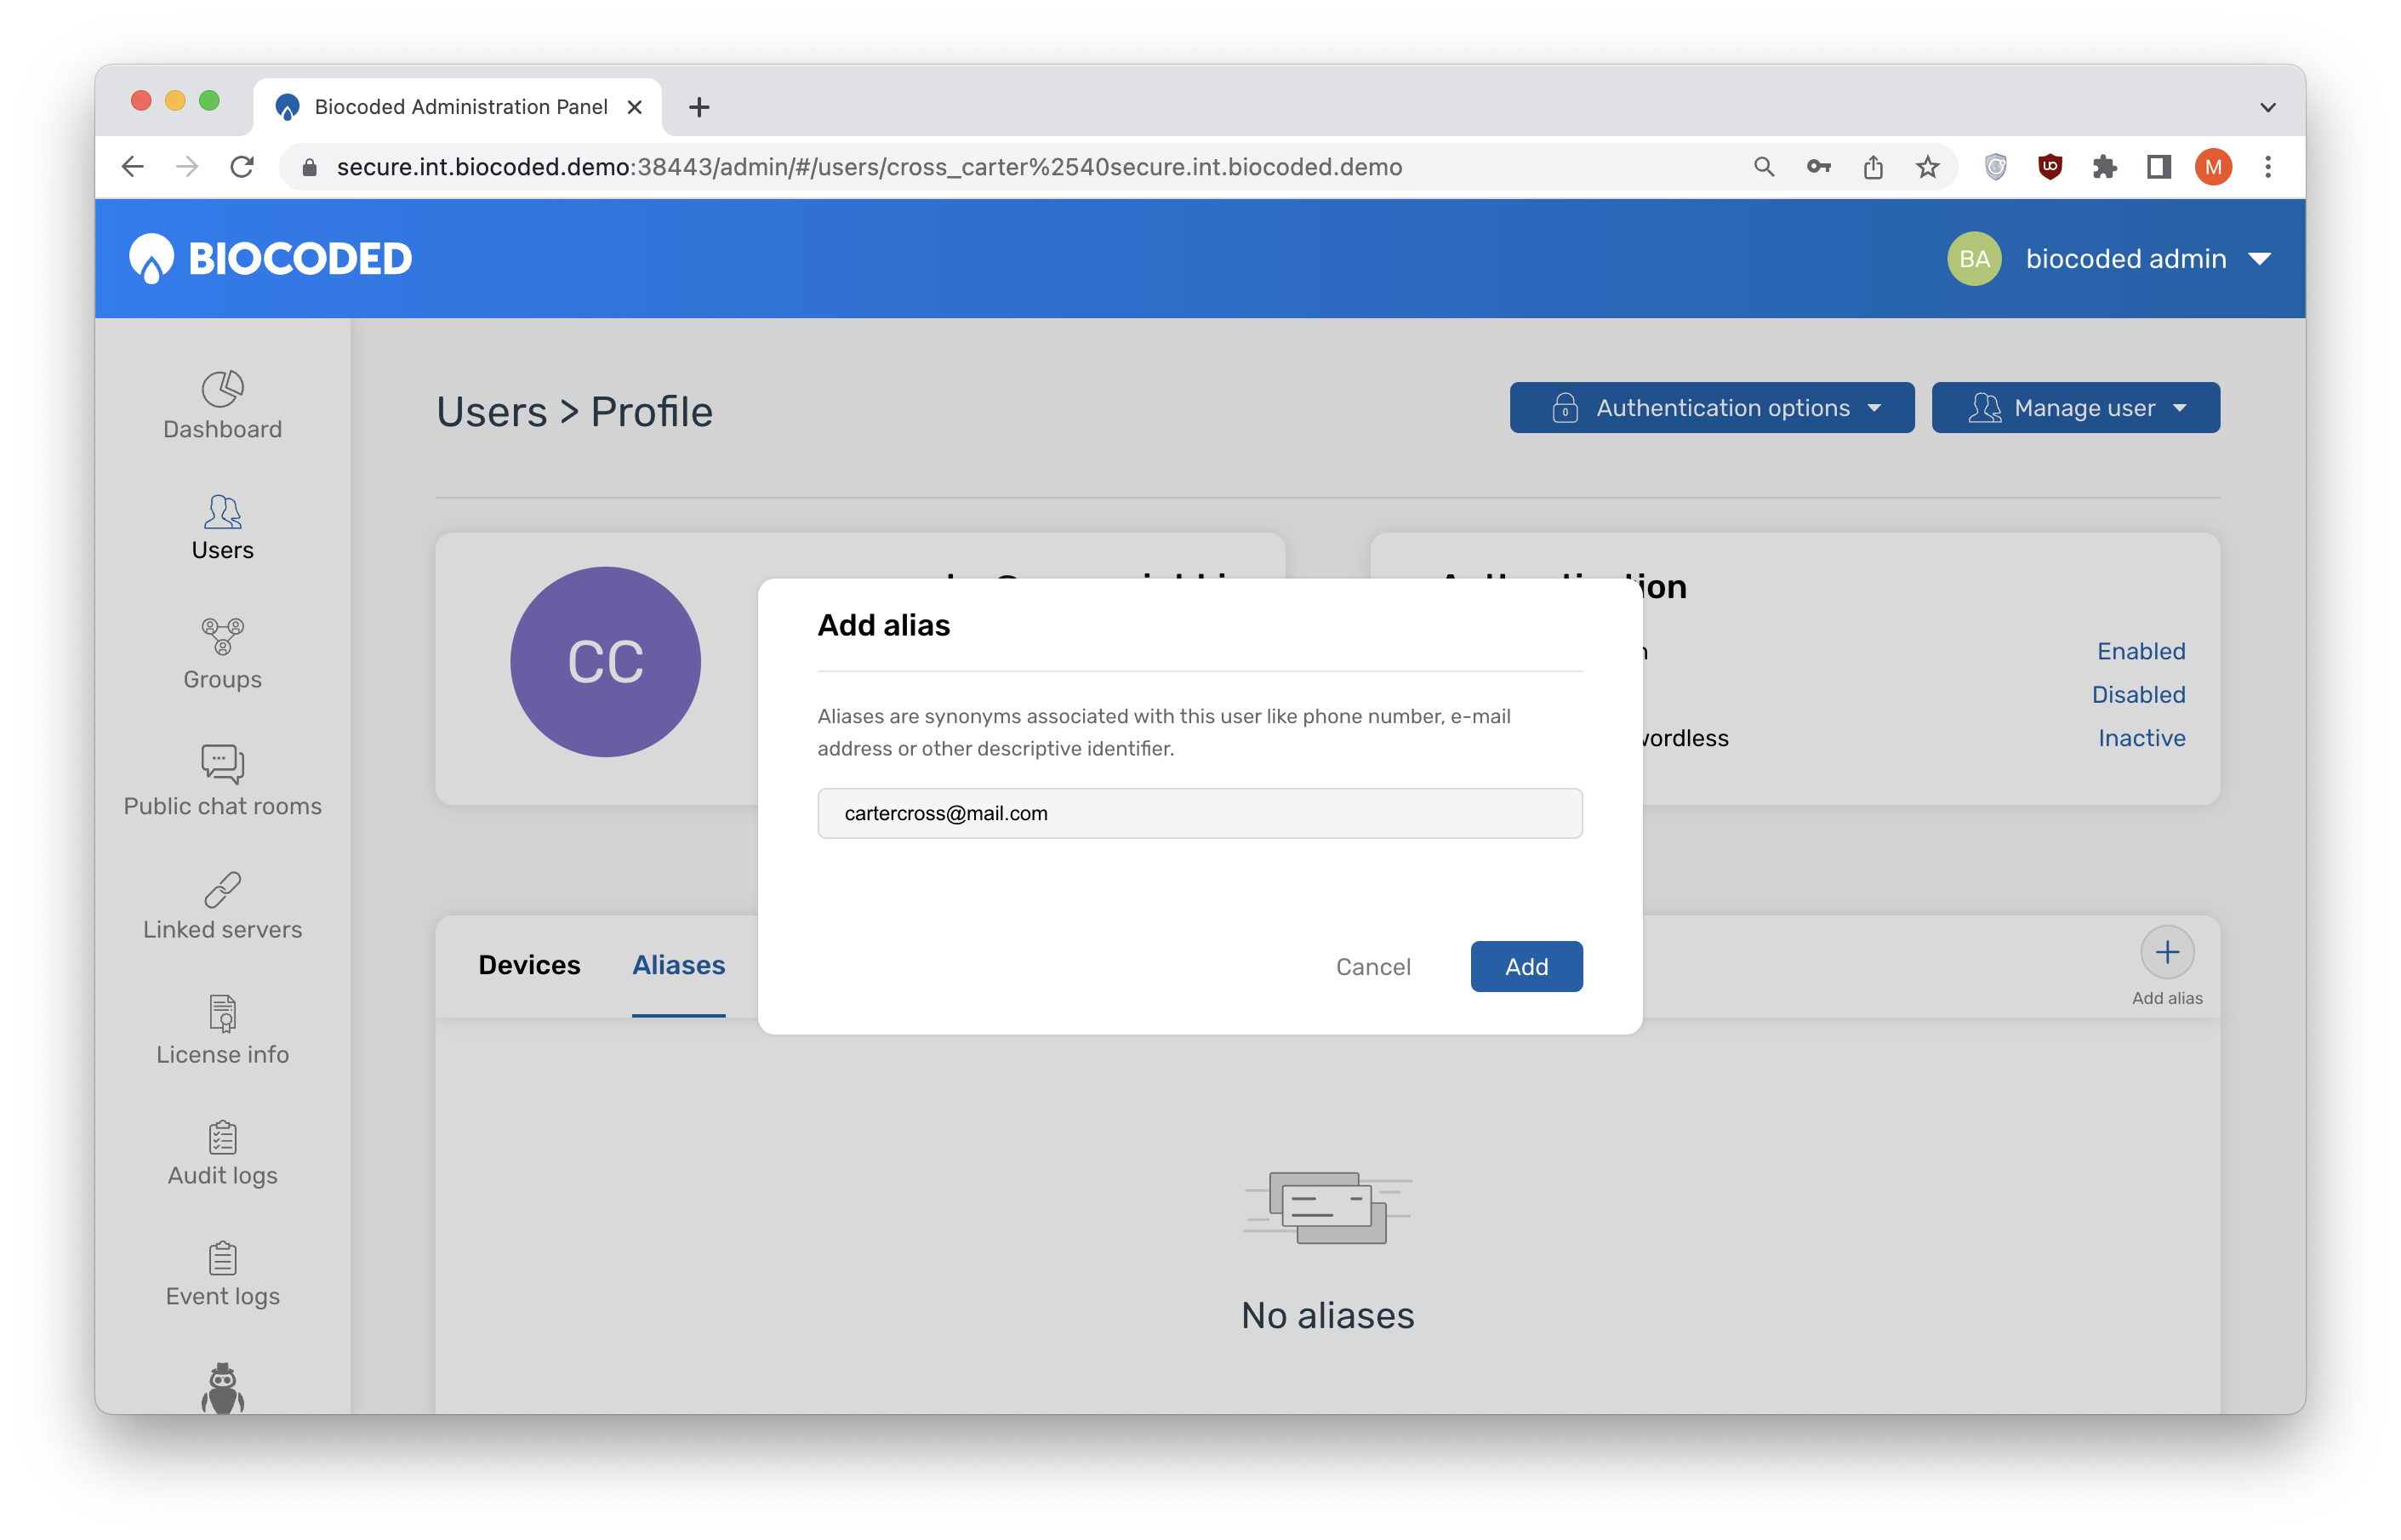
New aliases can be added by clicking "New alias". Clicking on offers "Delete" which removes the selected alias from the contact.
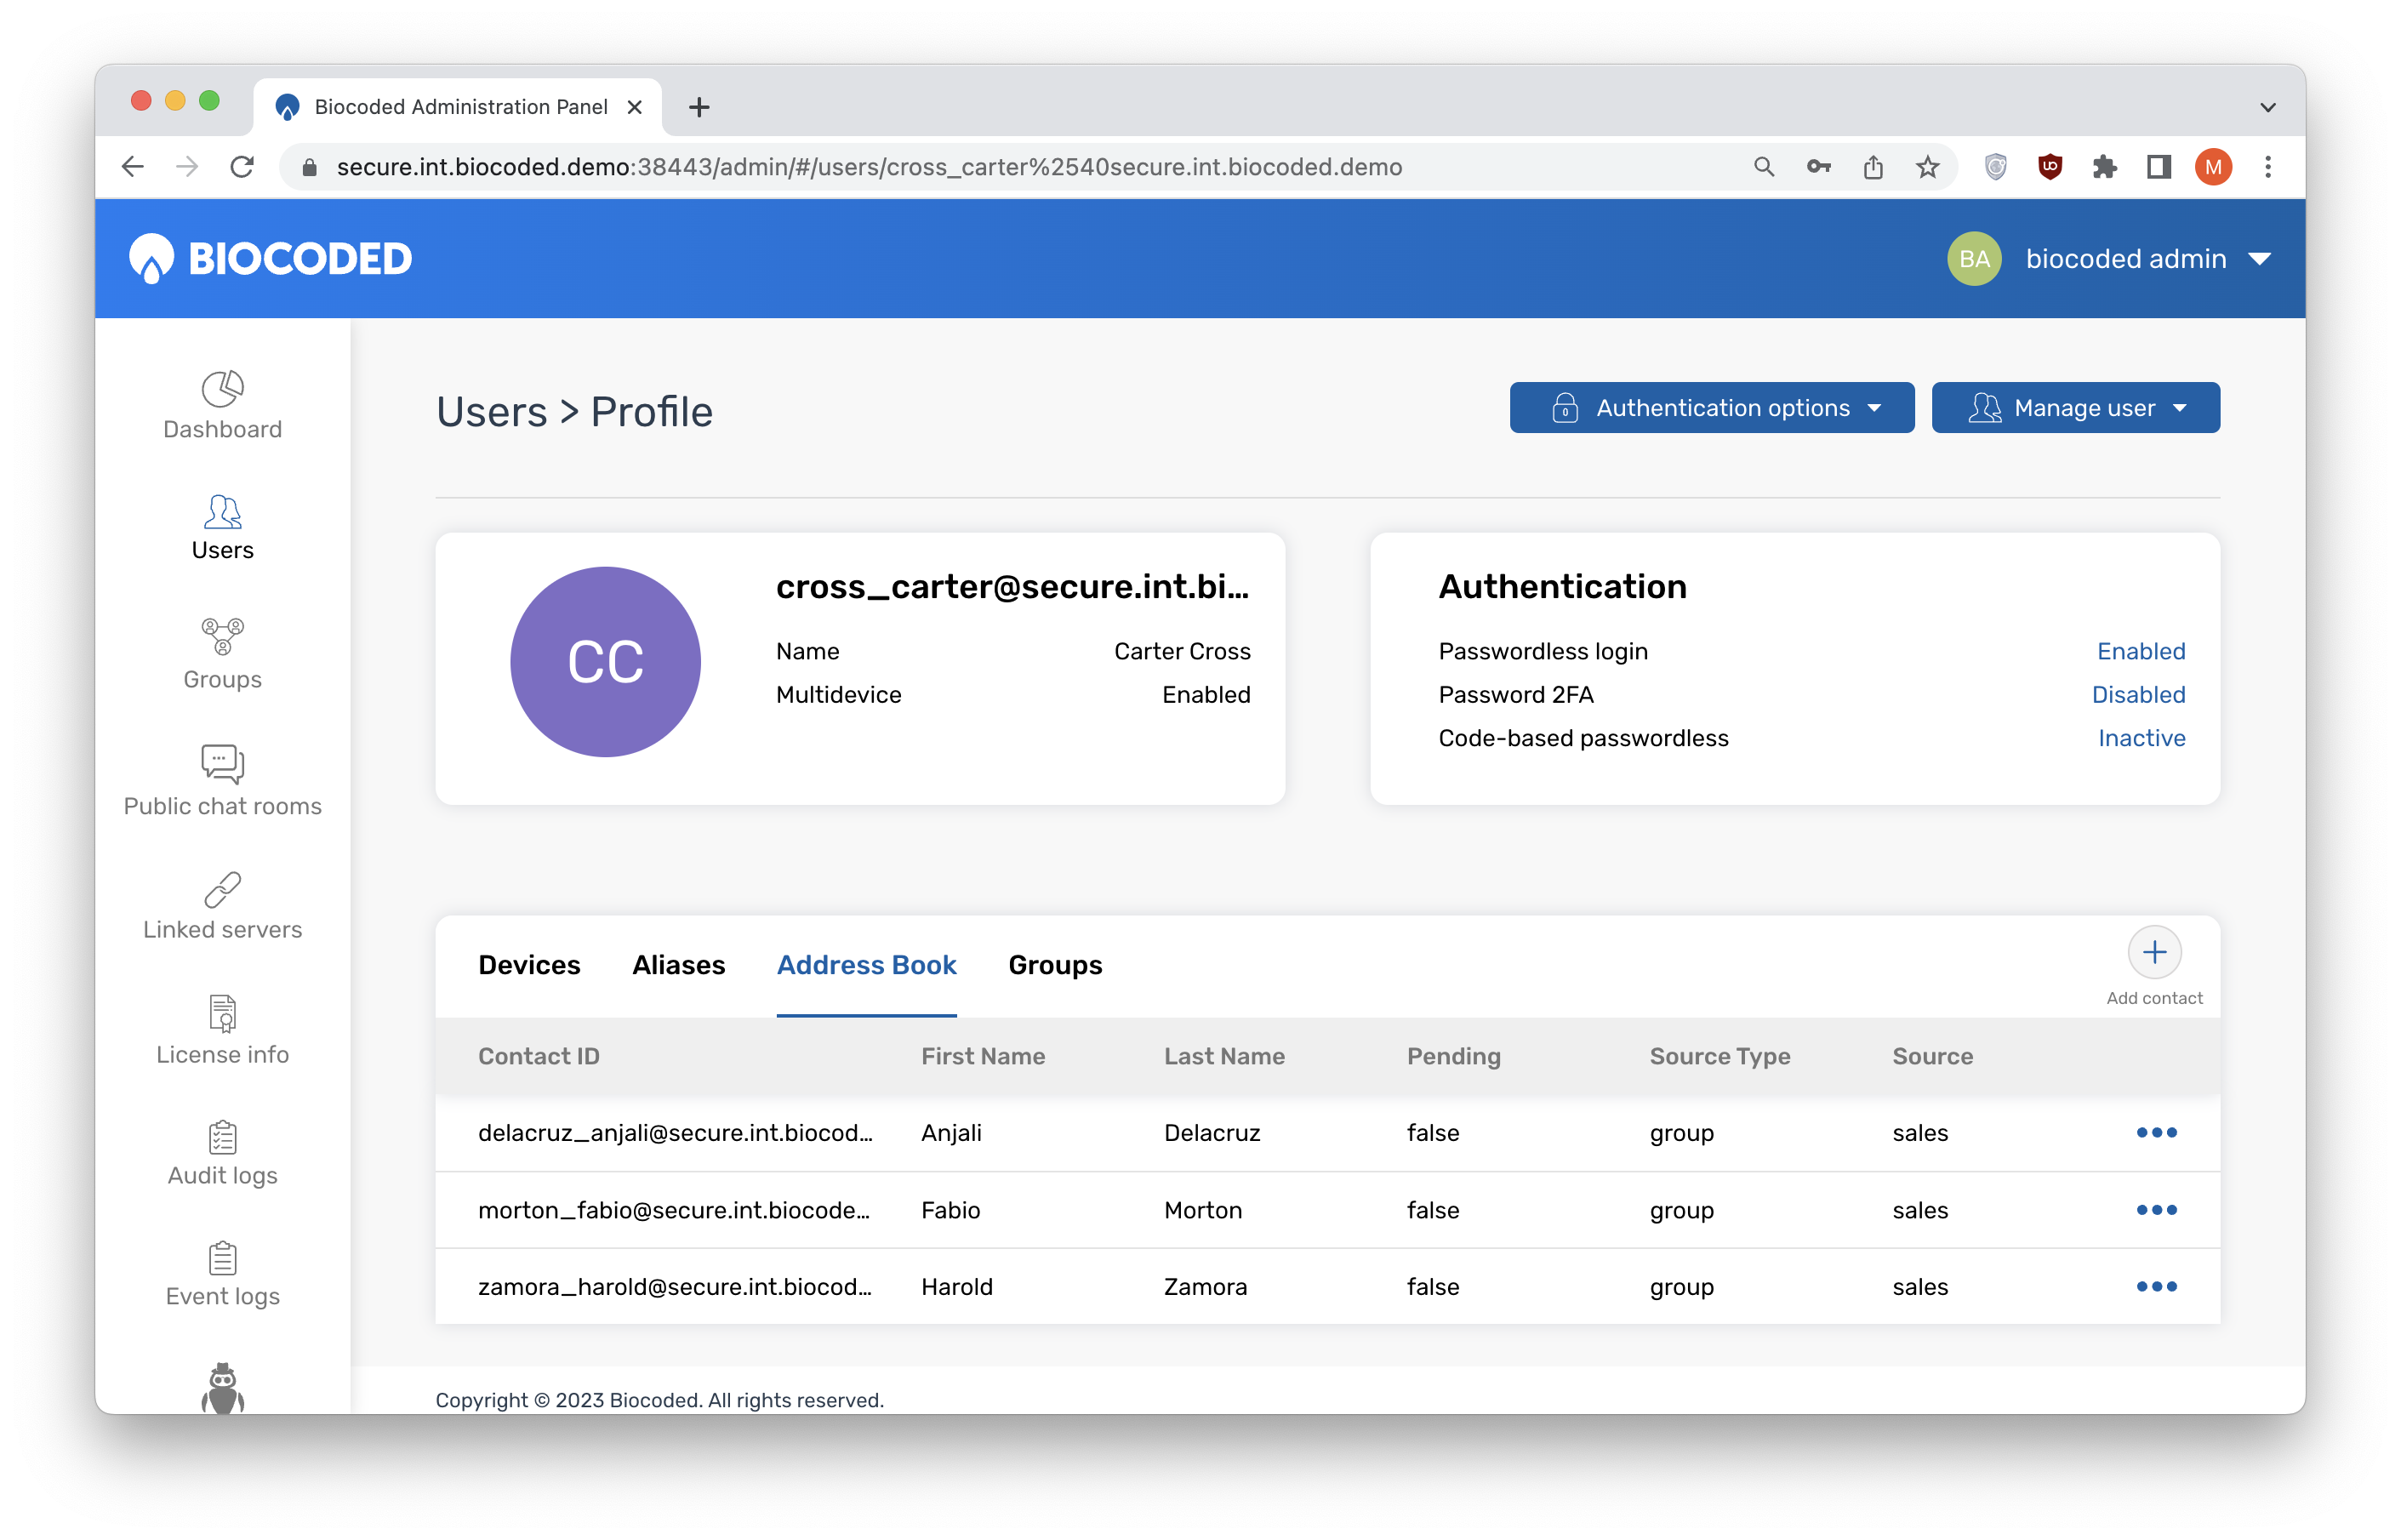
User Address book
Selecting "Address book", lists the user's Biocoded contacts list. This includes contacts connected through groups and the ones added manually, who can be from this server or from a linked server (described further in the document). Clicking on offers "View source group" for contacts from groups or "Remove" for manually added contacts.
User Groups
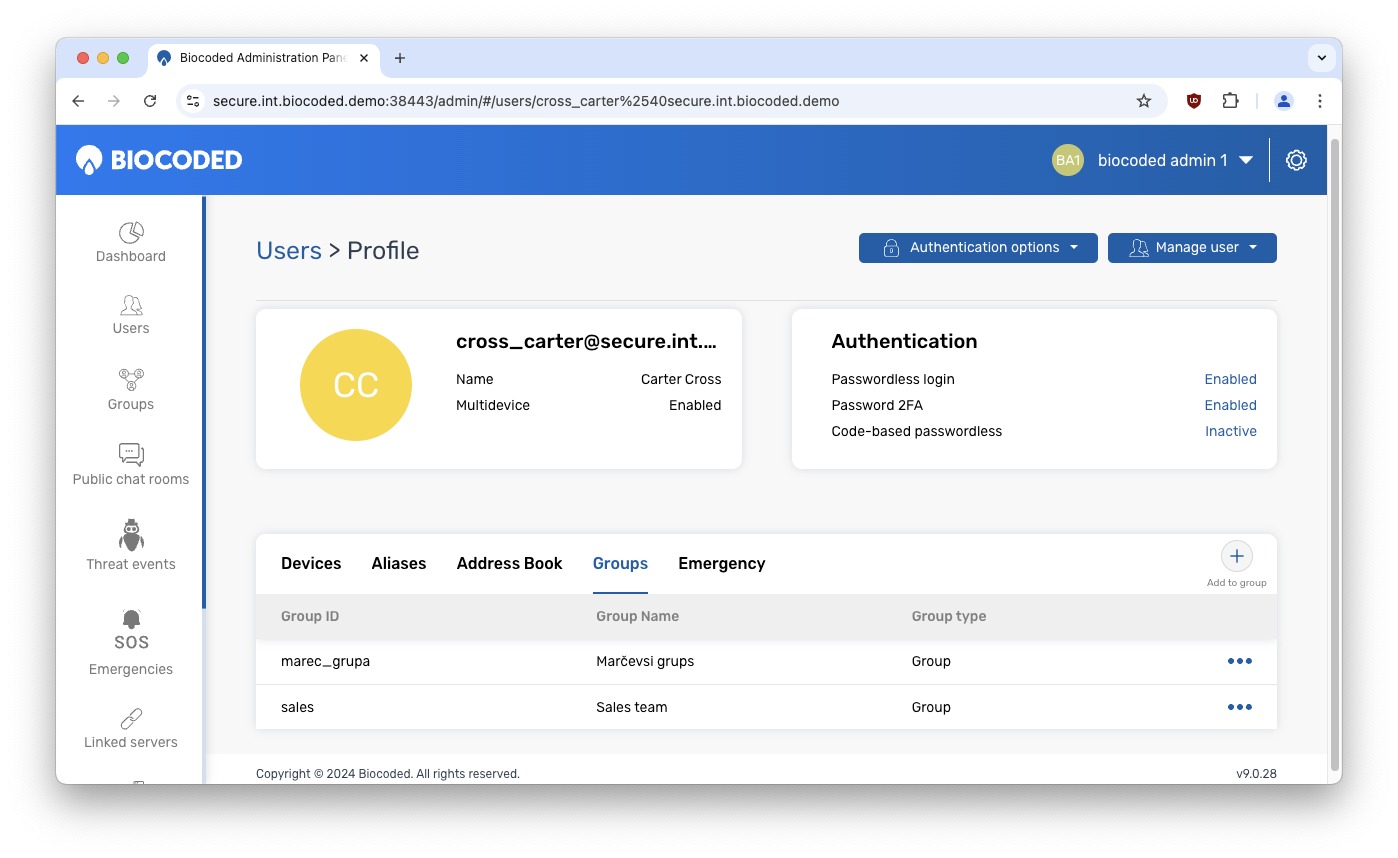
"Groups" lists all groups that the user is a part of. They are listed by ID, group name and group type. Clicking on "Add to group" enables adding to additional groups. The user can also be removed from a group by clicking on and selecting "Remove from group". This action requires confirmation.
User emergency
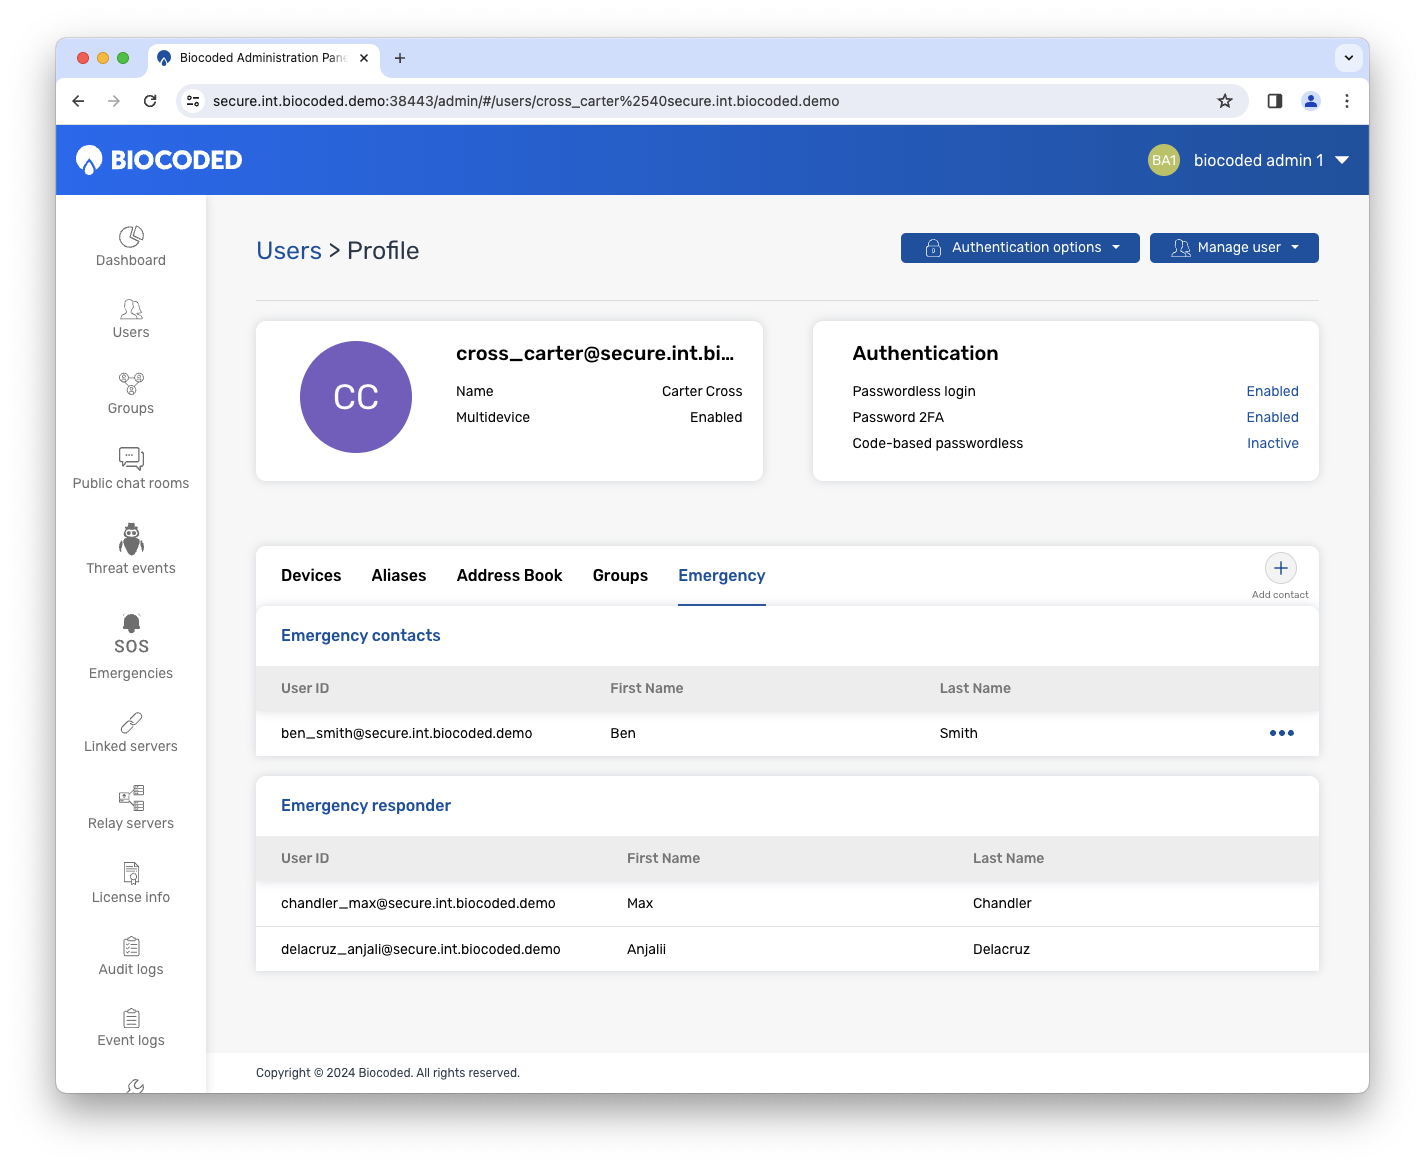
"Emergency" section consists of two lists:
- Emergency contacts - Biocoded users that will receive the selected user's emergency signal broadcasts.
- Emergency responder - Biocoded users whose emergency signal broadcasts will be received by the selected user - users who have this contact listed as emergency contact.
Emergency contacts for each user can be added by clicking on "Add contact" and removed by clicking on and selecting "Remove from emergency contacts".
Emergency responder list can only be viewed - it changes when the selected user is added as emergency contact of some other user.
Groups
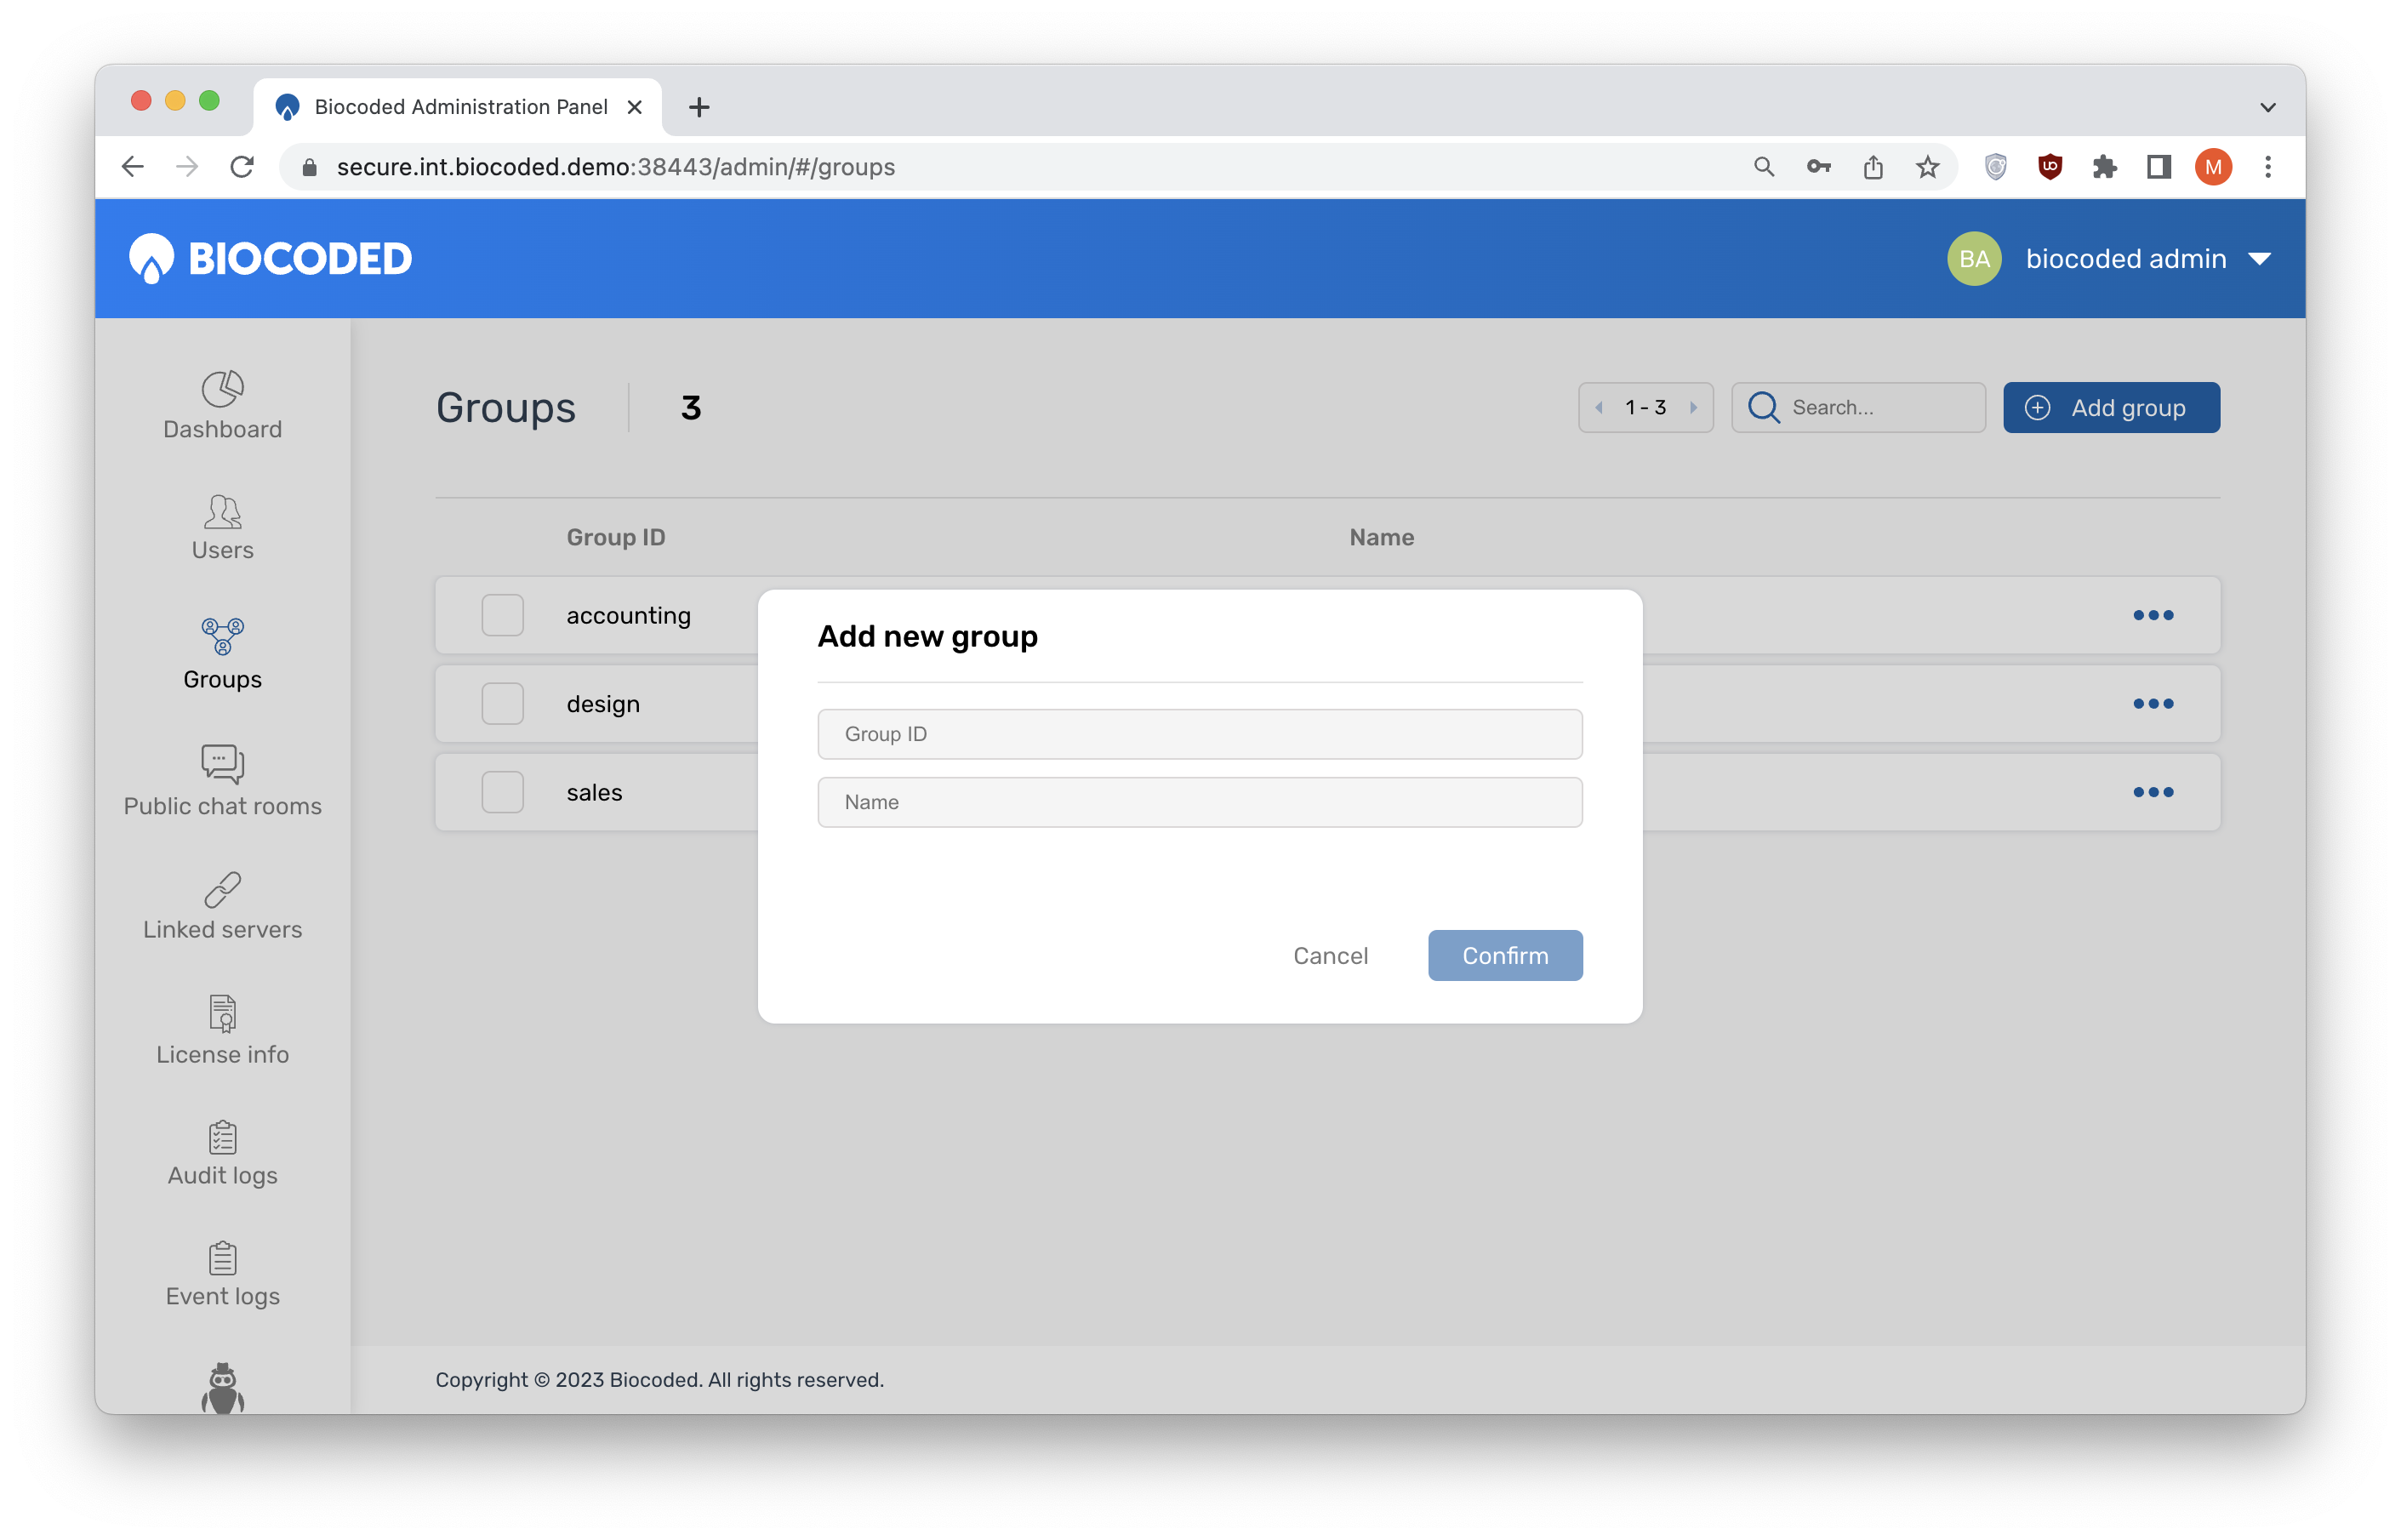
"Groups" tab shows all groups that were created on this server. More can be added by clicking "Add group".
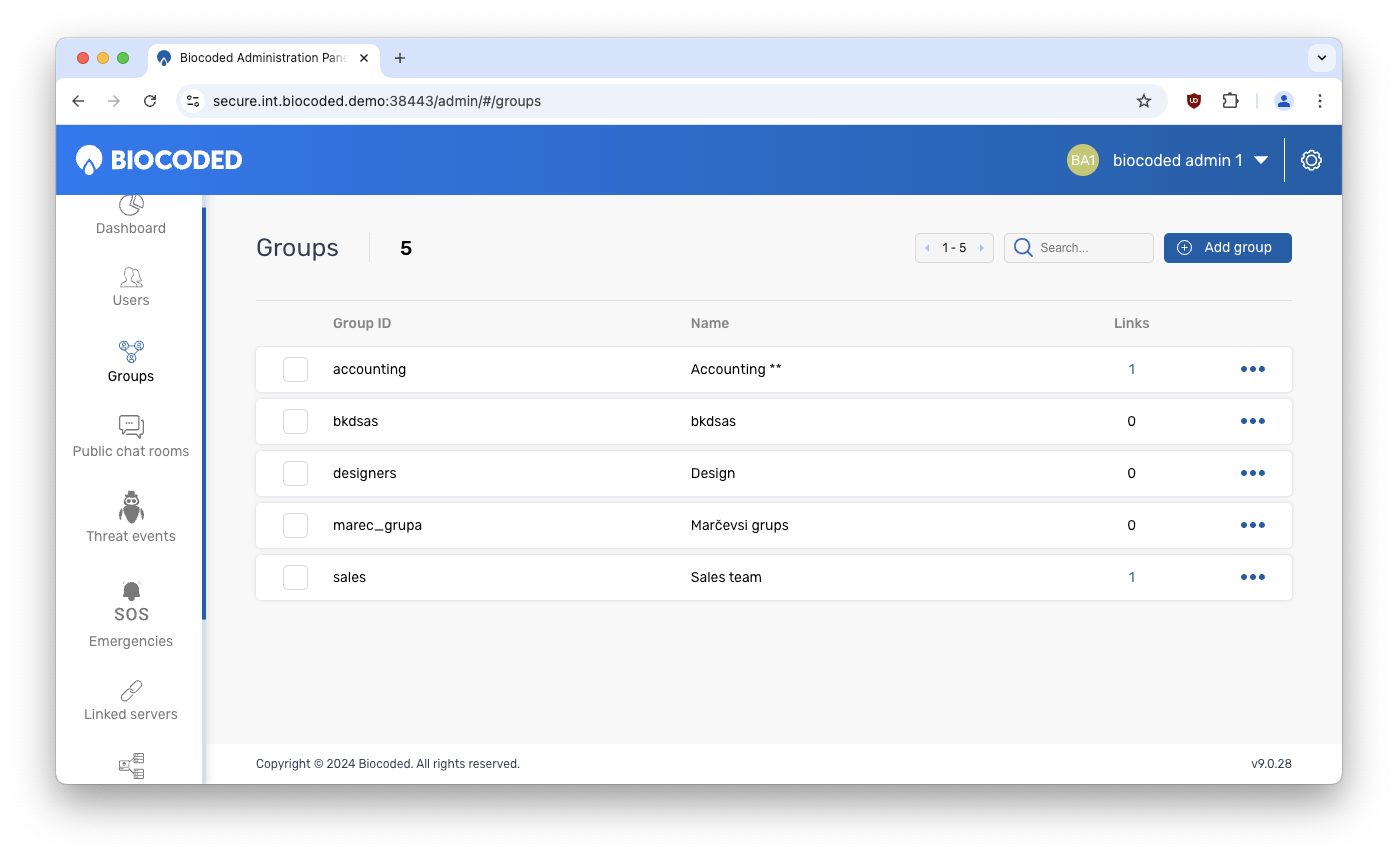
Each group listing consists of group ID, group name and number of group links.
More options can be accessed by clicking on a group and viewing it's participants or by clicking on .
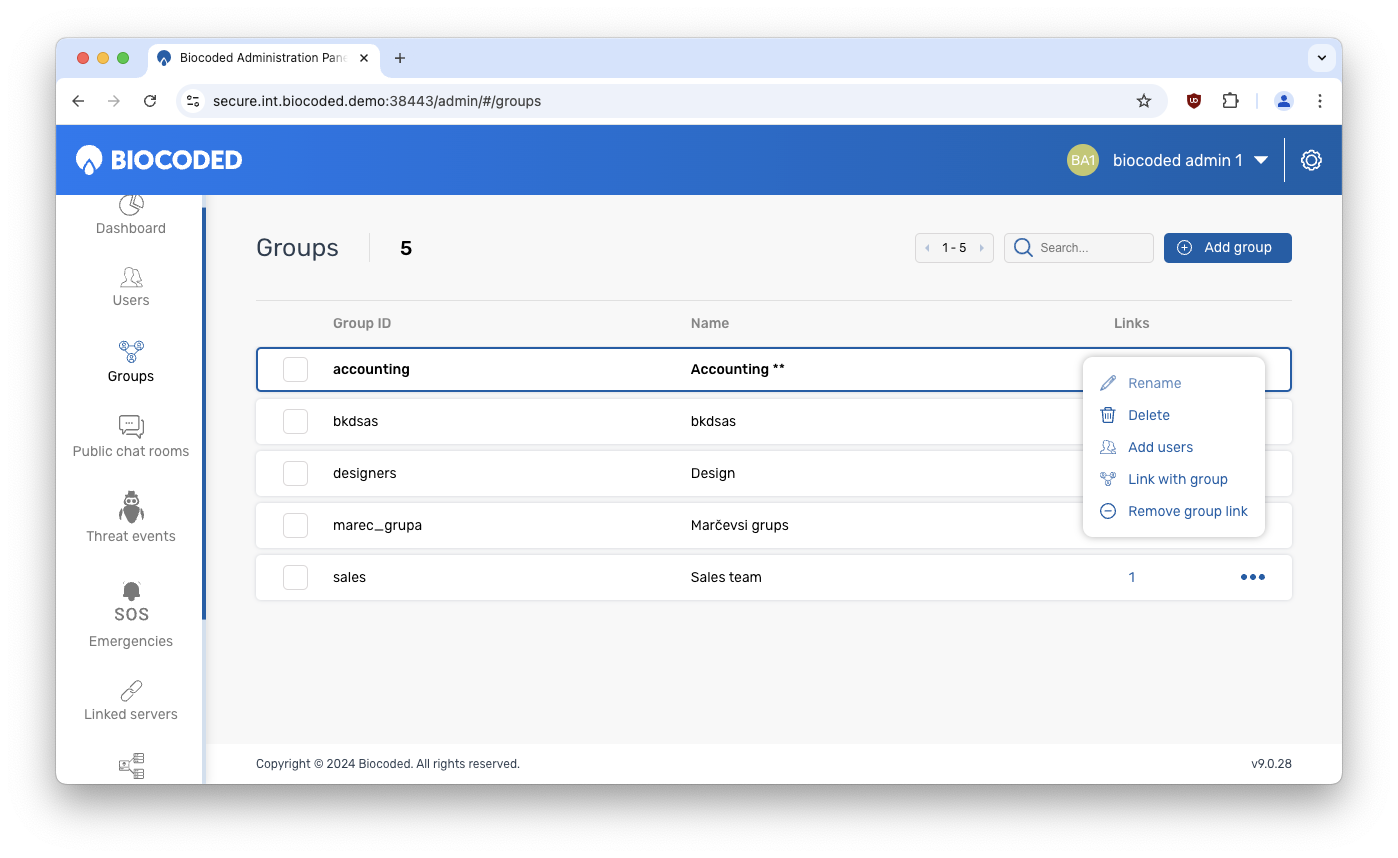
Group options include:
- "Rename" (sets a new name),
- "Delete" (confirmation required),
- "Add users" (opens a popup where you can select other users to add to your group),
- "Link with group" (connect participants of one group with users that are part of another group),
- "Remove group link" (removes existing connection between two groups).
Selecting the check box next to a group listing offers "Add users" option for multiple groups shown by clicking on .
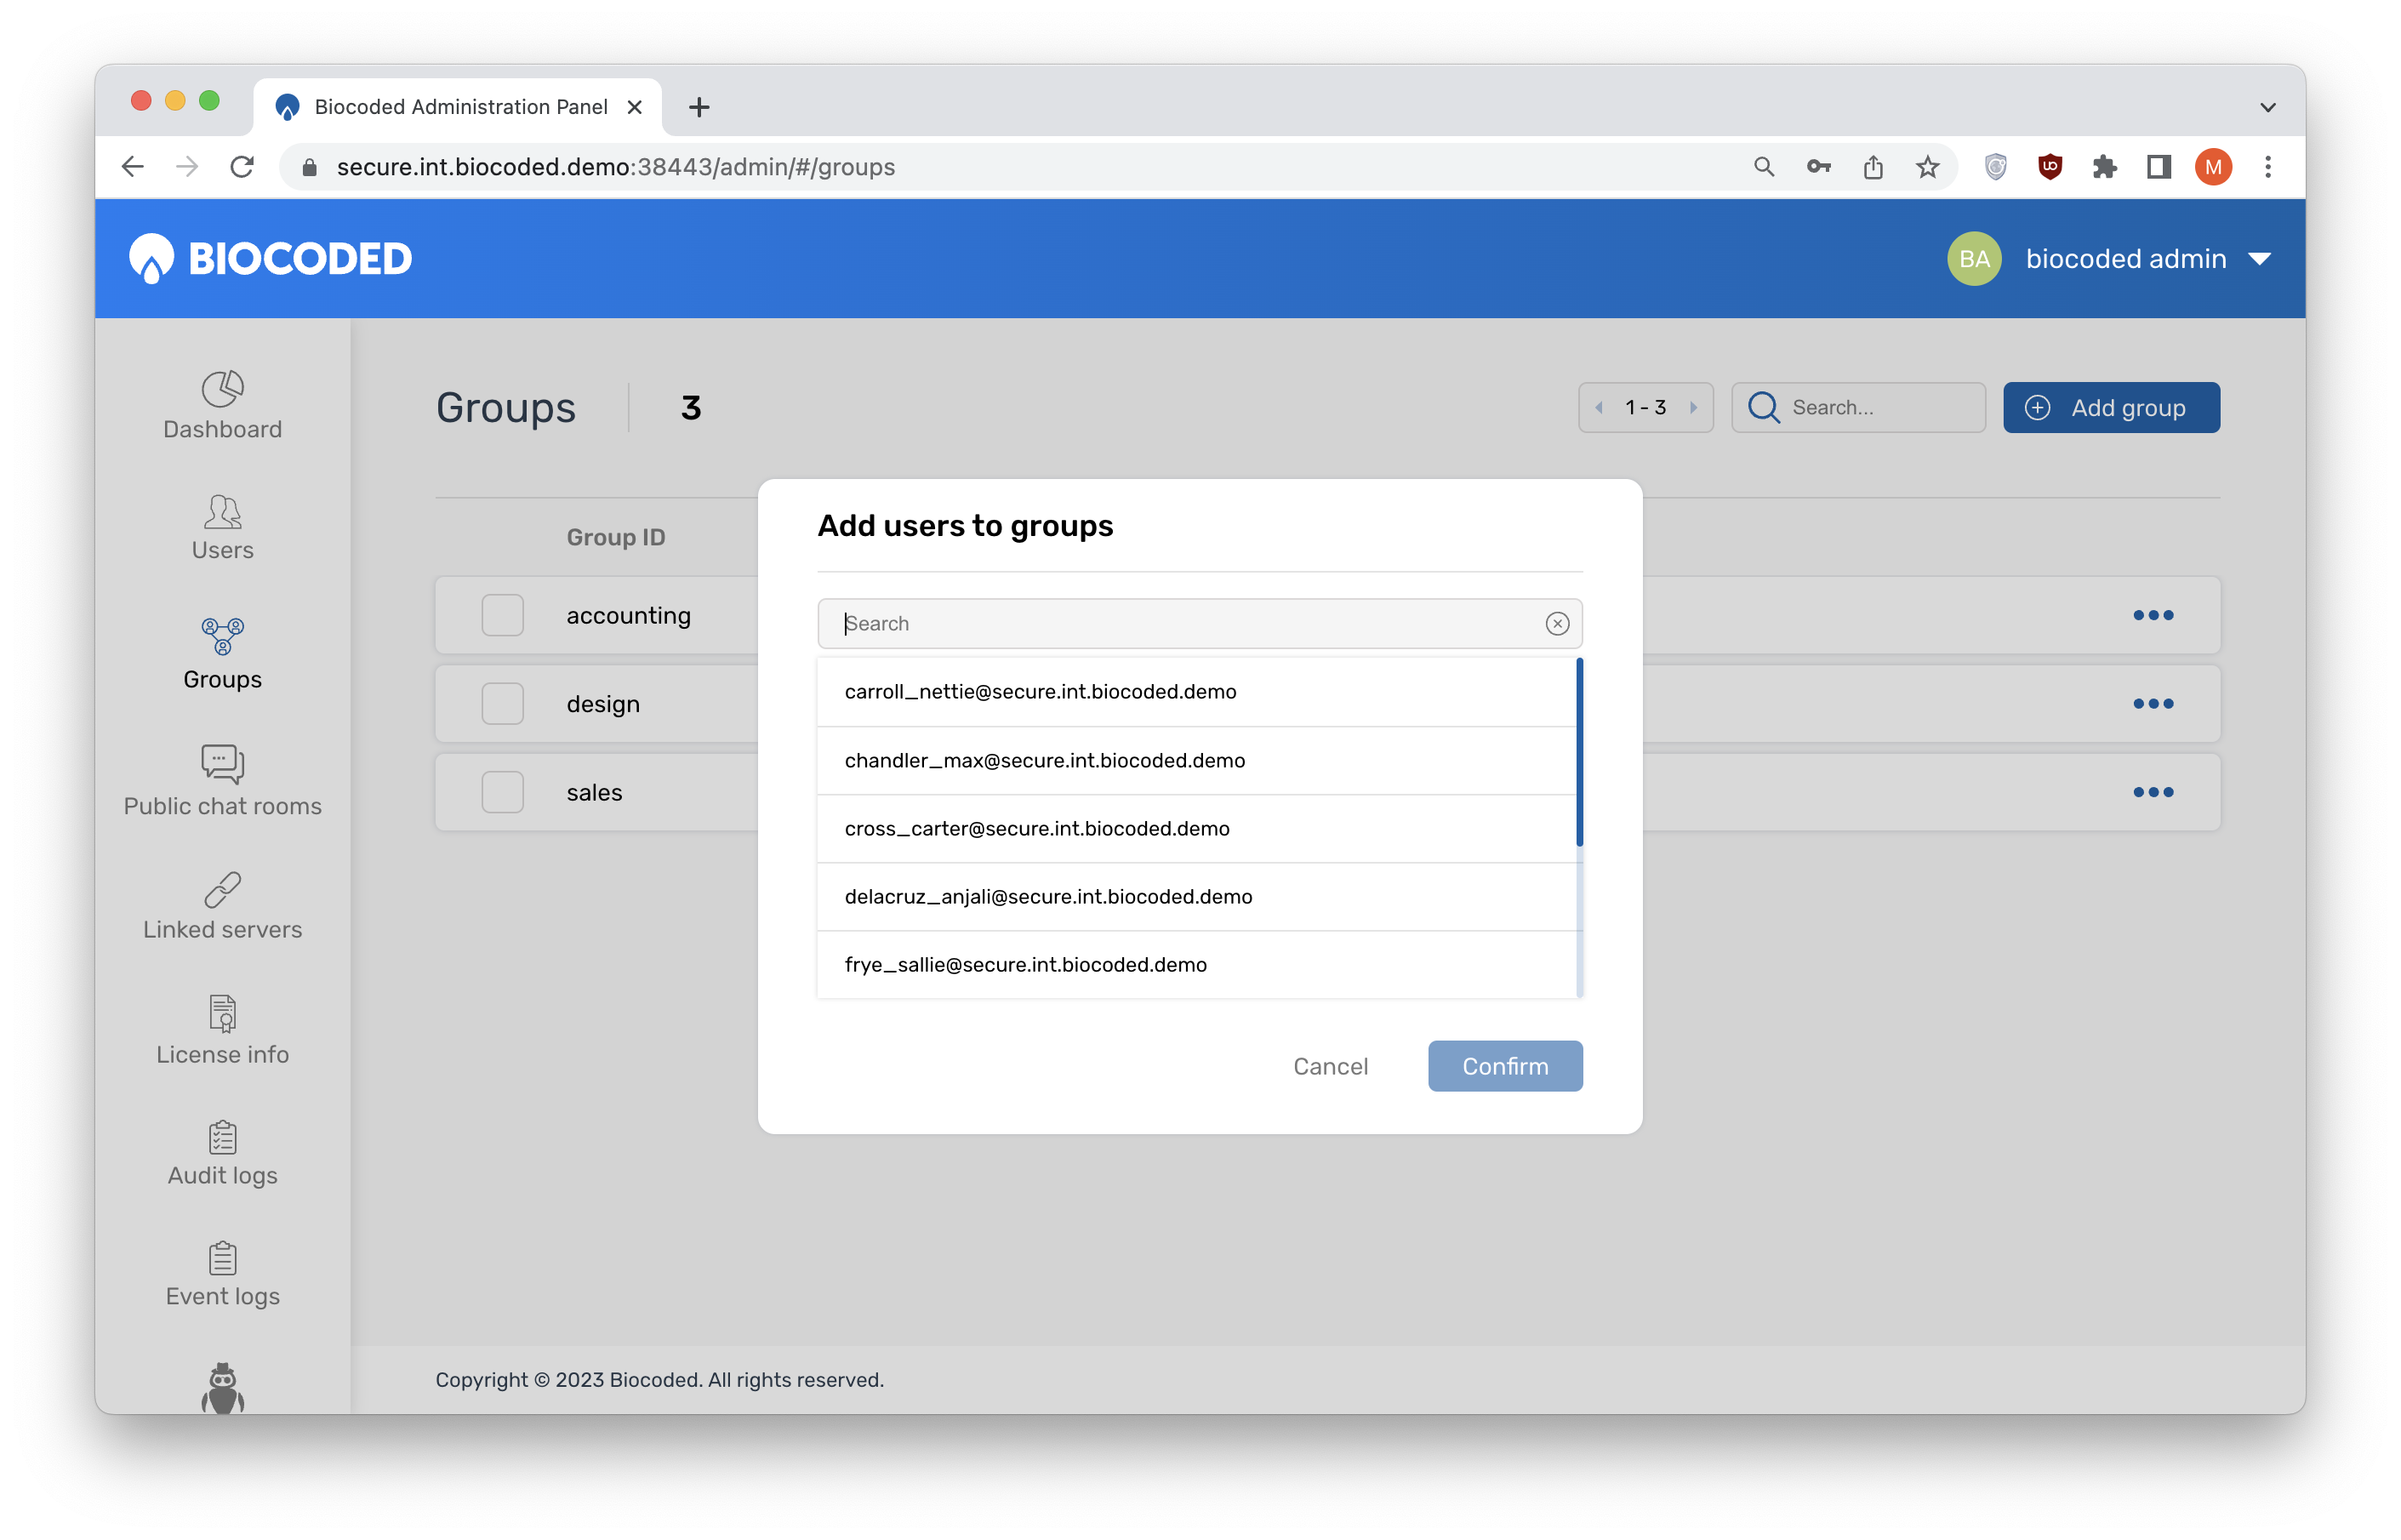
Add a group
A click on "Add group" opens the following dialogue, where a new group can be created by entering a group ID and name.
Managing group participants
Clicking on a group in "Groups" tab shows it's participants.
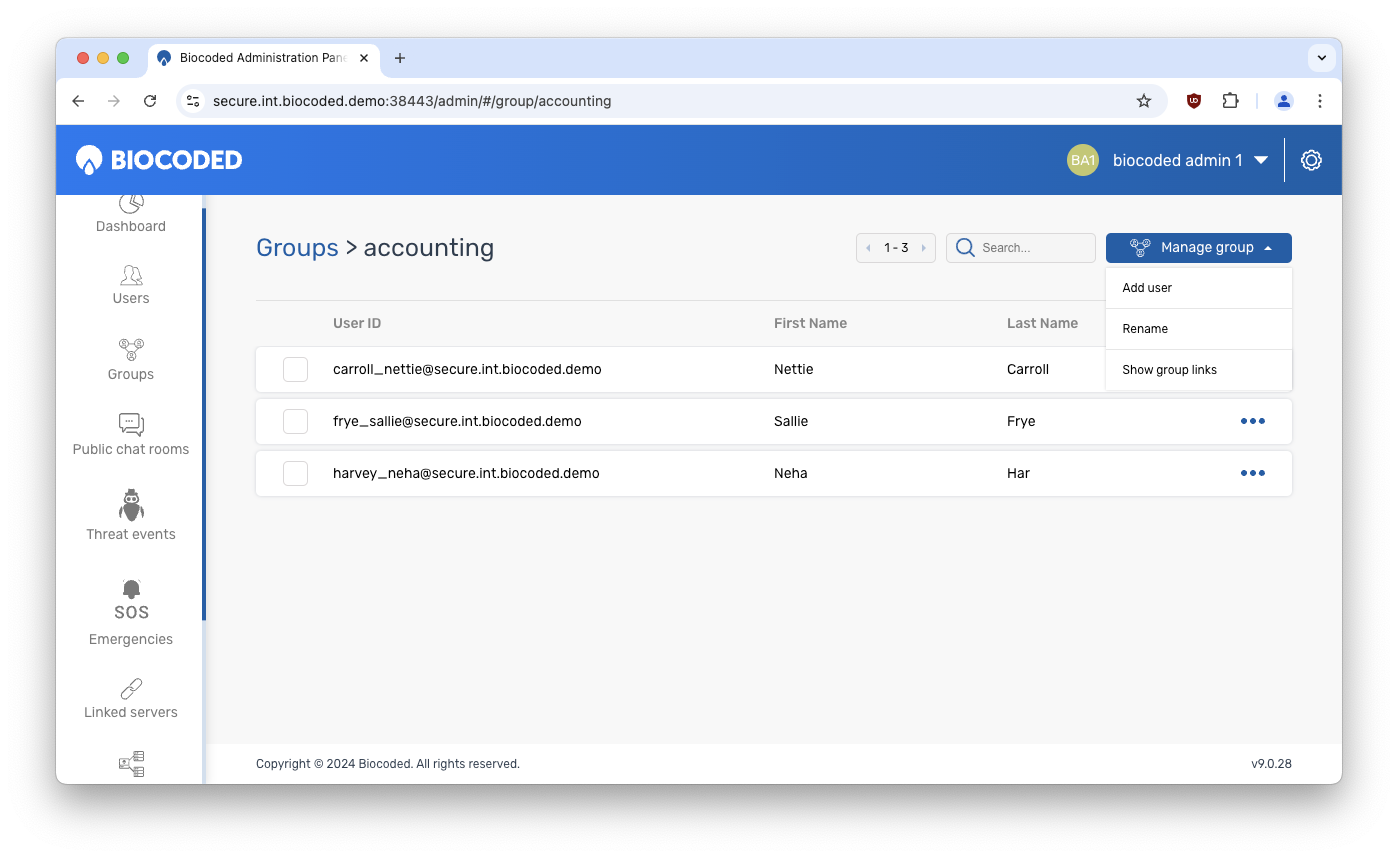
To add a new user to this group, click on "Manage group" and select "Add user". You can also rename the group and show group links. To remove a user from this group, click on and select "Remove from group" (confirmation required).
Group links
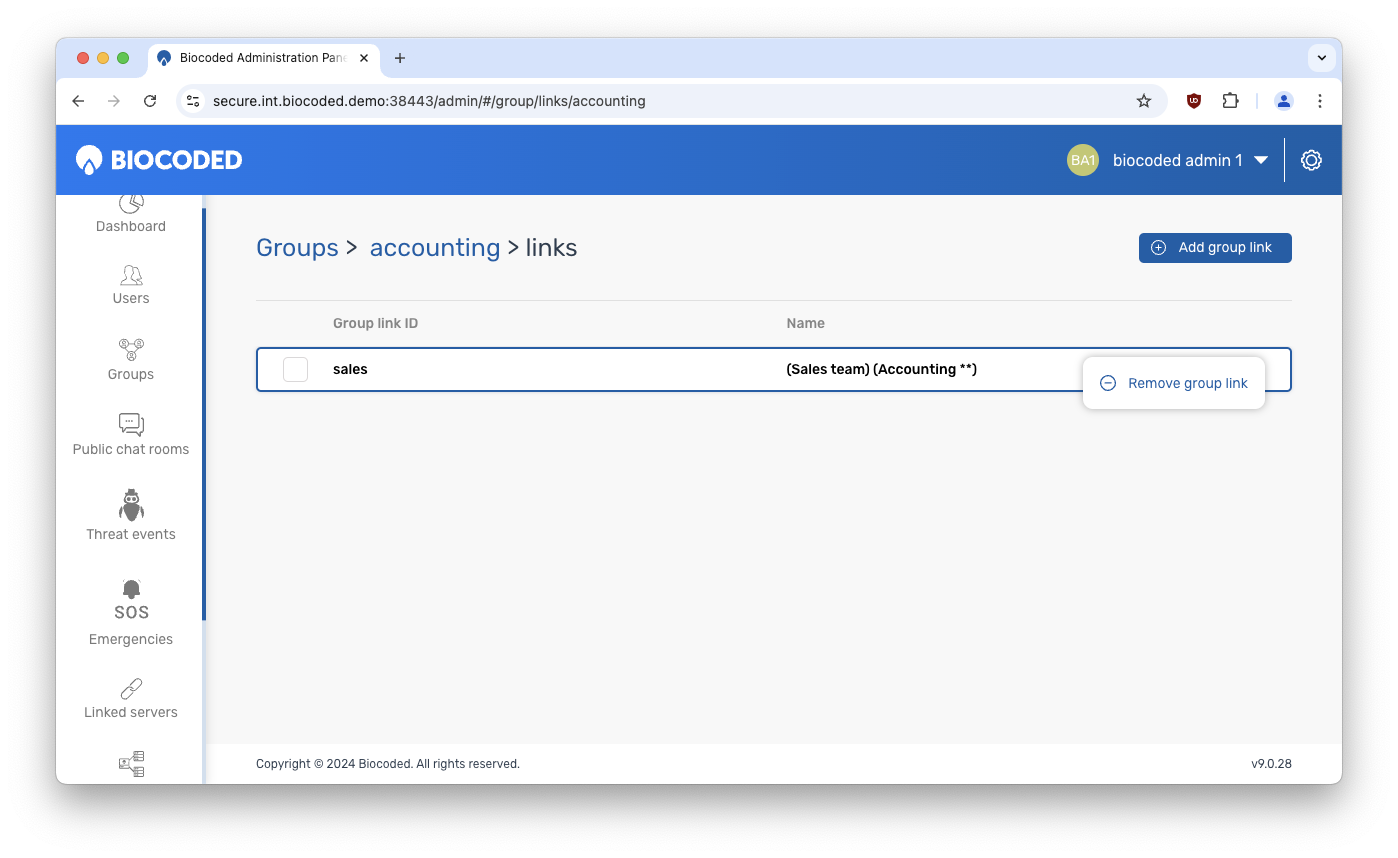
While viewing group links, you can add a new one by selecting "Add group link". Then you click on all the groups you wish to connect with each other. Confirm when done. This will connect participants of one group with users that are part of another group and they will be able to communicate with each other. To remove a group link, click on and select "Remove group link" (confirmation required).
Public chat rooms
A click on "Public chat rooms" tab lists all existing public chat rooms on this server.
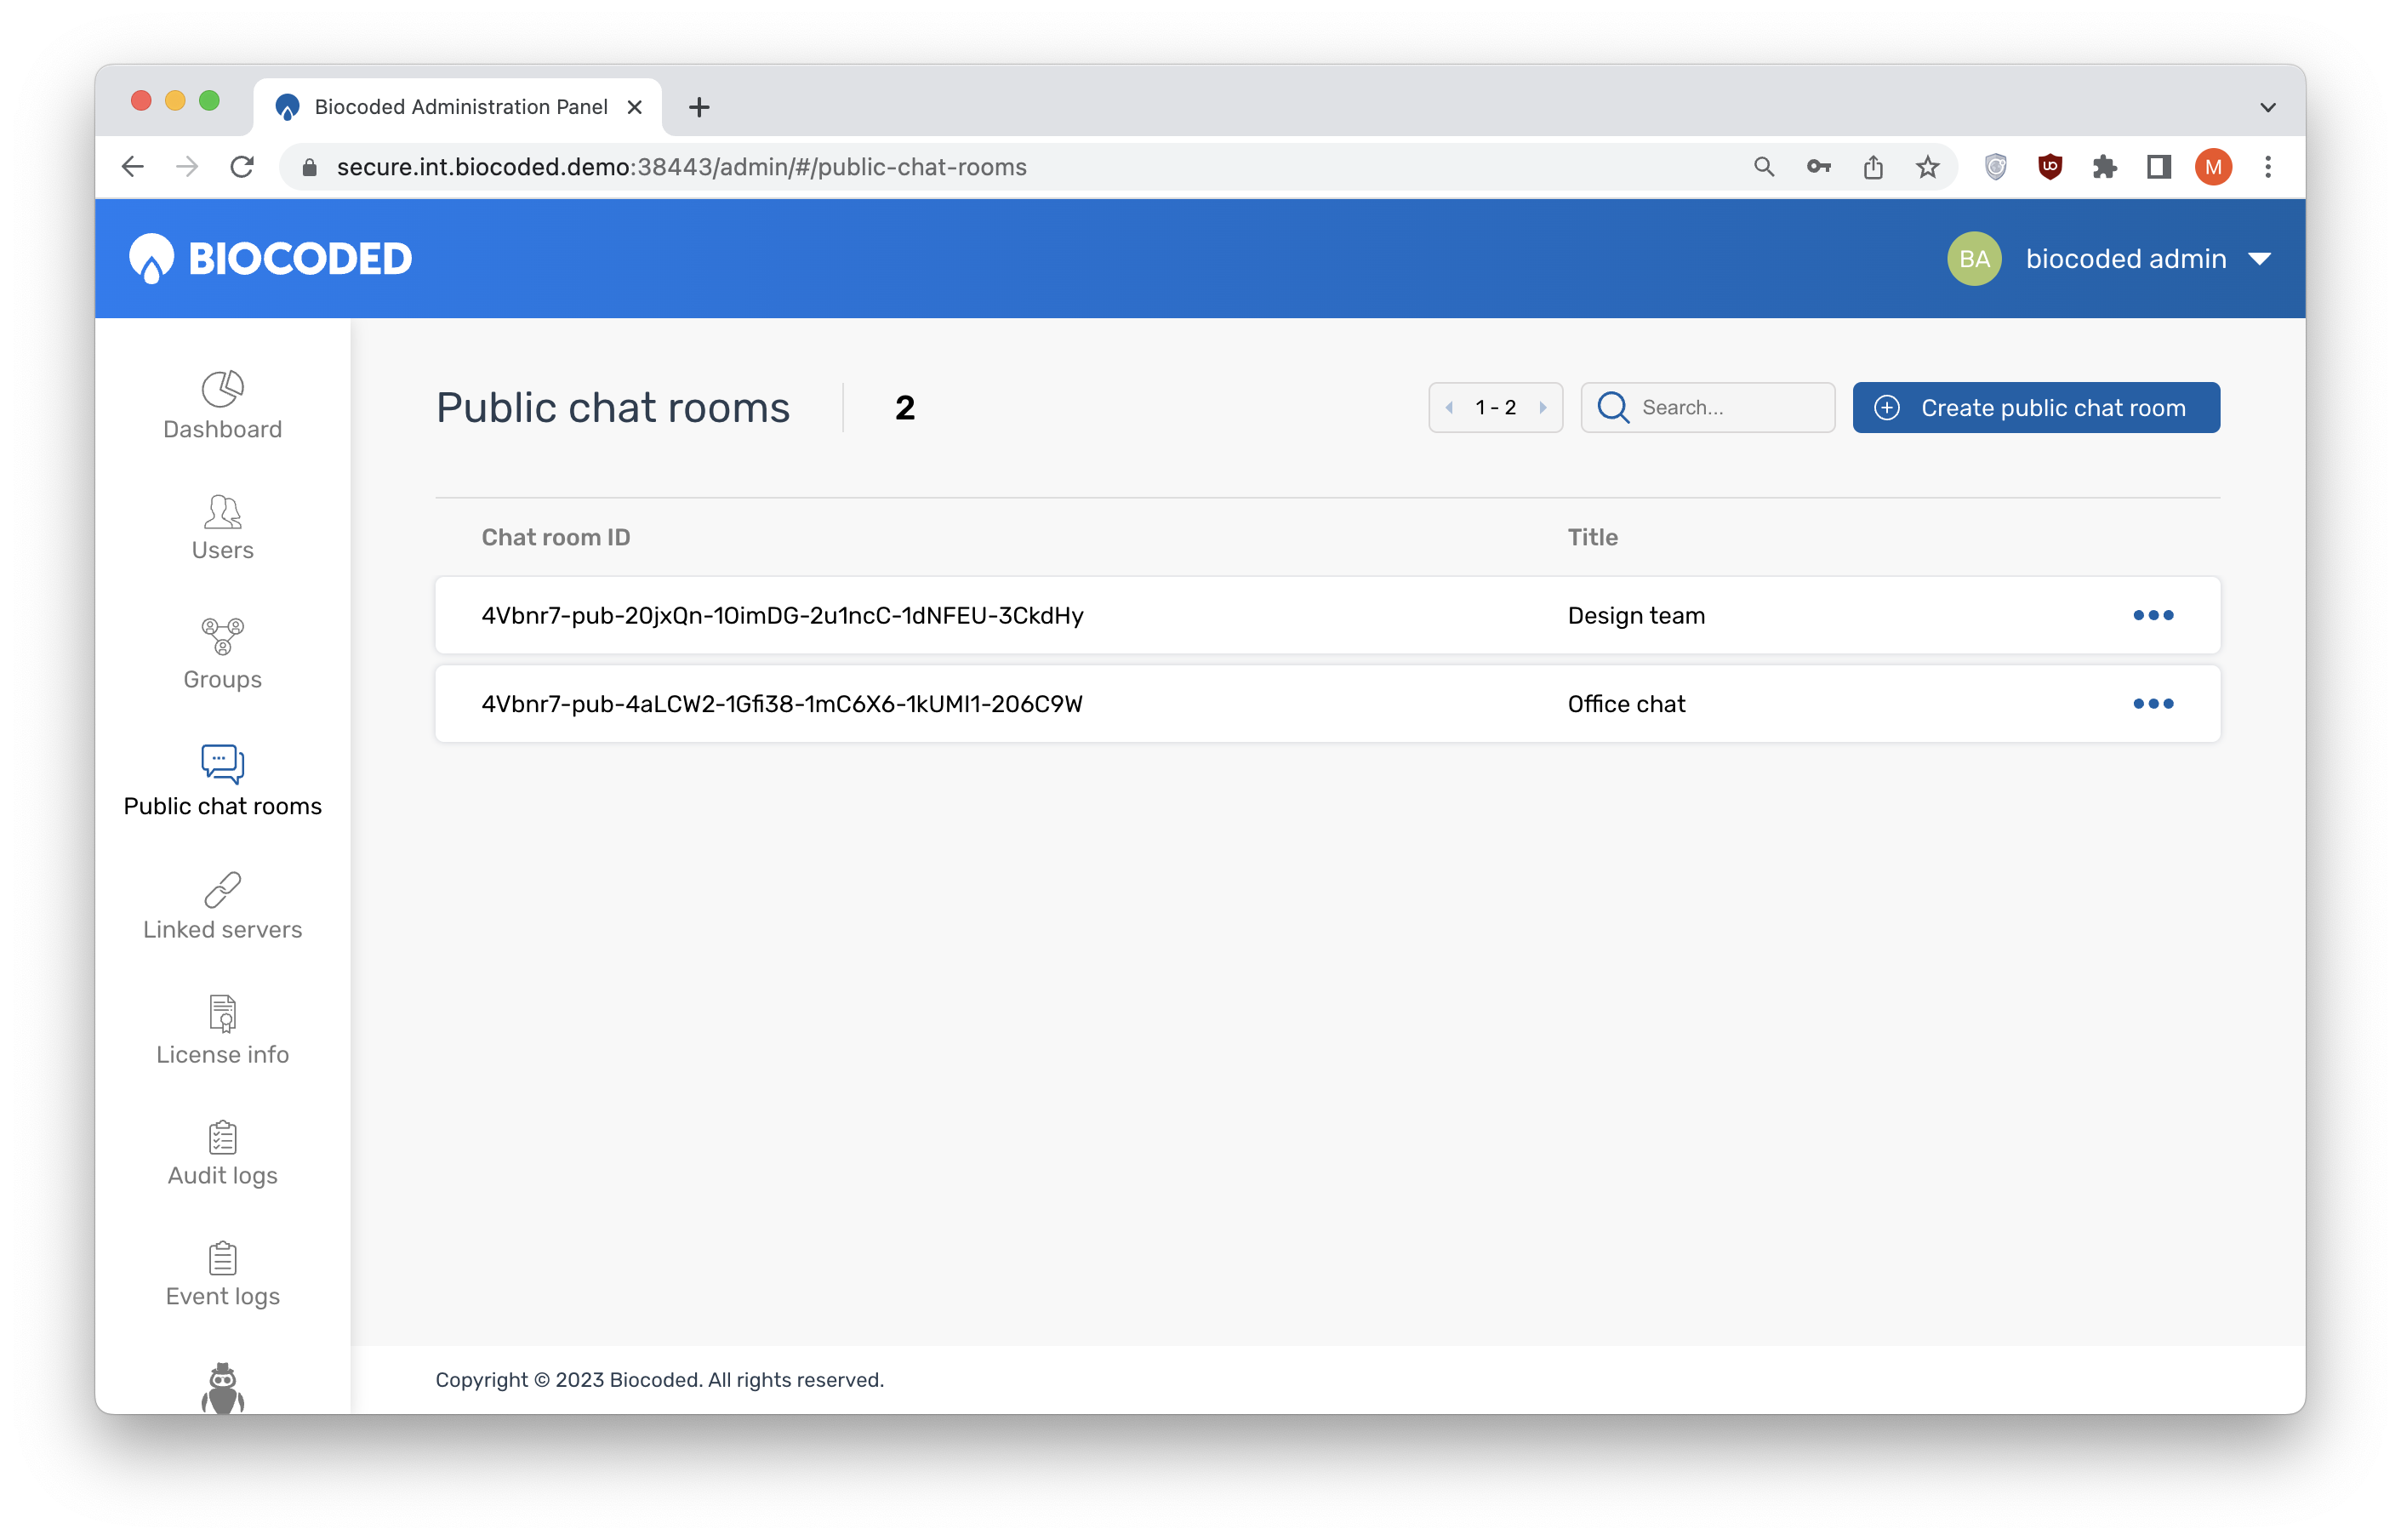
next to a room shows the options to "View more", which shows some room details, "Rename" and "Delete" (confirmation required).
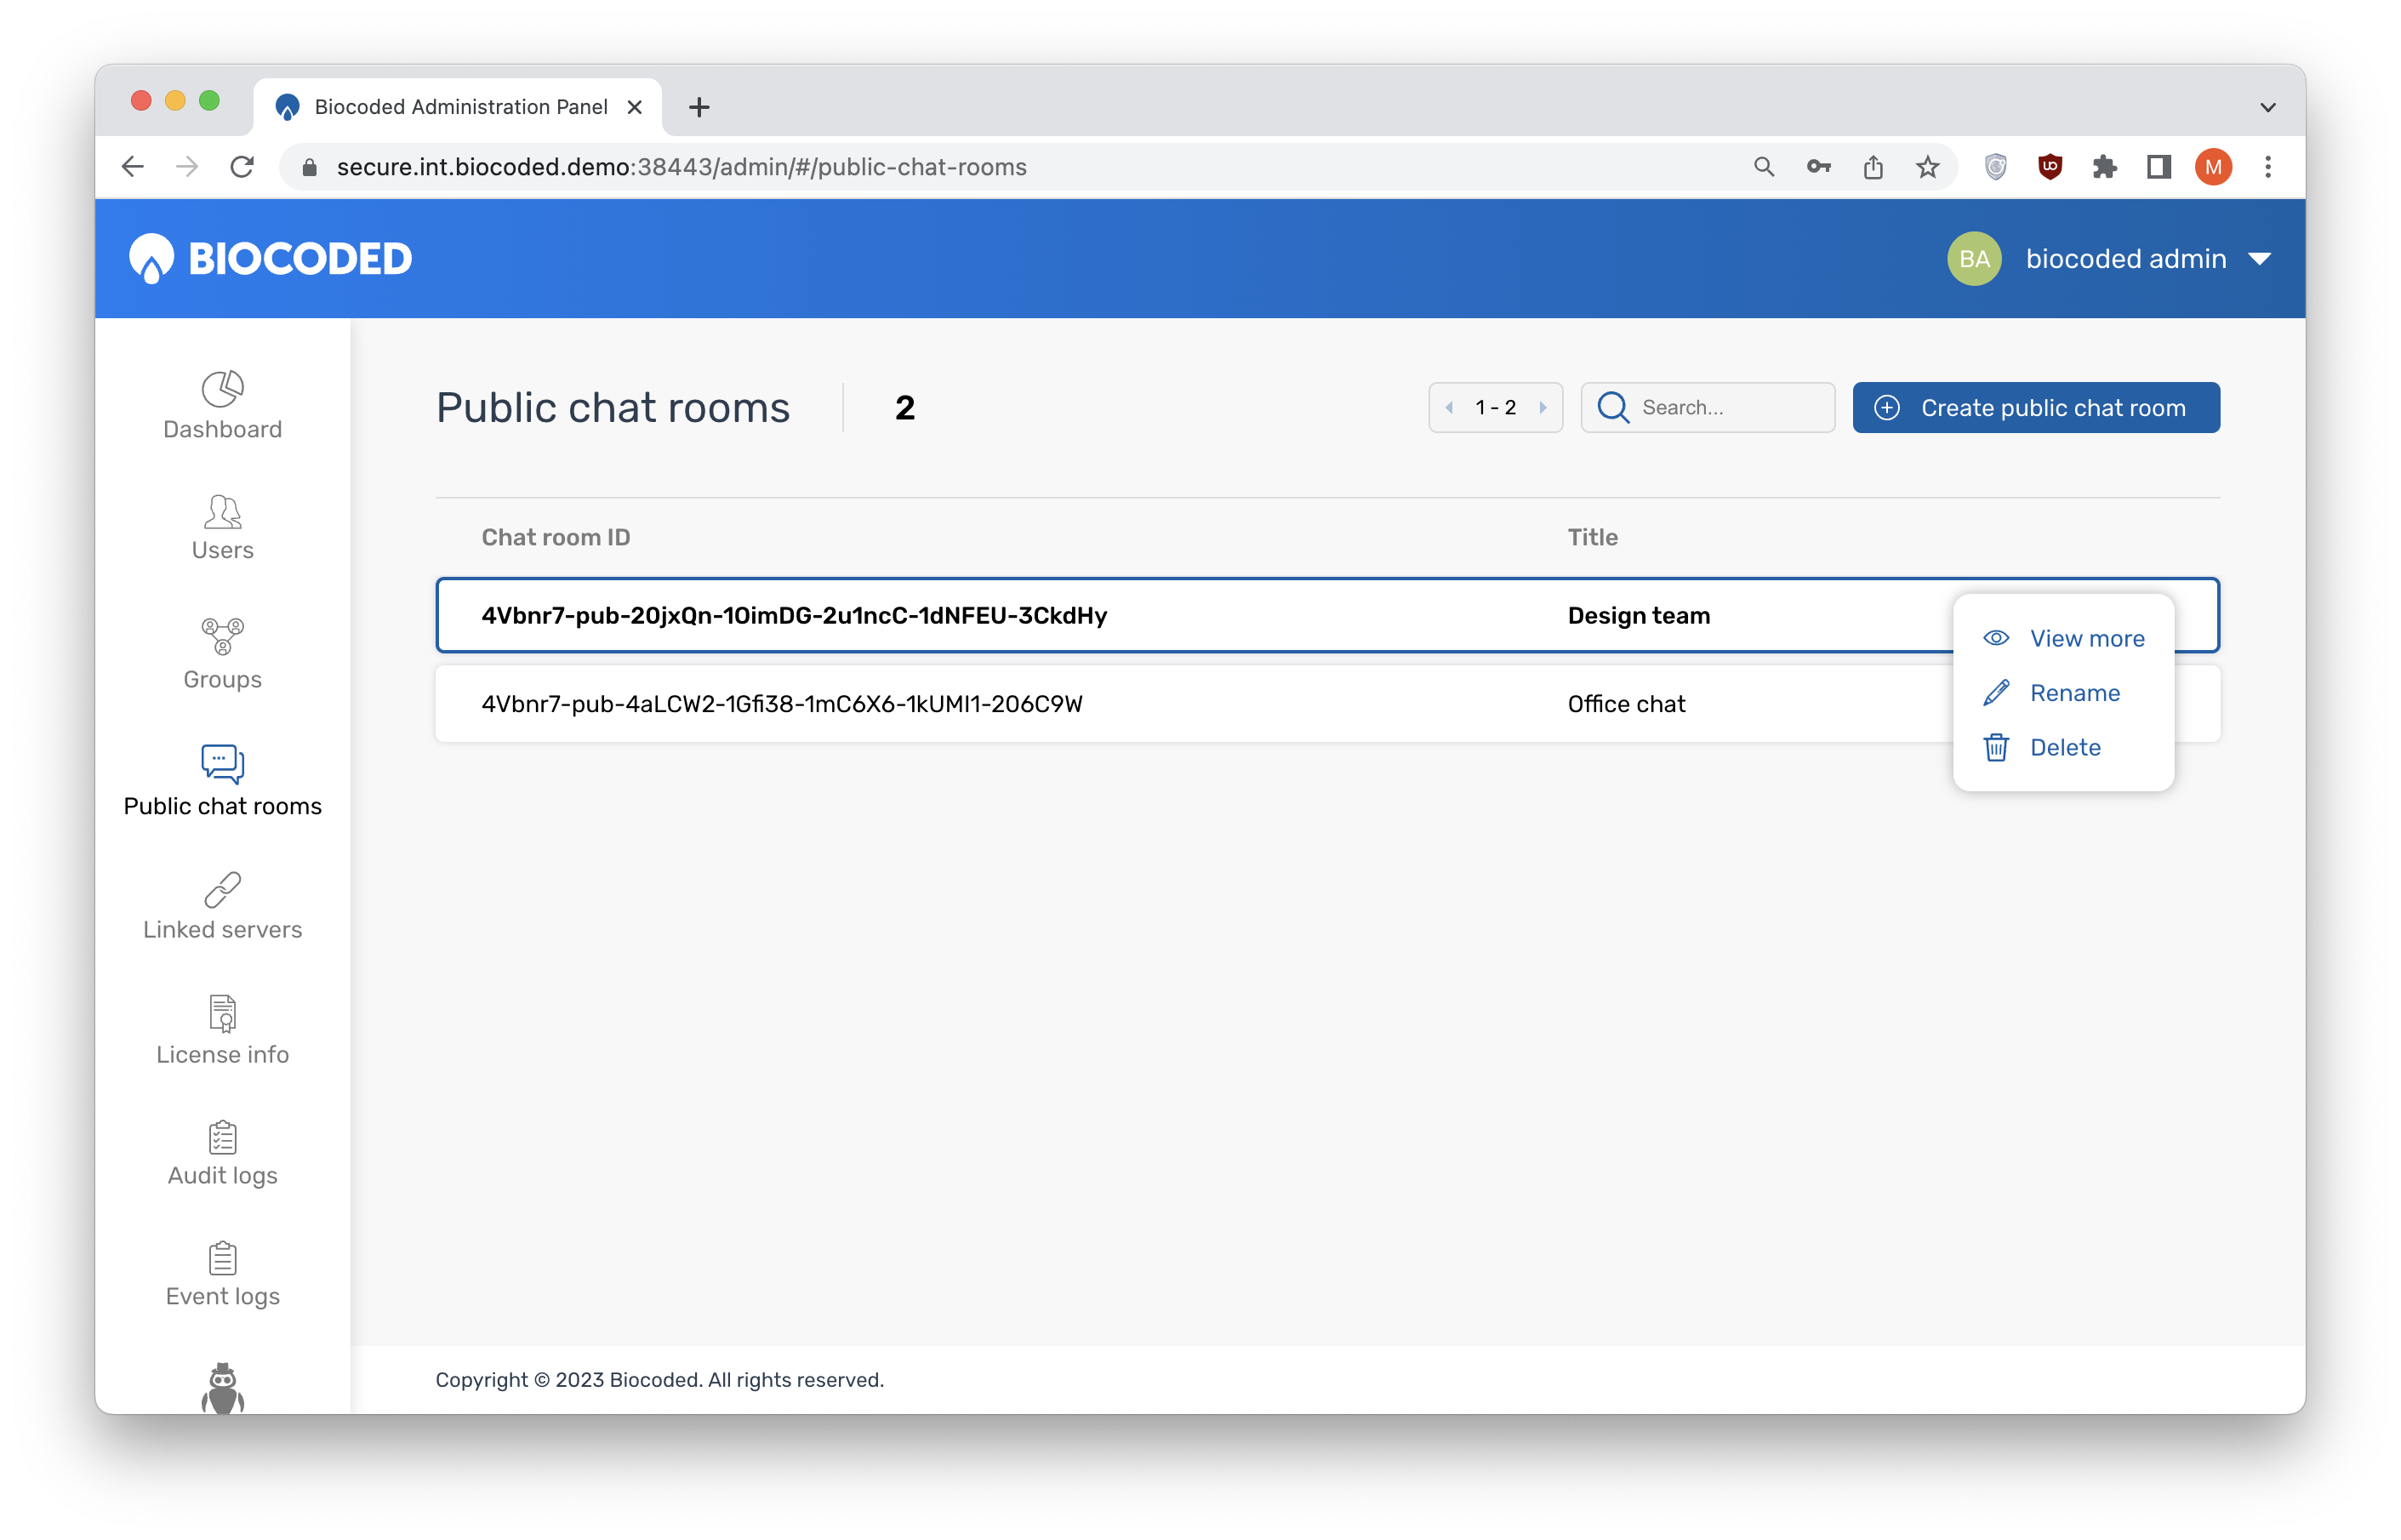
Viewing room details
Room details include chat room ID, room title and some parameters like "Joinable" (if enabled, users can join by clicking on the room link), "Searchable" and "Require password" (value is true if a PIN has been set to enable access to this room).
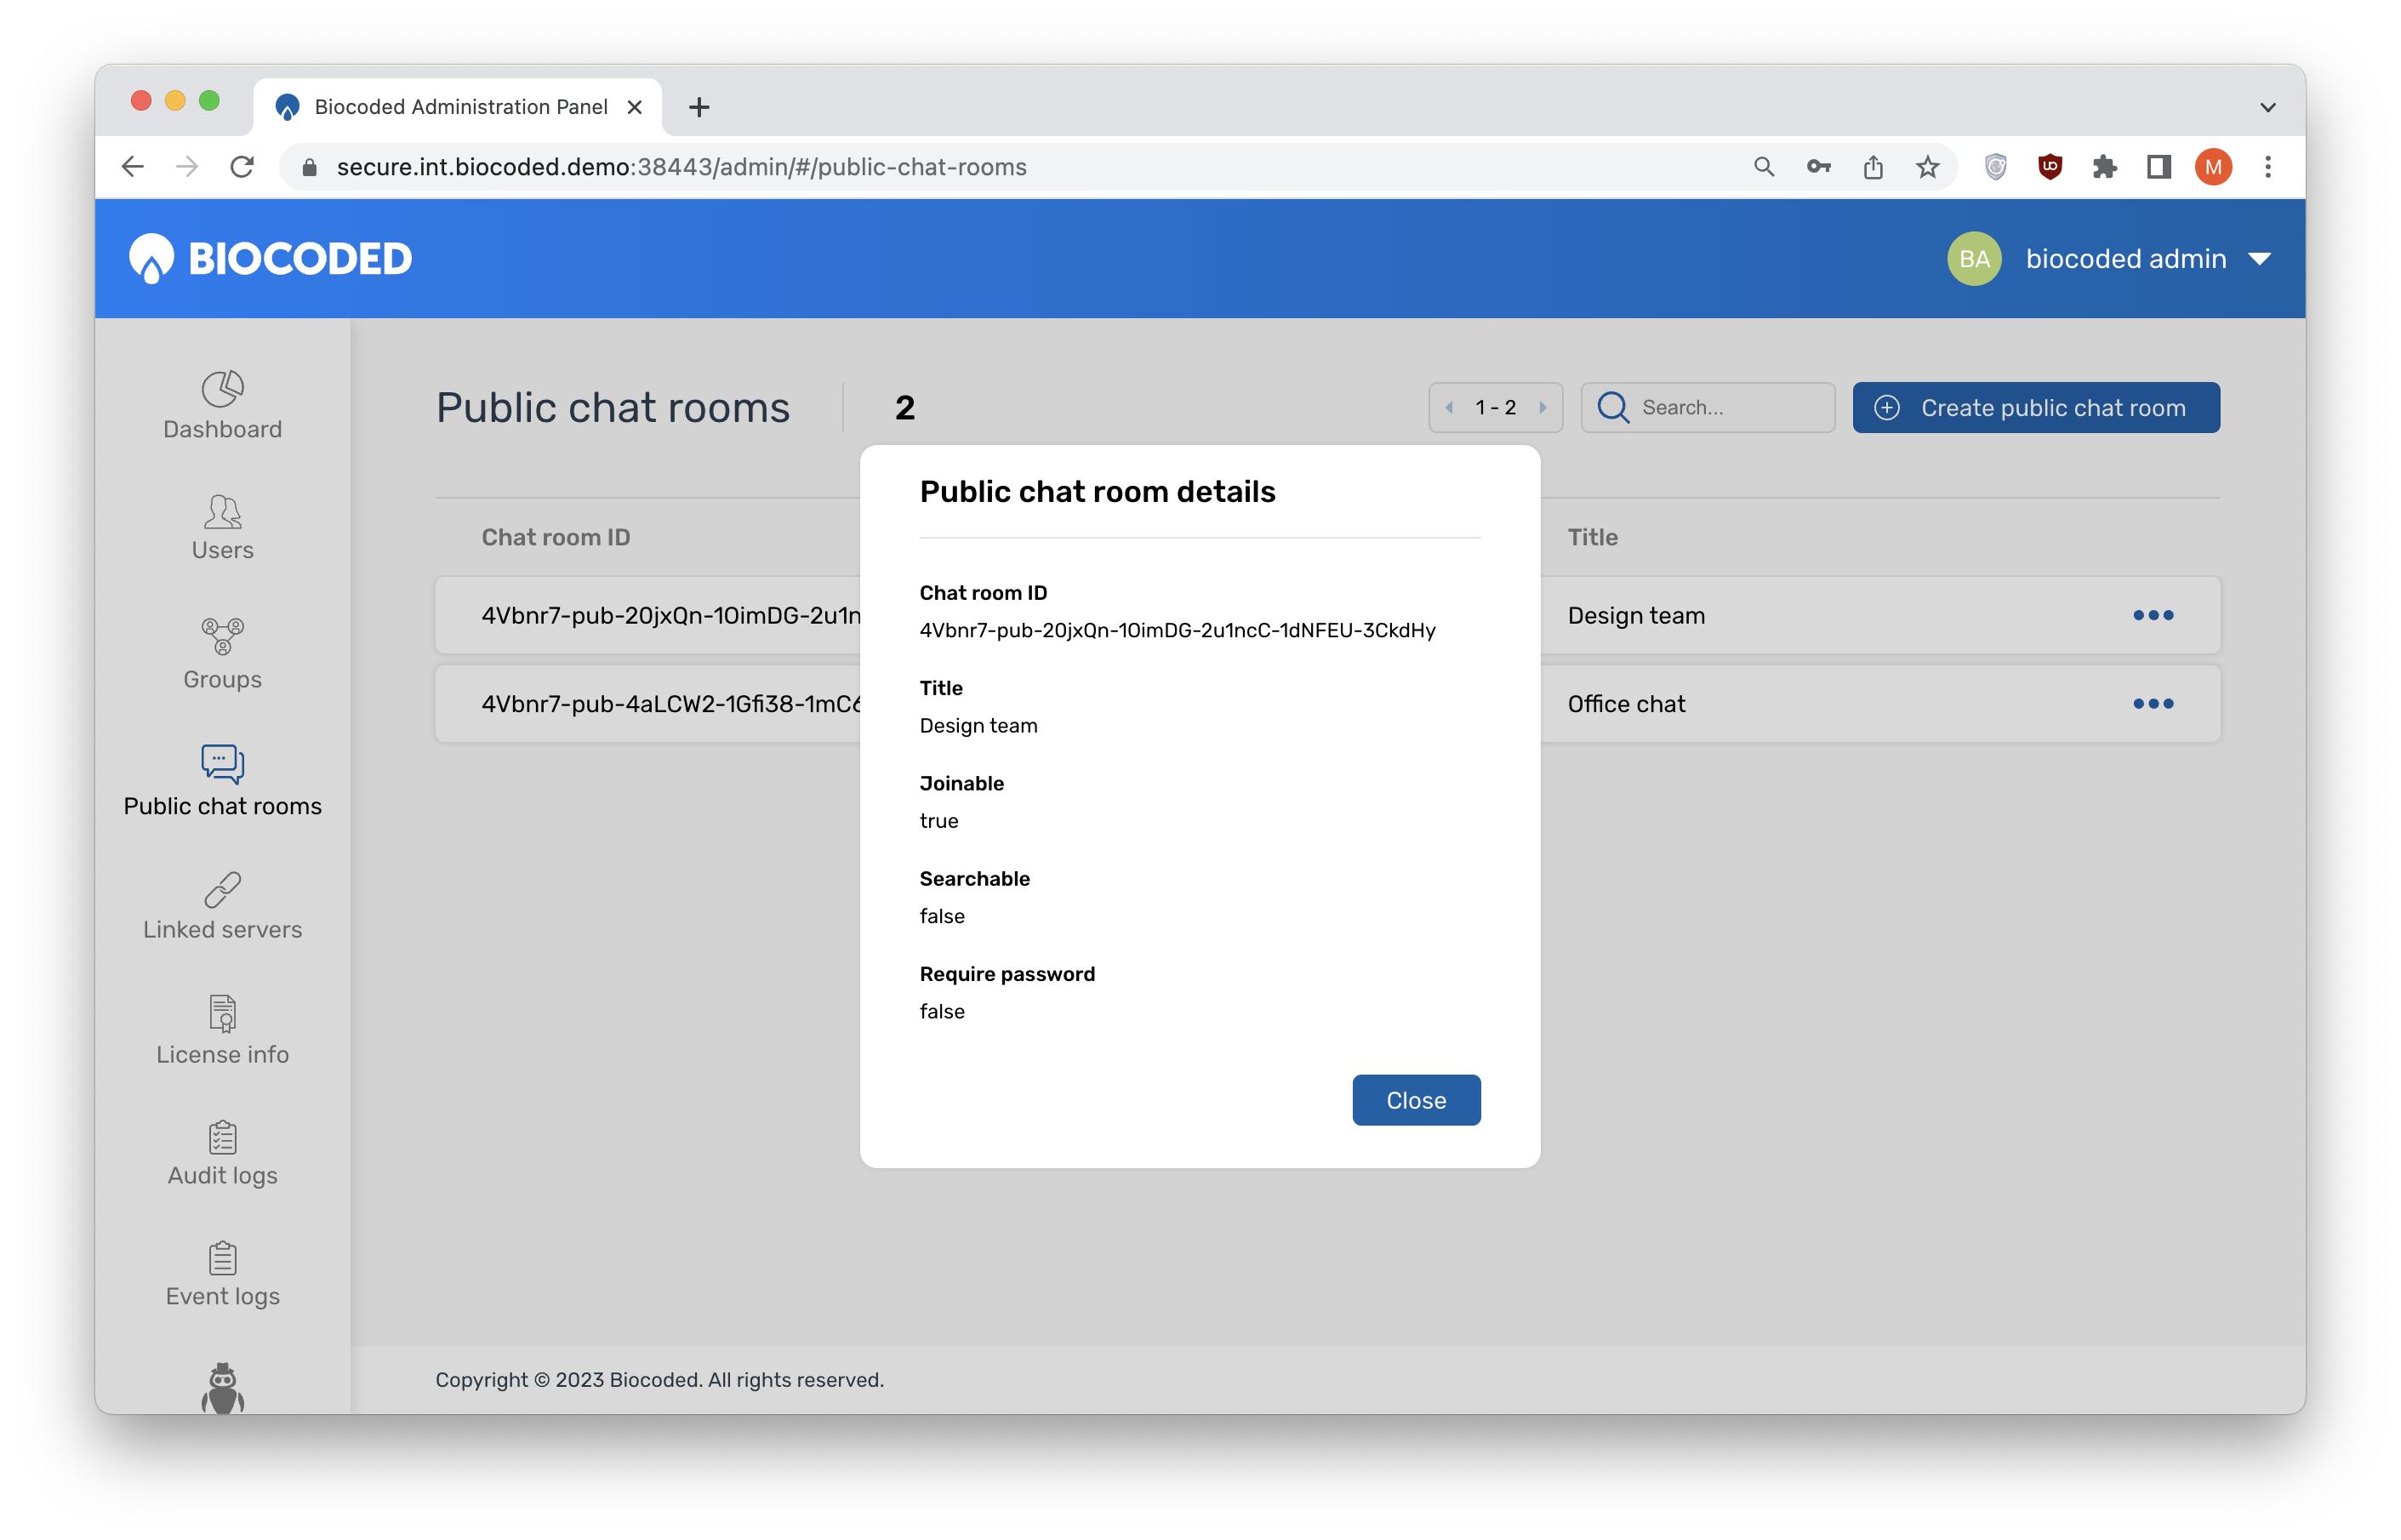
Create a new public chat room
To add a new public chat room, click on "Create public chatroom" and set a name and select an admin from the list by entering a name in the "Search" box. You can also add participants in the same way, but they can also be added at a later time. If you wish to secure the room with a PIN, check the box "Require password". "Searchable" is an option not yet implemented and "Joinable" enables users joining by link.
Managing a room
Clicking on a chat room shows a list of participants and allows their management.
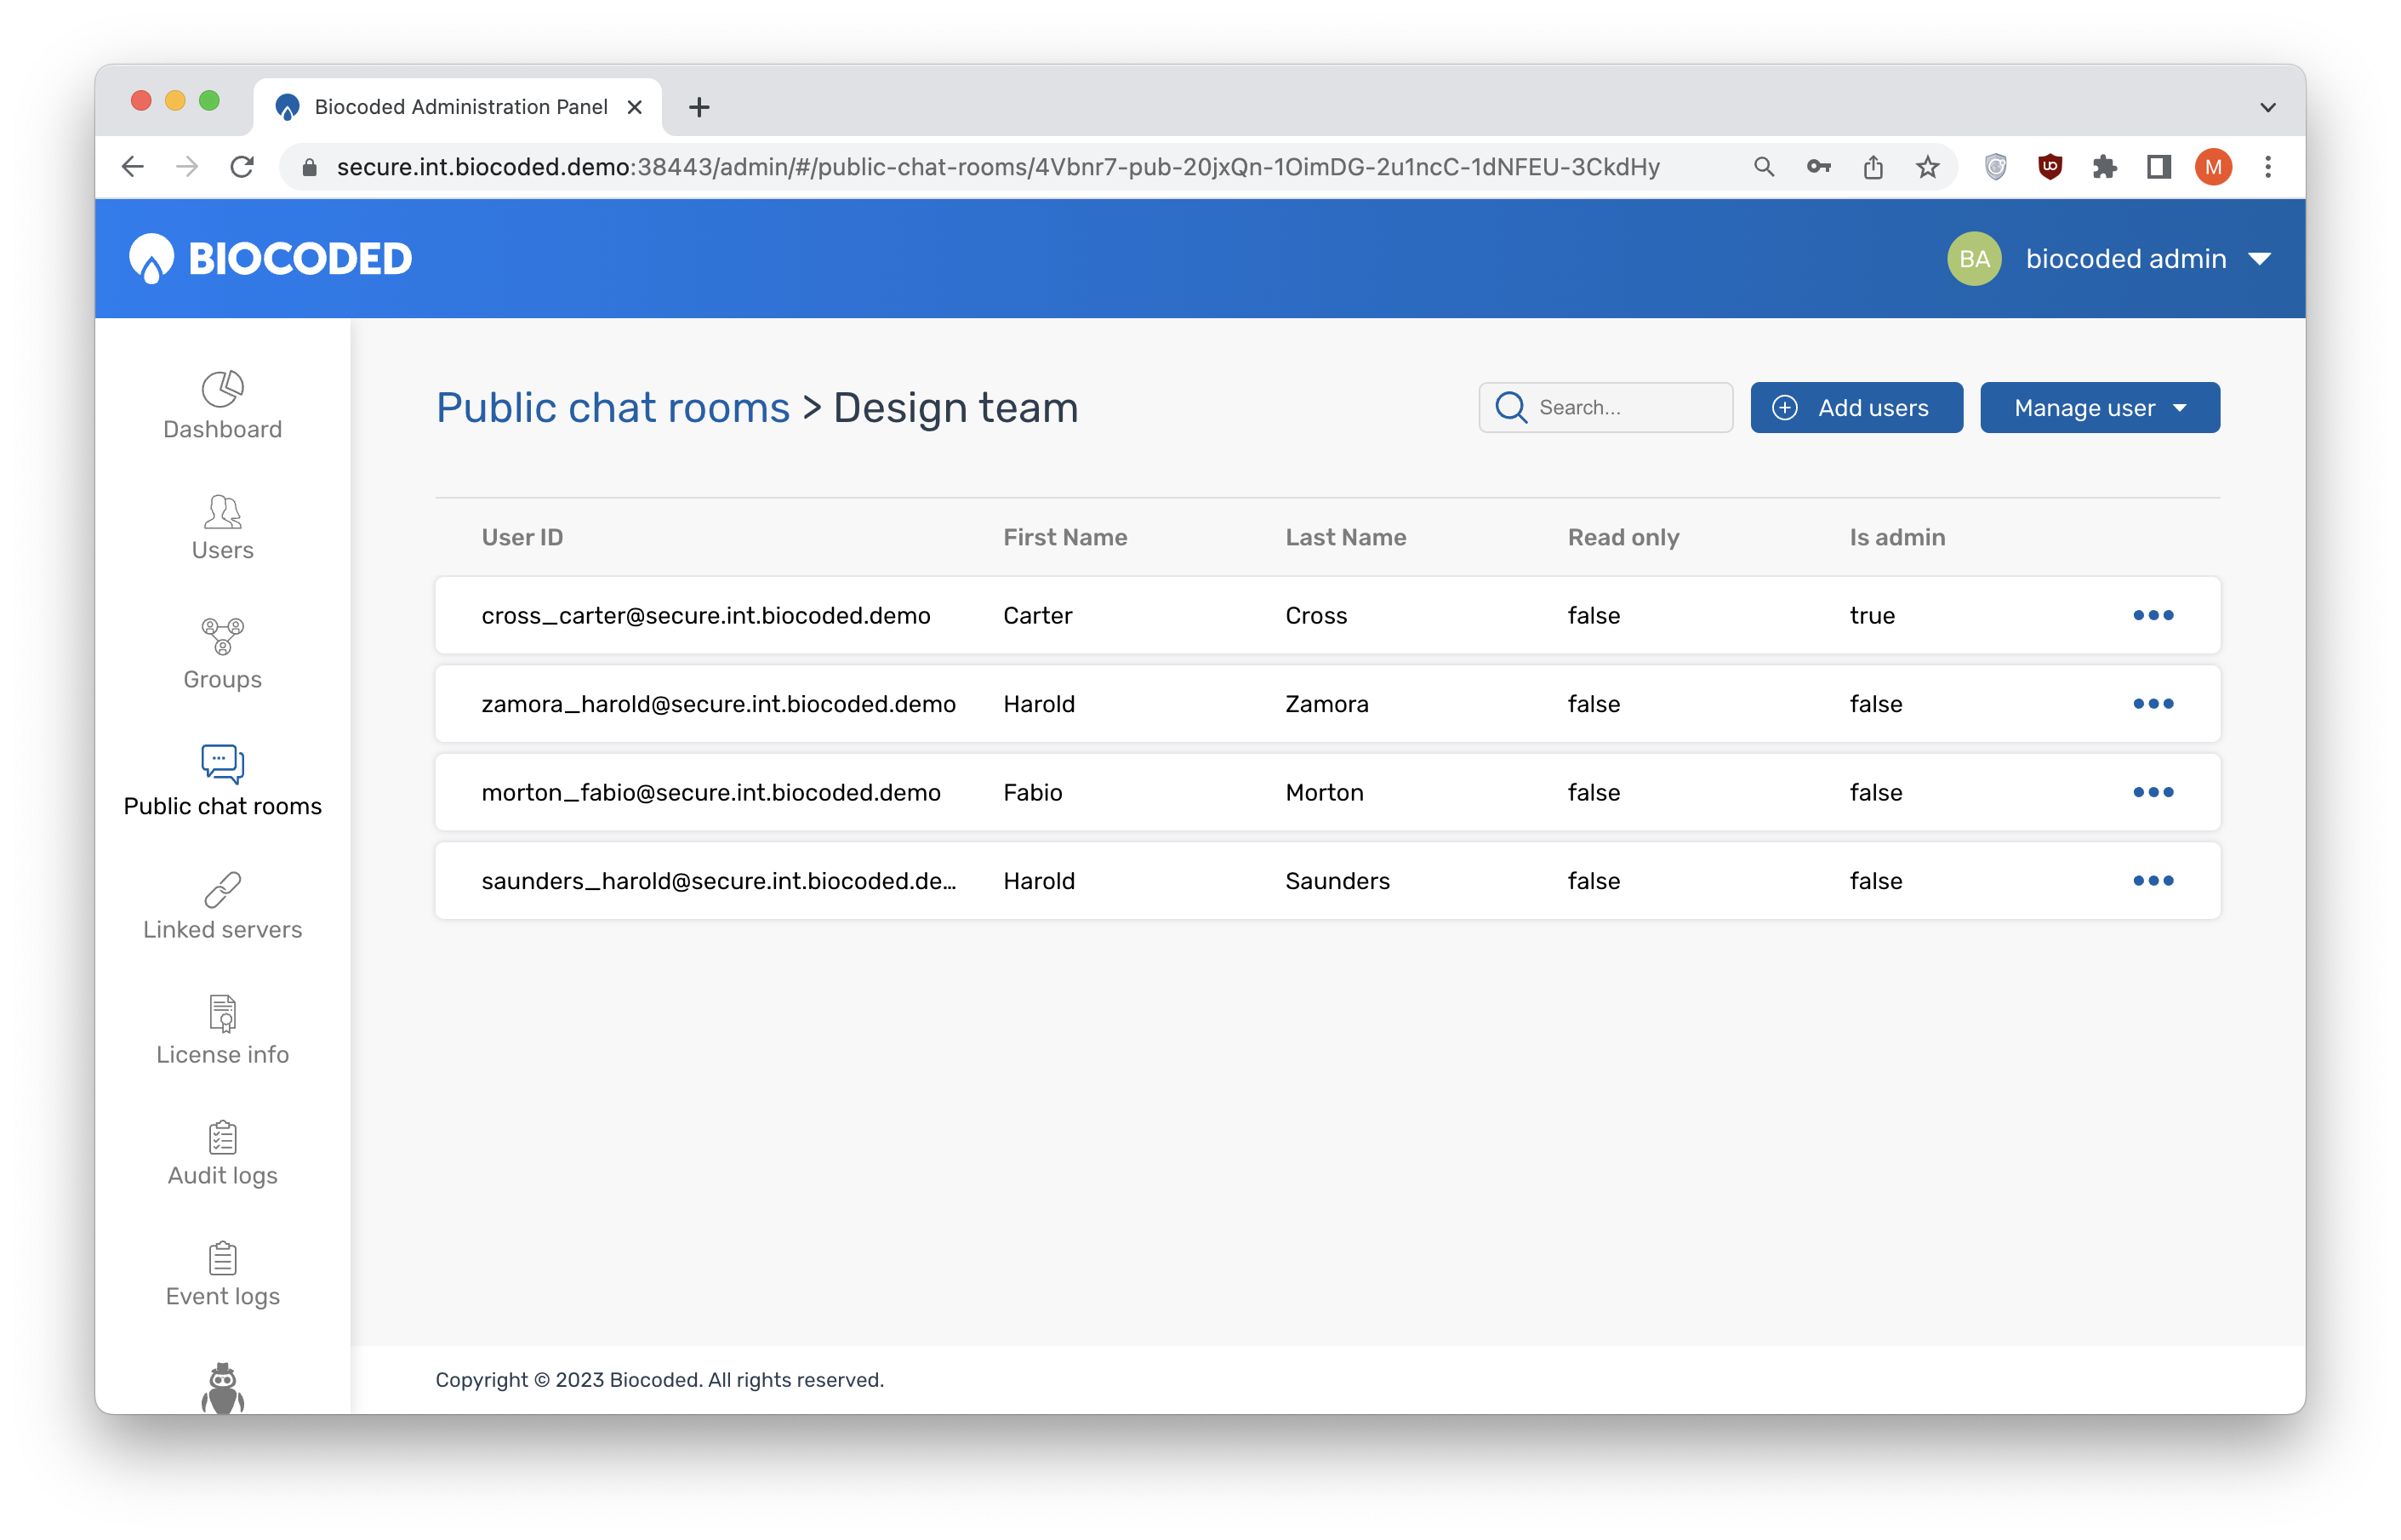
button shows different management options for admins and users. Admin options are "Leave" (confirmation is required to remove this participant from the room) and "Unset admin", which turns the admin into a user.
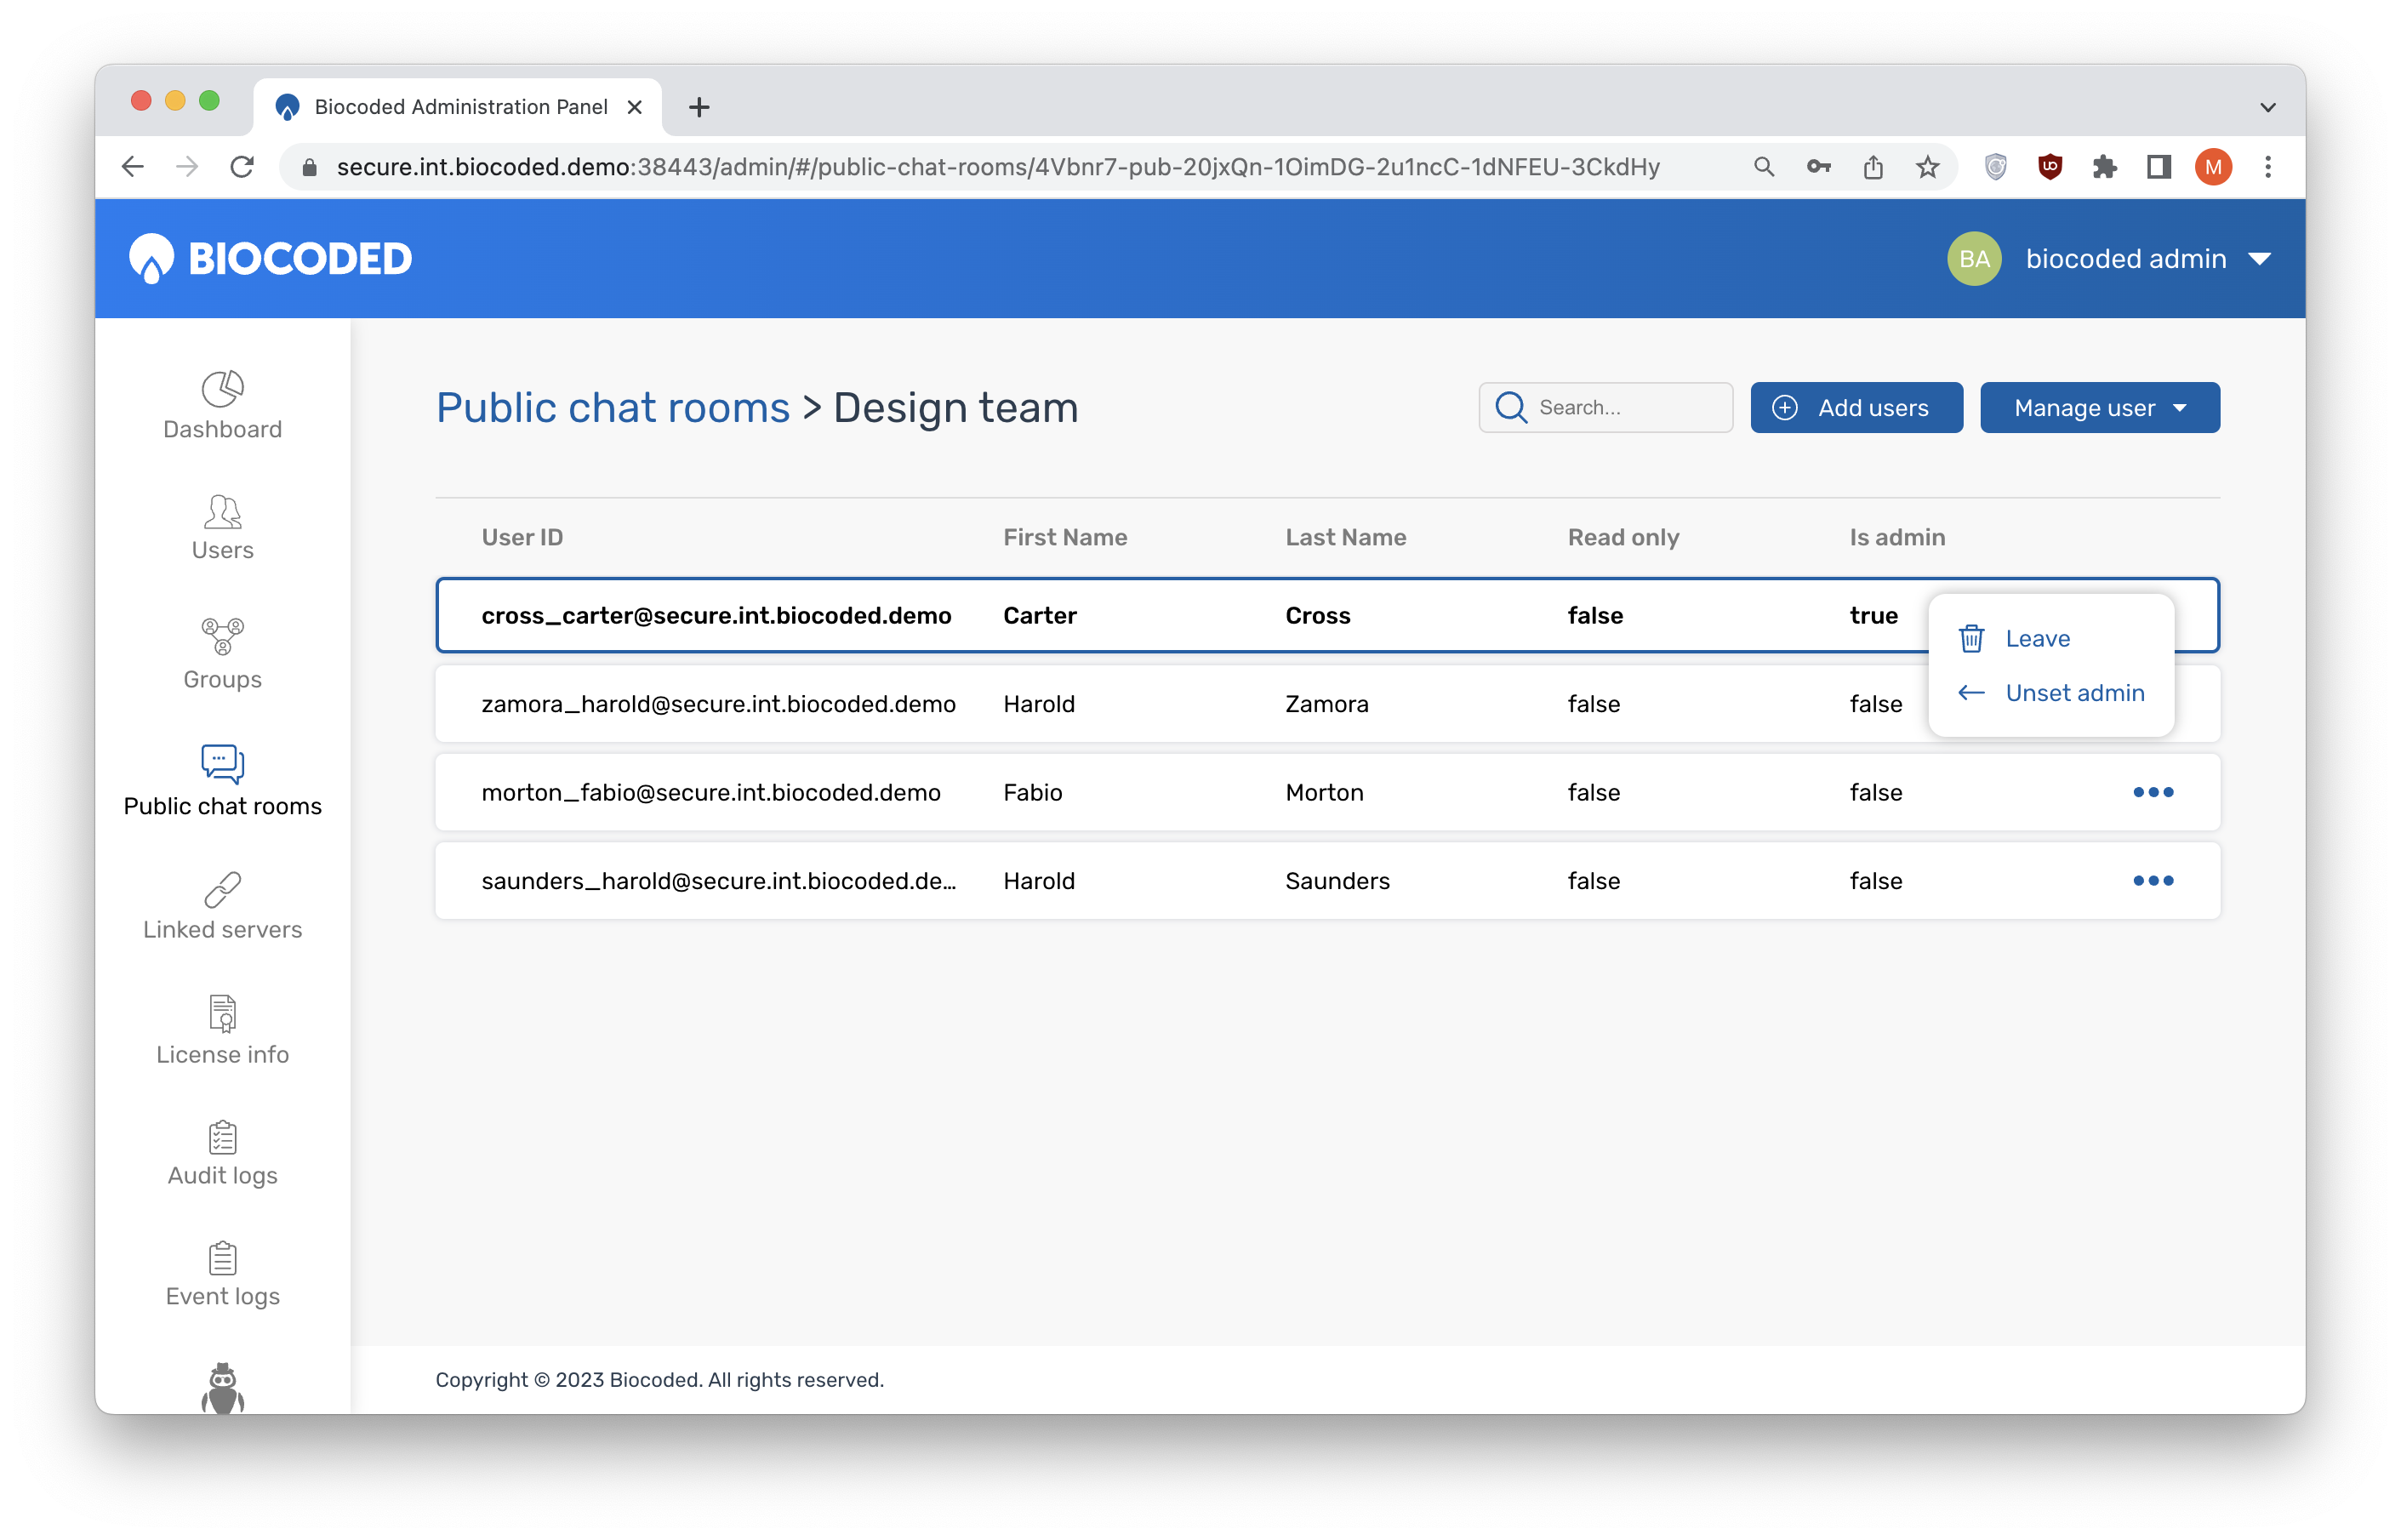
The options for users are "Leave" (with confirmation), "Set as admin", "Block user", which removes the user from this room and disables them from joining again, and "Set read only" or "User can write", depending on the current setting. Read-only users can only read messages, but can not send them. Admins can do both, but they can also manage the room participants and details.
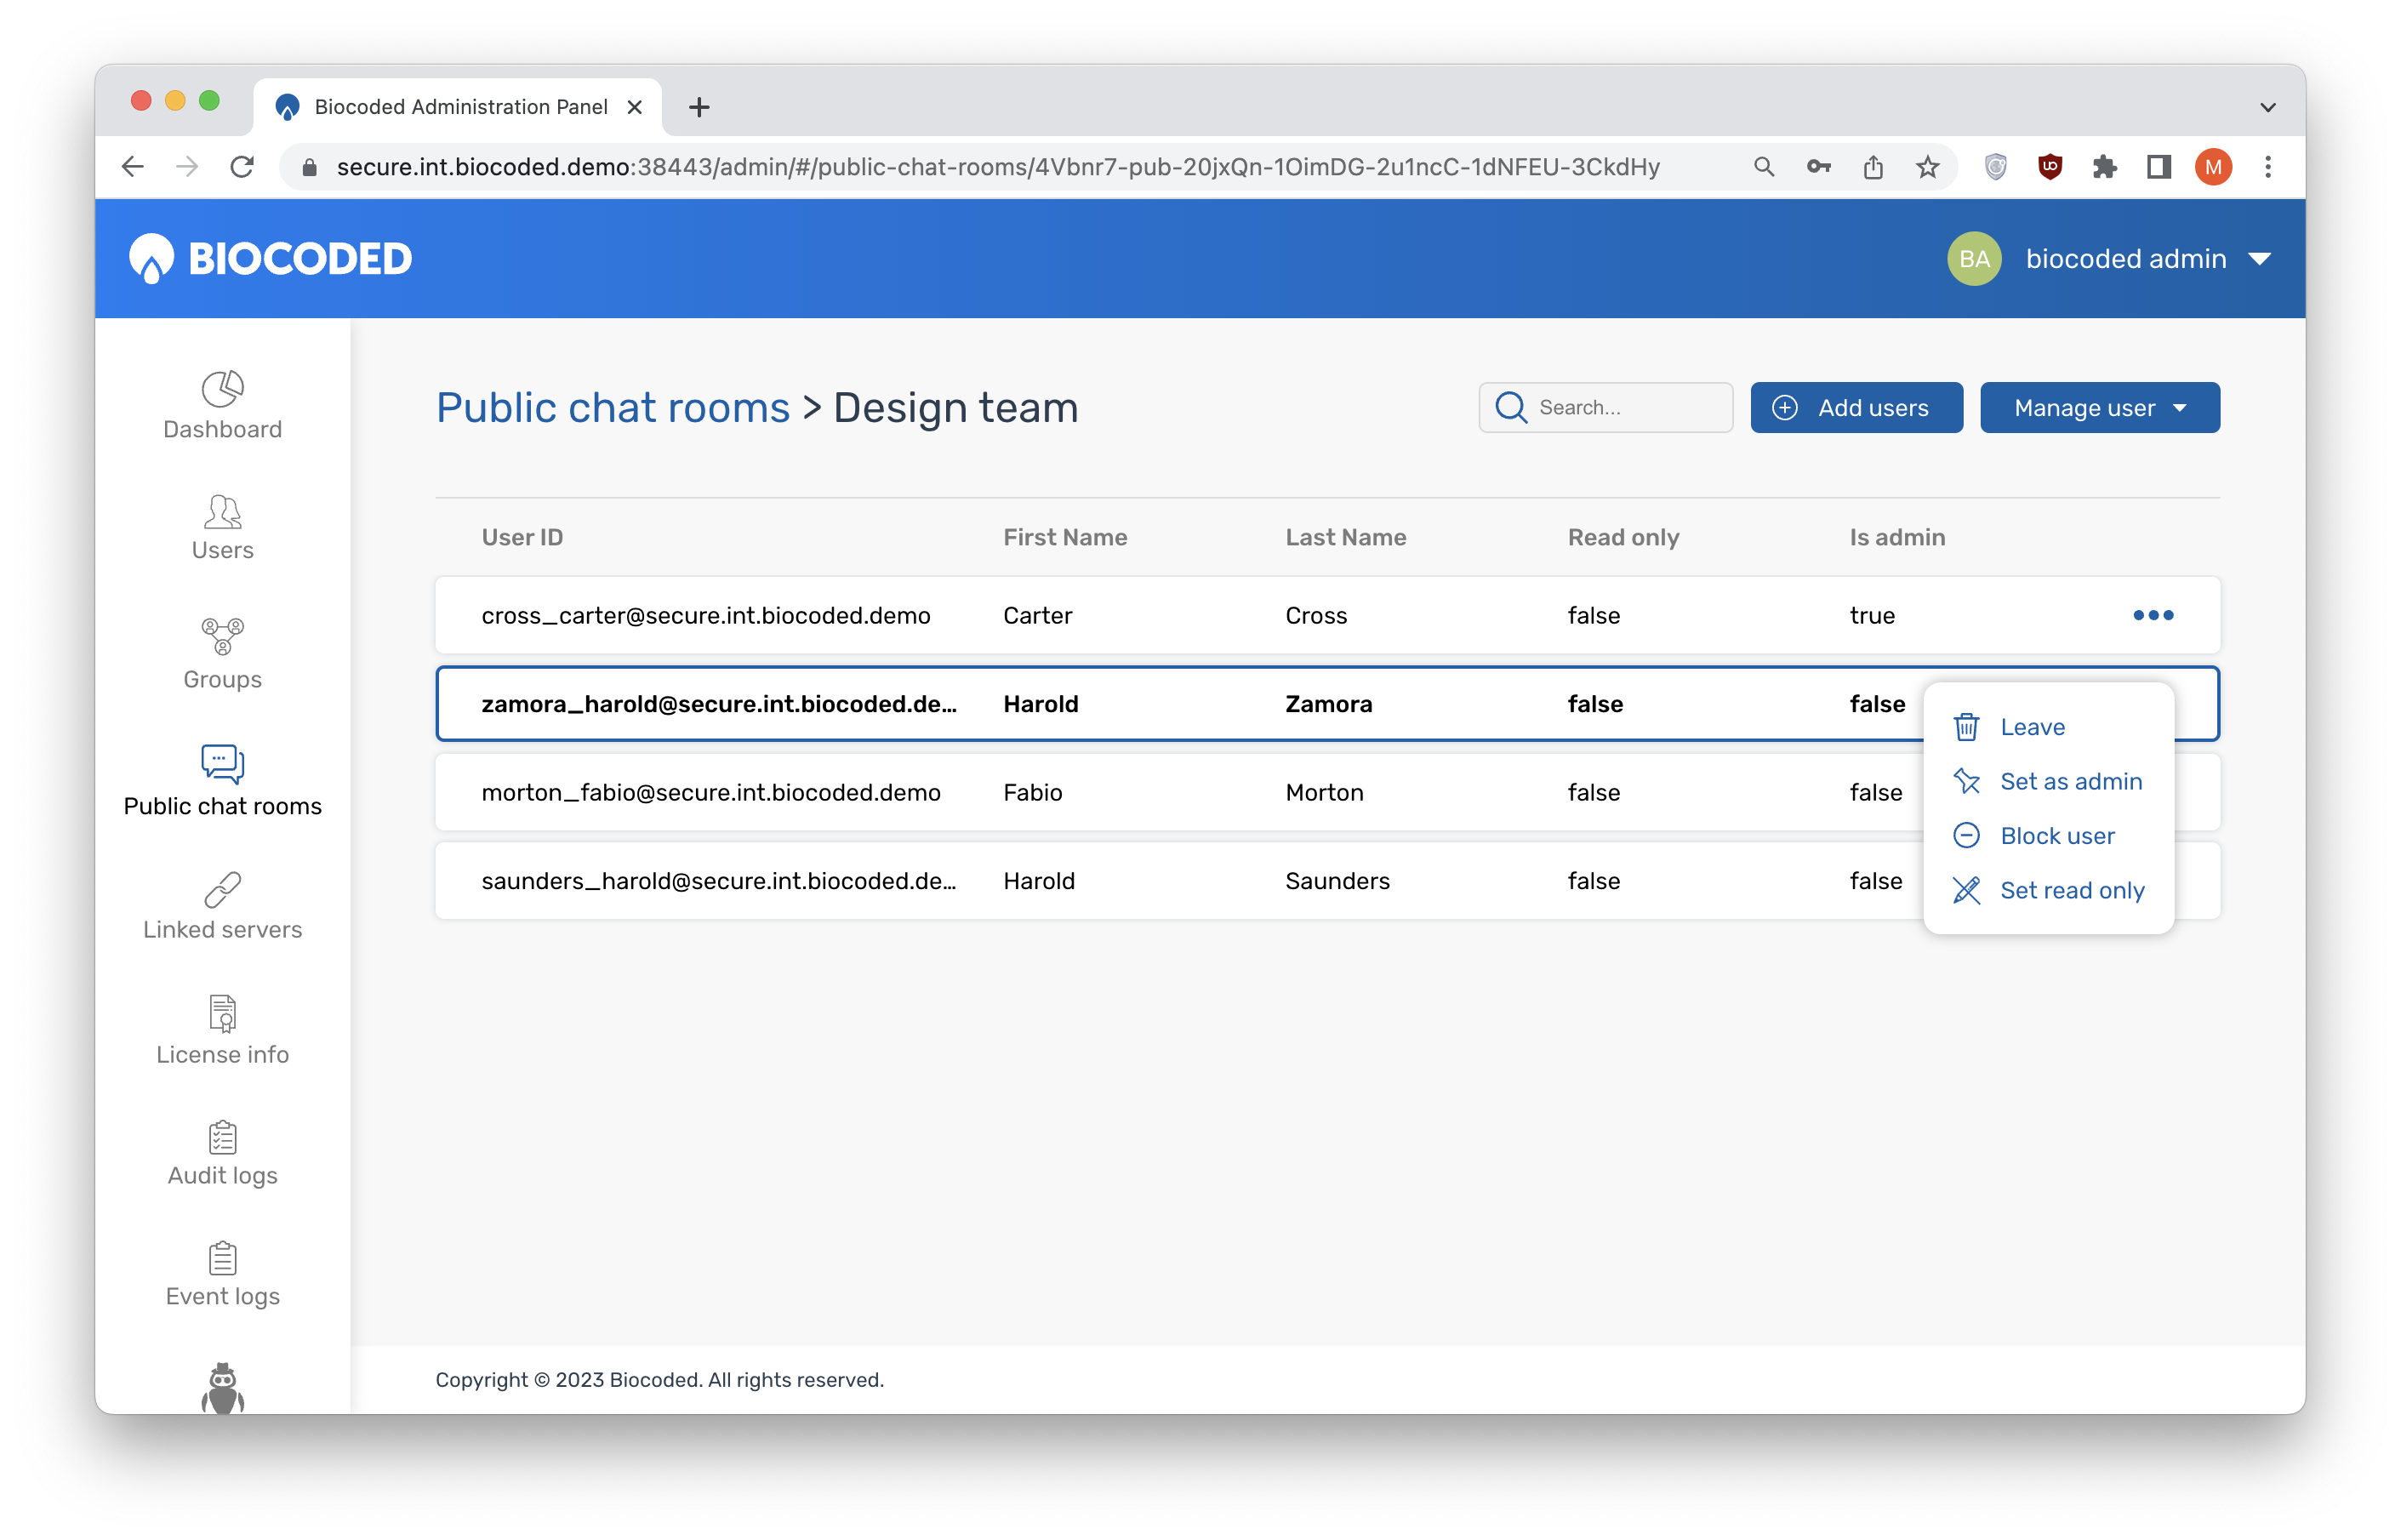
Selecting "Manage users" offers:
- Add users (you search for users and add them to this room),
- More info (shows room details),
- Show block list (shows a list of blocked users with the option to "Unblock user", hidden under and
- Edit, which opens a popup where the chat room name and other parameters can be changed.
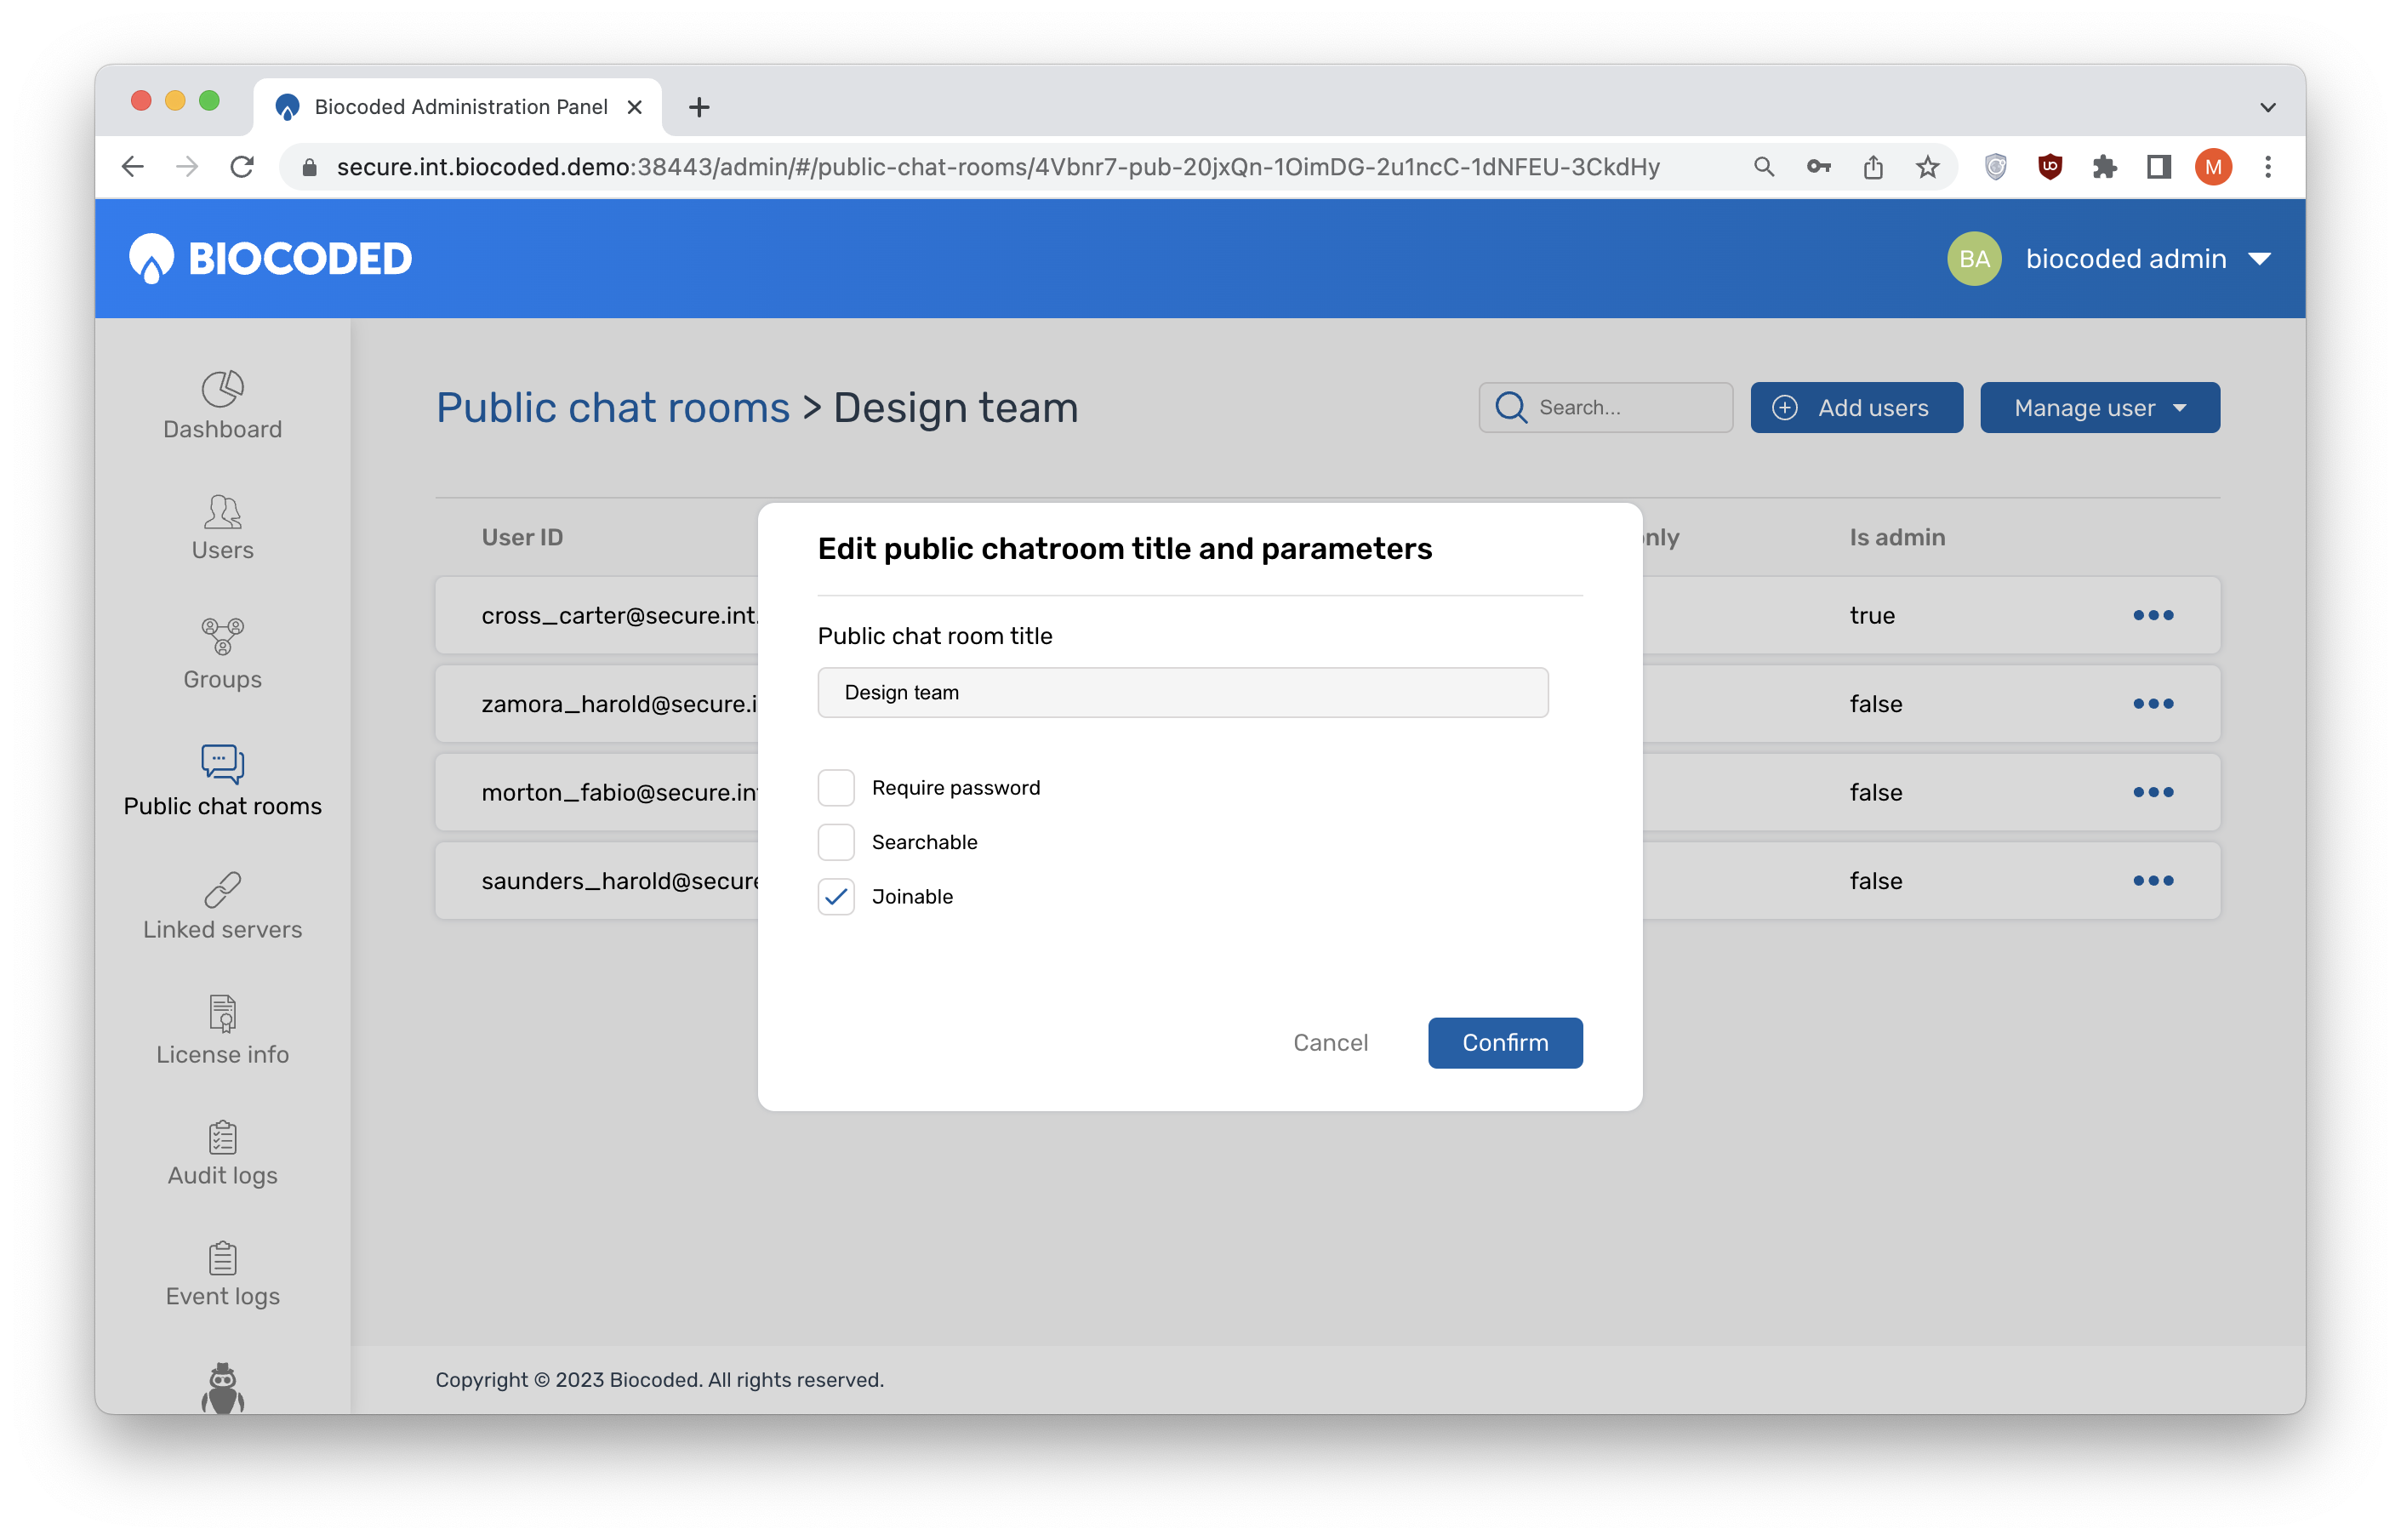
Editing a room
Change the room name and other parameters like "Require password", "Searchable" and "Joinable".
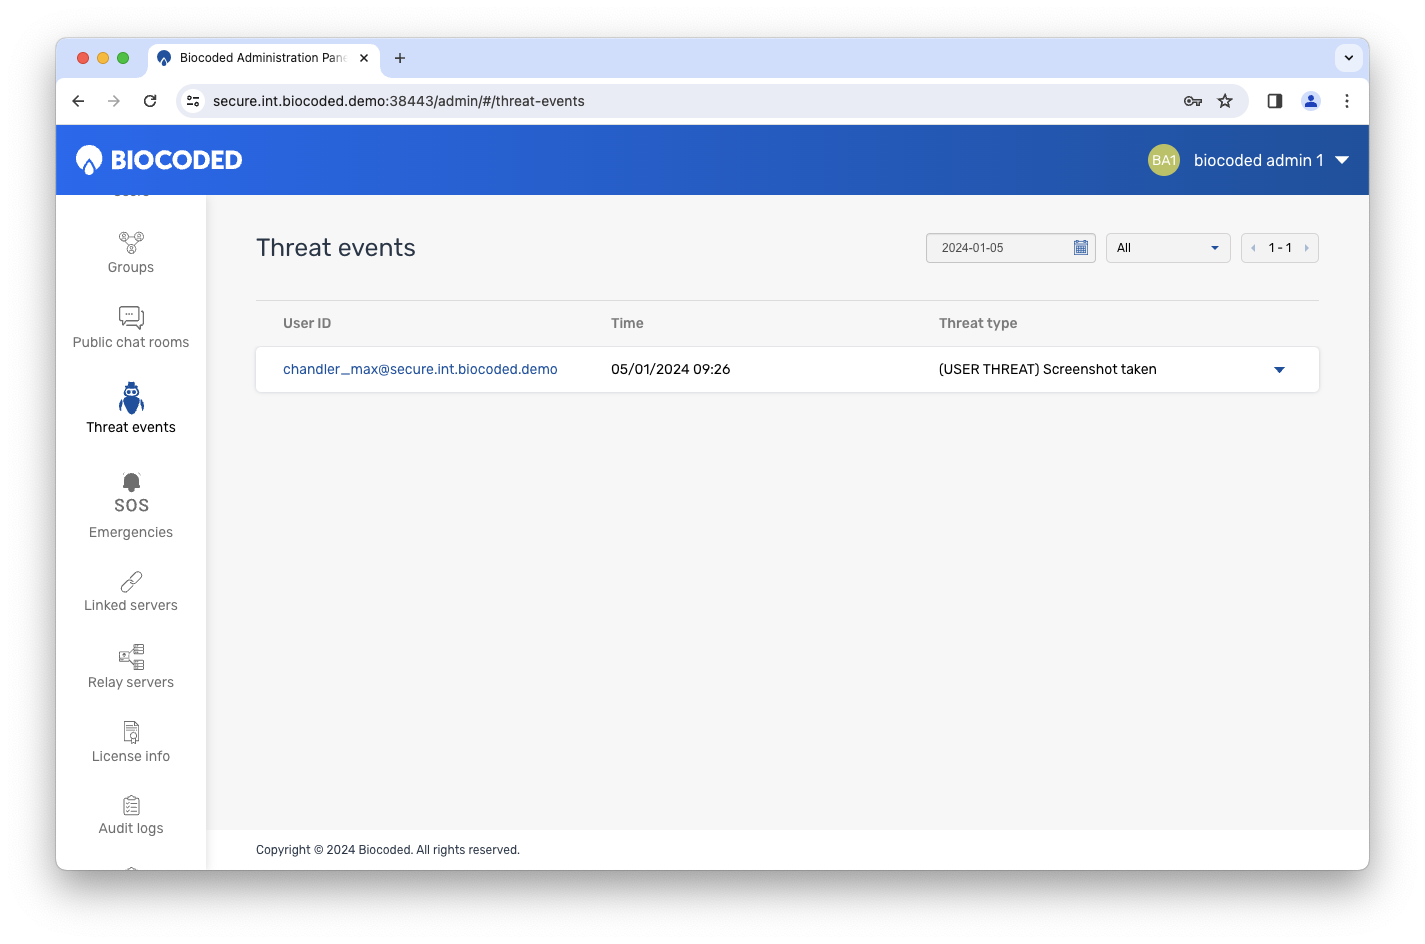
Threat events
The next tab named Threat events shows a list of all threat events that occurred on this server, like someone using a rooted device to log in or user taking a screenshot of a chat. They can be viewed by selecting a date range.
Emergencies
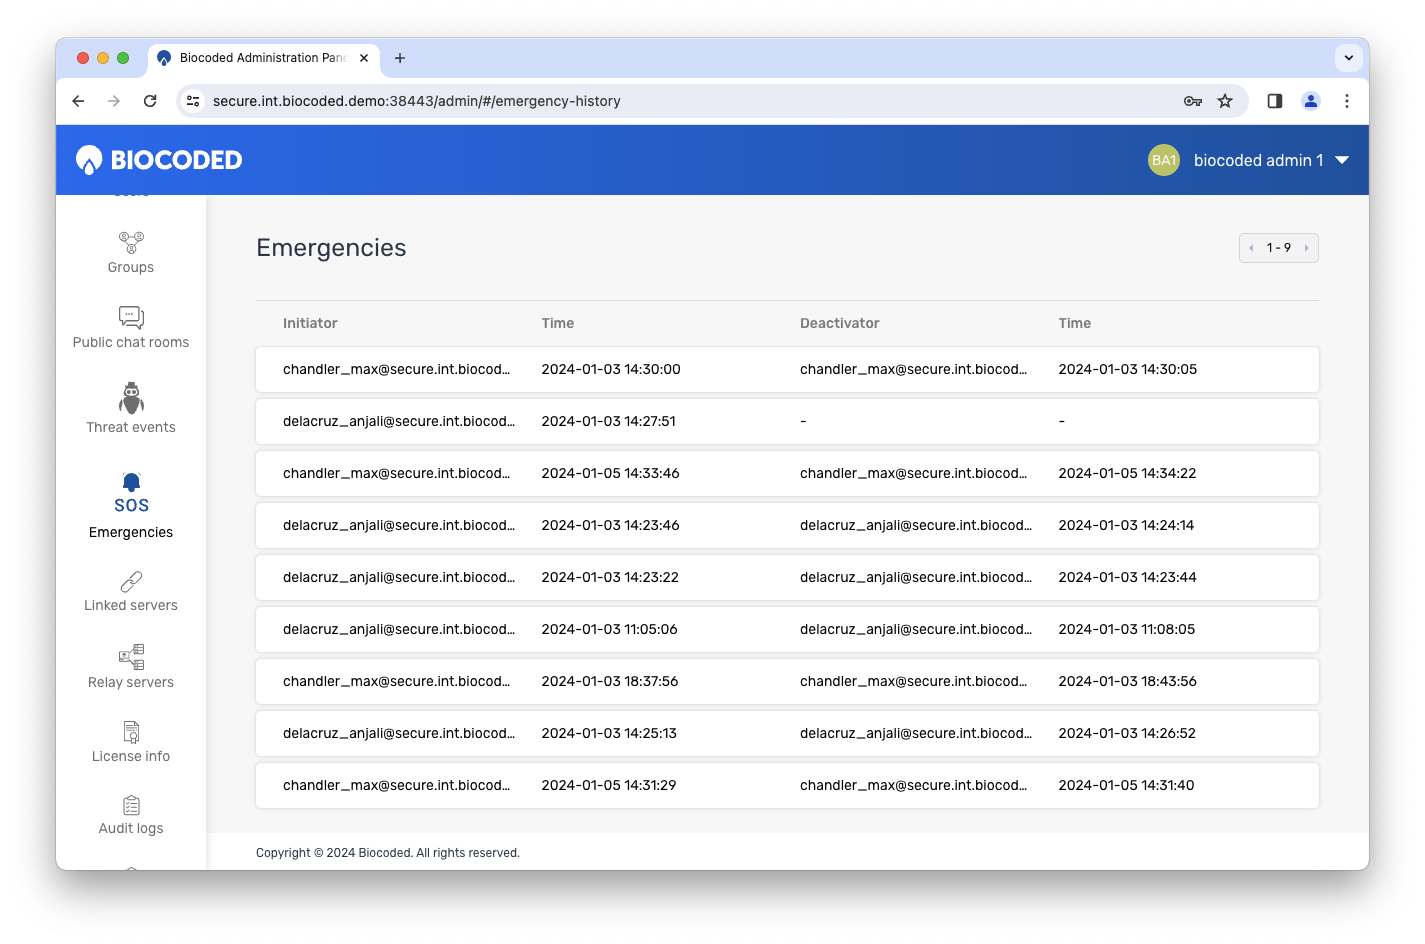
Biocoded users with emergency contacts assigned can trigger emergency signal broadcasts, which can be viewed in "Emergencies" tab. They are listed with initiator ID with timestamp and deactivator ID with timestamp.
Linked servers
Linked servers tab shows a list of other servers that this server can communicate with.
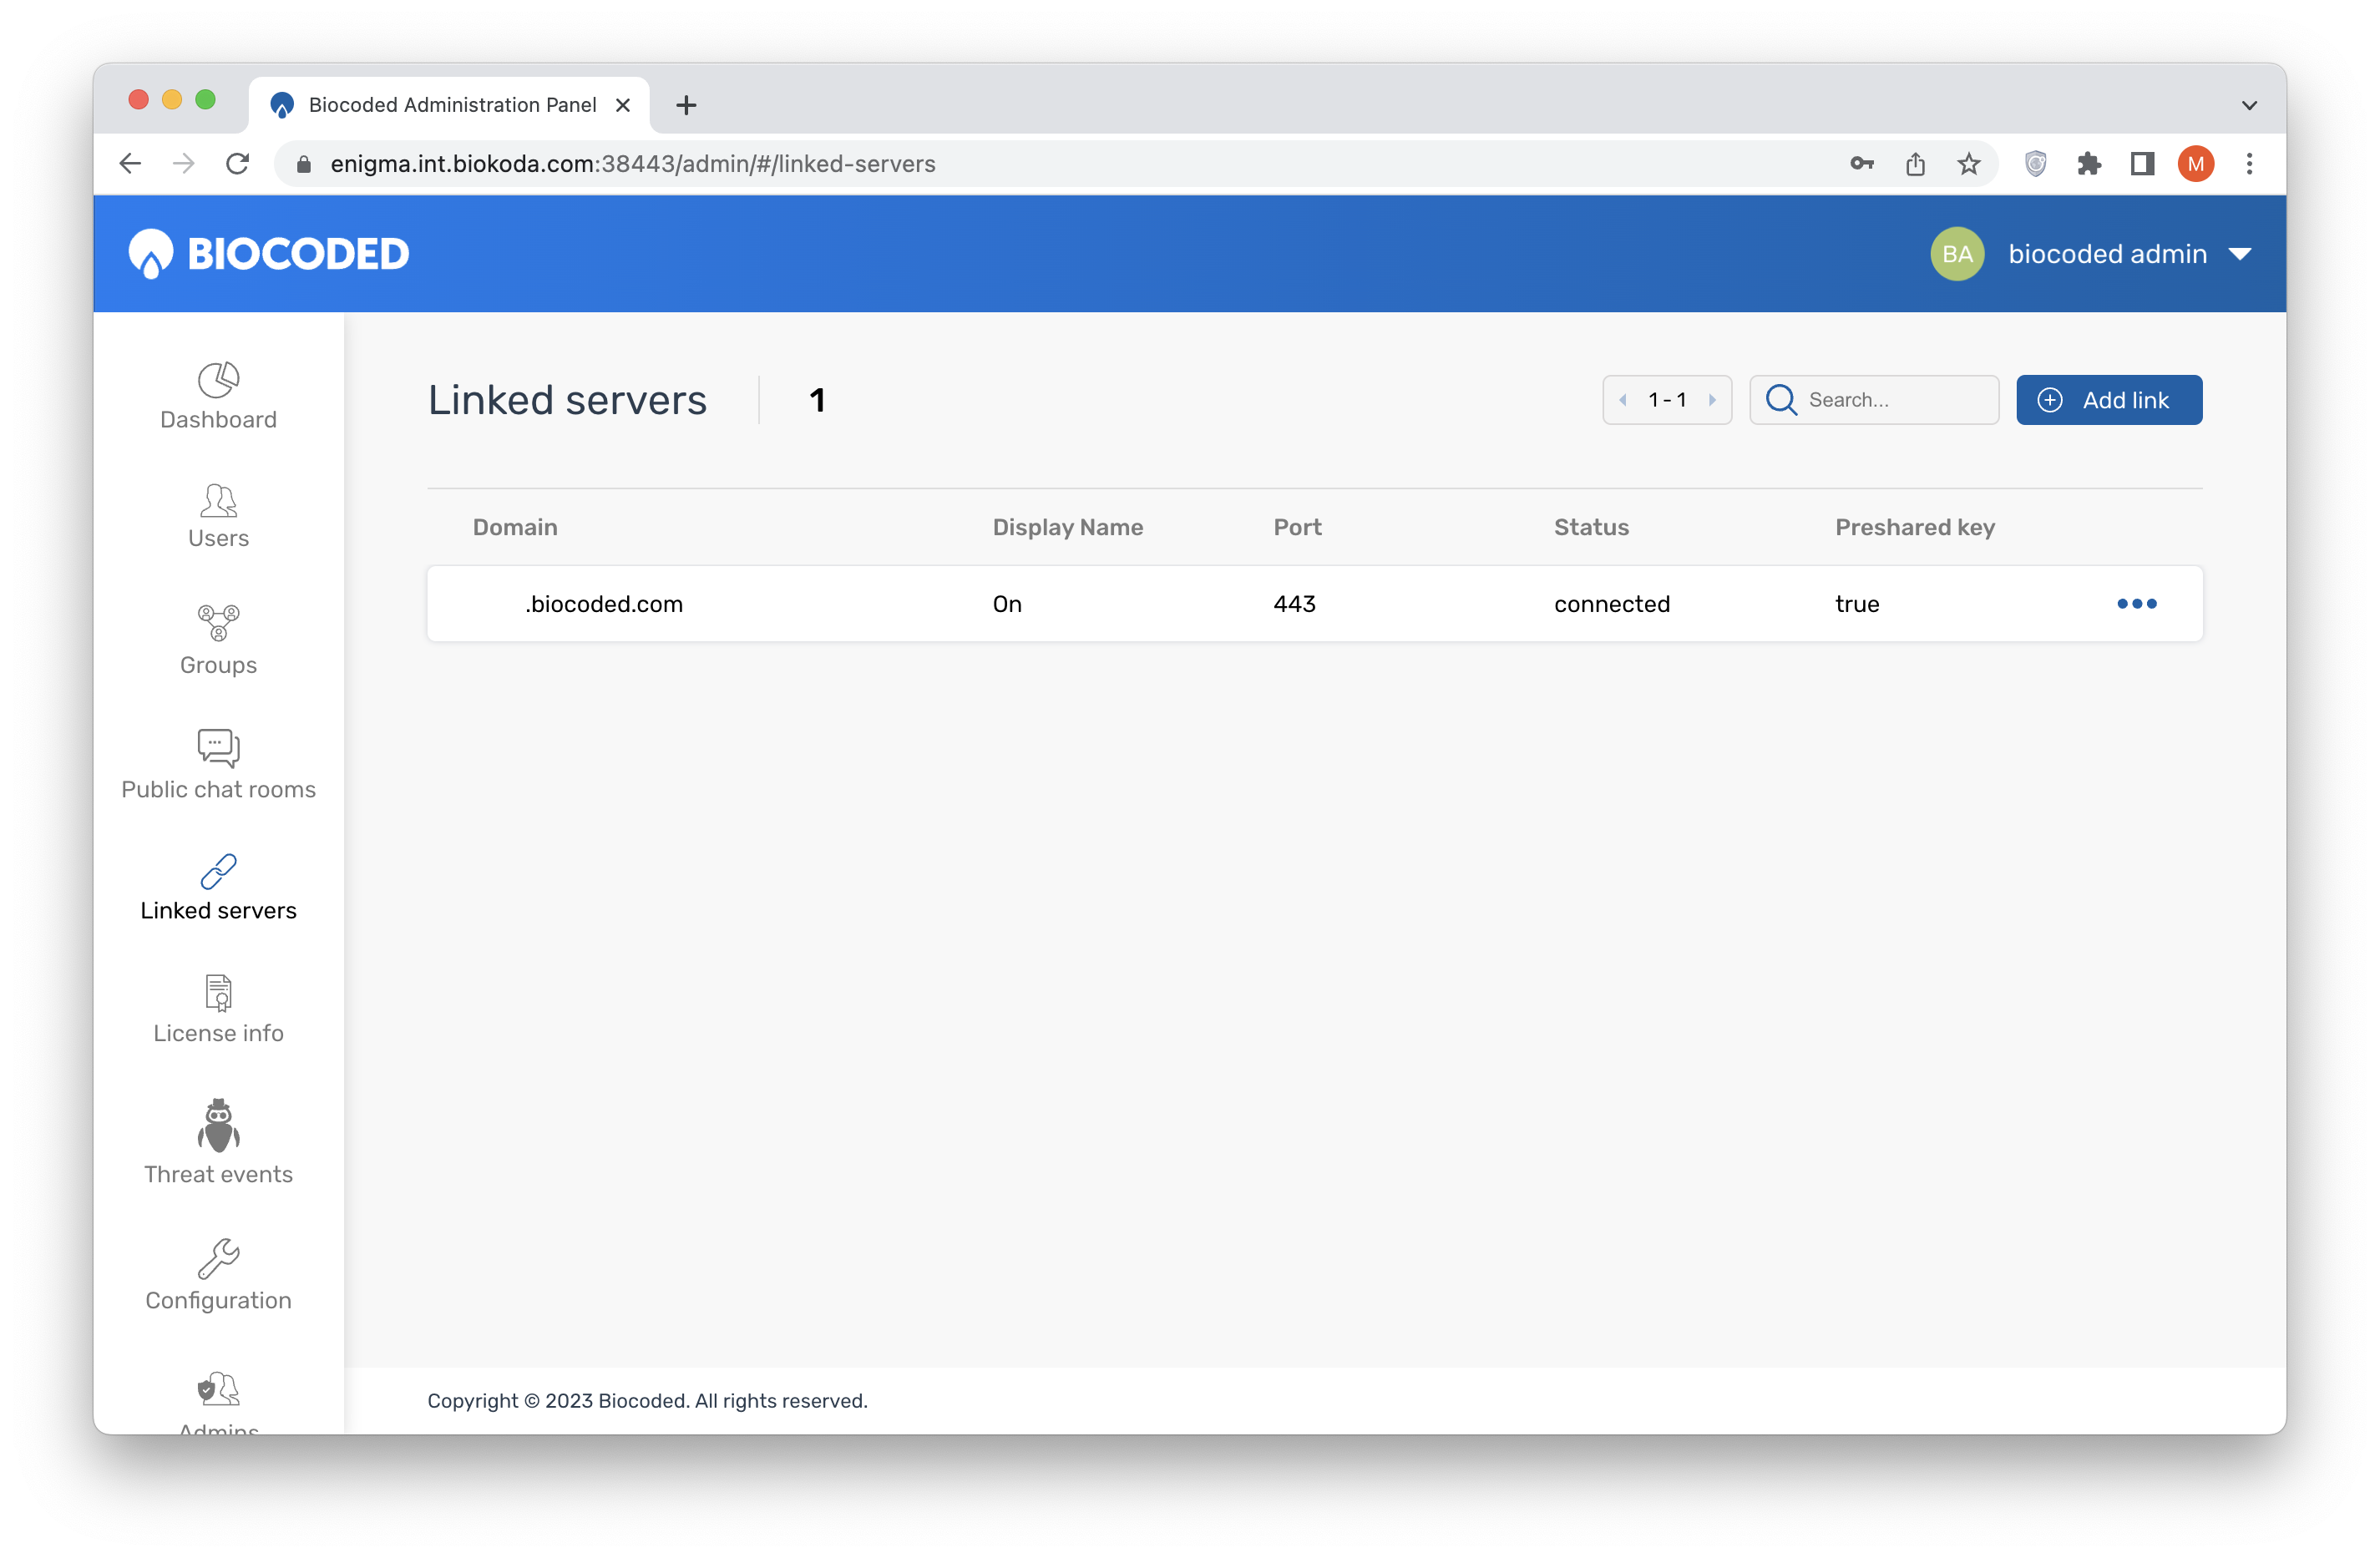
Add a new link by clicking on "Add link". You will have to enter a valid URL and a port.
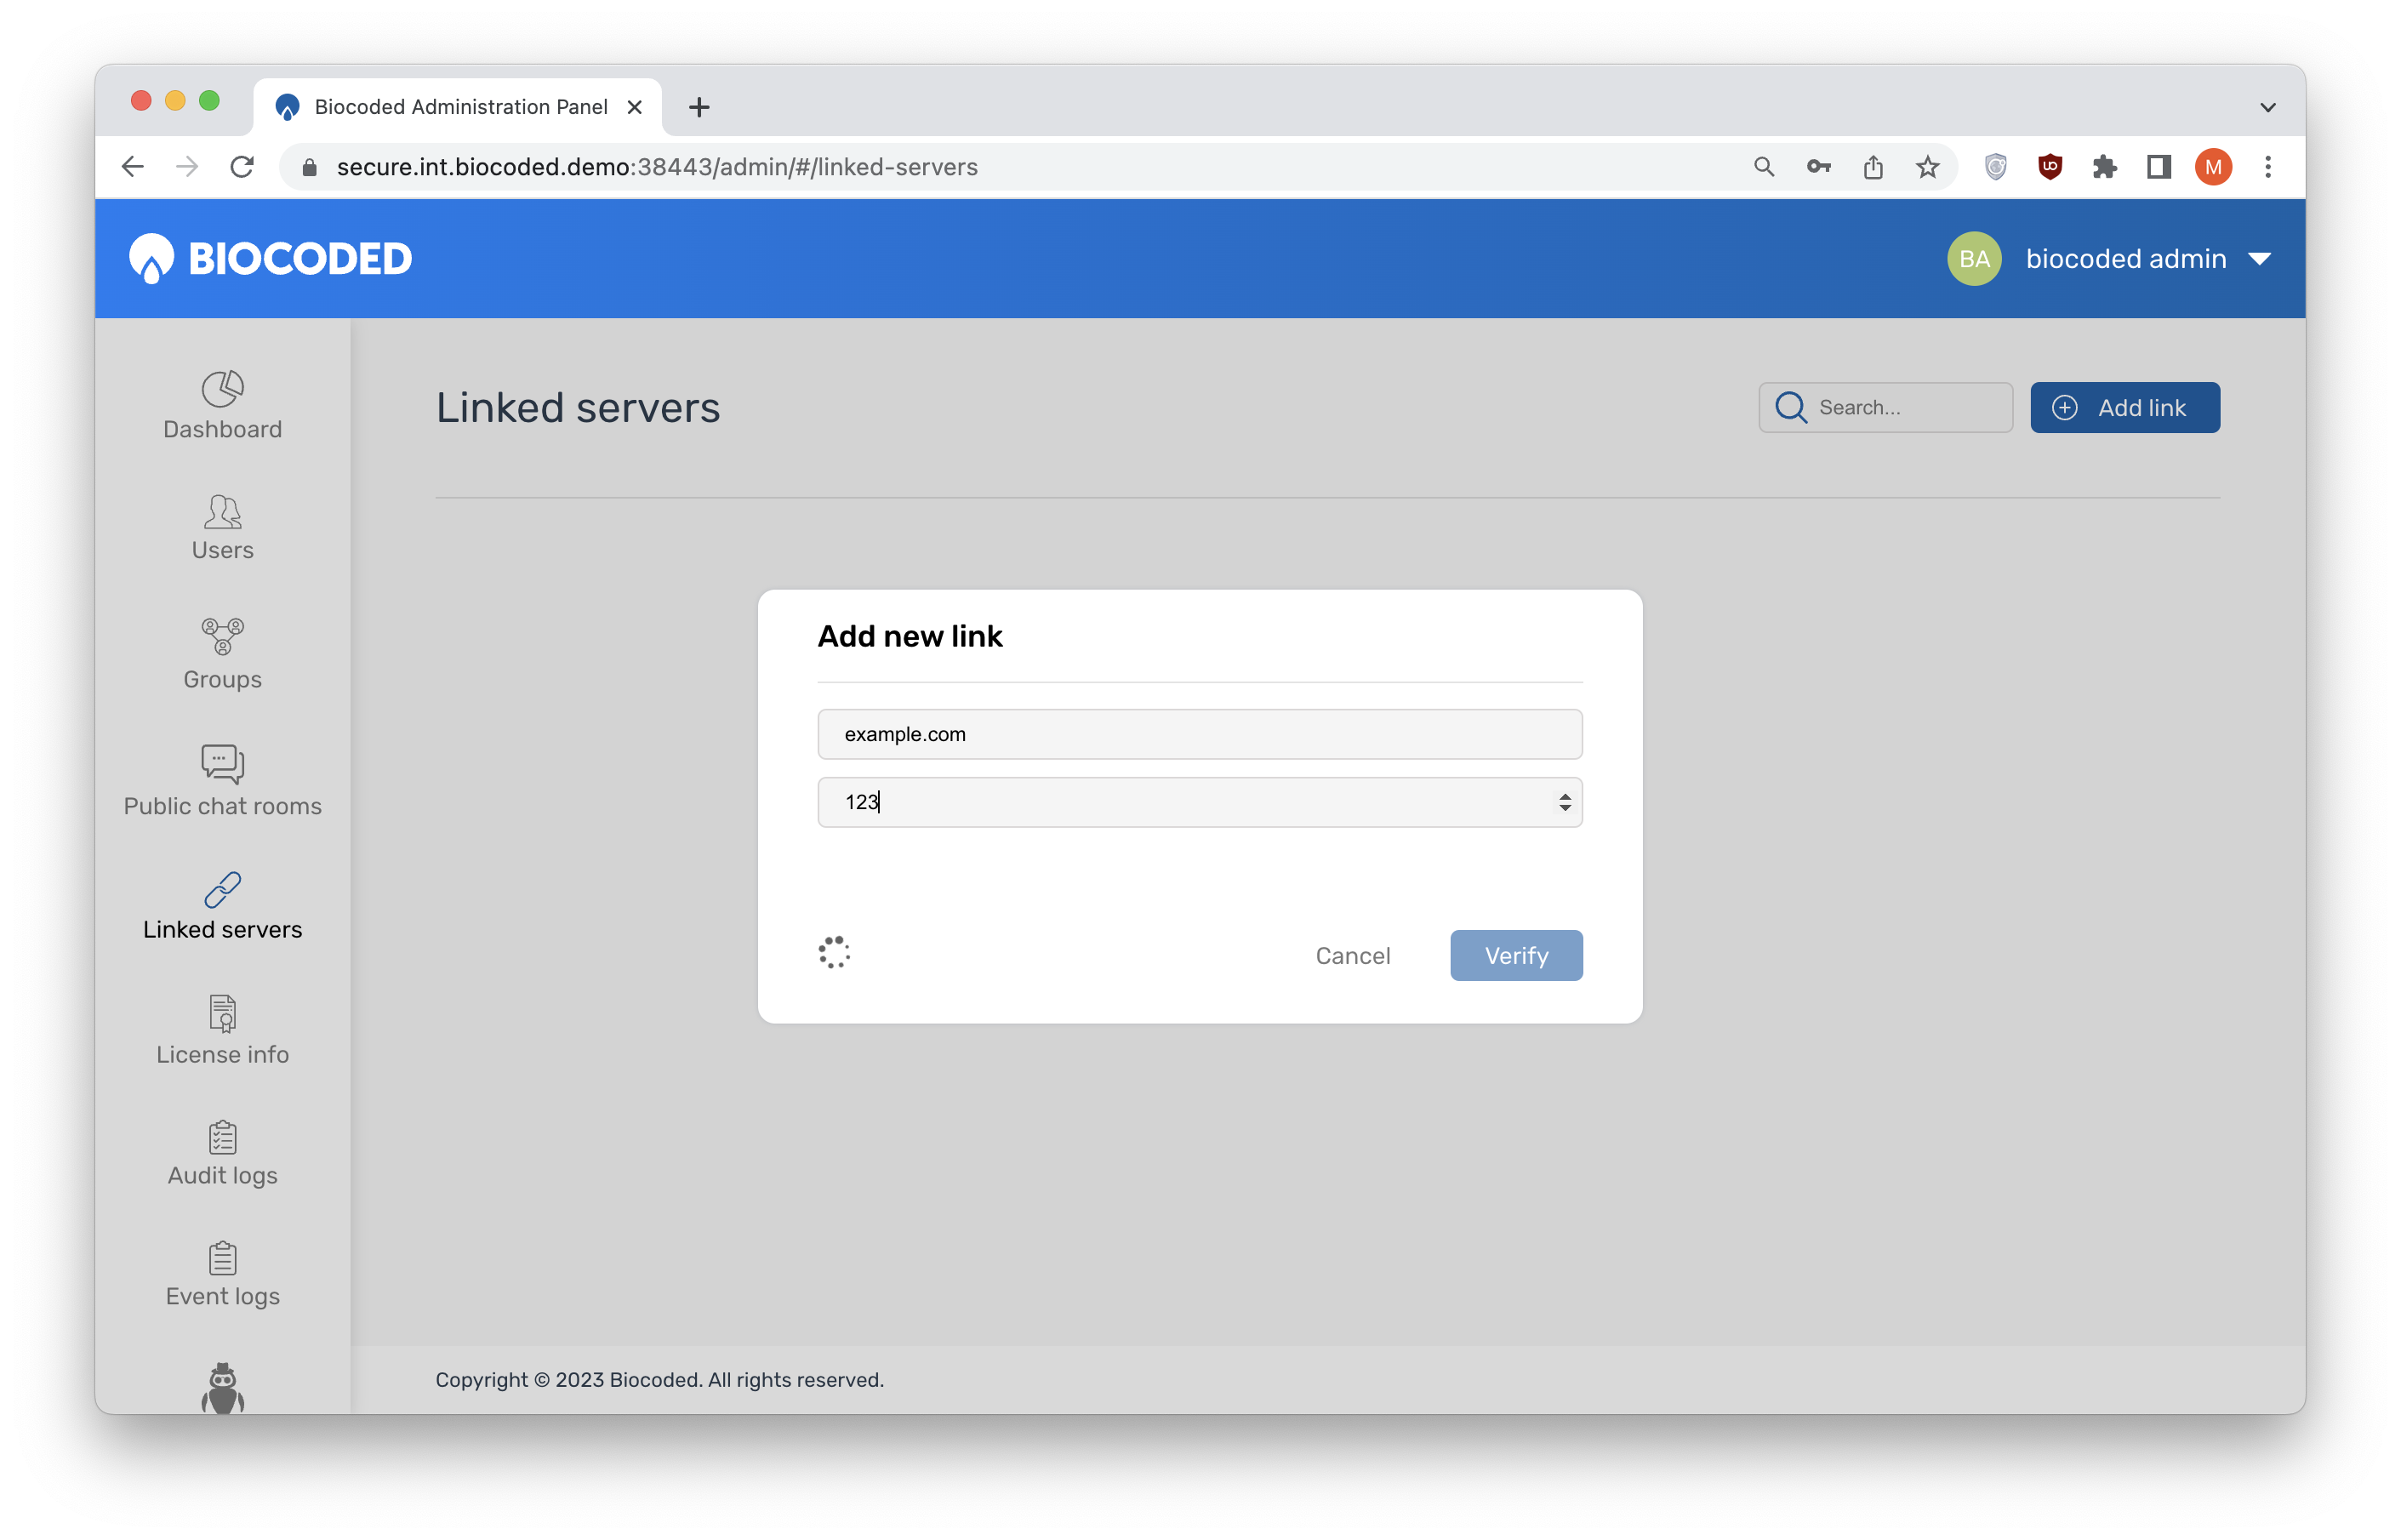
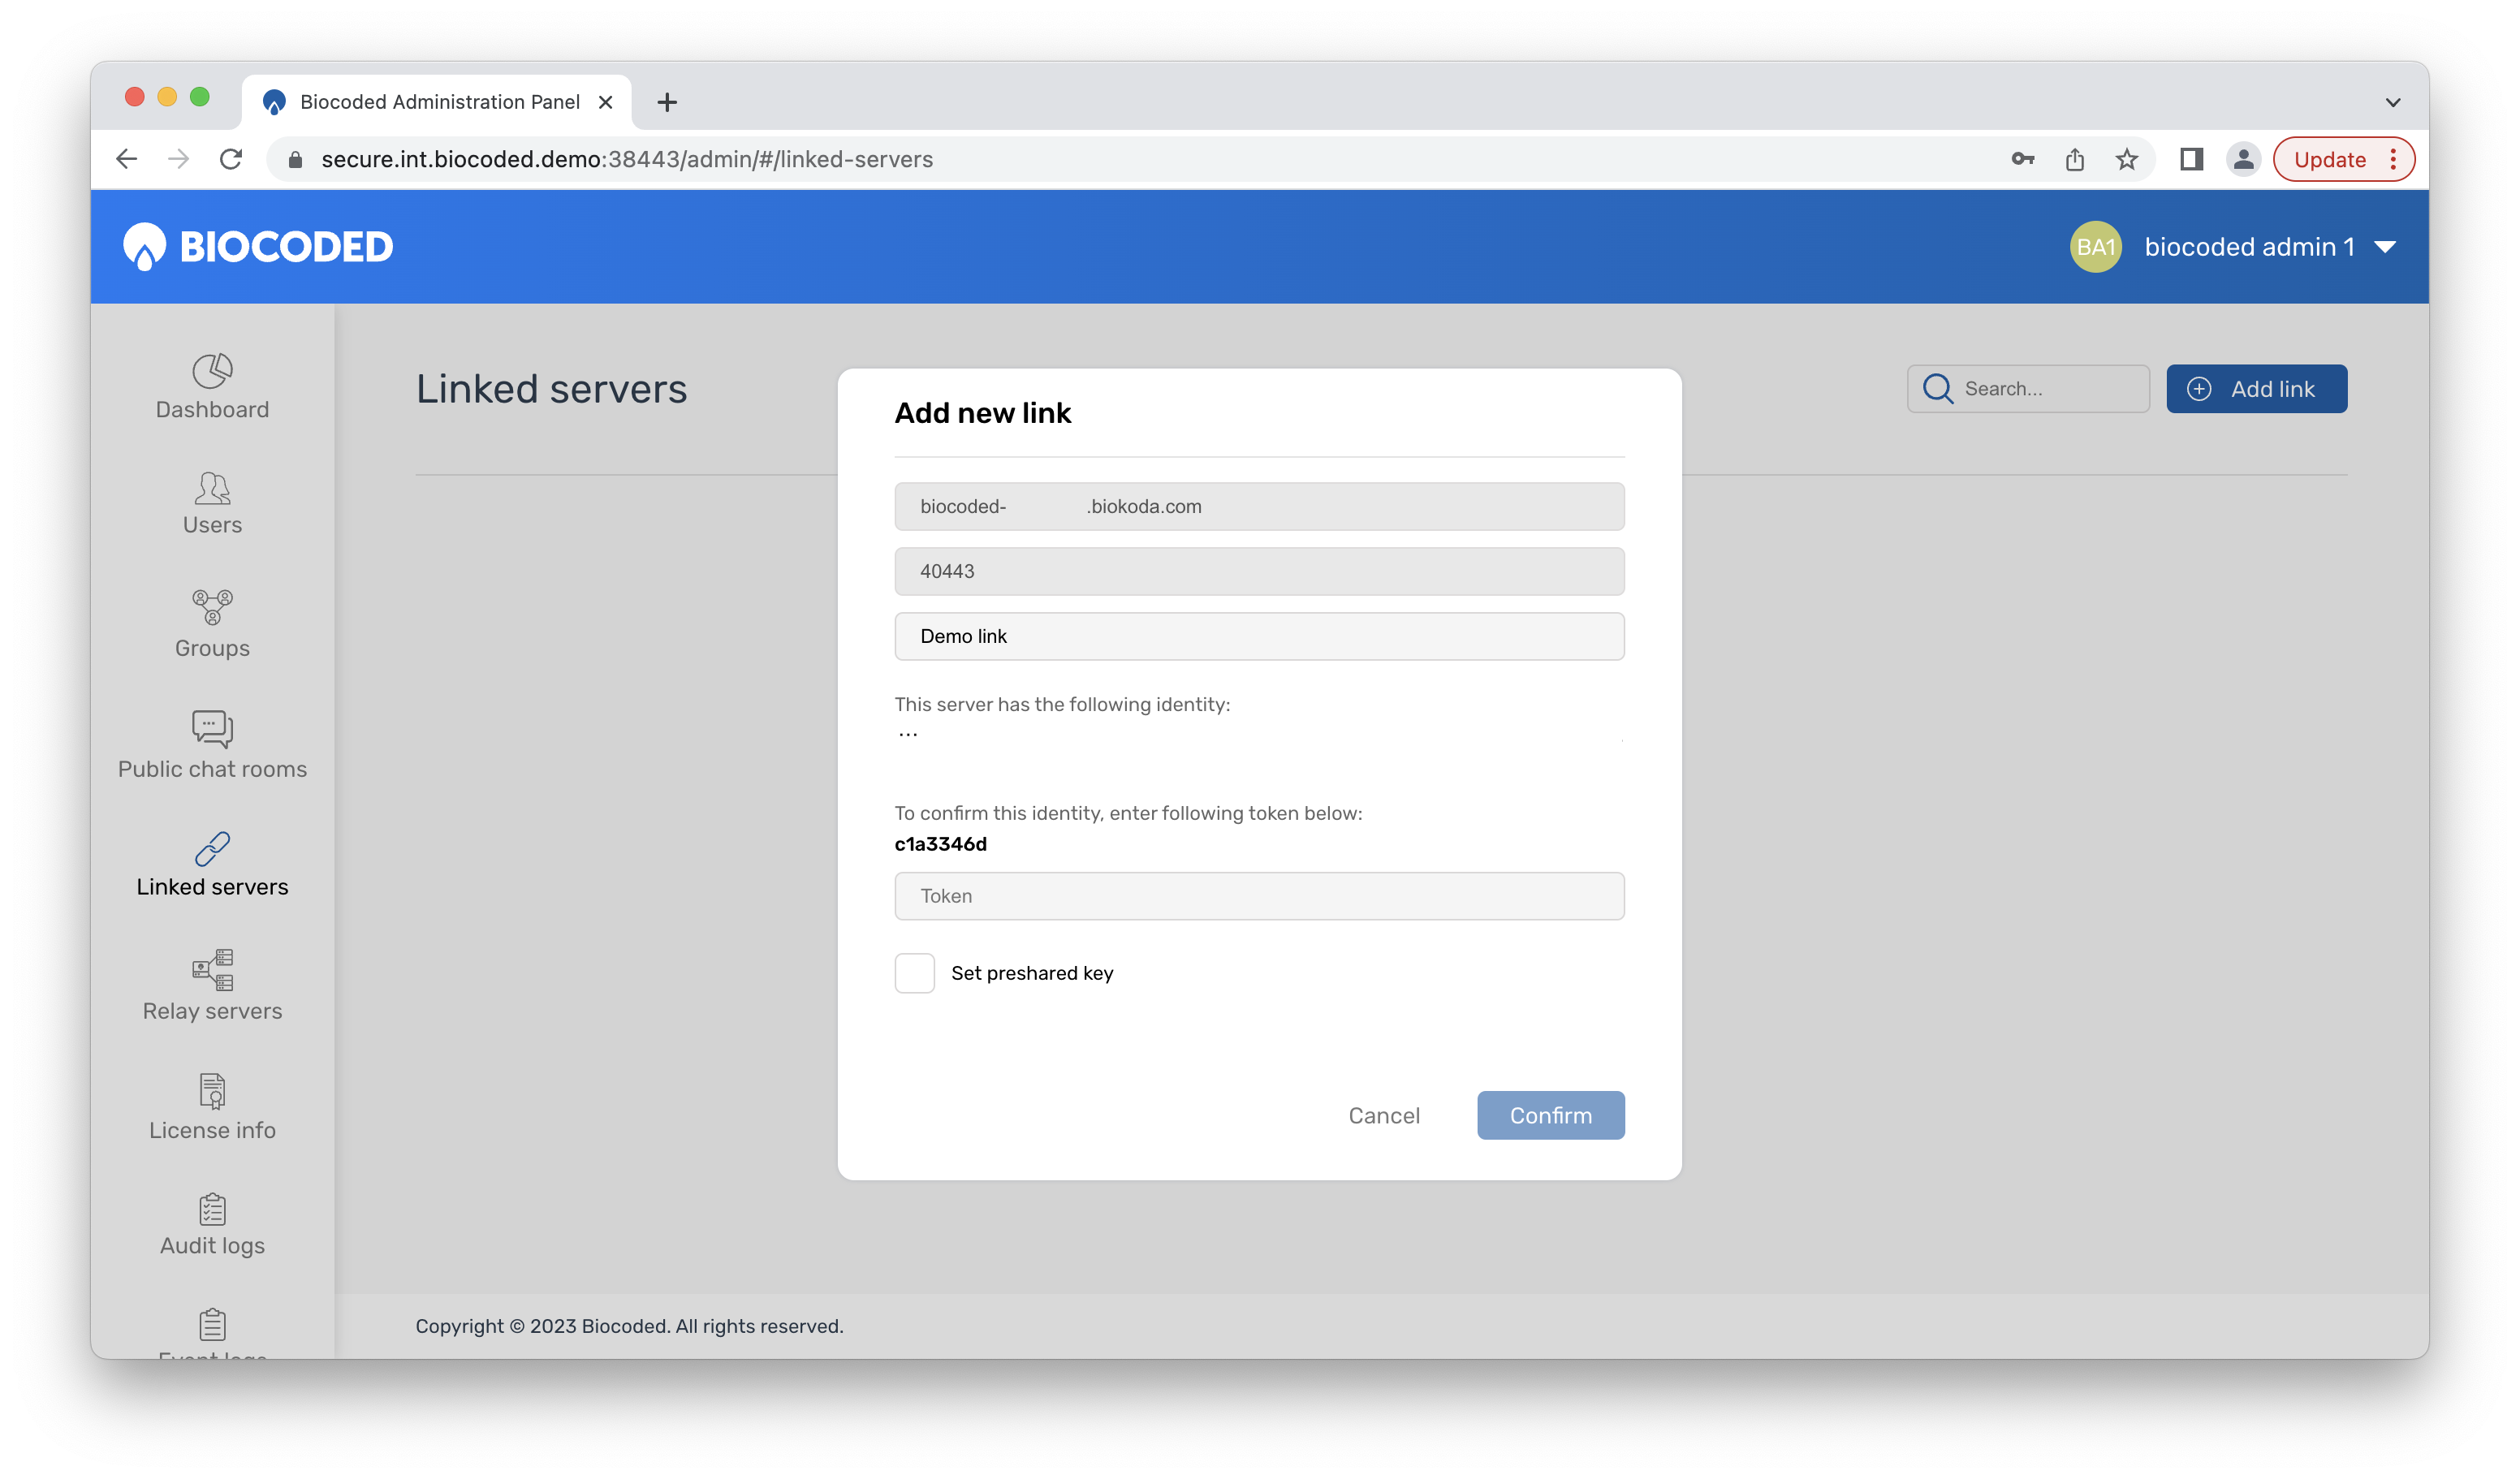
After verifying the server, set a server name and view the server's identity. To confirm it, you will have to enter a generated token displayed on screen. You can also set a pre-shared key, if you have one.
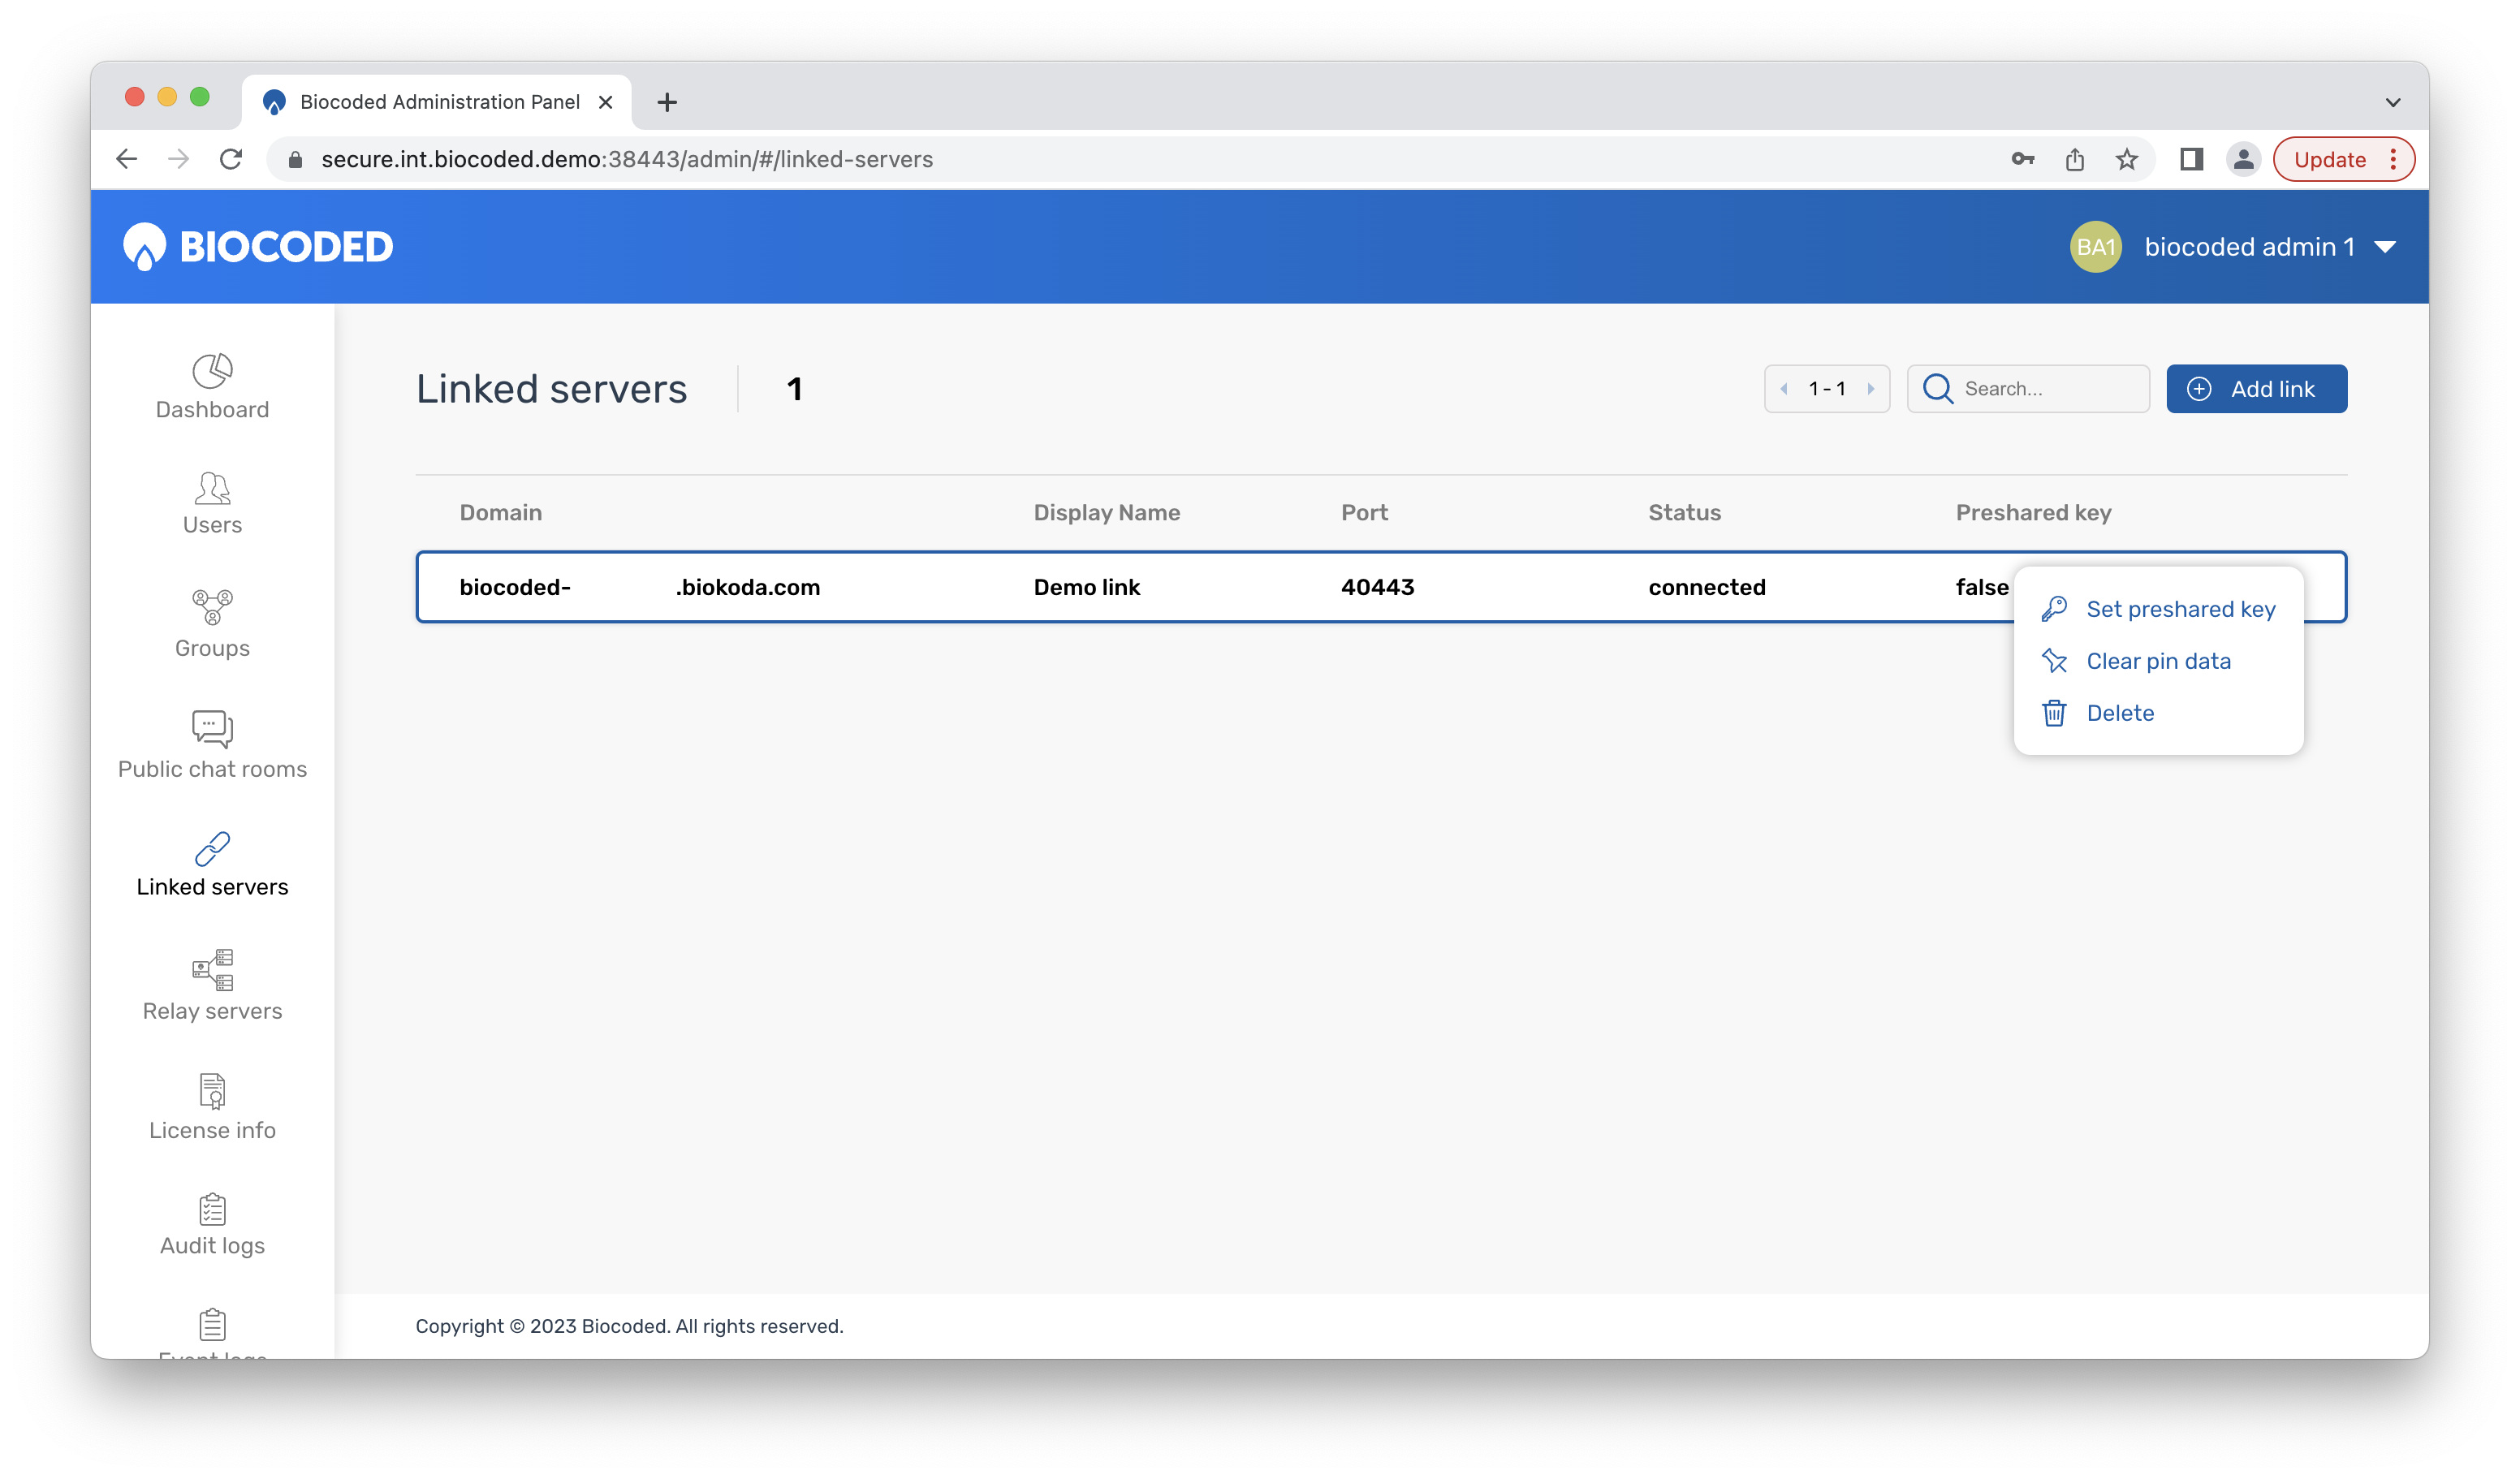
Clicking on shows the following options:
- Remove pre-shared key - which removes the previously set pre-shared key, or Set a pre-shared key, if one is not set,
- Clear pin data - clears pin data,
- Delete - deletes the server link from the list and disables communication.
Relay servers
Relay servers tab lists all additional servers used for transmitting messages to users.
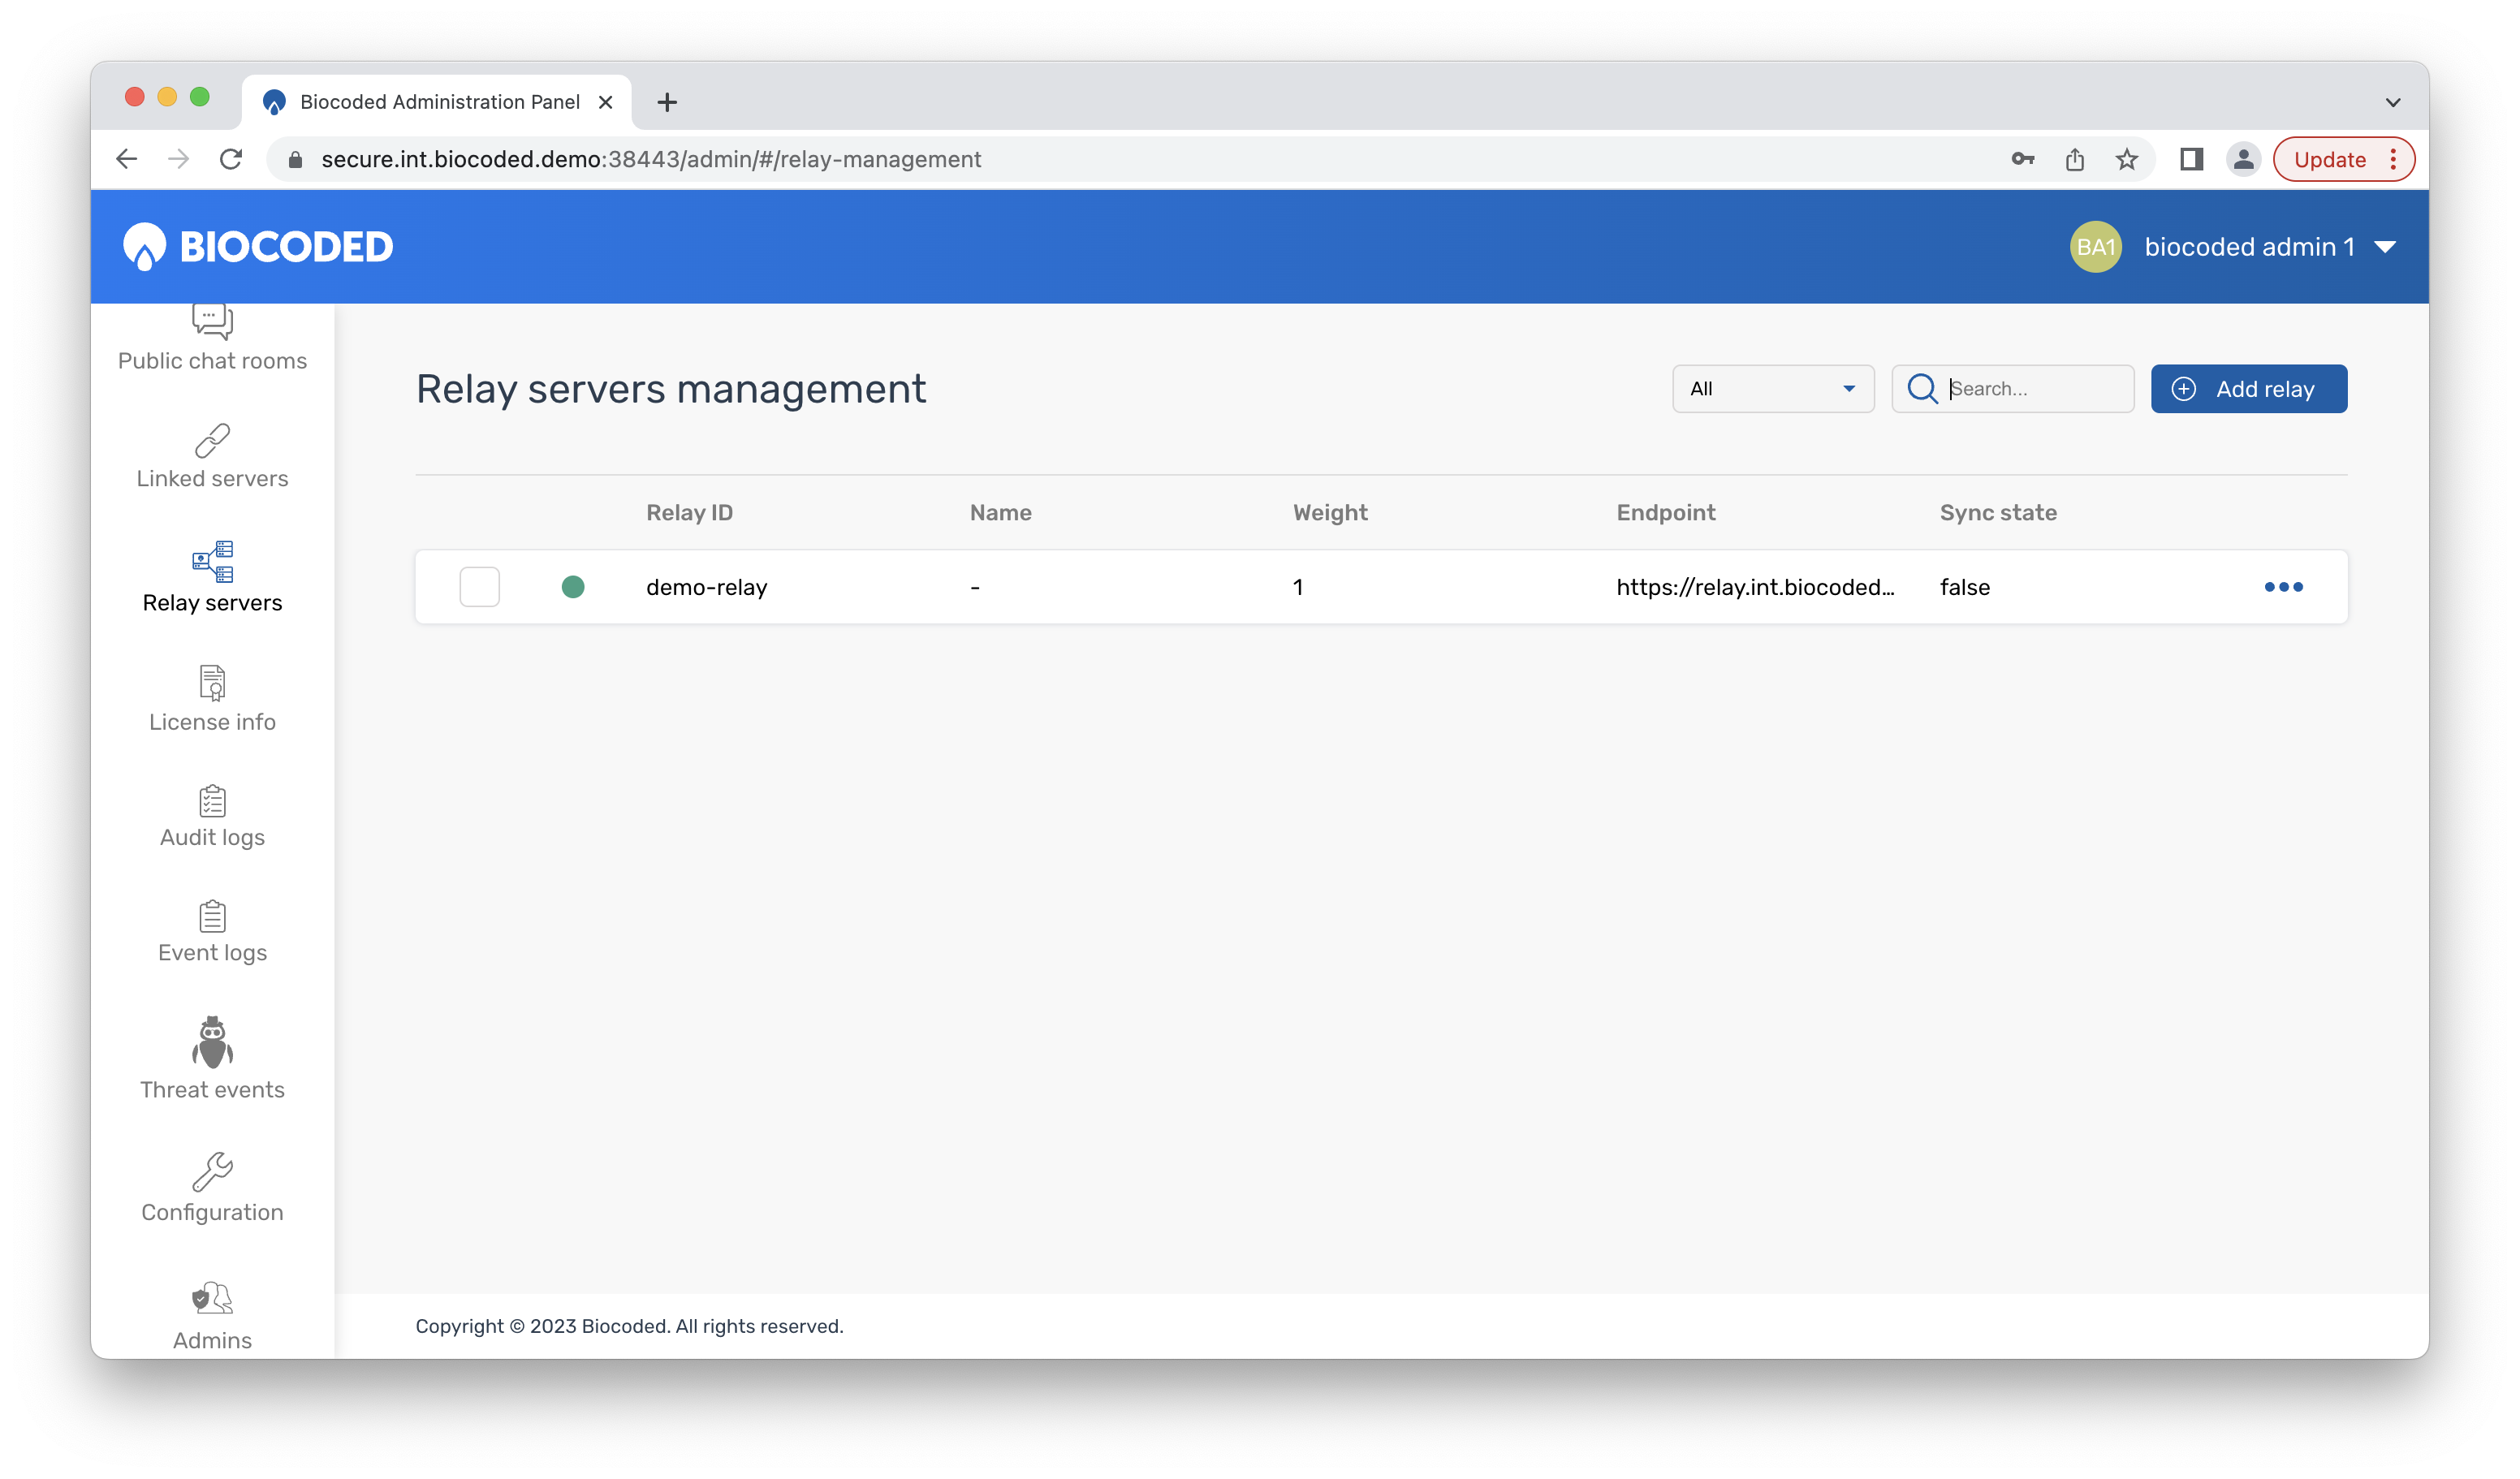
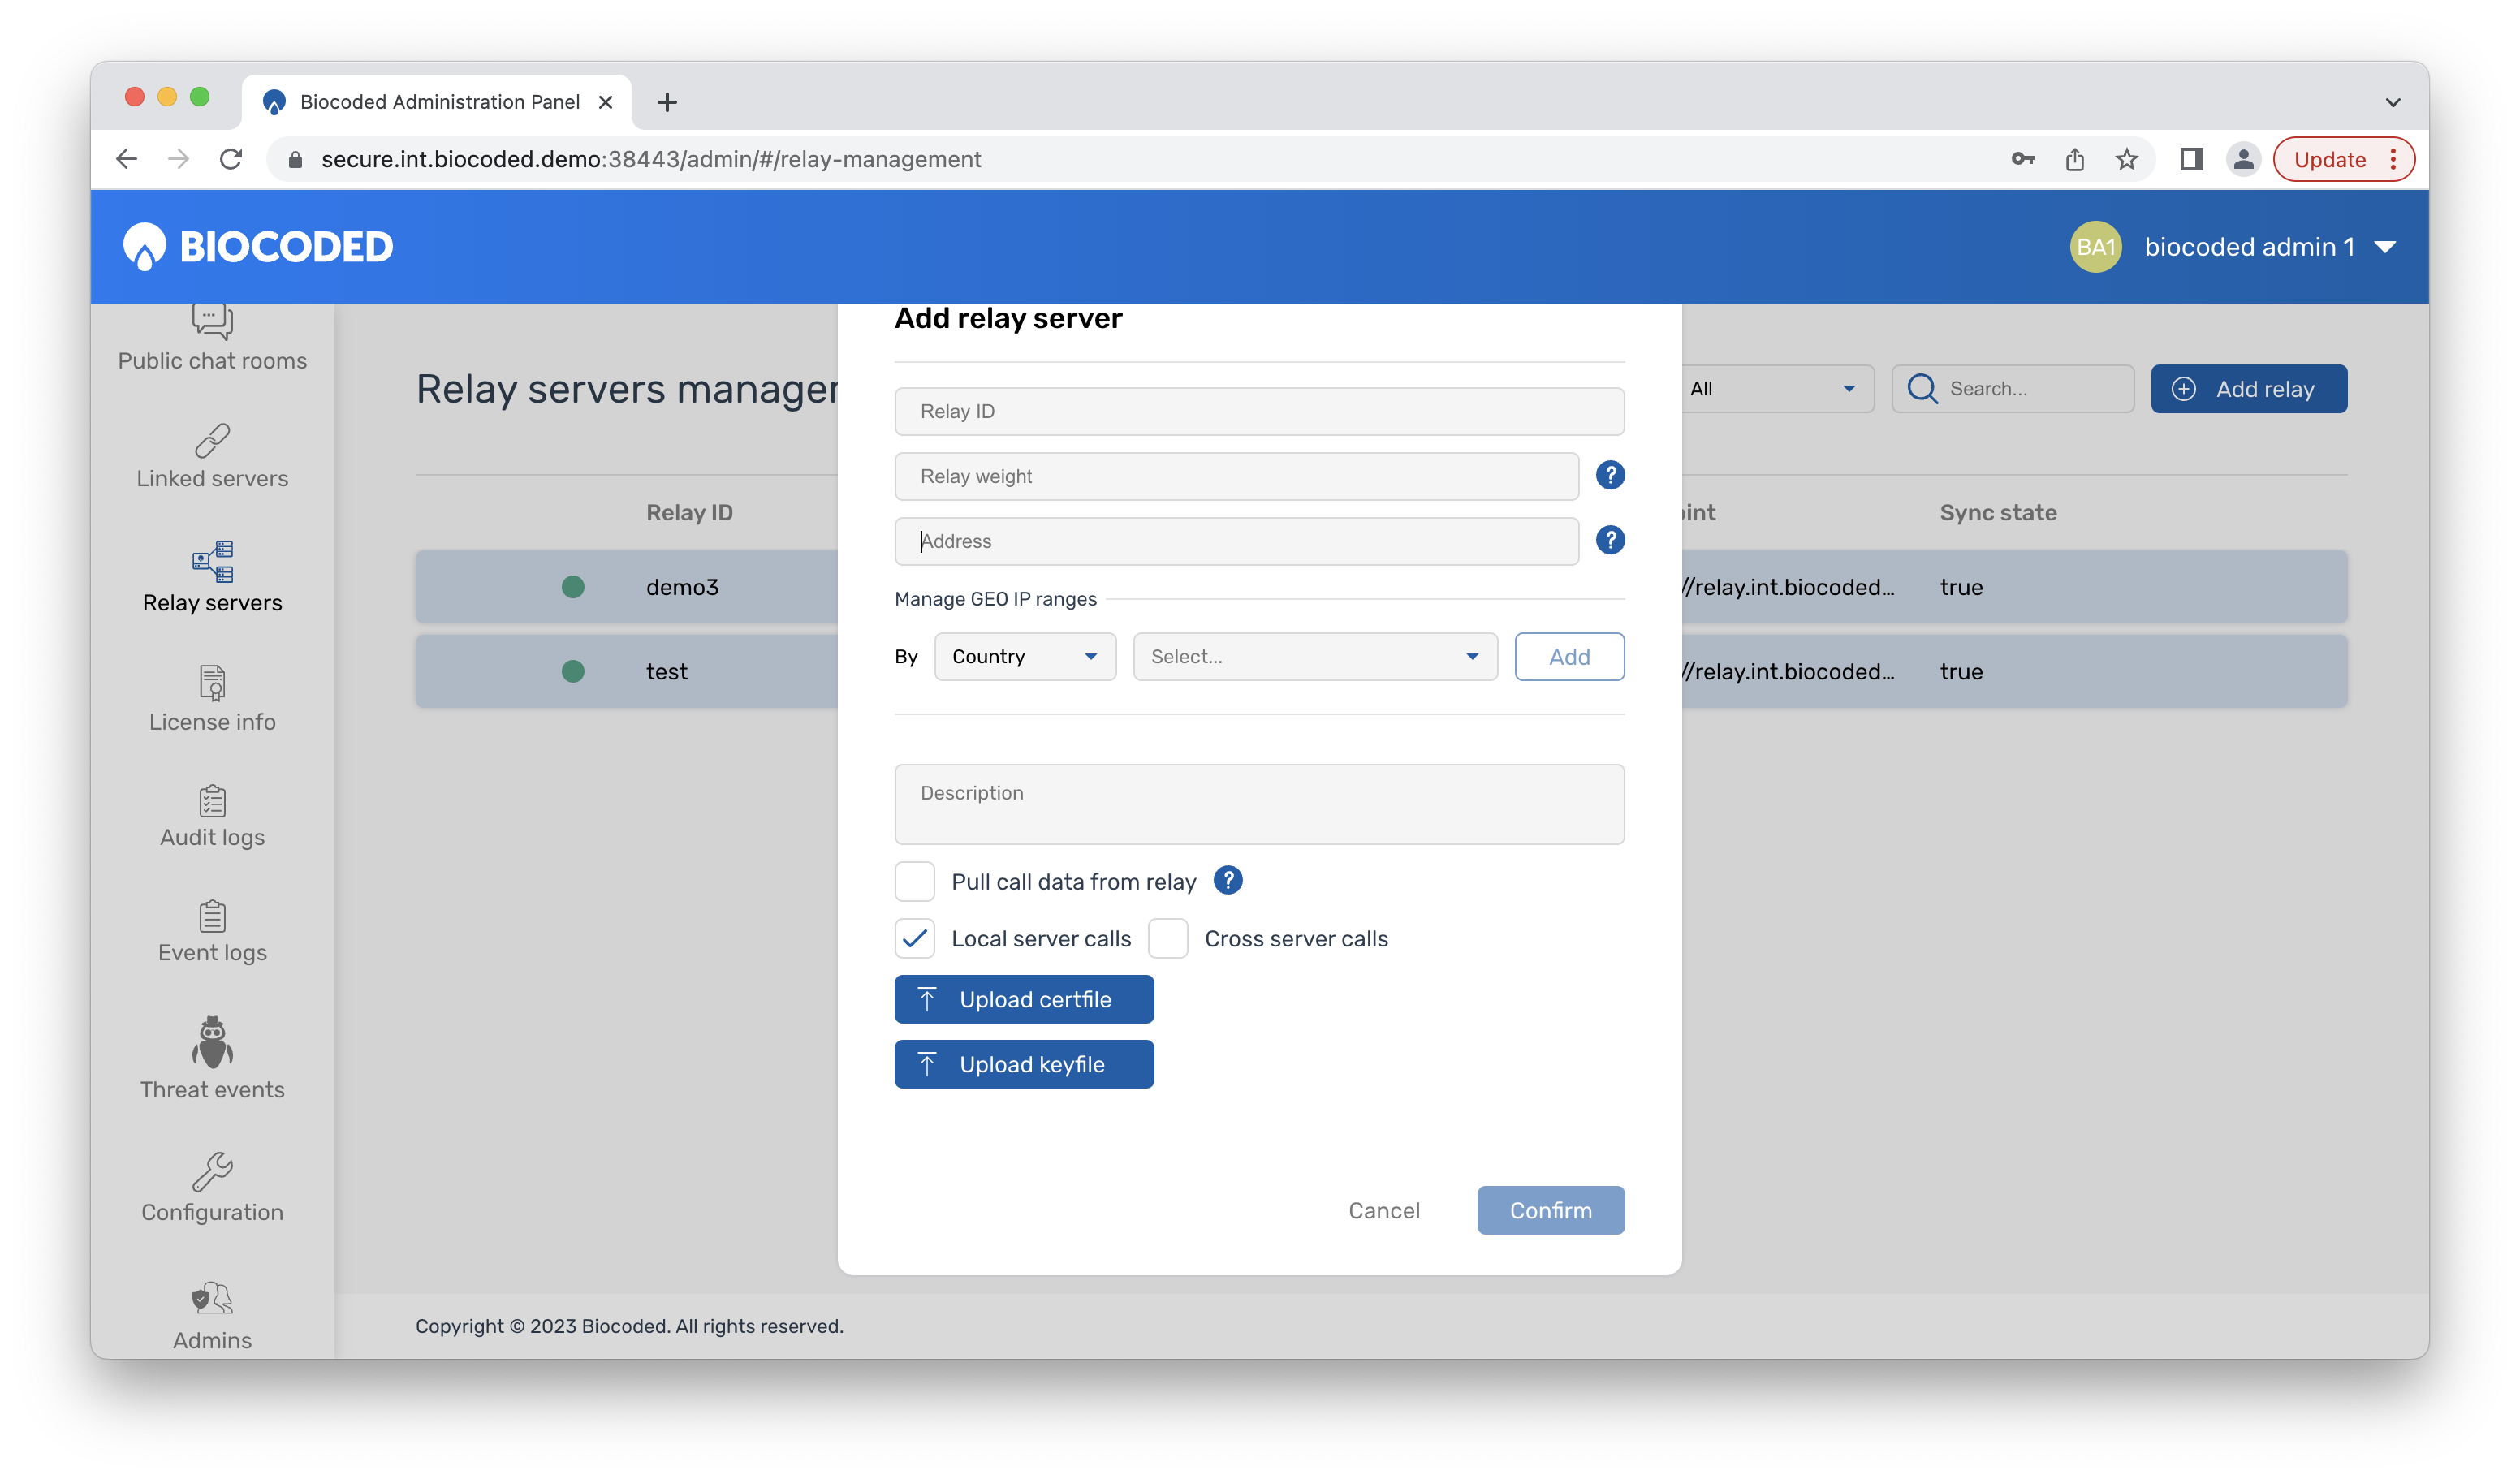
A new relay can be added by pressing "Add relay". You will have to set a relay ID, weight (used for distribution of messages over multiple relays) and server address. You can manage GEO IP ranges by country, continent or IP range. Multiple ranges can be added. There are also some additional options available:
- Pull call data from relay,
- Local server calls,
- Cross server calls.
A certfile and keyfile will have to be uploaded to add a relay server.
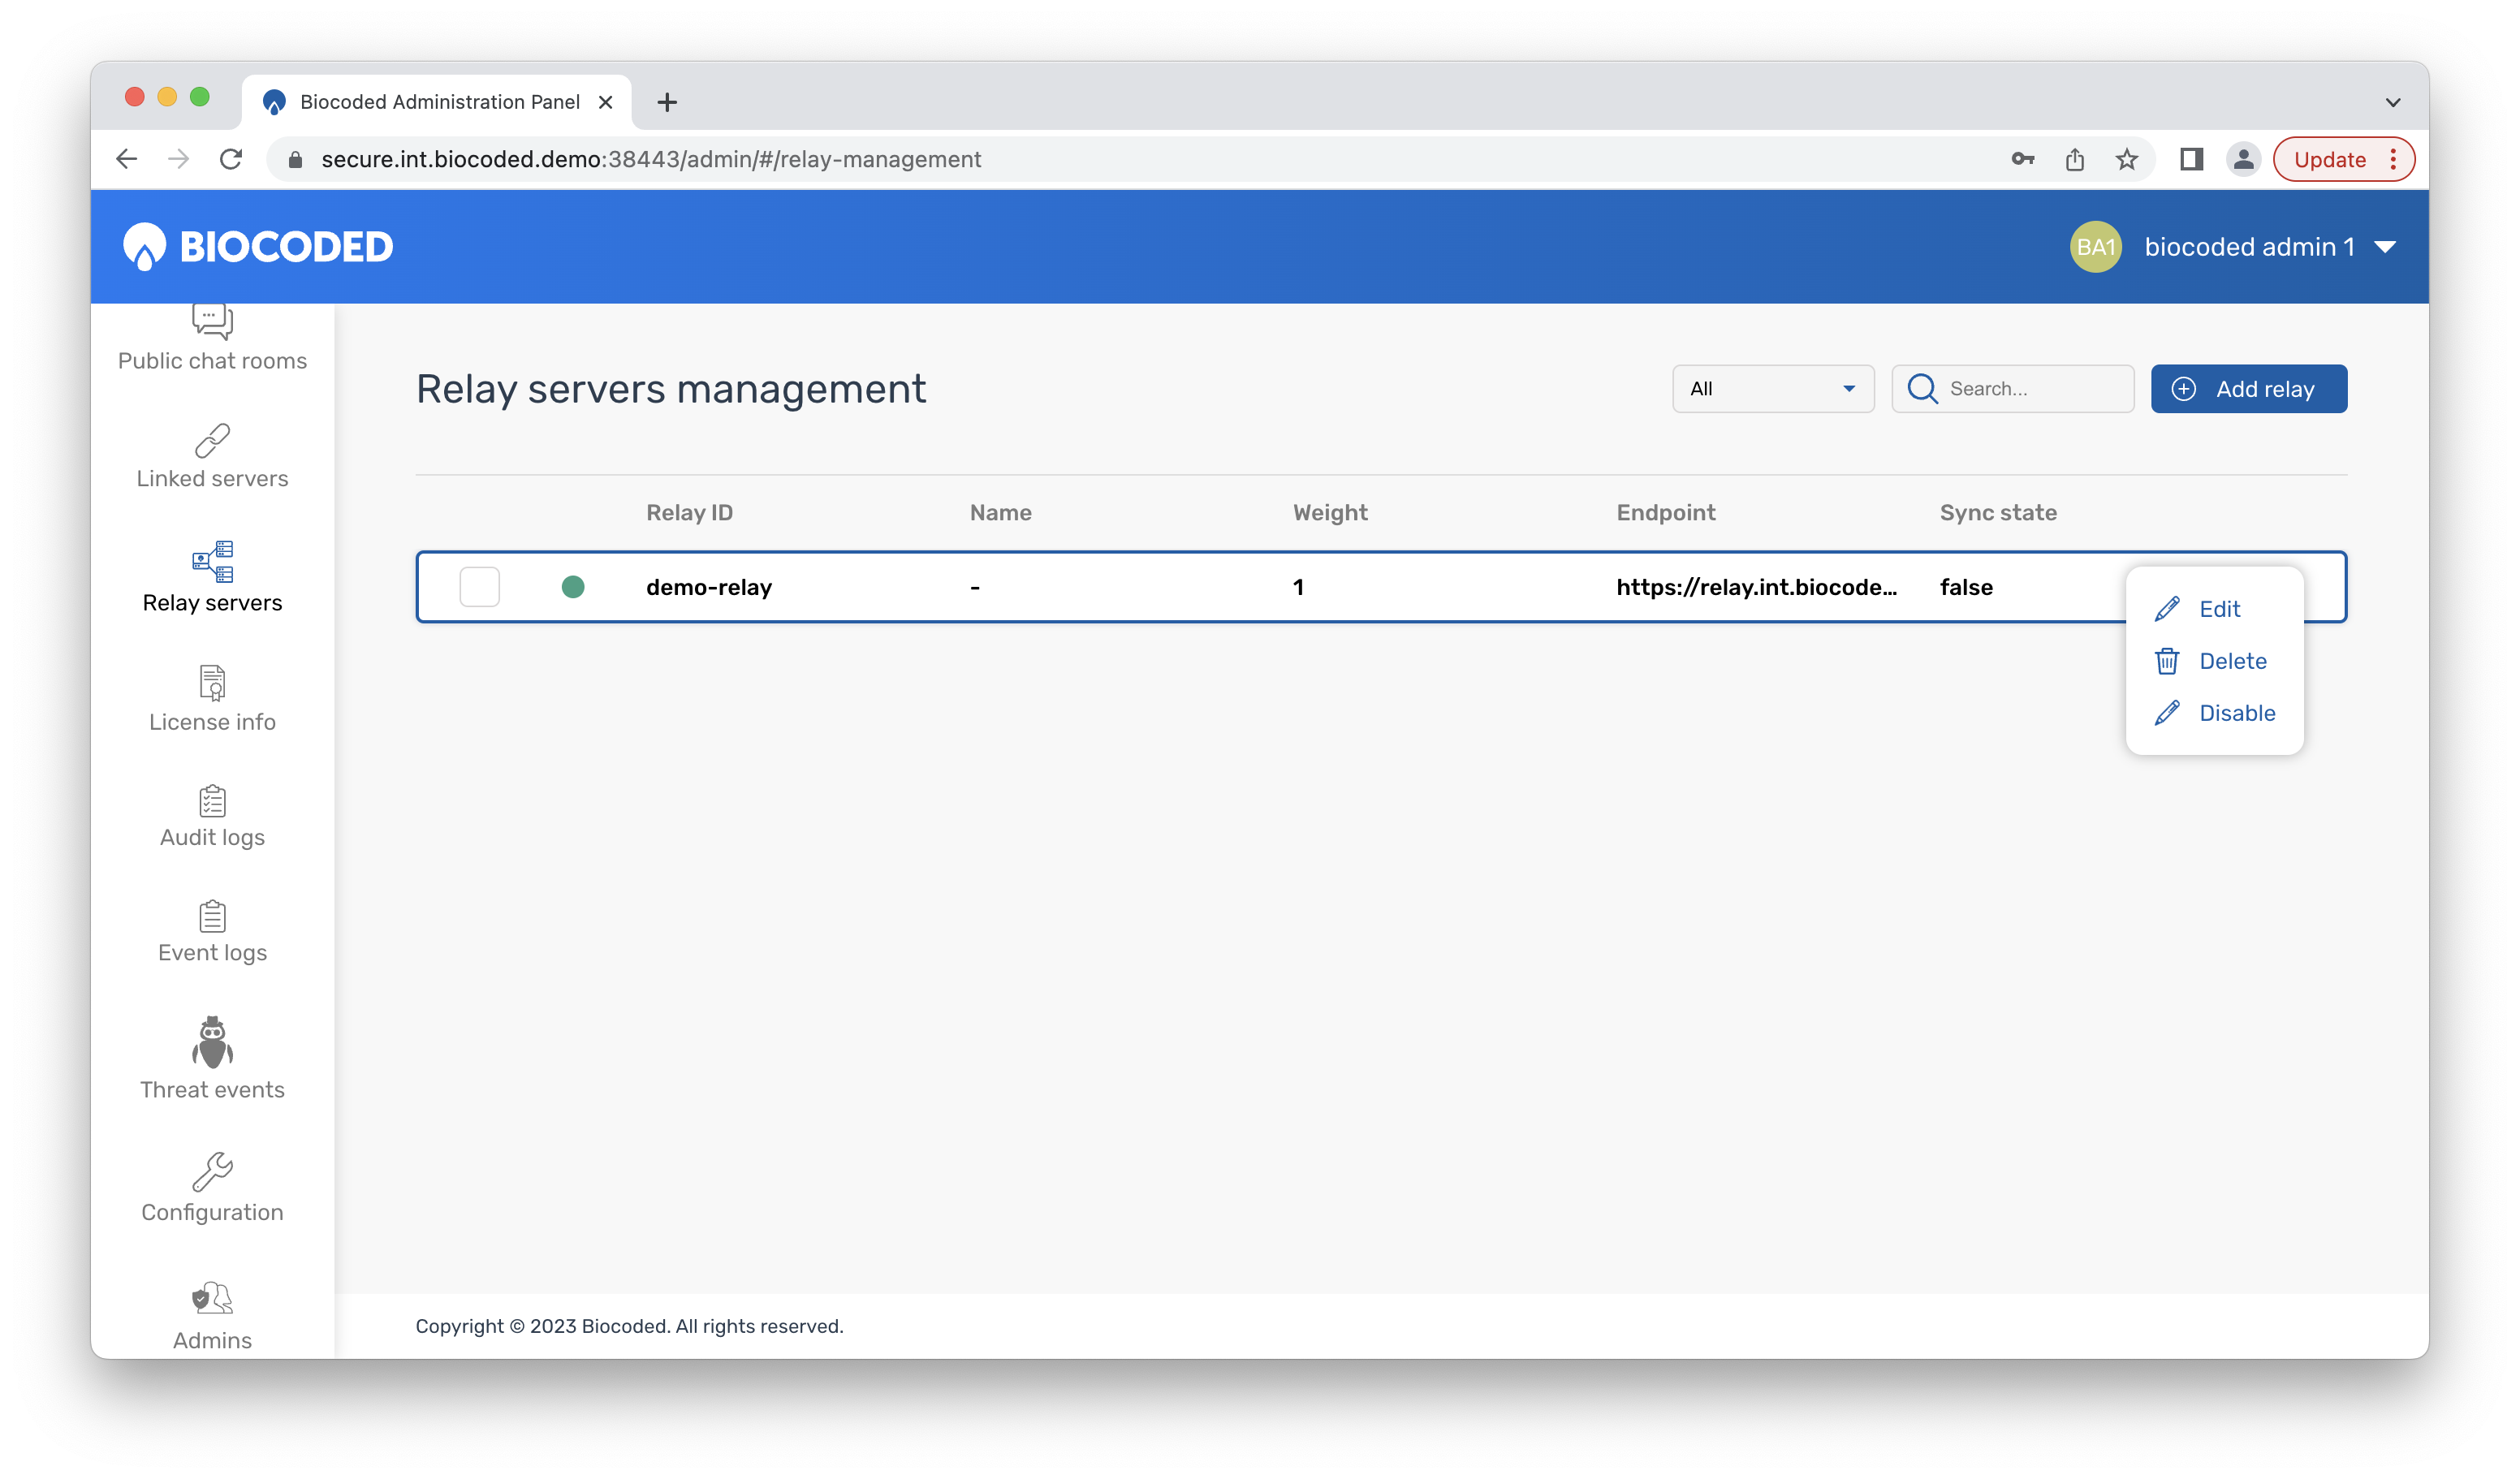
When a relay is added successfully, it can be edited by clicking on and selecting "Edit". Options to "Delete" and "Disable" will also be visible. For disabled relays, "Enable" will appear.
License info
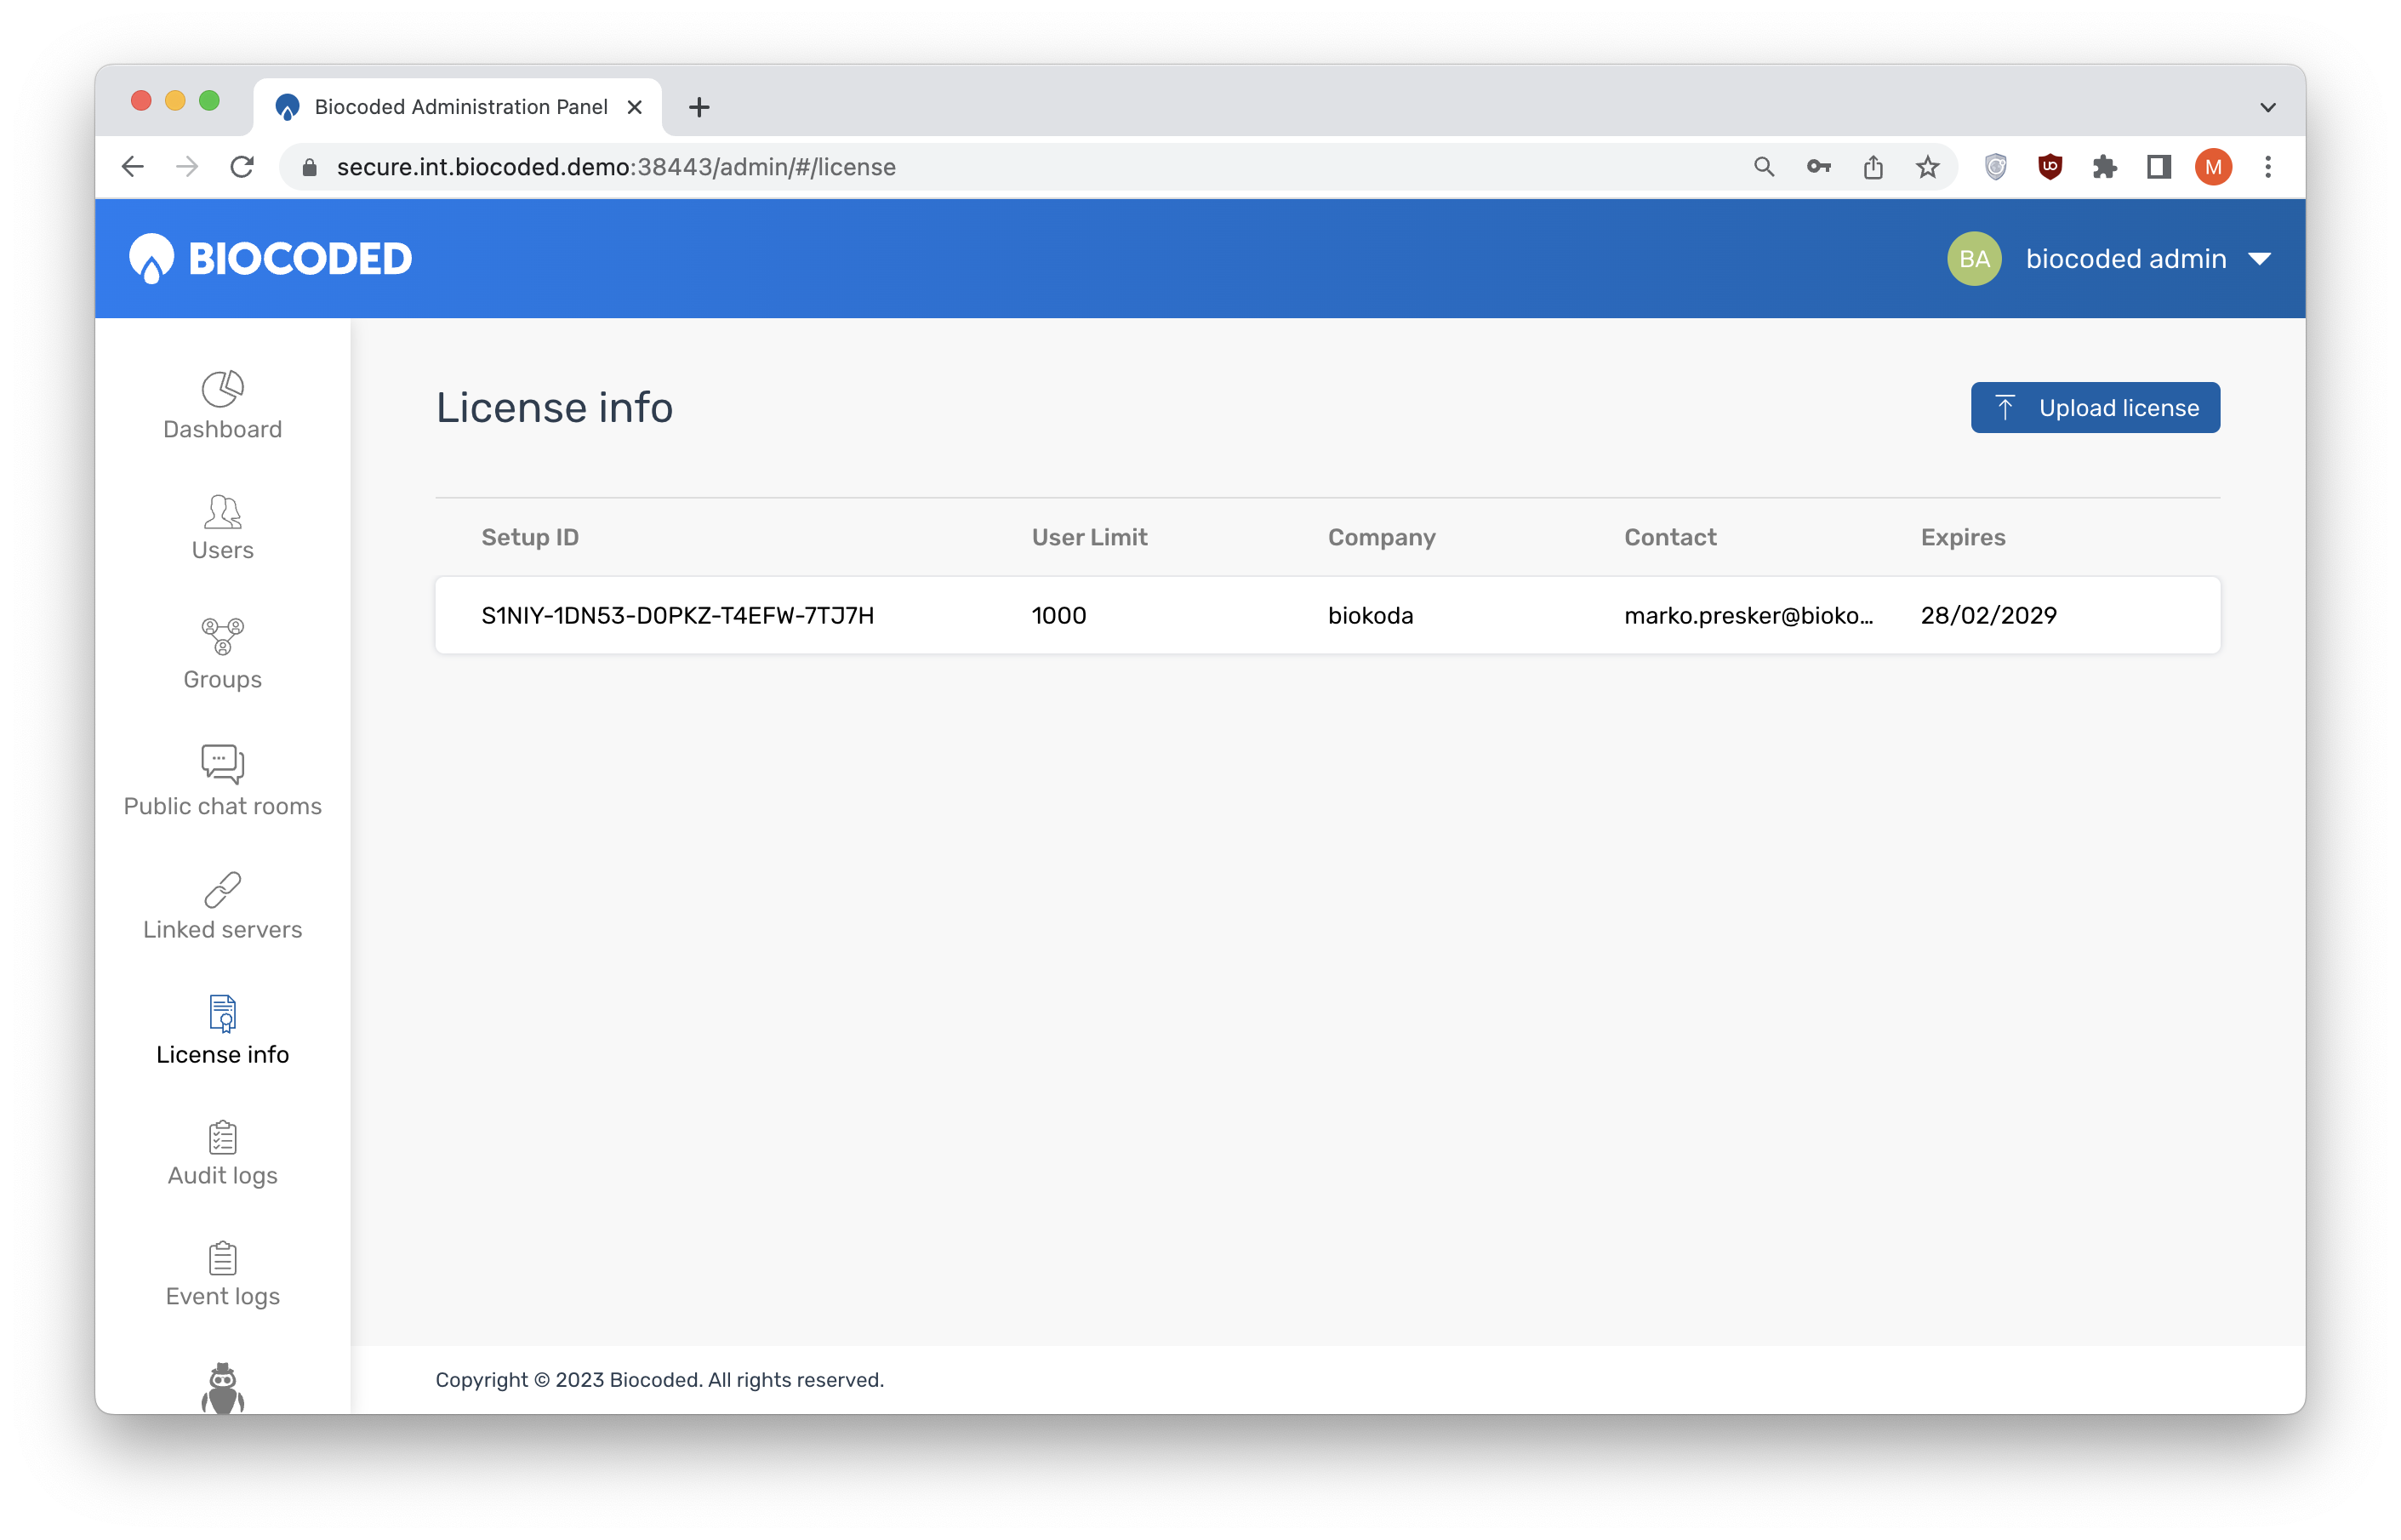
License info tab contains the information about the server's license and it's validity. The shown information includes setup ID, user limit (max number of users allowed), company name, contact info and license expiration date.
You can upload a license by pressing "Upload license" and select a license file from your disk.
Audit logs
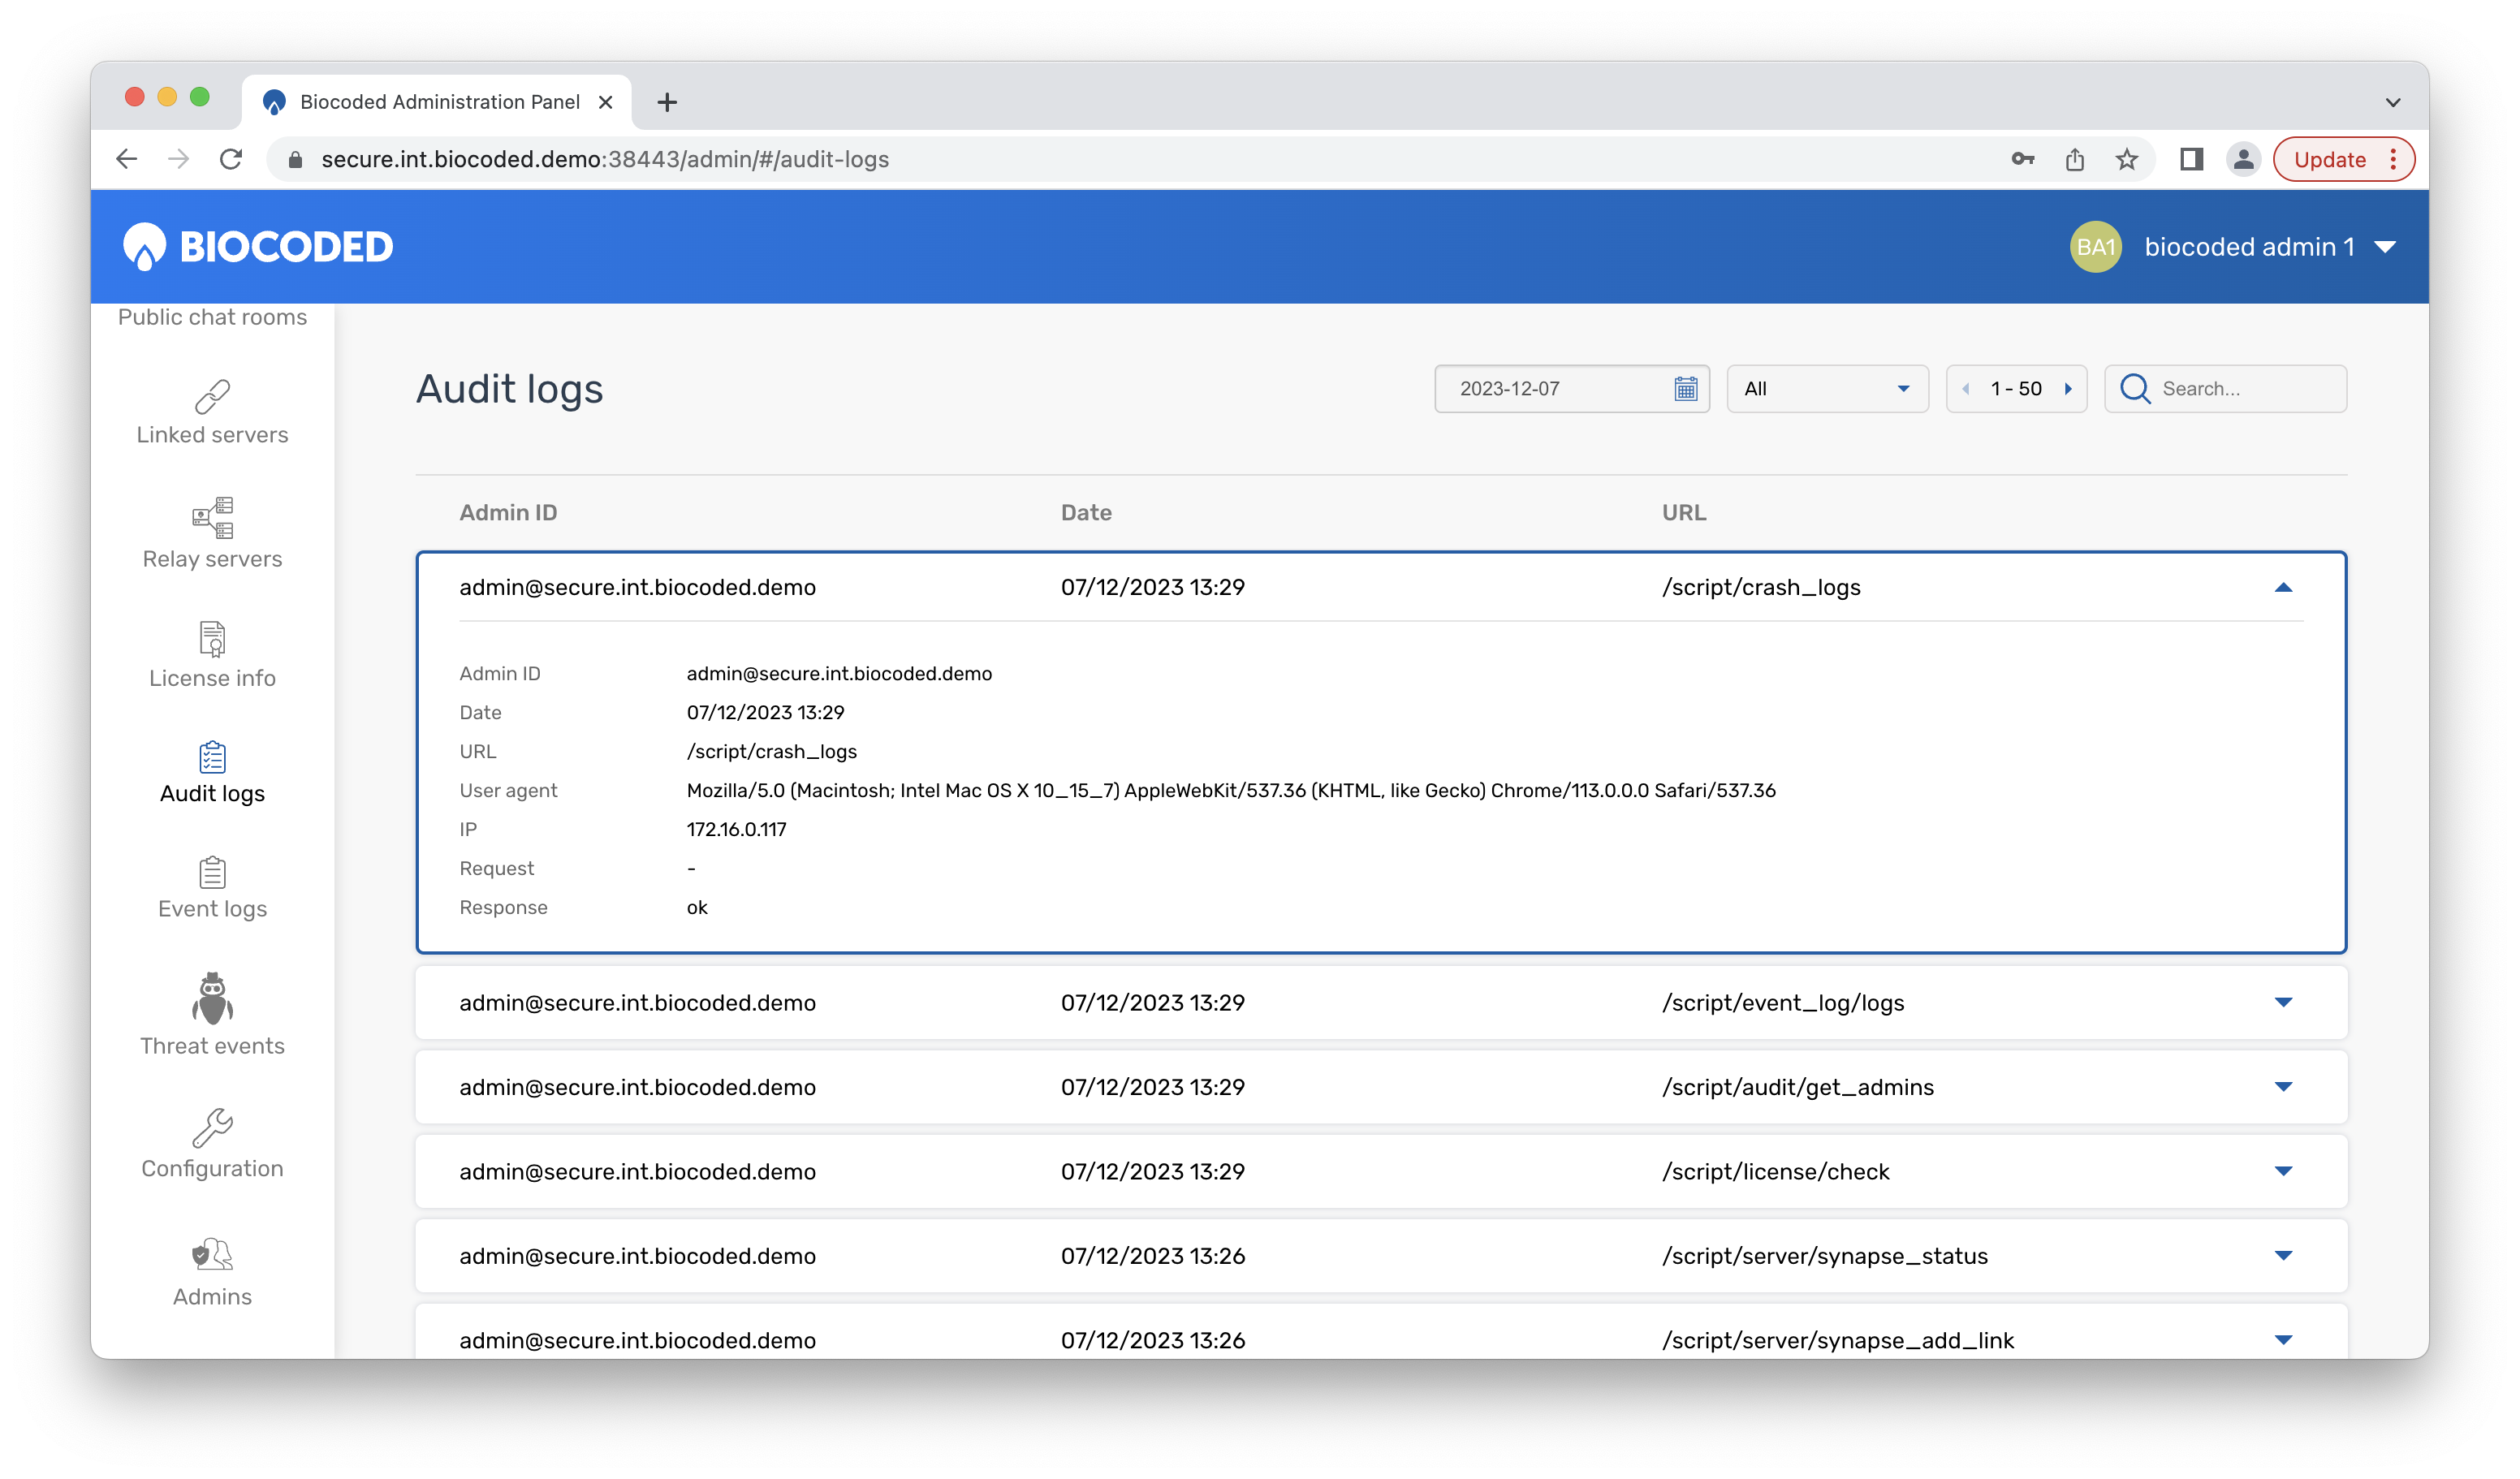
Audit logs contain a list of admin activities on the server. They can be filtered by name or by date.
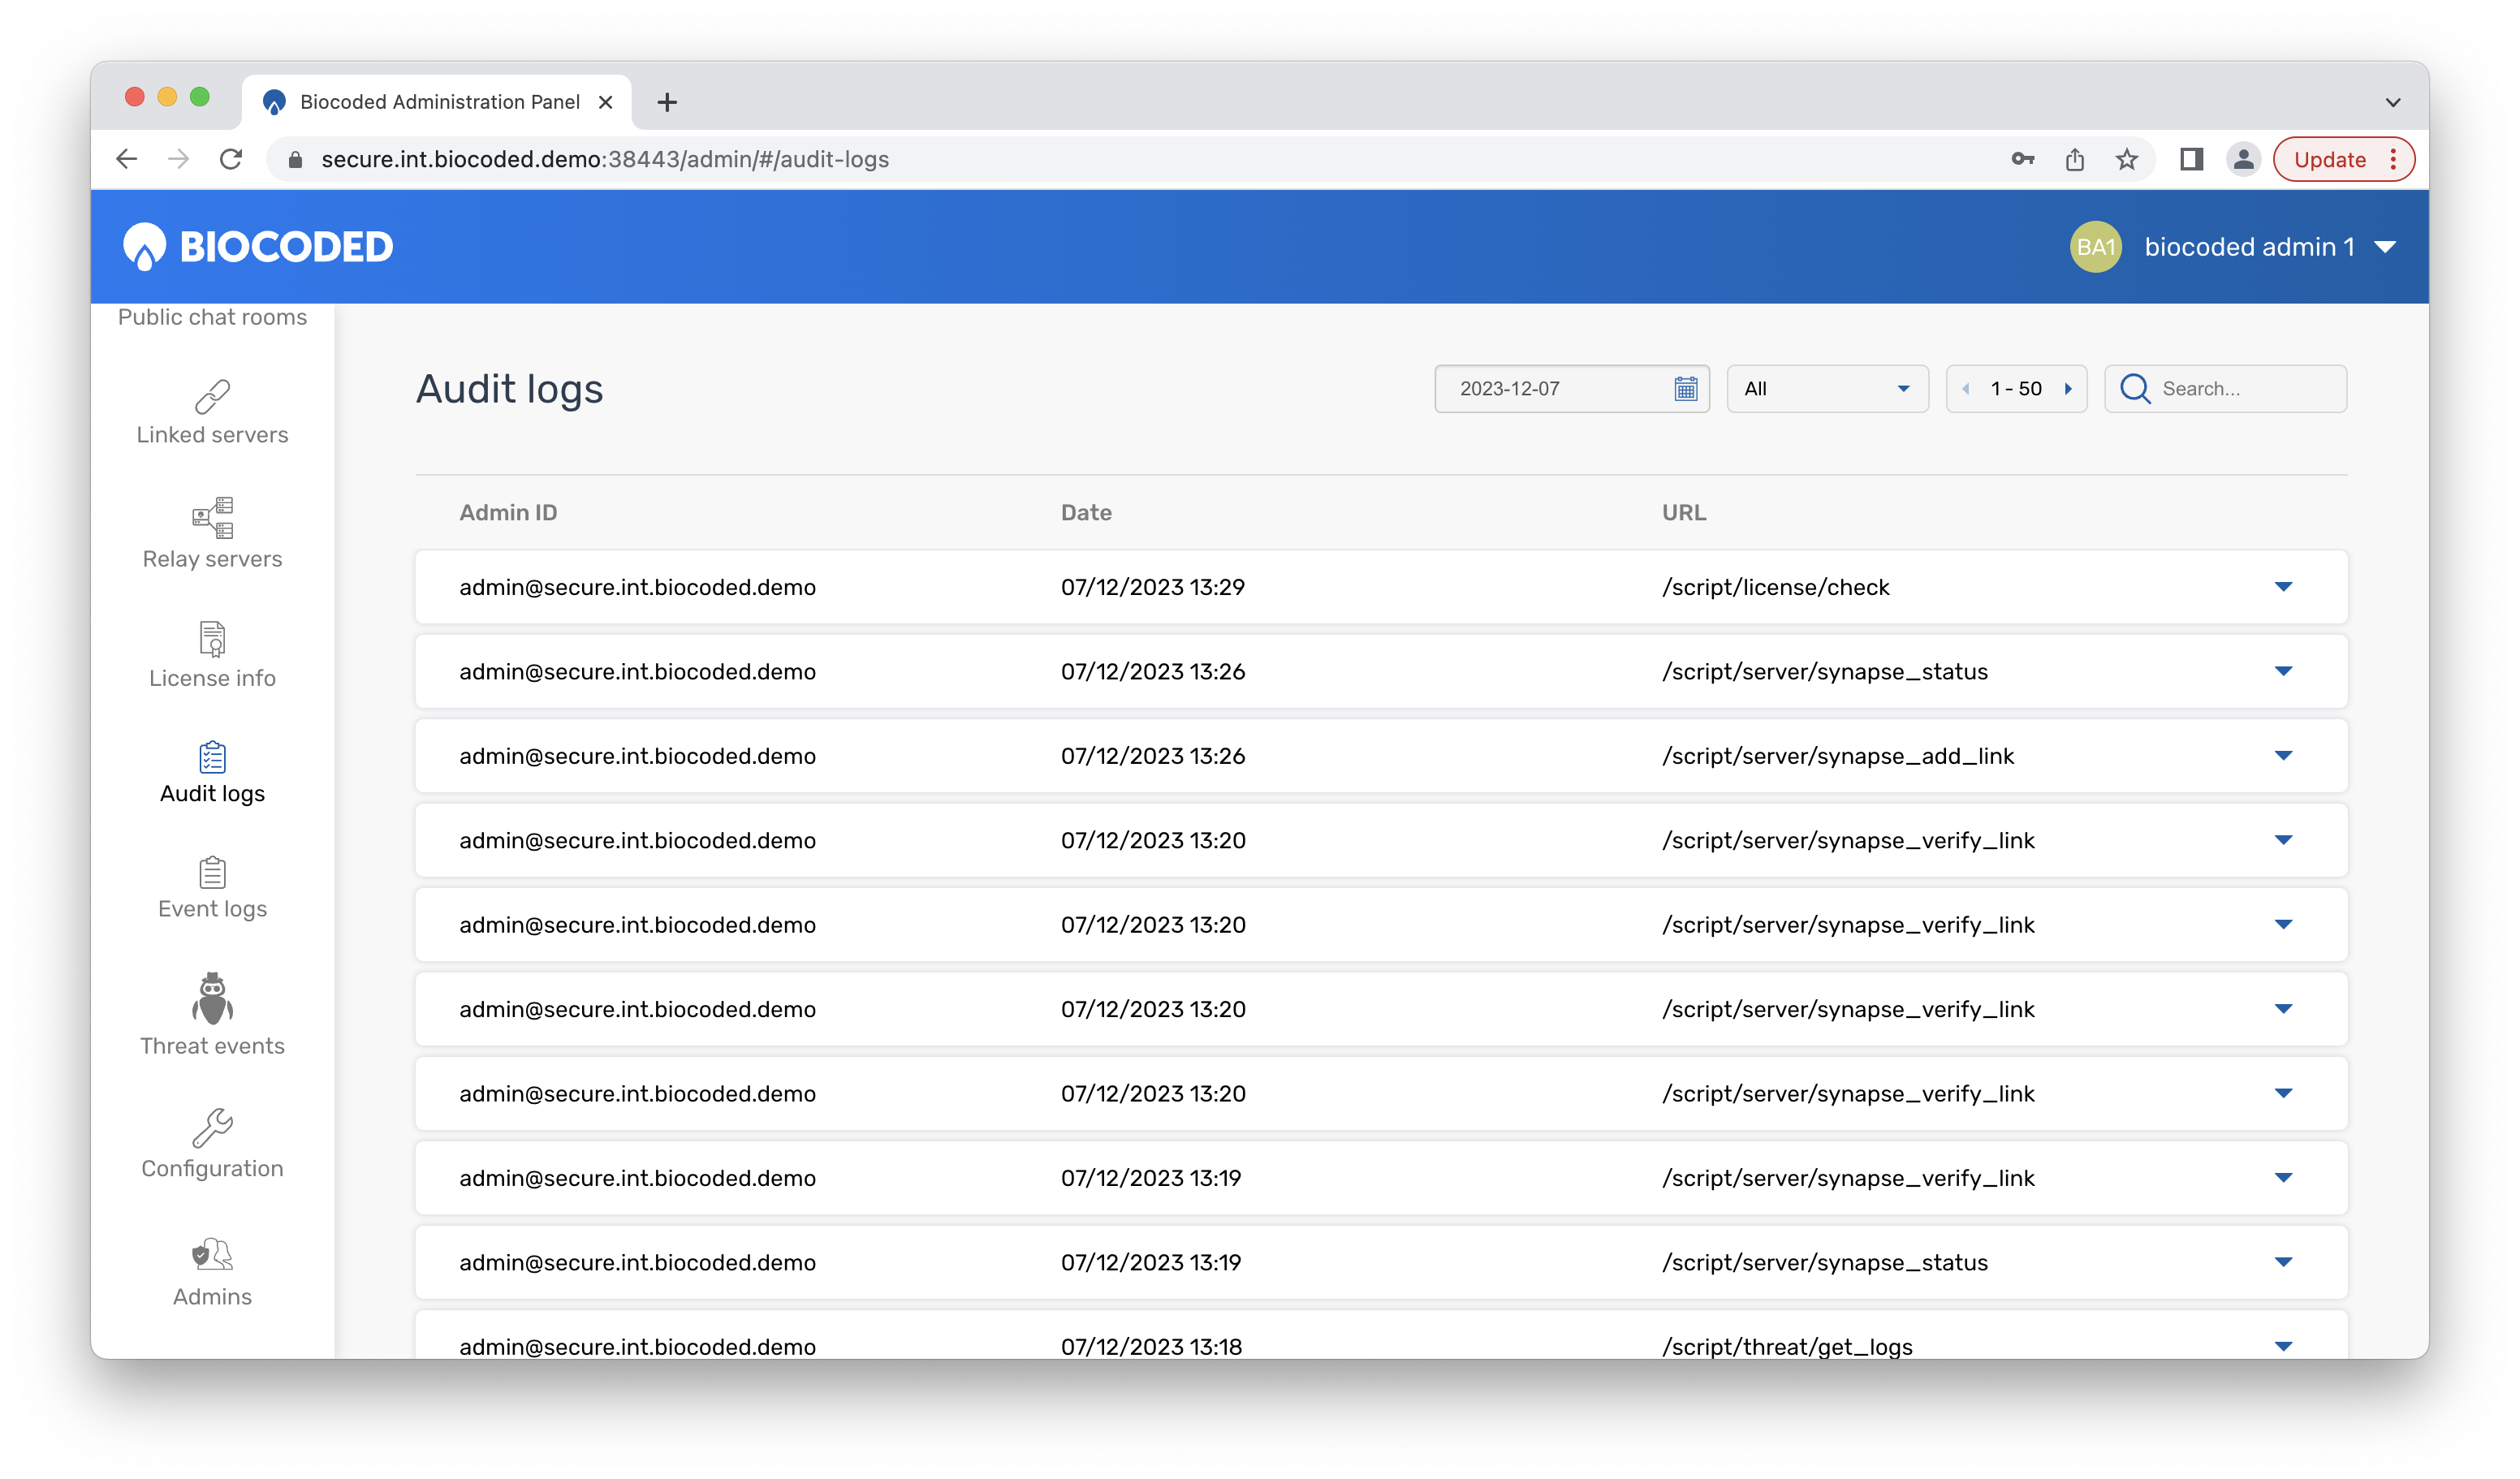
Additional data about a log entry can be viewed by clicking on it.
Event logs
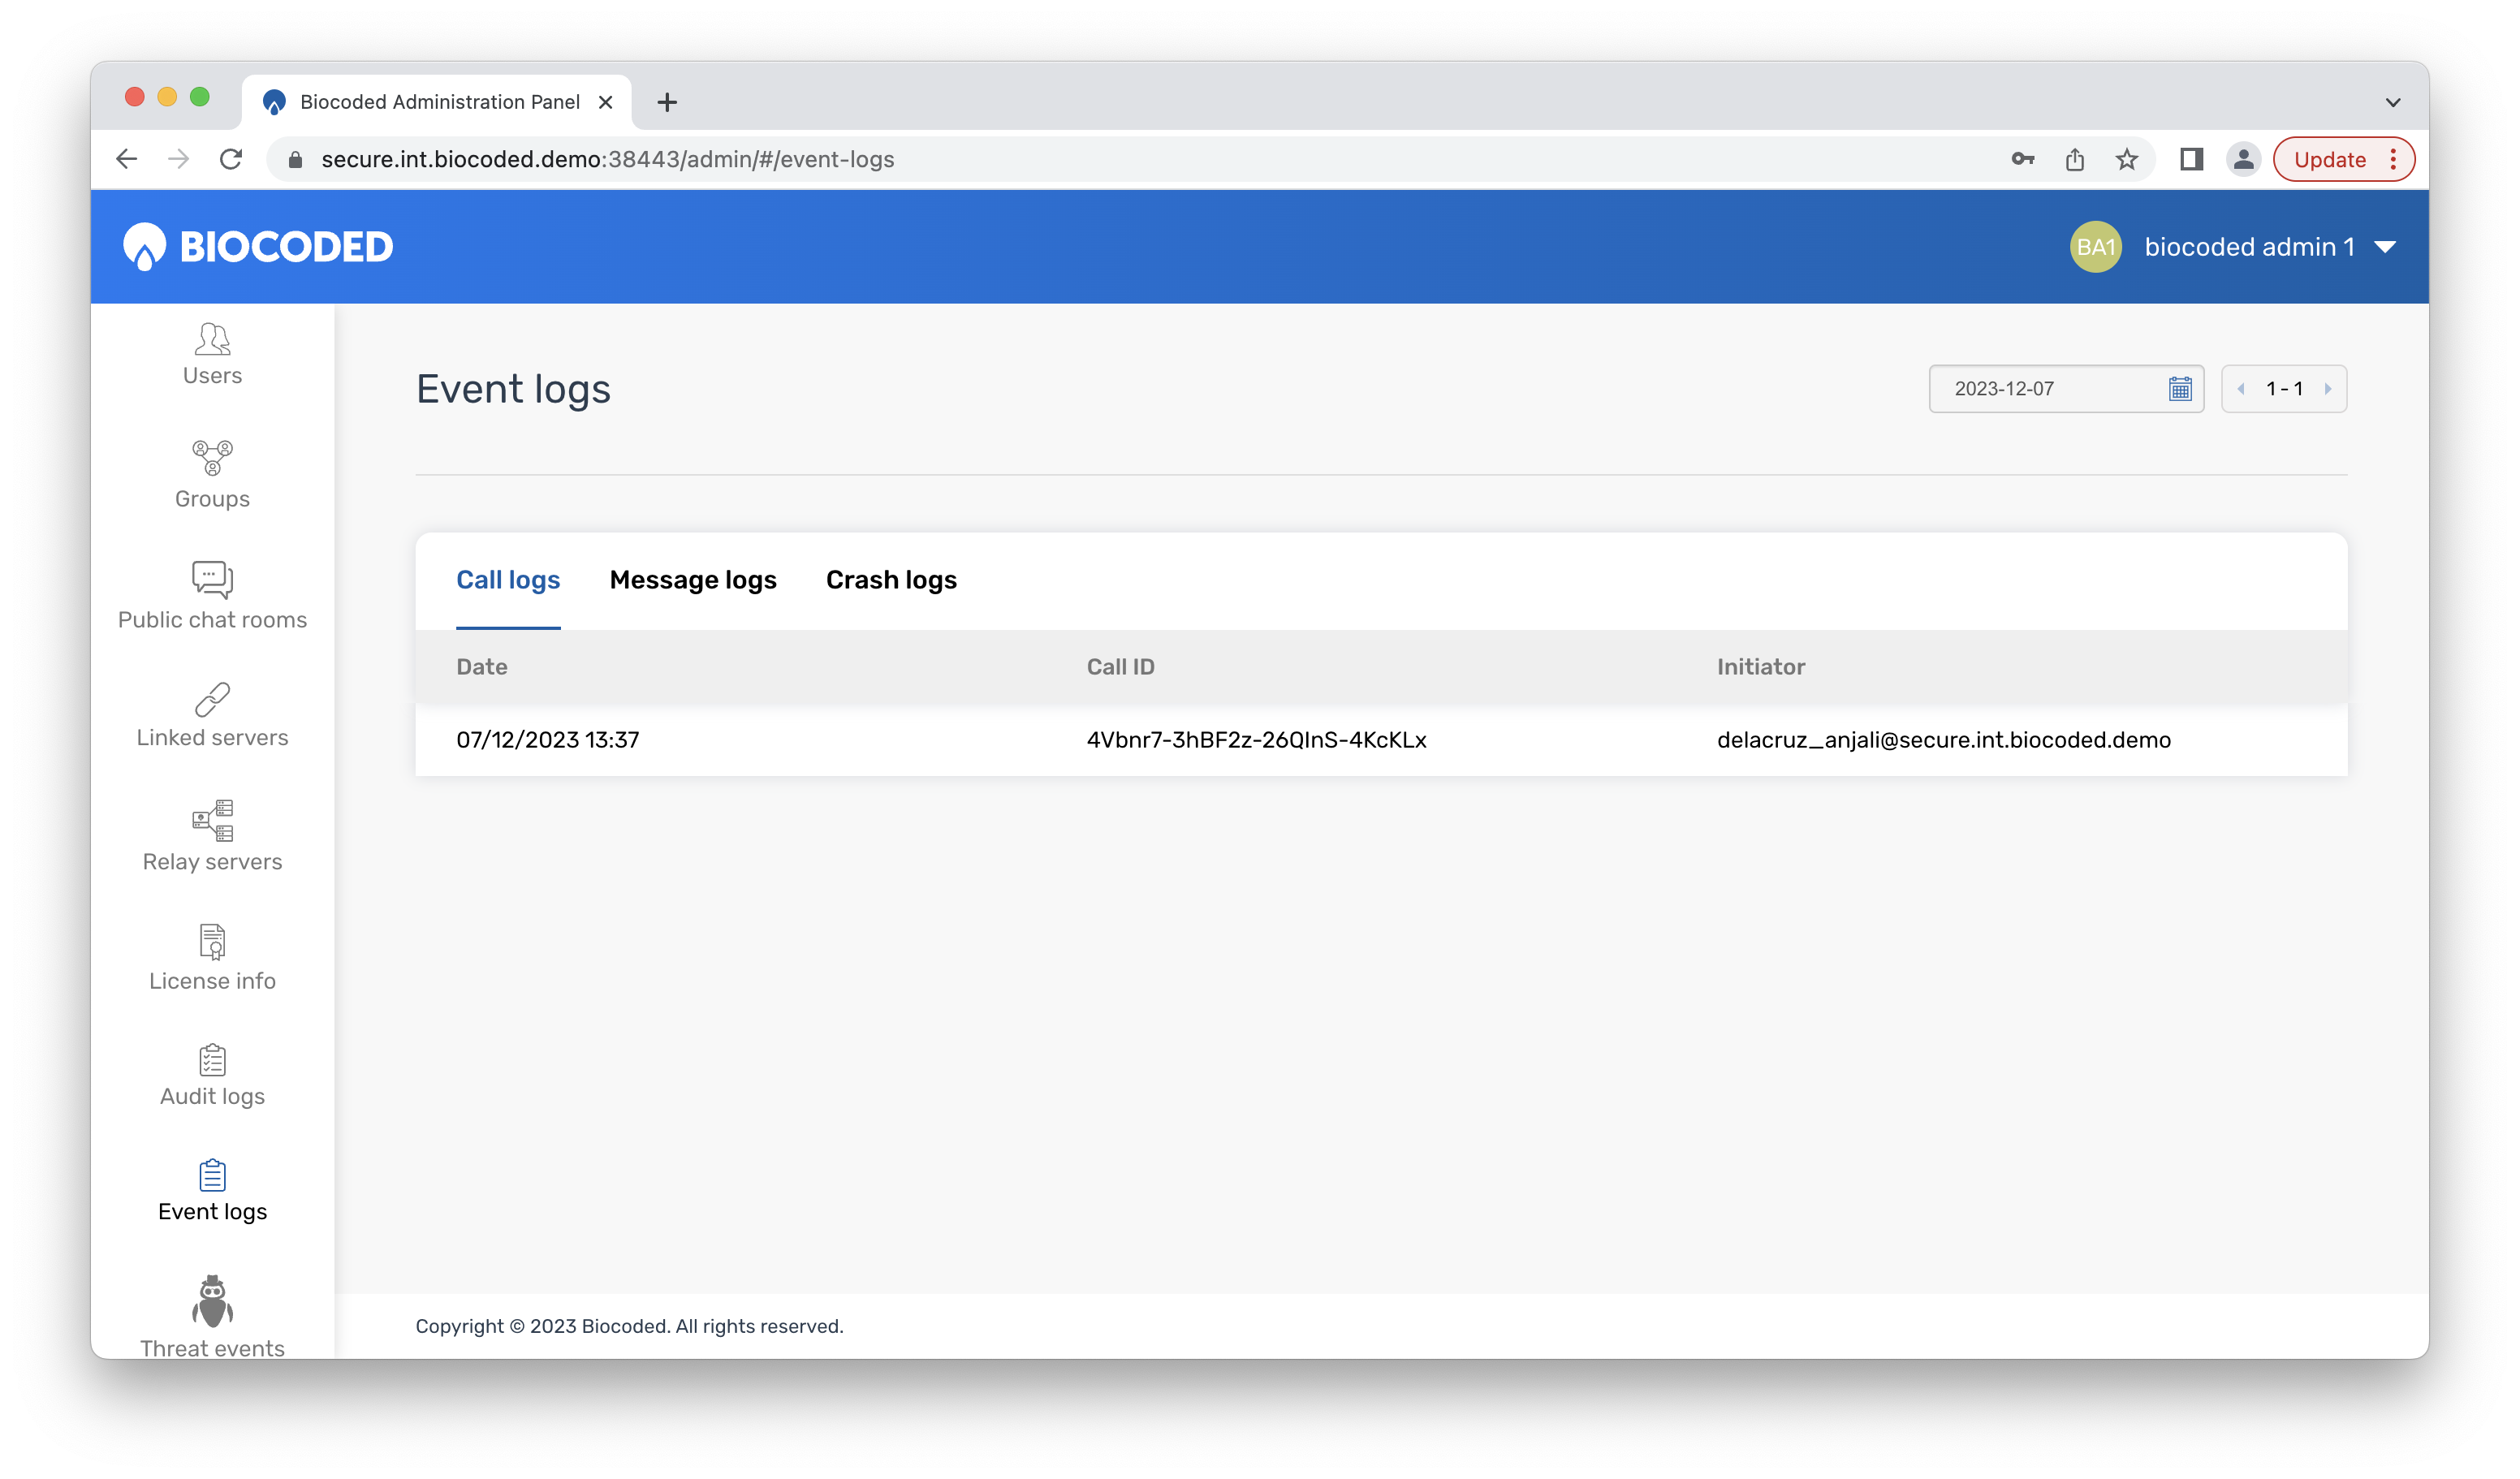
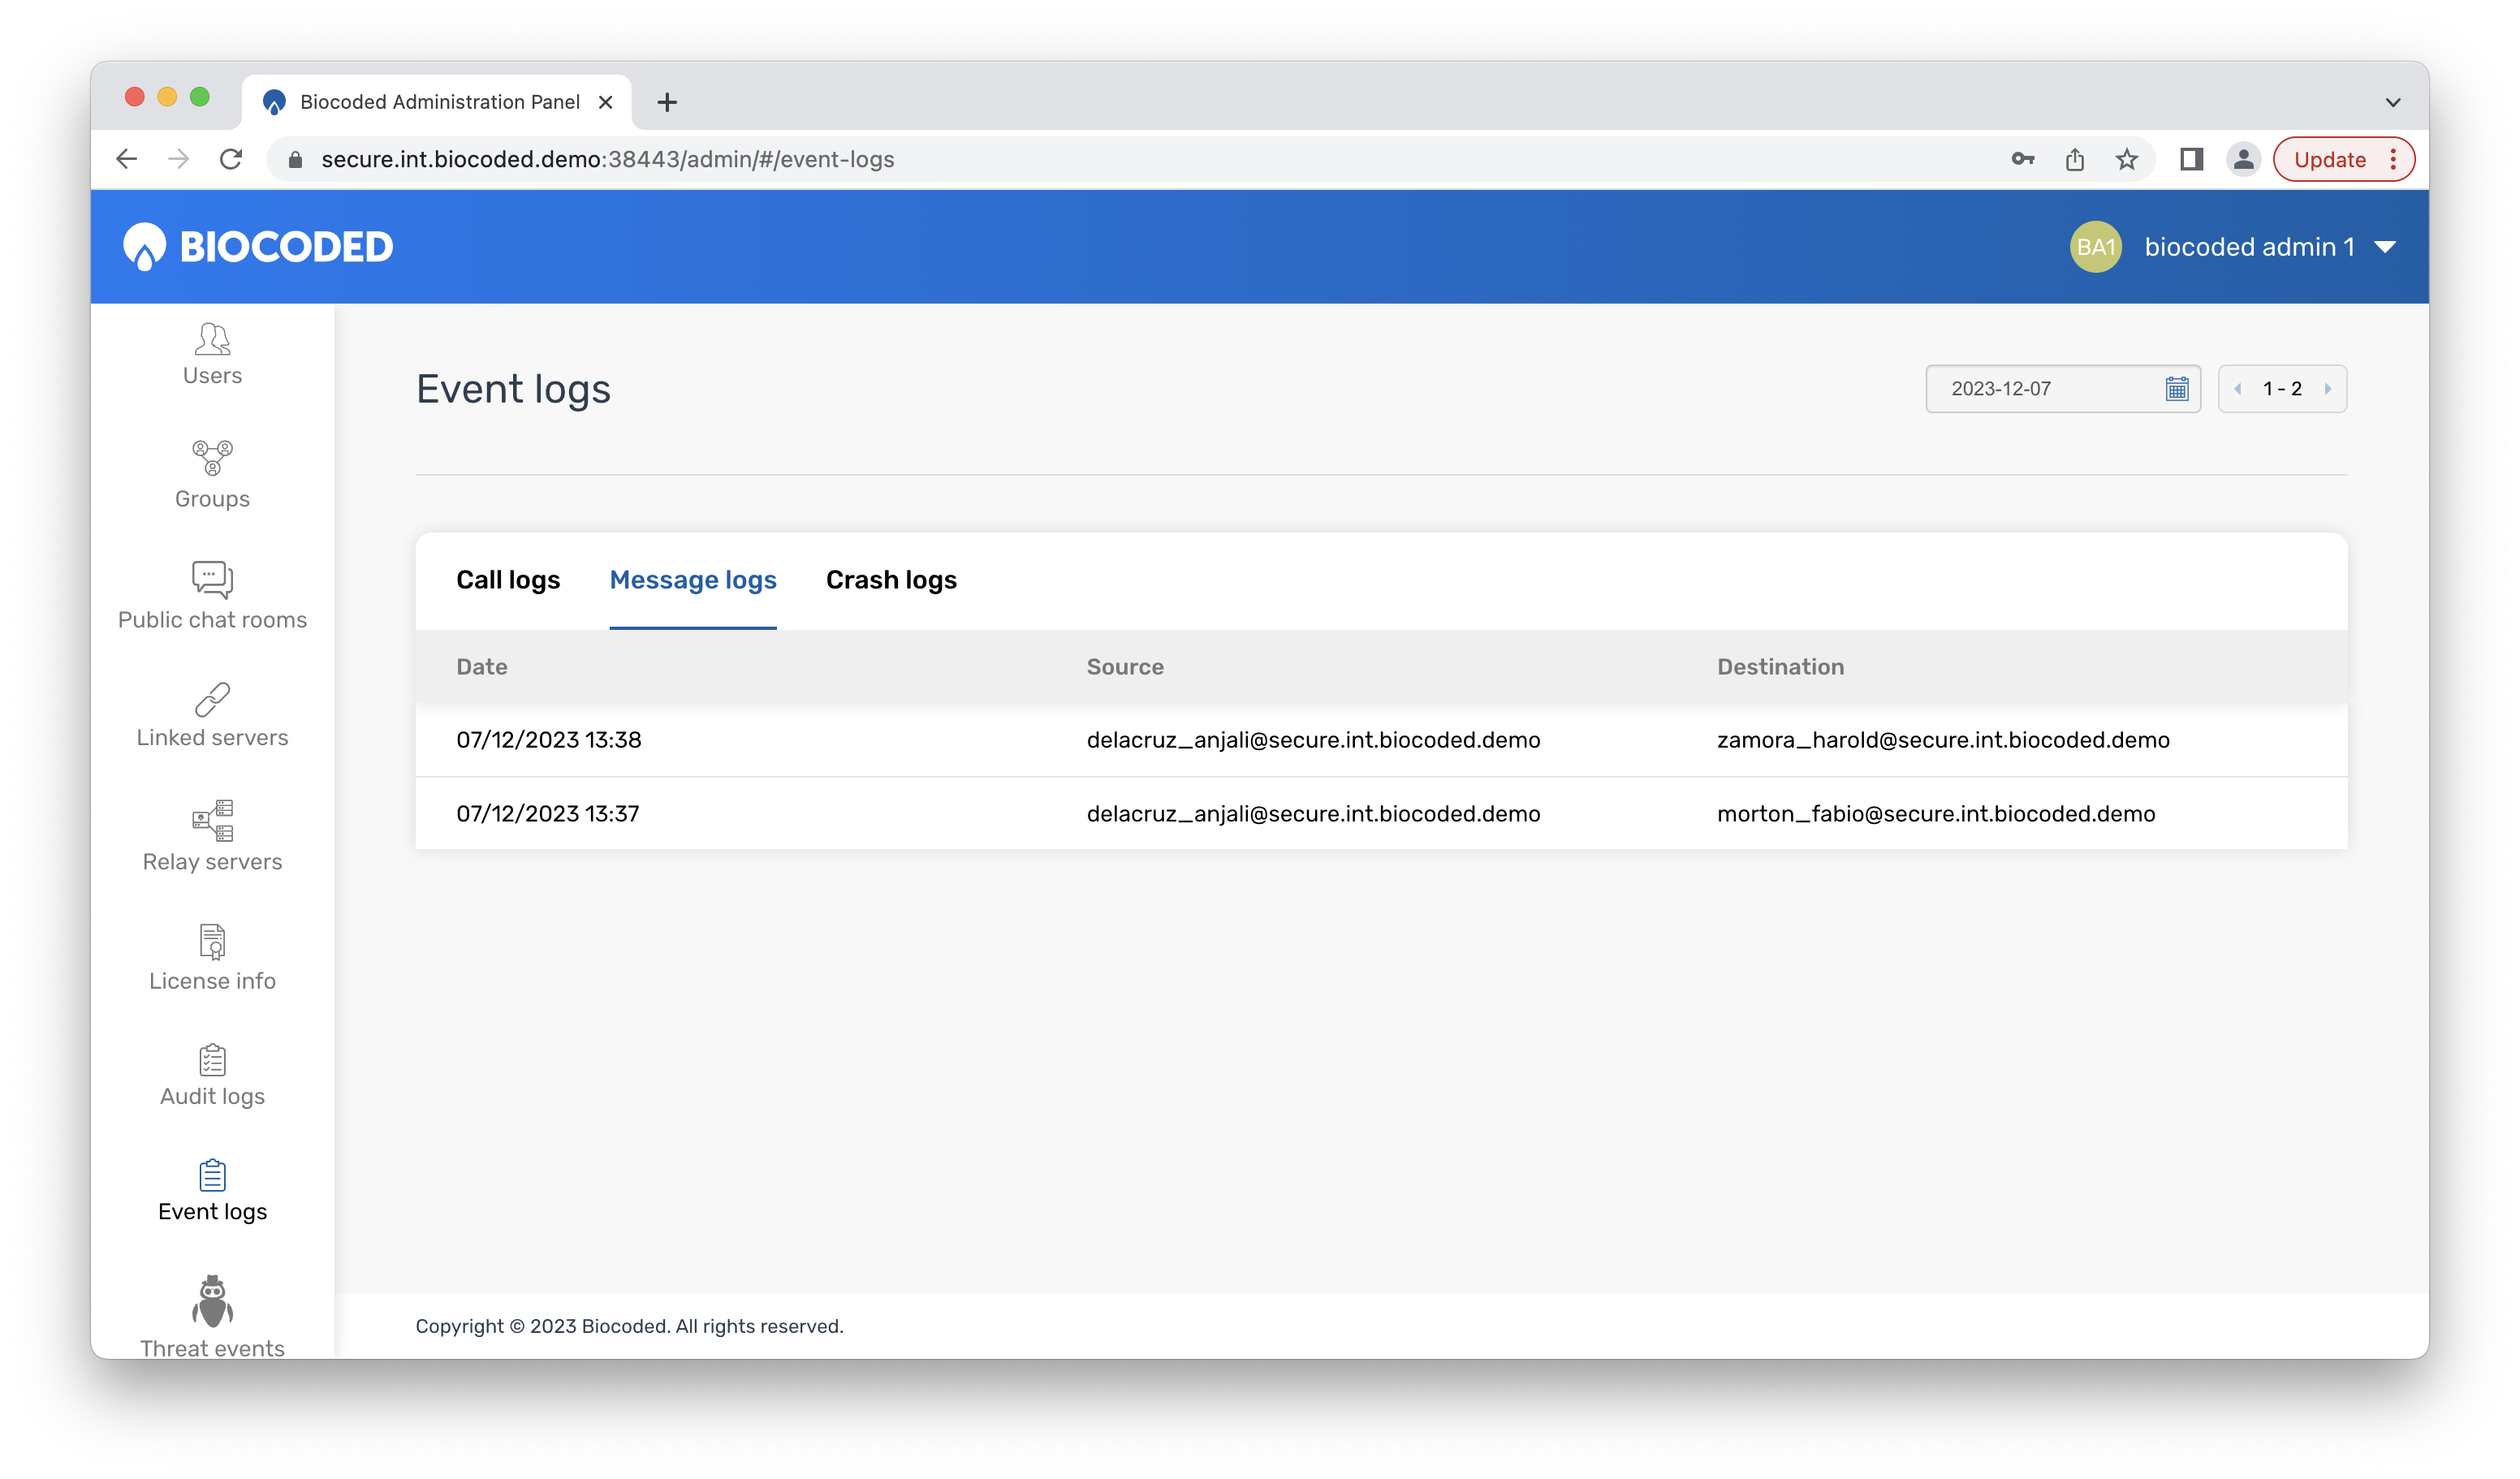
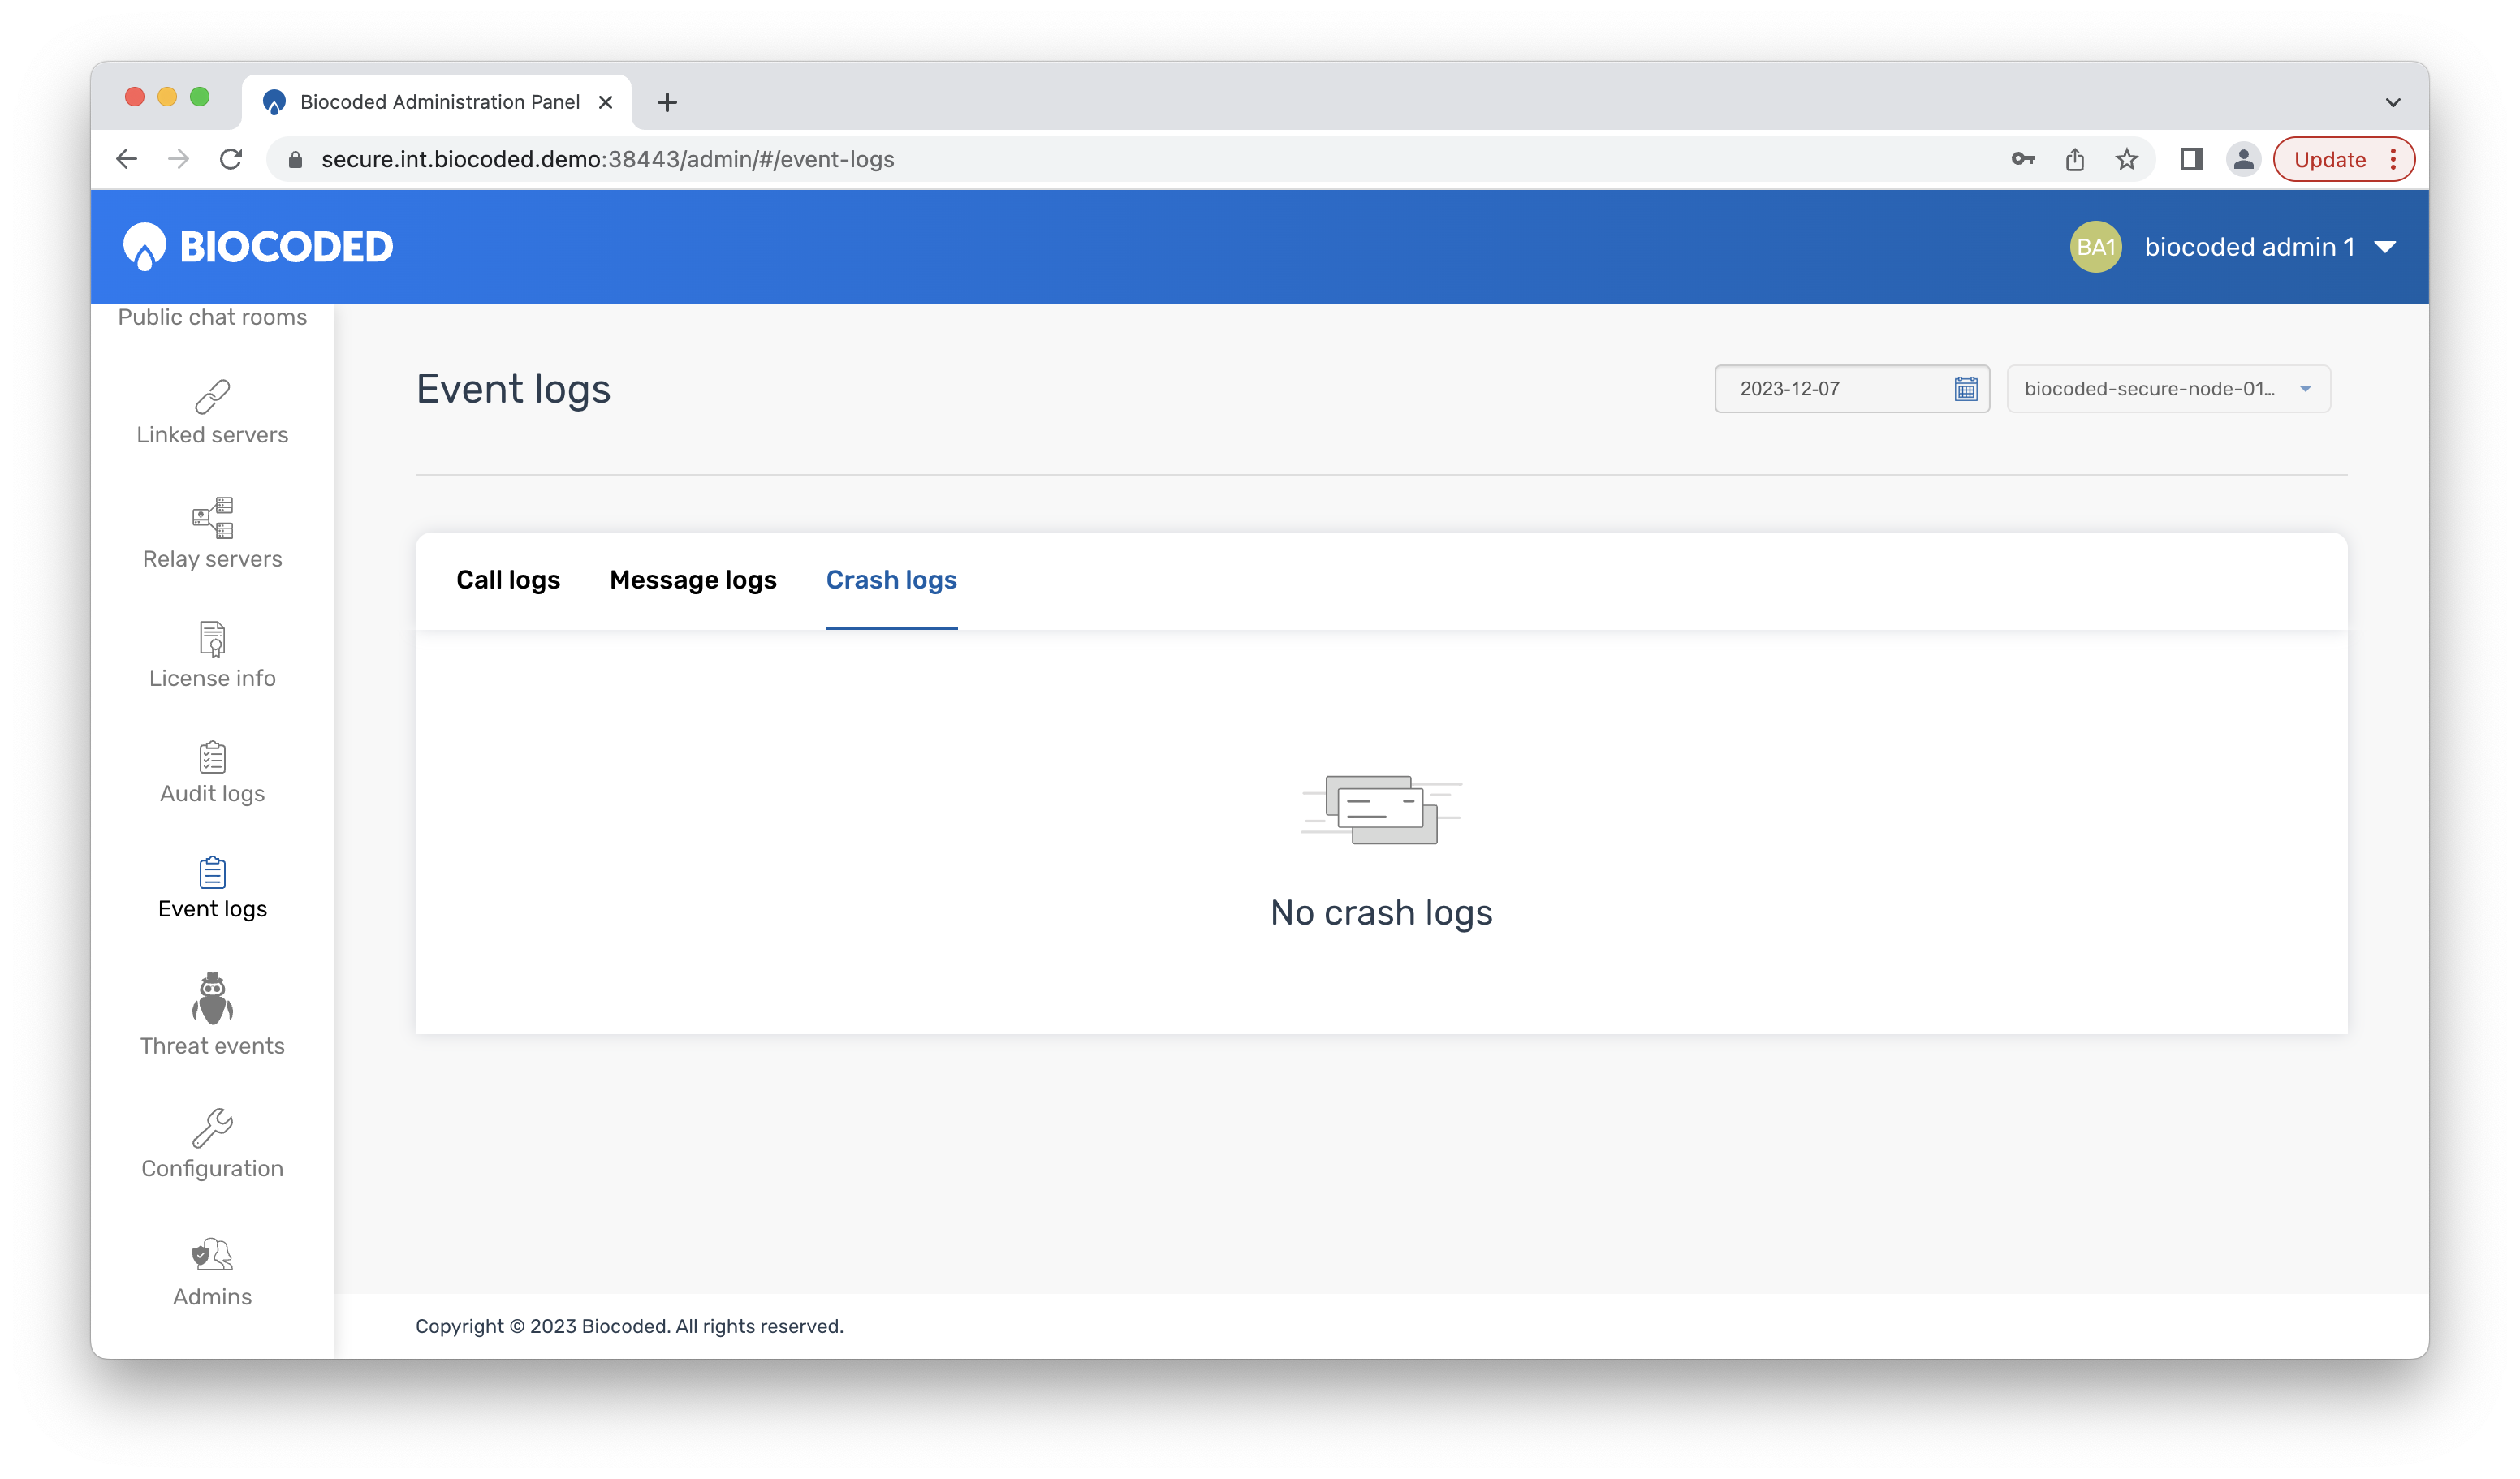
Event logs is a list of user activity on the server. It is separated into three columns - call logs, message logs and crash logs.
Configuration
Configuration is a combined list of settings separated into sections - general, network, admin, user, security, QOS (Quality Of Service), mobile, calling, services, location, file system, database, email and tuning.
A list of all settings: - General settings - server_name - name of server, - setup_id - same as in License info tab,
-
Network settings
- stun_port - port for STUN (Session Traversal Utilities for NAT)
- internal_https_port - port for internal https connections
- udp_port_count - number of UDP (User Diagram Protocol) ports
- udp_port_offset
- external_https_port
- public_address6
- stun_interfaces
- stun_public_addresses
- udp_port
- internal_http_port
- operating_mode
- public_address
- external_http_port
- public_domain - domain used for external connections
-
Admin settings
- admin_audit_enabled
- api_access_audit_enabled
- event_log_retention_sec
- telemetry_age
- event_log_enabled
- telemetry_enabled
- admin_session_expiration
- maintainance_inactive_time
-
User settings
- user_group_chat_enabled
- user_location_sharing
- contact_invite_disabled
- multidevice_default
- user_realtime_functions
- allowed_device_count
- multidevice
- profile_update_enabled
- user_location_functions
- allowed_device_count_hardlimit
-
Security settings
- cacerts_size
- system_data_sharing
- threat_events_enabled
- alias_dispatch
- synapse_enabled
- ssl_pins_sha1
- allowed_device_ua
- synapse_domain_config
- user_visibility
- ssl_pins_sha256
- system_administrators
- synapse_cacertfile
- onetime_password_expiration
-
QOS settings
- crypto_user_timeout
- crypto_user_persist_timeout
- max_chatroom_message_count
- crypto_message_device_queue_max_size
- crypto_message_persistent_queue_max_size
- chatroom_allowed_inactivity
-
Mobile settings
- push_service_mode
- push_configuration_ios_filter
-
Calling settings
- server_call_ref
- conference_call_max_users
- conference_room_slots
- conference_room_slot_timeout
-
Services settings
- push_servers
-
Location settings
- location_services_center
- location_services_bounds
-
File system settings
- bdfs_folder
- bdfs_max_file_size
- bdfs_repl_factor
-
Database setting
- actordb
-
Email settings
- smtp_username
- smtp_server
- smtp_port
- smtp_password
-
Tuning settings
- debug_requests
- whitelabel_logo
- packet_logging
- ip_remap
- registry_proc_handlers
CA store (a list of trusted TLS certificated) can also be viewed by clicking "Show CA store".
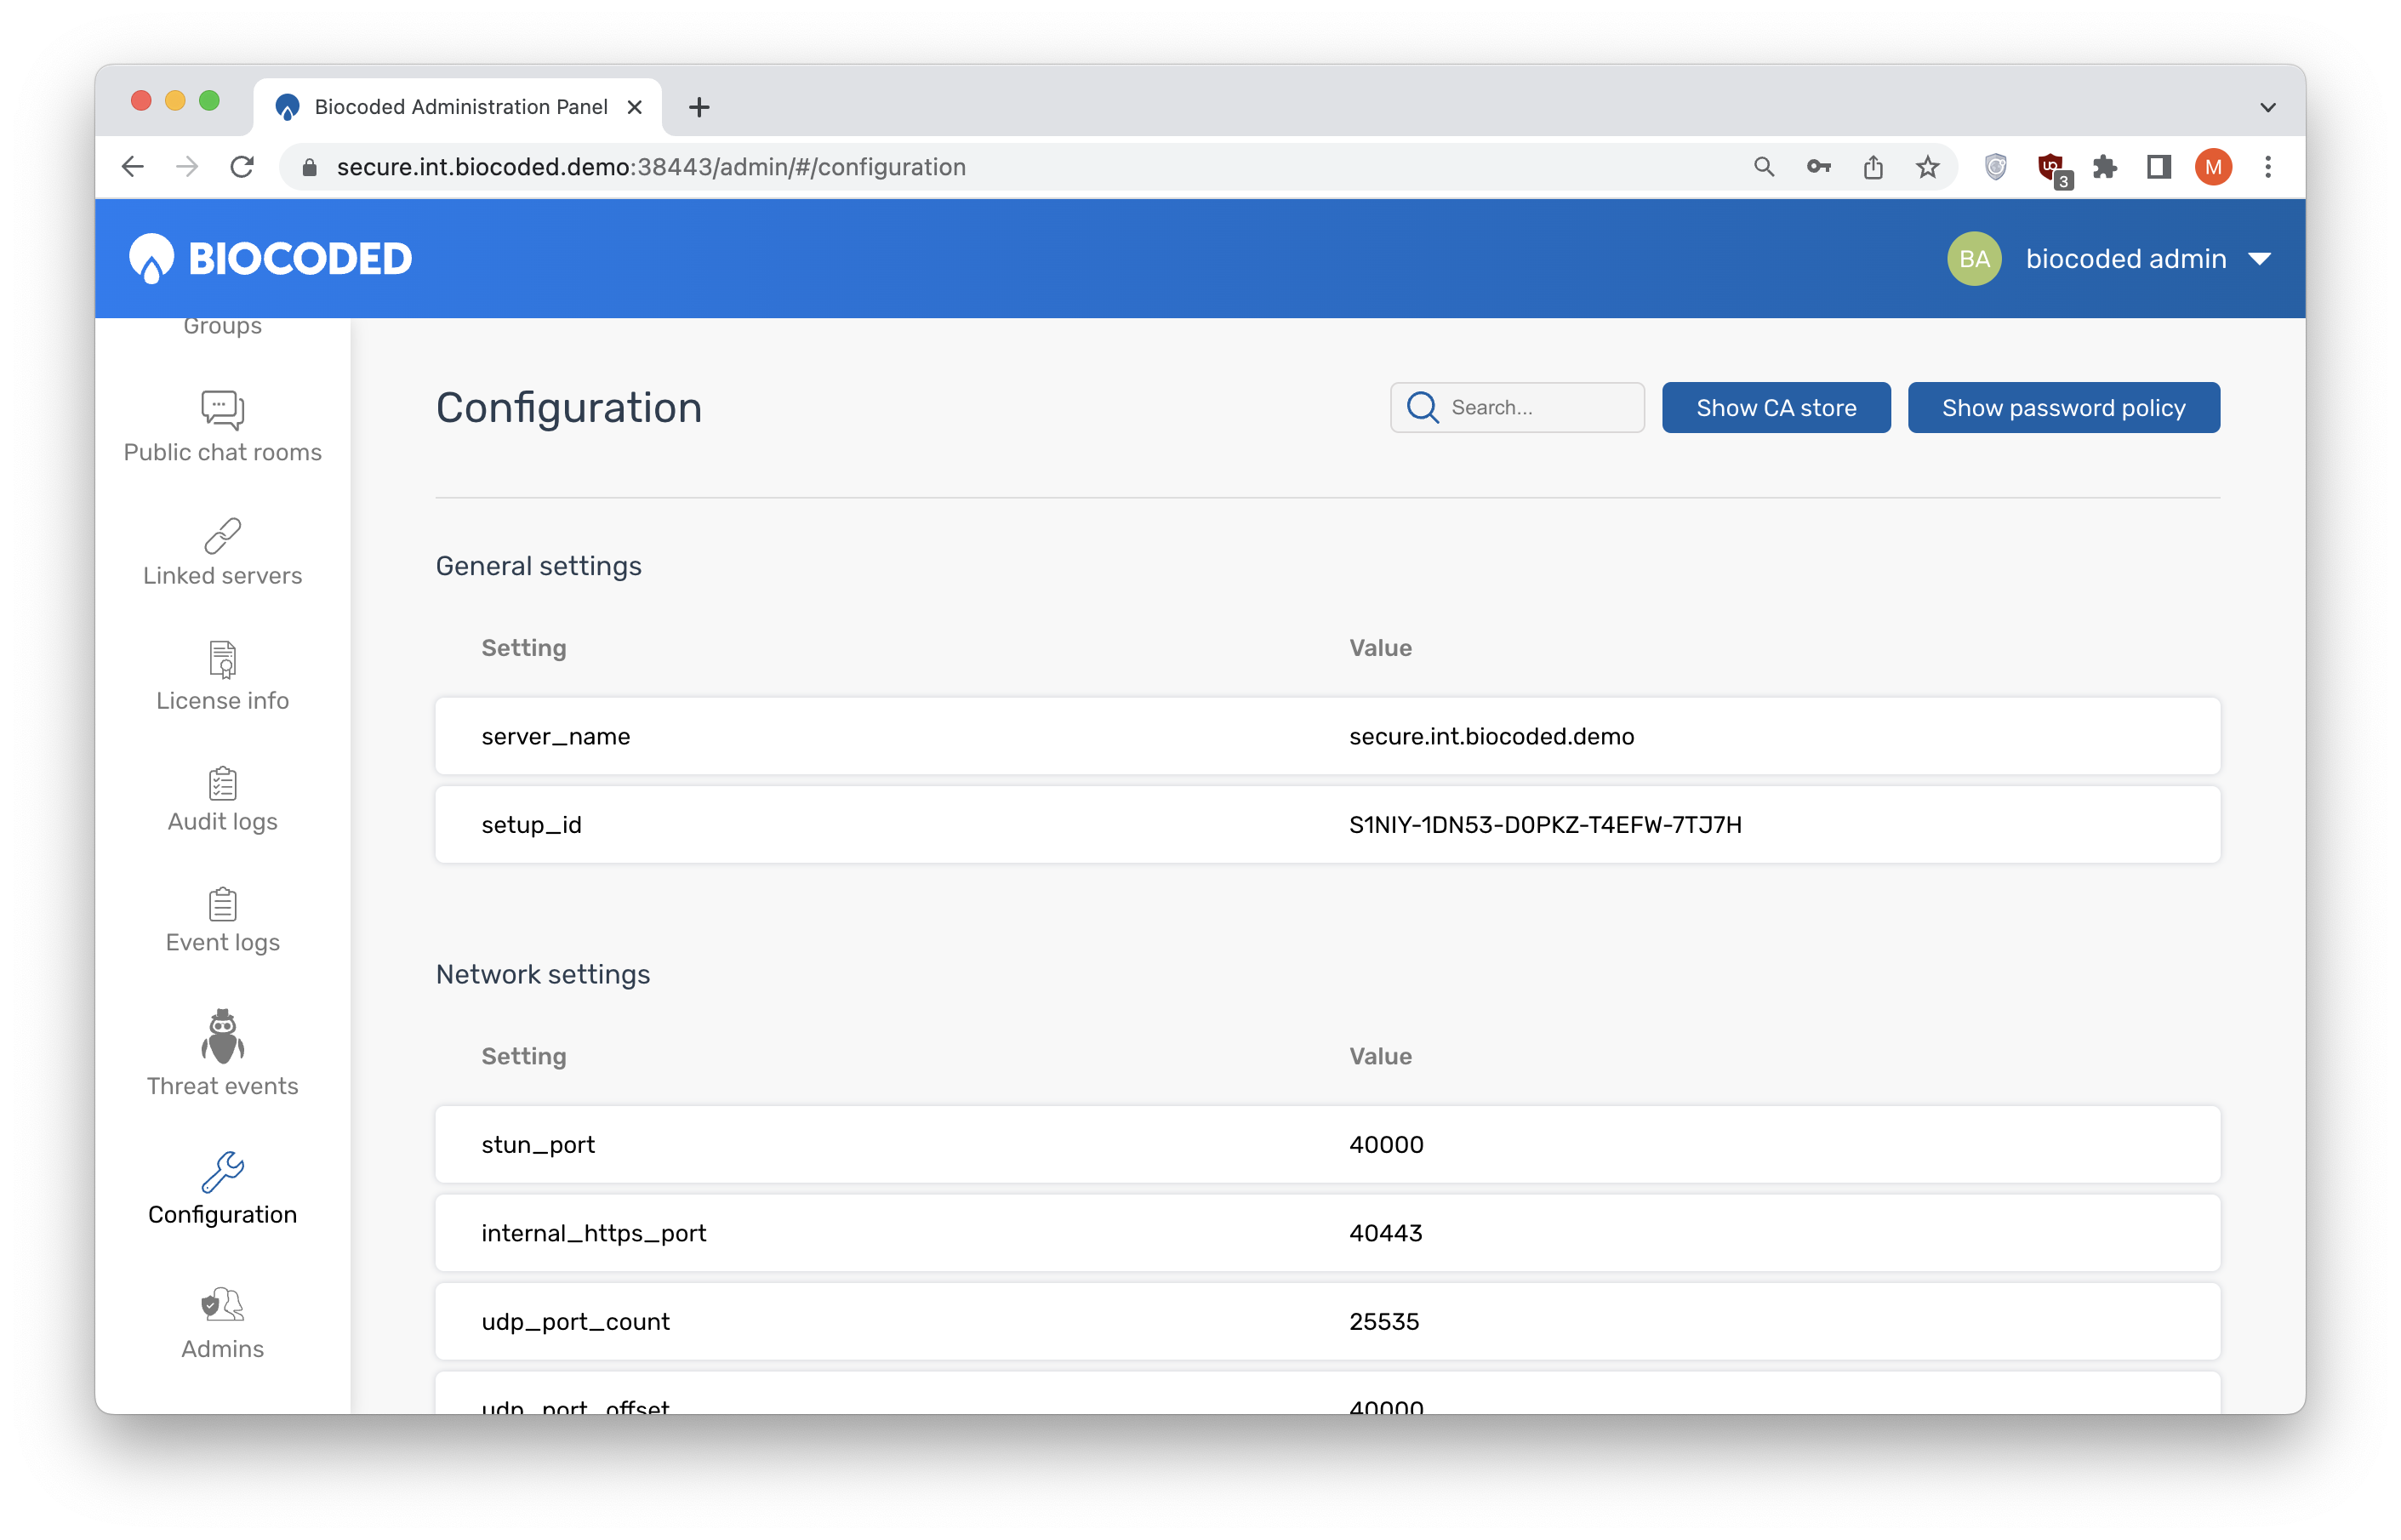
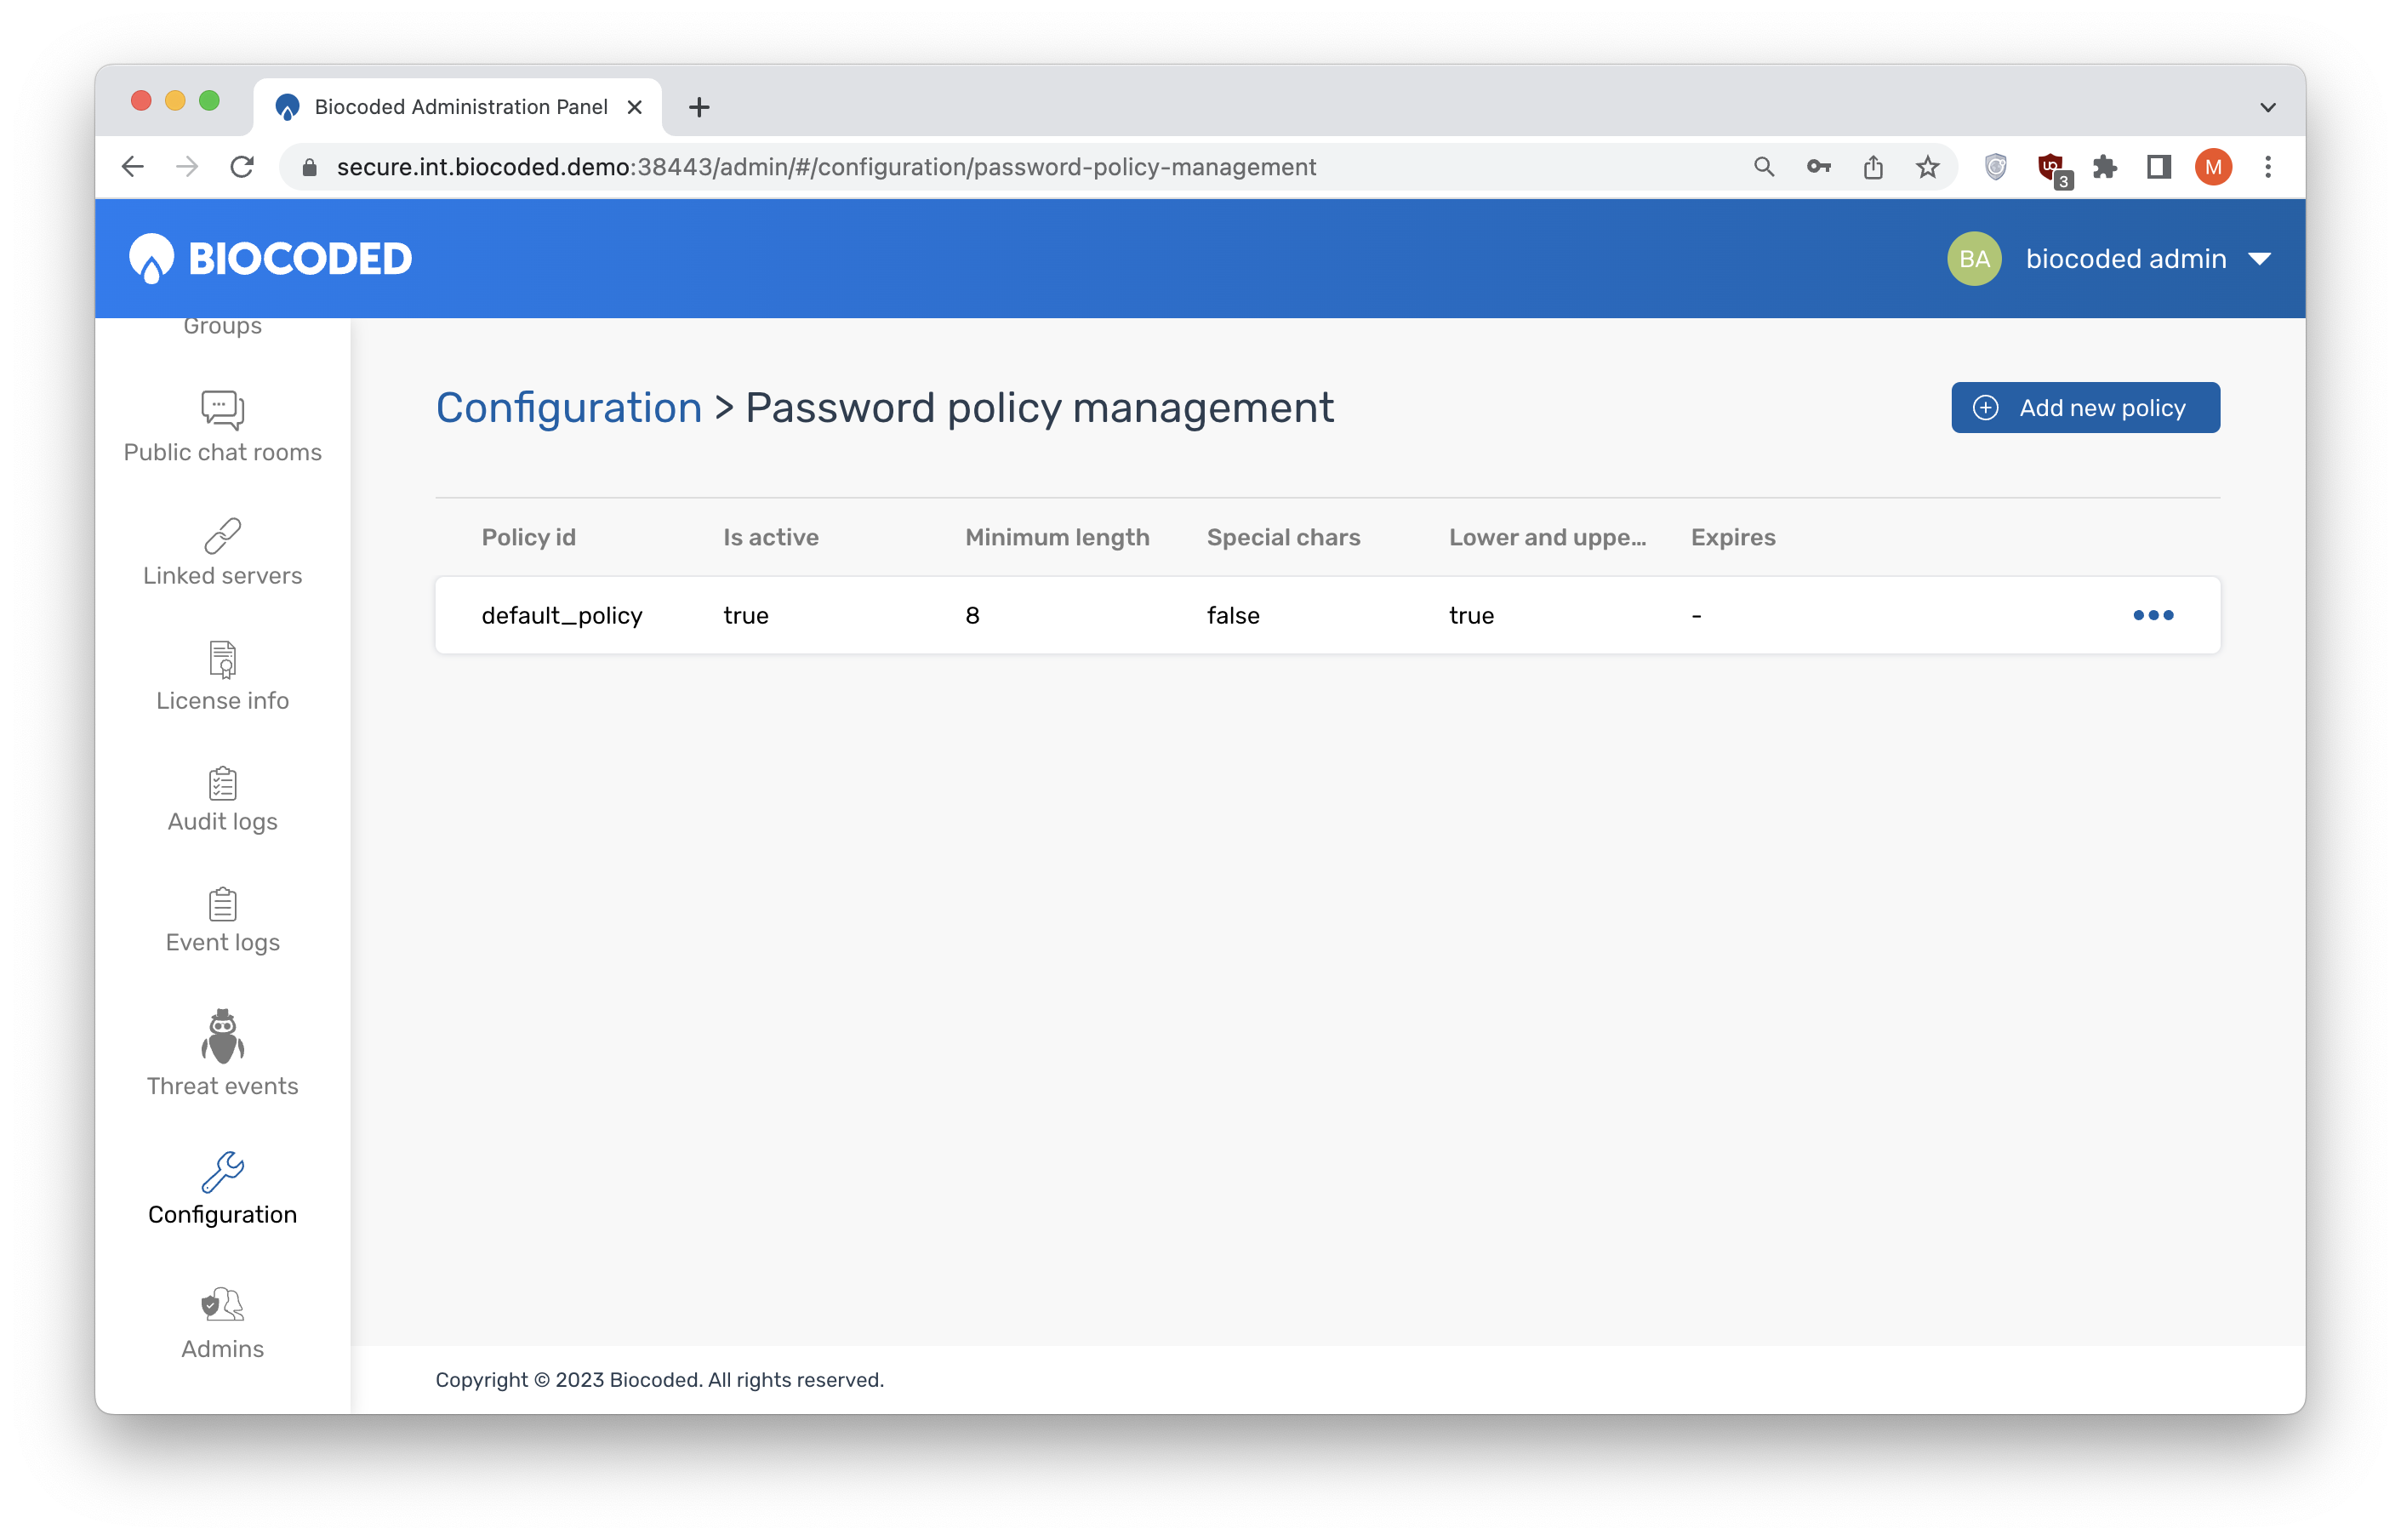
Show password policy shows a list of password policies, which can be temporary.
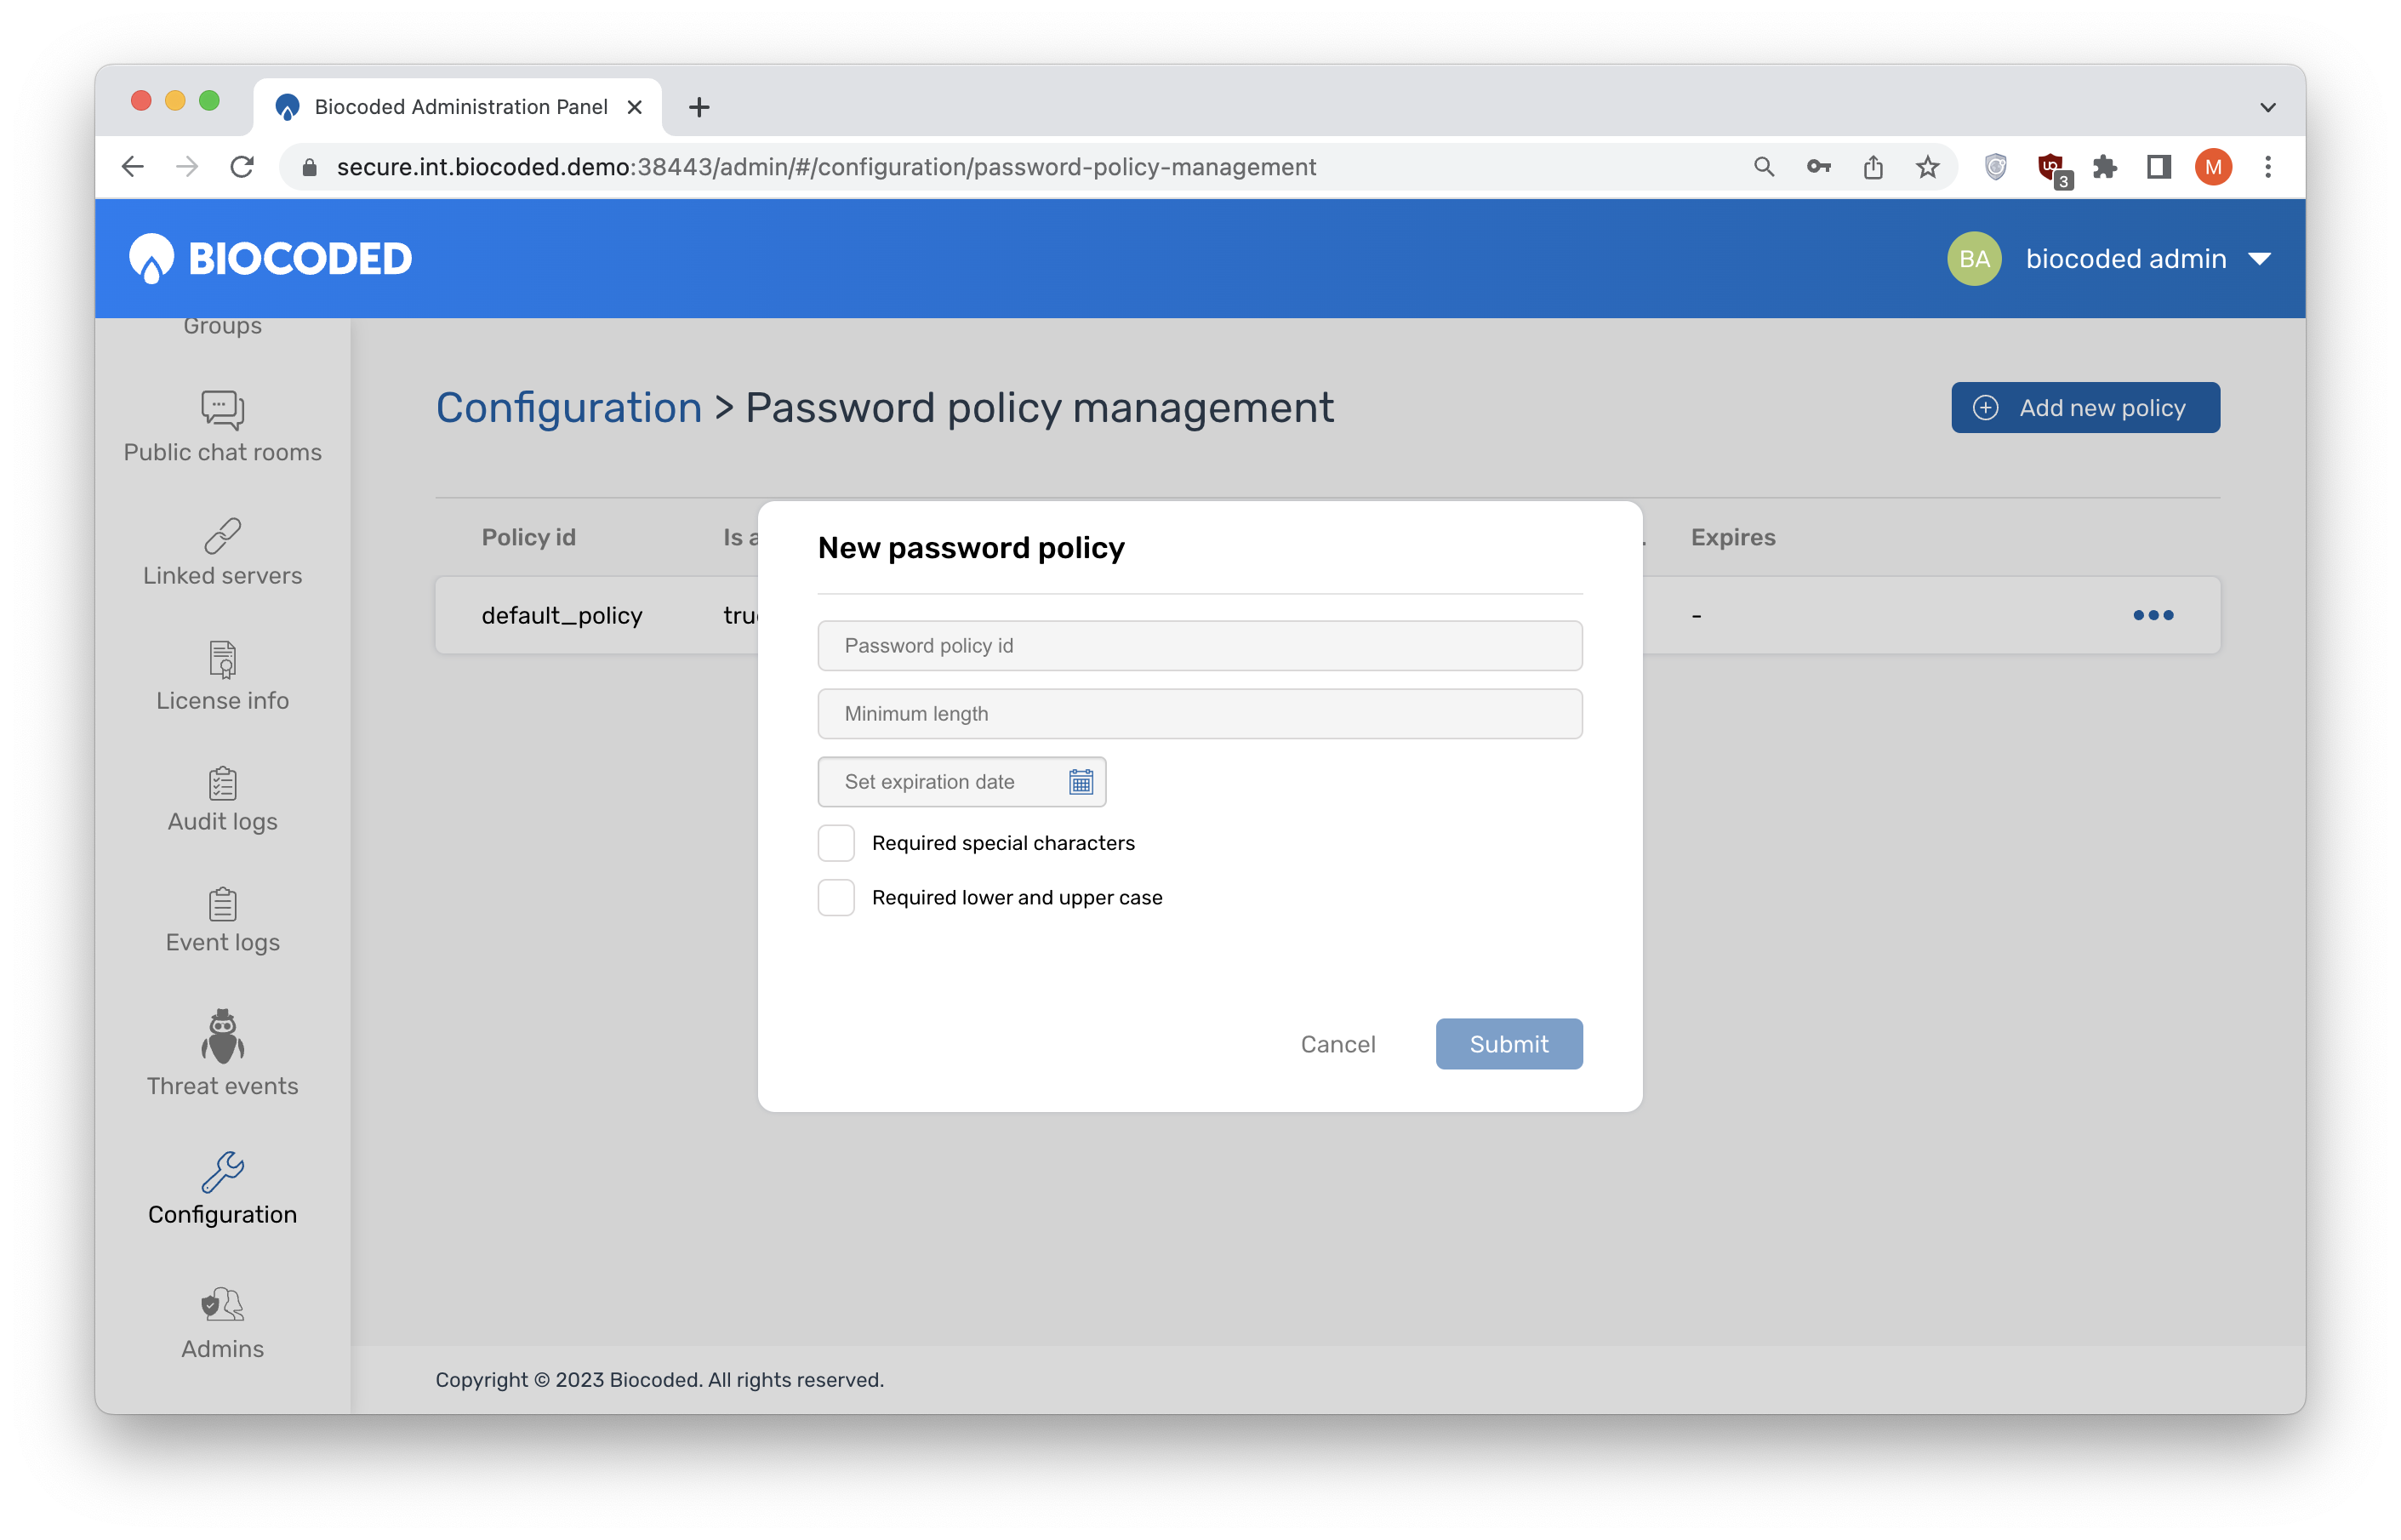
To add a new policy, click "Add new policy", select an ID, required minimum length of password, an optional expiration date and optionally if special characters or lower and upper case letters should be required.
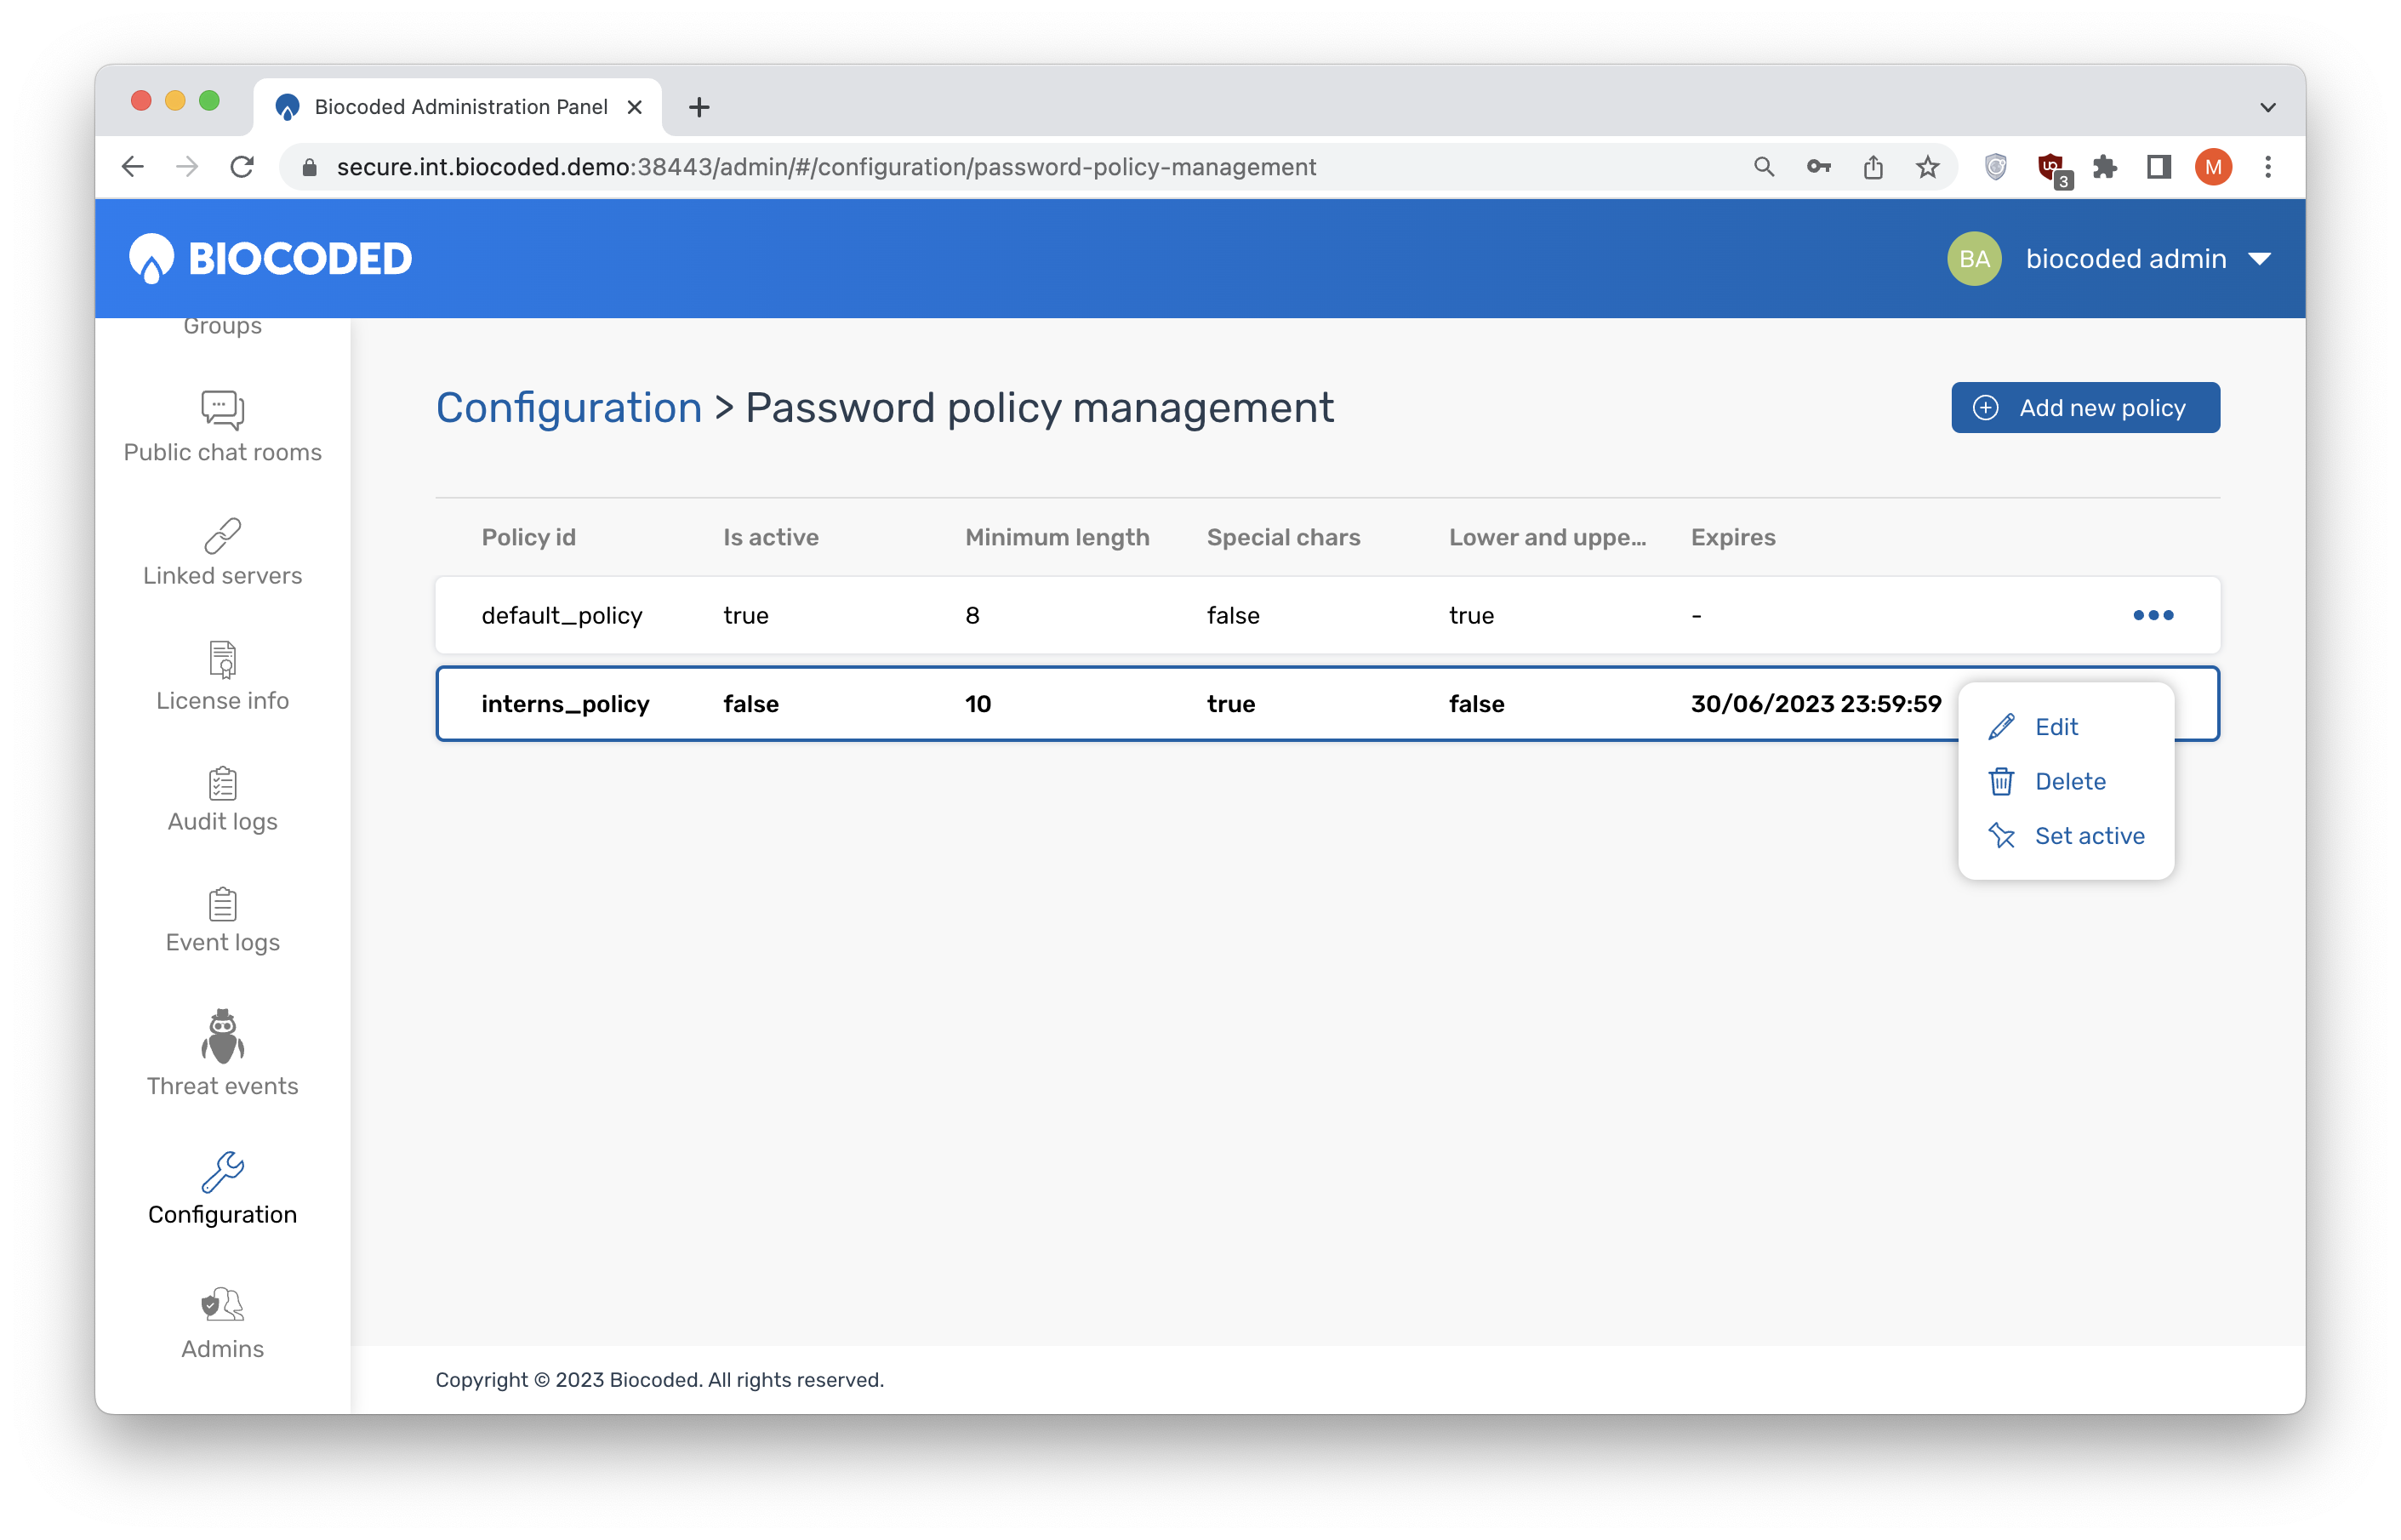
reveals a list of options:
- Edit - change password policy settings,
- Delete - removes the password policy,
- Set active - activates the selected policy.
Admins
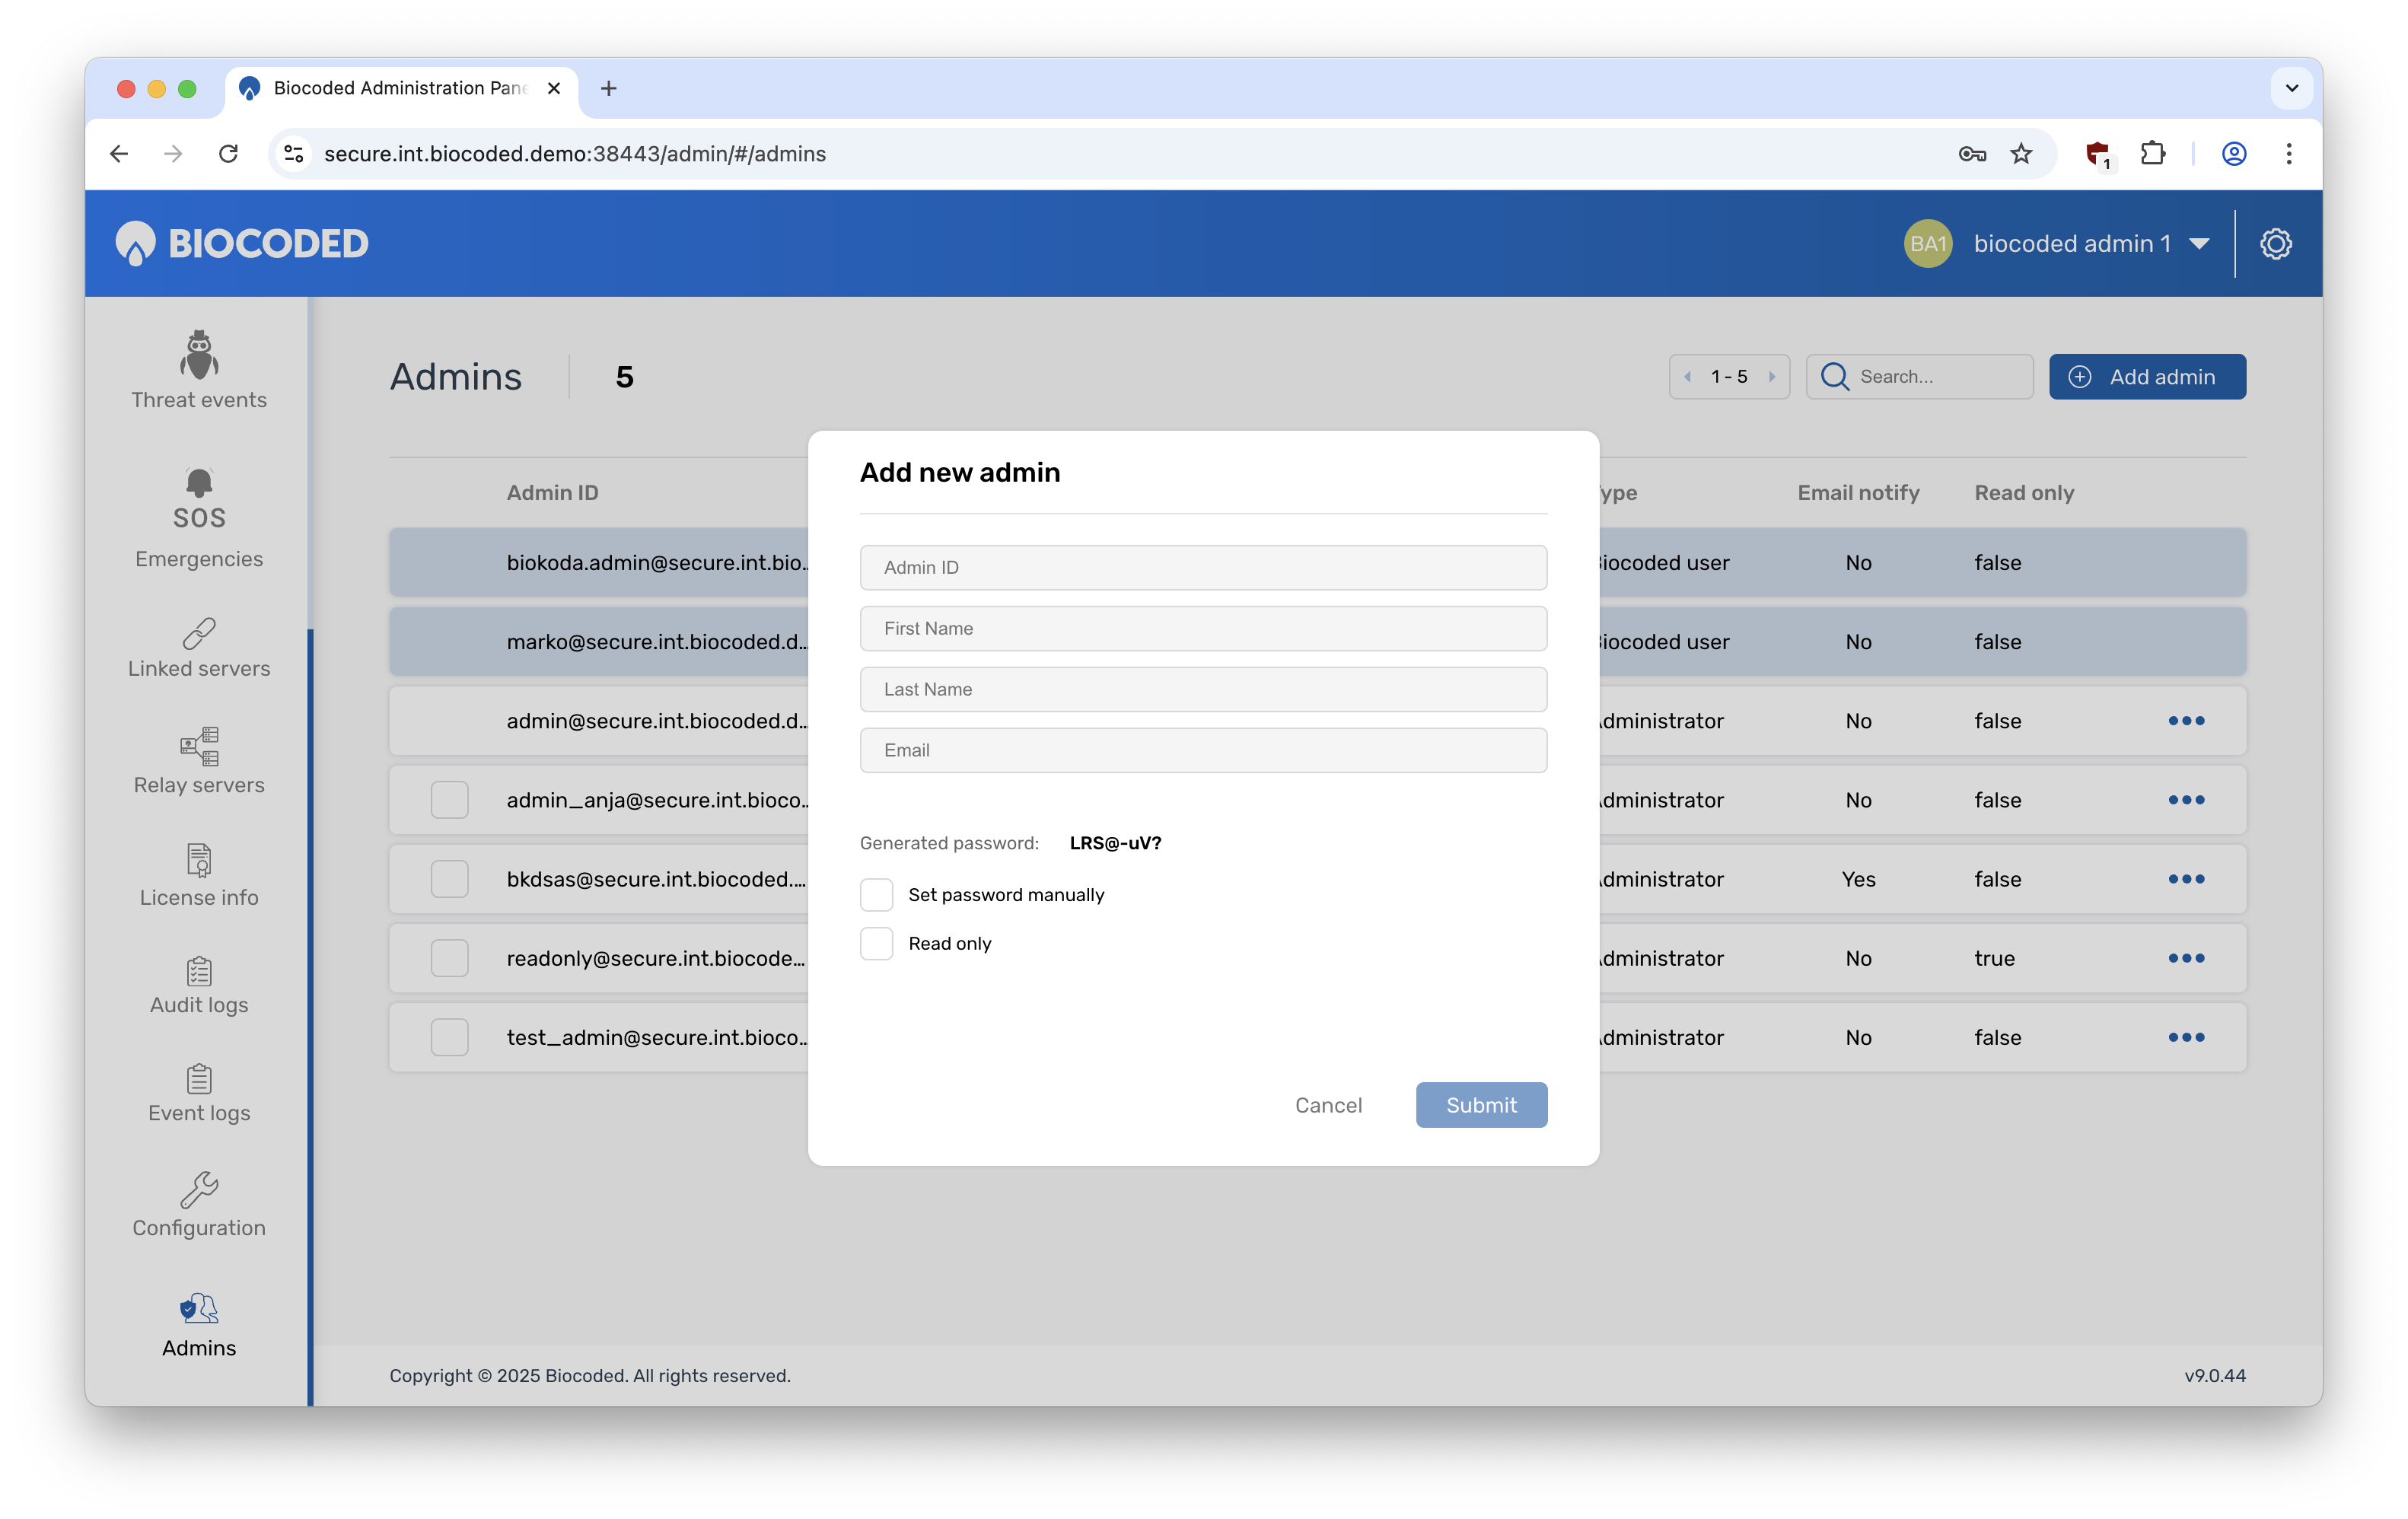
Manage the list of server administrators in Admins tab. They are listed by ID, first name, last name, email, type and email notify setting (for receiving emails when threats occur) and read only setting (for admins that only need to view server data, not change it).
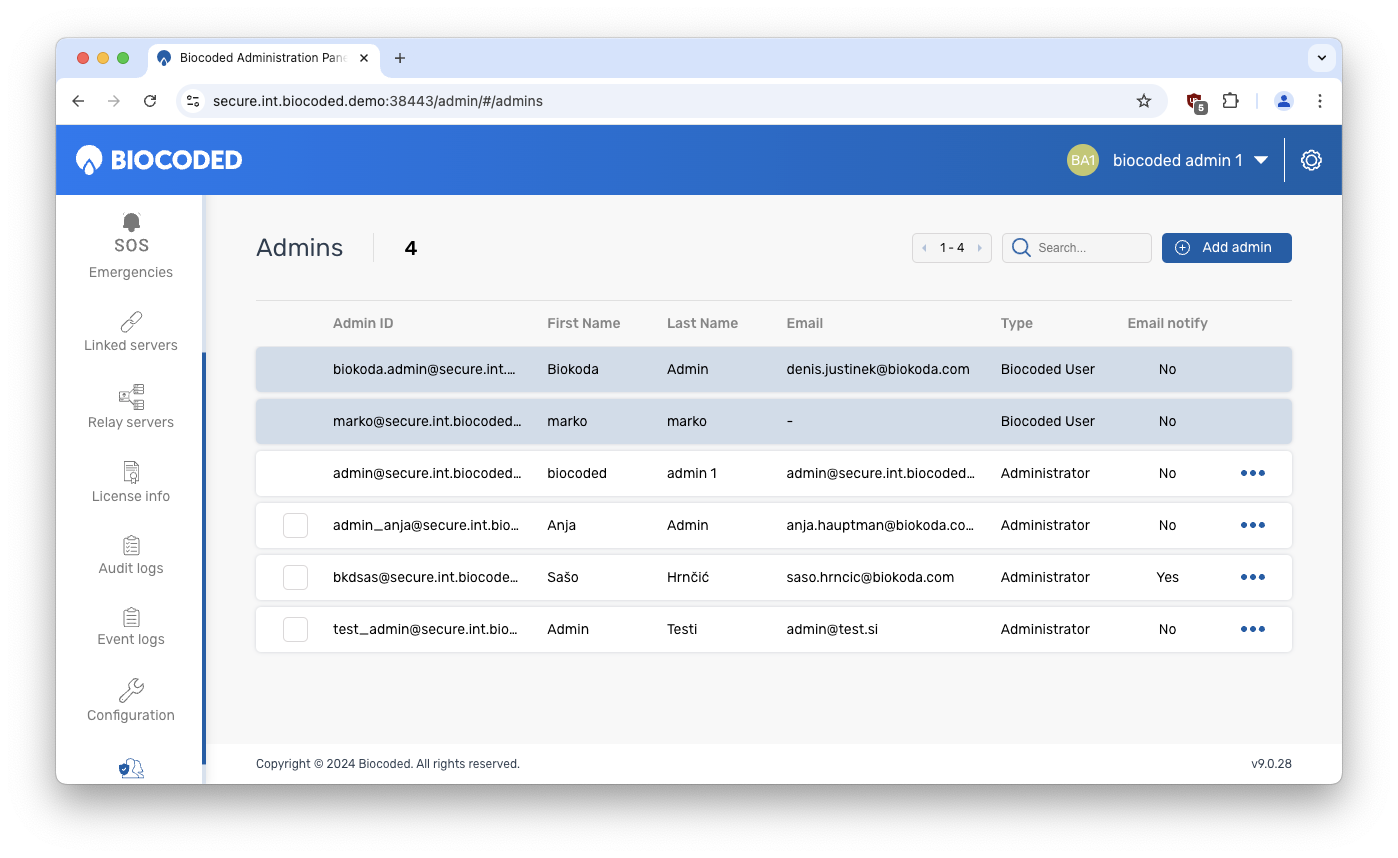
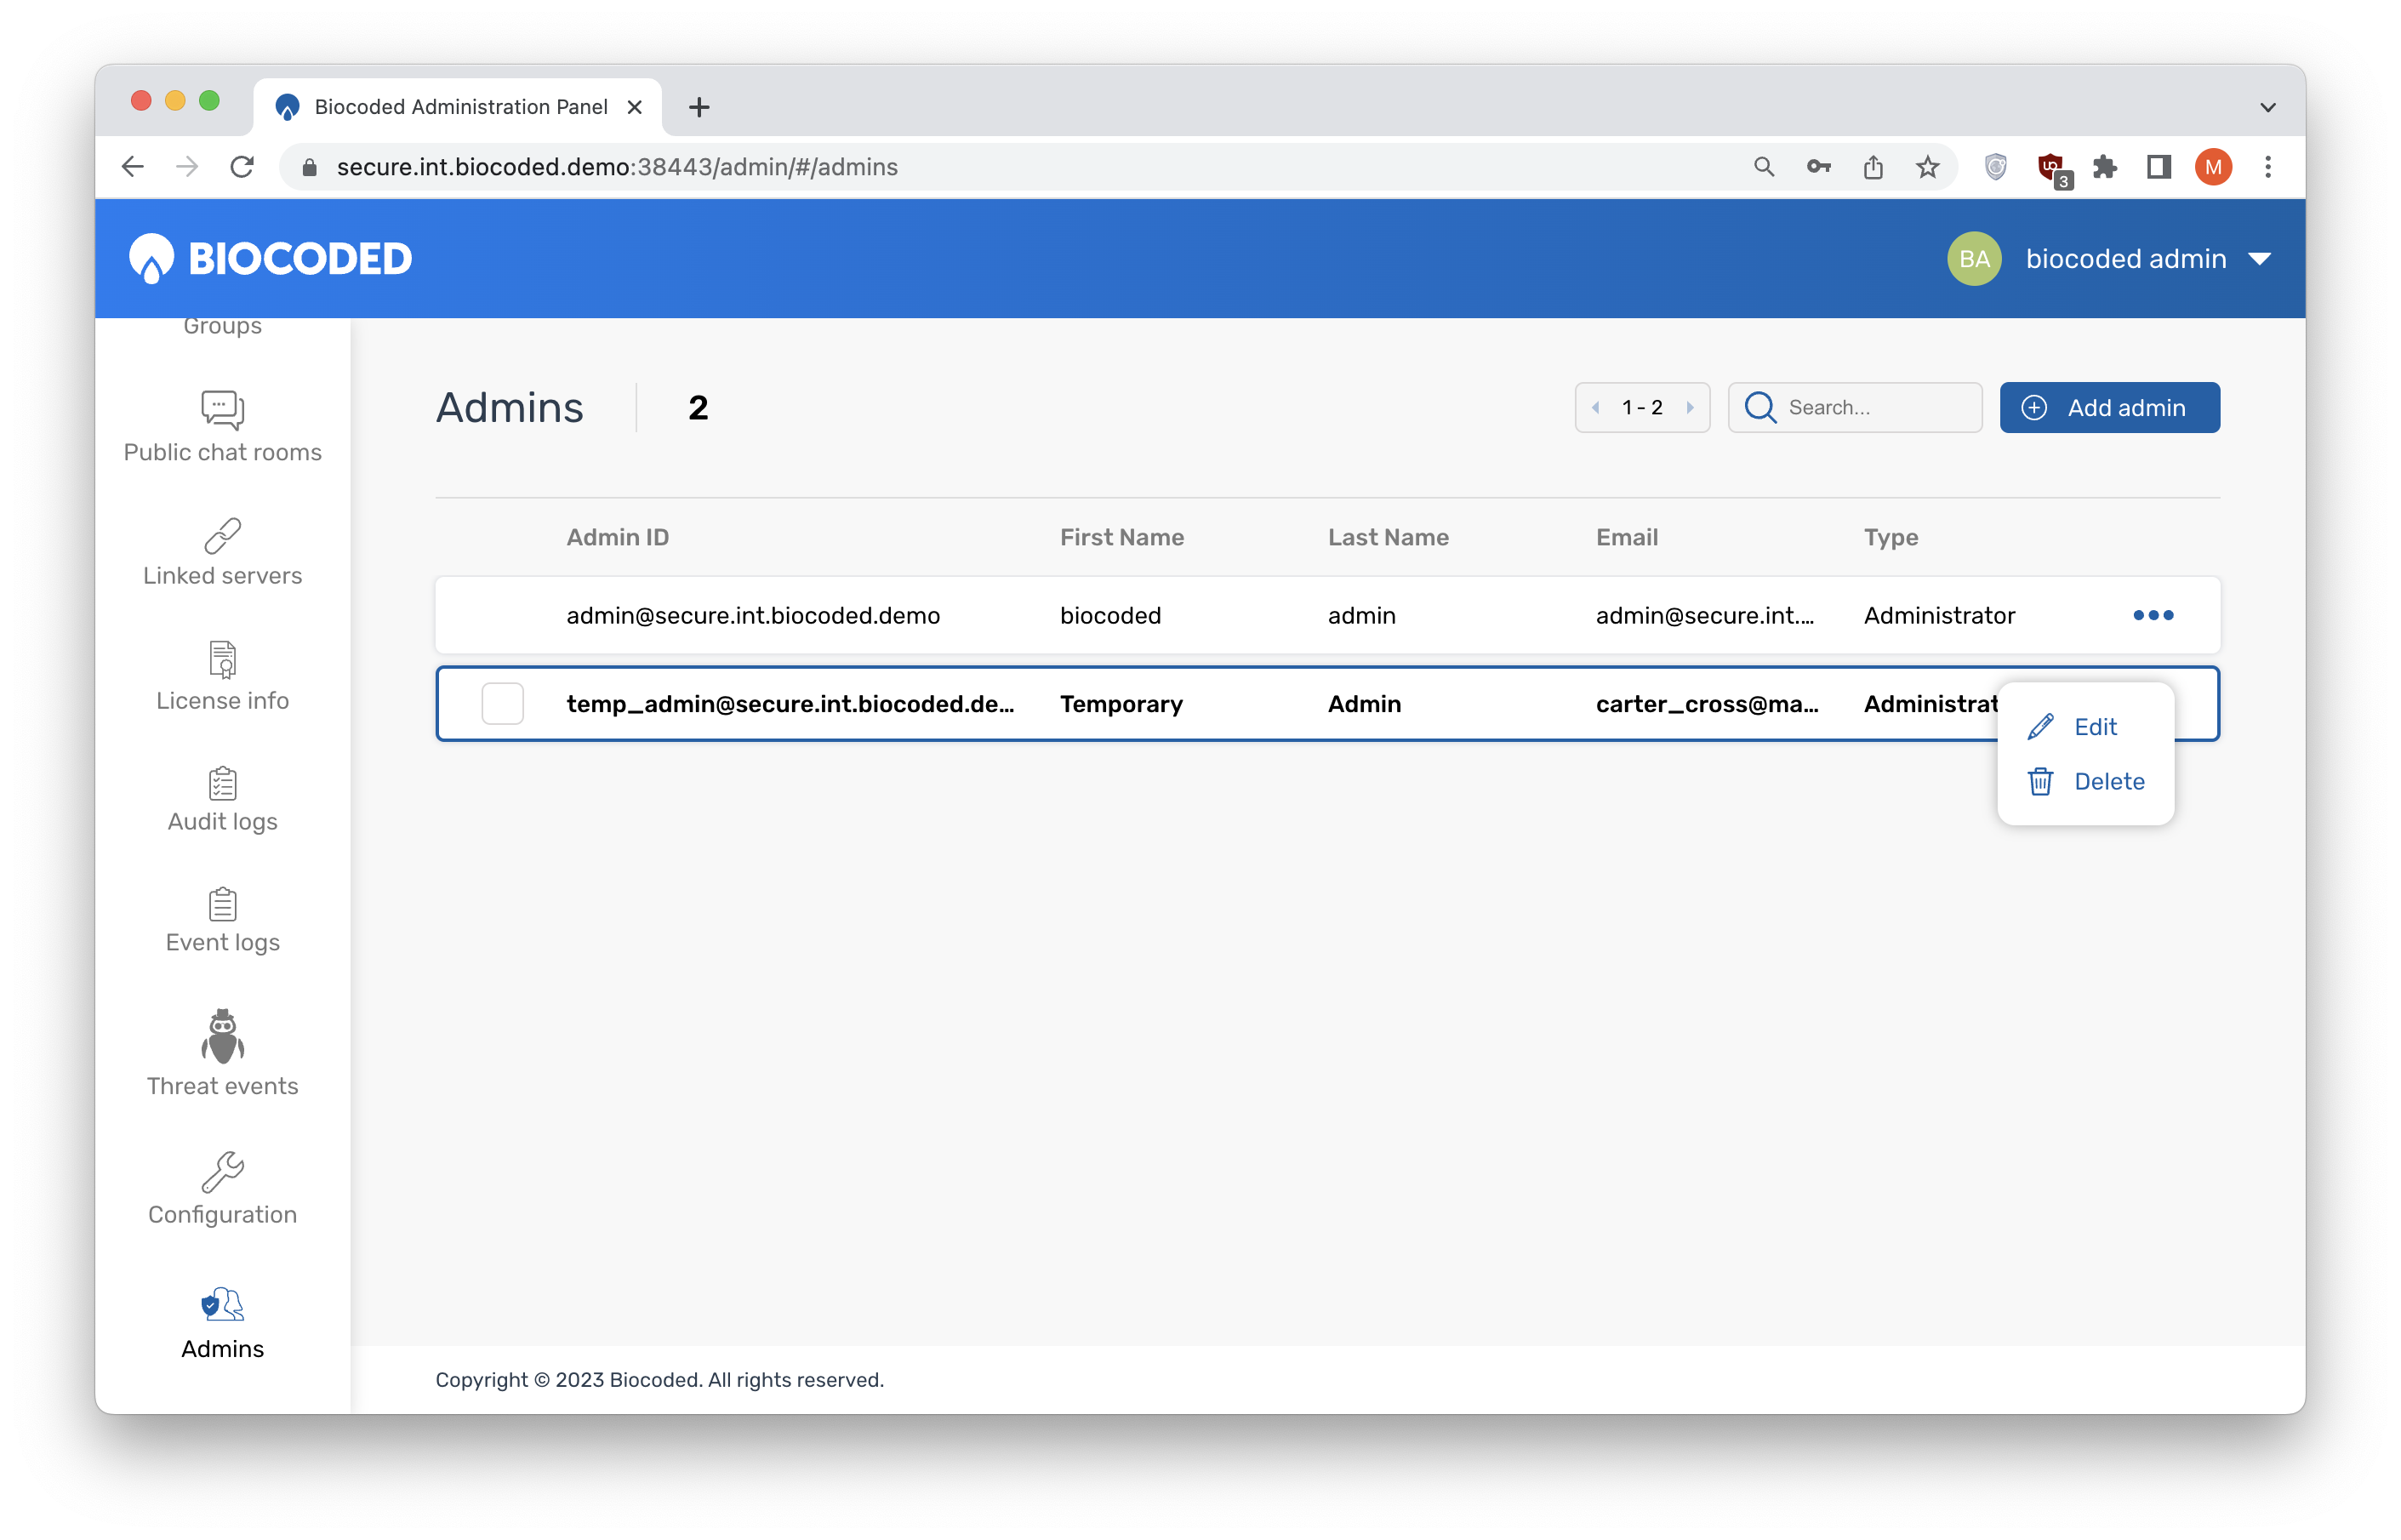
reveals a list of options for the selected admin:
- Edit - change the name or email address,
- Delete - removes the admin (the default admin can not be deleted).
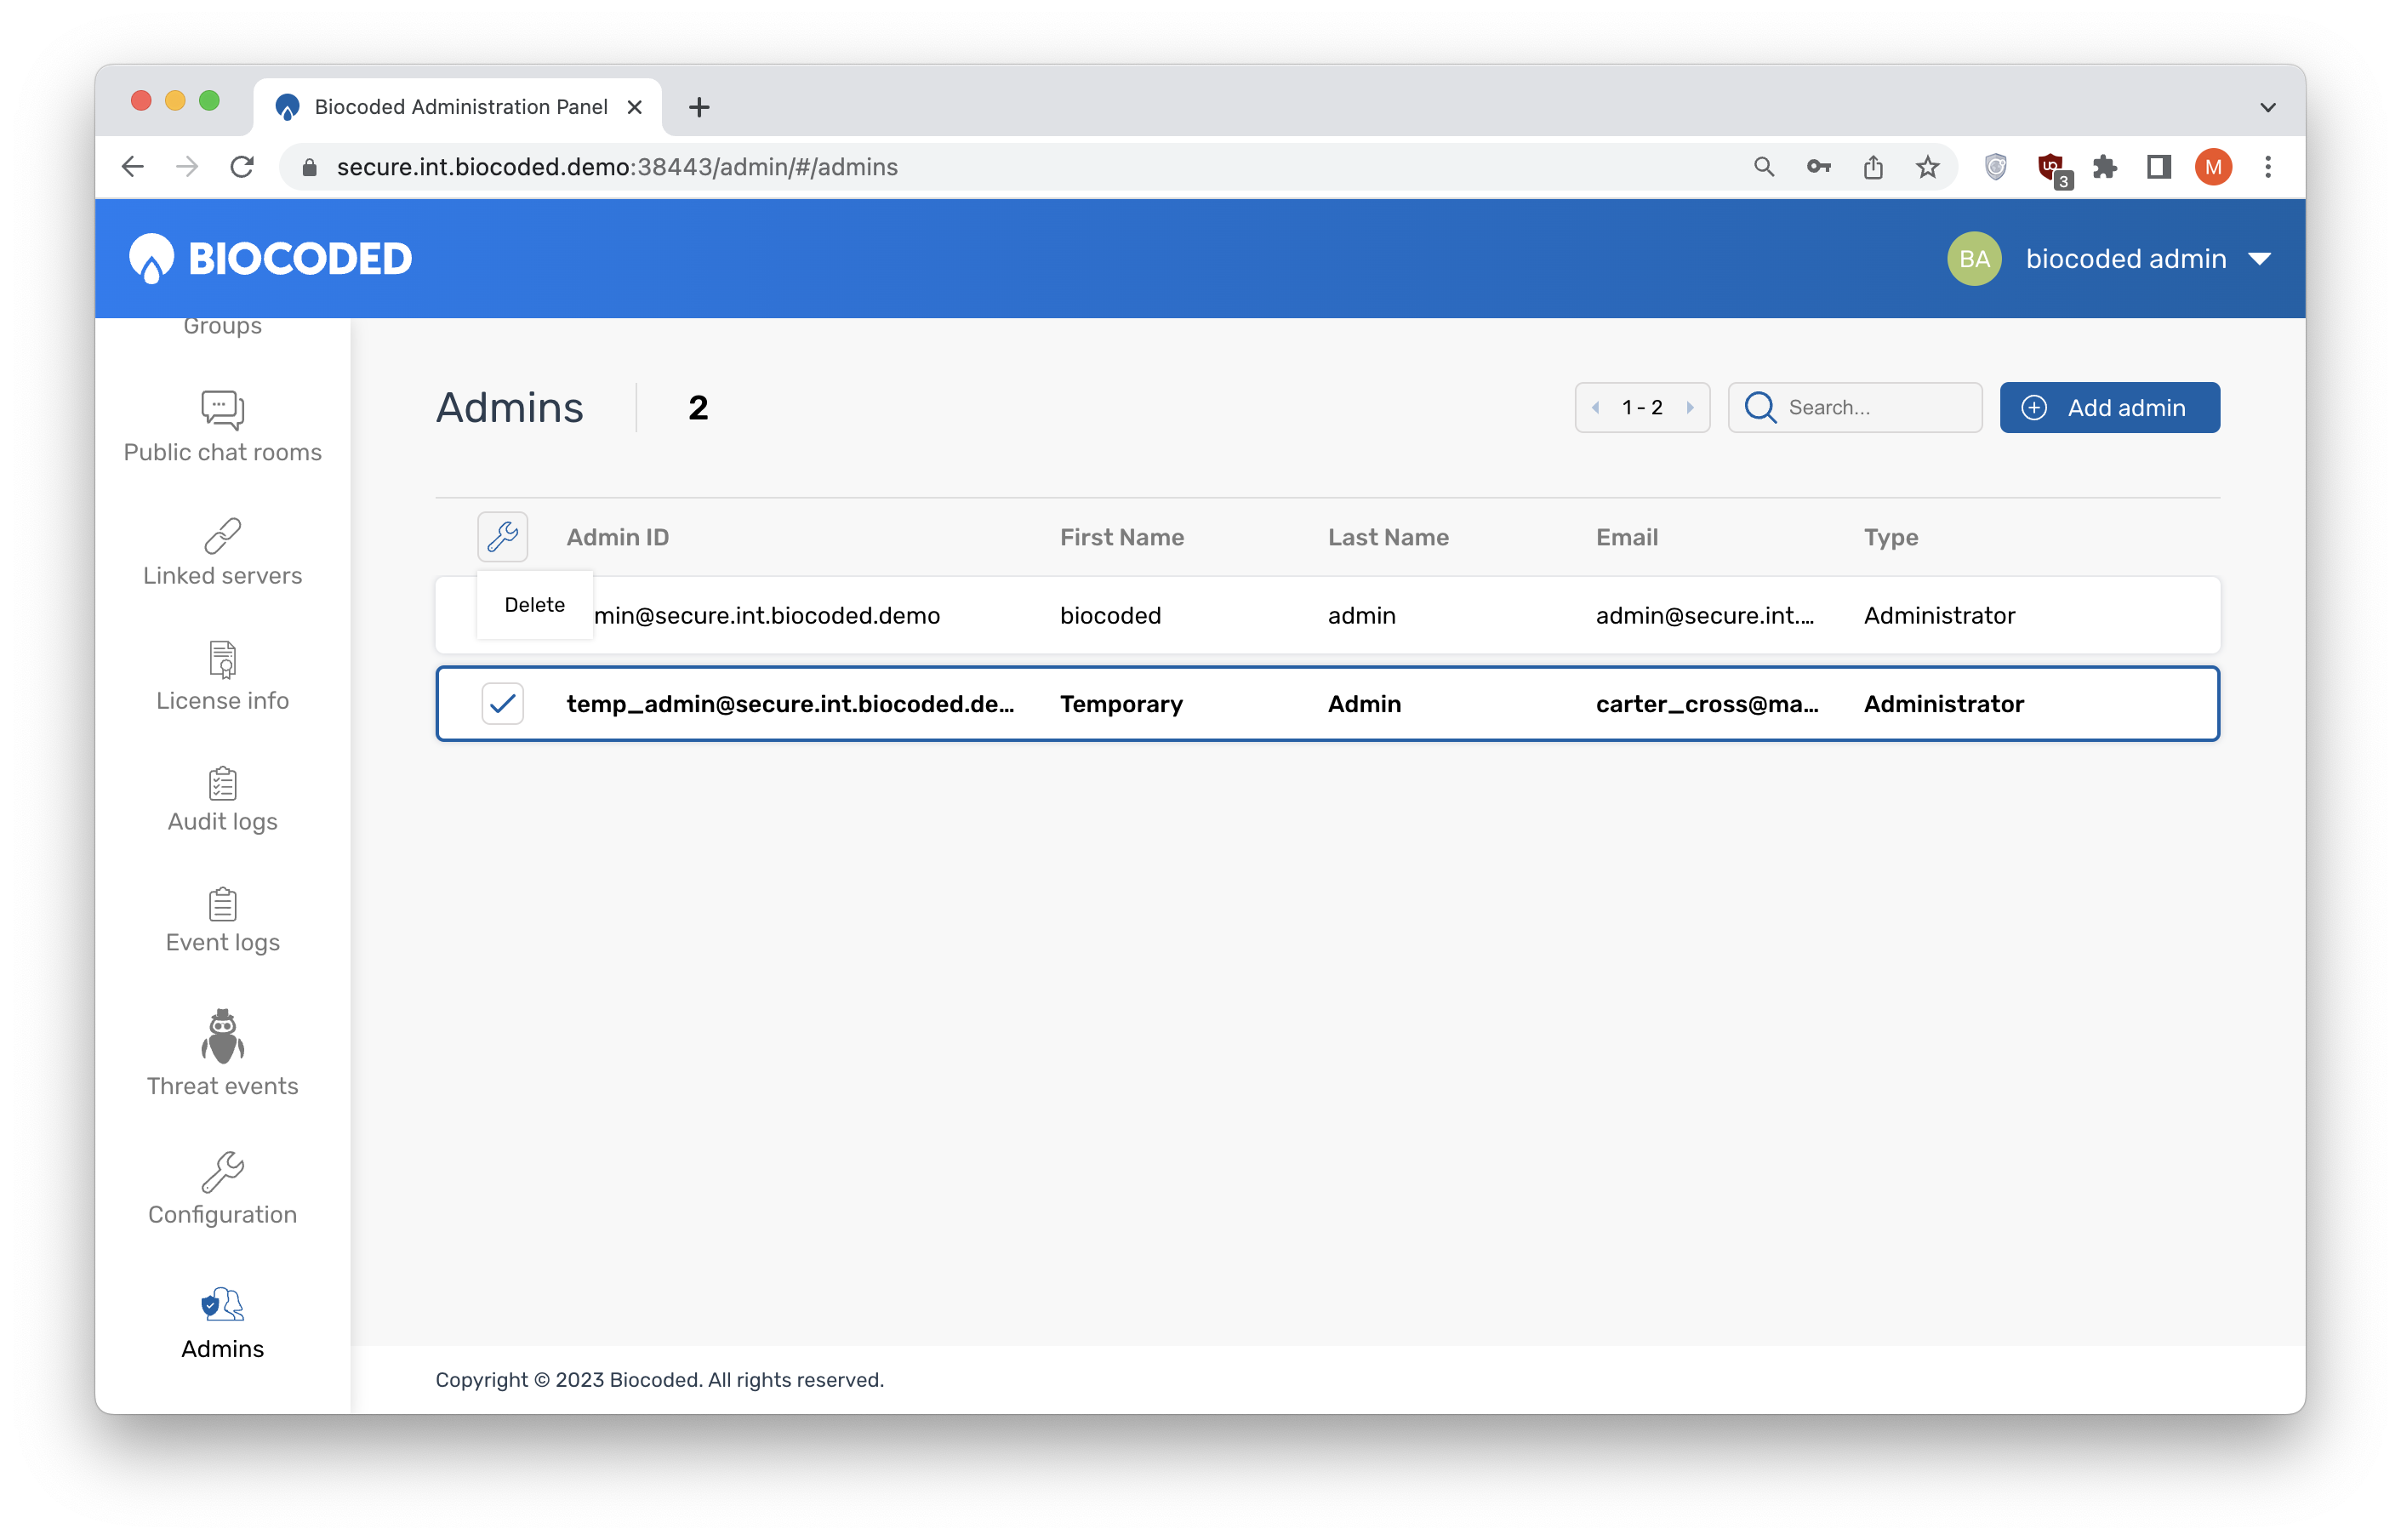
If you want to delete multiple admins, select them by clicking the checkboxes next to their names and select . The option to delete will be displayed (confirmation required).
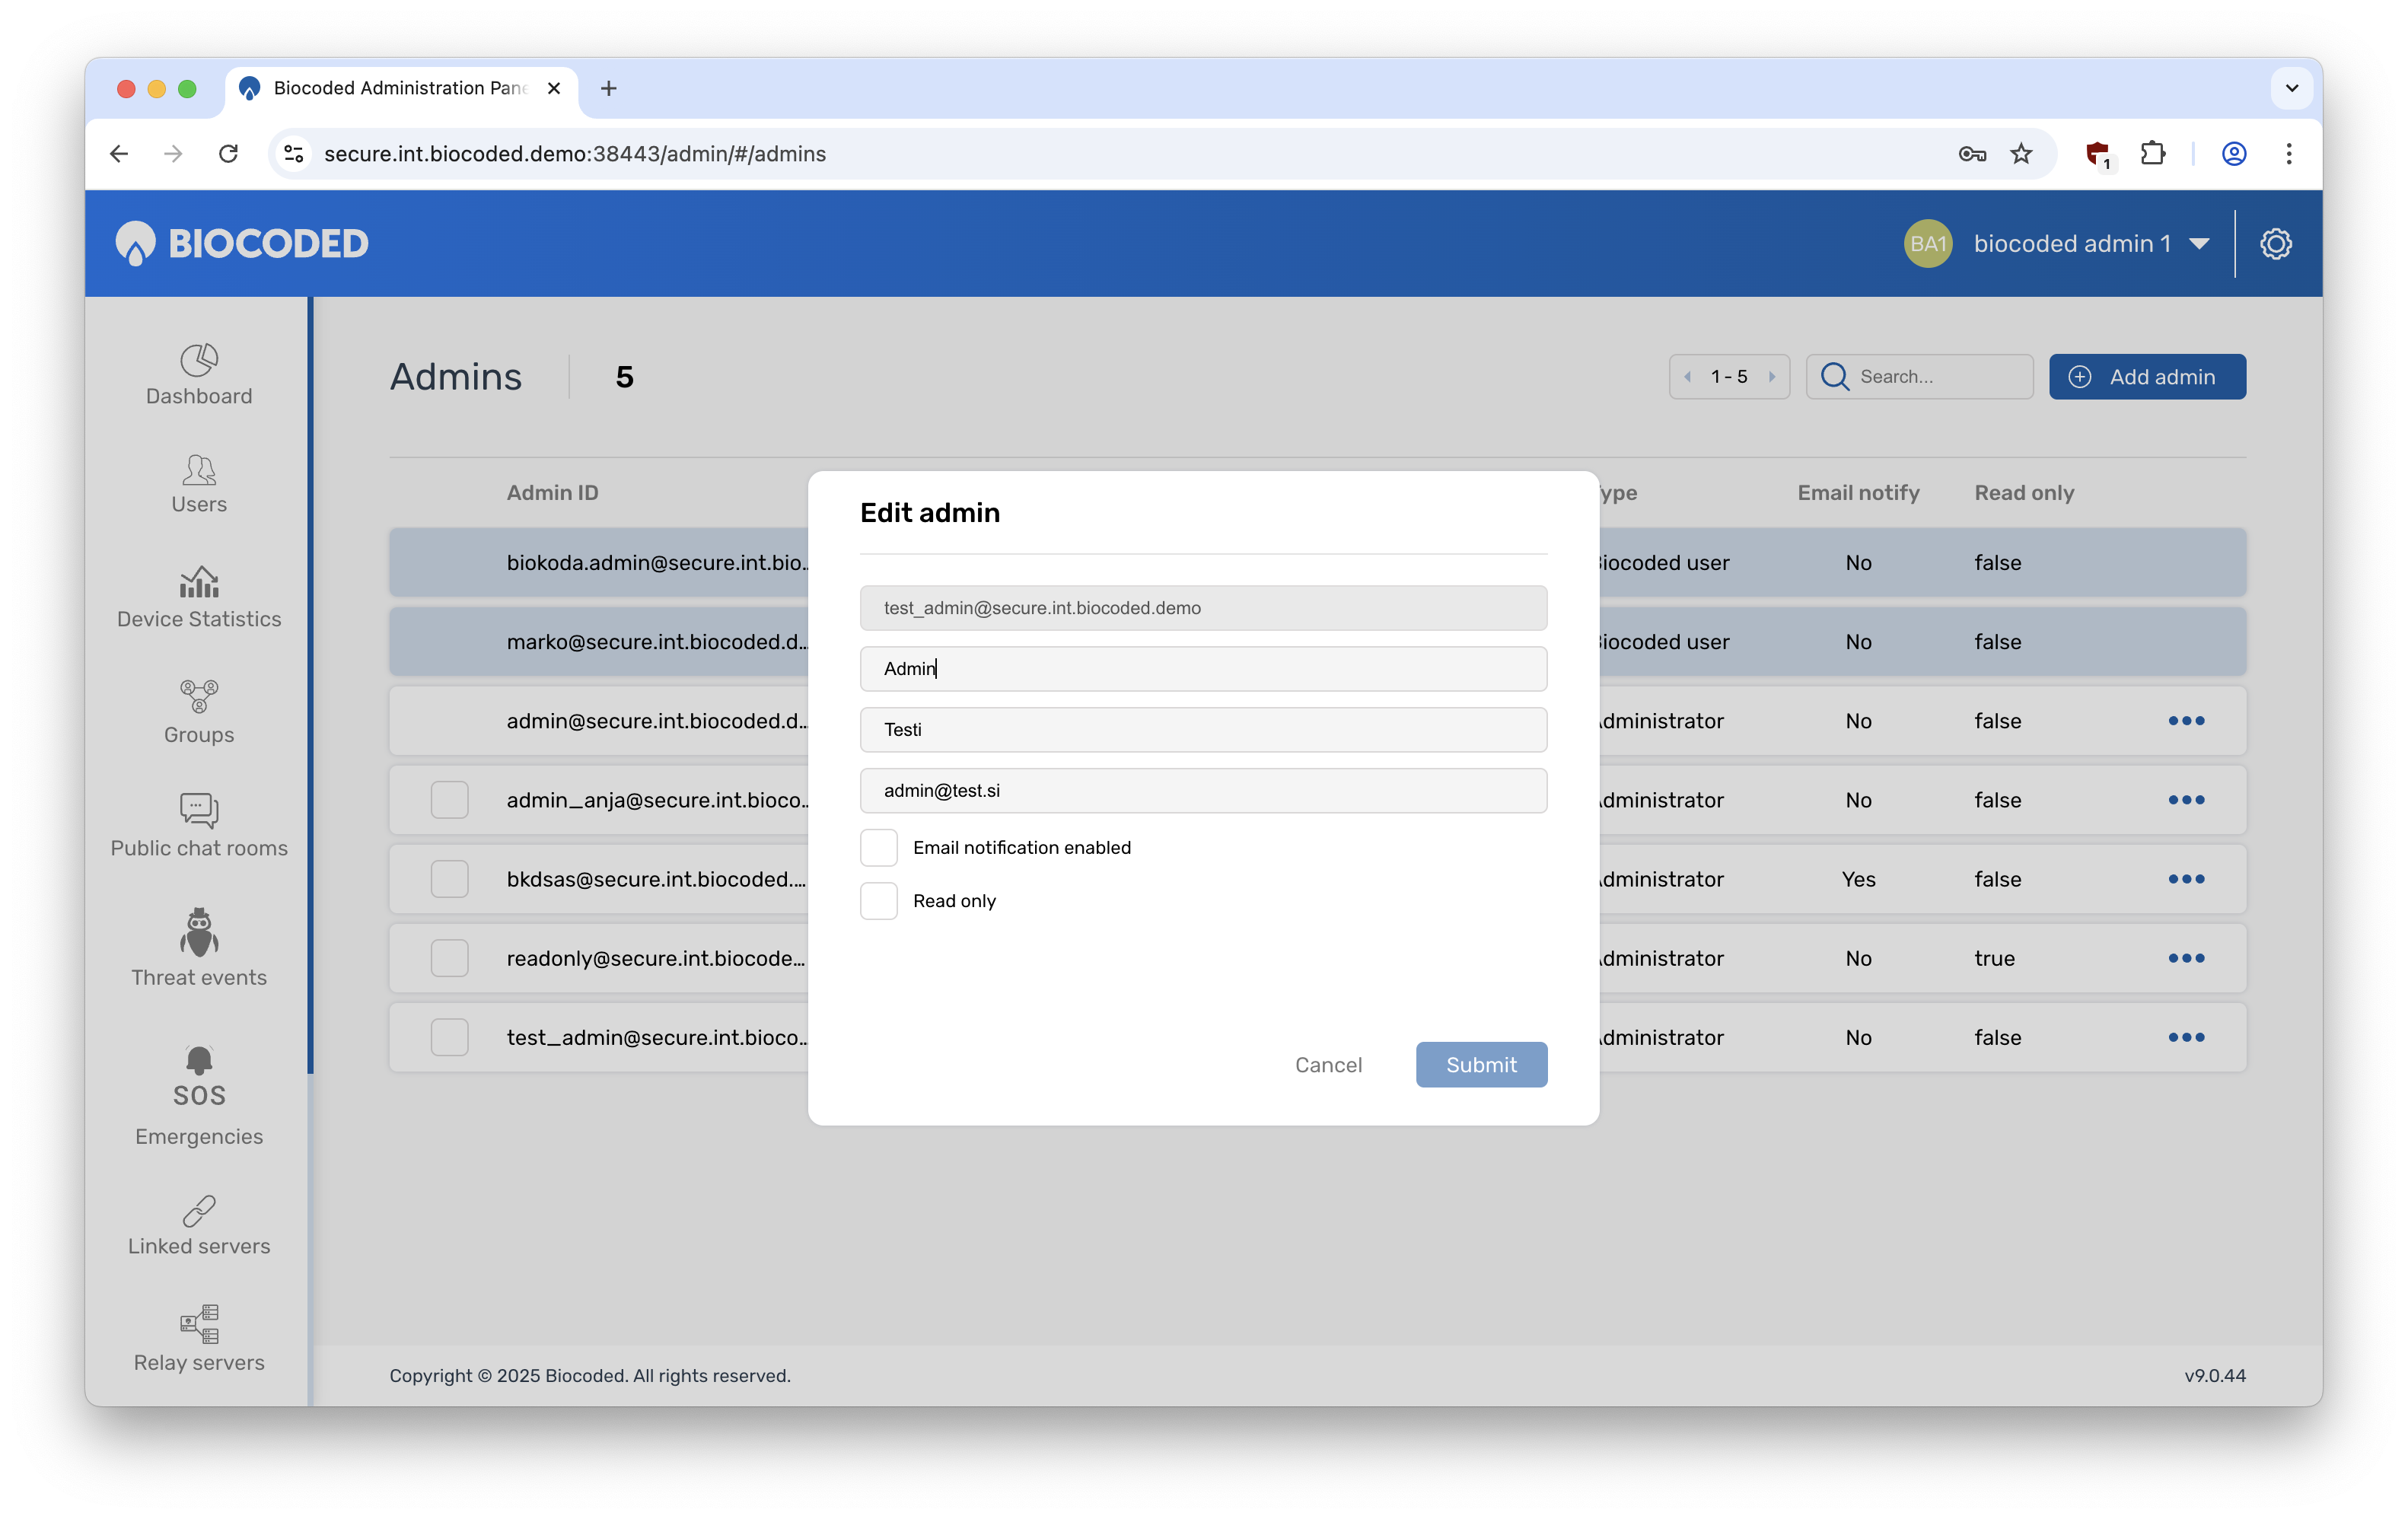
Editing admin data
Change the first name, last name and email address of the selected admin. Email notifications can also be turned on for receiving emails when threats occur. Admins can also be set as read-only, useful for admins that only need to view server data, not change it.
Add an admin
To add an admin, click "Add admin". You will have to set an admin ID, first and last name and an email address. You can use the generated password or manually set a new one. User IDs can contain only lowercase letters (a-z), numbers (0-9), underscores (_), dots(.) and dashes(-). Read-only setting can also be turned on.