Biocoded Desktop User Guide
Installation
Microsoft Windows
To install Biocoded Desktop for Windows download the setup executable file for Microsoft Windows (https://www.biocoded.com/enterprise).

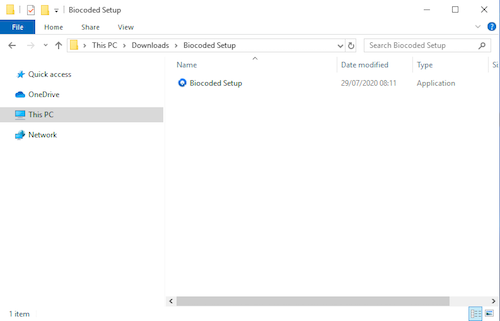
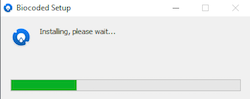
Install application by double clicking the installation package and follow the on screen instructions.
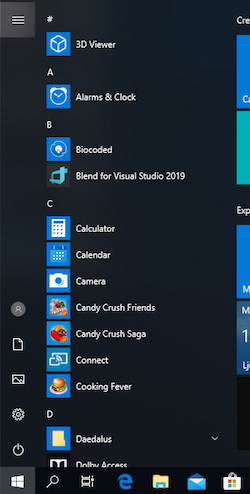
You can start Biocoded from Start menu.
MacOS
To install Biocoded Desktop for macOS, download the Biocoded Desktop release for MacOS (https://www.biocoded.com/enterprise).
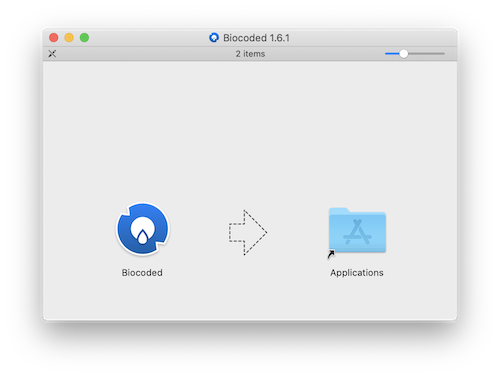
Install application by double-clicking the DMG file and dragging the presented Biocoded icon to the application folder shortcut.
Linux
First, ensure you are running a supported version of Linux operating system.
To install Biocoded Desktop for Linux download Biocoded Desktop release for Linux (https://www.biocoded.com/enterprise).
Install application by double clicking the file on the graphical interface or running the following command in the terminal:
dpkg -i {biocoded-desktop}.deb
Updating
If a new version of the application is available, a pop up will be shown providing you with update options and you can choose between automatic and manual update.
Pressing the "Manual update" button will take you to a website where you can begin the process of installing the new version.
Pressing "Auto-update" will do this process for you automatically, requesting a restart of the app when the download finishes.
Your data in the application will remain unchanged after updating.
Application usage
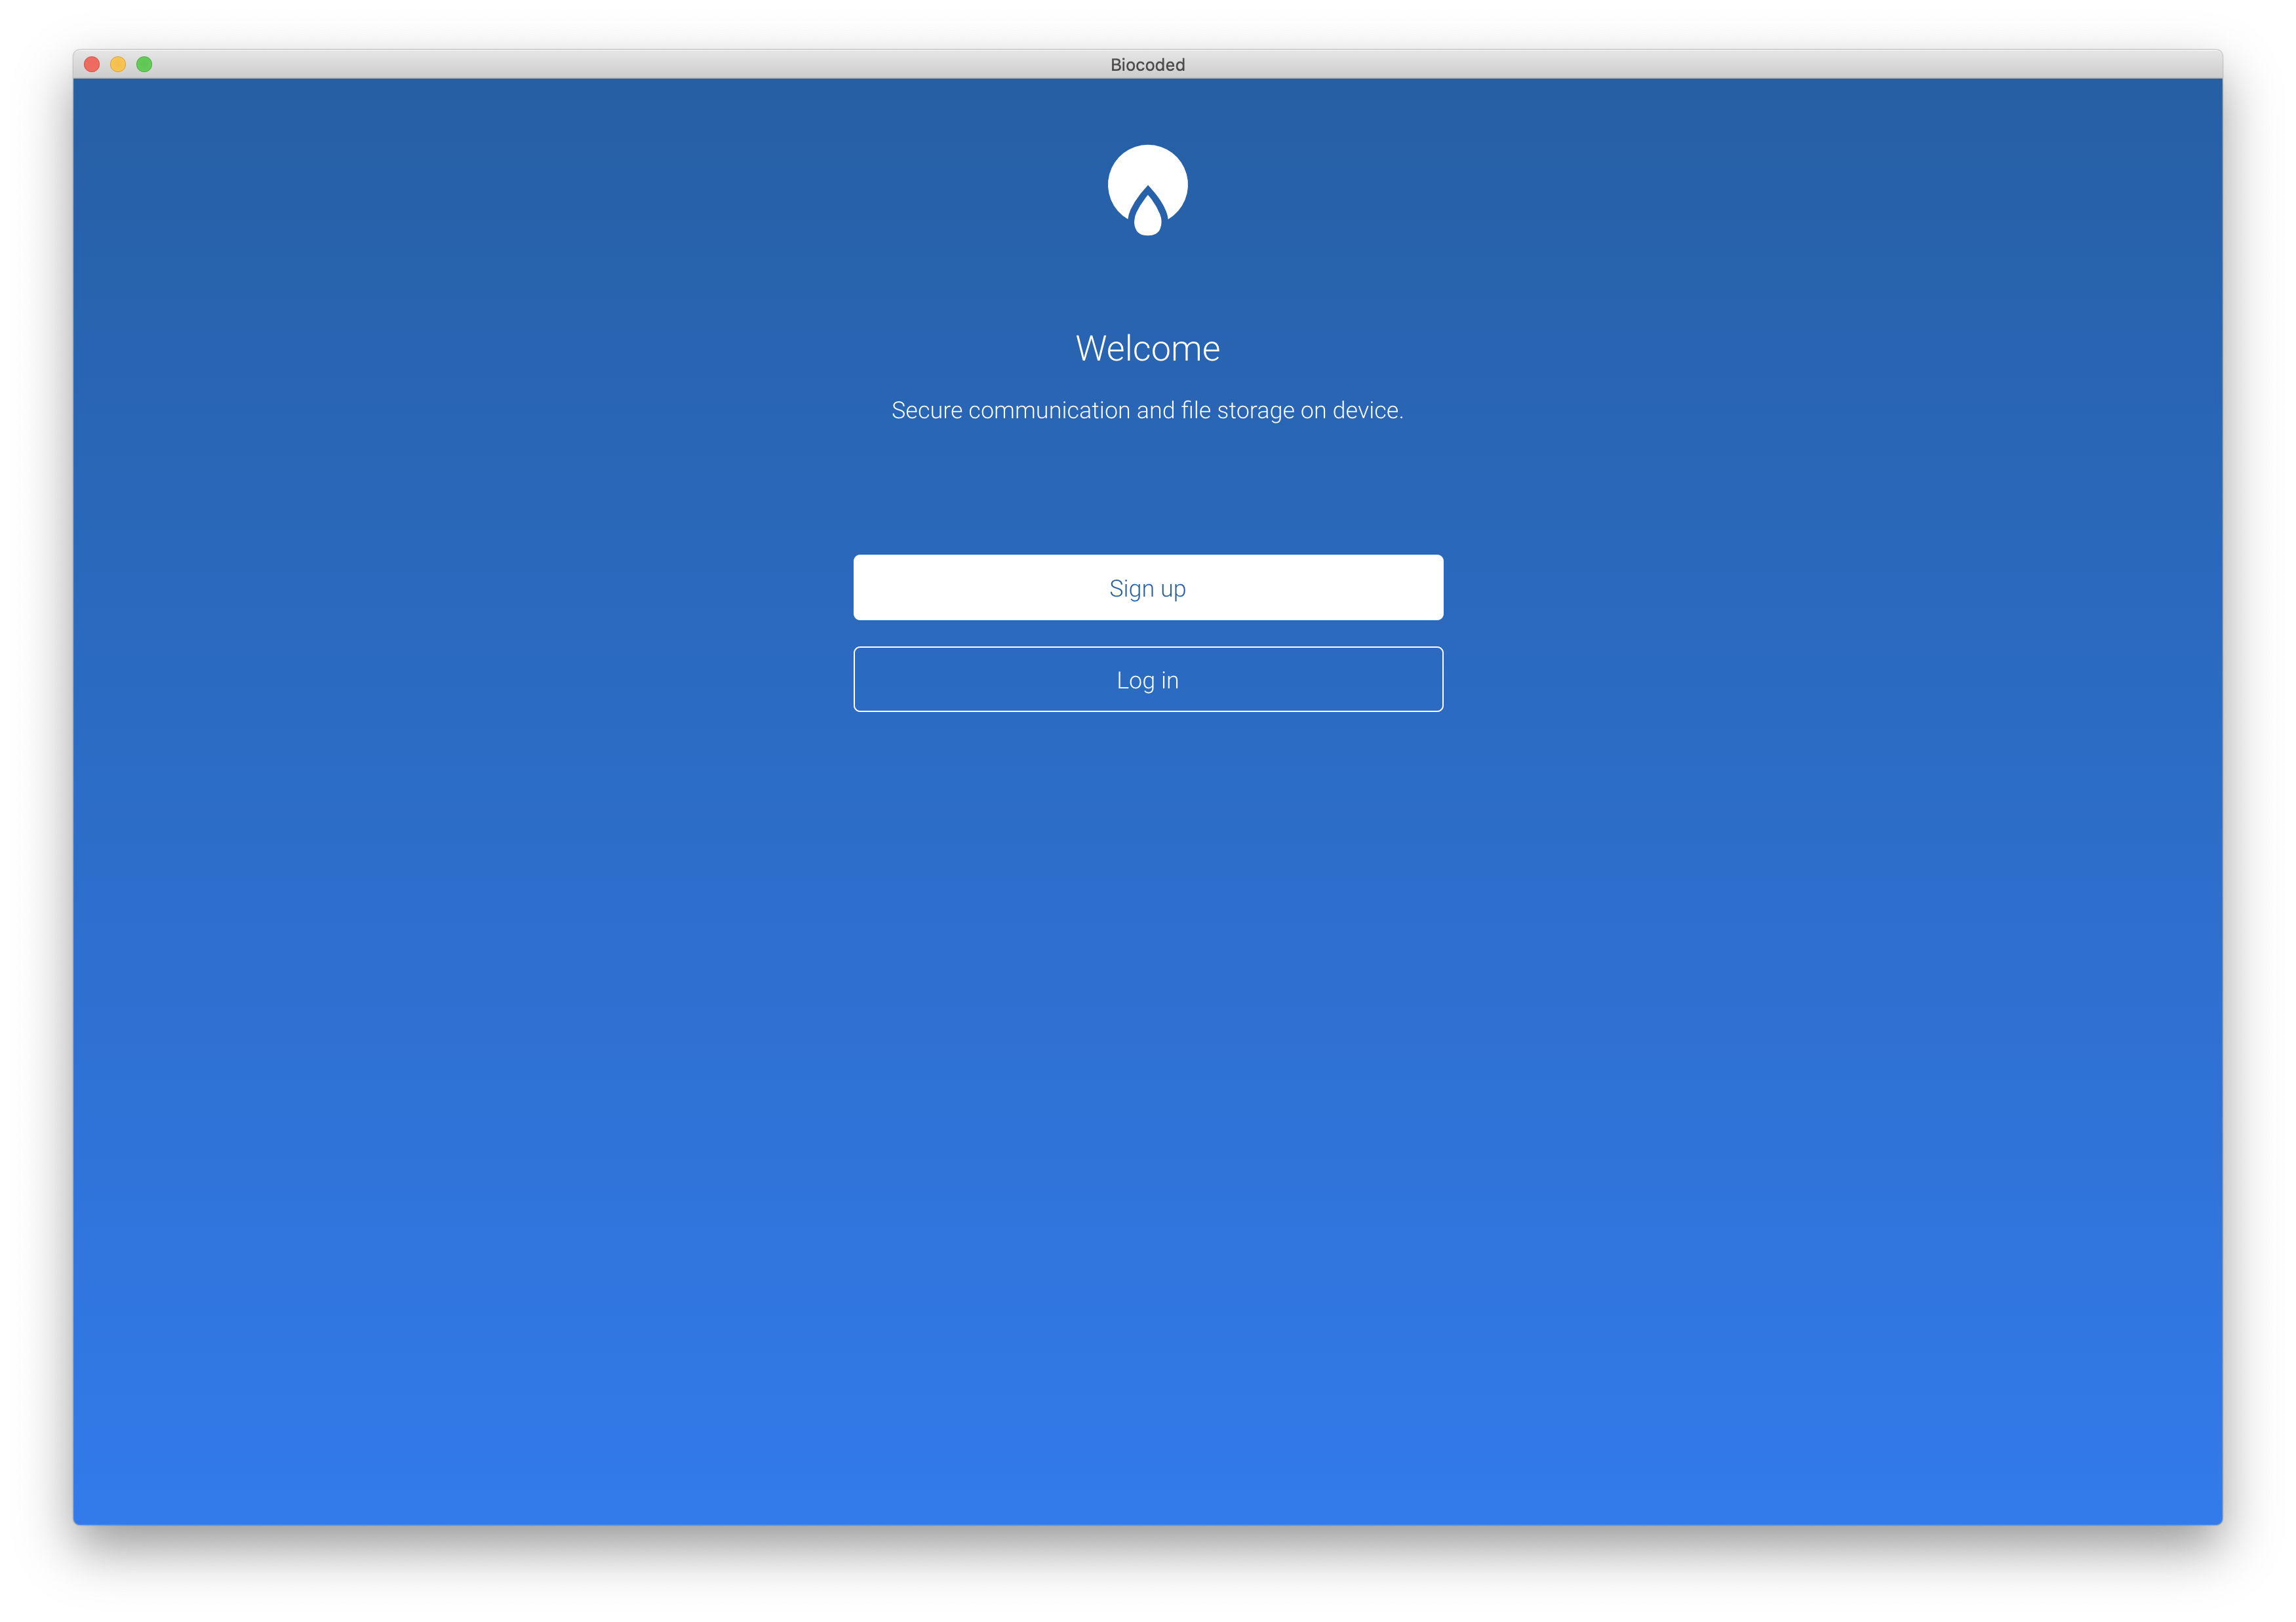
After running Biocoded for the first time, the welcome screen is presented. You can change application language here in bottom right part of window.
Login to private setup
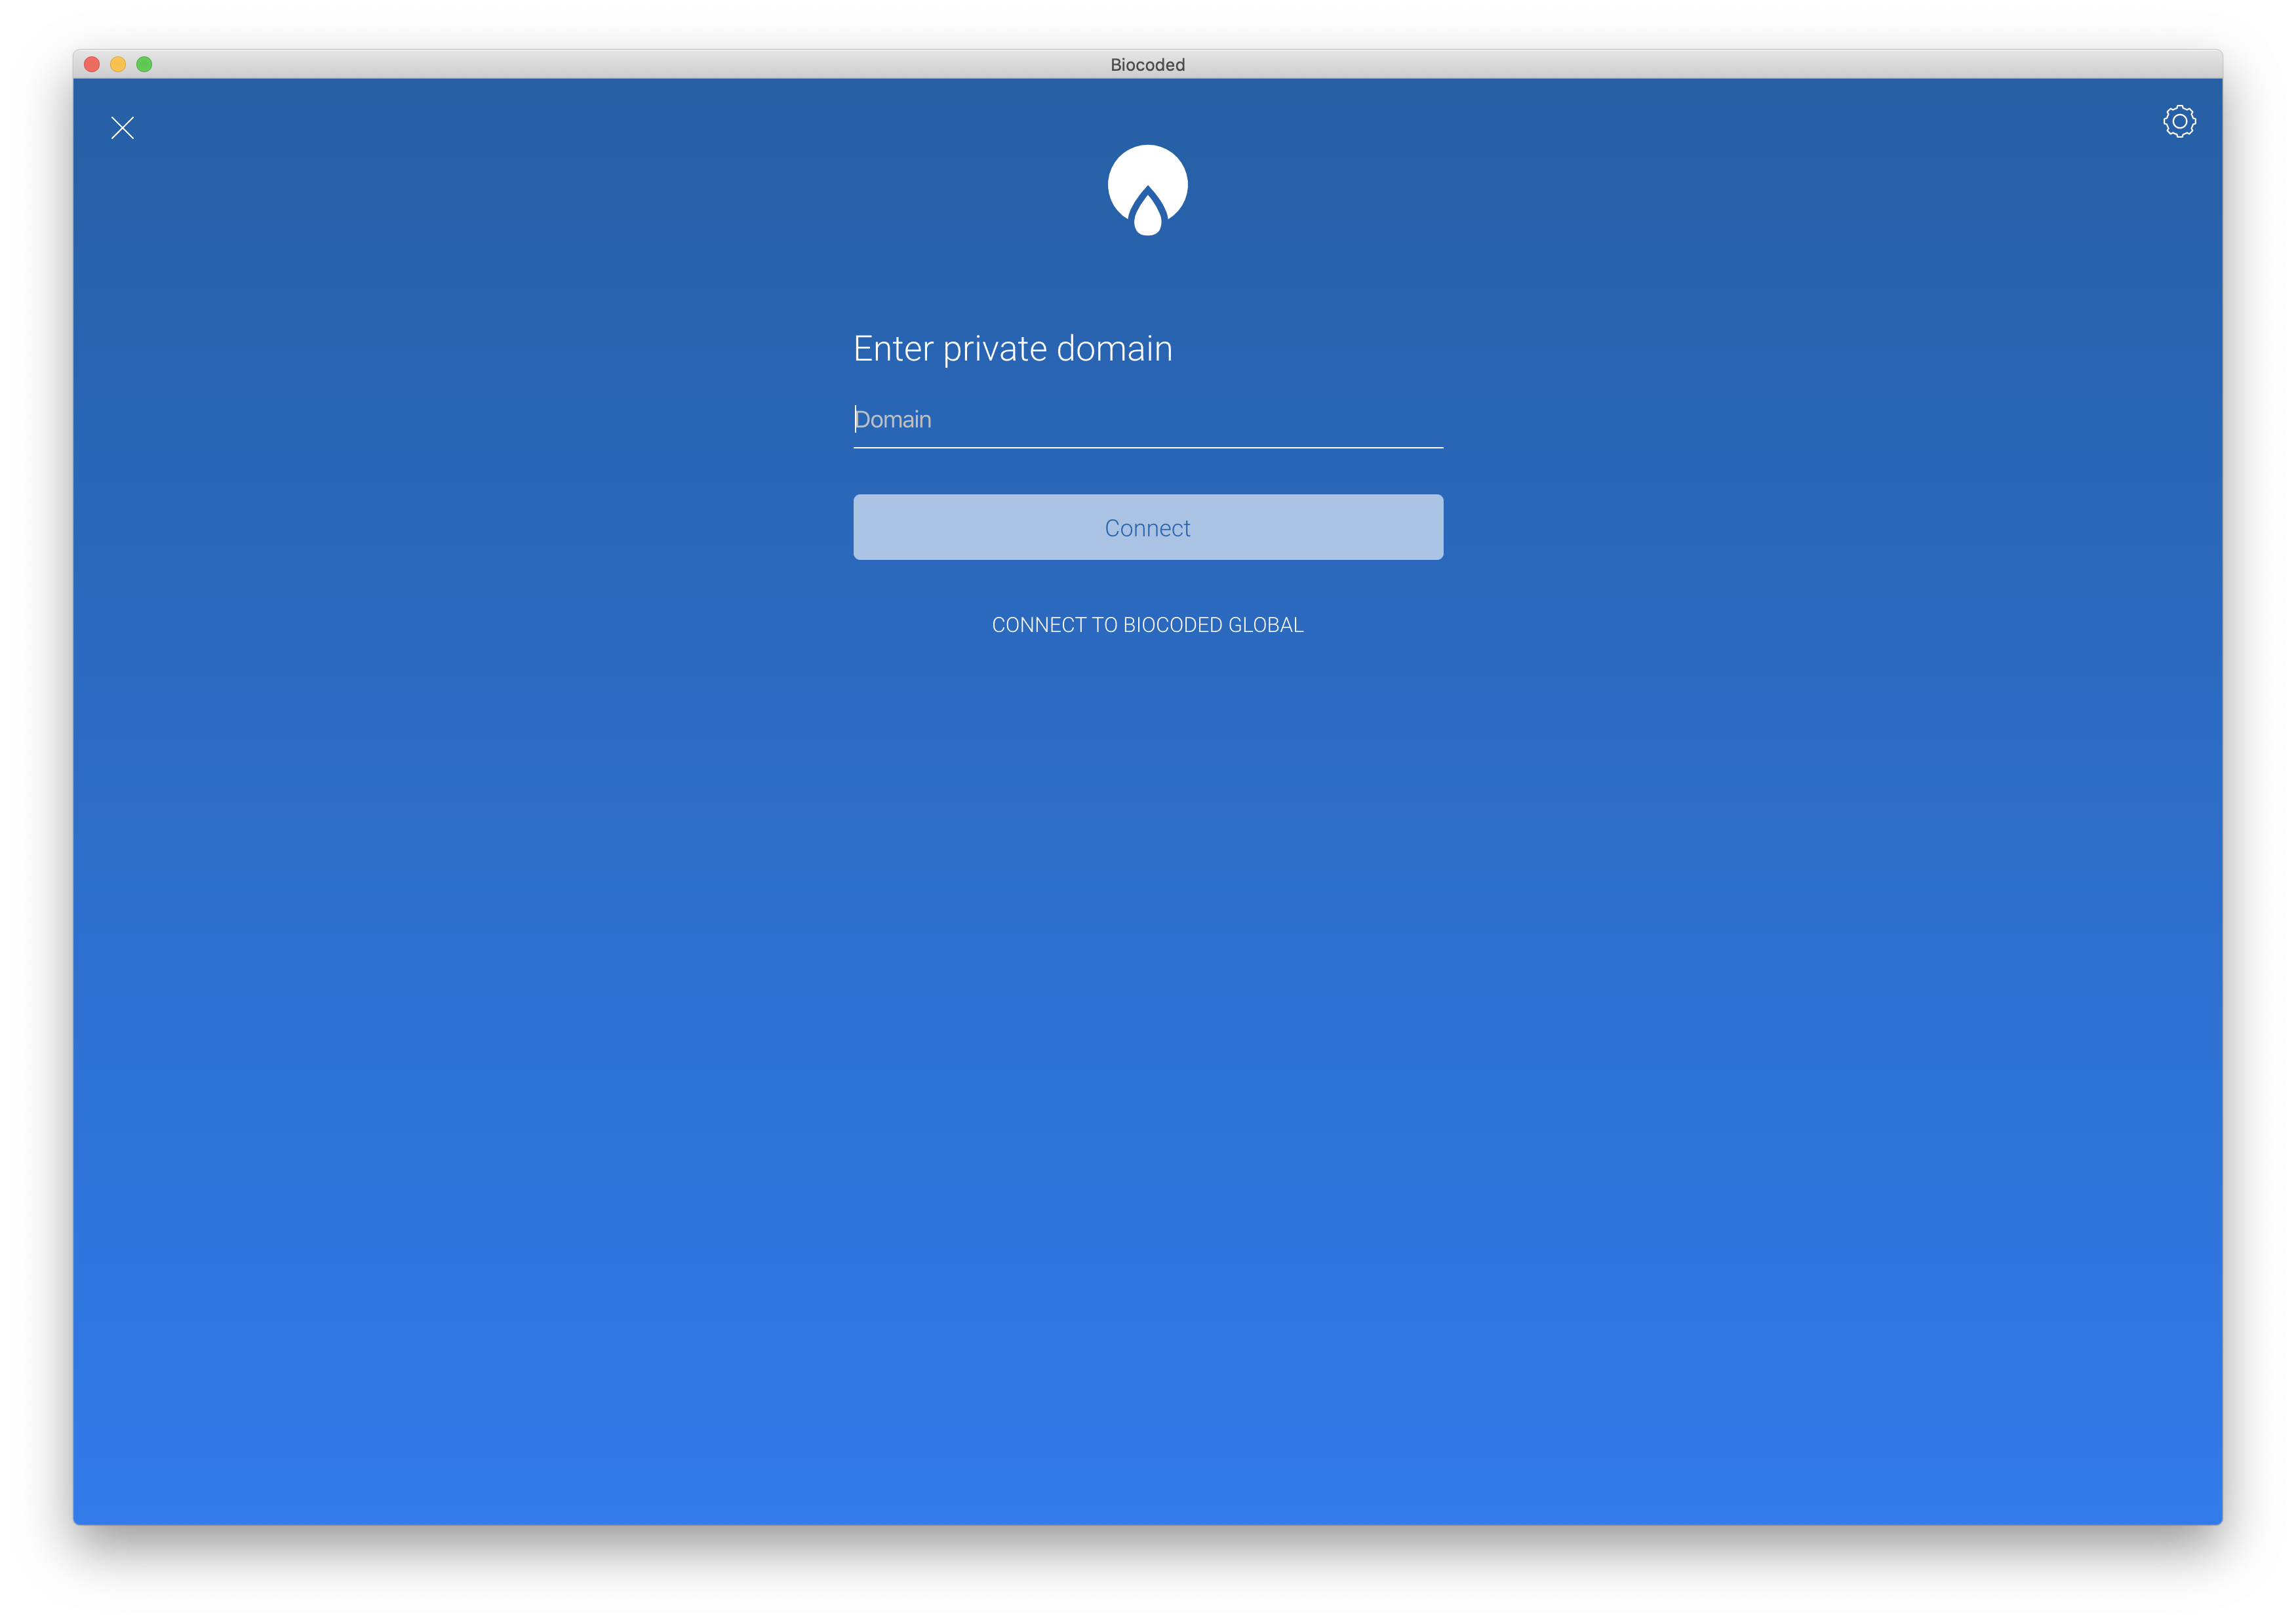
To log in to your private server click "Connect to private domain", enter your private server domain, then press "Connect". You will be presented with a confirmation popup to verify the server. You can also login with a URL your system administrator provided. Clicking it will open Biocoded and you will have to confirm login.
Note
On private installations, username and password are provided by your server administrator.
Sign-up and Login to Biocoded Global
To login to Biocoded Global, press "Connect to Biocoded Global" on welcome screen presented after starting the application for the first time. If you selected "Connect to private domain" by mistake, you can select "CONNECT TO BIOCODED GLOBAL".
If you do not have an account yet, select "Register here" and create a new Global account.
If you have forgotten the password for your Biocoded Global account, you can reset your password by selecting Forgot password?.
Sign-up process
To register using e-mail, enter your e-mail address and the on-screen security code and press "Continue".
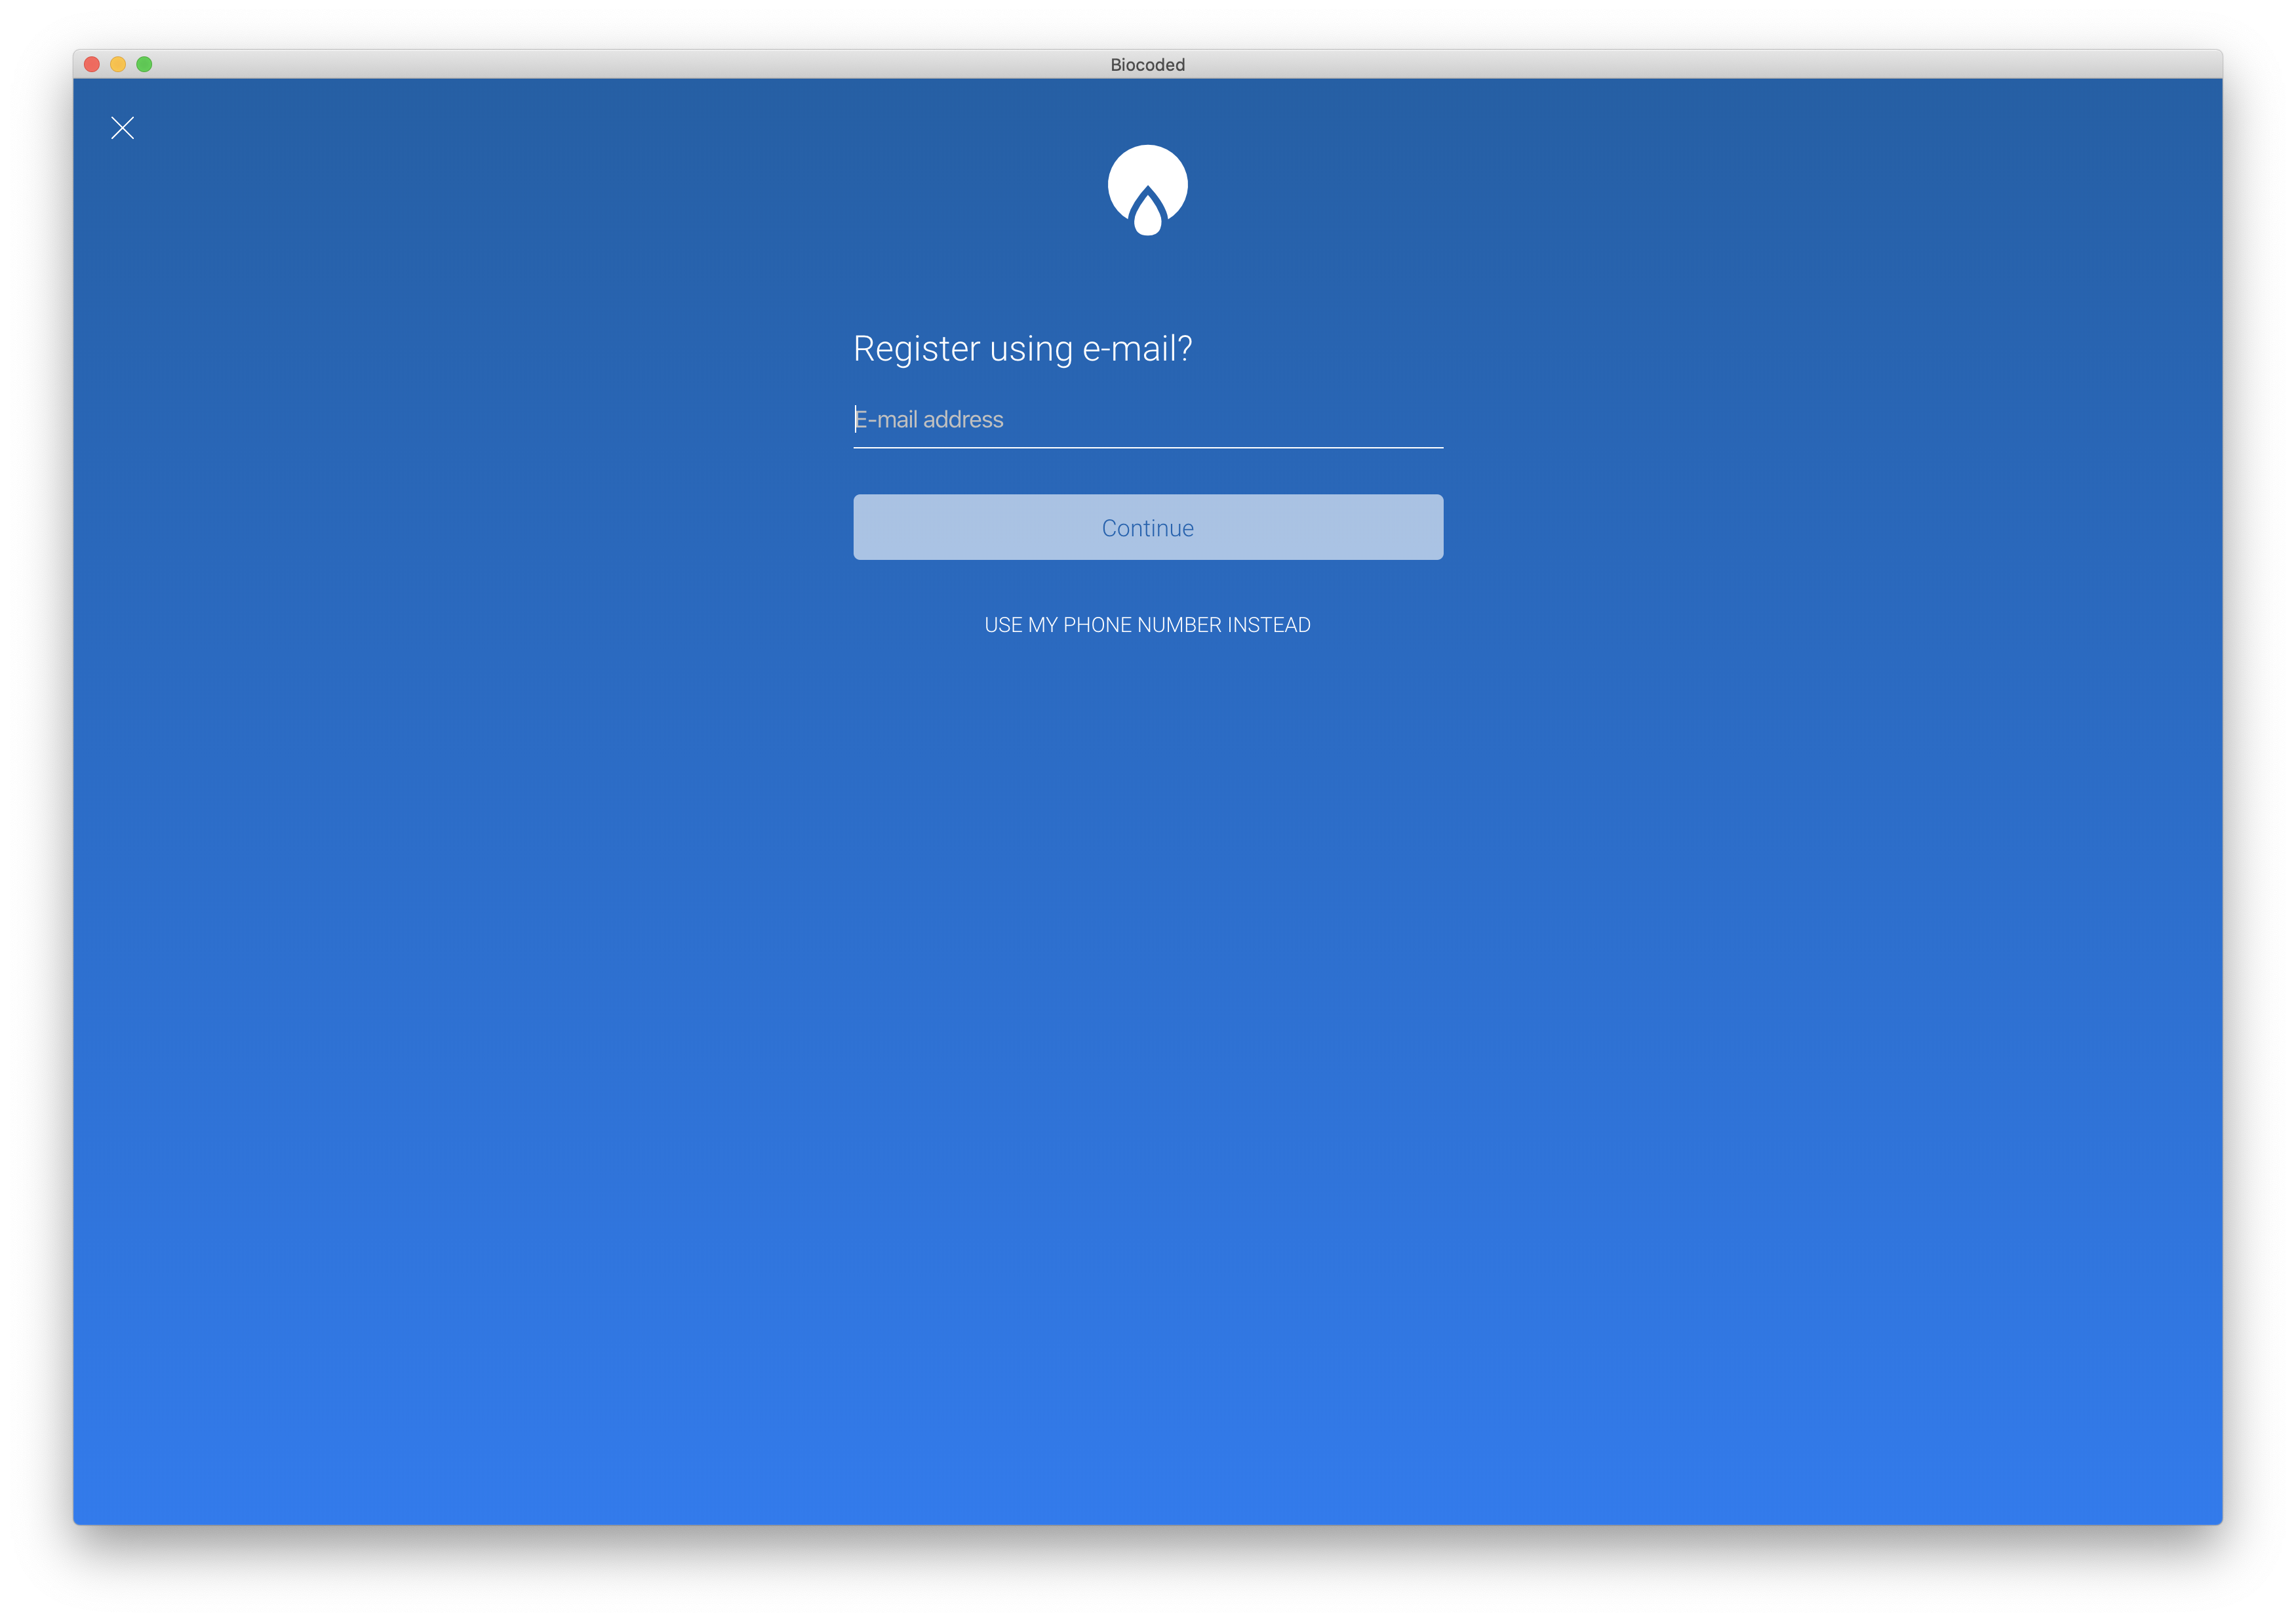
To register using a phone number, click on "Use my phone number instead". On the presented screen, select your country, enter your phone number and press "Continue". Pressing "Use my email instead" will return you to the registration screen using e-mail account.
After registering, you will receive an e-mail or text message containing a temporary one-time password. Enter it on the presented login screen along with your selected e-mail or phone number and press "Log in".
When you are logged in successfully, you will be presented with a popup, where you must choose a new password for your account and press "Confirm".
Activation
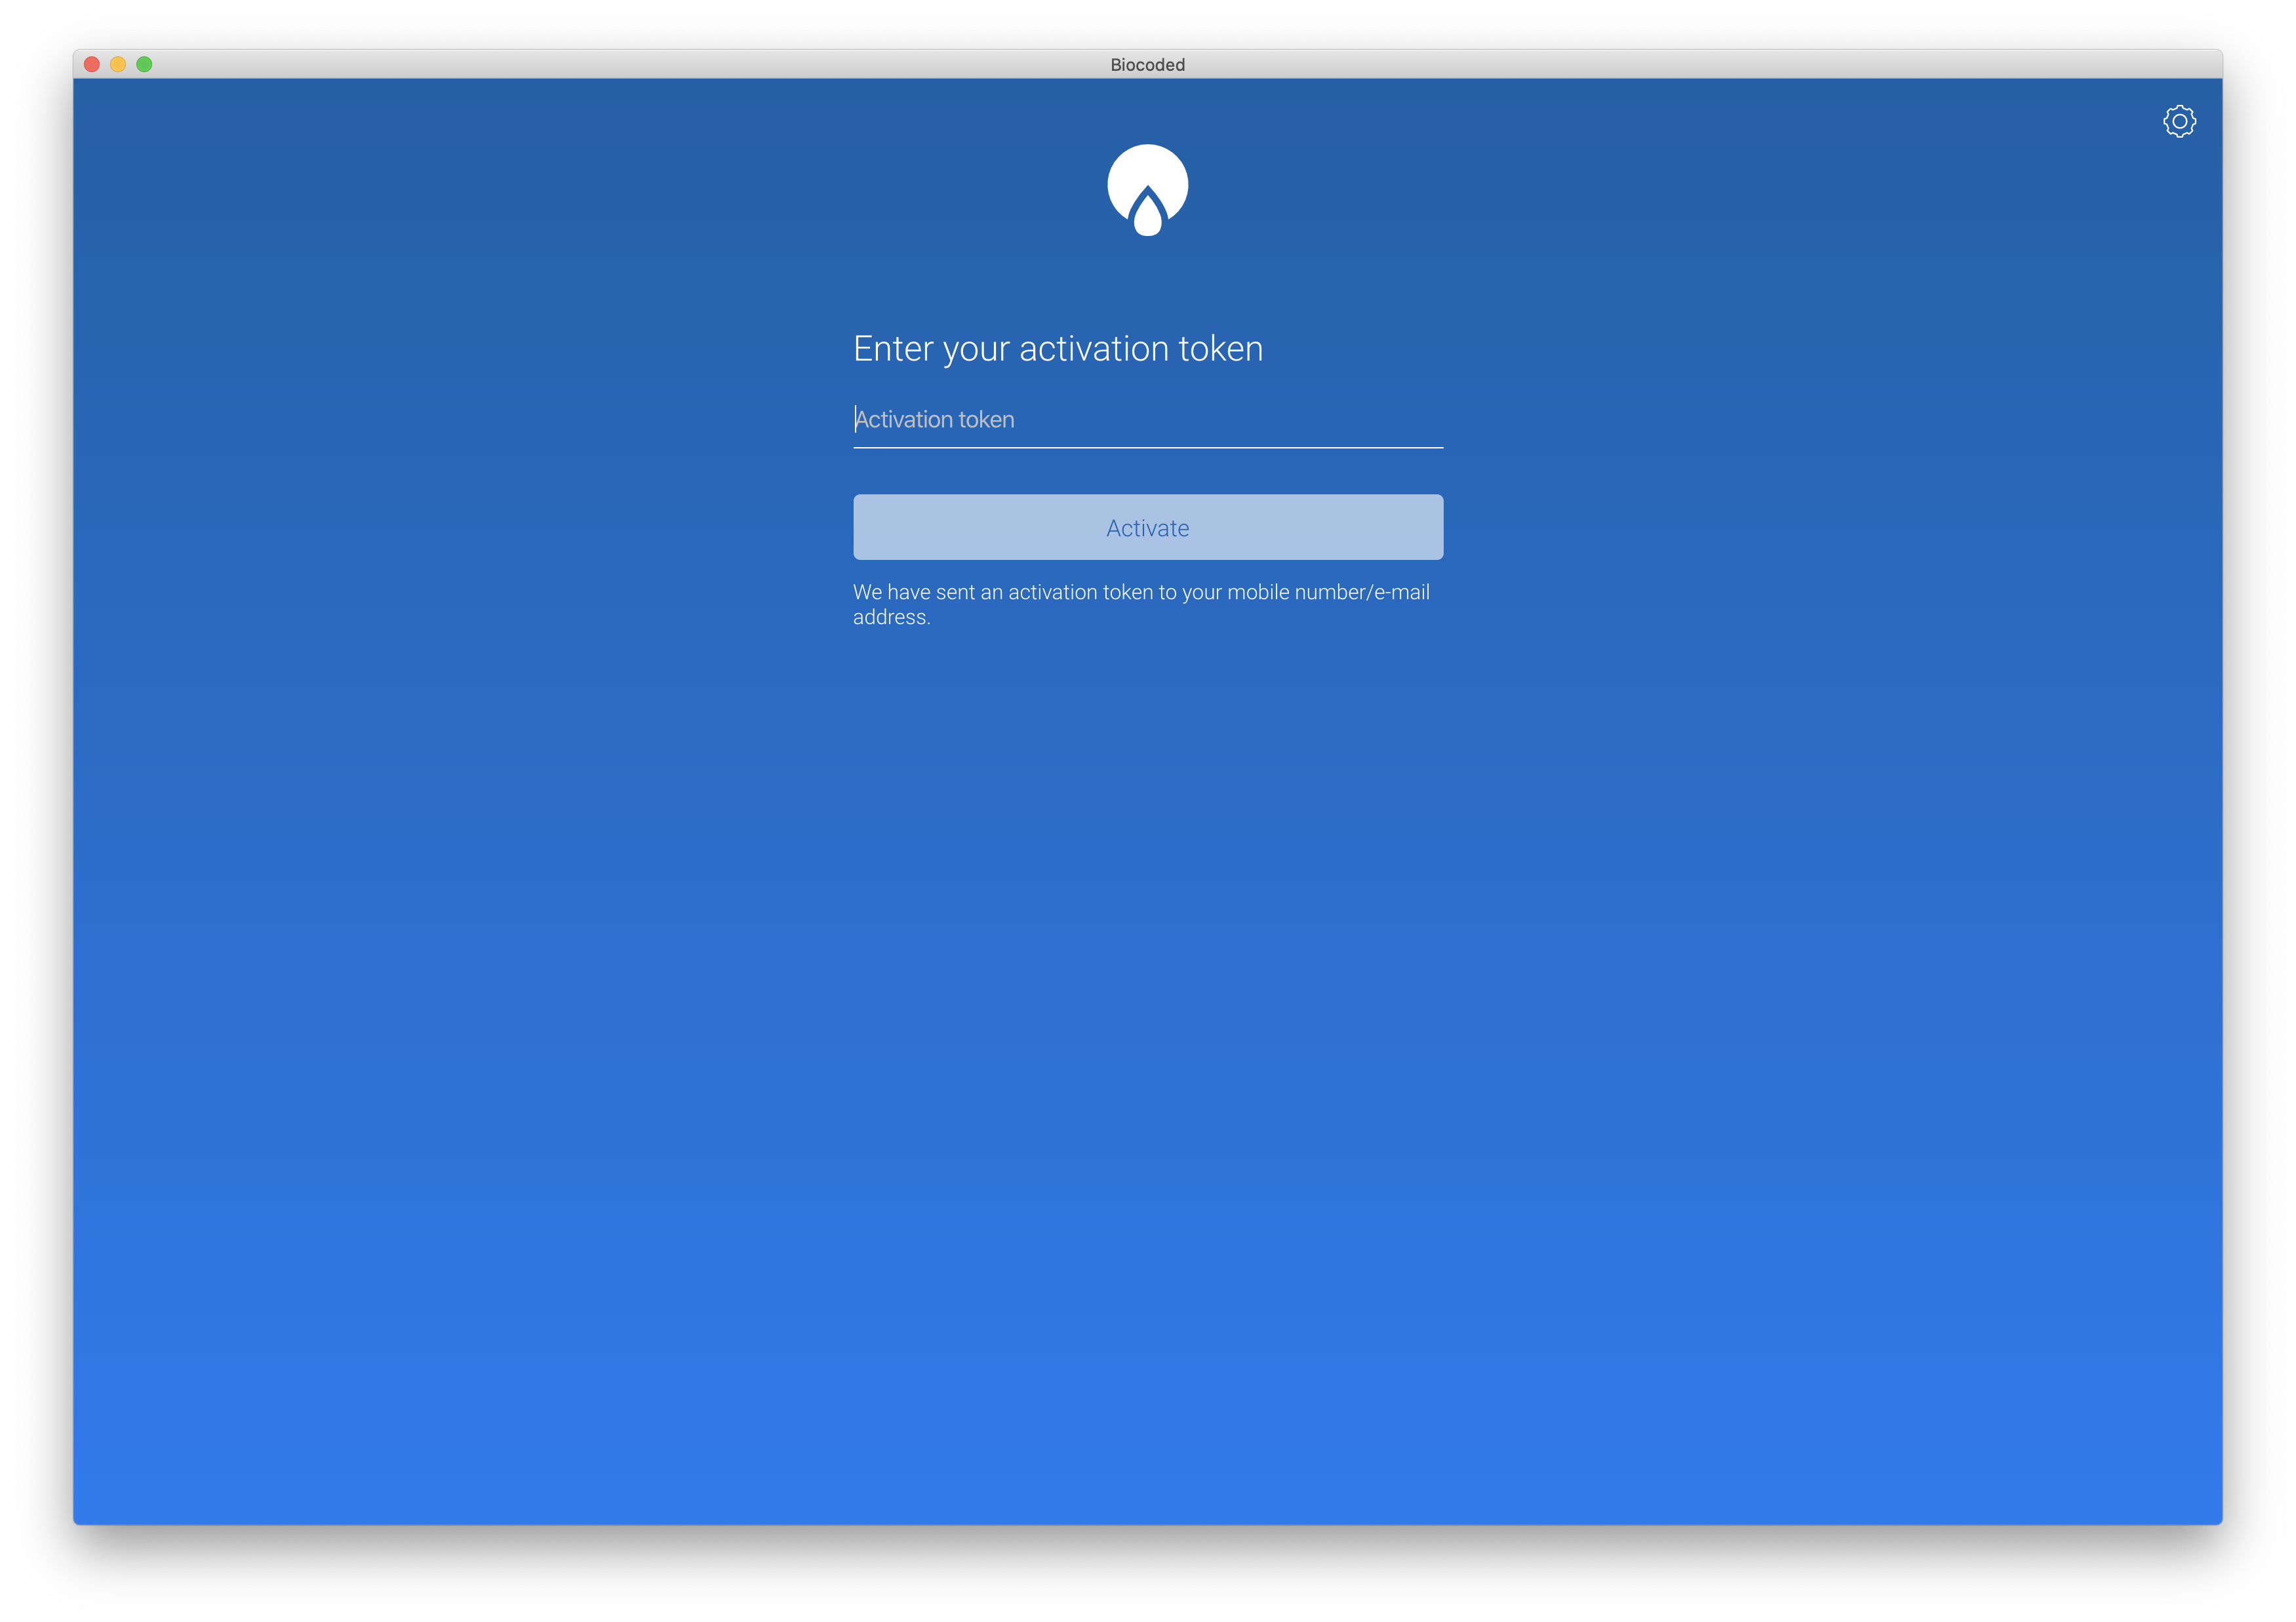
After signing in on a new device, you will have to activate it. An activation code will be sent to your e-mail address or phone number or provided by your server administrator. Input your activation code and press "Activate".
Note
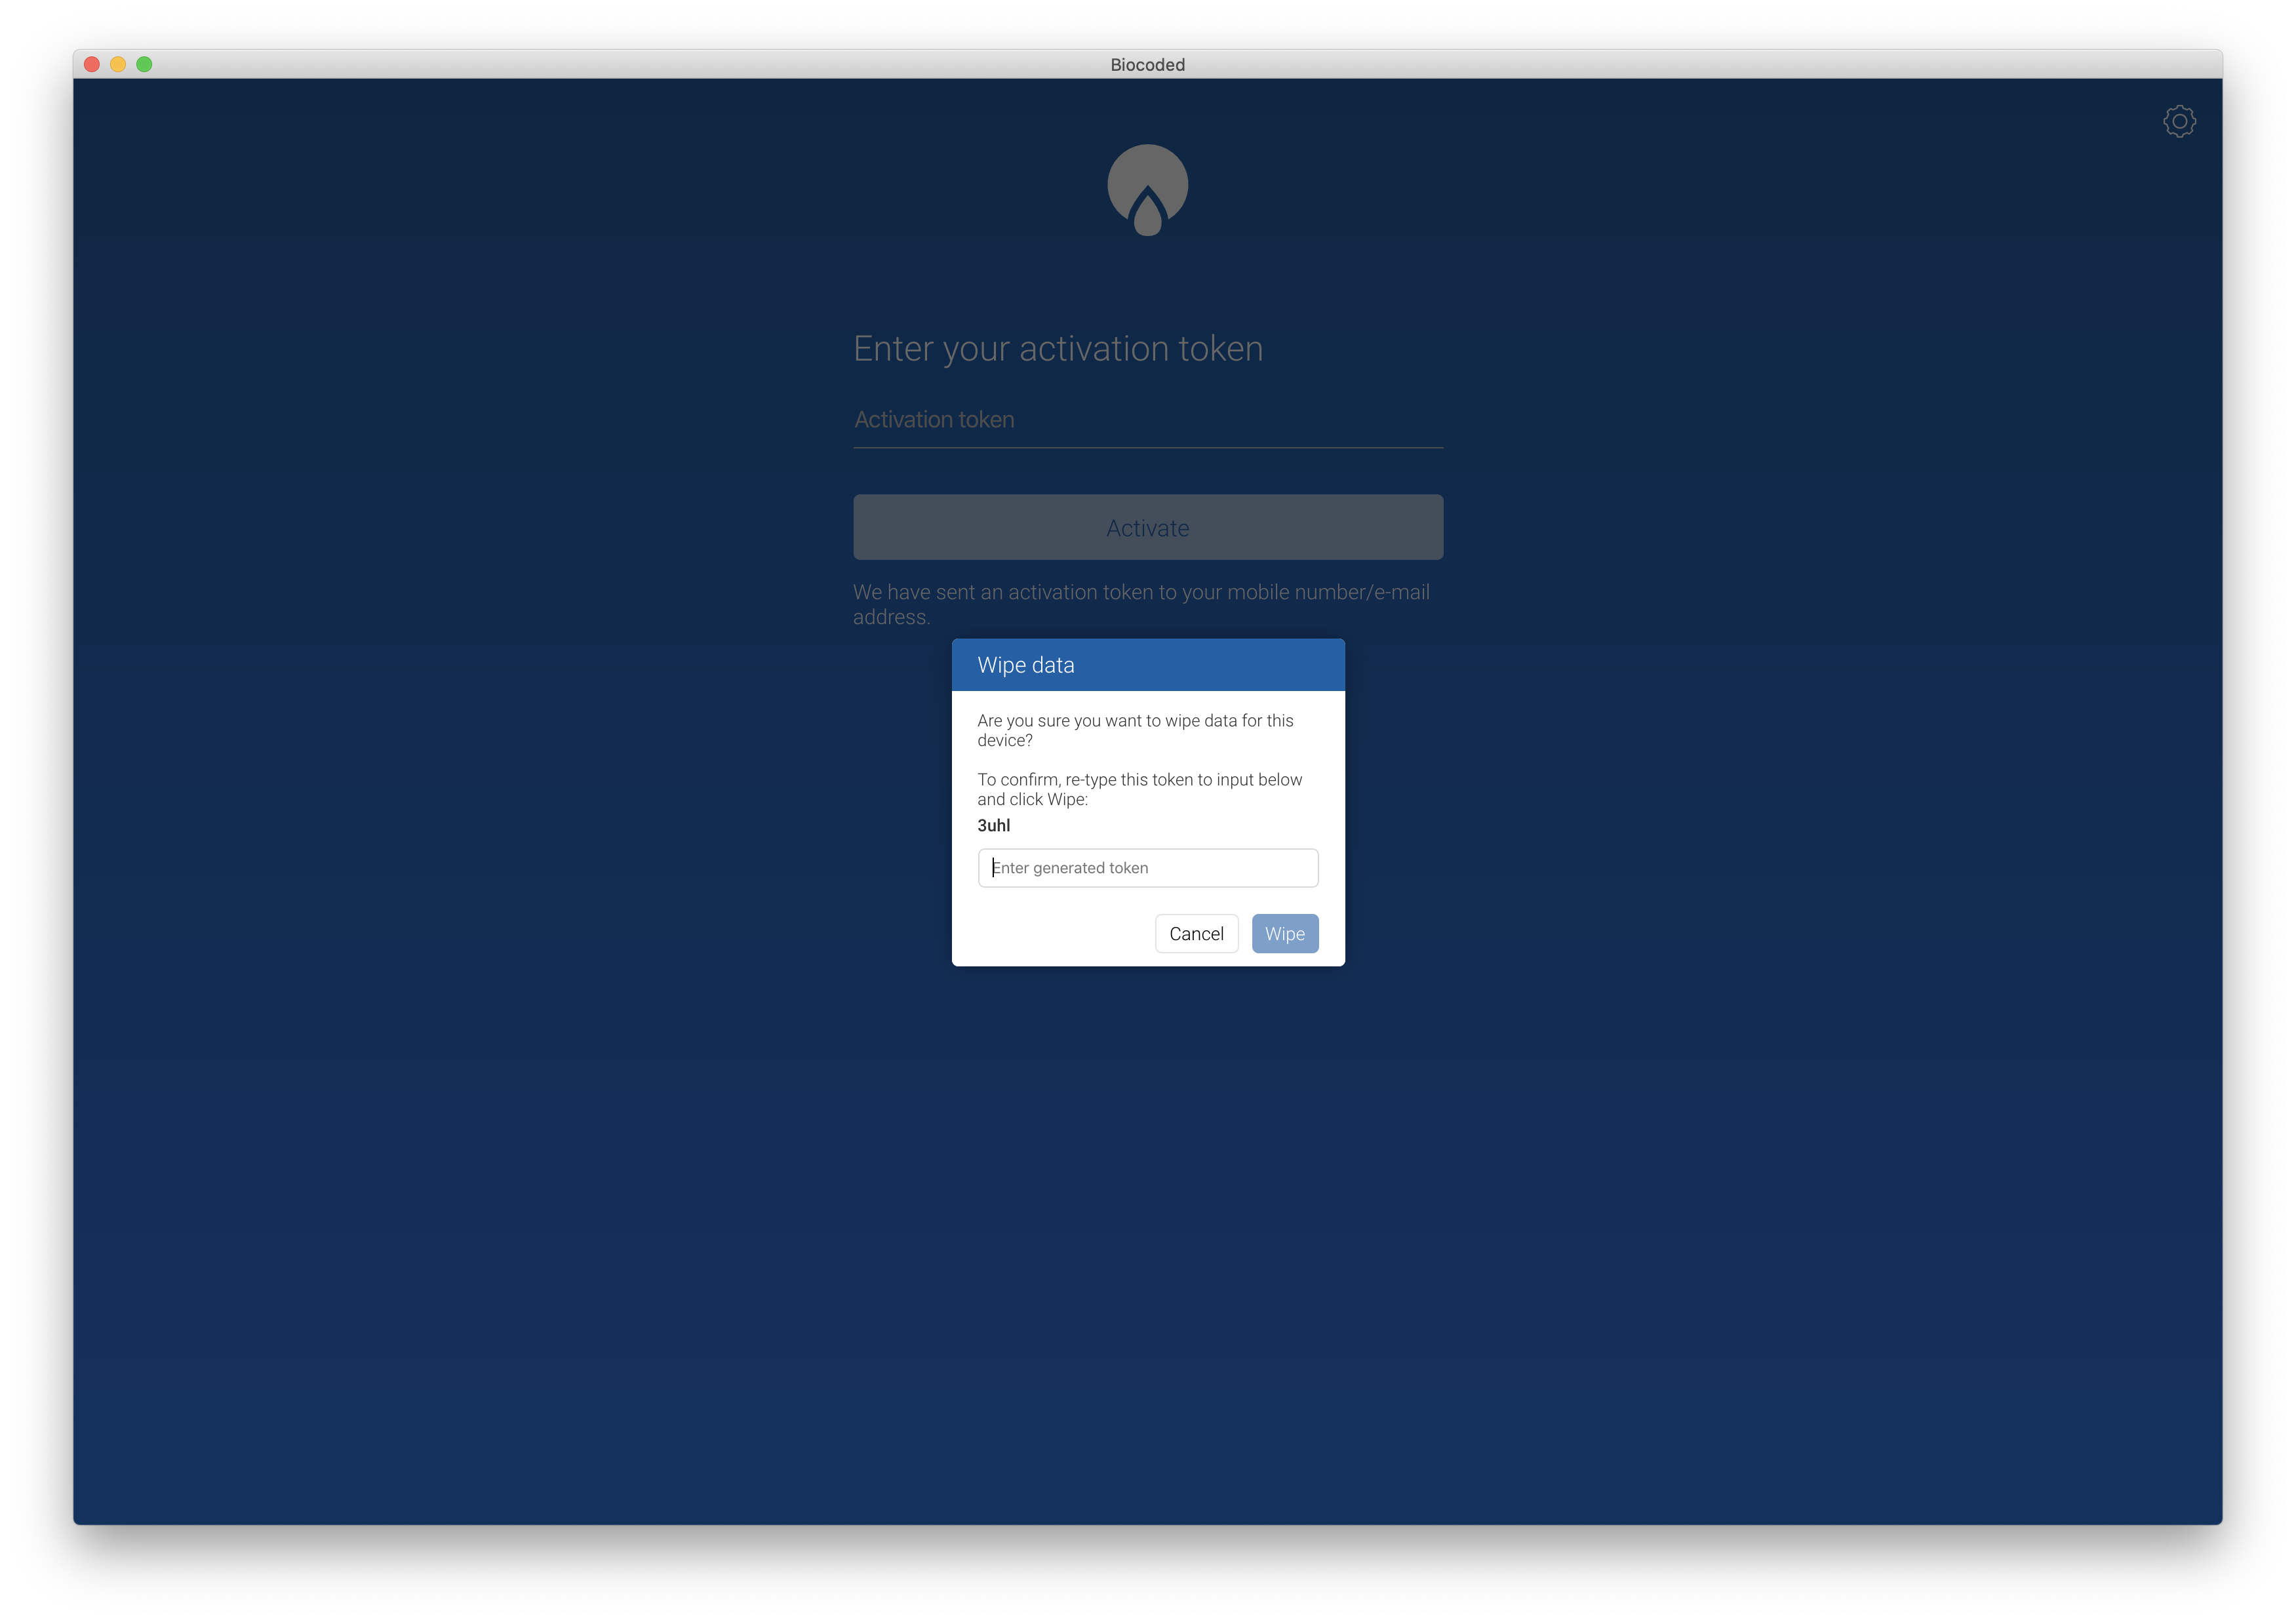
To log in with a different account, your application data will have to be wiped.
If you have logged in before, a wipe button  will be visible. After clicking it, you can confirm wiping this device by re-typing the displayed keyword.
Biocoded user interface
Main Navigation Bar
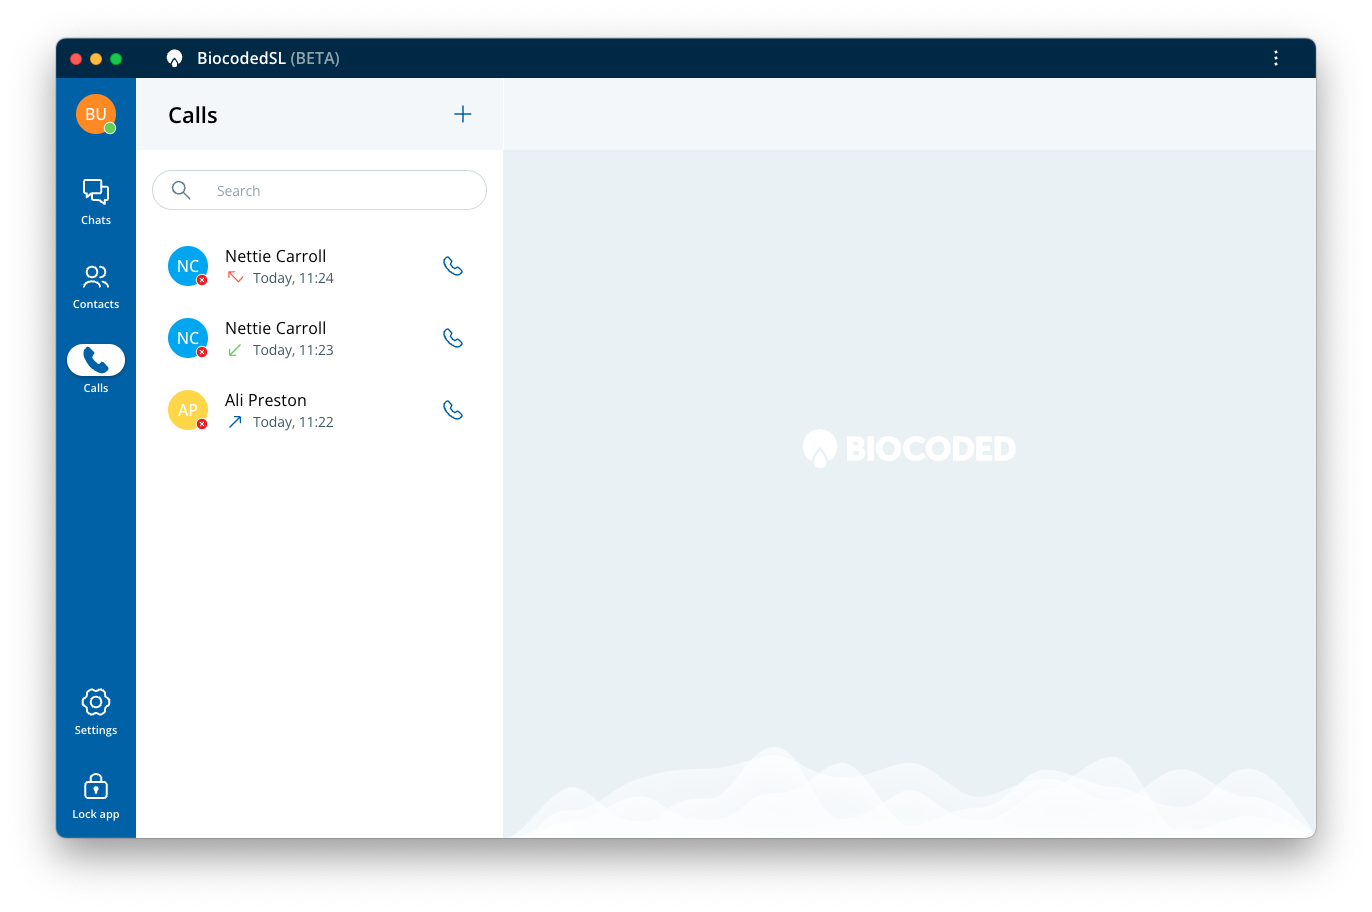
Biocoded user interface is divided into sections. They all offer a search functionality (except settings). The left side of app window is the main navigation bar which contains your:
- USER ICON,
- CALLS: list of past calls, also called call log, here you can repeat a past call and also view communication history with a contact or view the info of a group conference call,
- CONTACTS: Biocoded contacts that you are connected with appear here, and you can view their contact info,
- MESSAGES: list of chats that you've exchanged messages in with users or groups, with options to pin a chat (swipe right on a chat) or delete/leave a chat (swipe left),
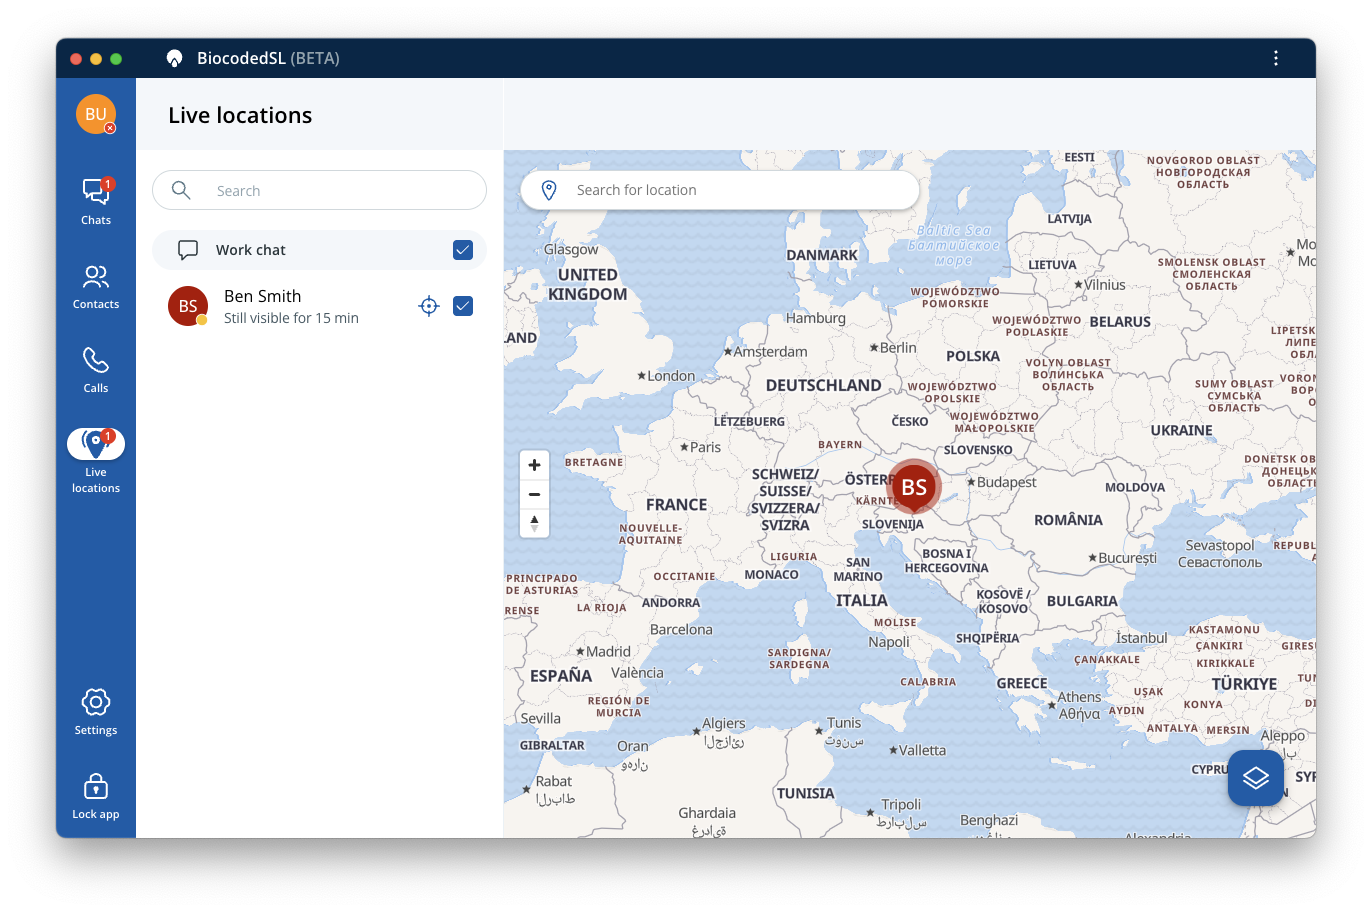
- LIVE LOCATIONS shared by your contacts (if aggregated map view is turned on from settings),
- SETTINGS: various settings that can be applied, described further in this document.
- and a shortcut to LOCK APP.
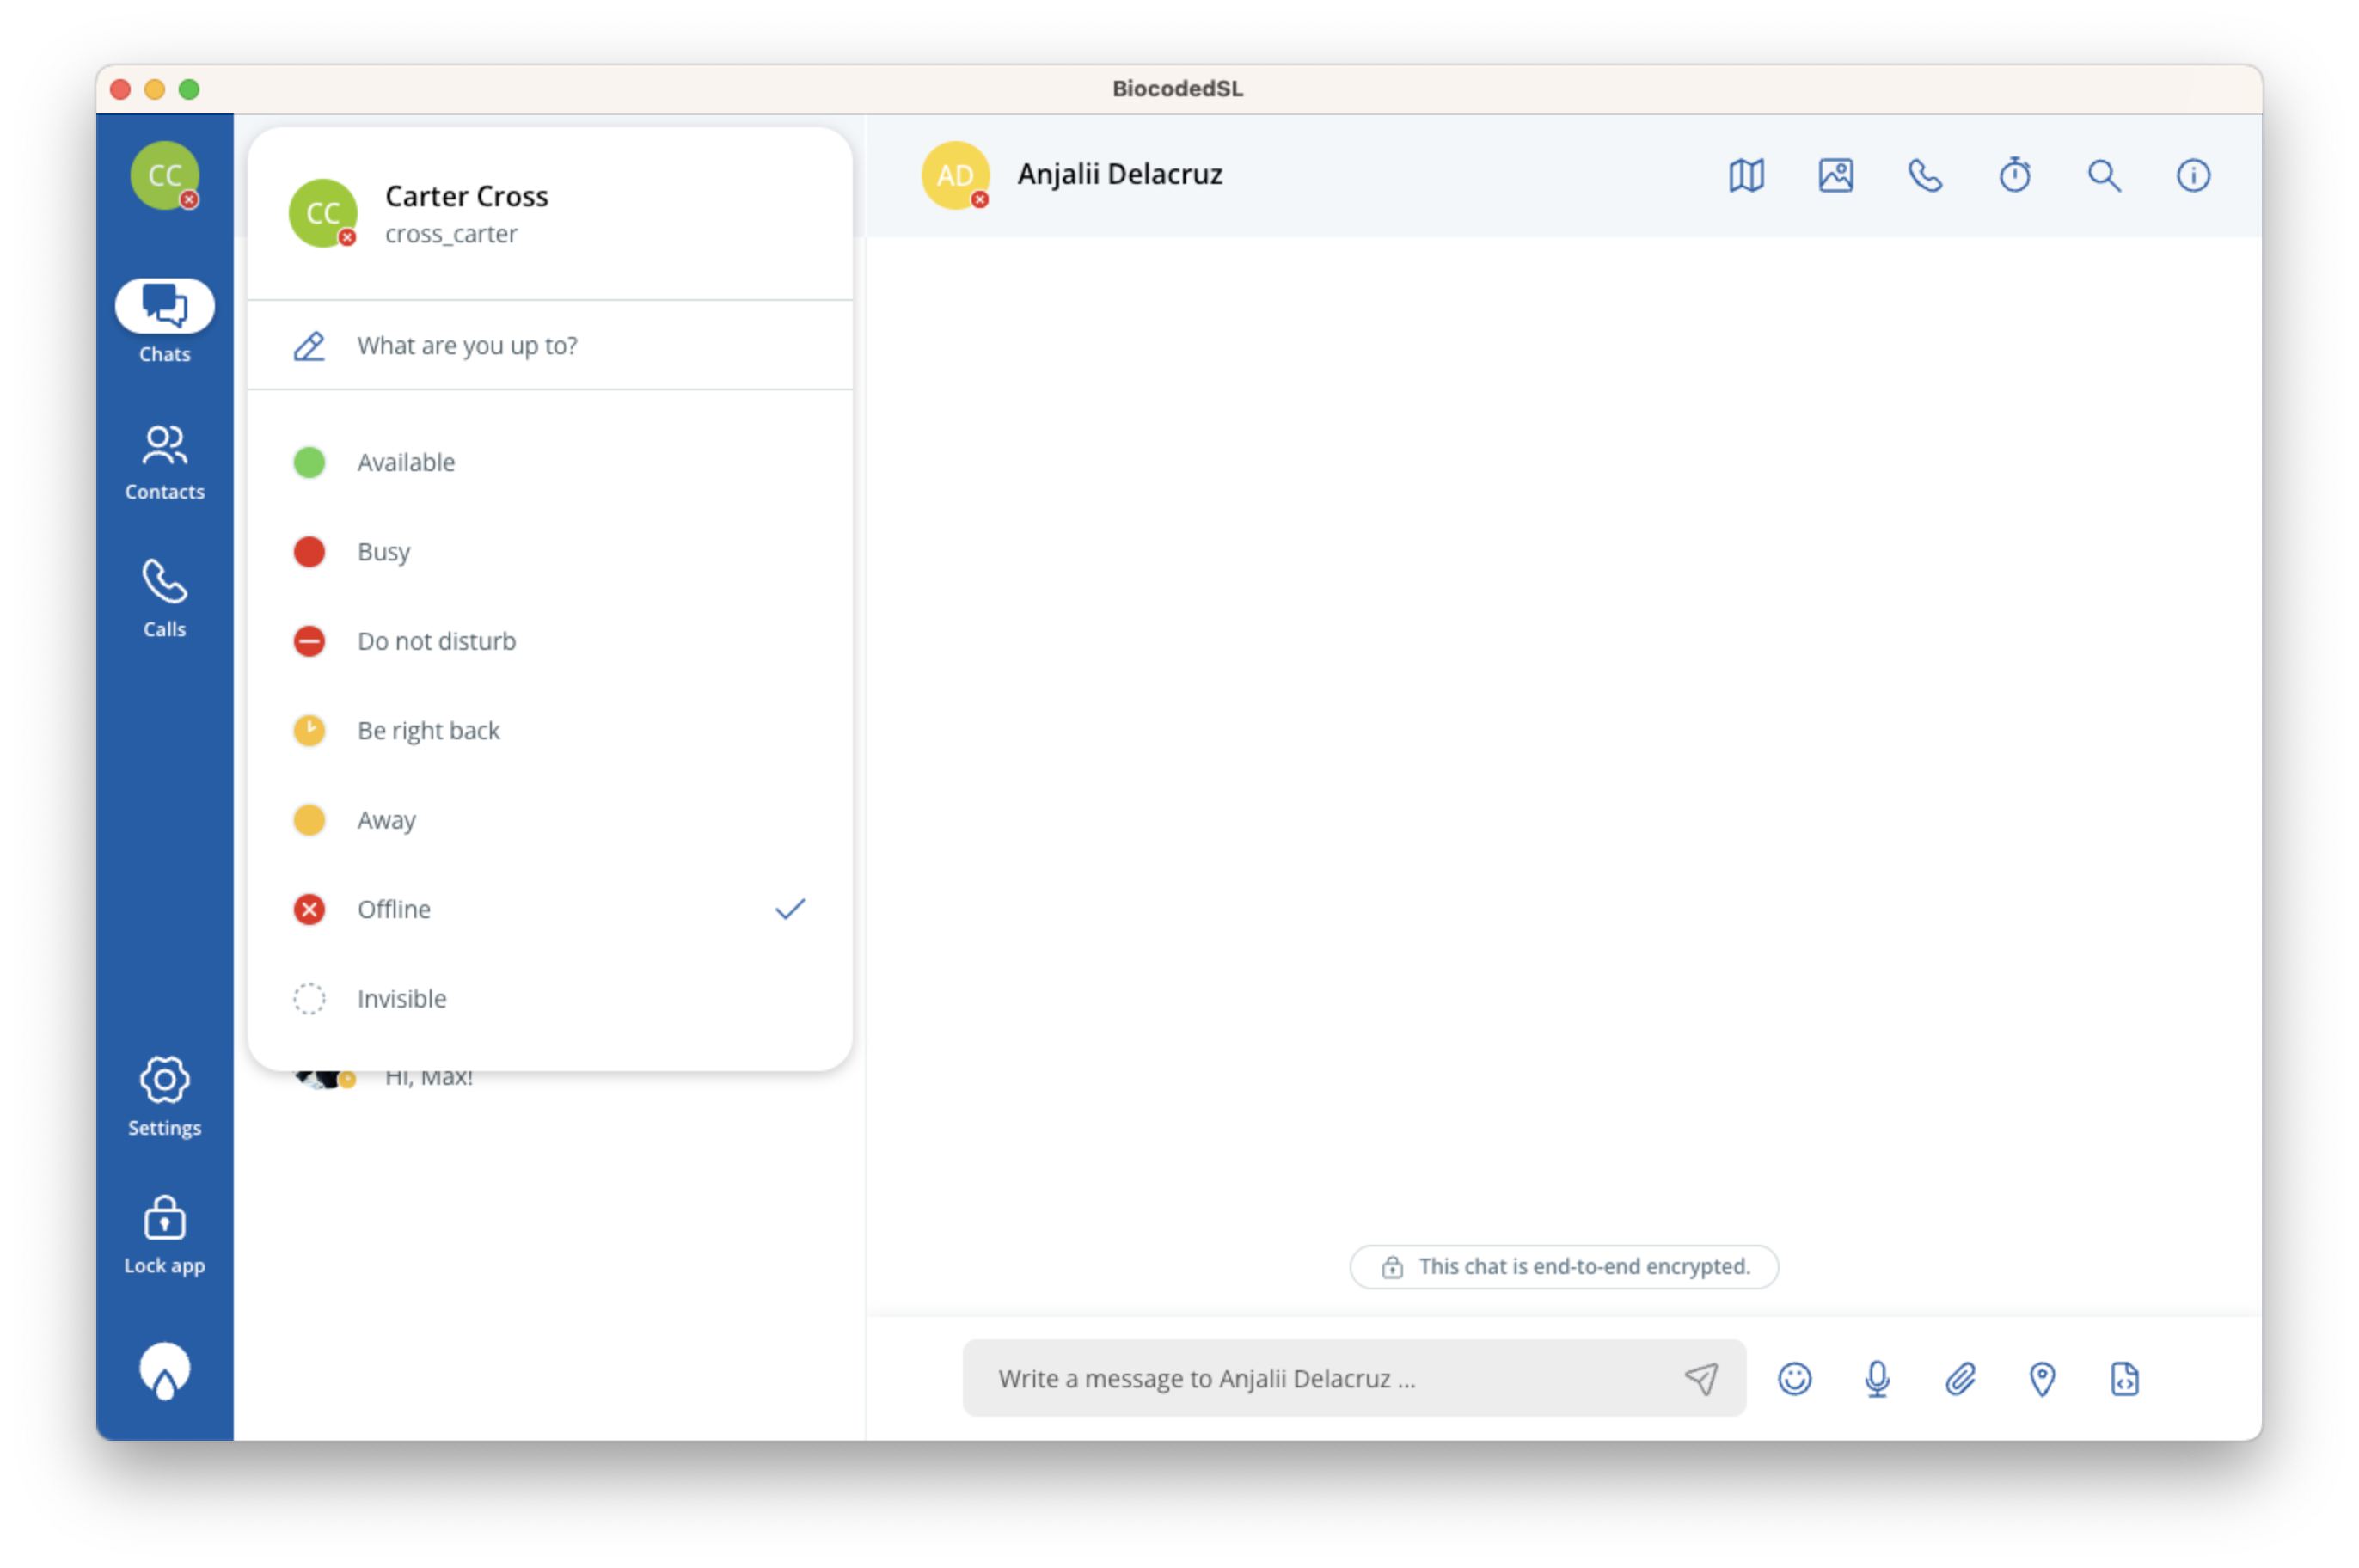
Select your user icon in the top left corner and a popup will appear containing:
- Your profile image or avatar with user's name and id,
- Your personal status message shown to users in your contacts list,
- A list of available statuses for your account - also shown to others.
Biocoded contacts
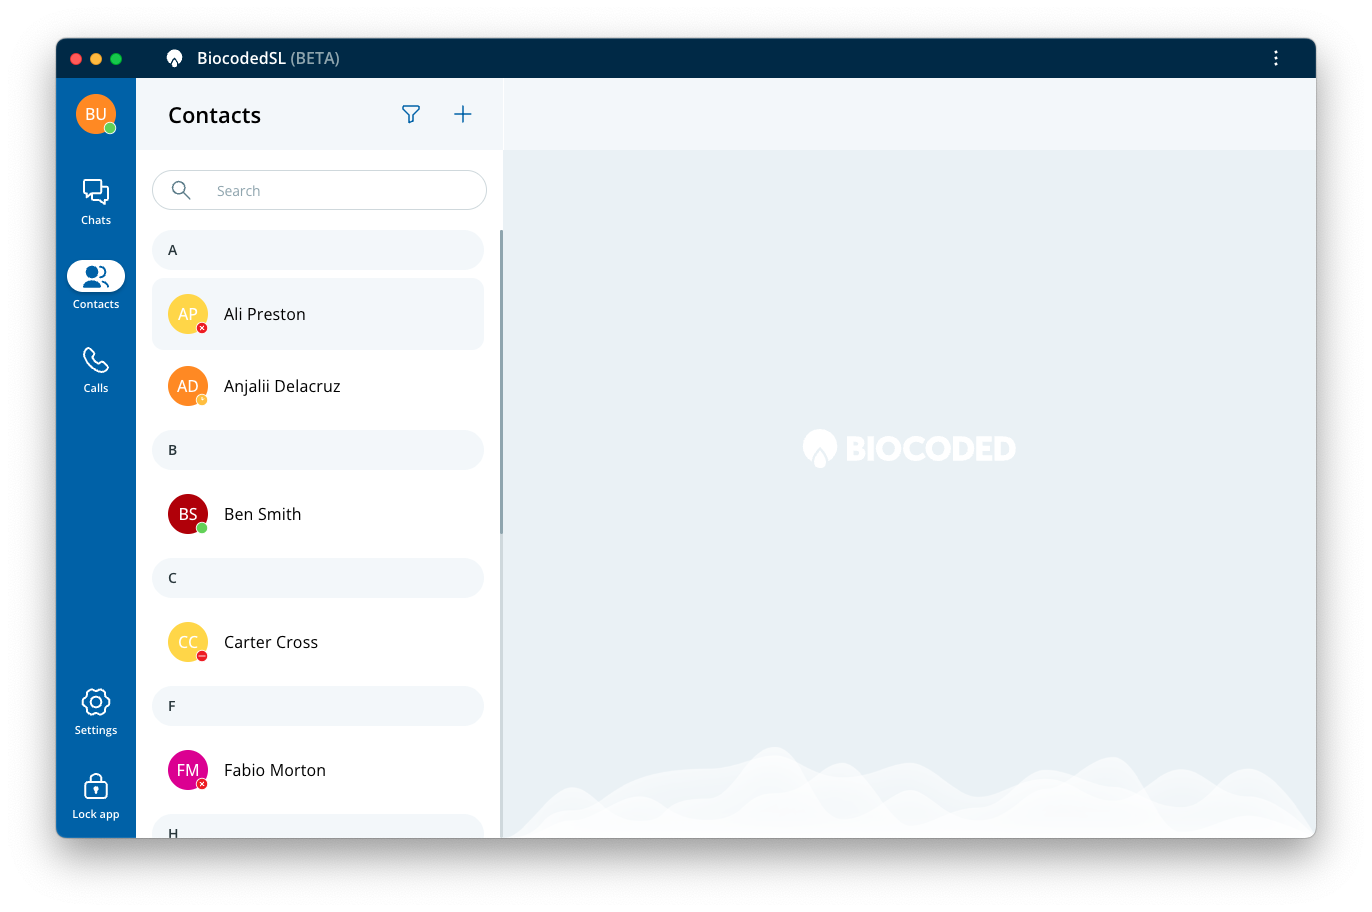
After selecting "Contacts" a list appears containing all your Biocoded contacts with whom you can communicate securely over Biocoded. You can search for a contact or filter them by groups using the filter button.
Adding a new contact
To add a new contact, tap on "+" on the Contacts tab. You add a contact by entering their Biocoded ID, e-mail or phone number and pressing Invite.
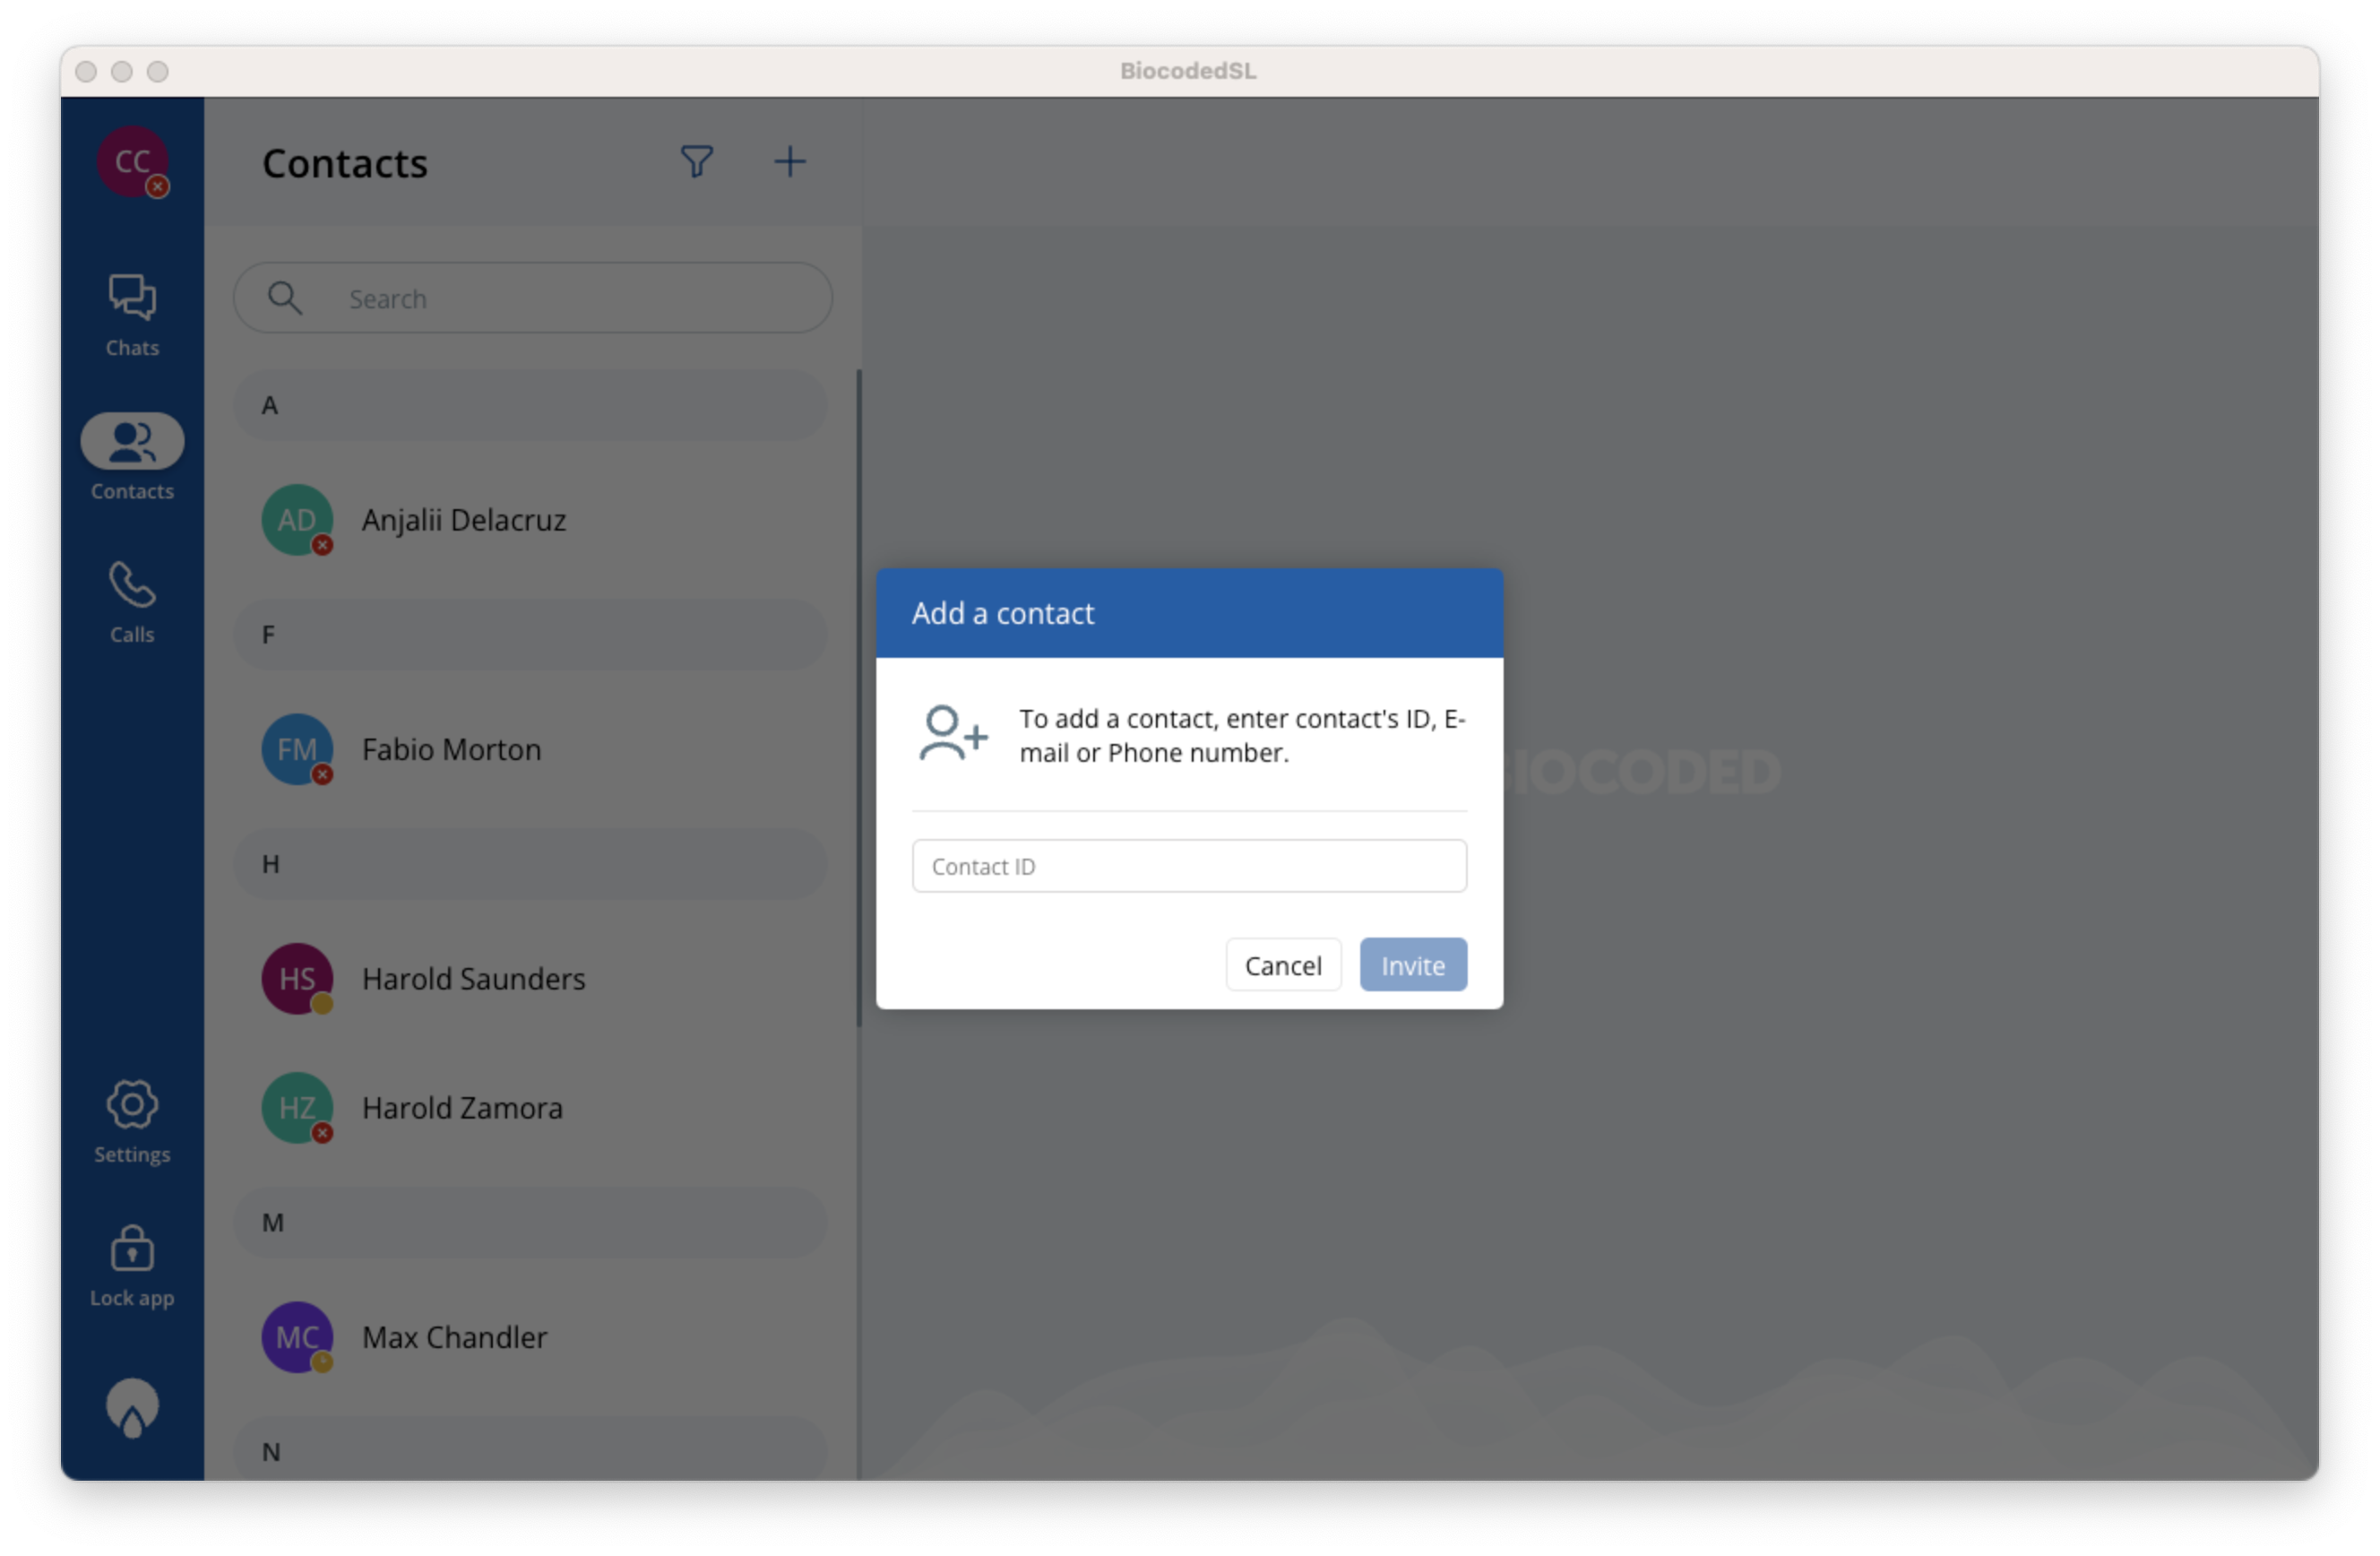
All contact requests will appear on top of contacts list, where they can be cancelled or accepted.
Viewing a contact's information
After selecting a contact, the "Contact info" screen will appear.
This screen shows your contact's display name (if one exists), name and surname, user's profile image, user status (if set), Biocoded ID, security information and a list of groups that connect you to this contact.
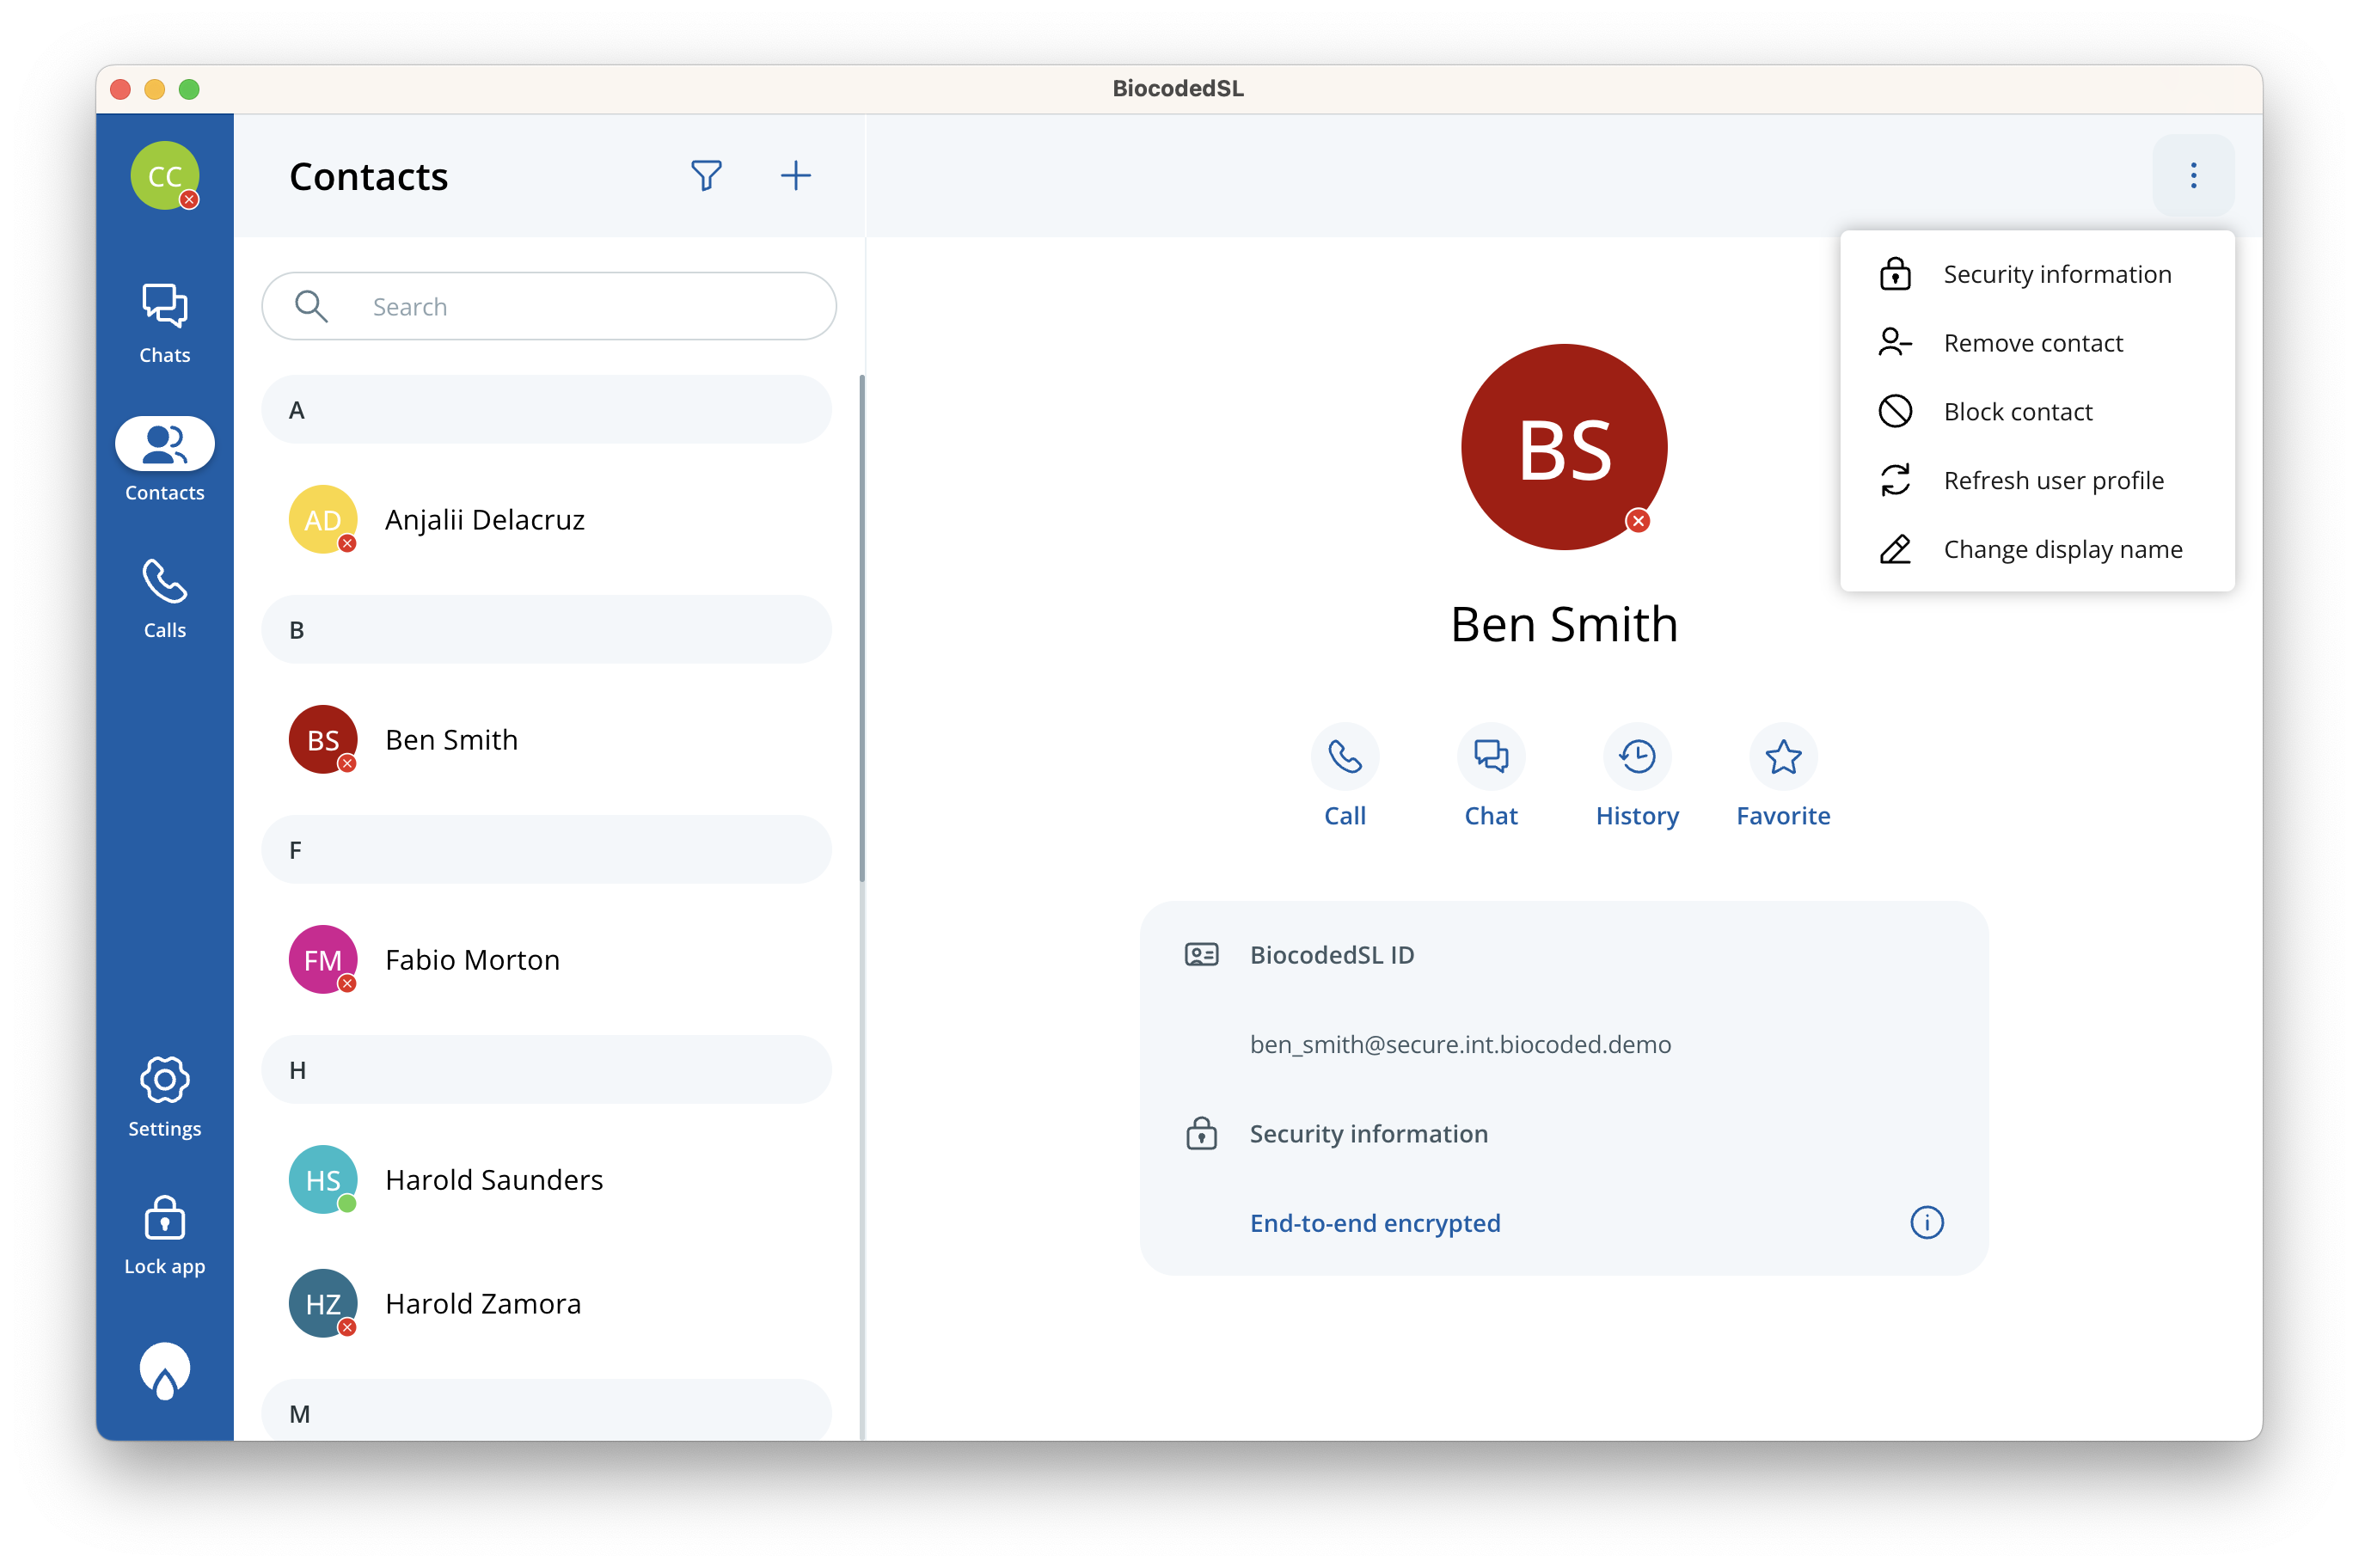
Pressing  will execute a secure call with this contact and bring up the call screen. Pressing
  will open an existing conversation with this contact or create a new one, if no messages have been exchanged yet. Contact history can be accessed by pressing
  and it contains a list of past calls with this contact. Pressing
  will add this contact to your favourites list.
After selecting  , an option popup appears:
- SECURITY INFORMATION: displays a new window containing the secure channels with the contact.
- REMOVE CONTACT: removes the contact from your contact list. You will have to confirm the removal. After they are removed, they will have to be re-added to communicate with you,
- BLOCK CONTACT: blocks the contact from your contact list. You will have to confirm the block. After they are blocked, you will have to unblock them to enable communication.
- REFRESH USER PROFILE: fetches the latest profile data for this user.
- CHANGE DISPLAY NAME: you can set a custom display name for a contact. Only you will be able to see this name,
Some options might not be available according to server installation settings.
Calling
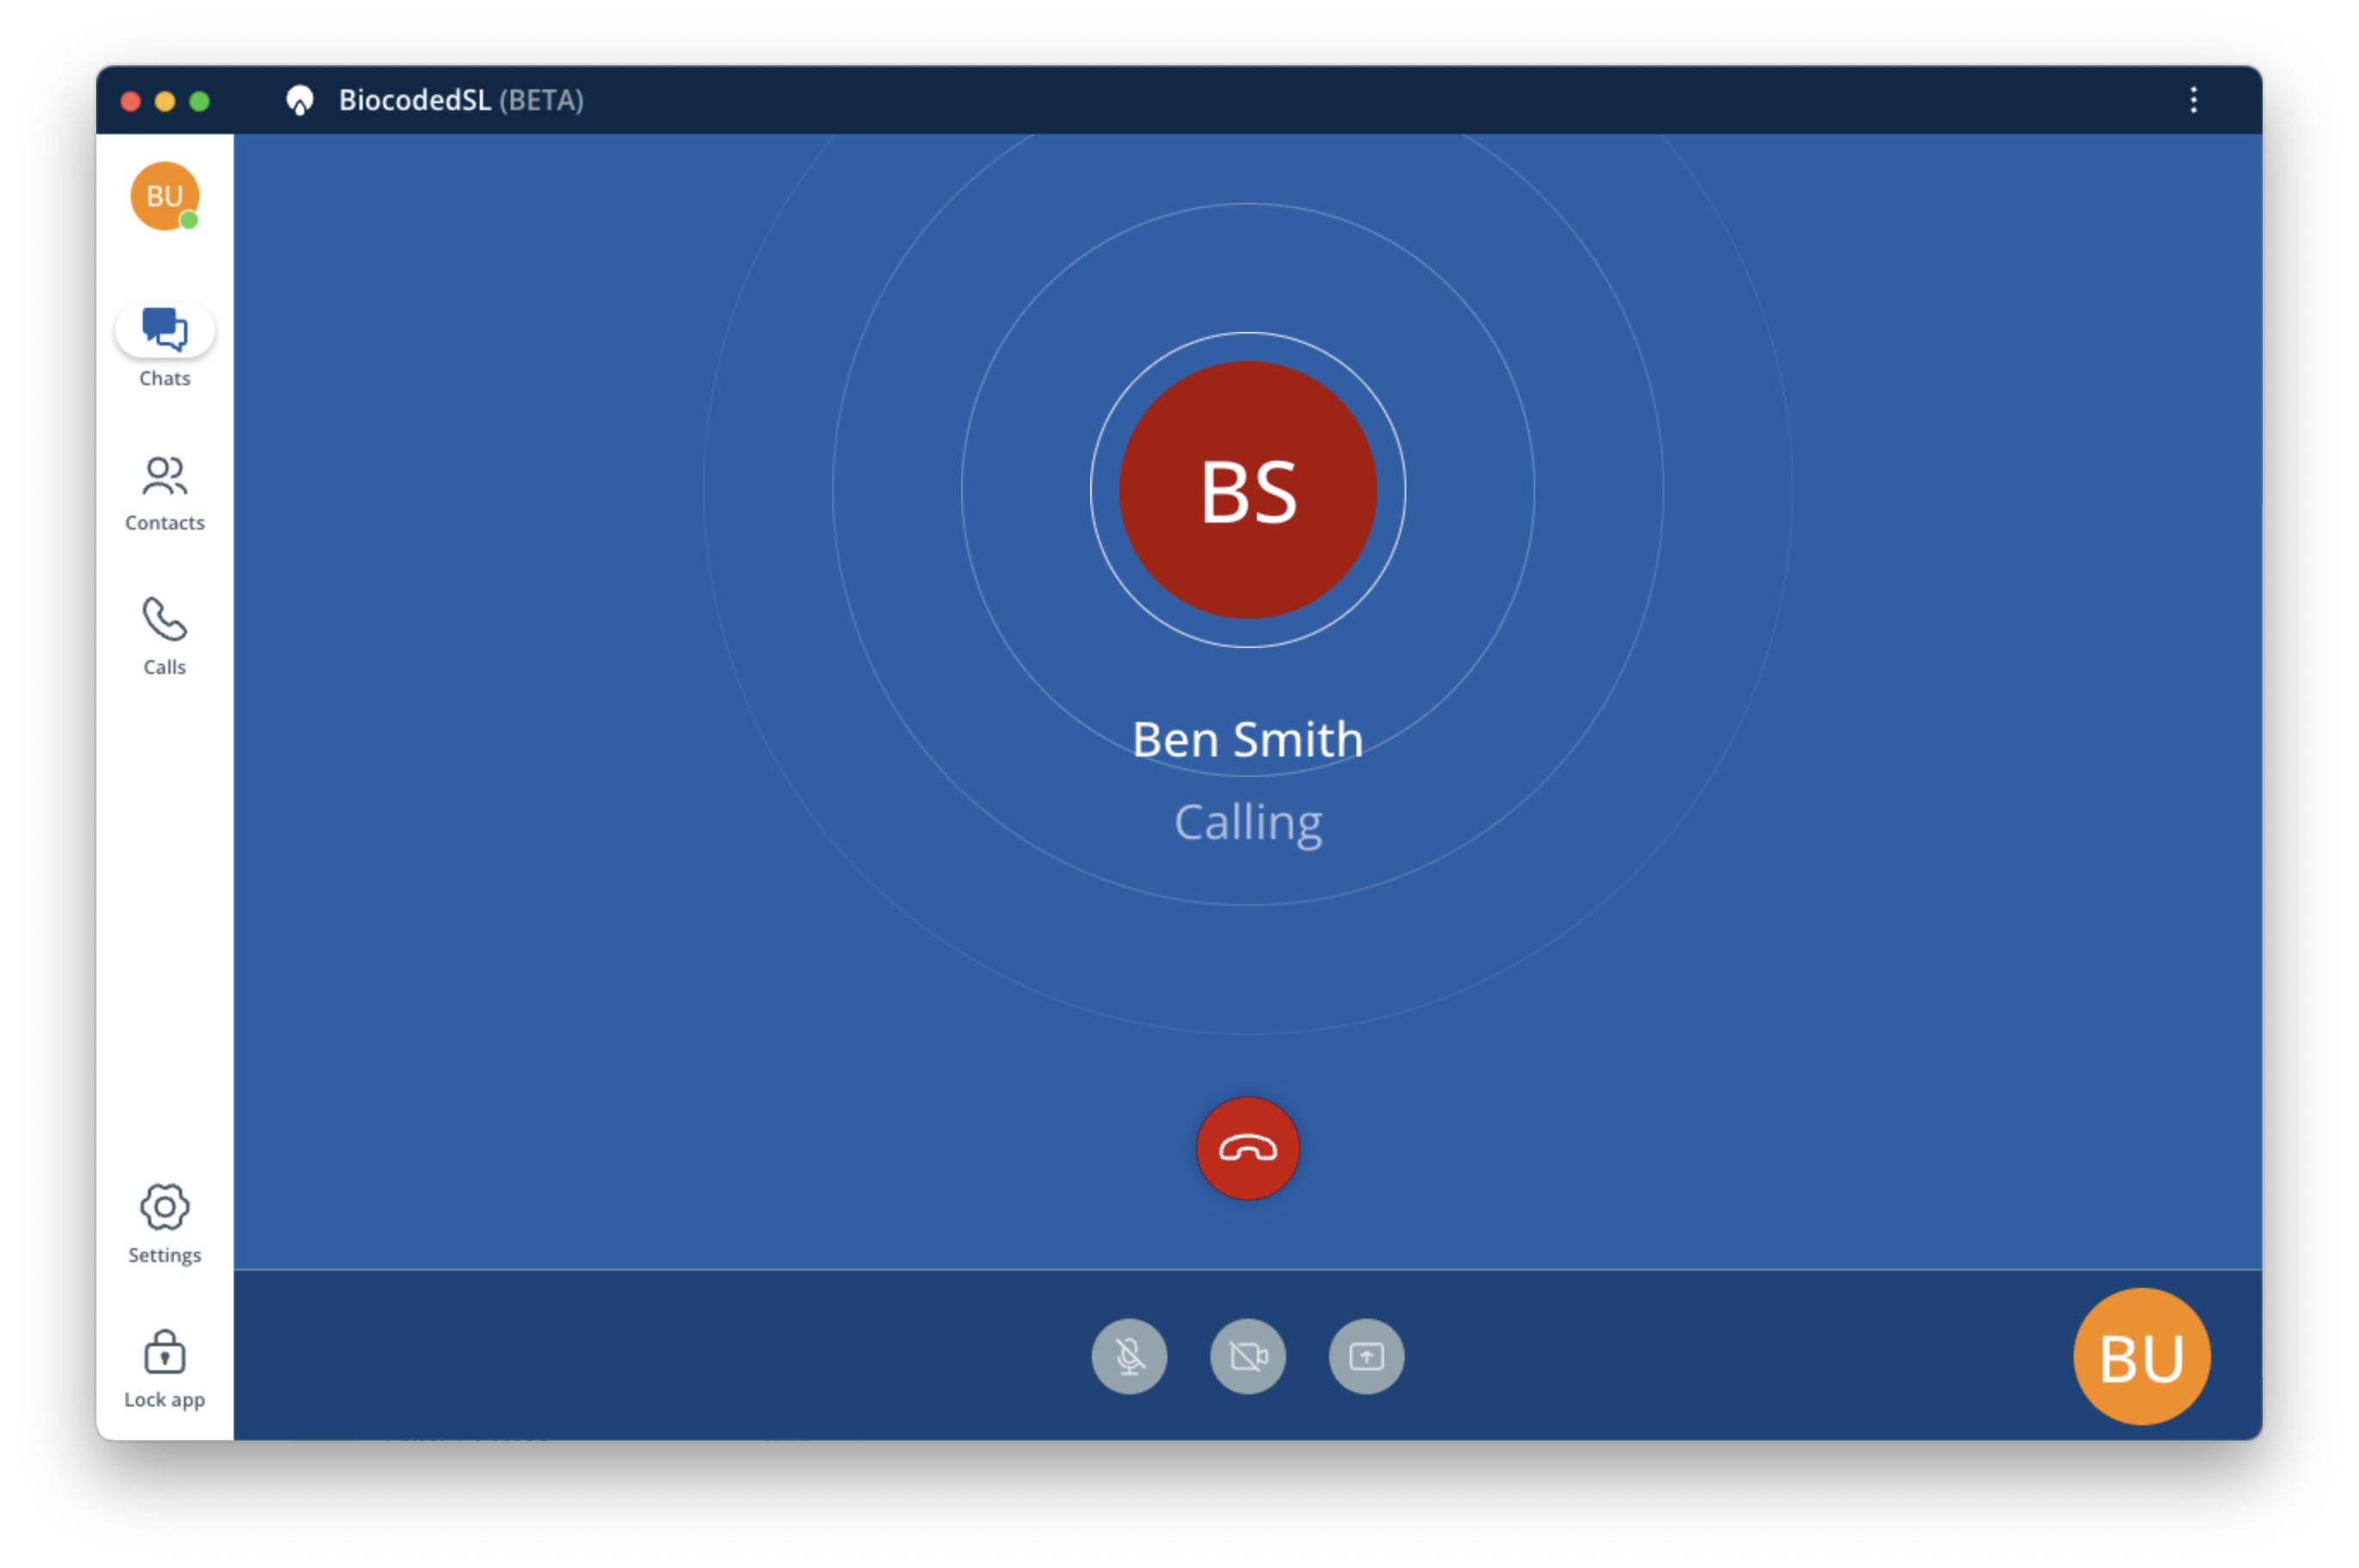
Placing a call
You can call a contact using any of the following ways:
- By pressing the contact’s call button from the Calls tab,
- By selecting the contact in the Contacts tab and then pressing on on the contact info screen,
- From the chat with the contact, by pressing ,
- Repeat a previous call from call log shown in Calls tab.
Receiving a call
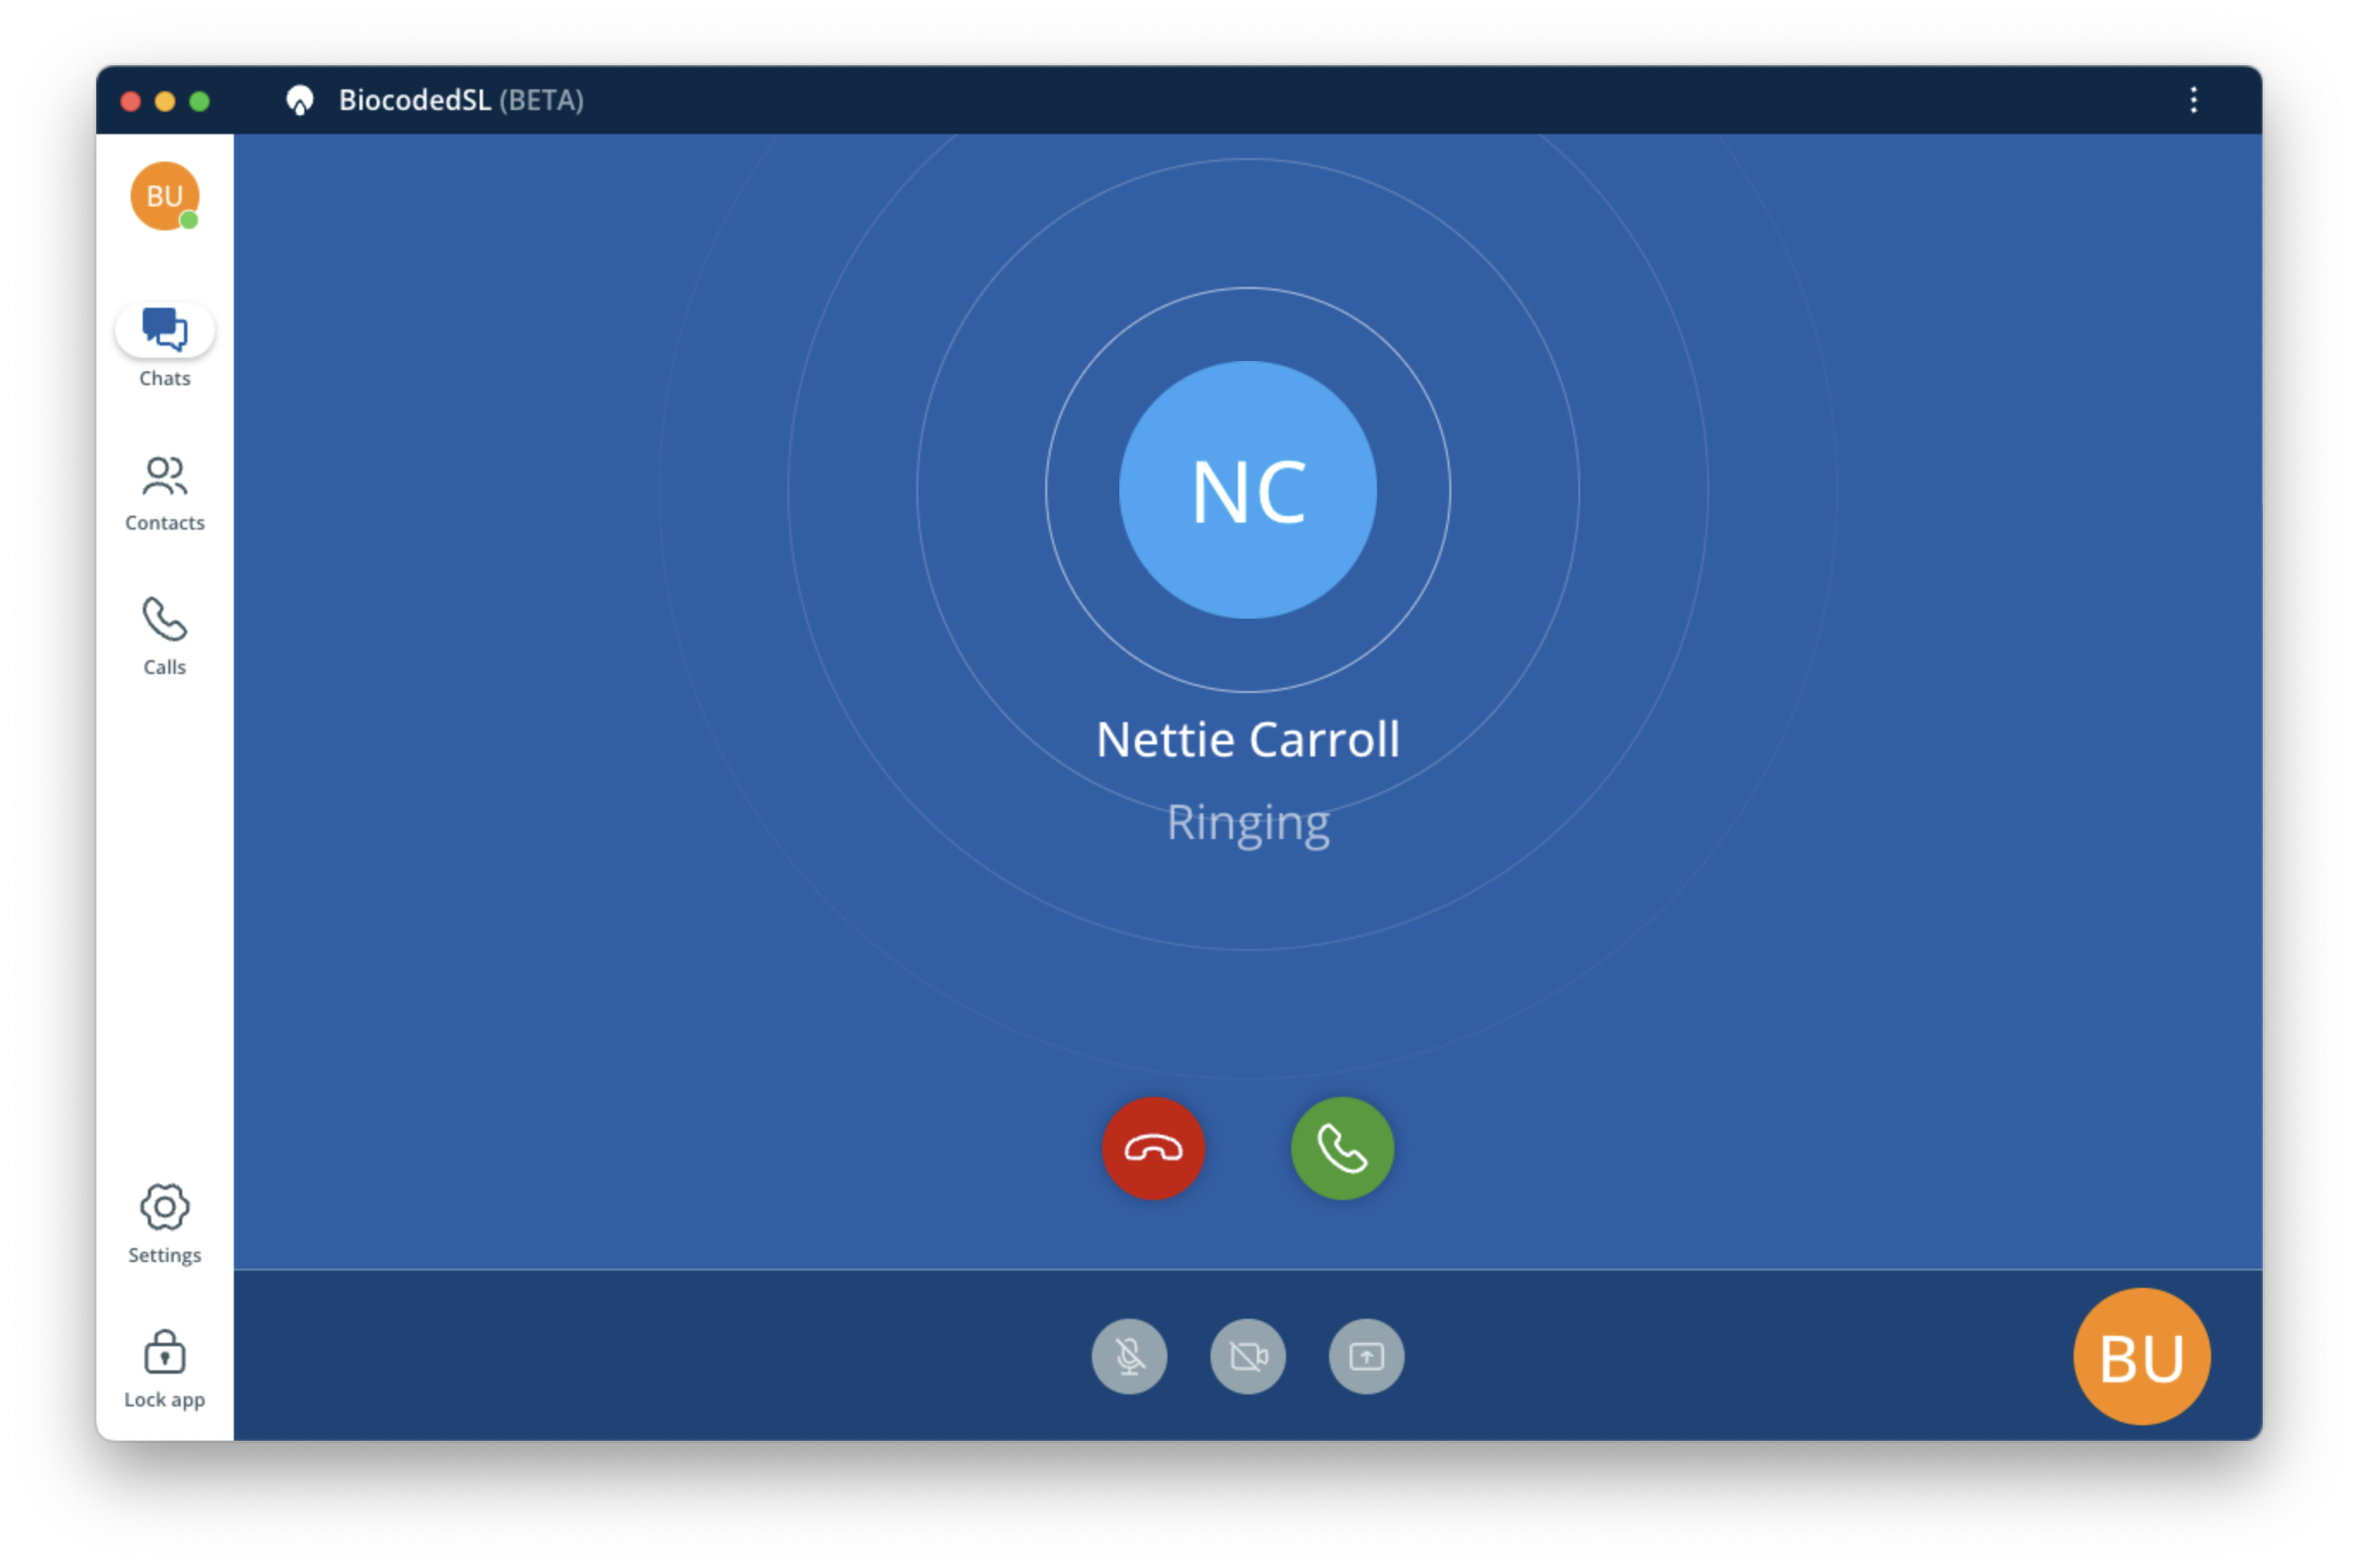
An incoming call presents a screen to accept or reject a call. A system notification will appear.
Call screen
After a call is executed or answered, a standard call screen will appear.
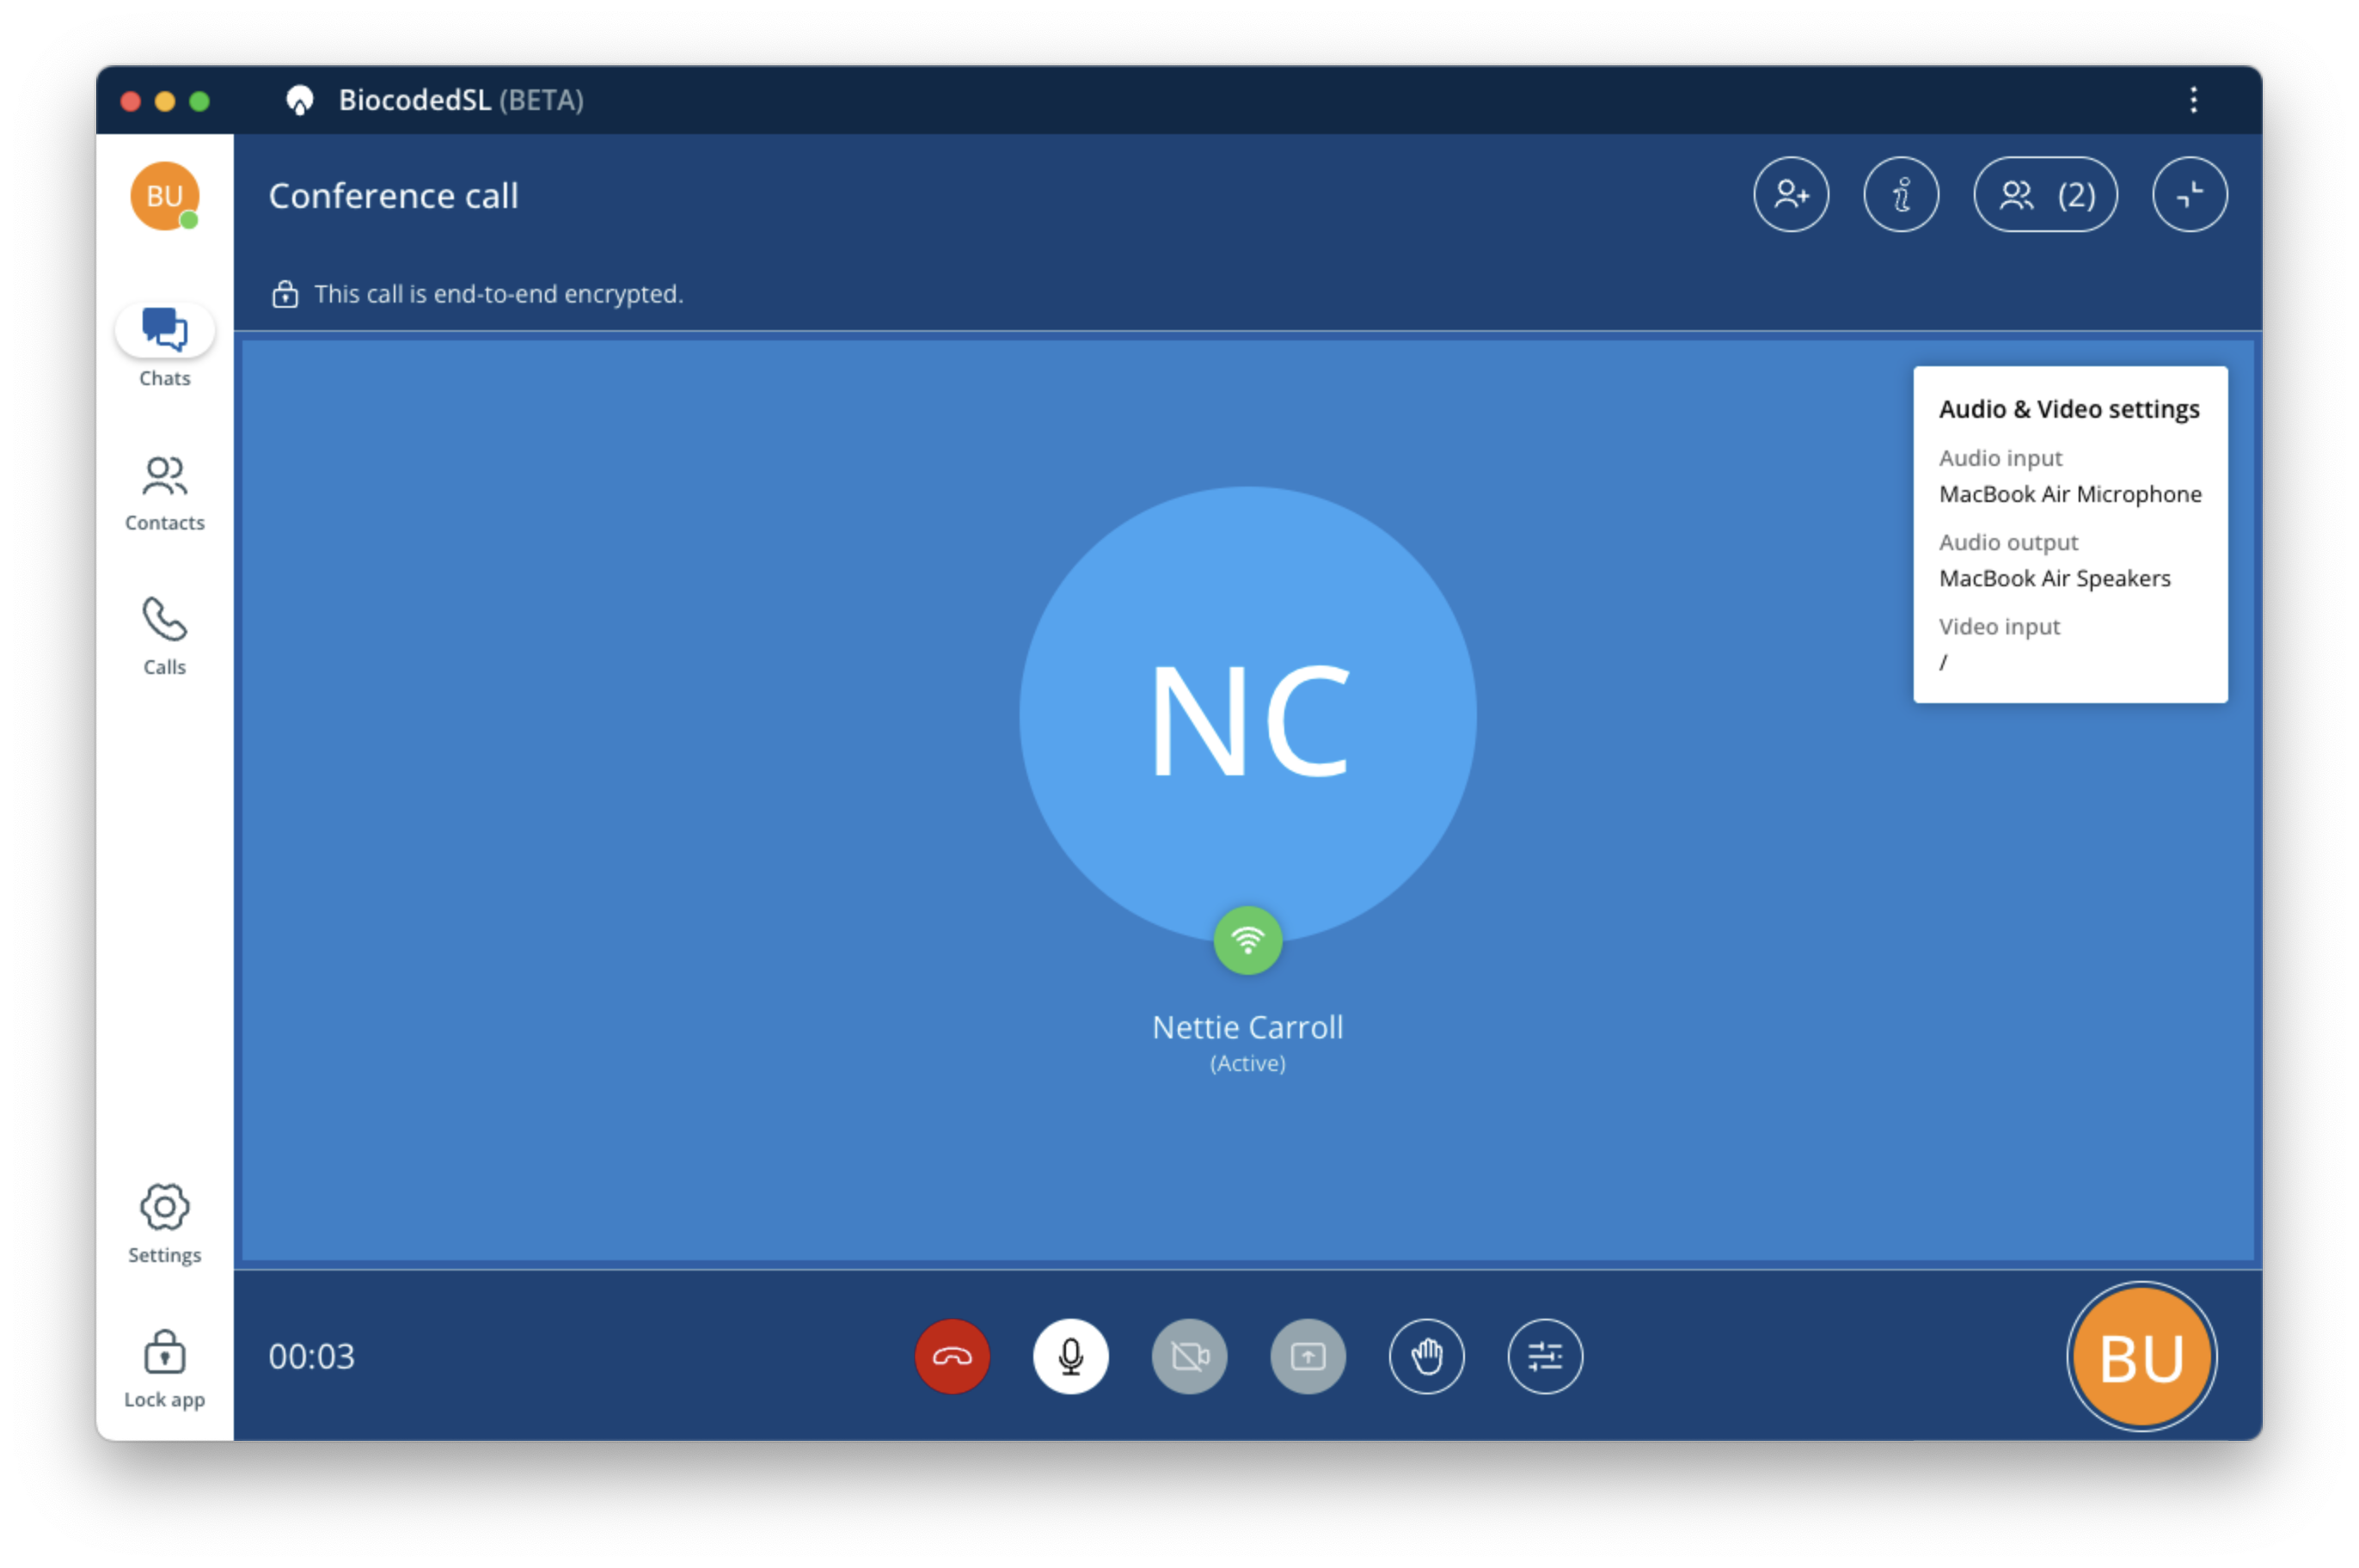
Basic call controls
Basic call controls found in the bottom part of call screen include buttons to:
- hang up and leave call,
- mute or un-mute microphone,
- turn video chat on or off,
- share screen or window,
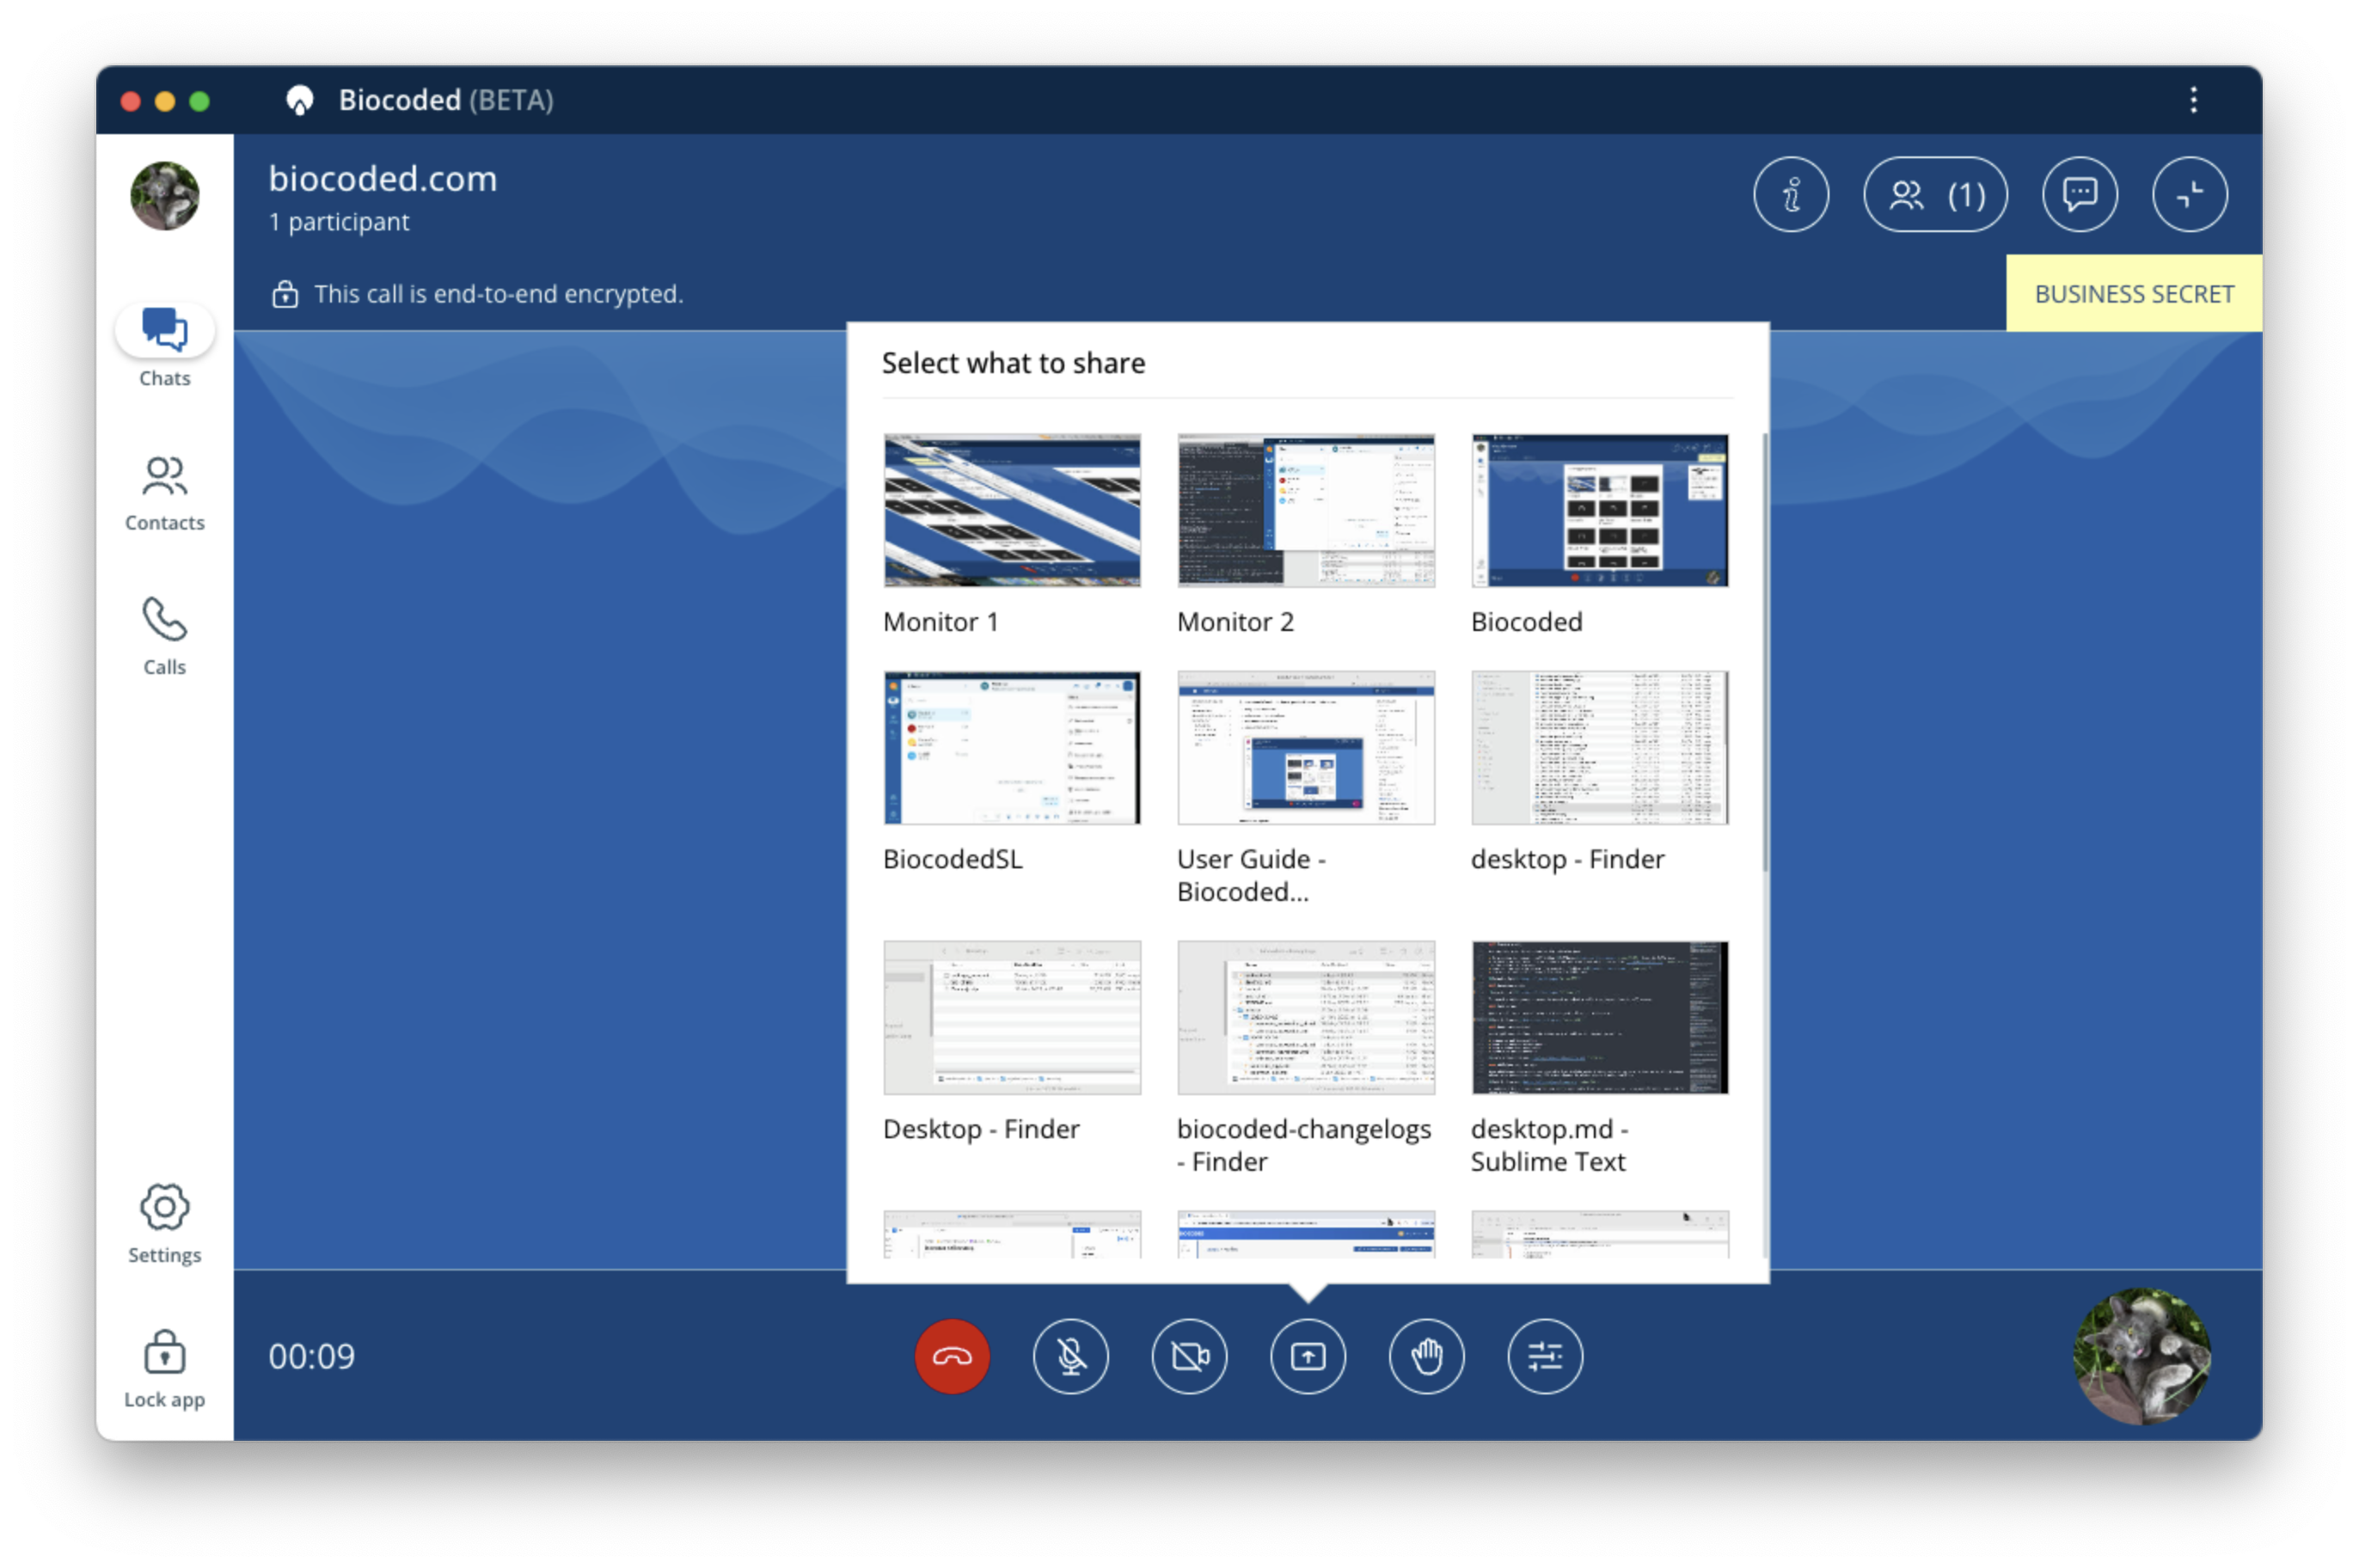
Additional call options
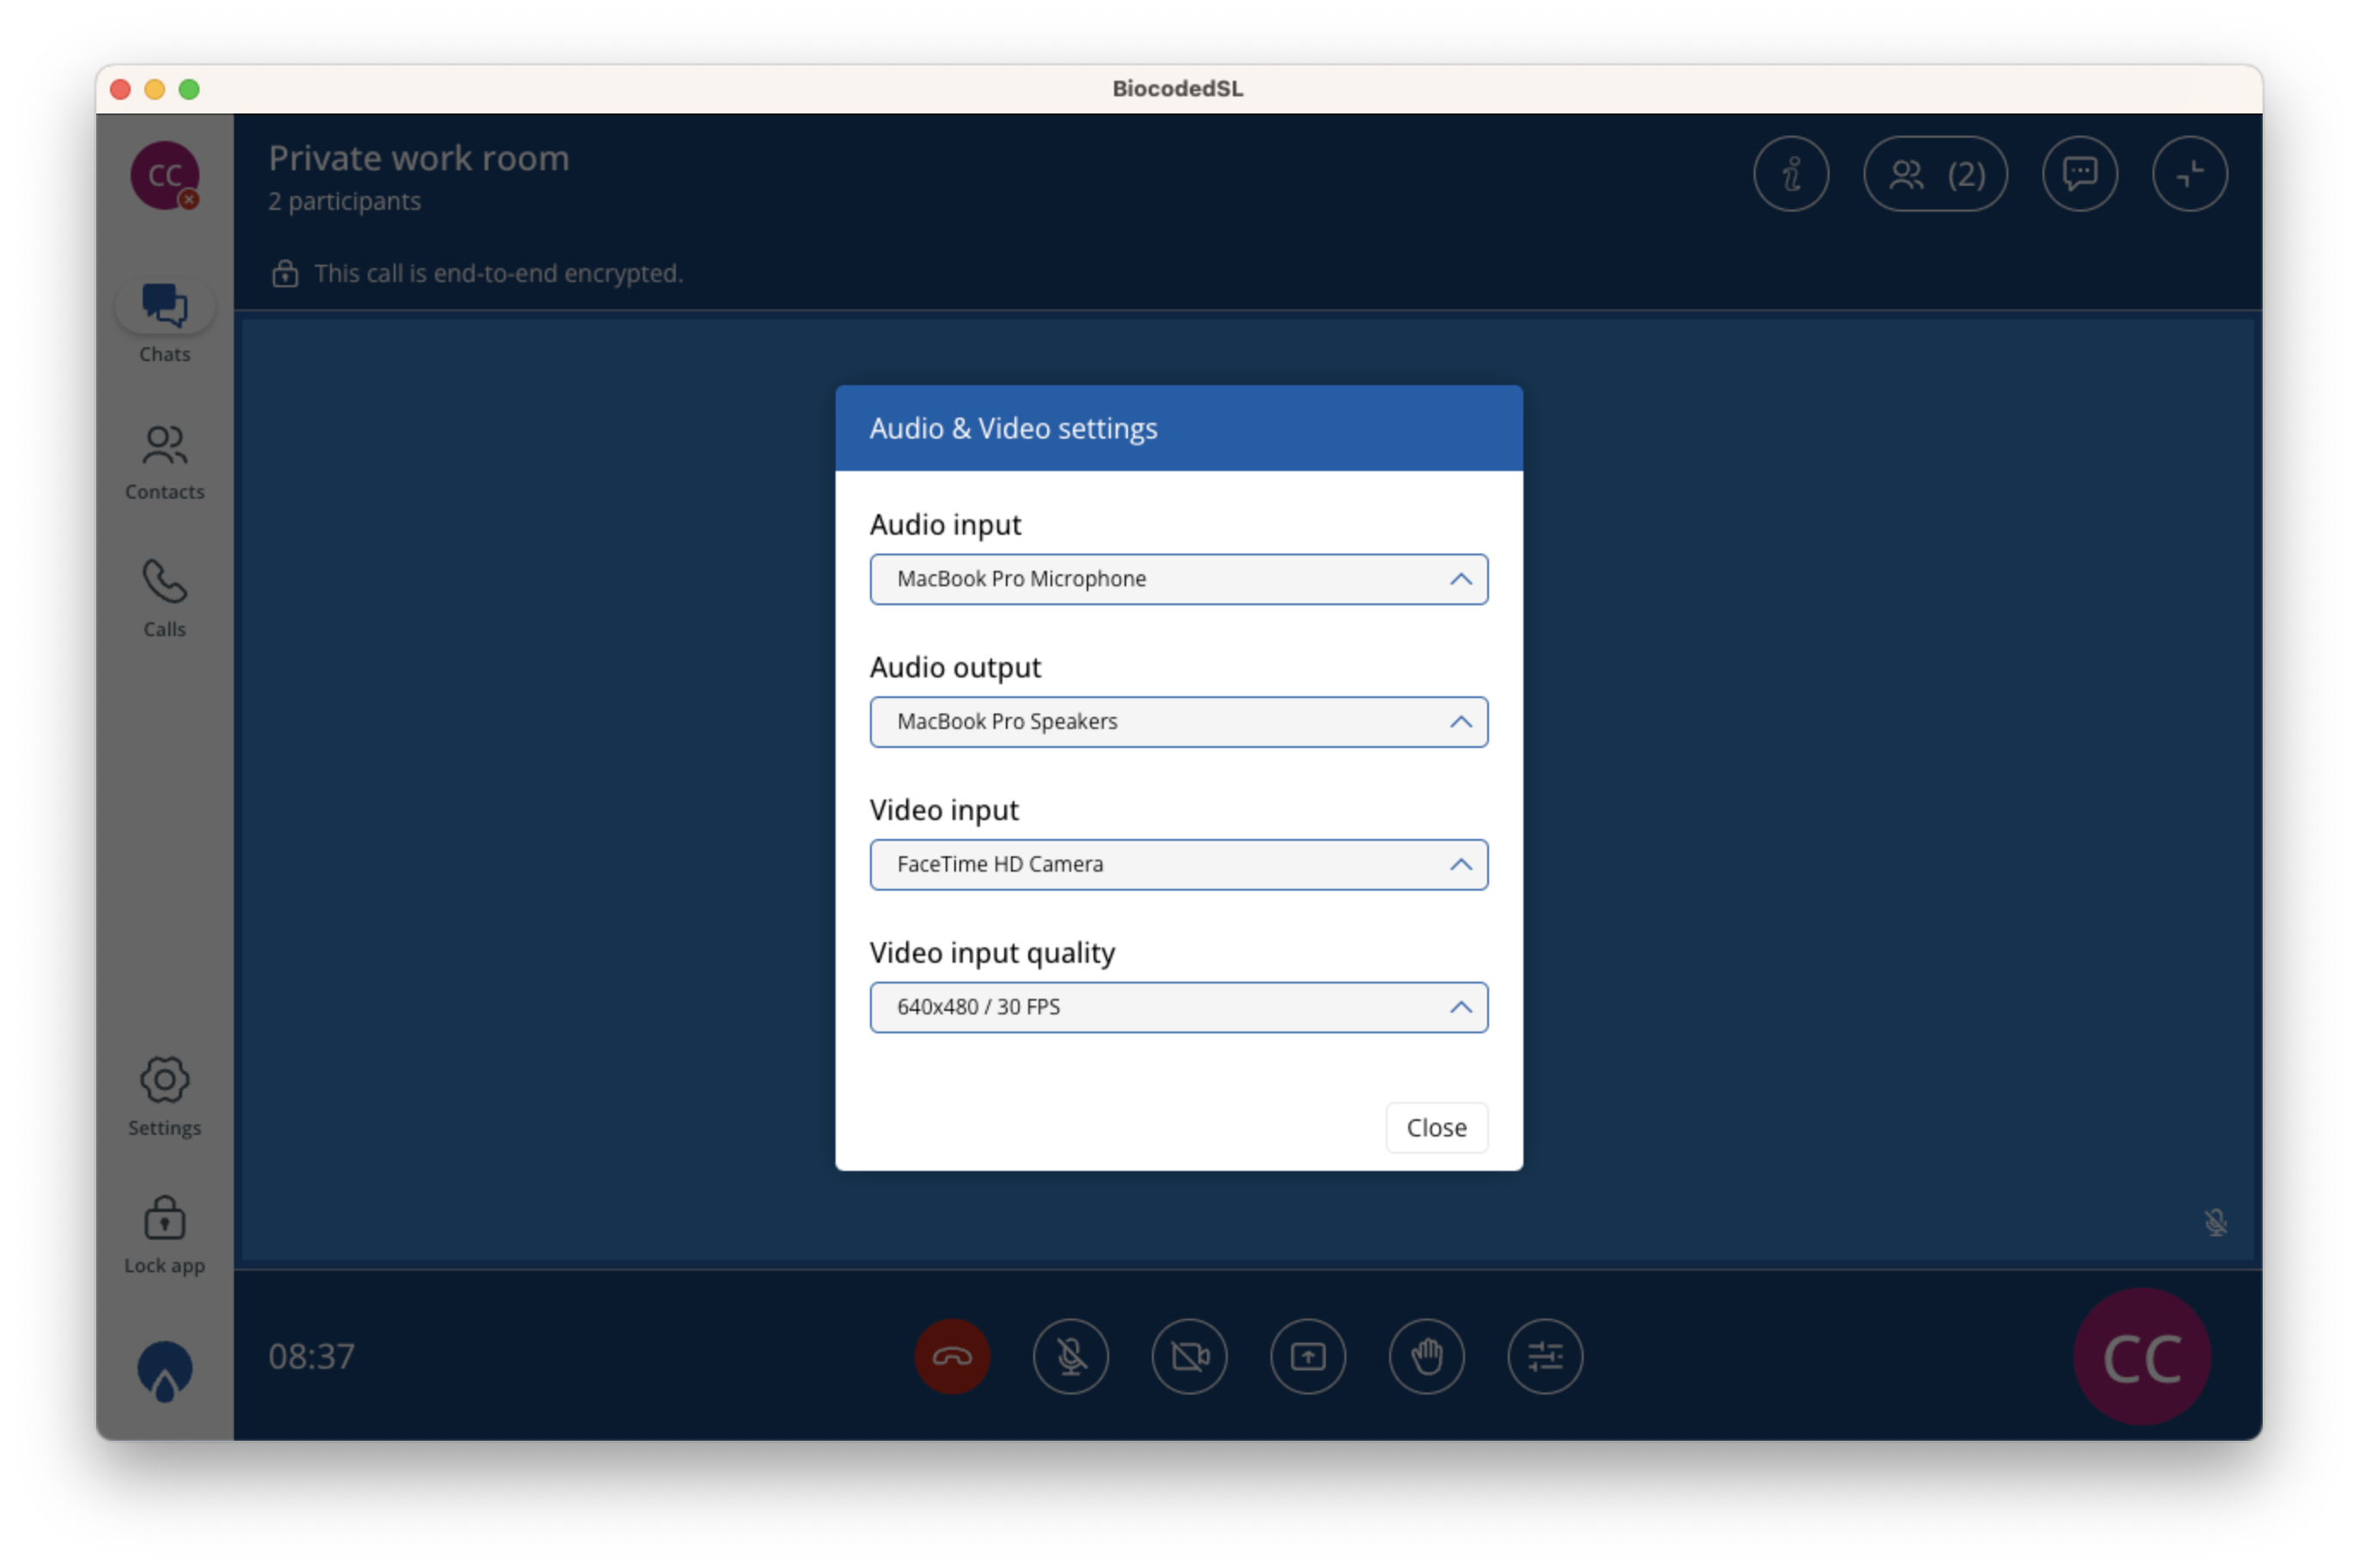
Some additional call options are available that include audio & video settings, options to turn on or off: incoming video, show only active streams, fit video streams to window size and background blur.
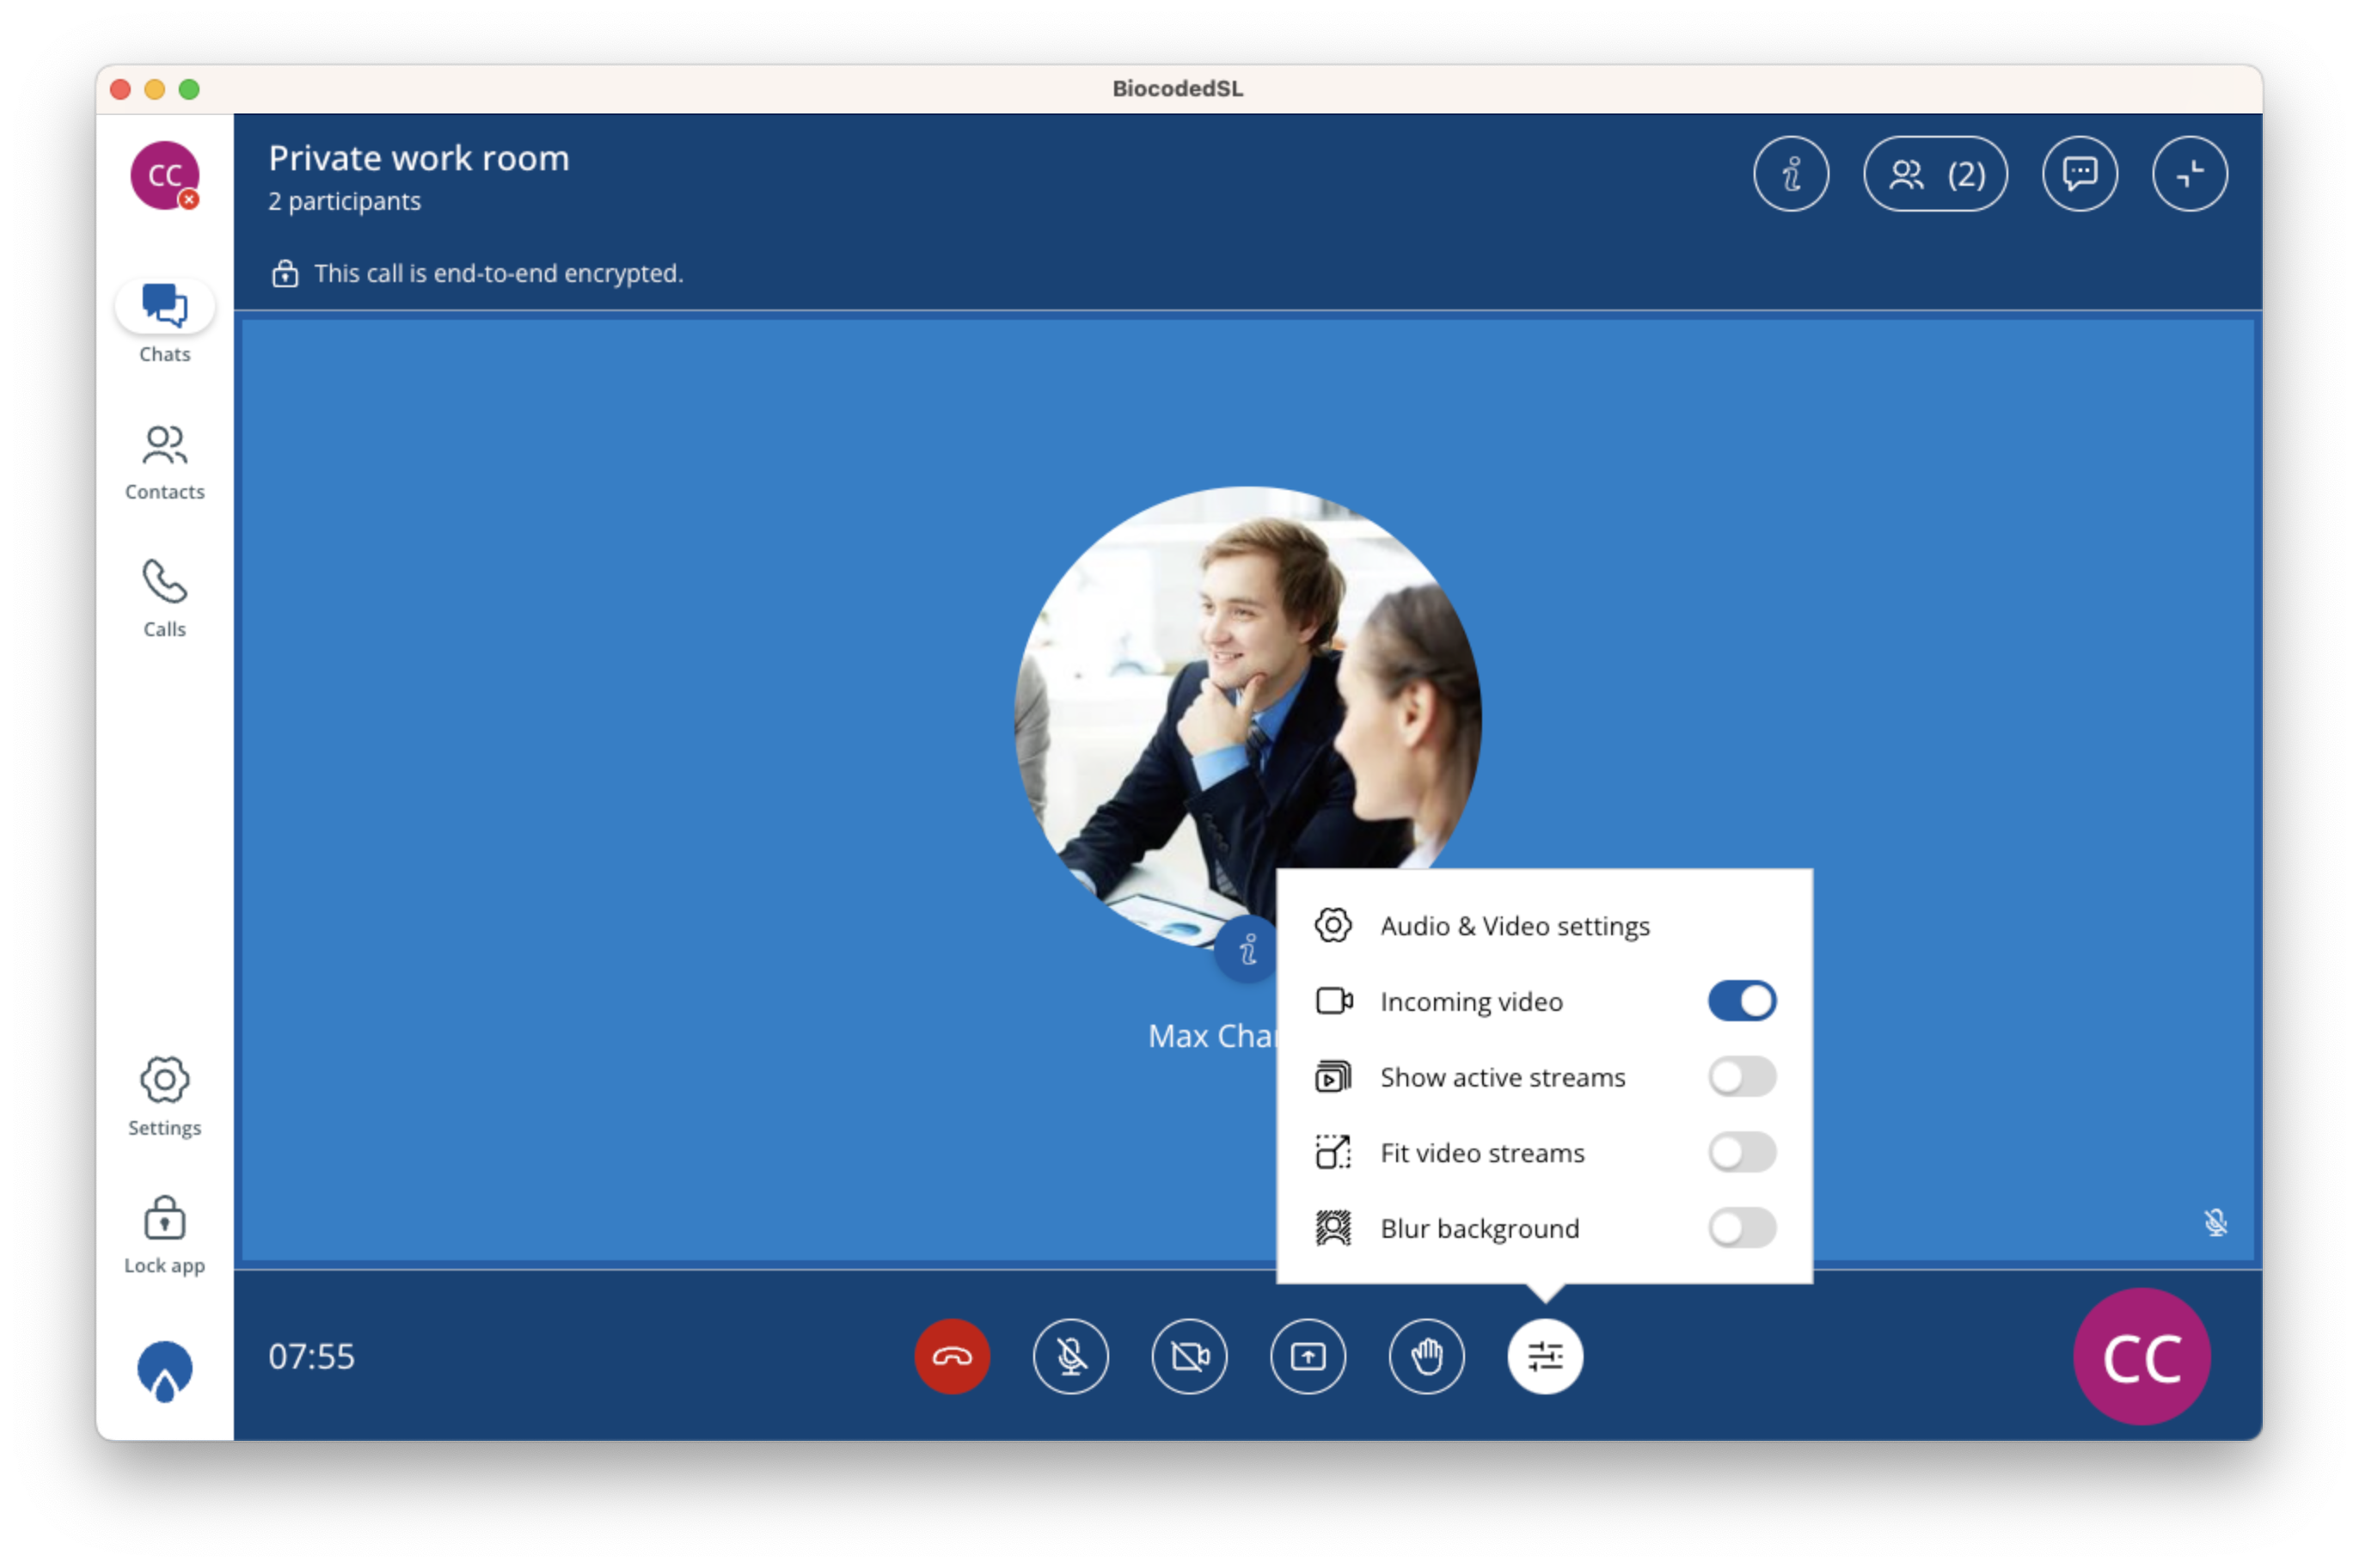
In Audio & Video settings popup you can choose your audio input and output devices, your default video input and the video input quality.
Manage call participants
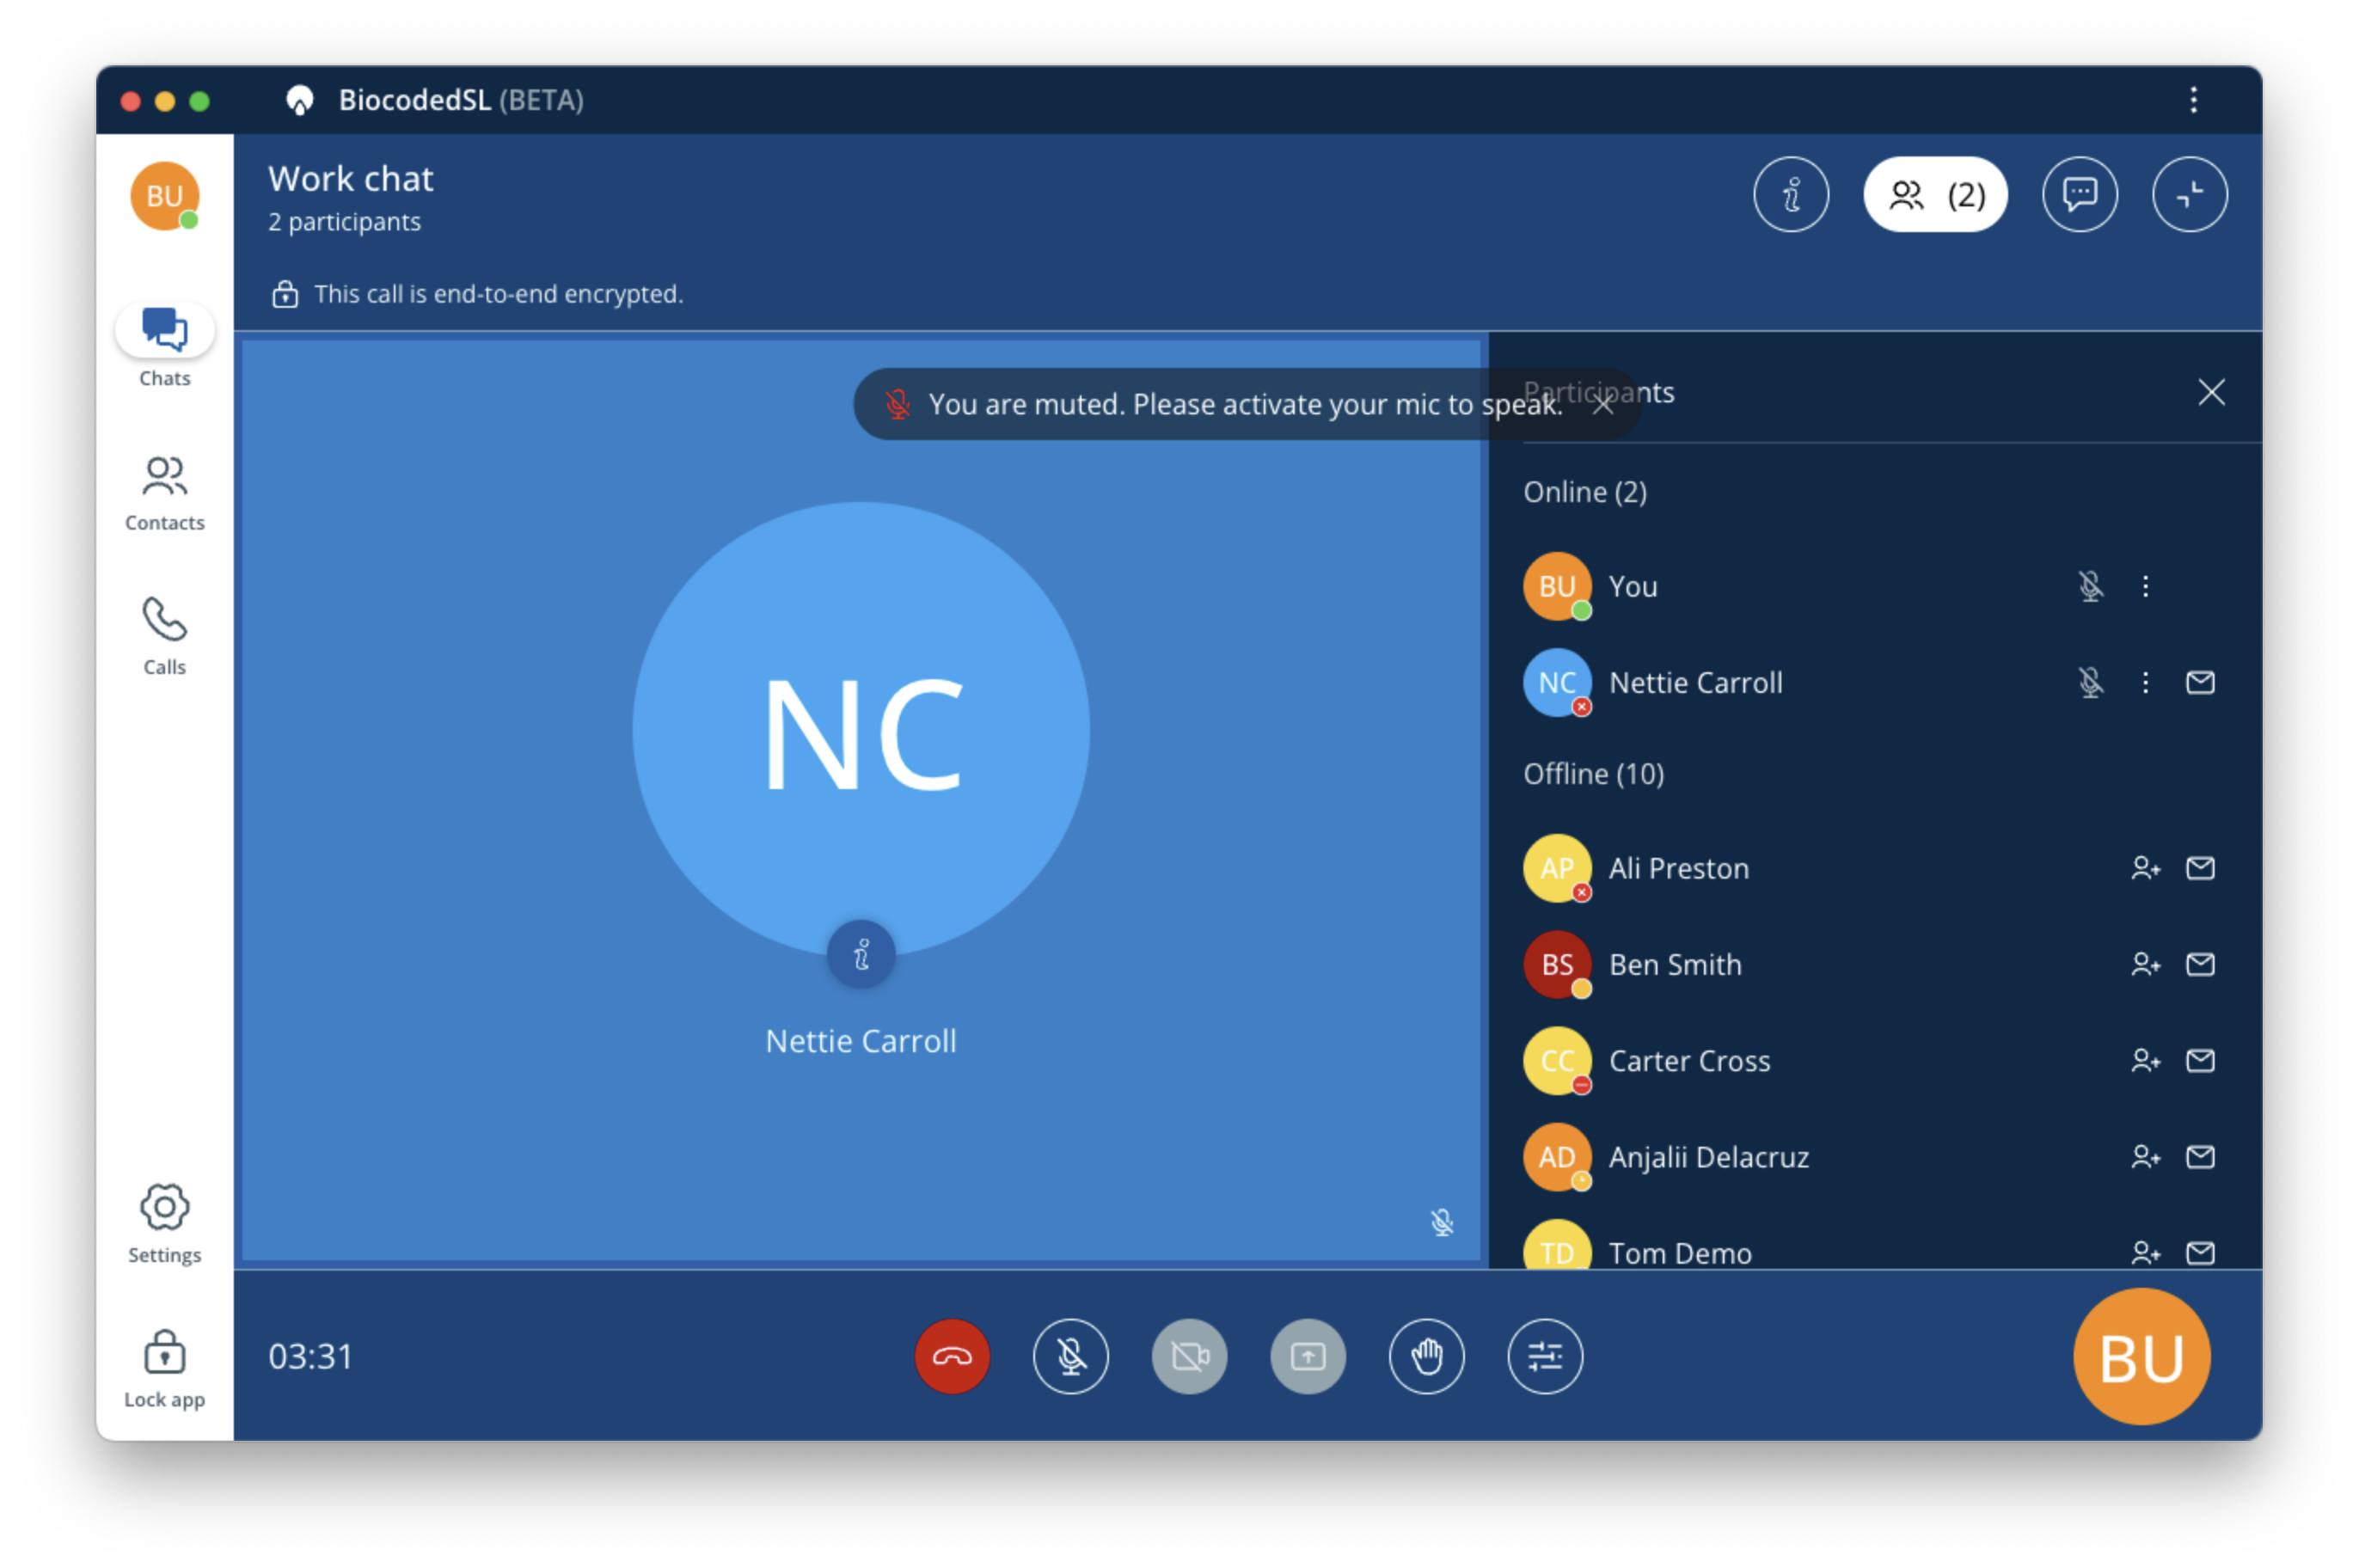
You can view the current participants of the call by clicking  . This list shows if their microphones are muted, with the option to request their presence in a call (for admins of chat) or to open a chat with them.
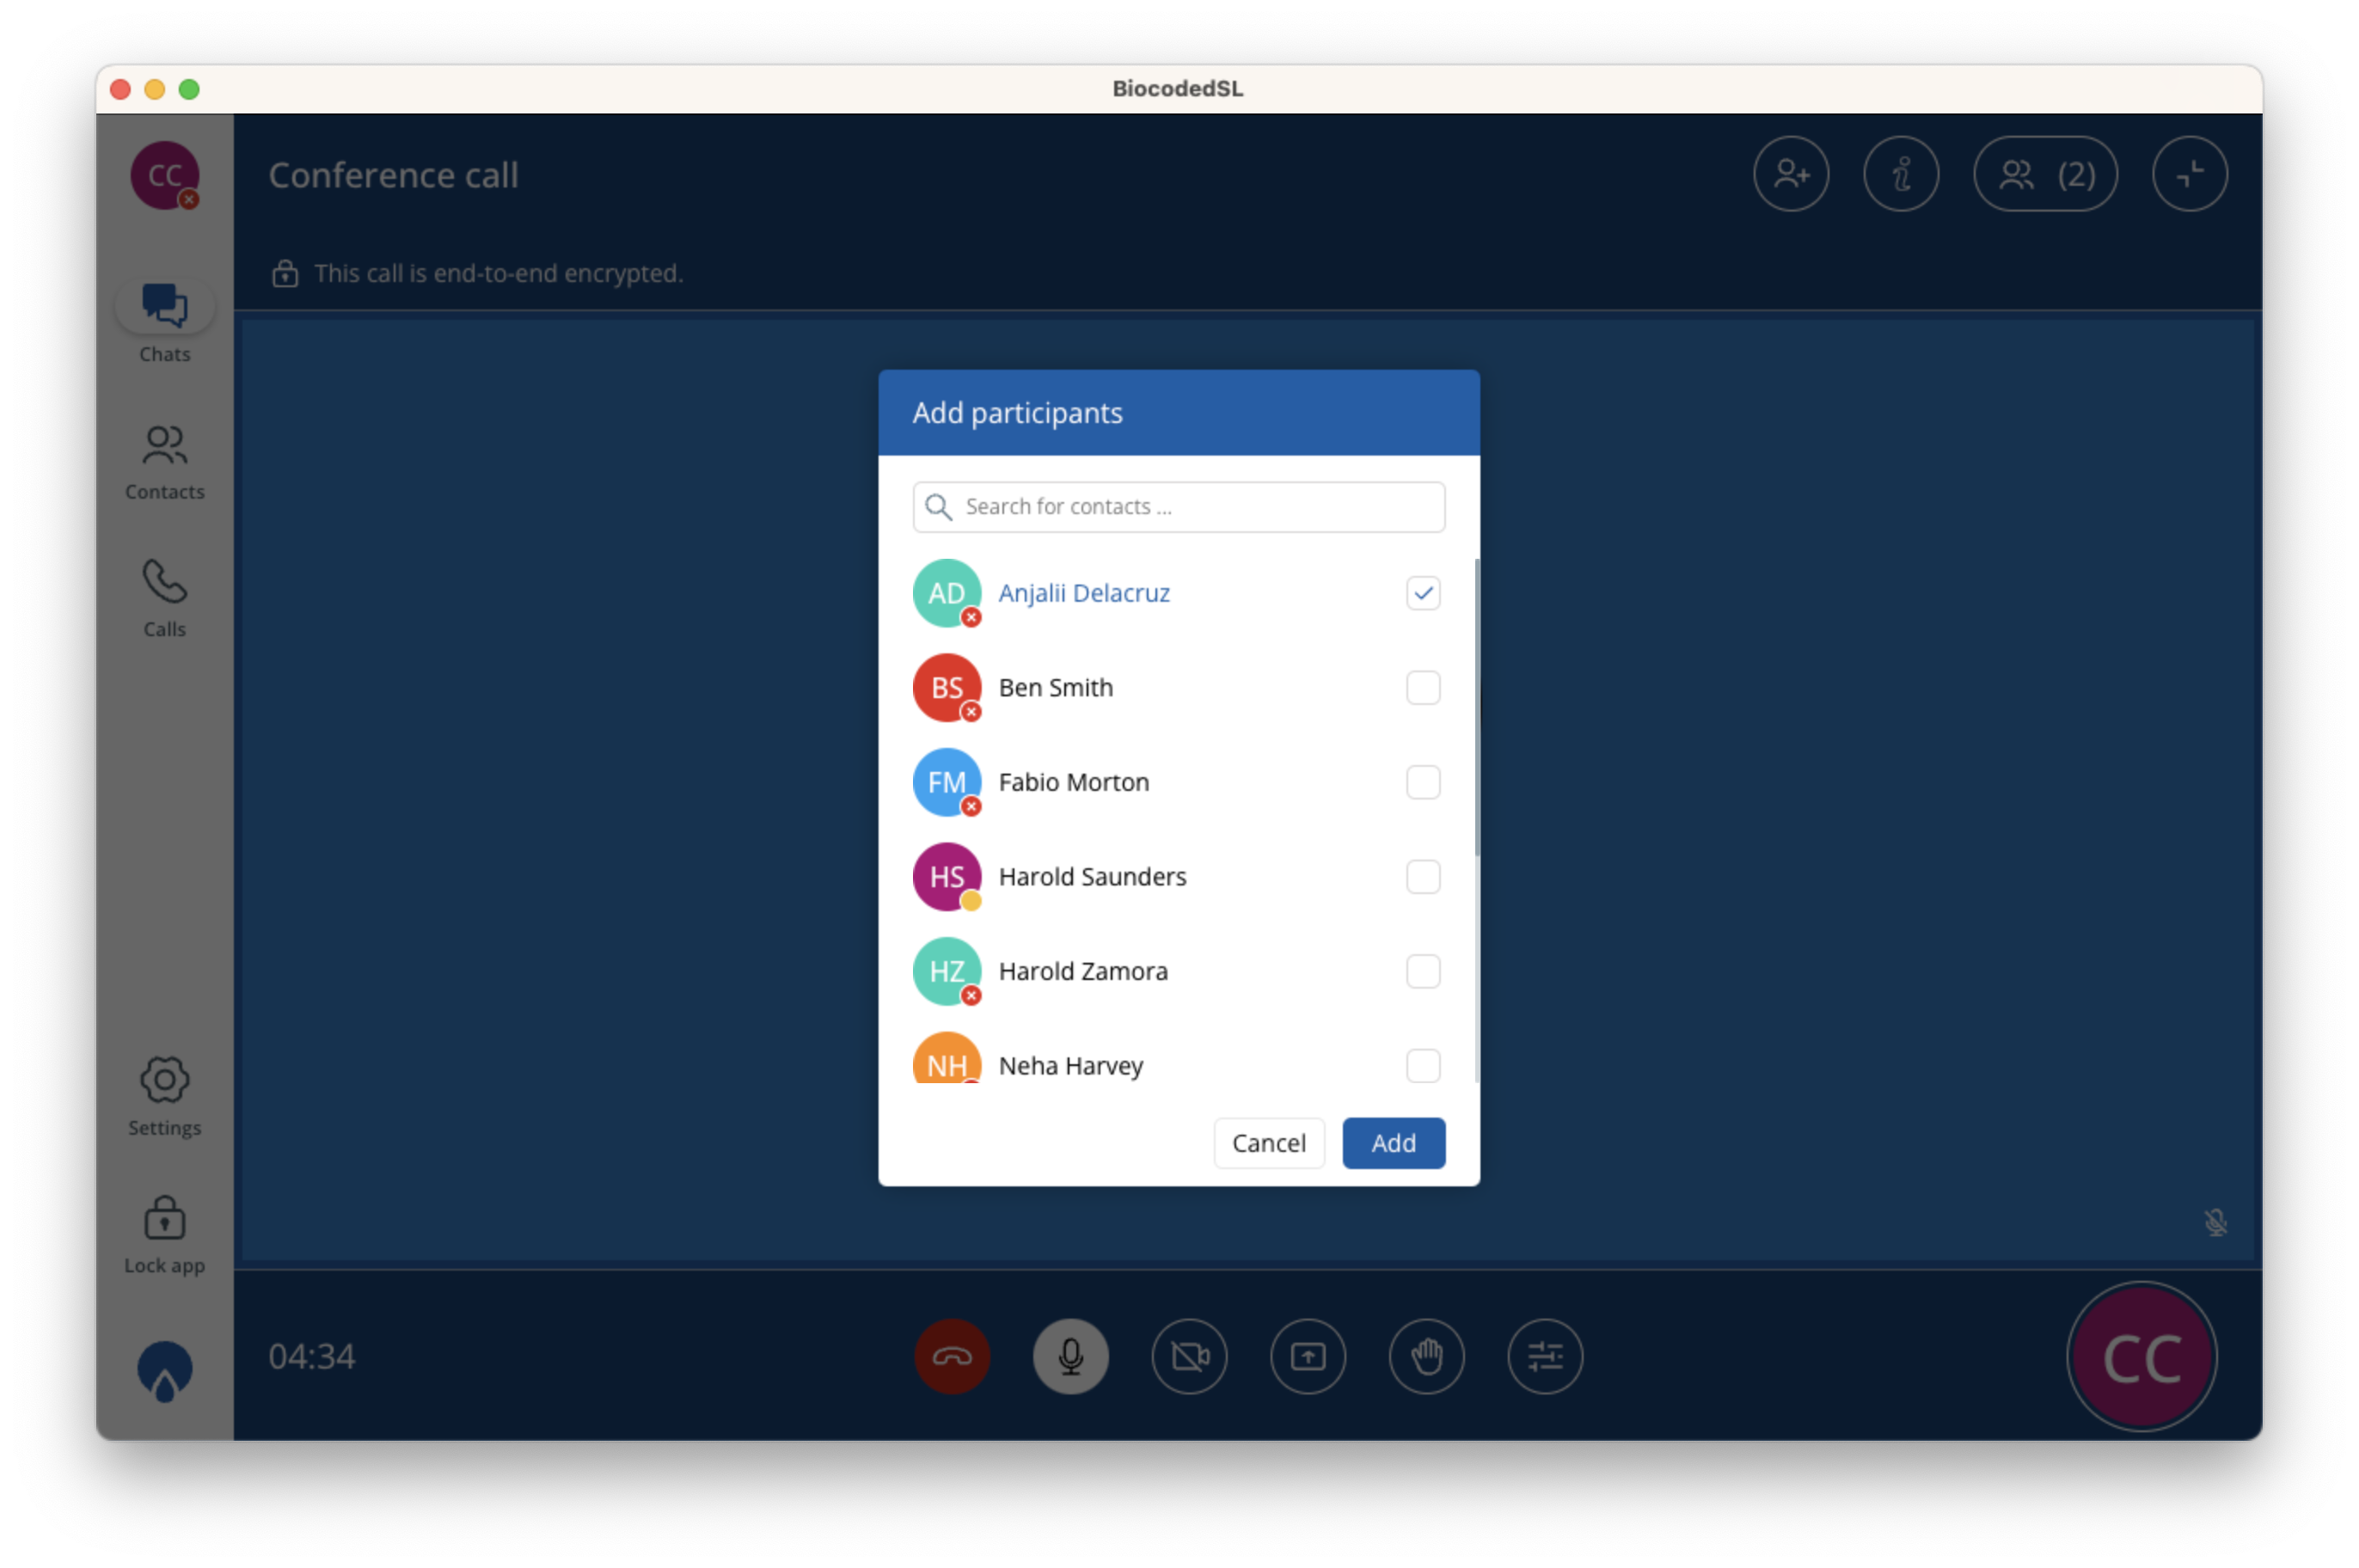
You can also add participants to a call by clicking "+". If this button is not visible, you do not have the rights to add participants.
Call information
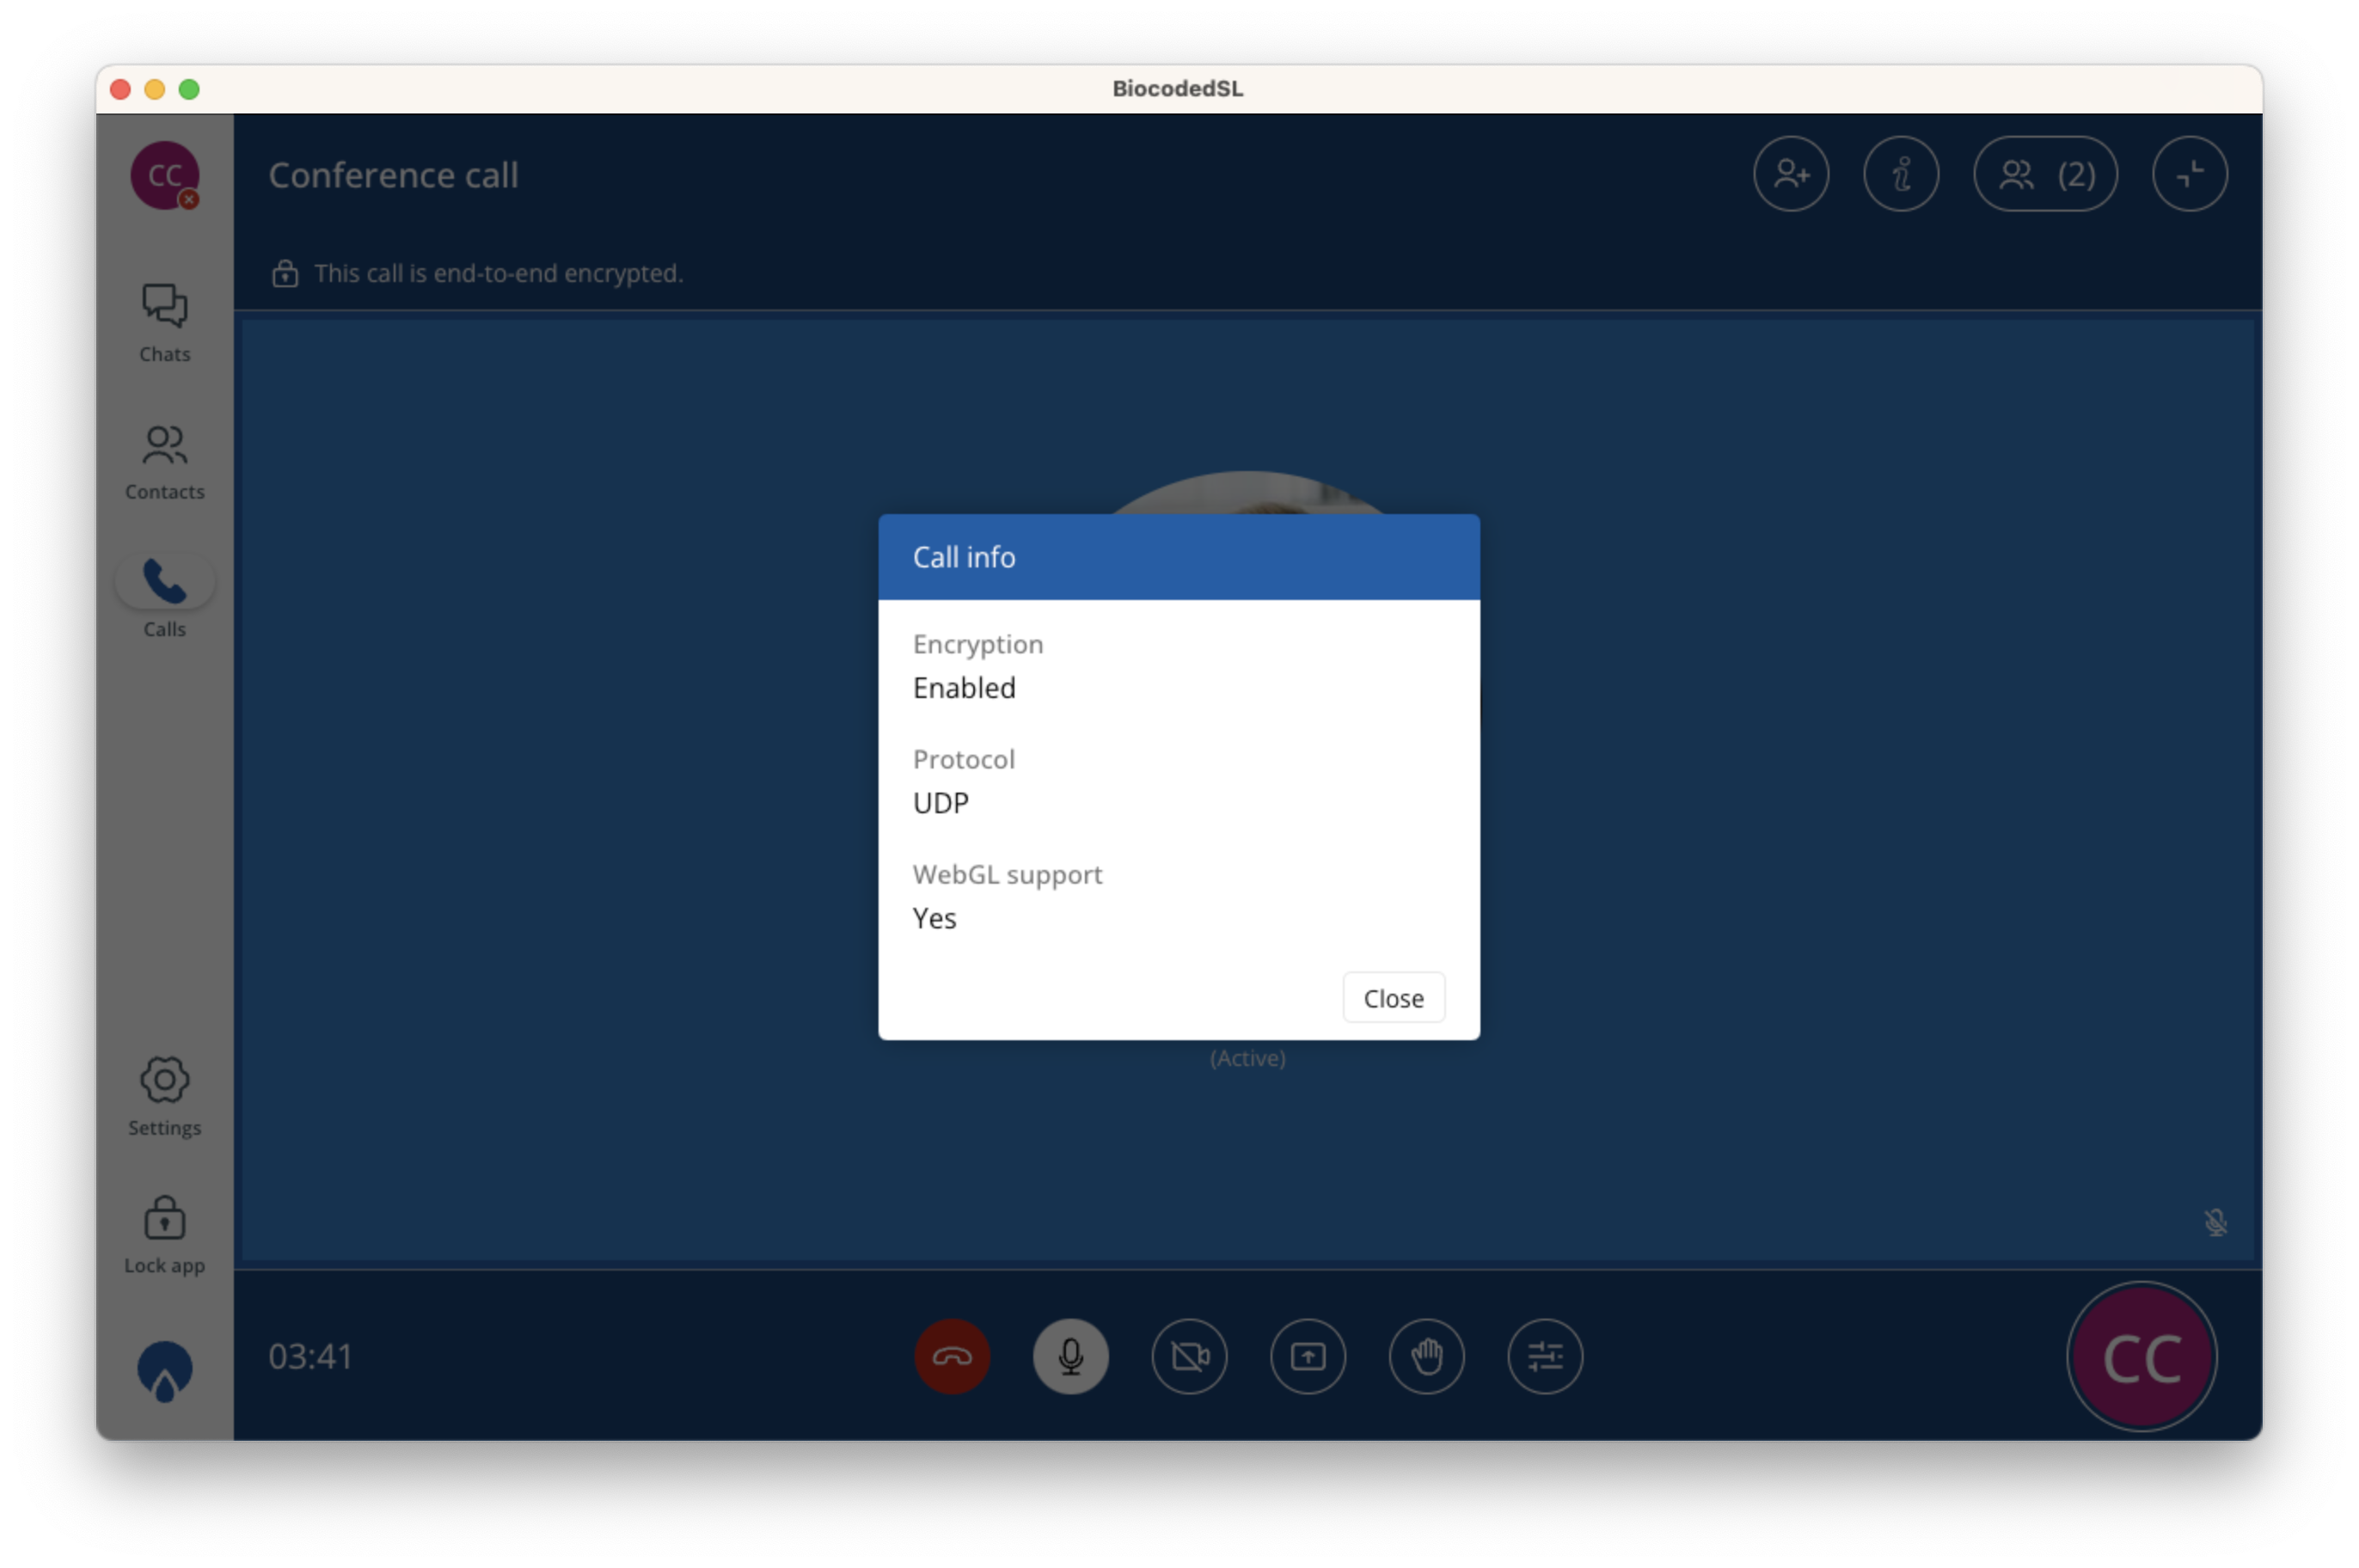
Call info can be accessed by tapping on info button, showing some information useful for advanced users or administrators including:
- ENCRYPTION: tells the user whether the encryption of data is turned on.
- PROTOCOL: the protocol that is being used for sound transmission.
- WEBGL SUPPORT: if WebGL is supported or not (for video).
Participant info
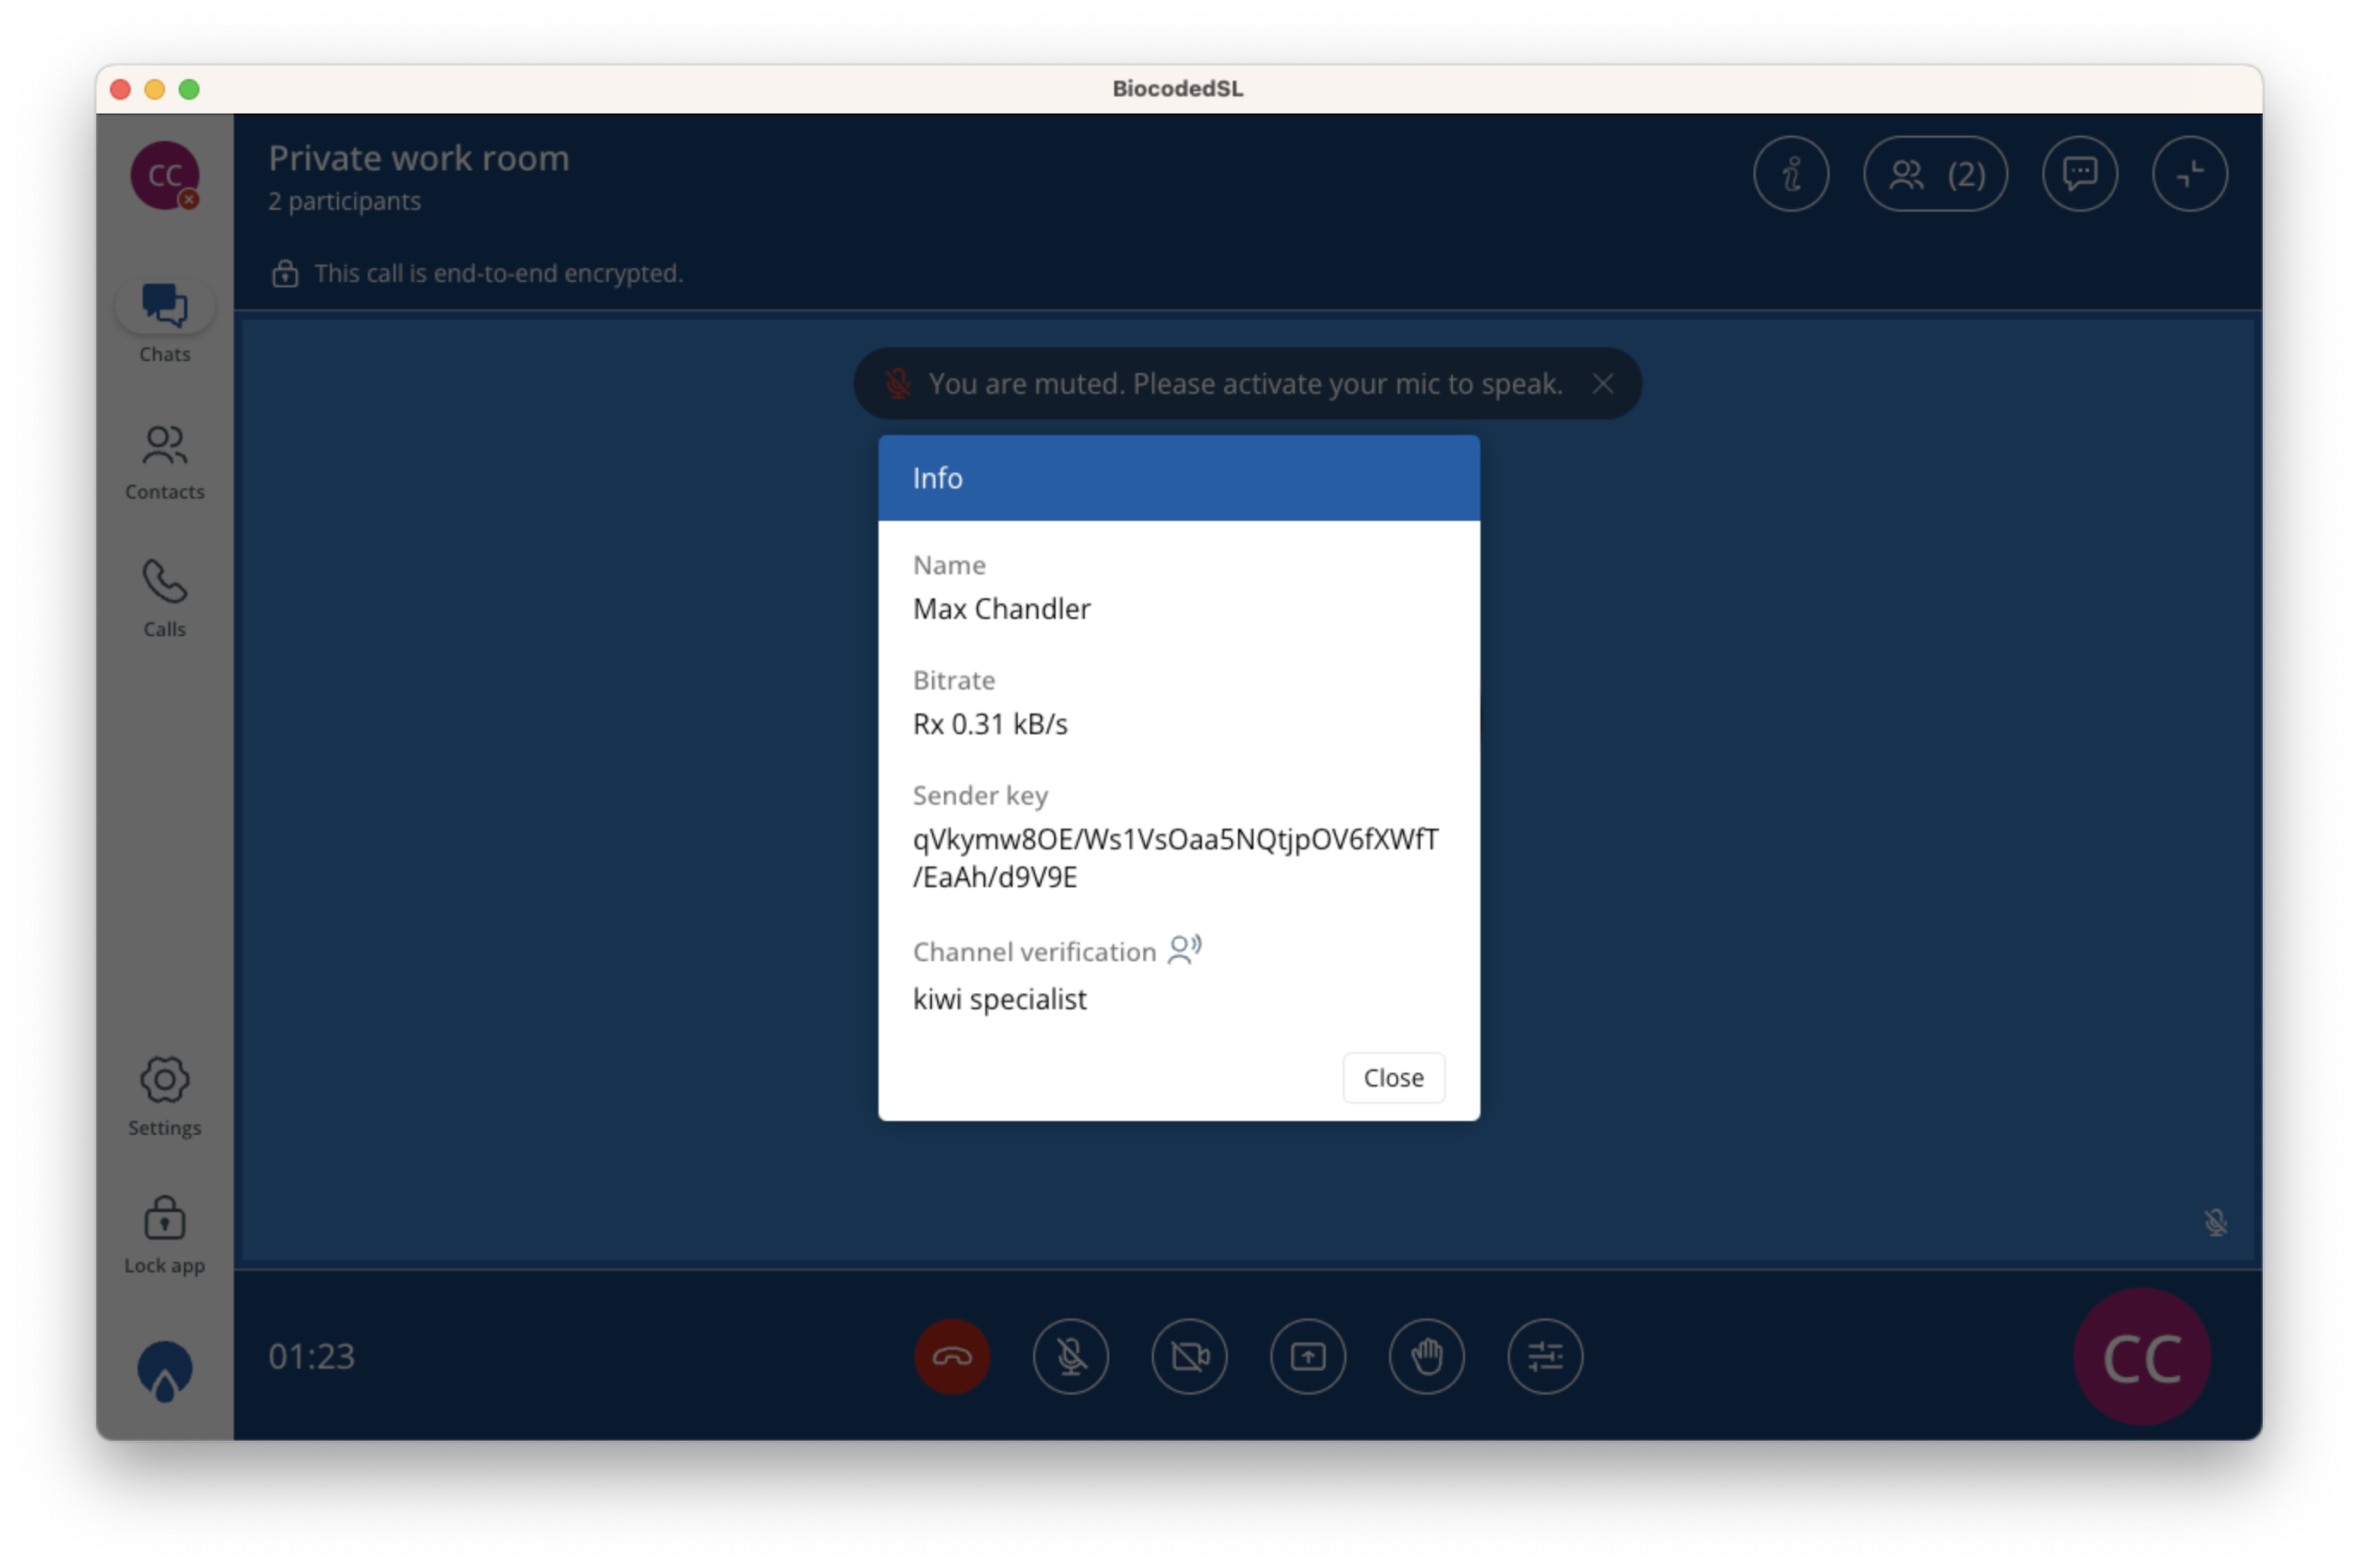
To show information about call participants or chatroom, tap on info on each participant's avatar. This will show call's bit rate, sender key for participants and channel verification data, that must match for all participants of call.
Note
For optimum call quality, your network must allow at least 5kB/s receive speed (Rx) and 5kB/s send speed (Tx). If your network speed is less than specified, the sound can be distorted or the call can work incorrectly.
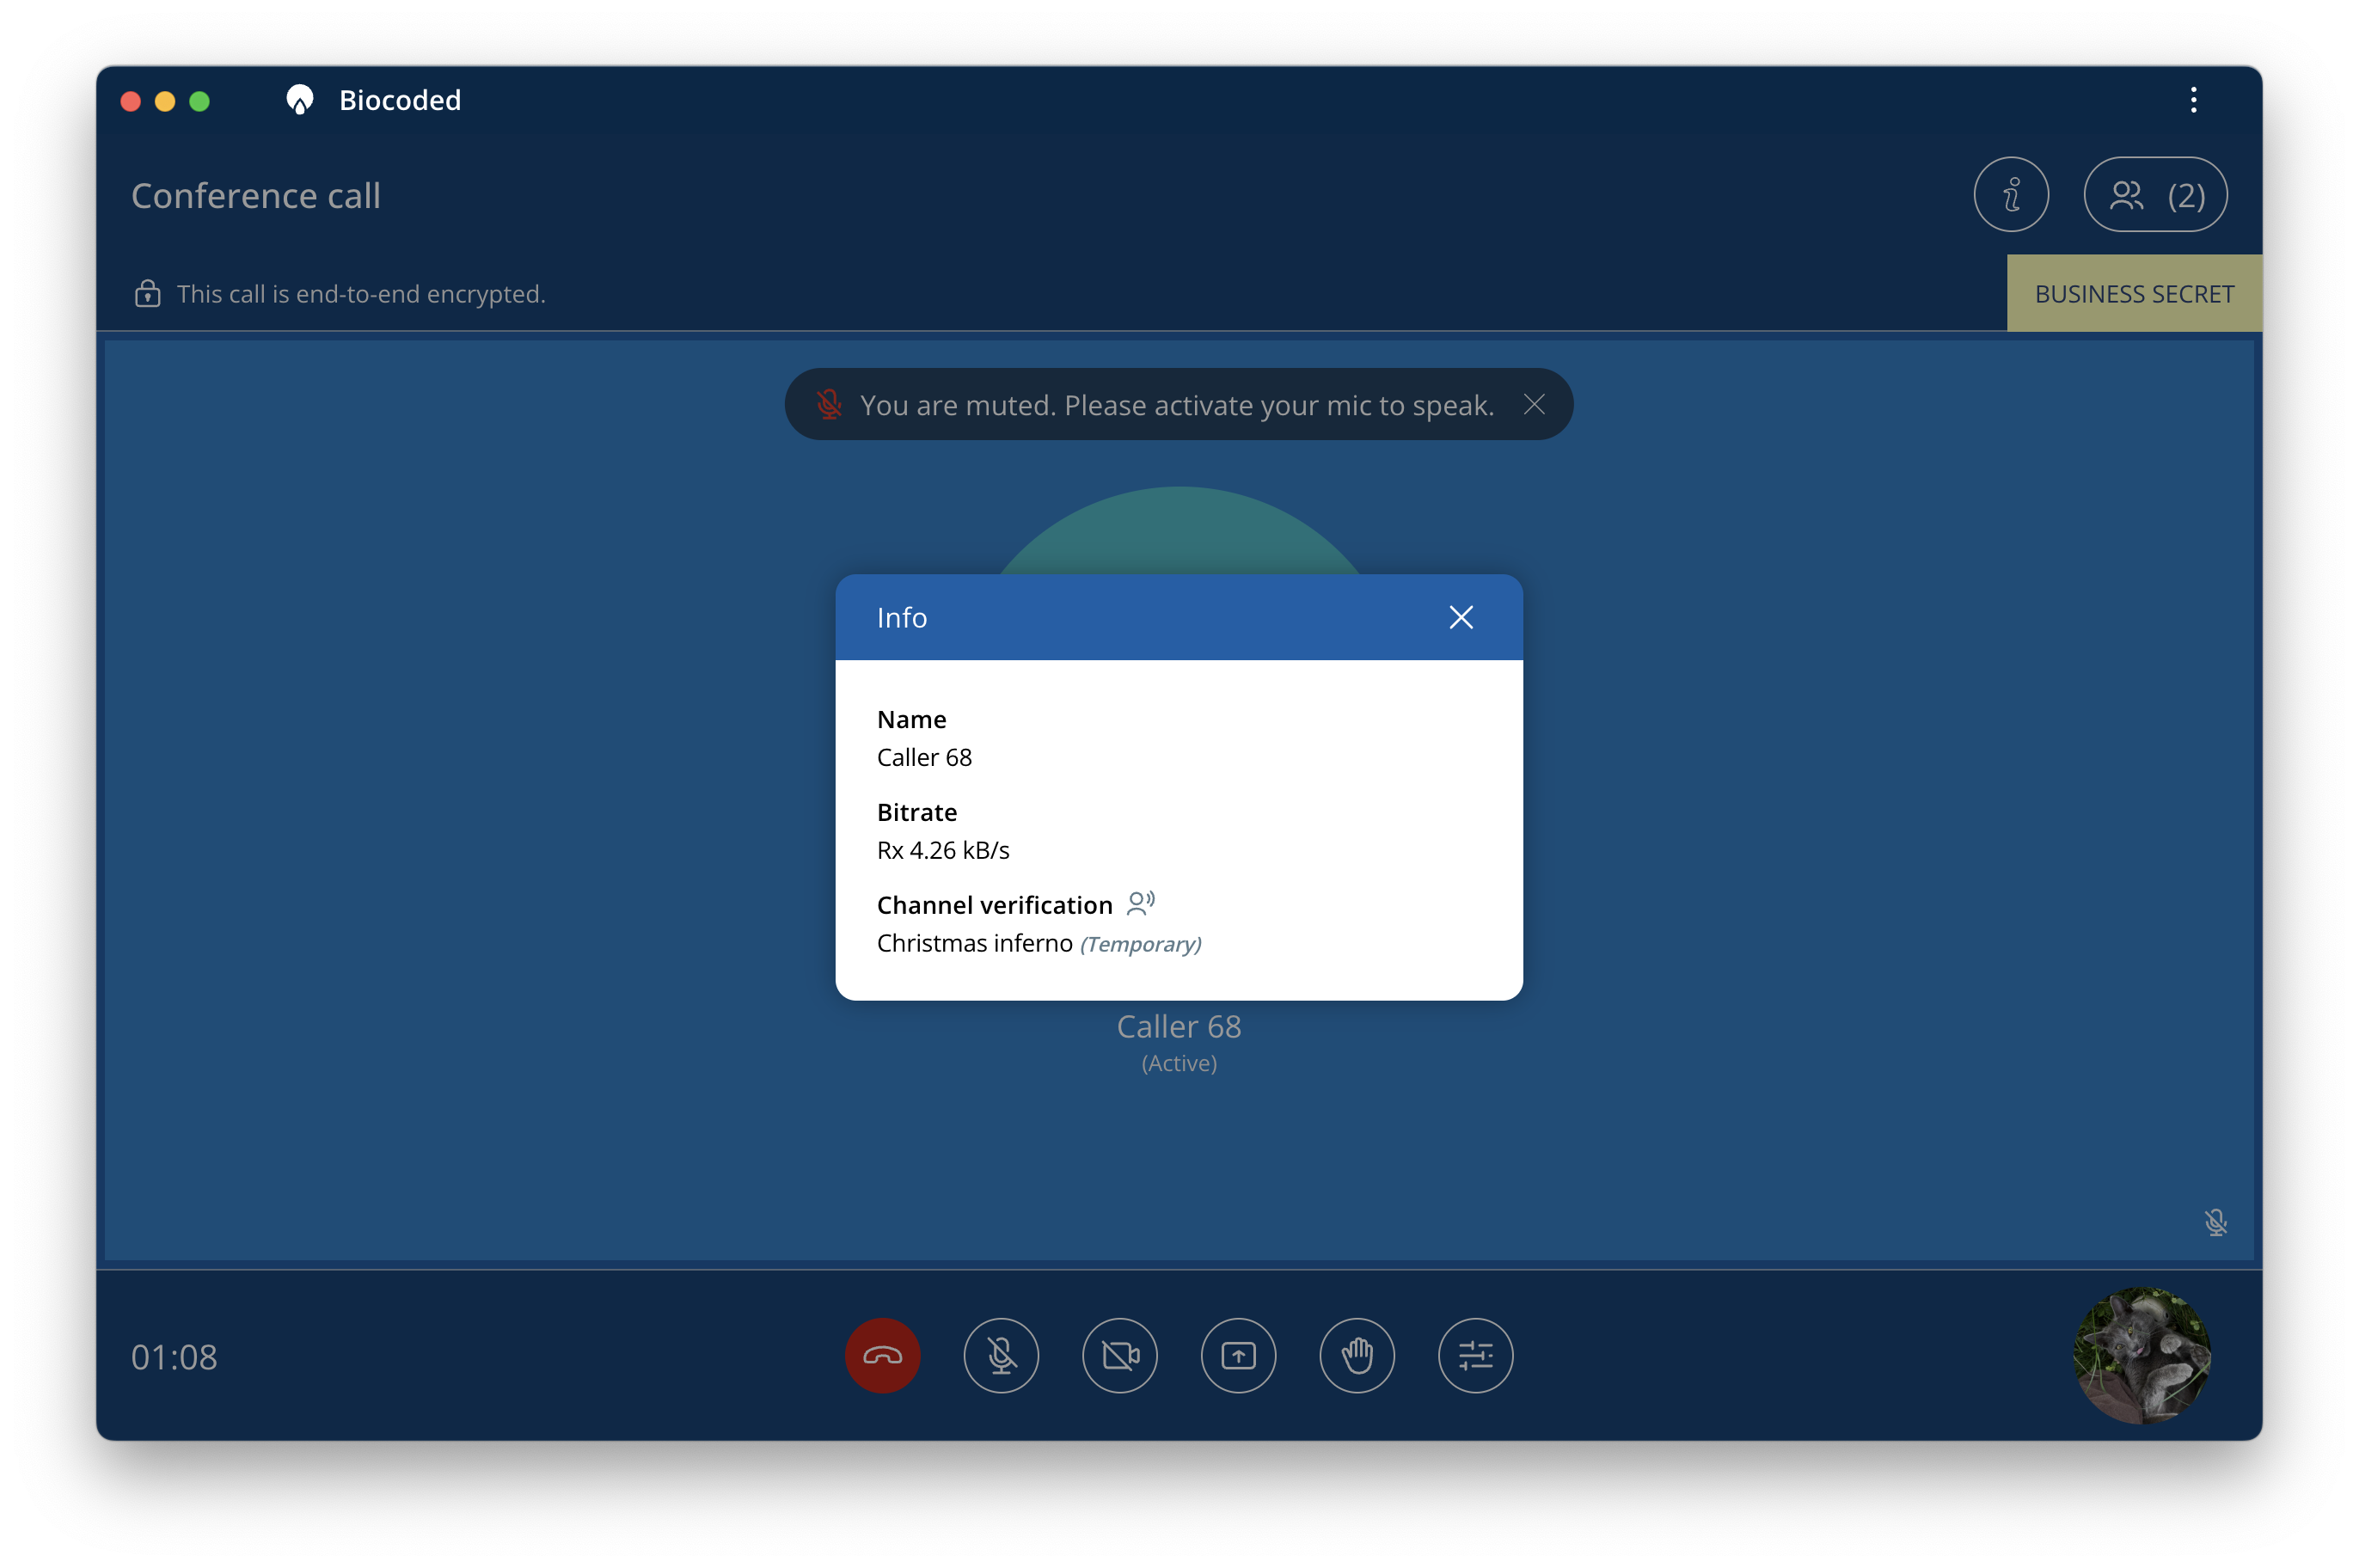
If your incoming 1-1 call was answered while app was locked by App Lock, the displayed verification words are temporary (note the word "(Temporary)" next to verification words).
Warning
When the verification words match for both participants of call, the call is secure. If the verification words differ, the call must be terminated immediately.
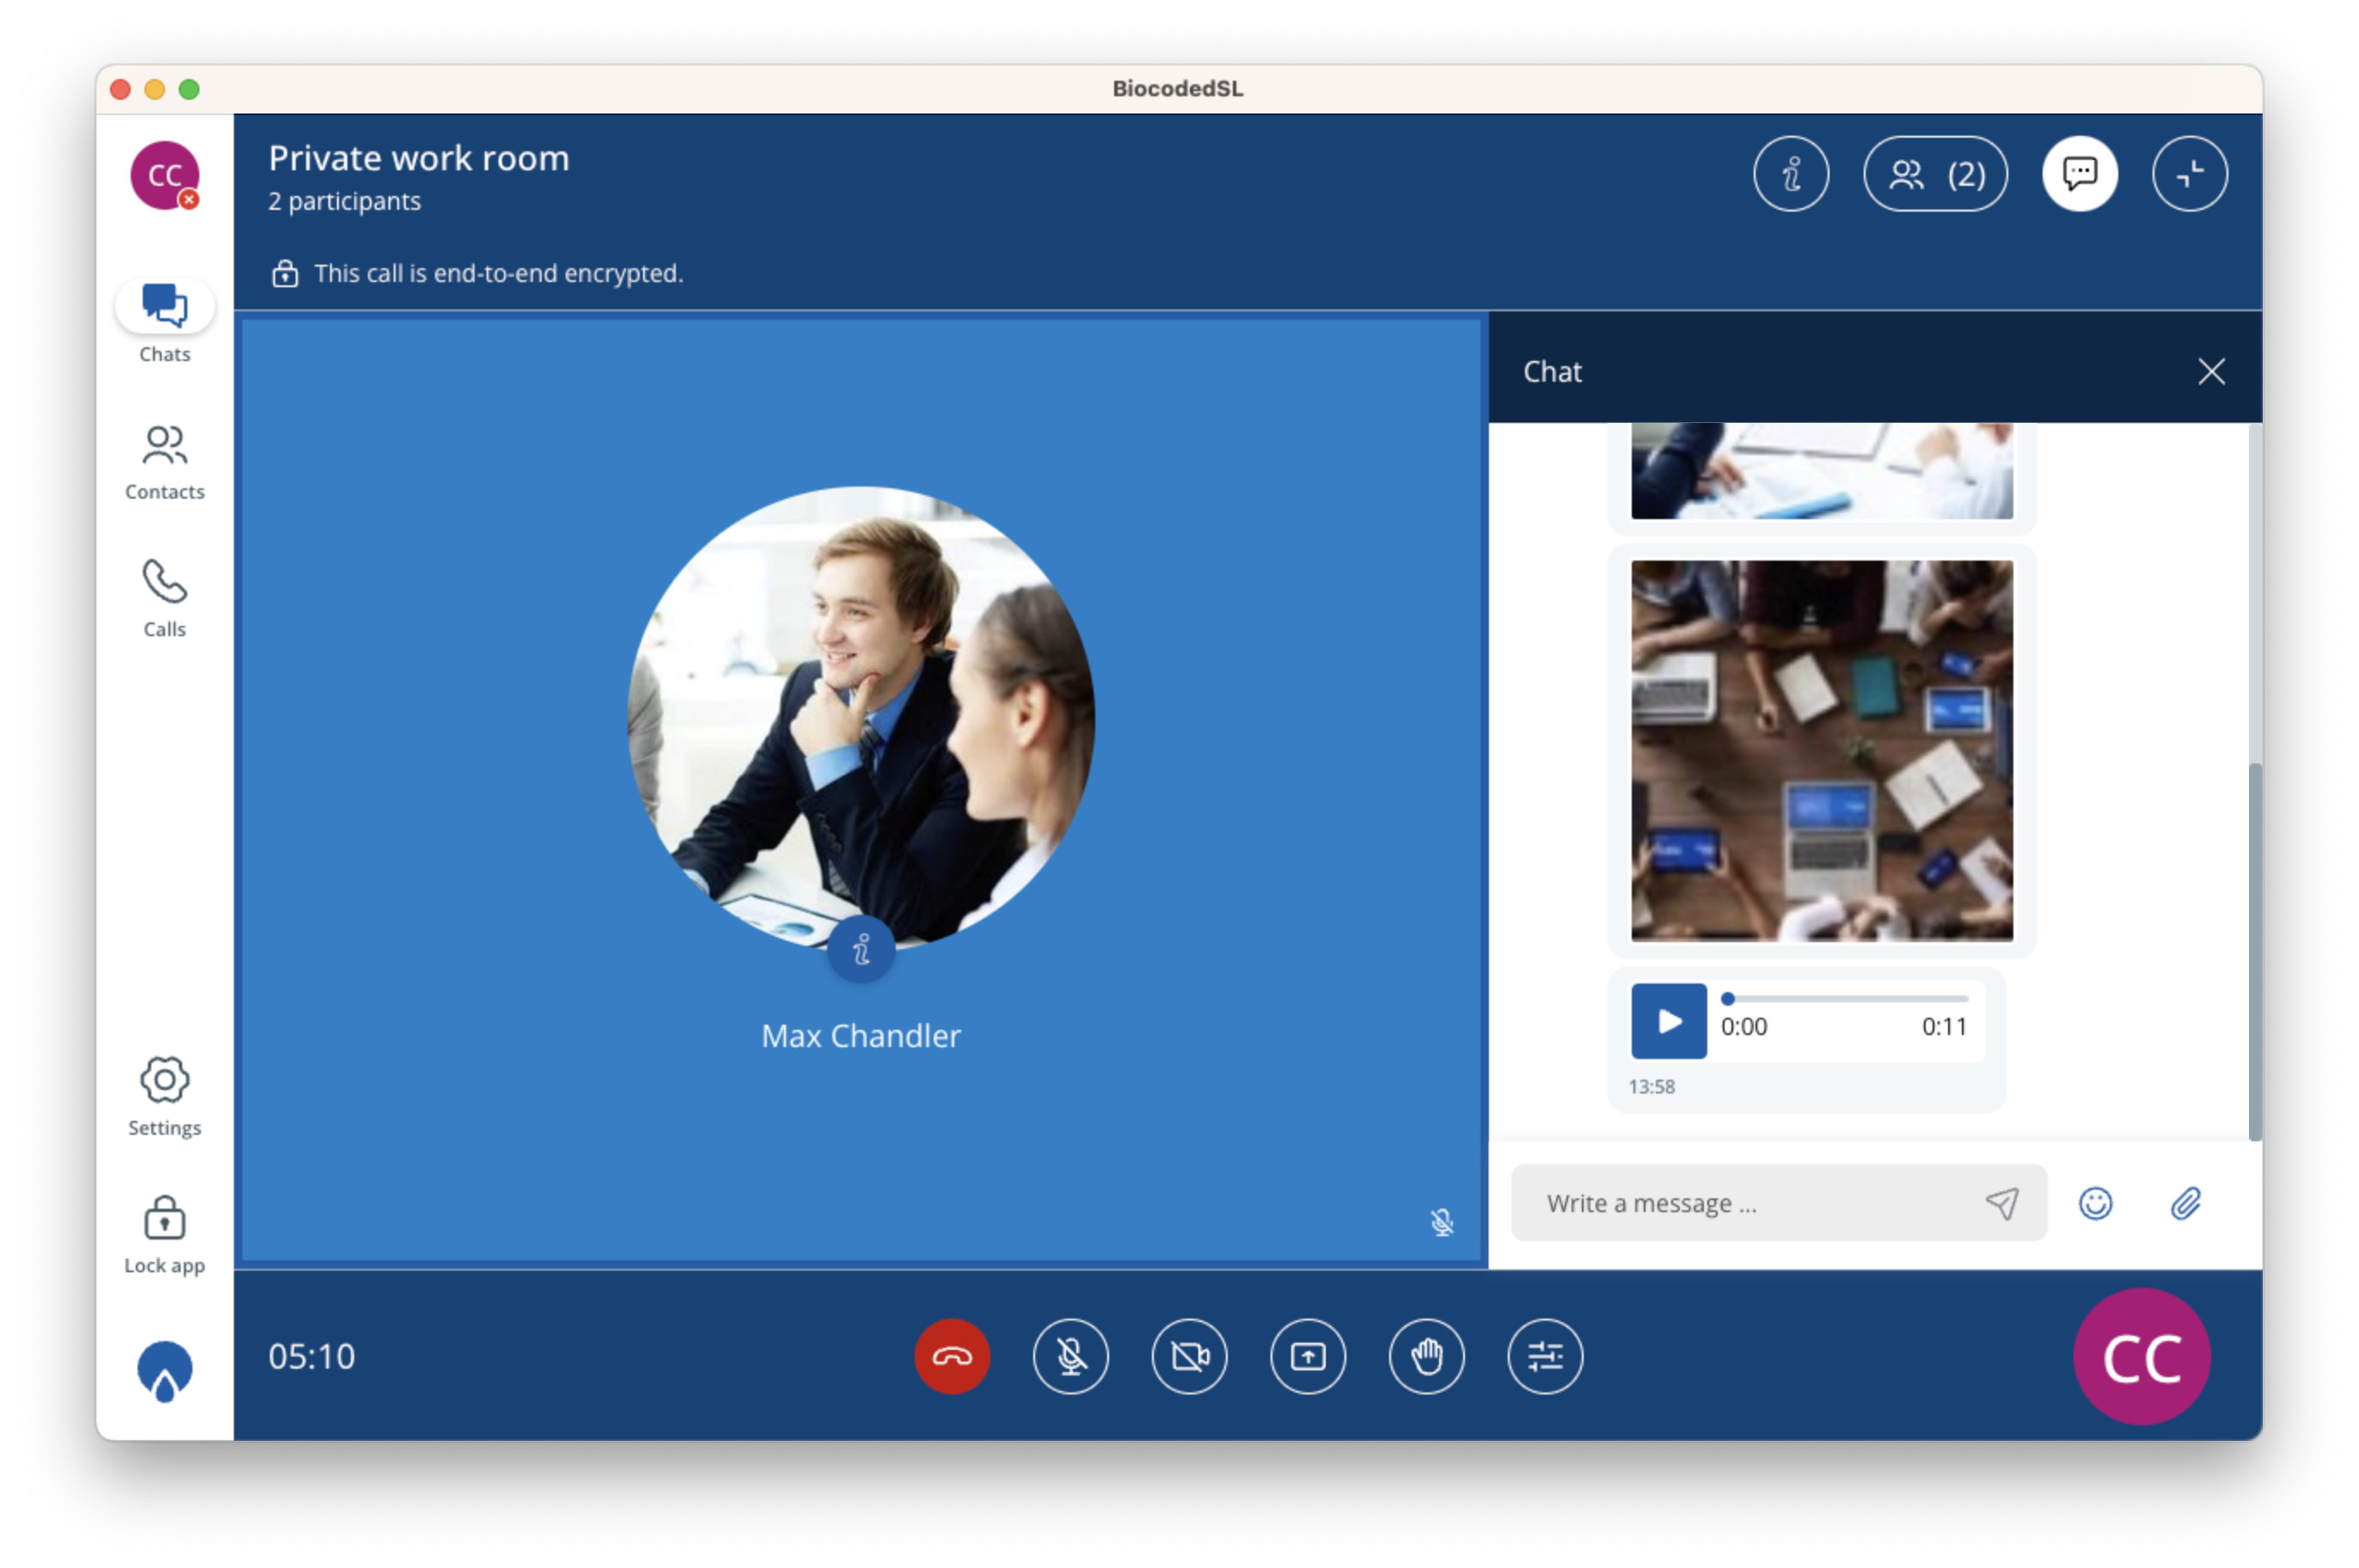
Chat during call
You can choose to view chat during call by clicking chat icon.
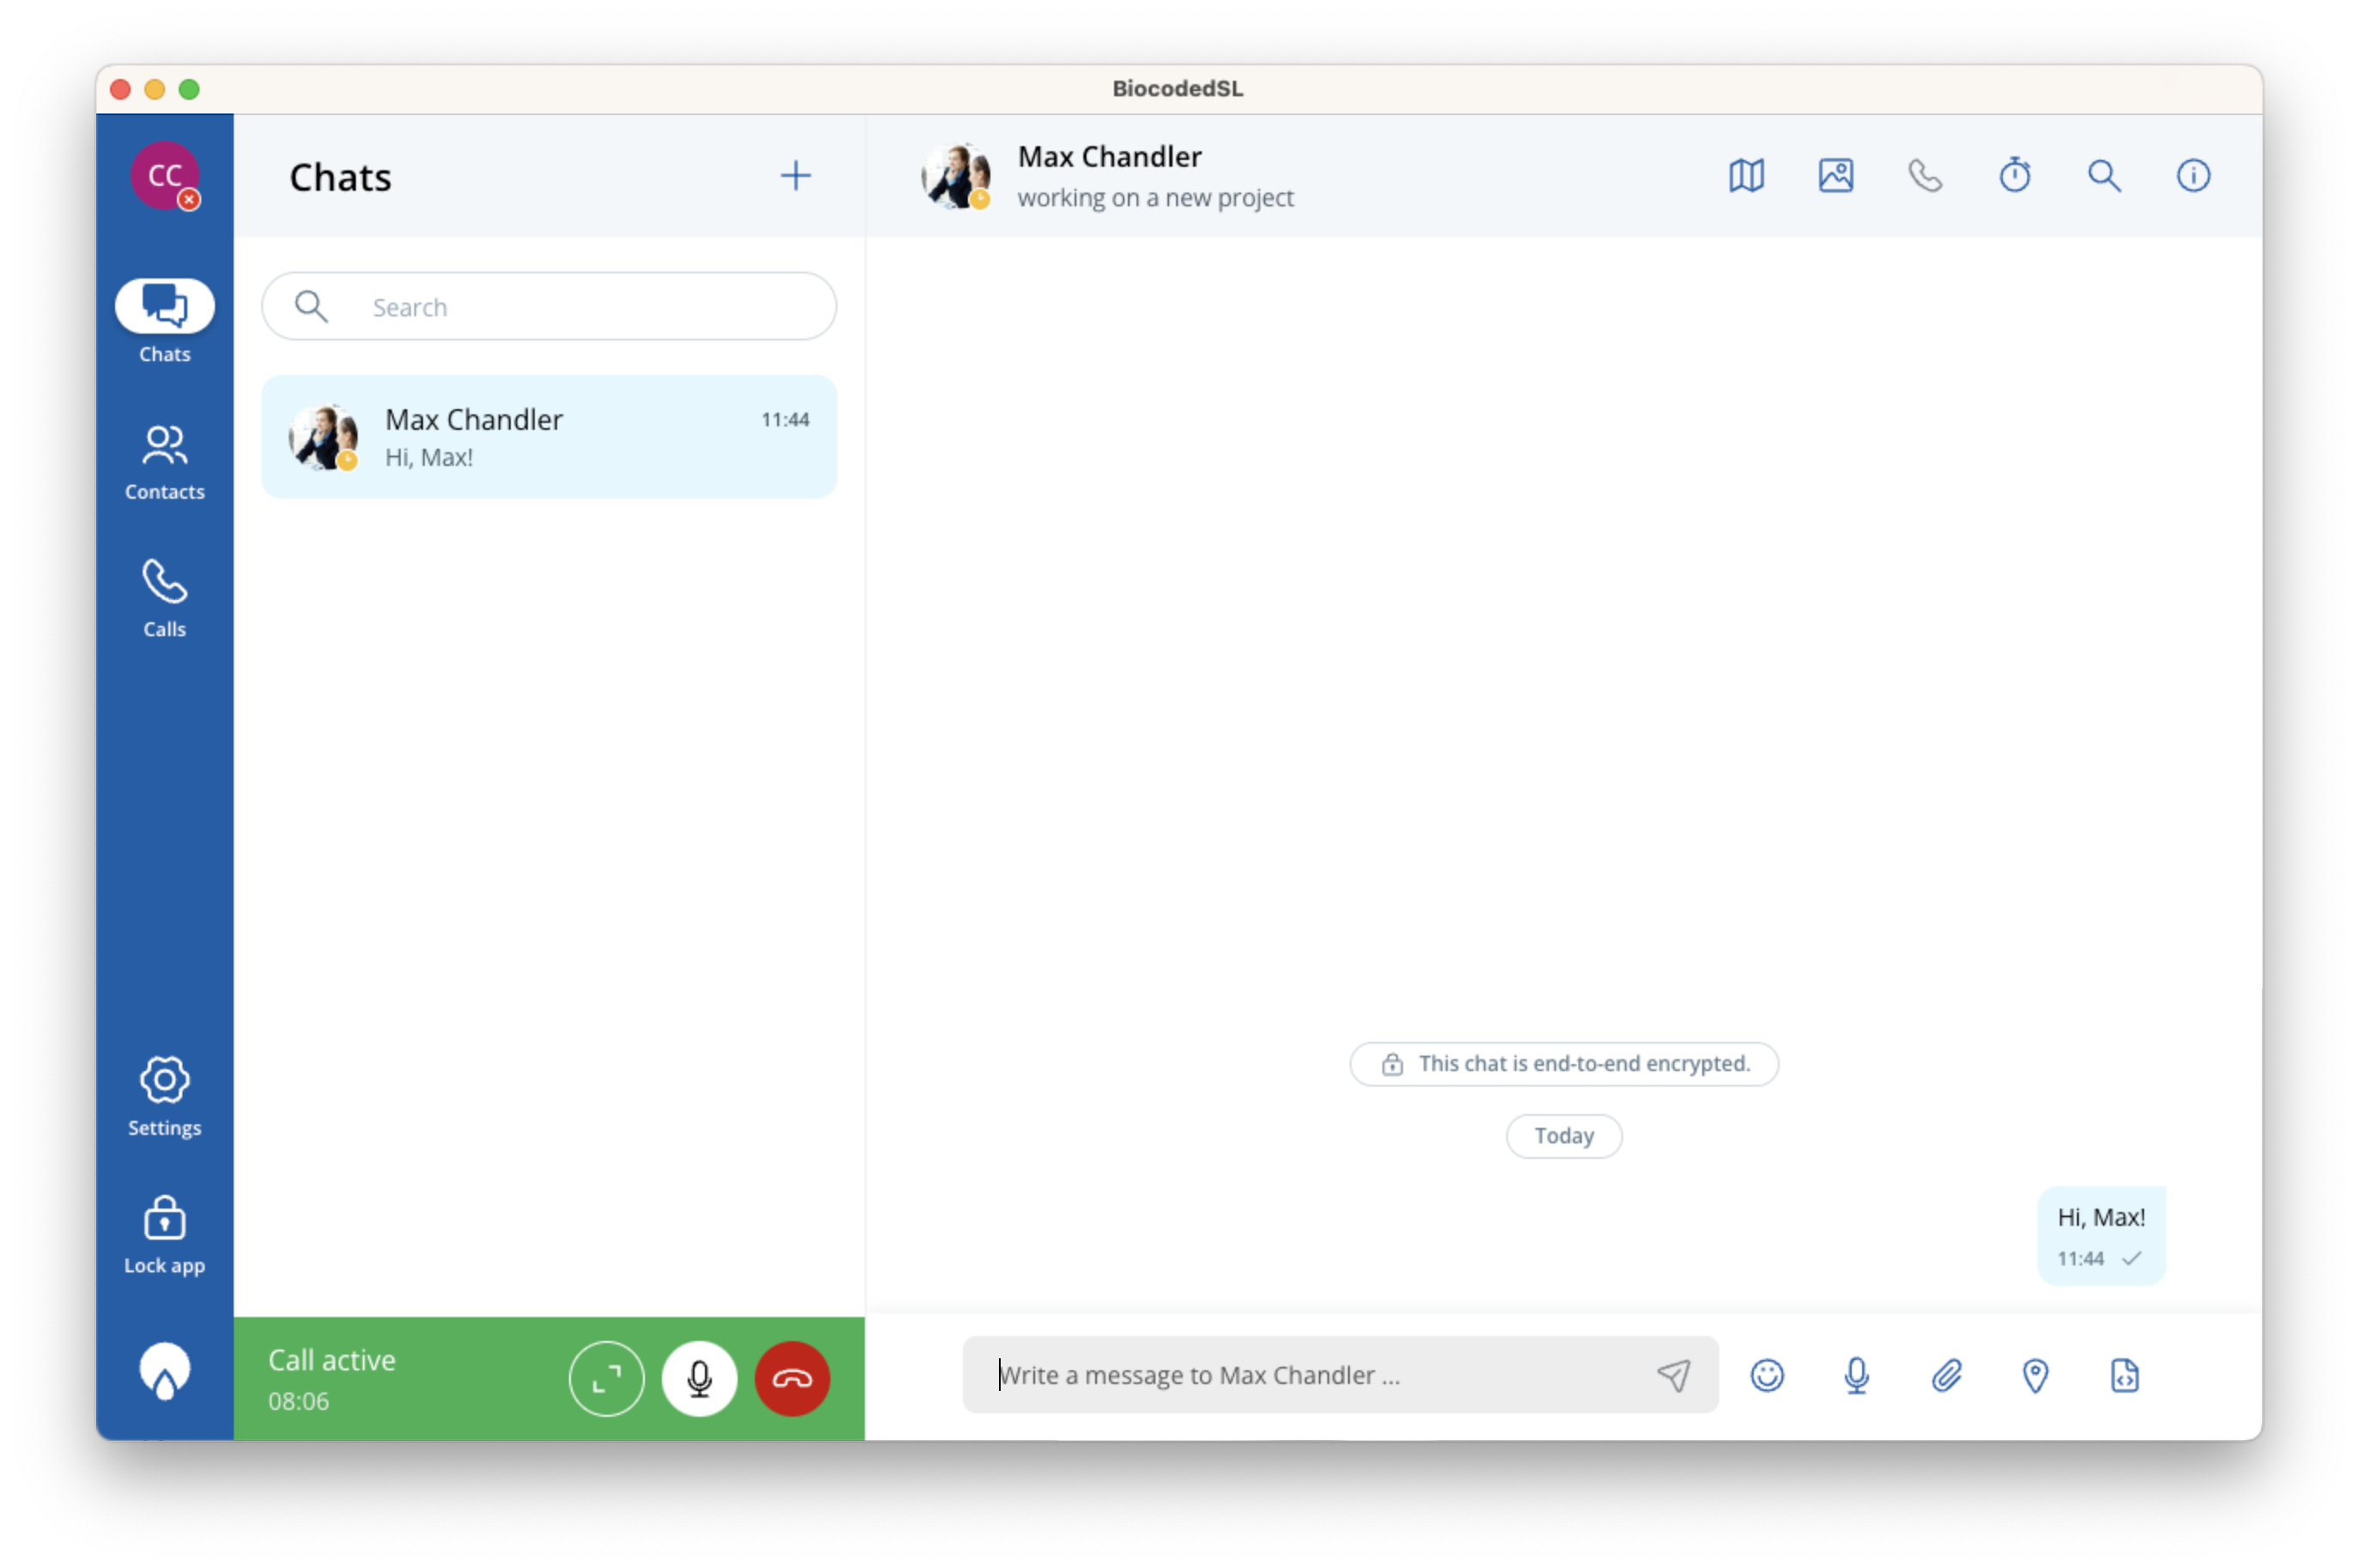
Minimised call
When in call, selecting minimise icon (top right corner of the call screen) will set the call in background state and the user can navigate through the app freely. Clicking the expand icon opens call screen again.
Messaging
A list of existing chats can be found in "Chats" tab.
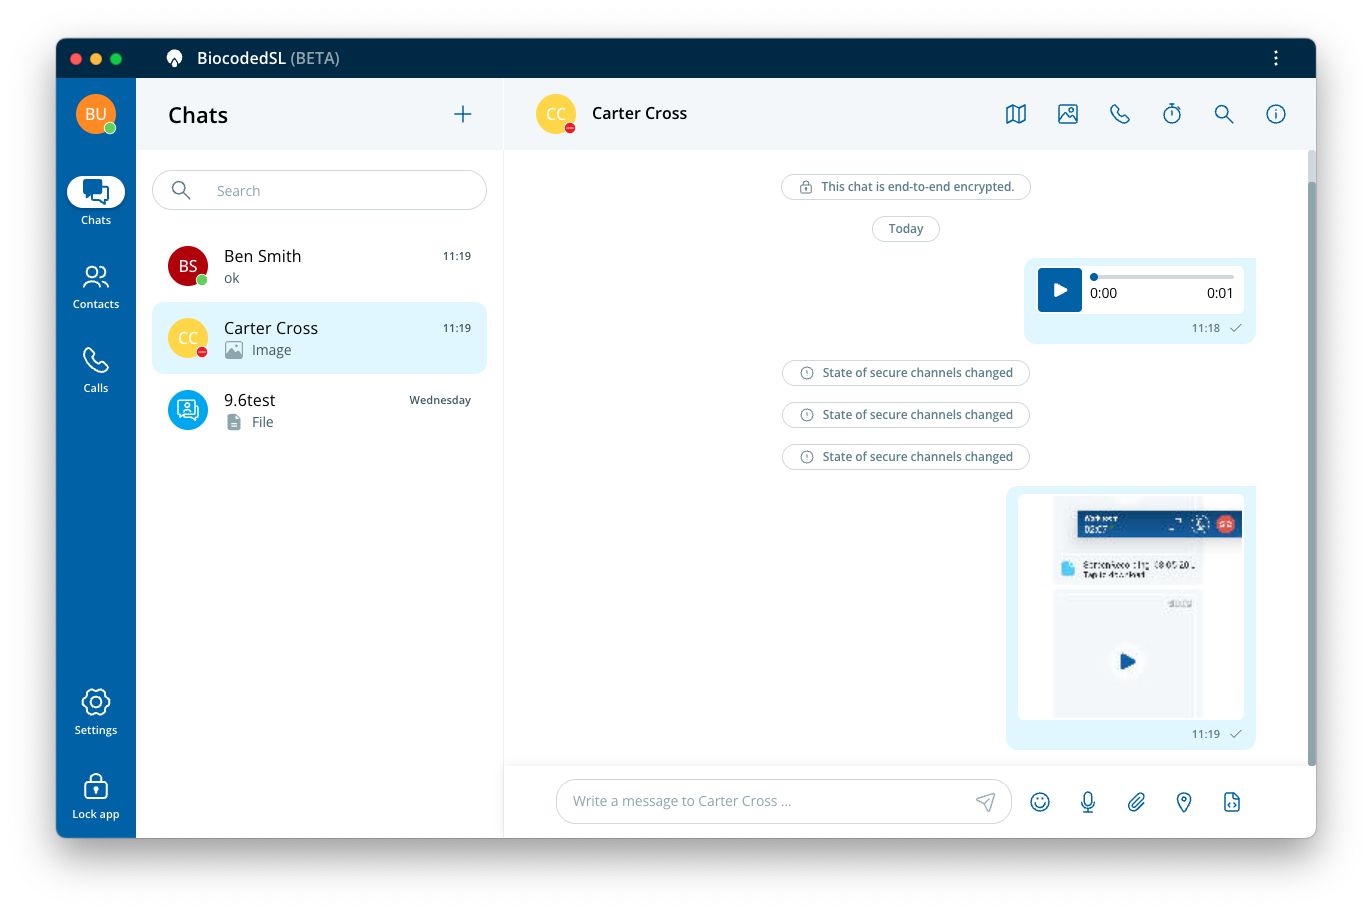
You can send a new message to a contact in the following ways:
- by selecting a contact on the Contacts tab and then pressing on the contact info screen,
- send a message to existing conversation.
Creating a new chat
To create a new conversation press "+" button in "Chats" tab. You will have the options to create a new chat (1-1 or group) and to create a chatroom (private or public).
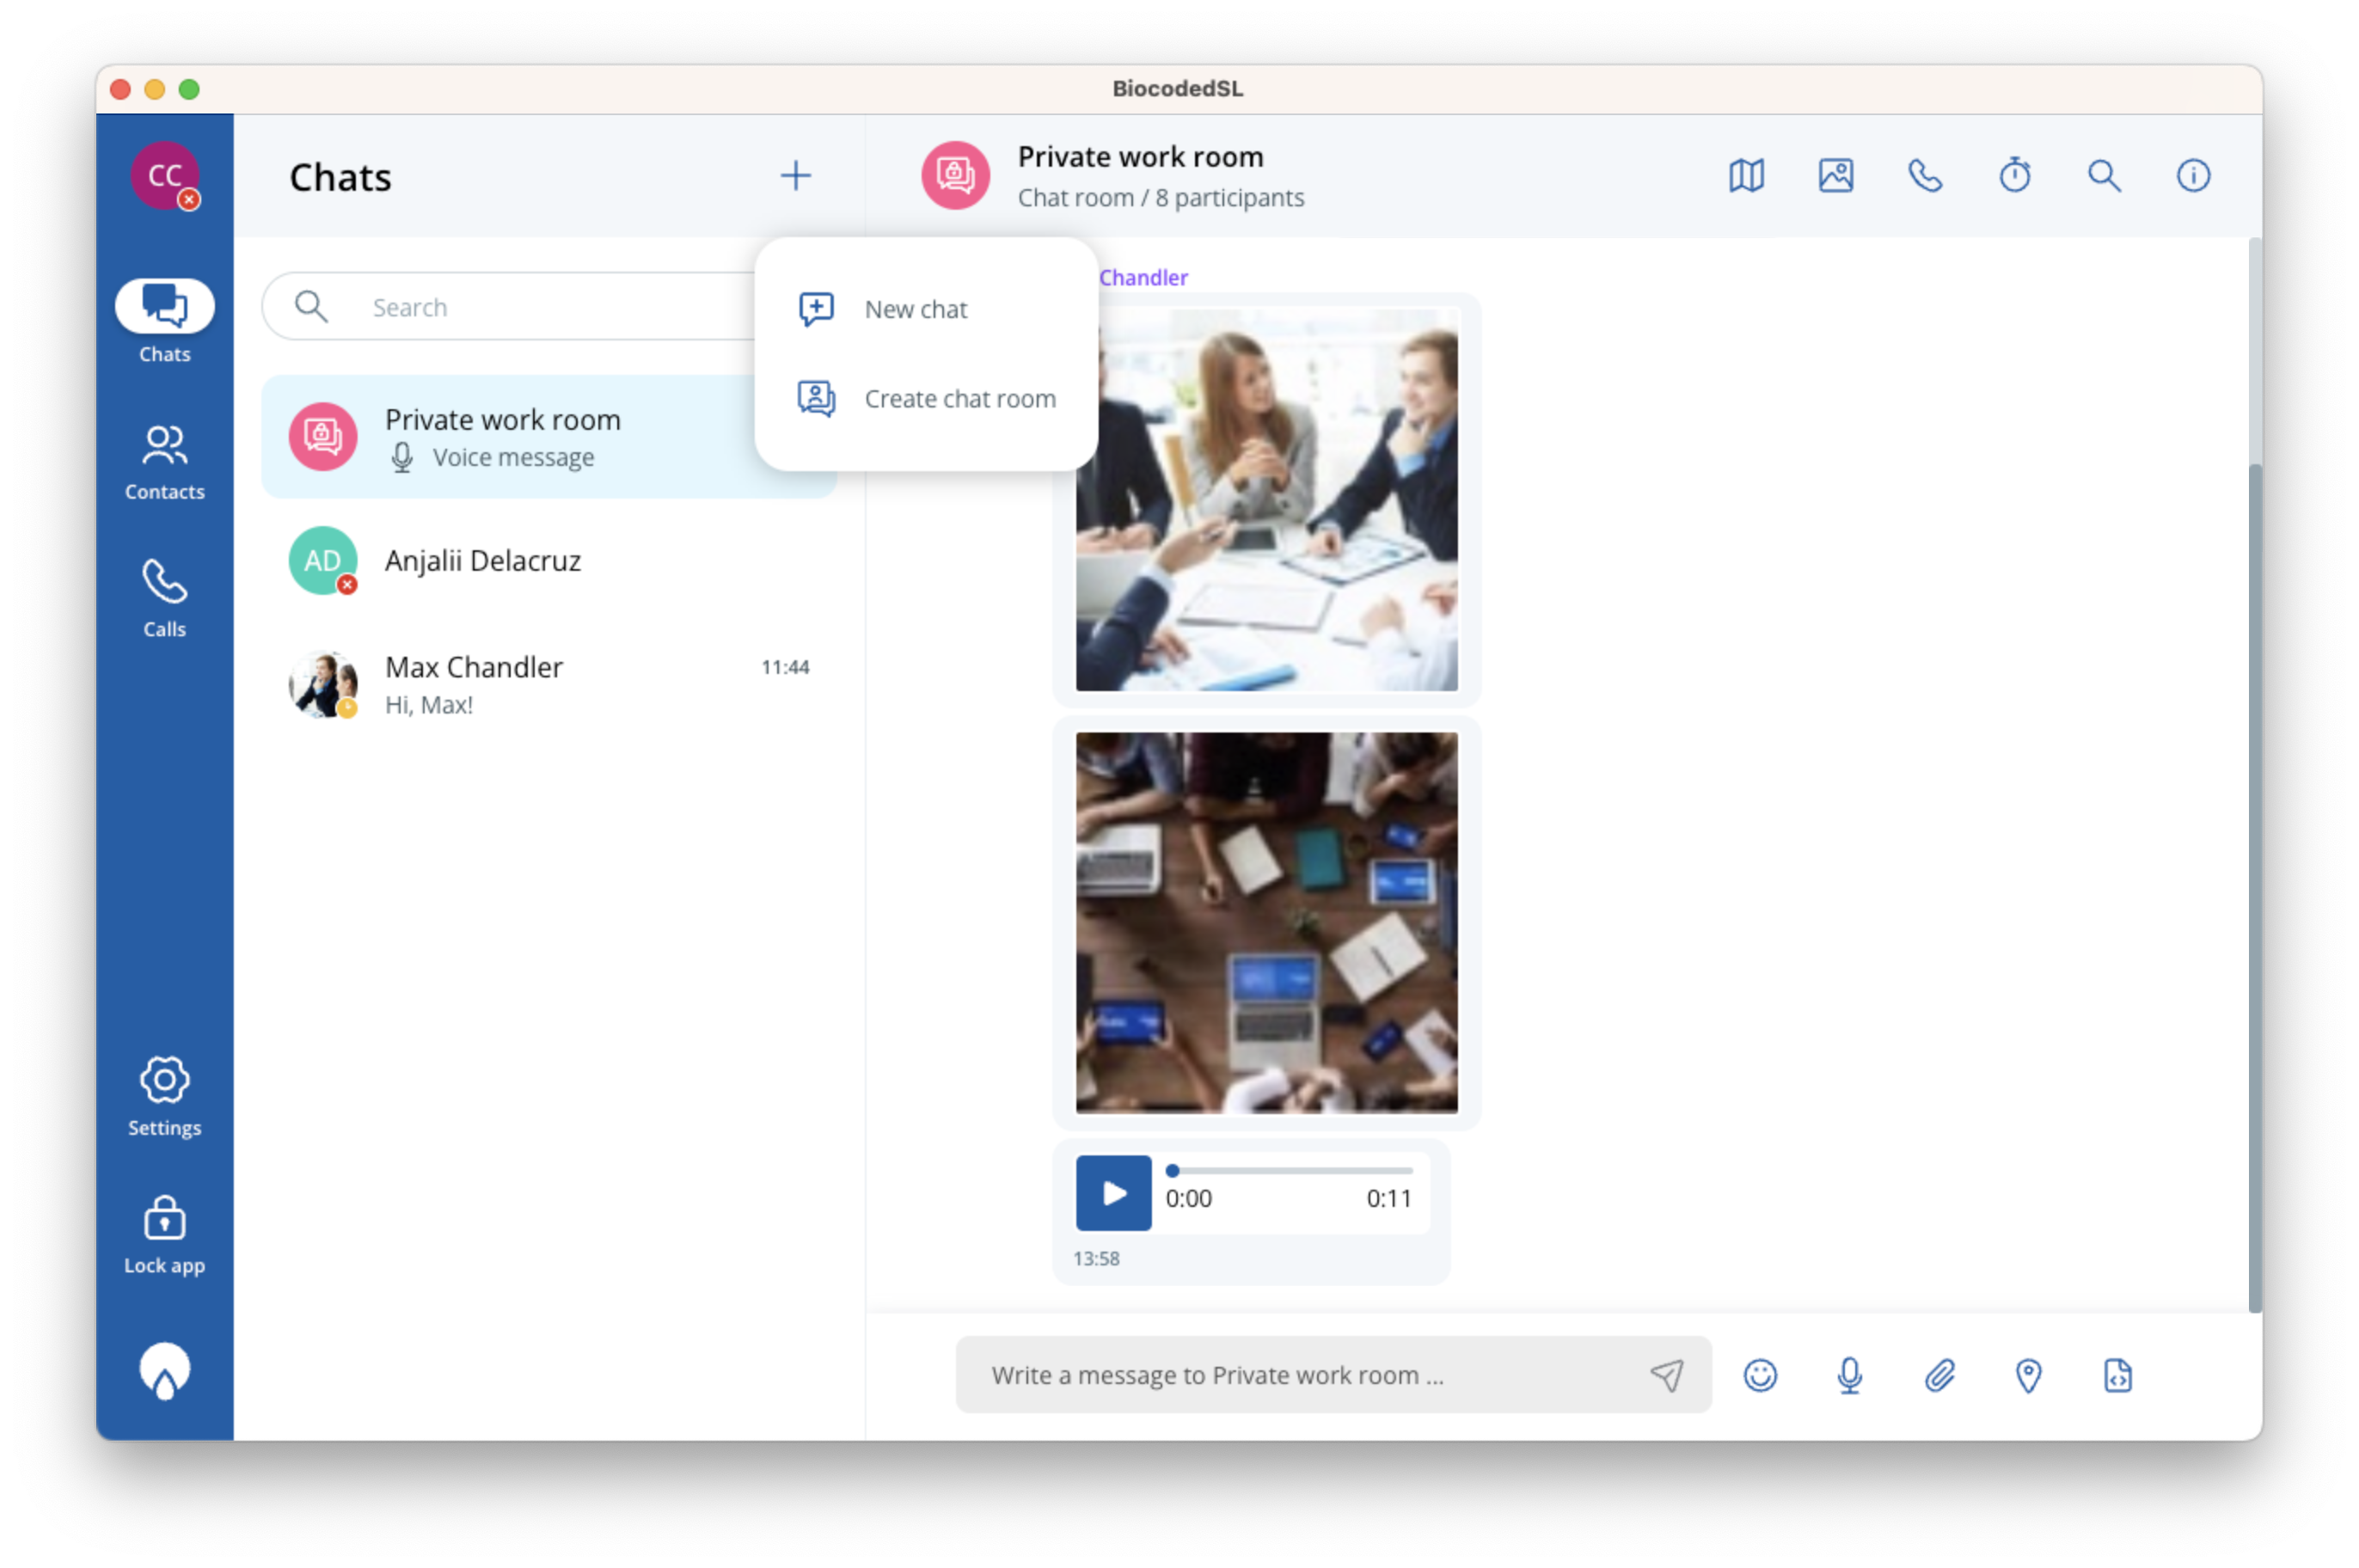
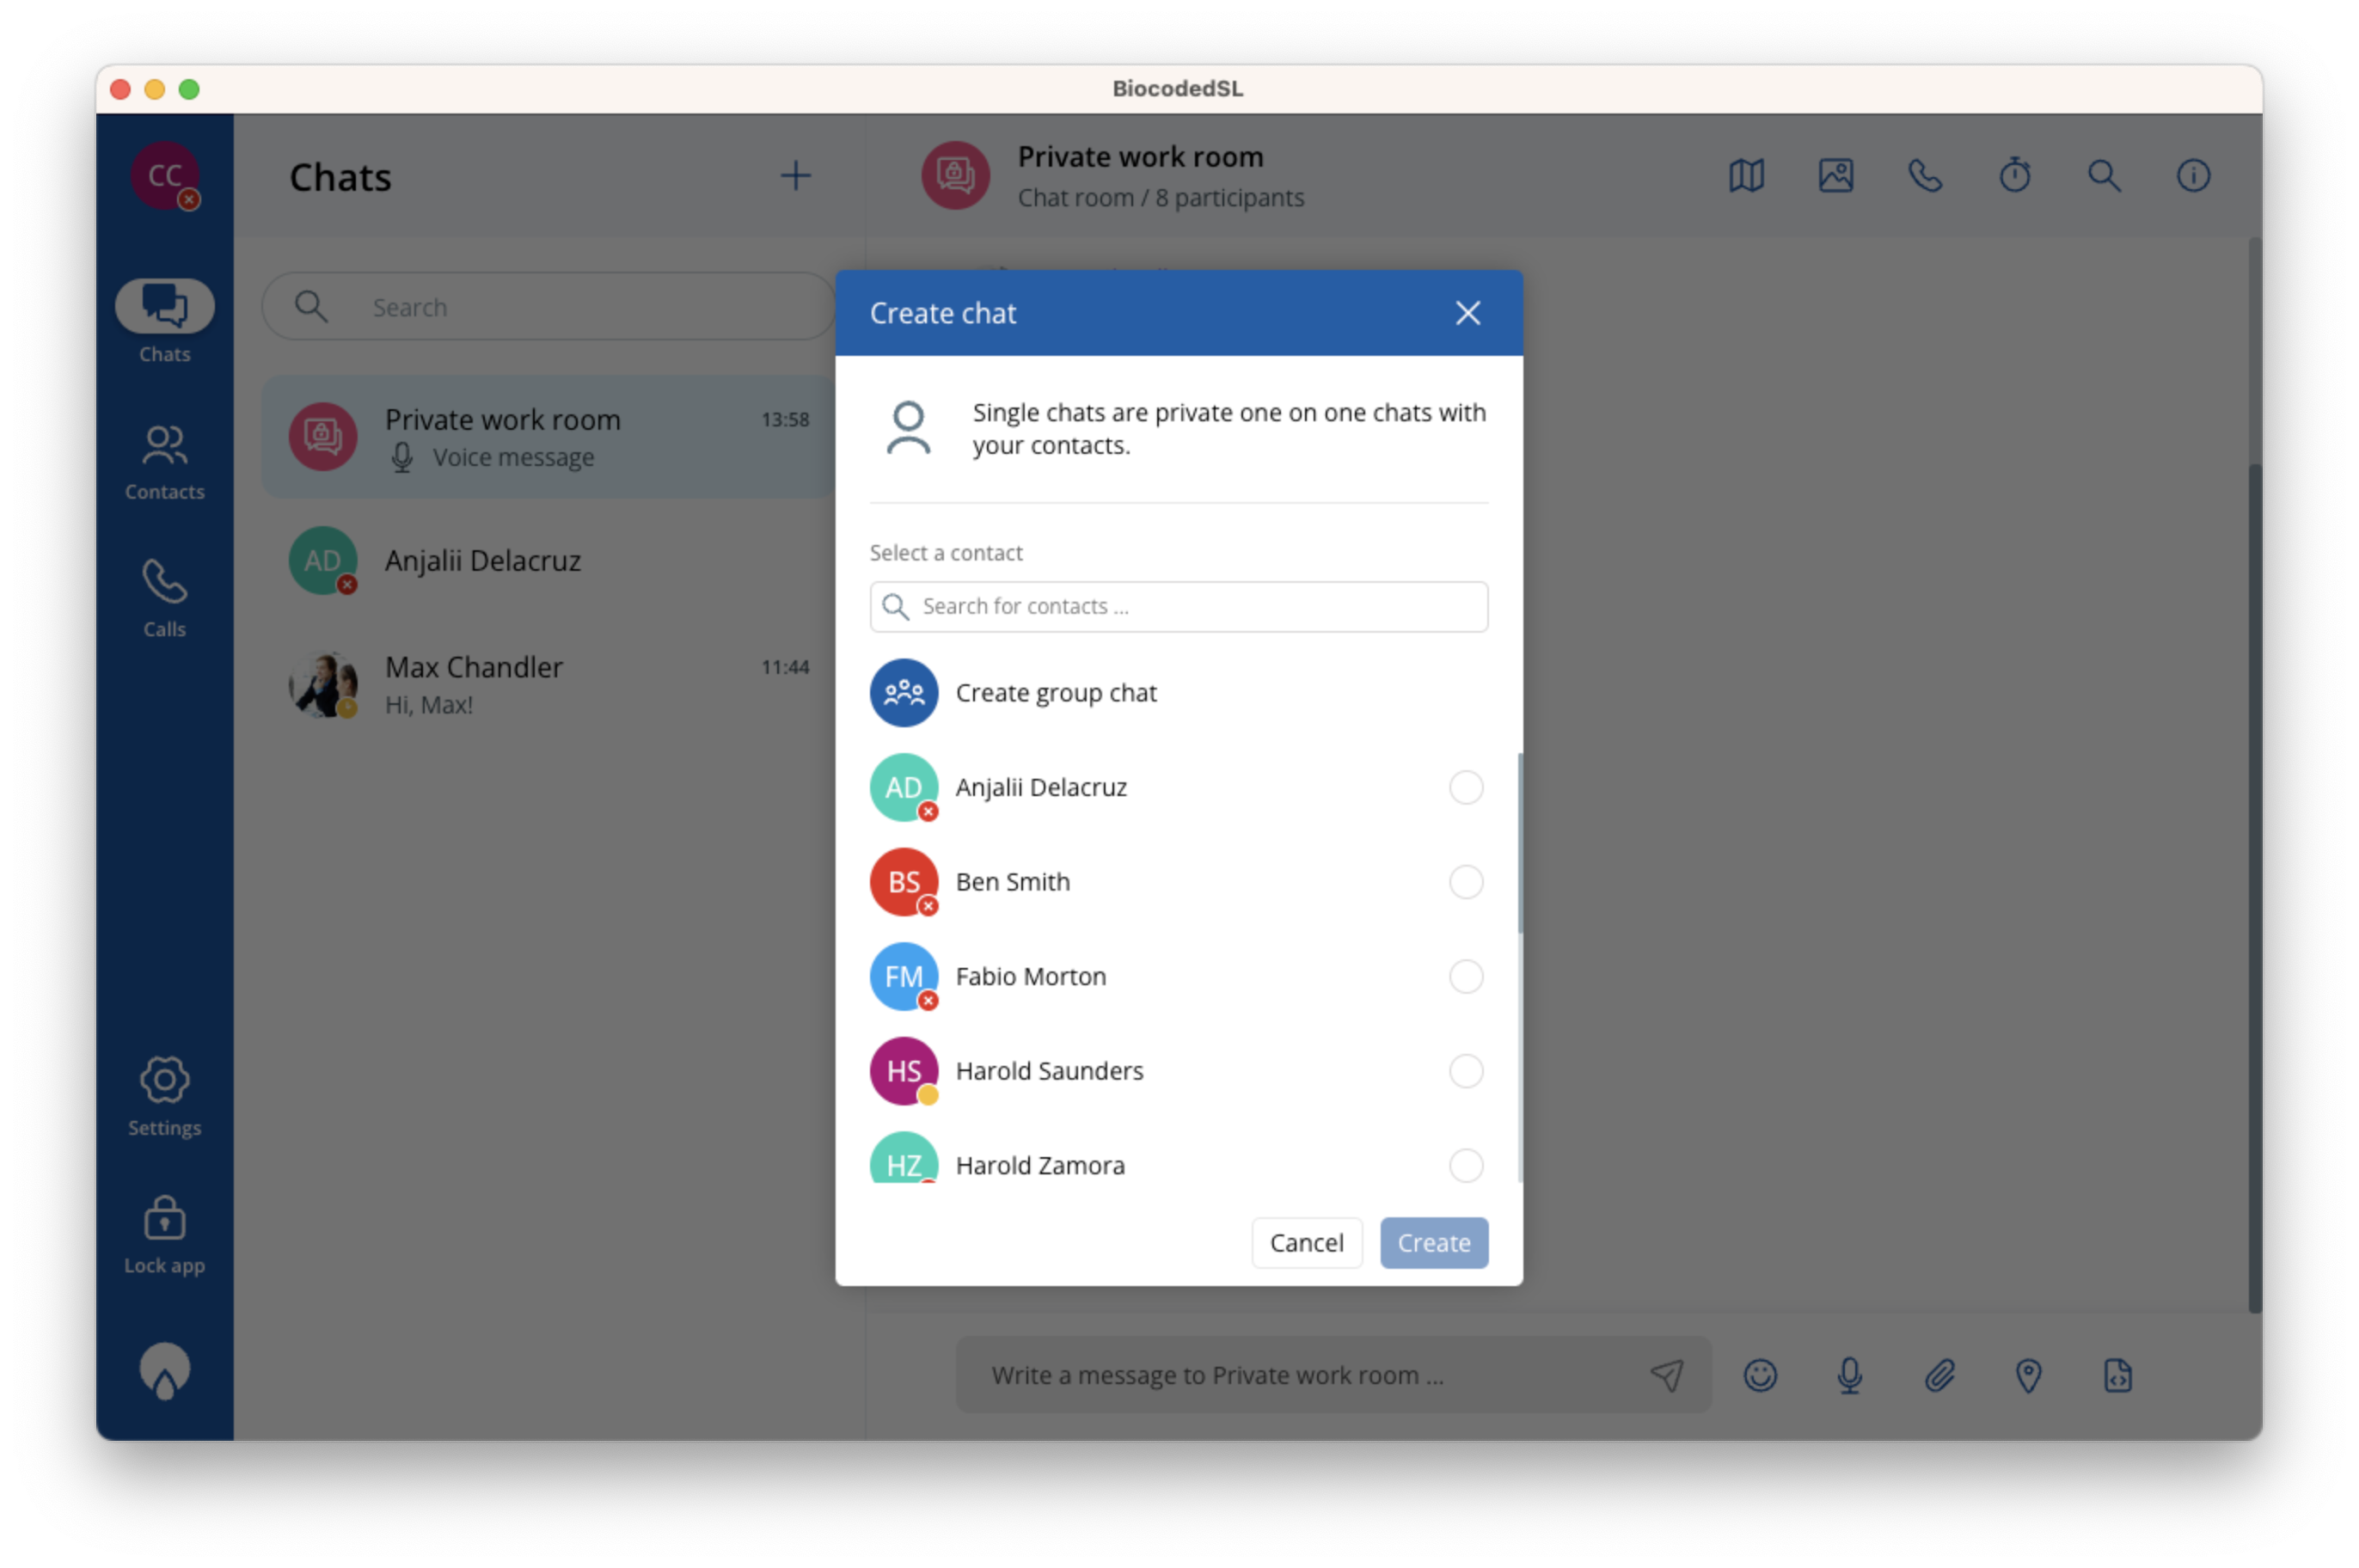
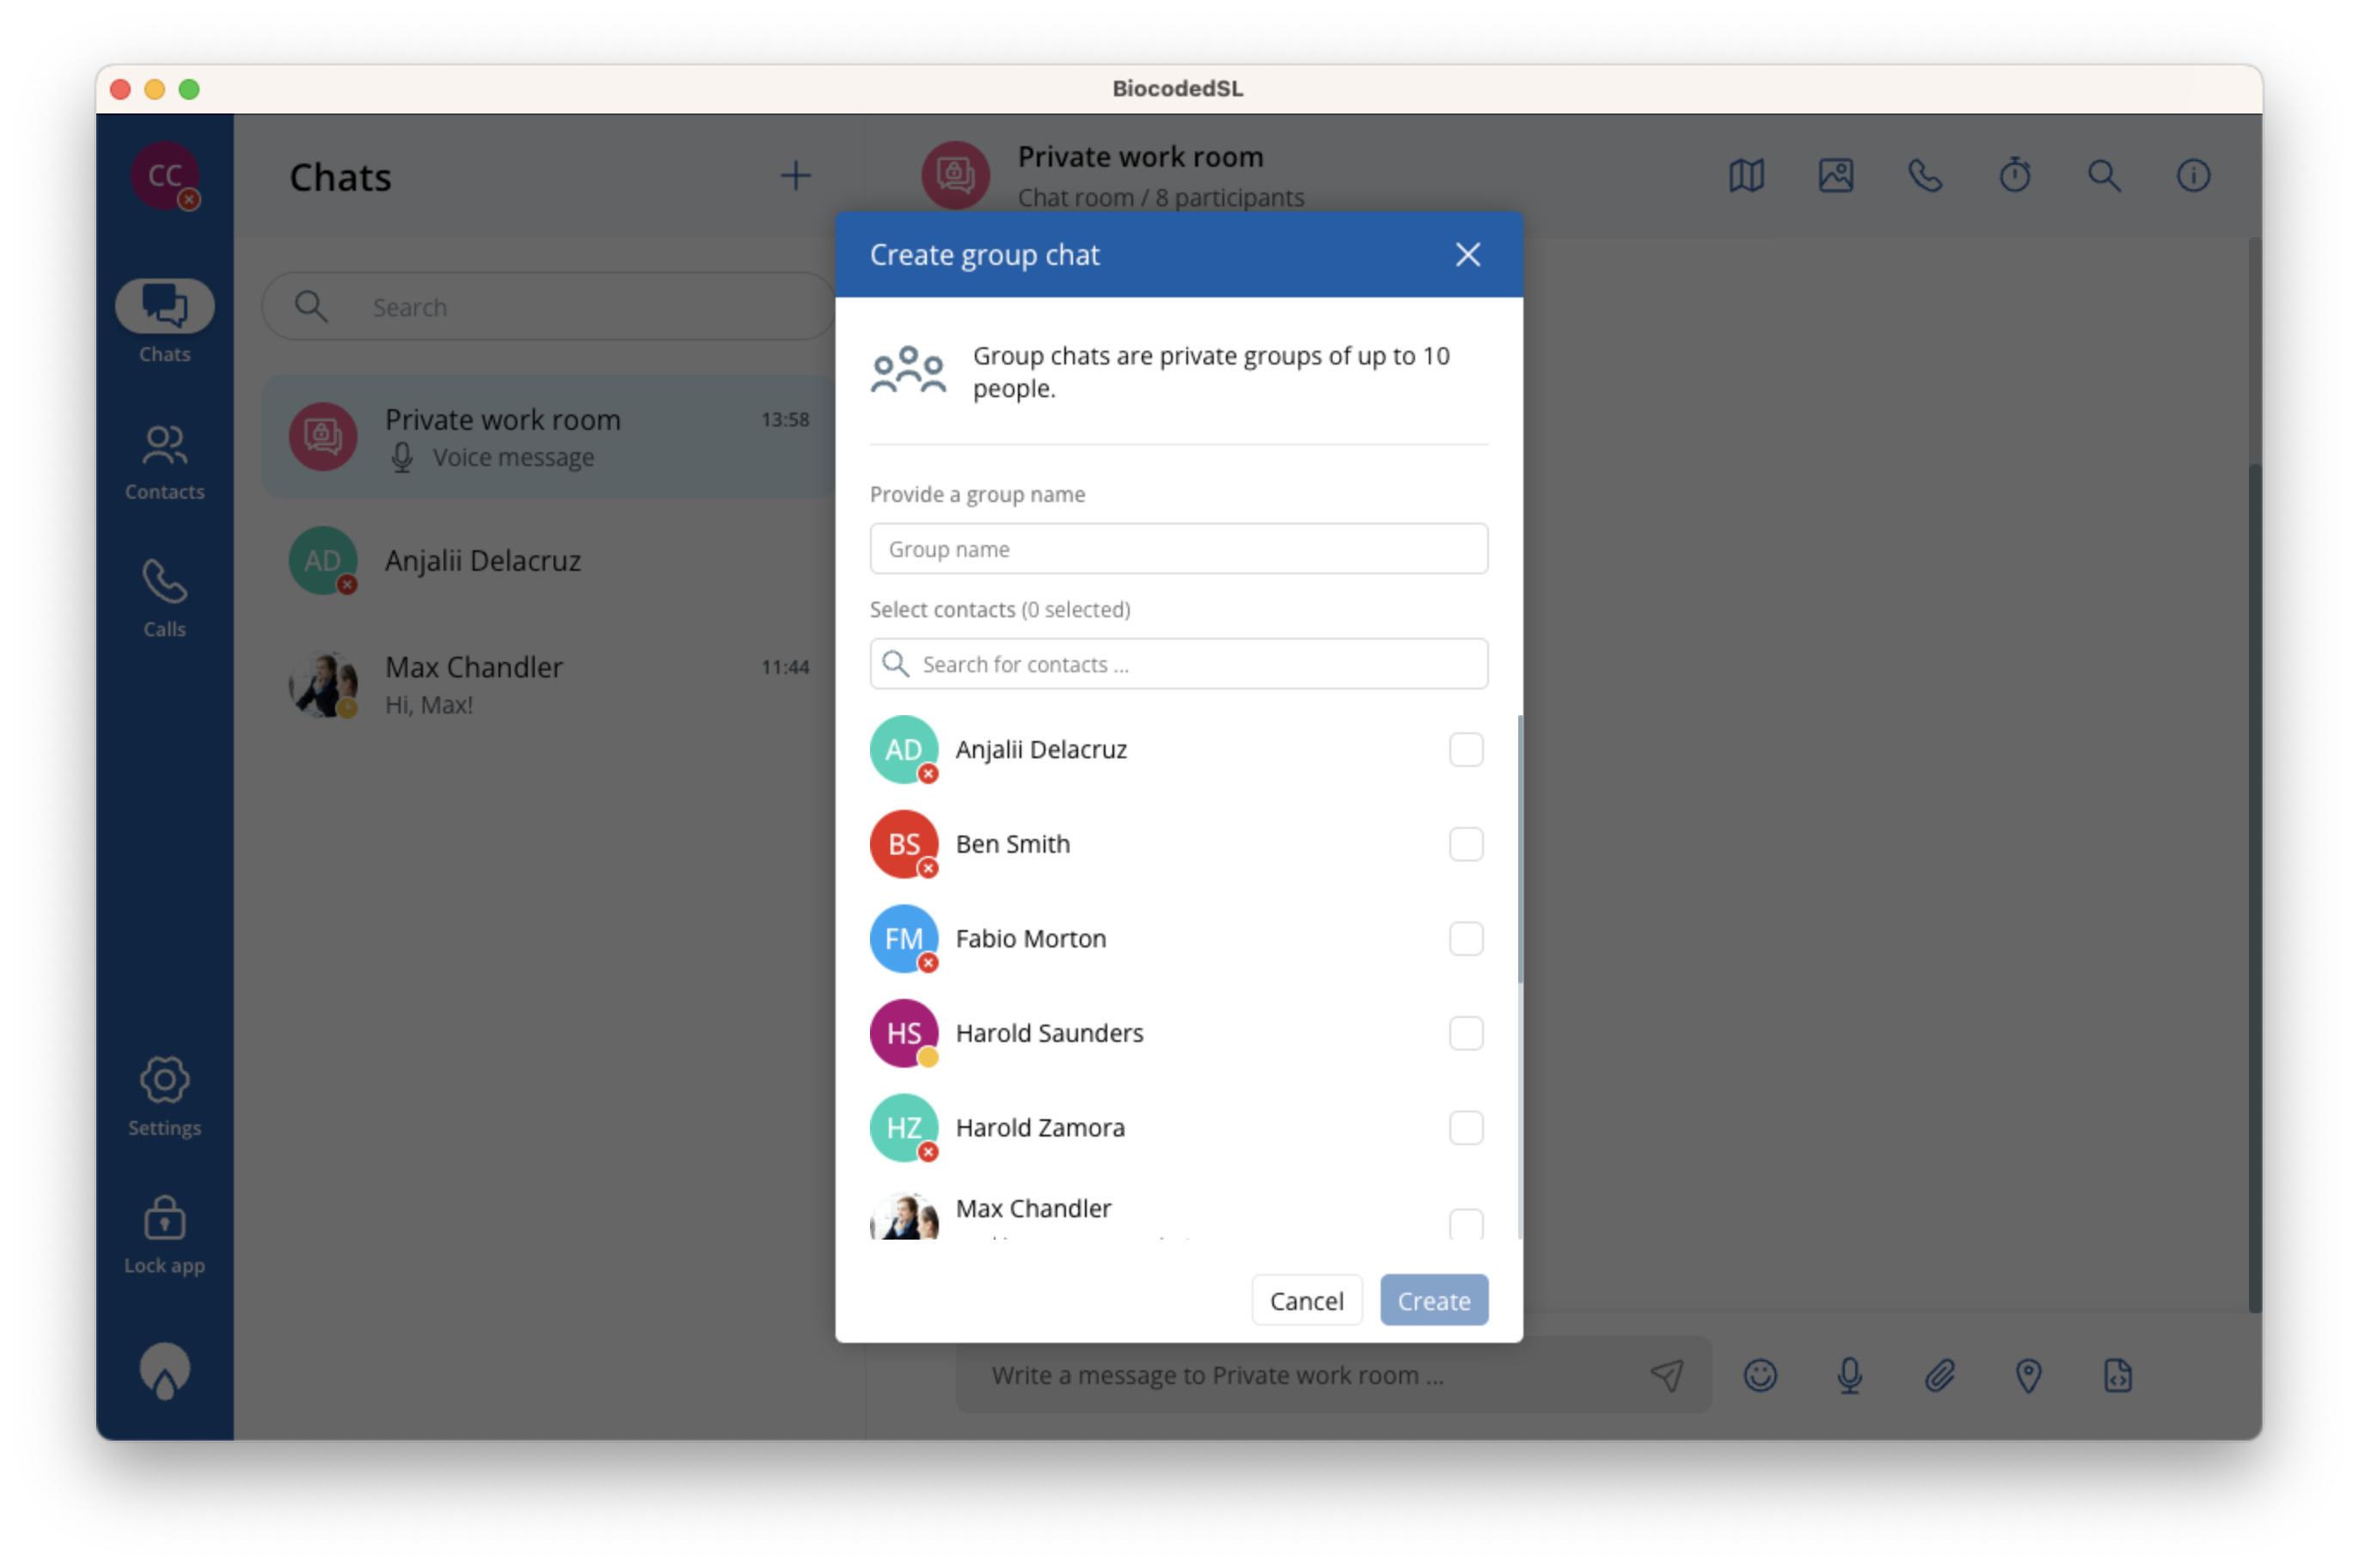
New chat creates a one-on-one chat or group chat with multiple people (up to 10) by clicking "Create group chat". You can select participants and search for them by id or name.
You will also have to assign a name for your group chat.
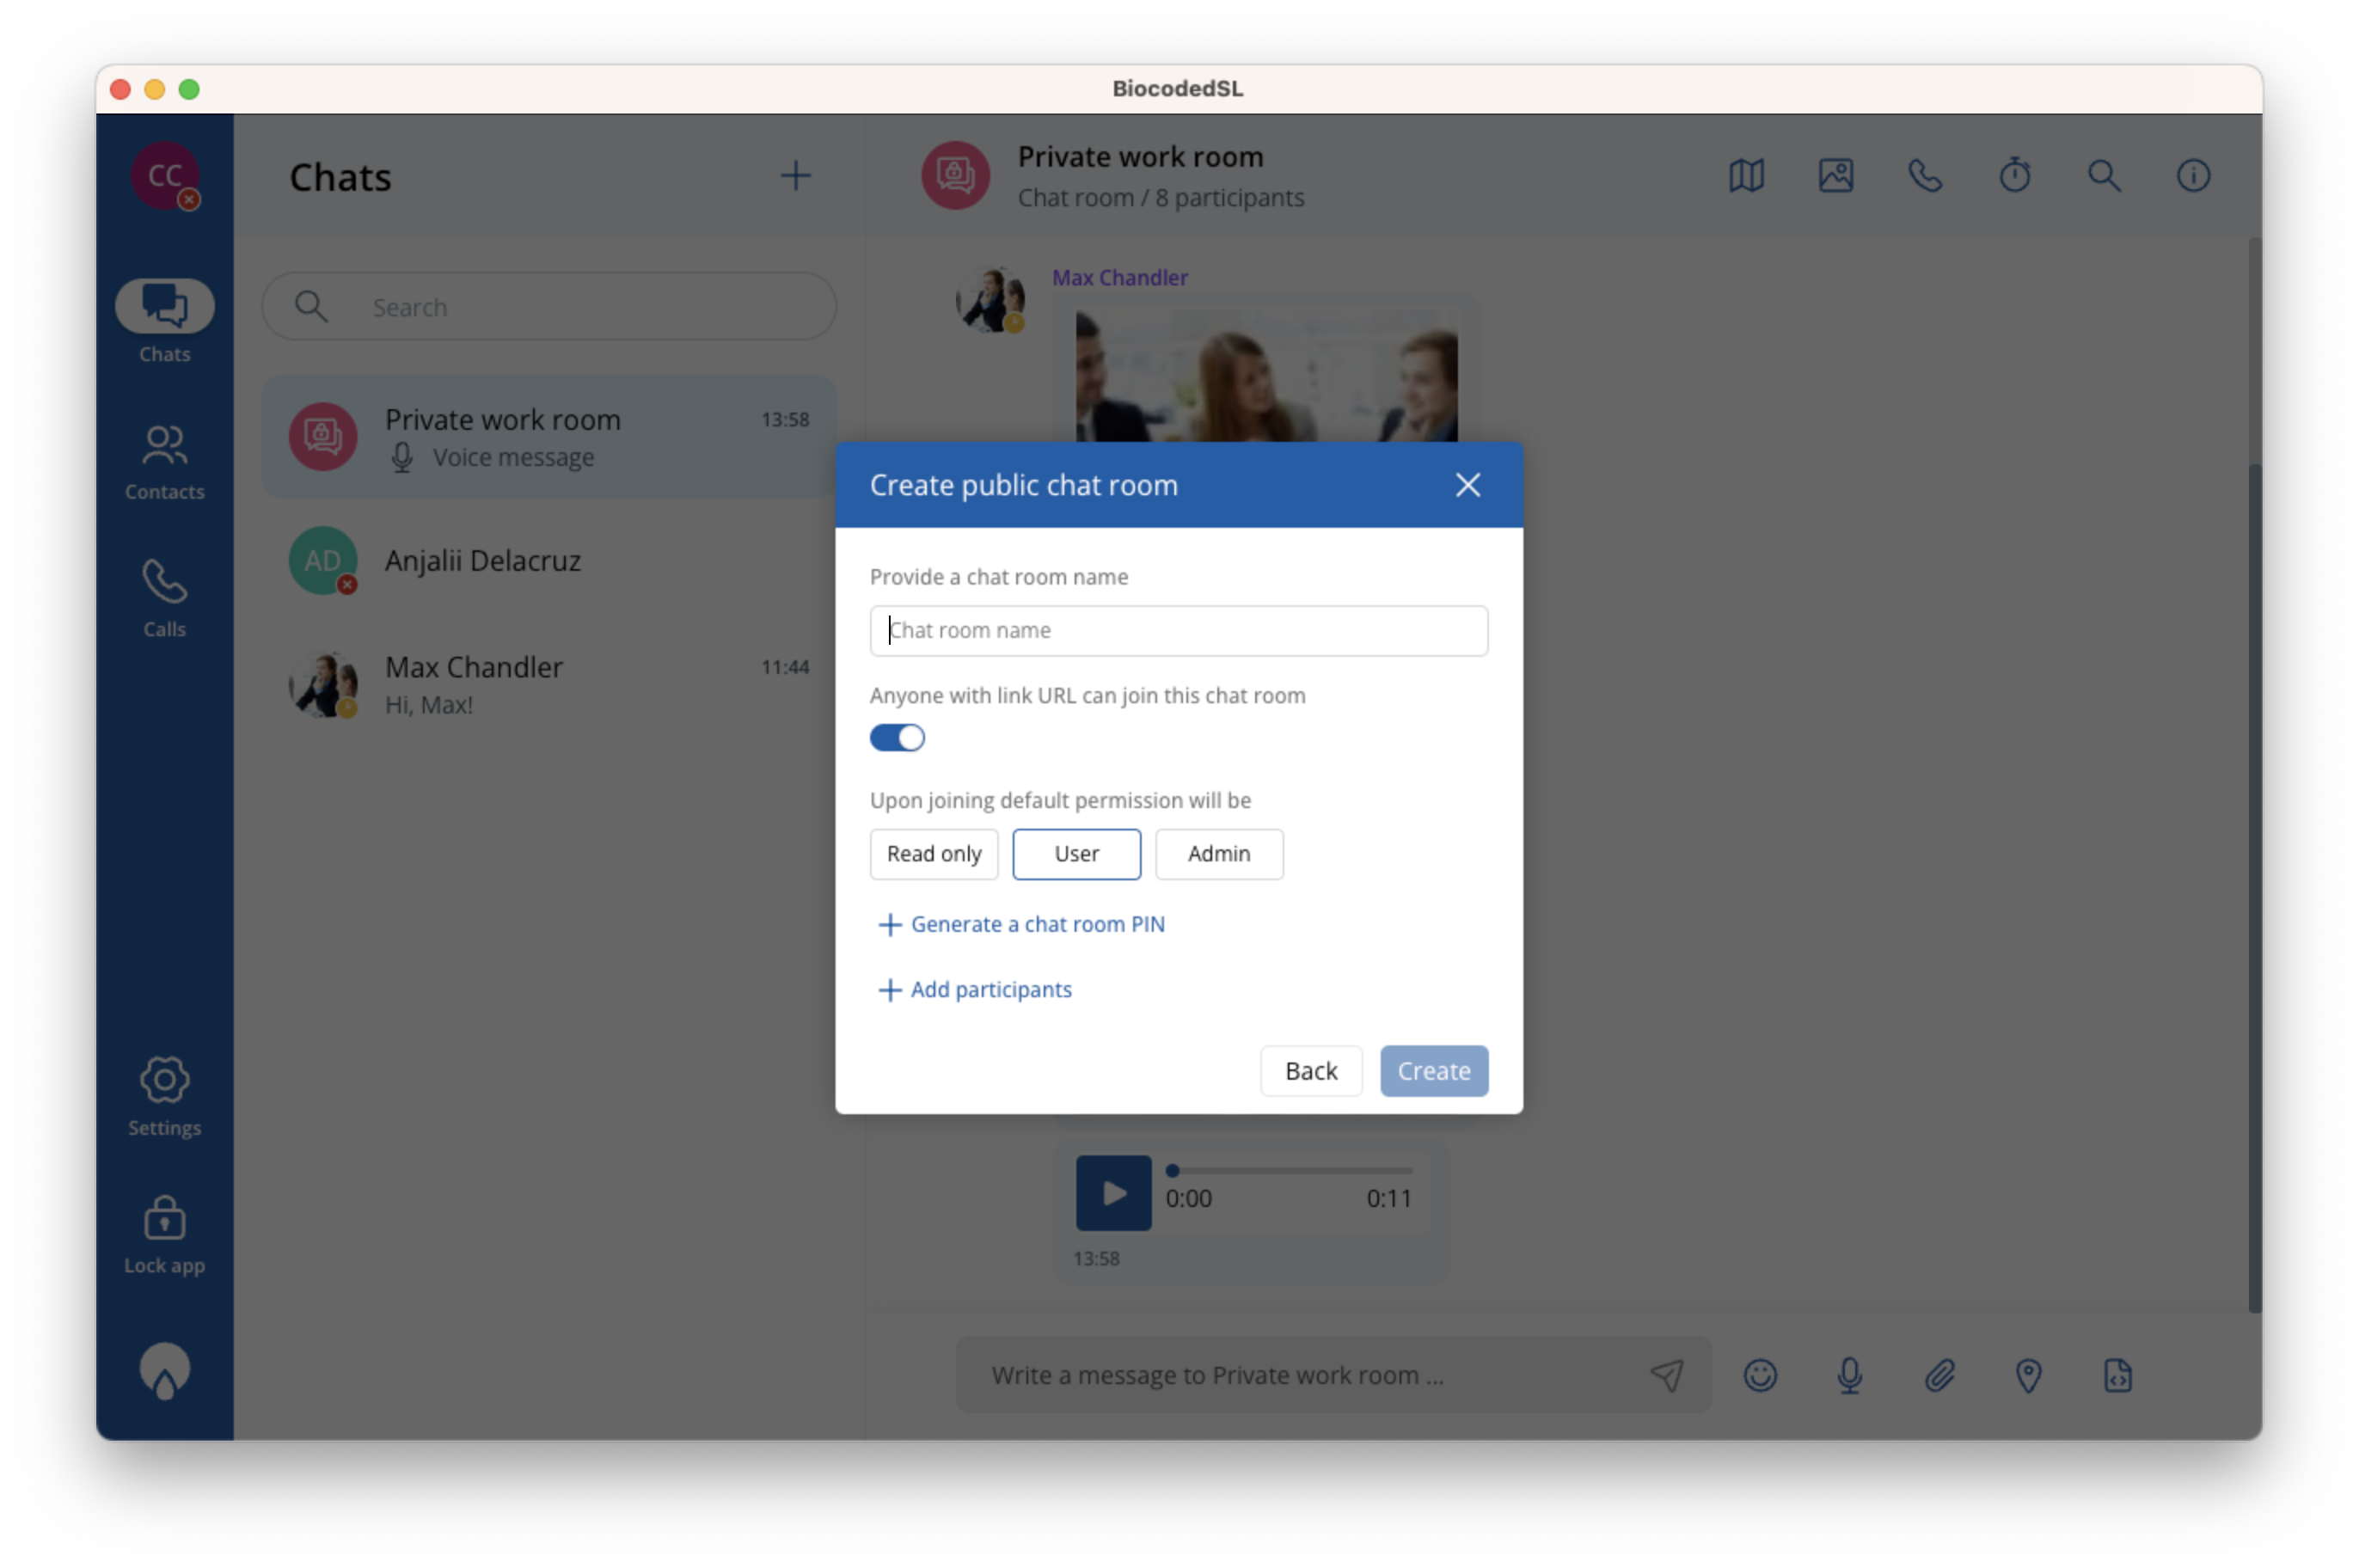
Create chat room offers a choice between a private or a public chat room. Both options create a conversation for large groups up to 255 people. User that creates the chat room becomes the administrator and manages the room users. Chat rooms can be joined by URL and public rooms can require a PIN to join. After creating a chatroom, participants can be added similar to group chats.
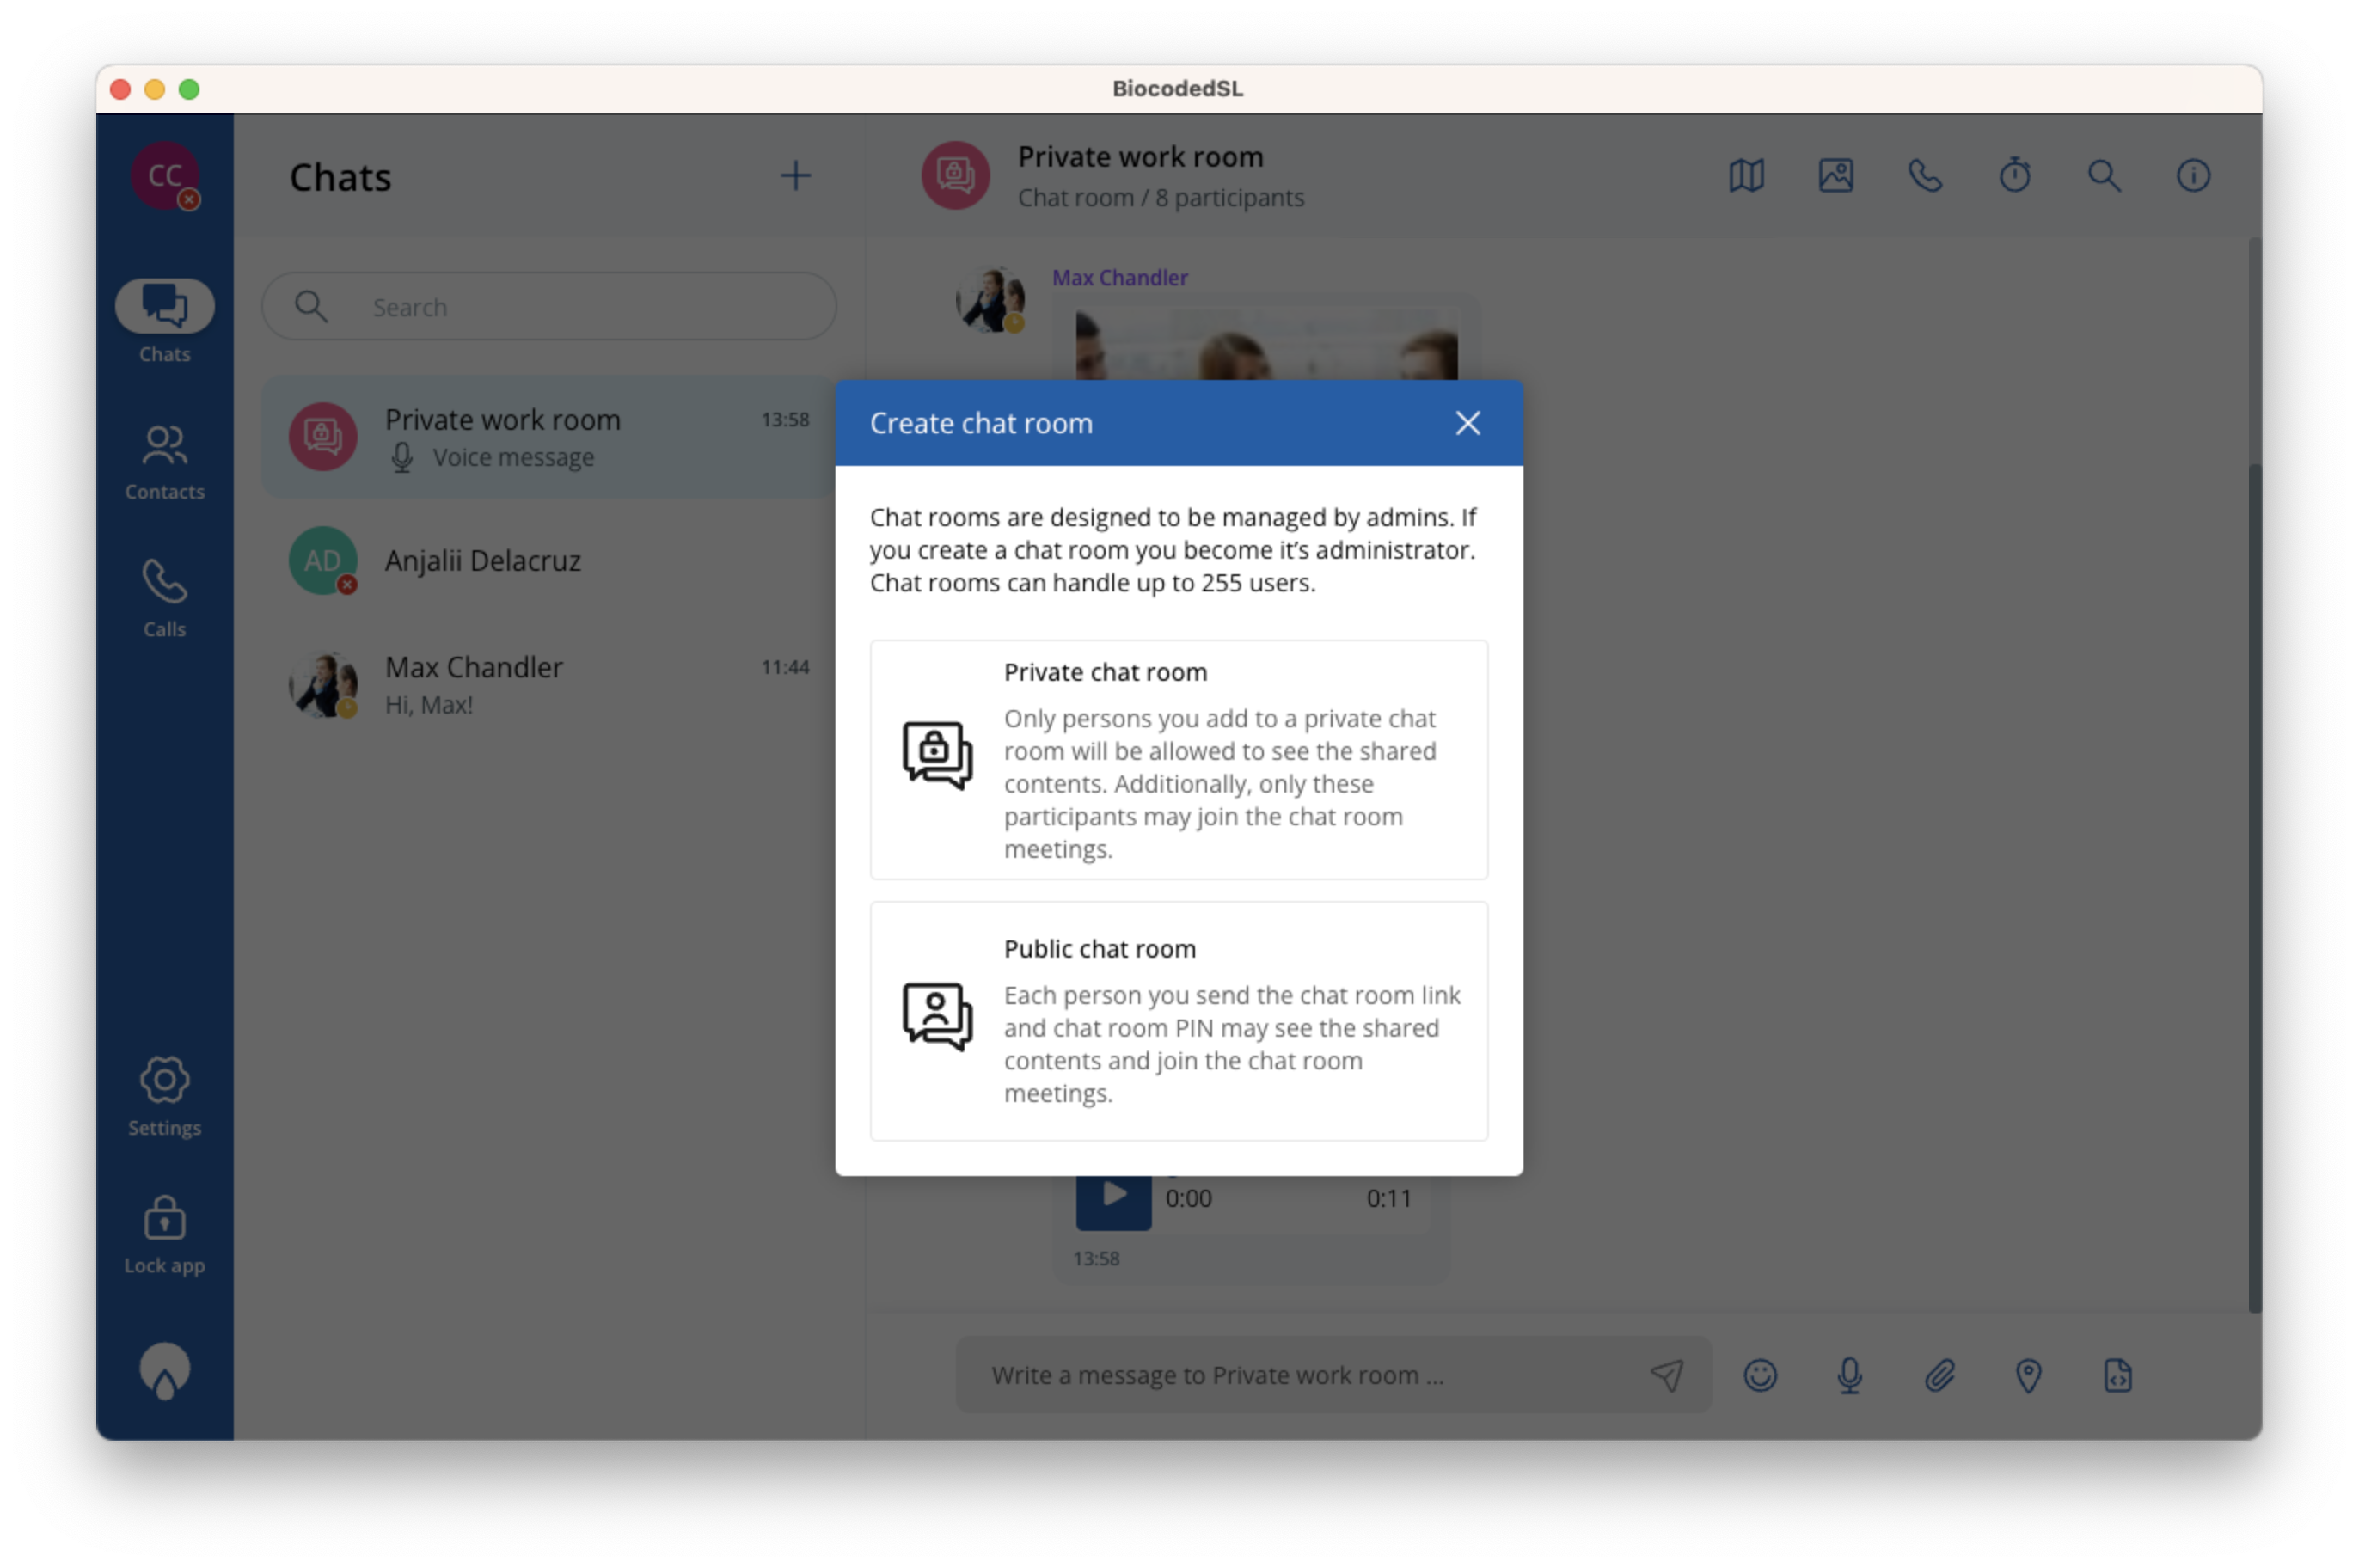
Create a private chat room
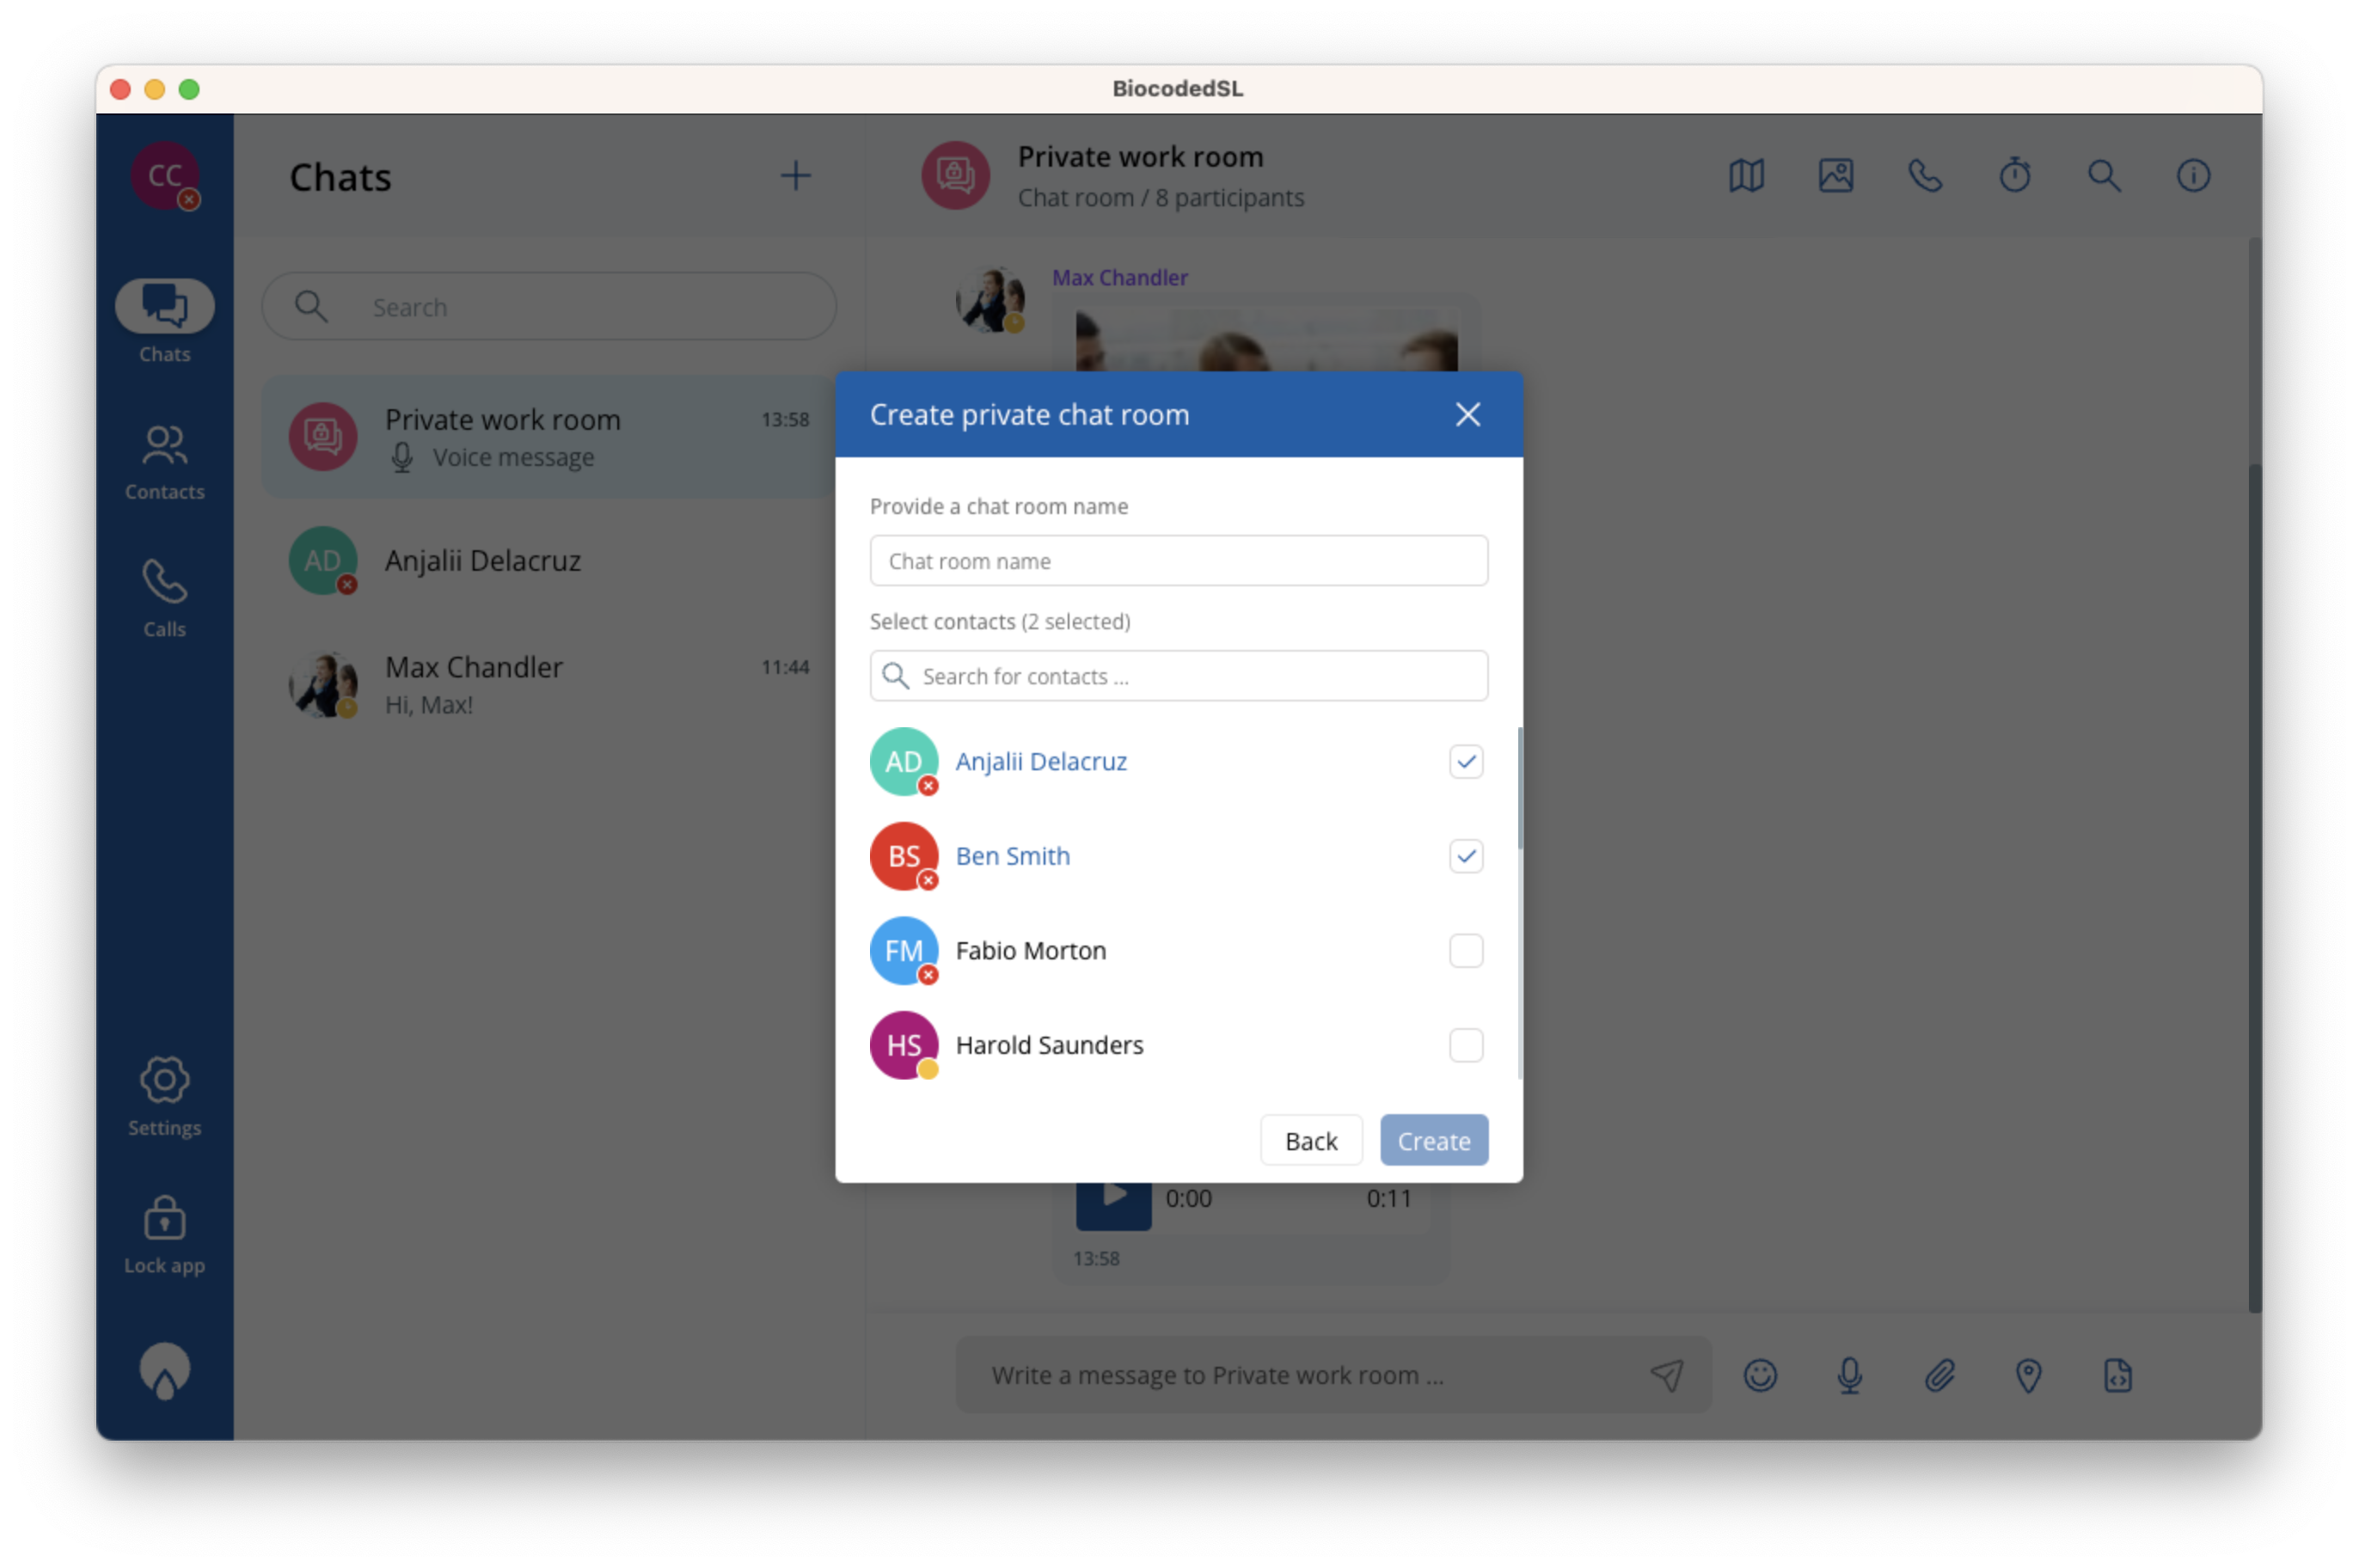
Create a public chat room
Sending a message
To send a text message, write the message in the "Write a message..." box and press ENTER key.
You can mention a person in your message by typing @ symbol and selecting their name from a list that appears, which can be filtered by typing some additional letters after @.
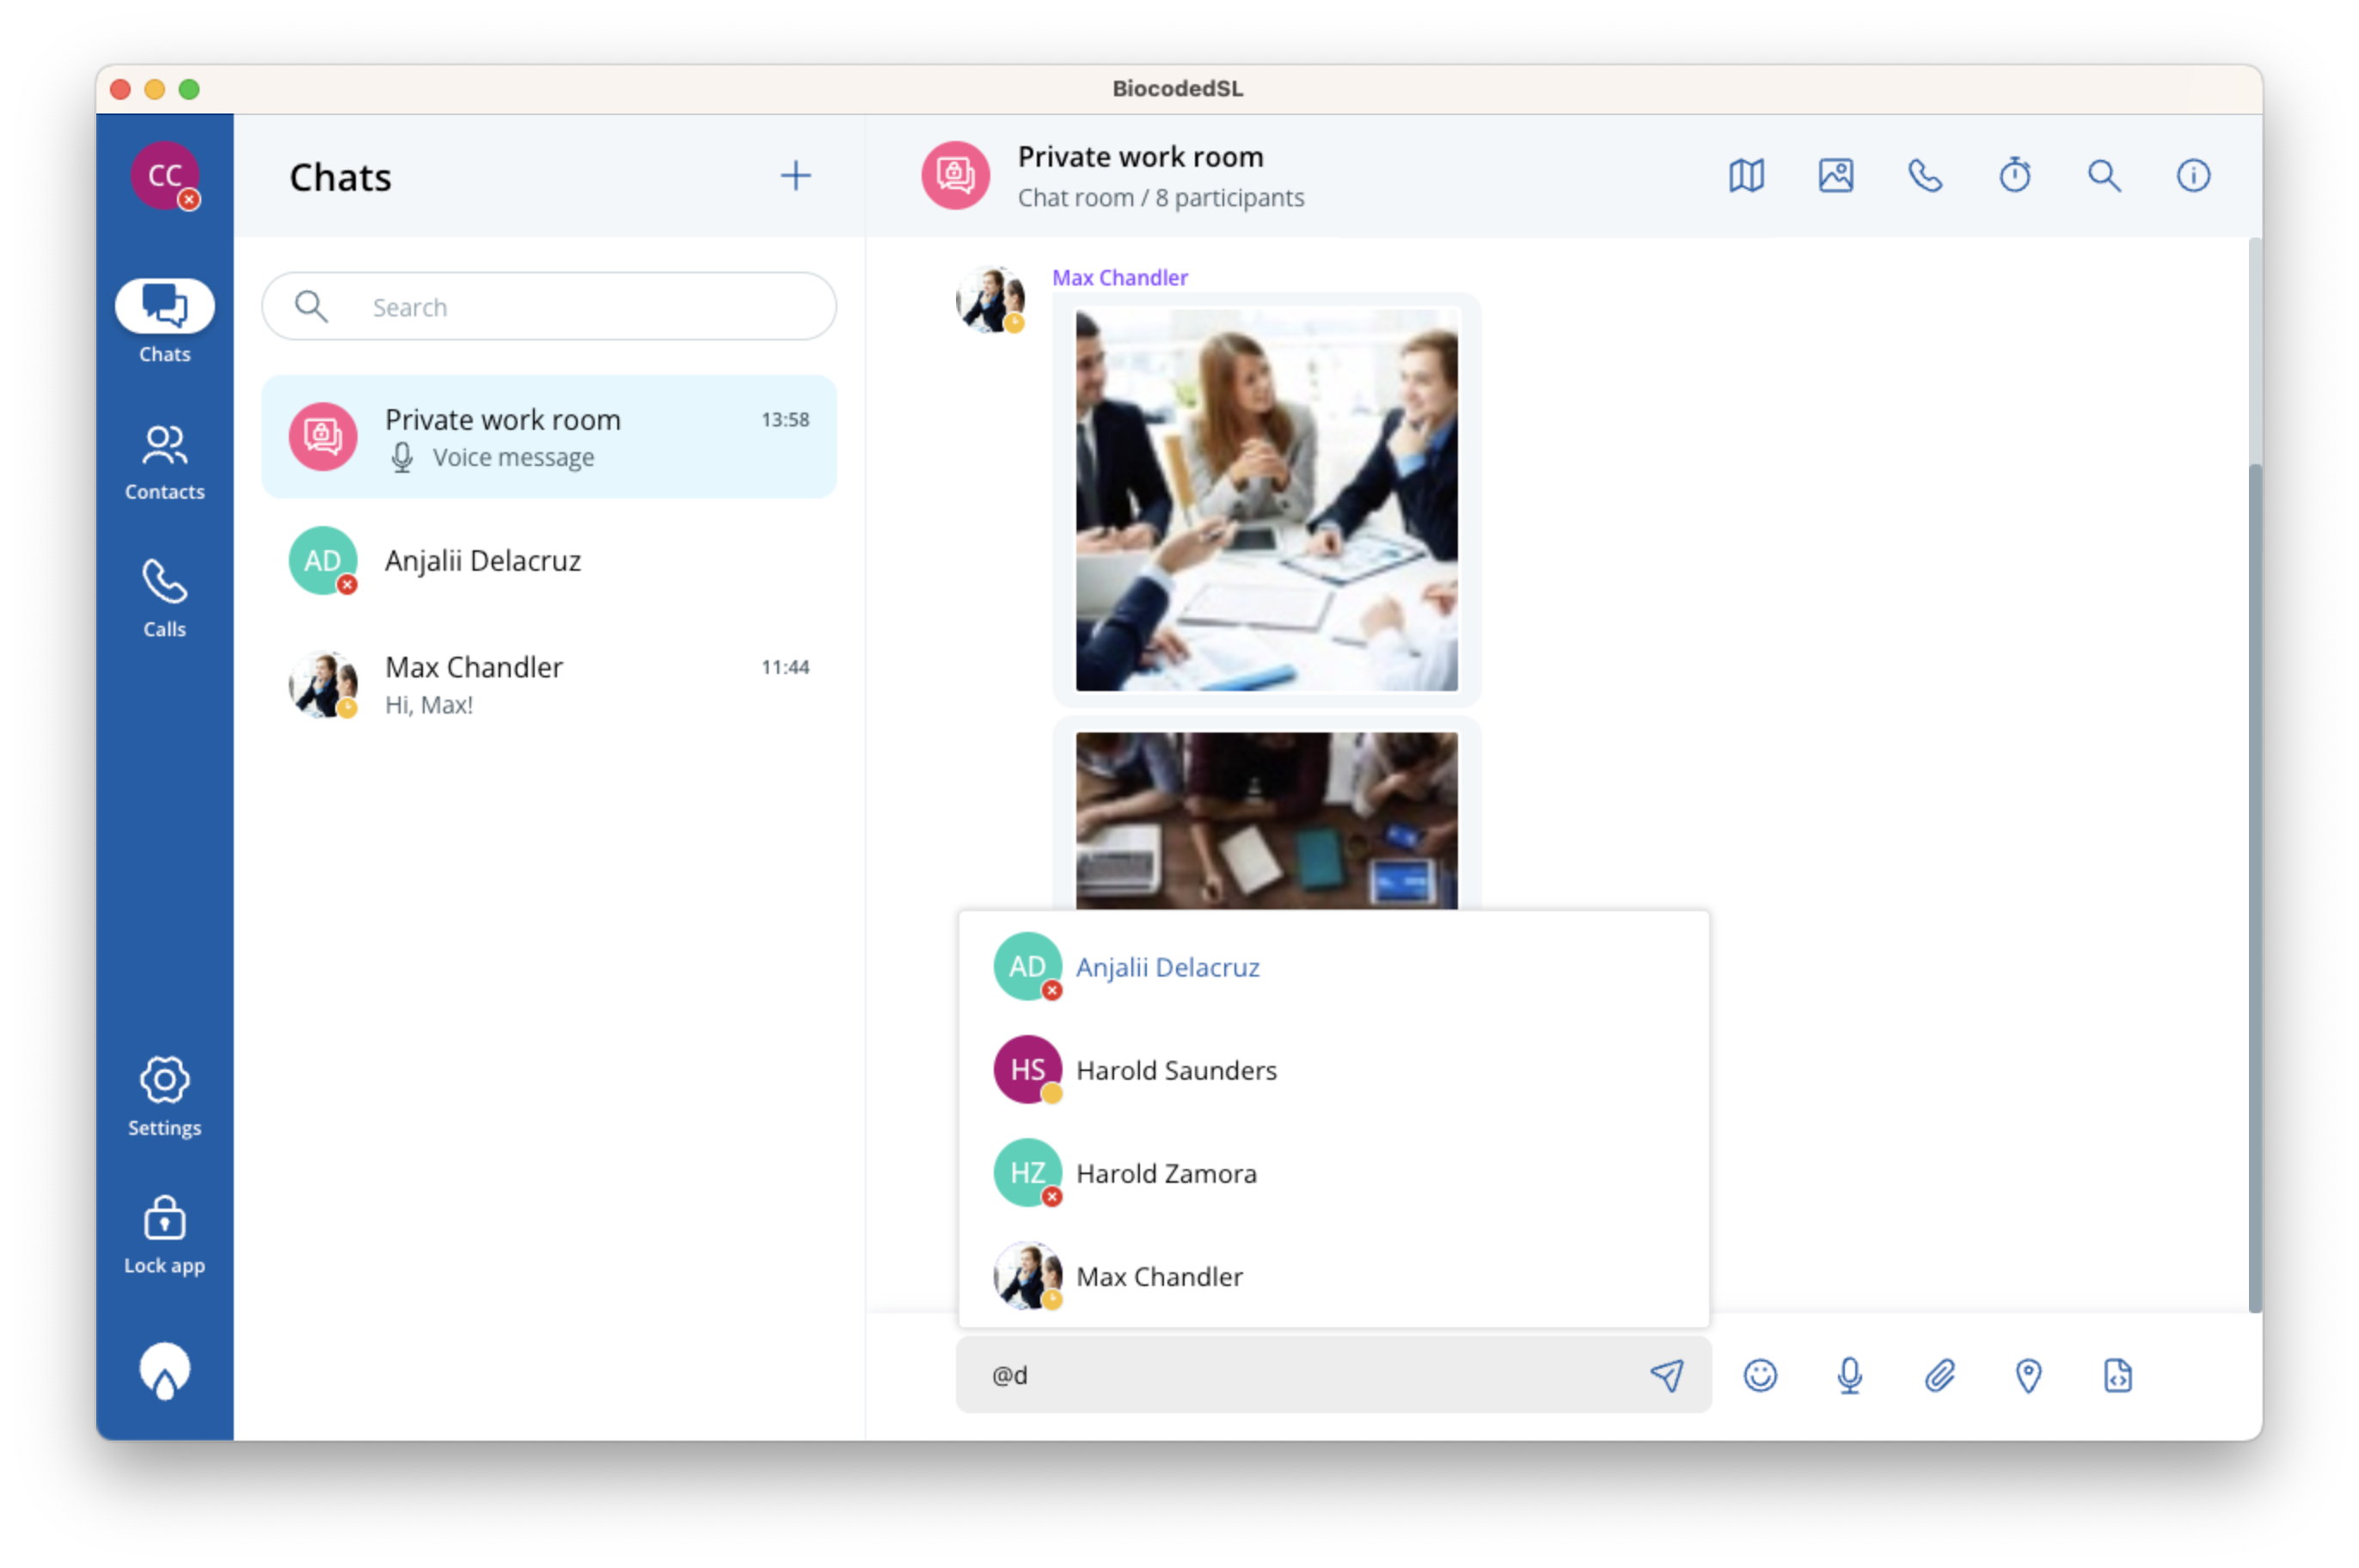
By tapping the smiley face icon, you can add emoji to your message.
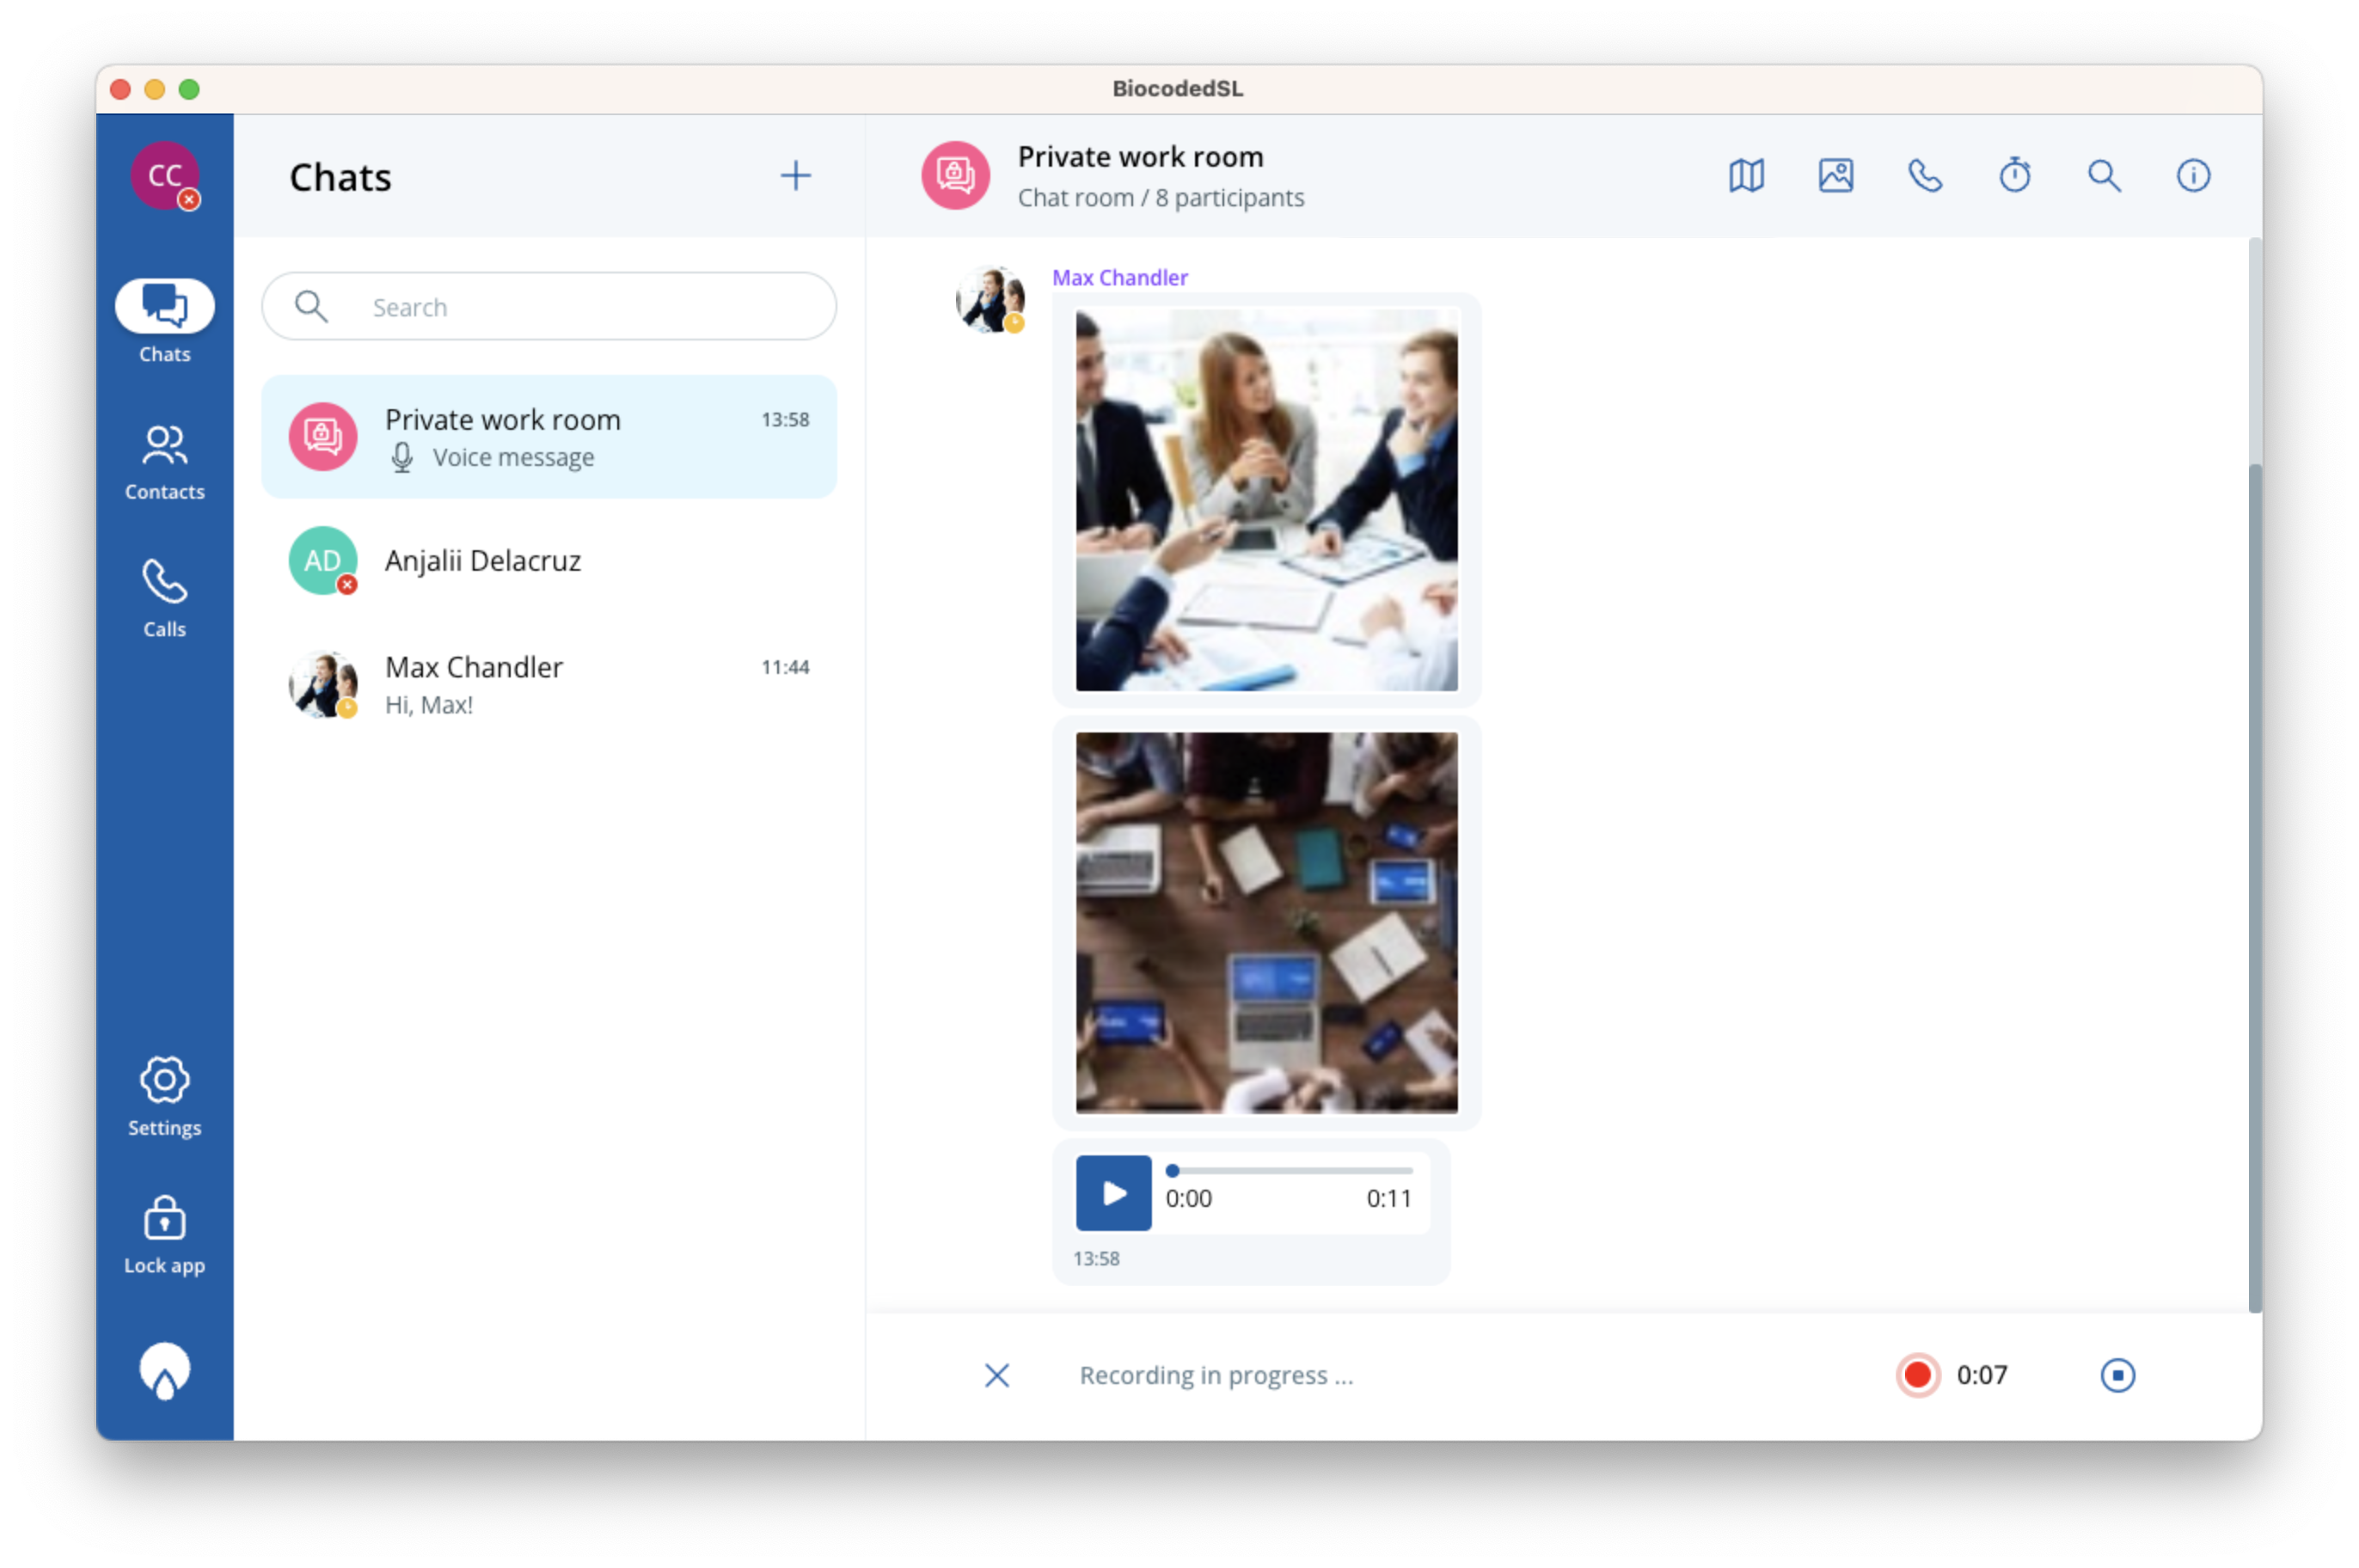
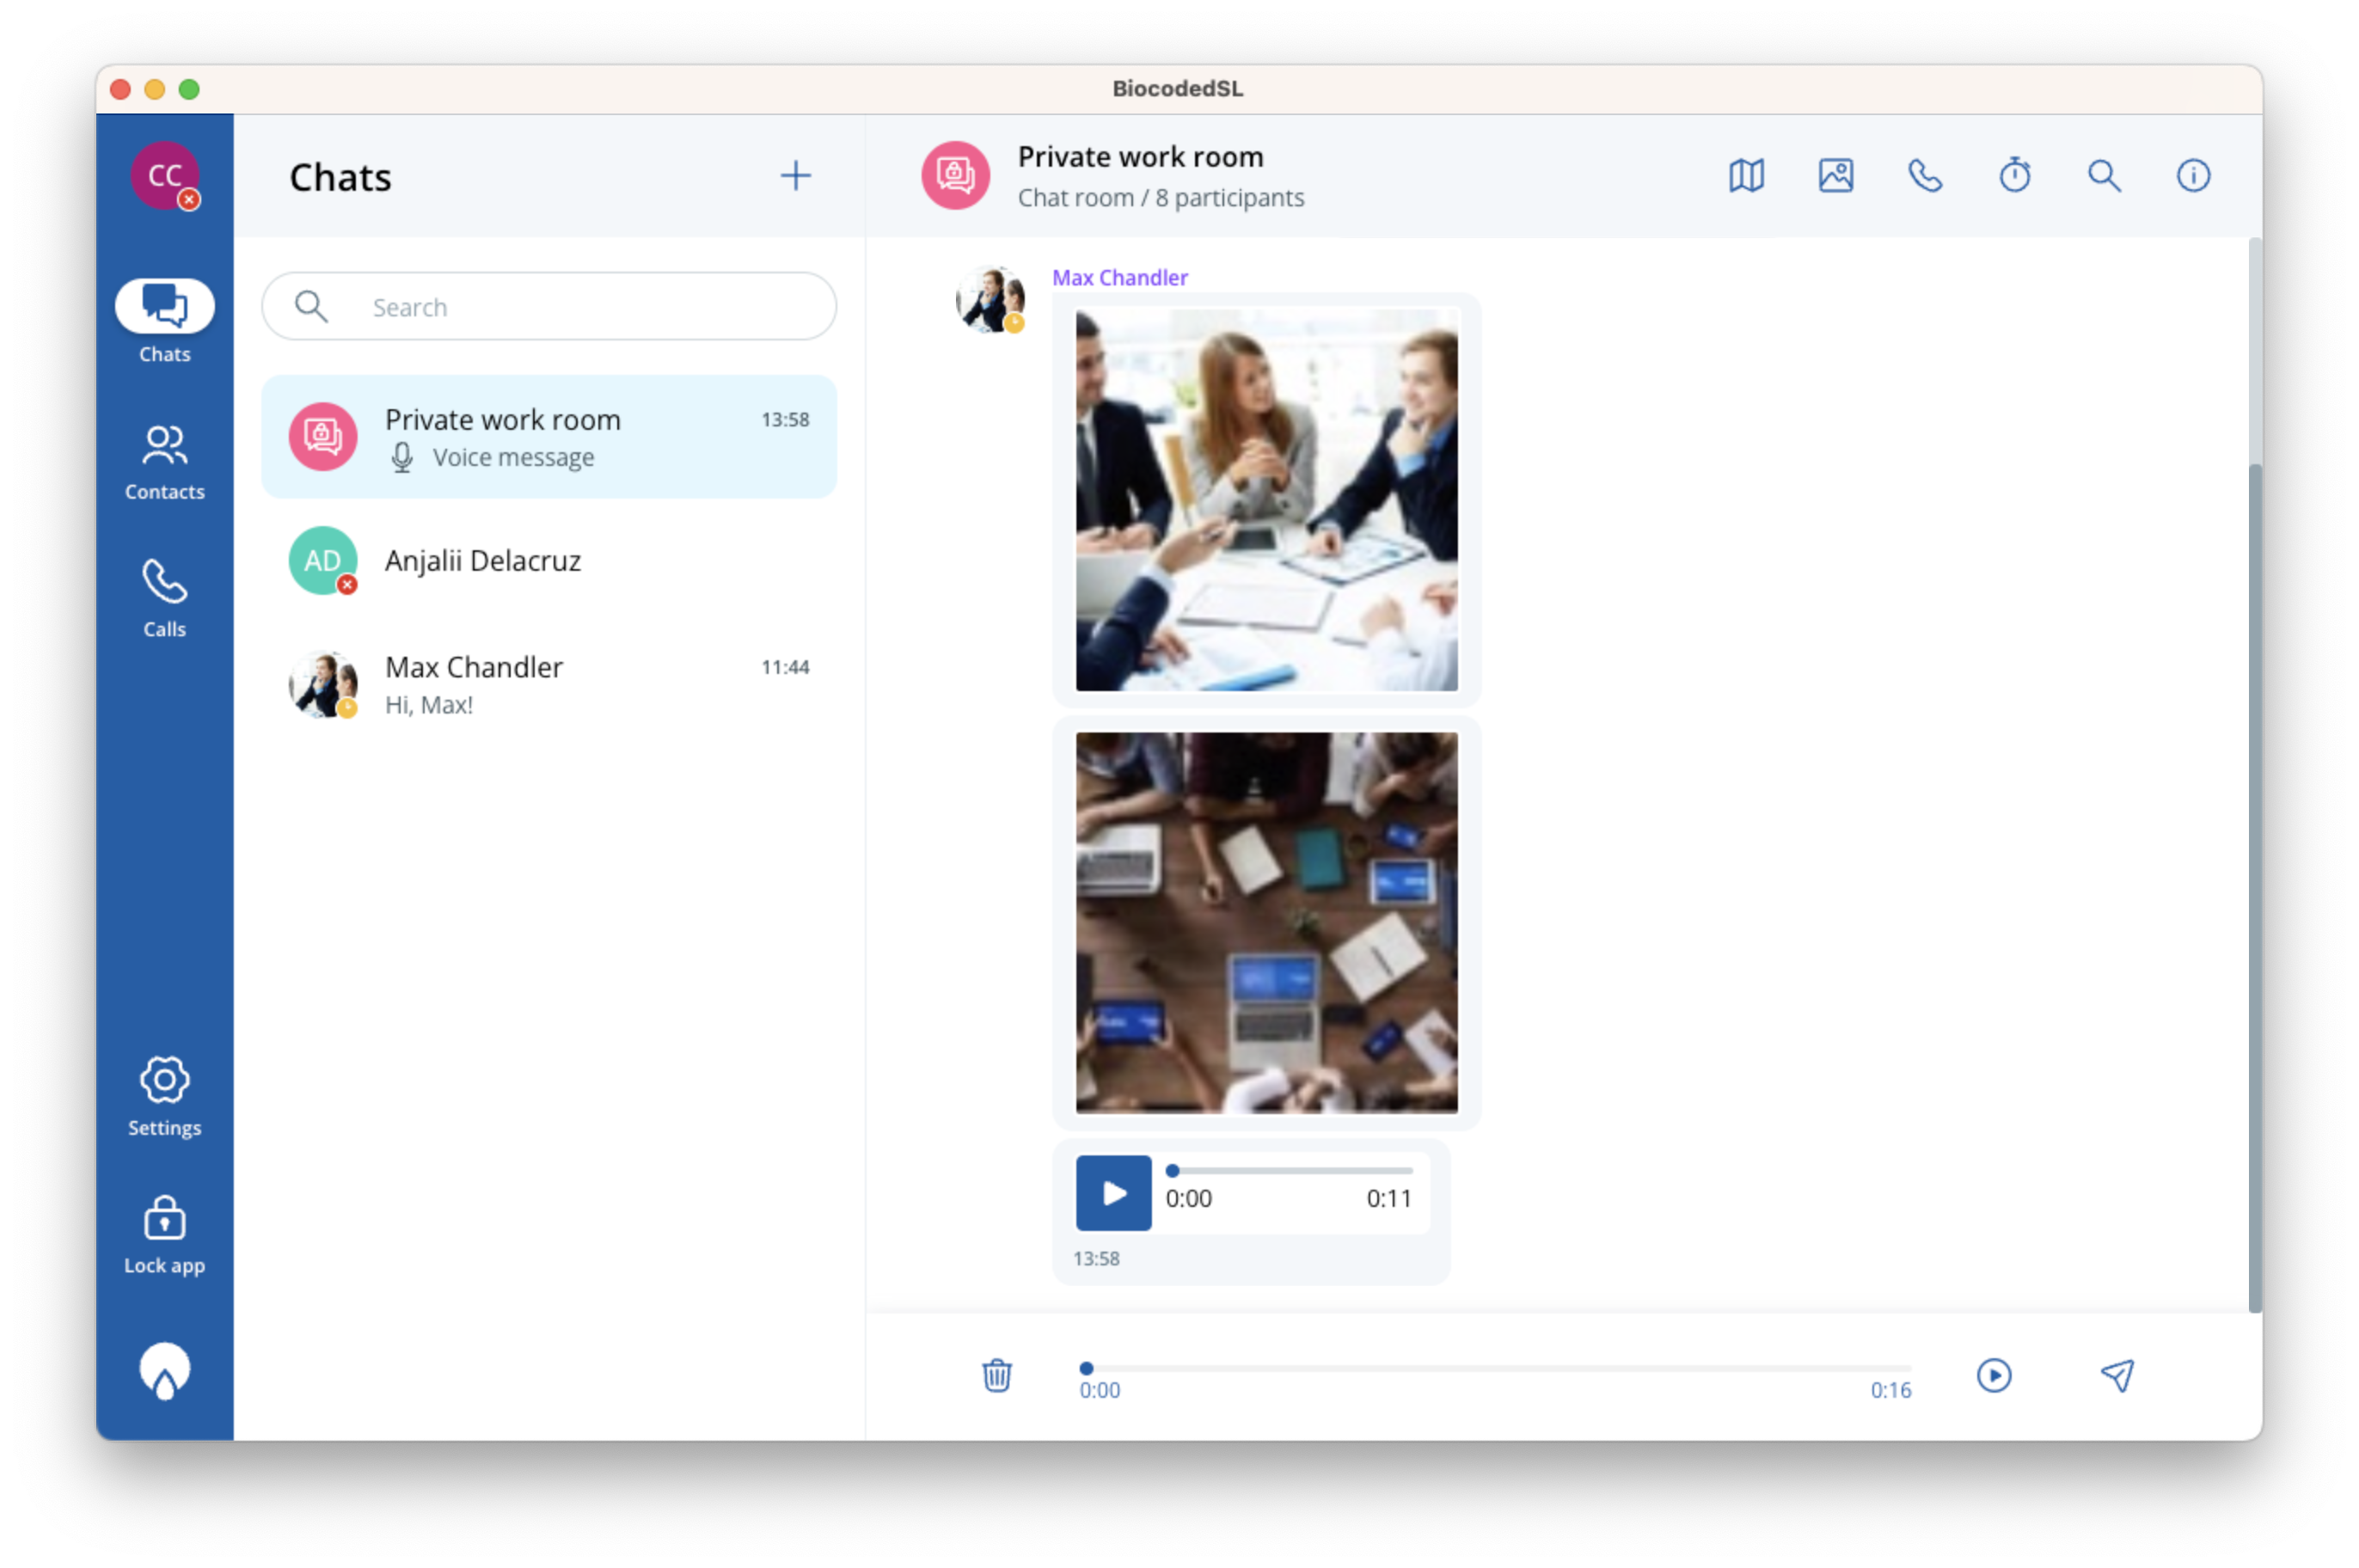
To make a voice recording, press on microphone icon. When you are finished recording, press stop and you will be able to play your recording and send or delete it.
To send a file, click on the file icon, select the file (or multiple files) and press SEND on system popup.
One icon in message inputs box represents a code snippet, which can auto-detect the language of your code to share with participants of chat.
Maps
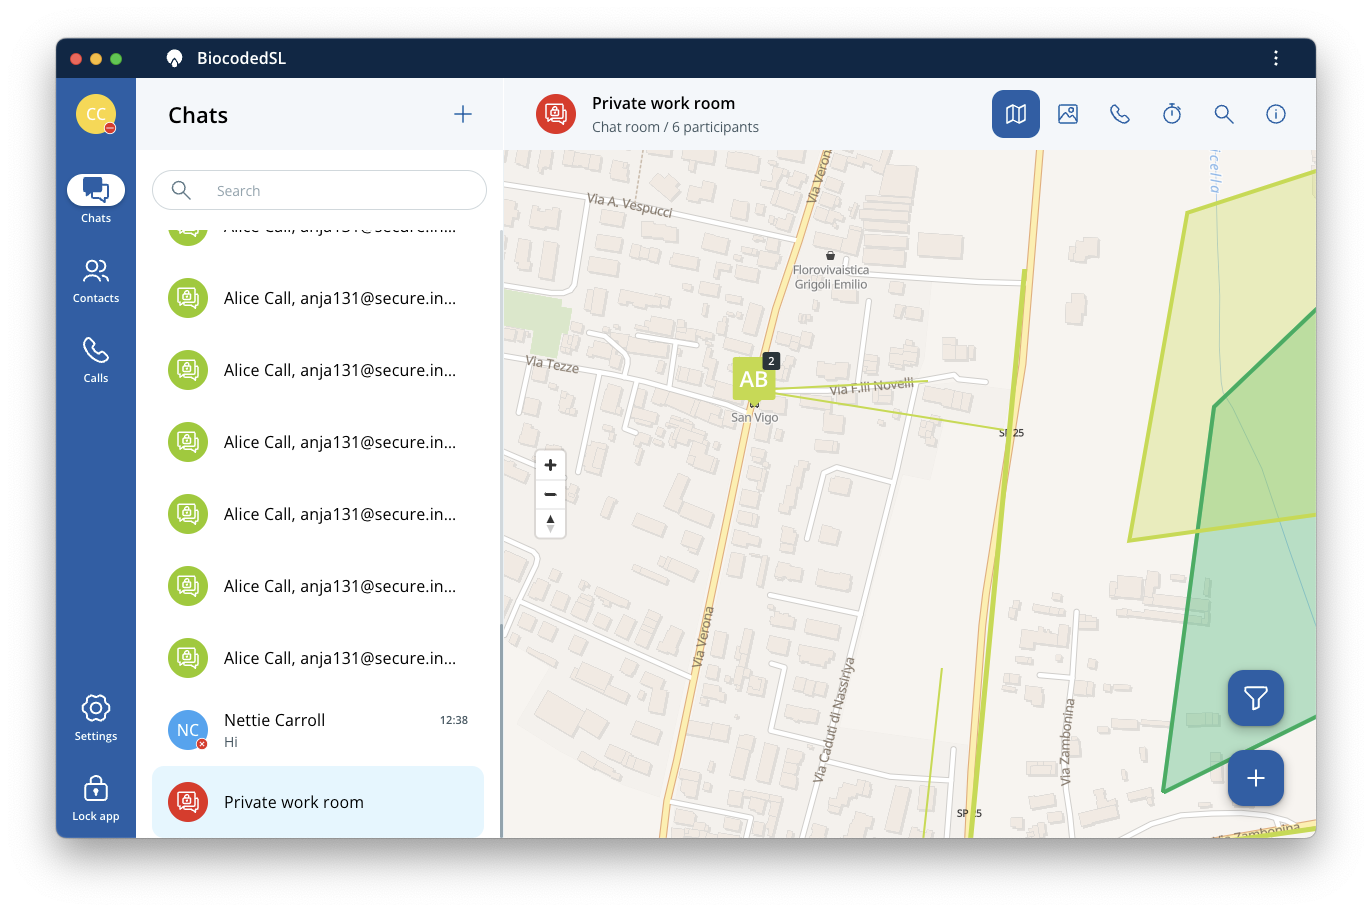
Biocoded supports sharing of different types of location-related data. You explore them by clicking on map or location pin icons.
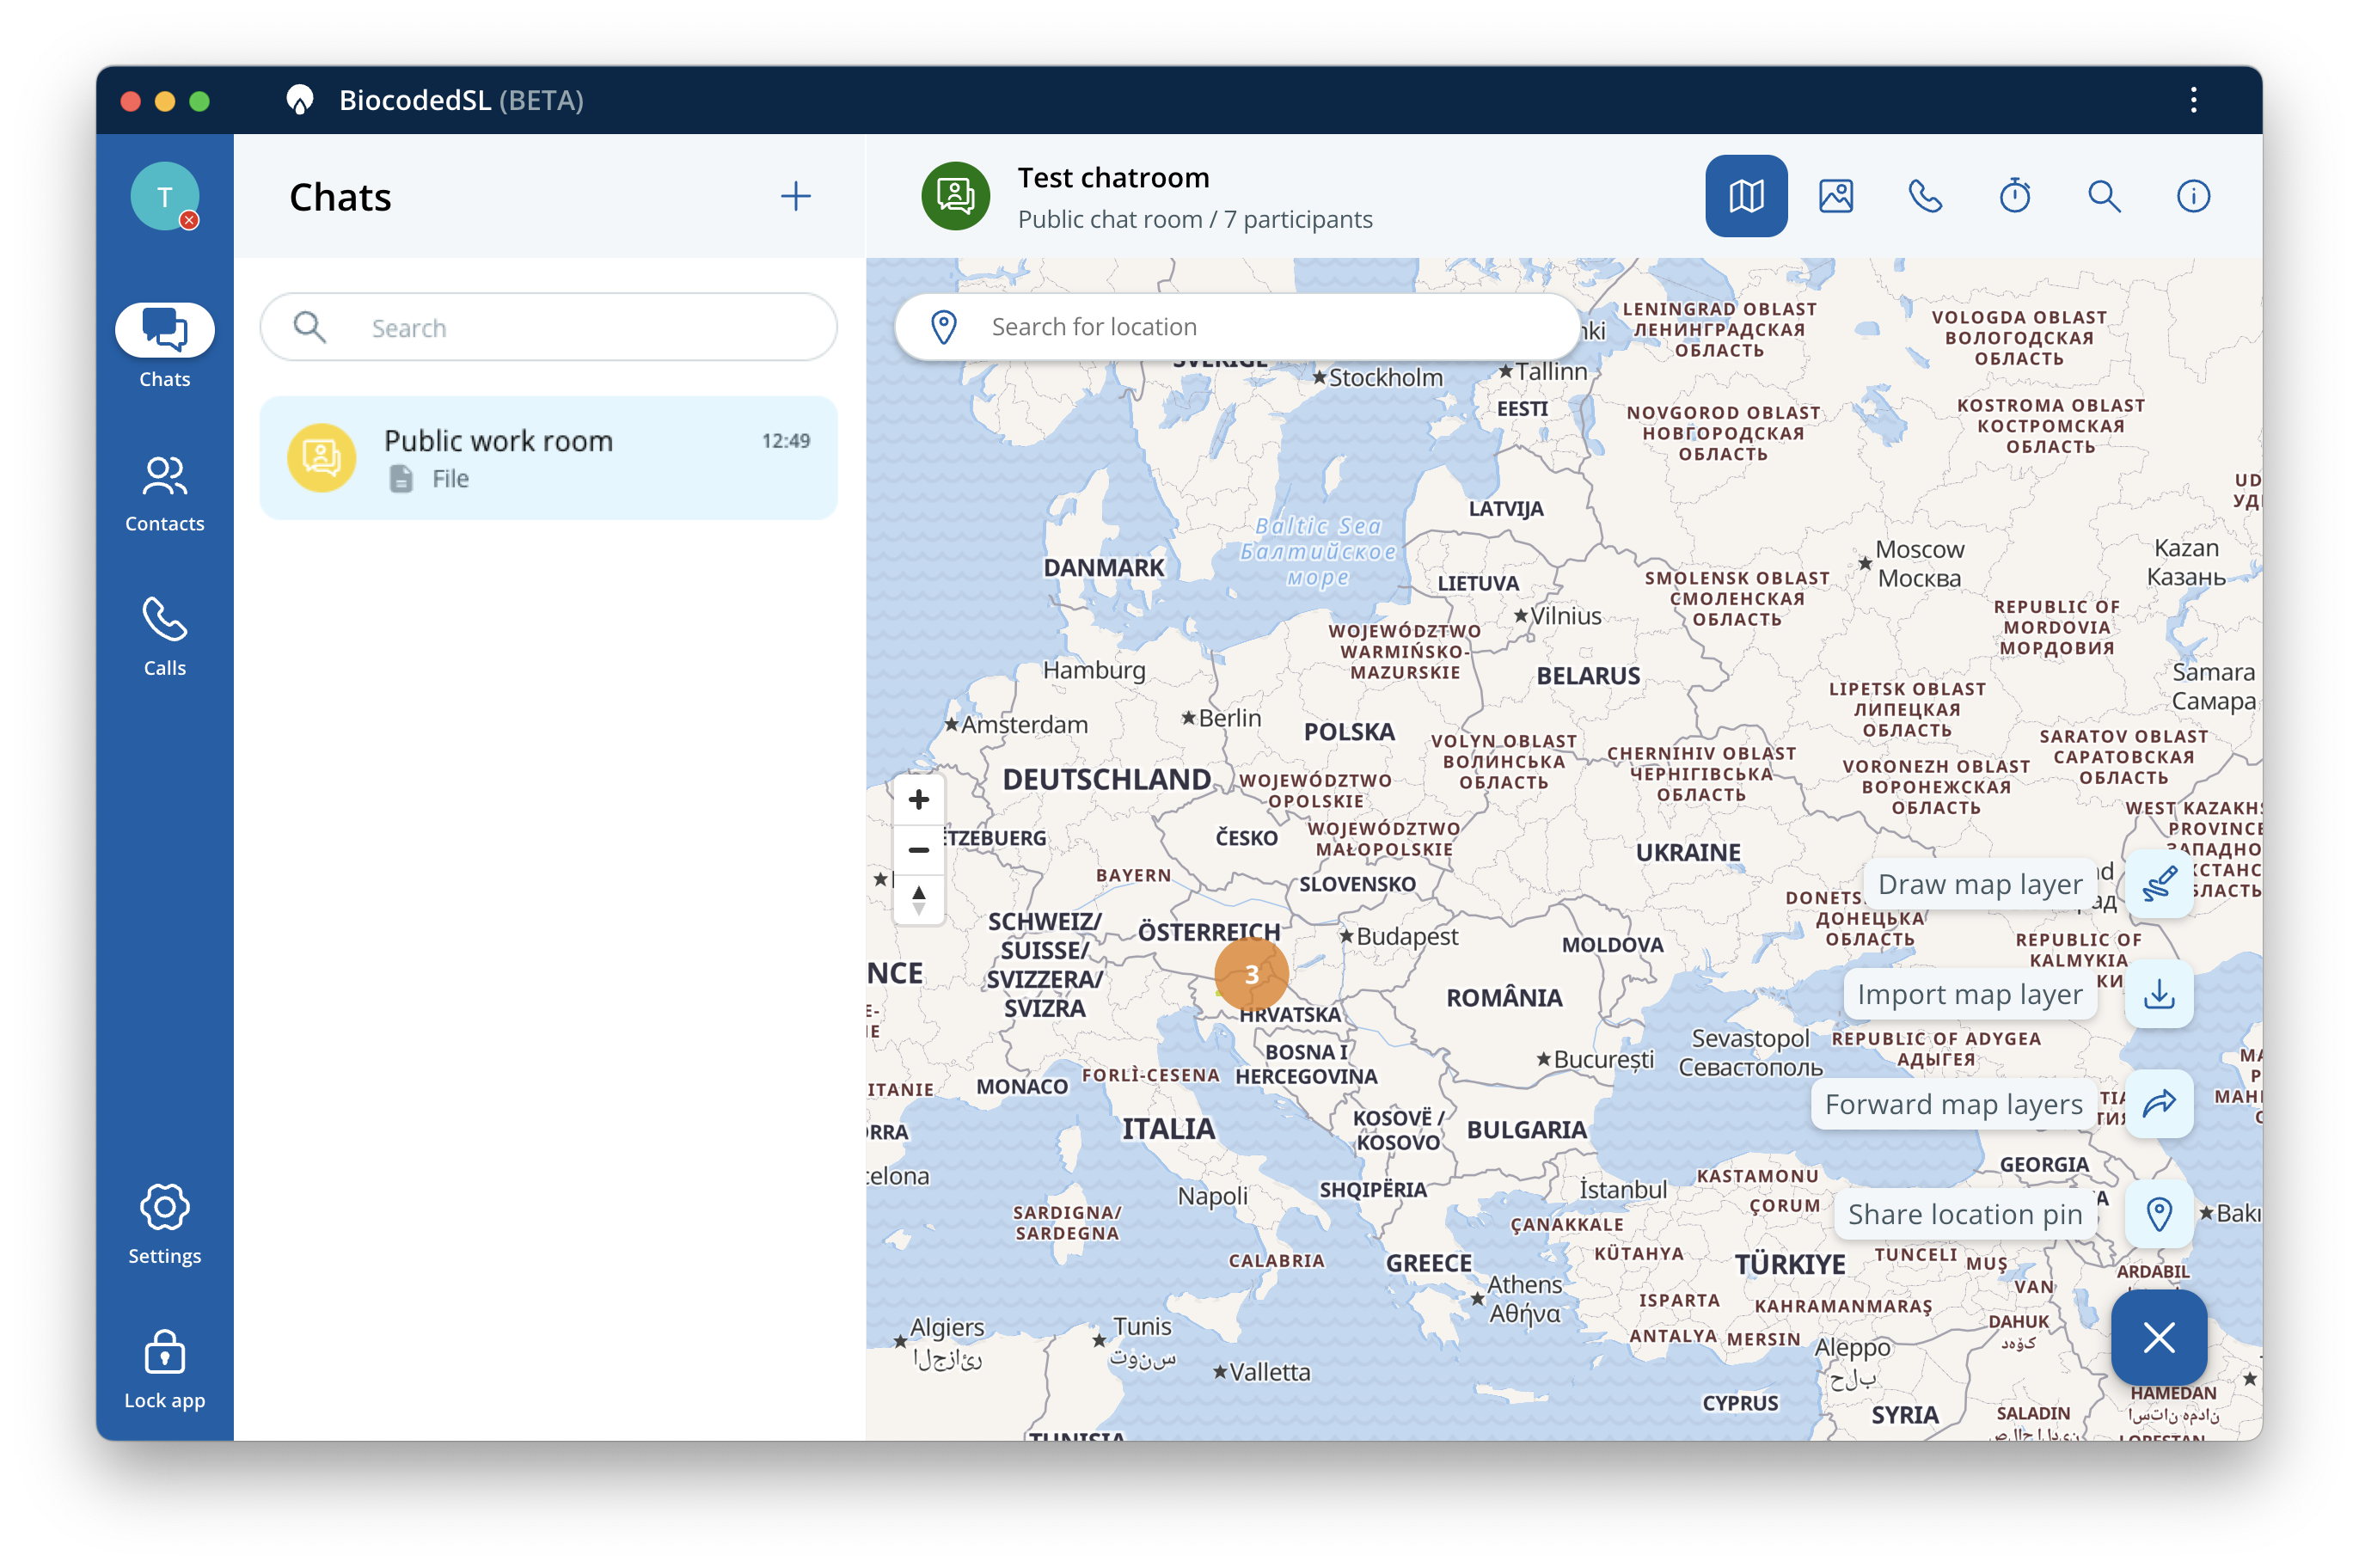
User's shared locations and pins will be shown on map, along with drawn map layers. If user's location is not being updated anymore, it will be marked as offline.
To send a location pin, click on the location pin icon and select Share location pin.
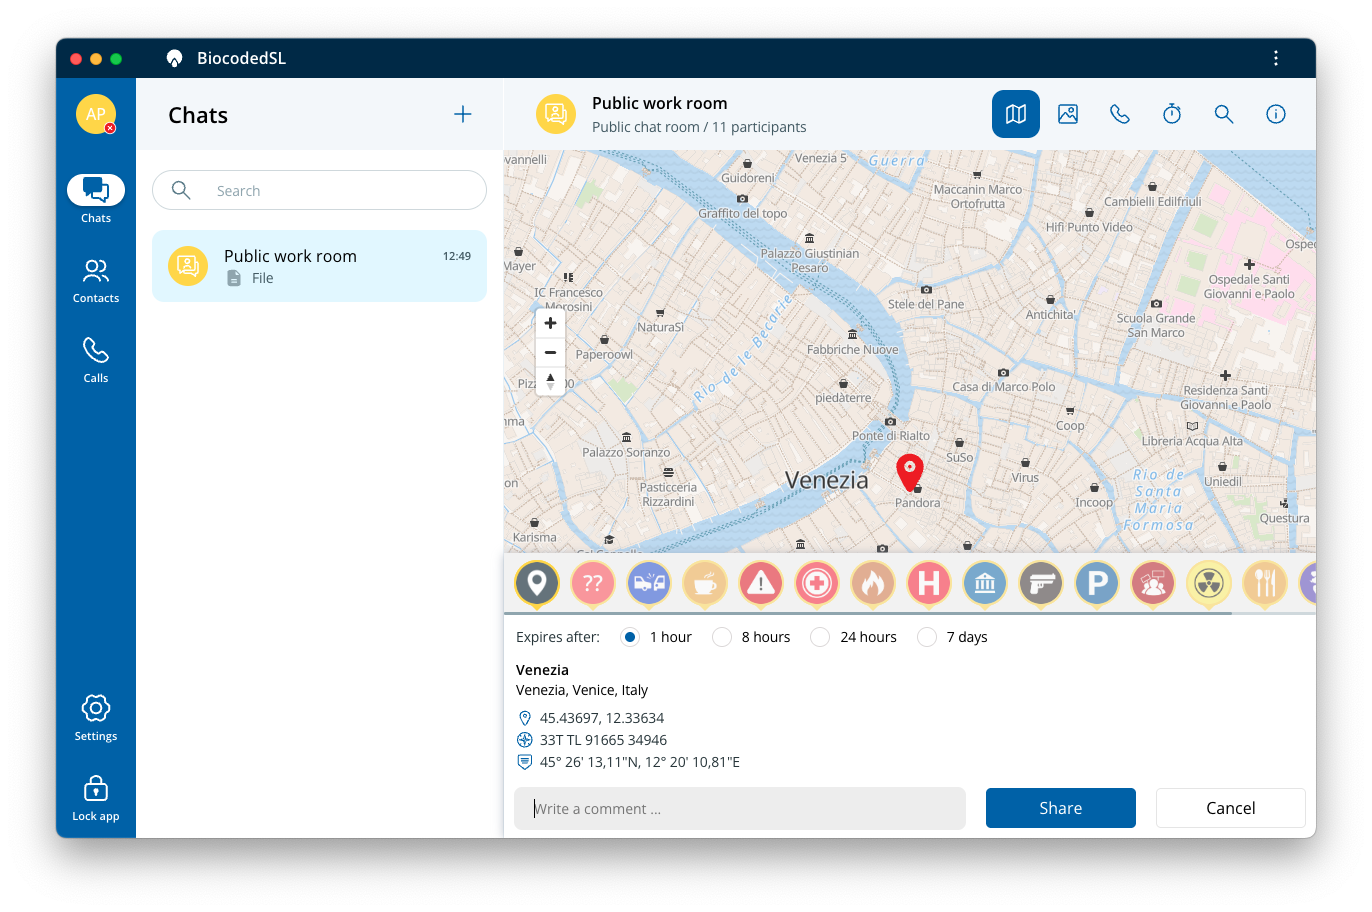
Now drag the map and scroll to zoom in/out to adjust the coordinates and press SHARE. You can also select an icon, a description for your location pin and set an expiration time.
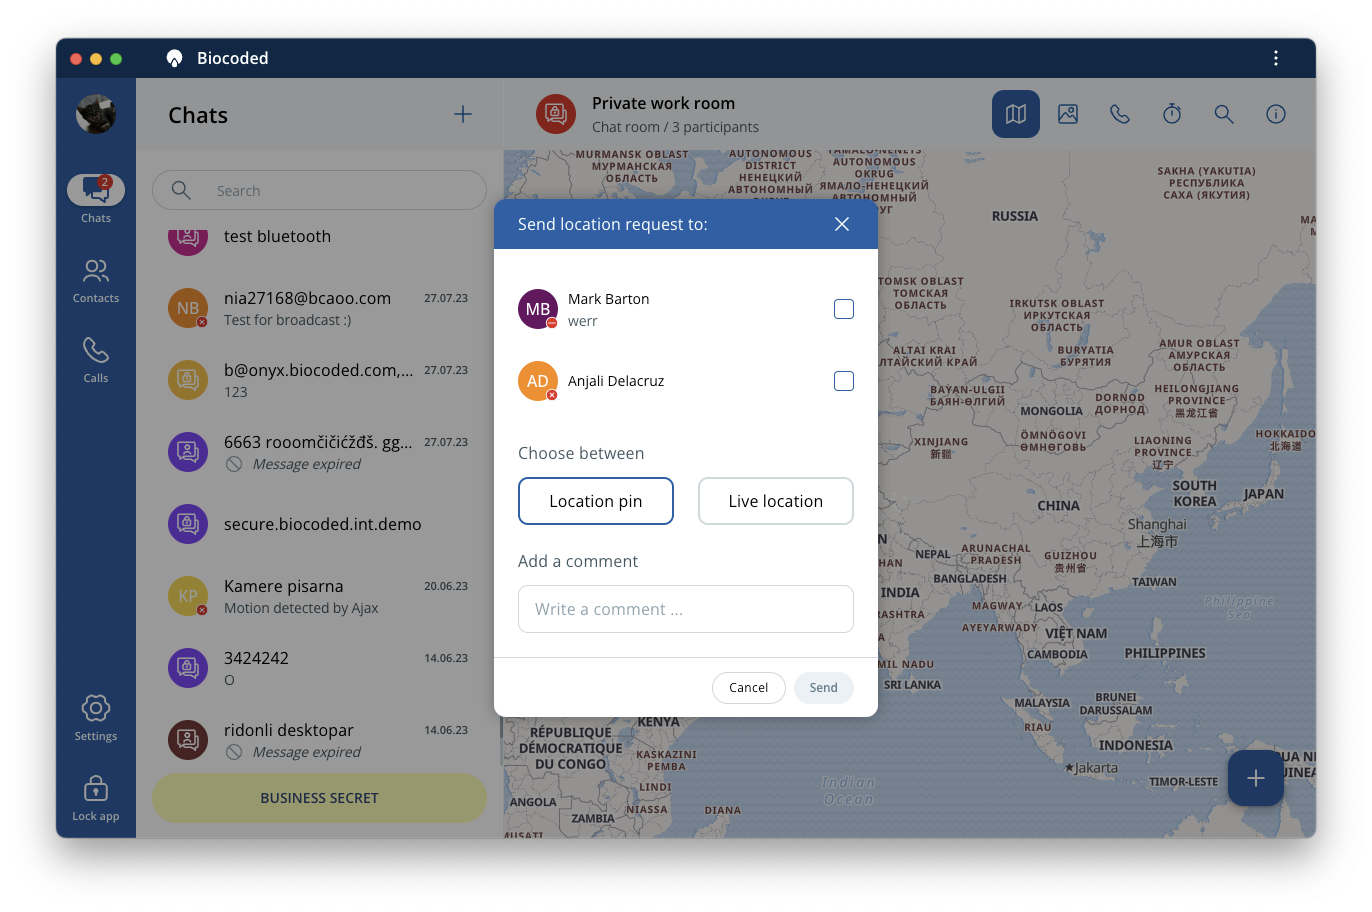
To request the location of chat participants, click on the map icon, select + and Request location, choose participants and location type (location pin or live location), add a comment (optional) and press Send.
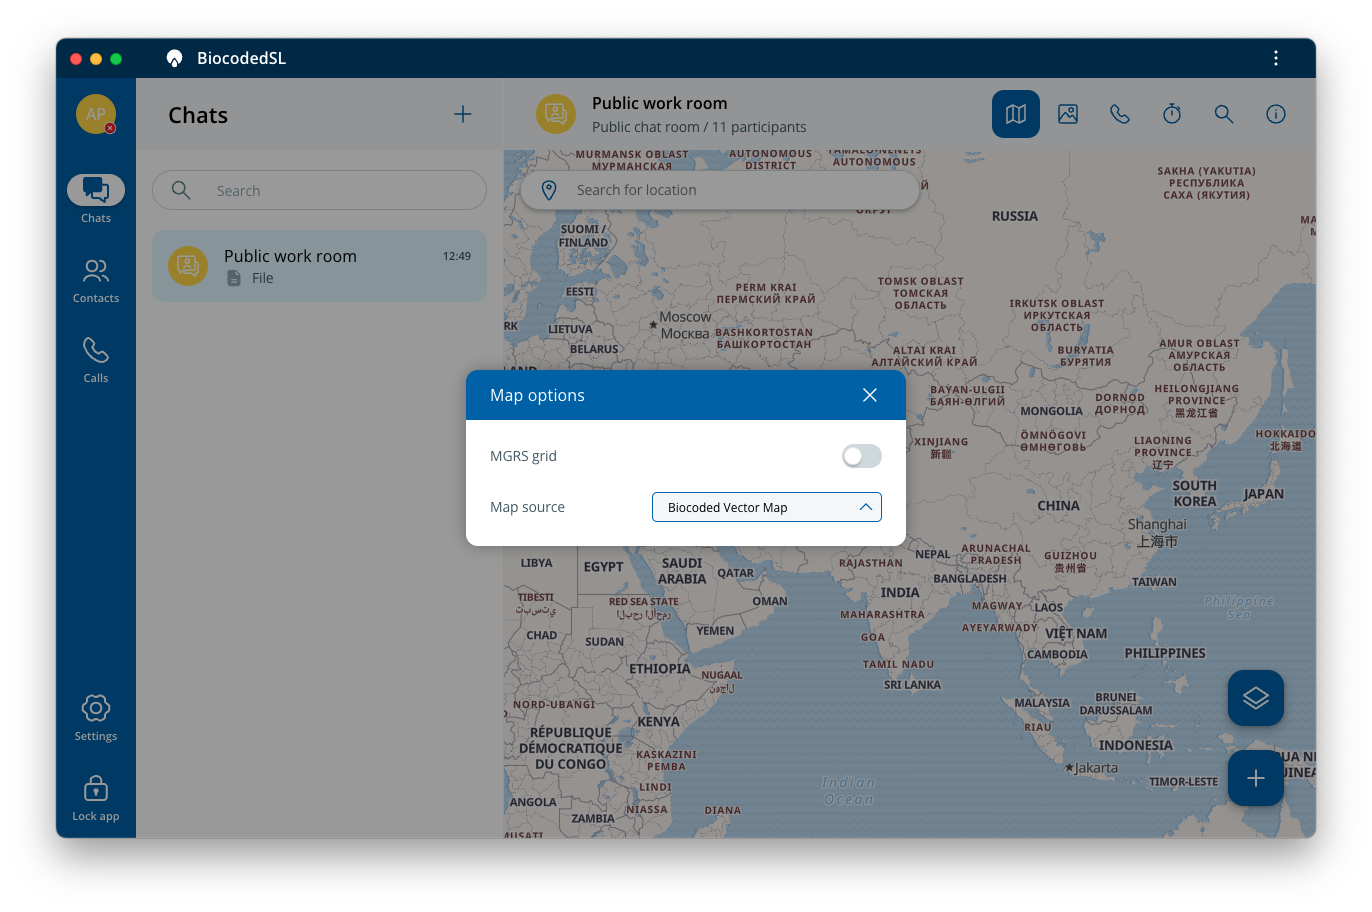
To choose between different map types on map screen, select map options icon. Here you can turn on MGRS grid and choose between available map sources.
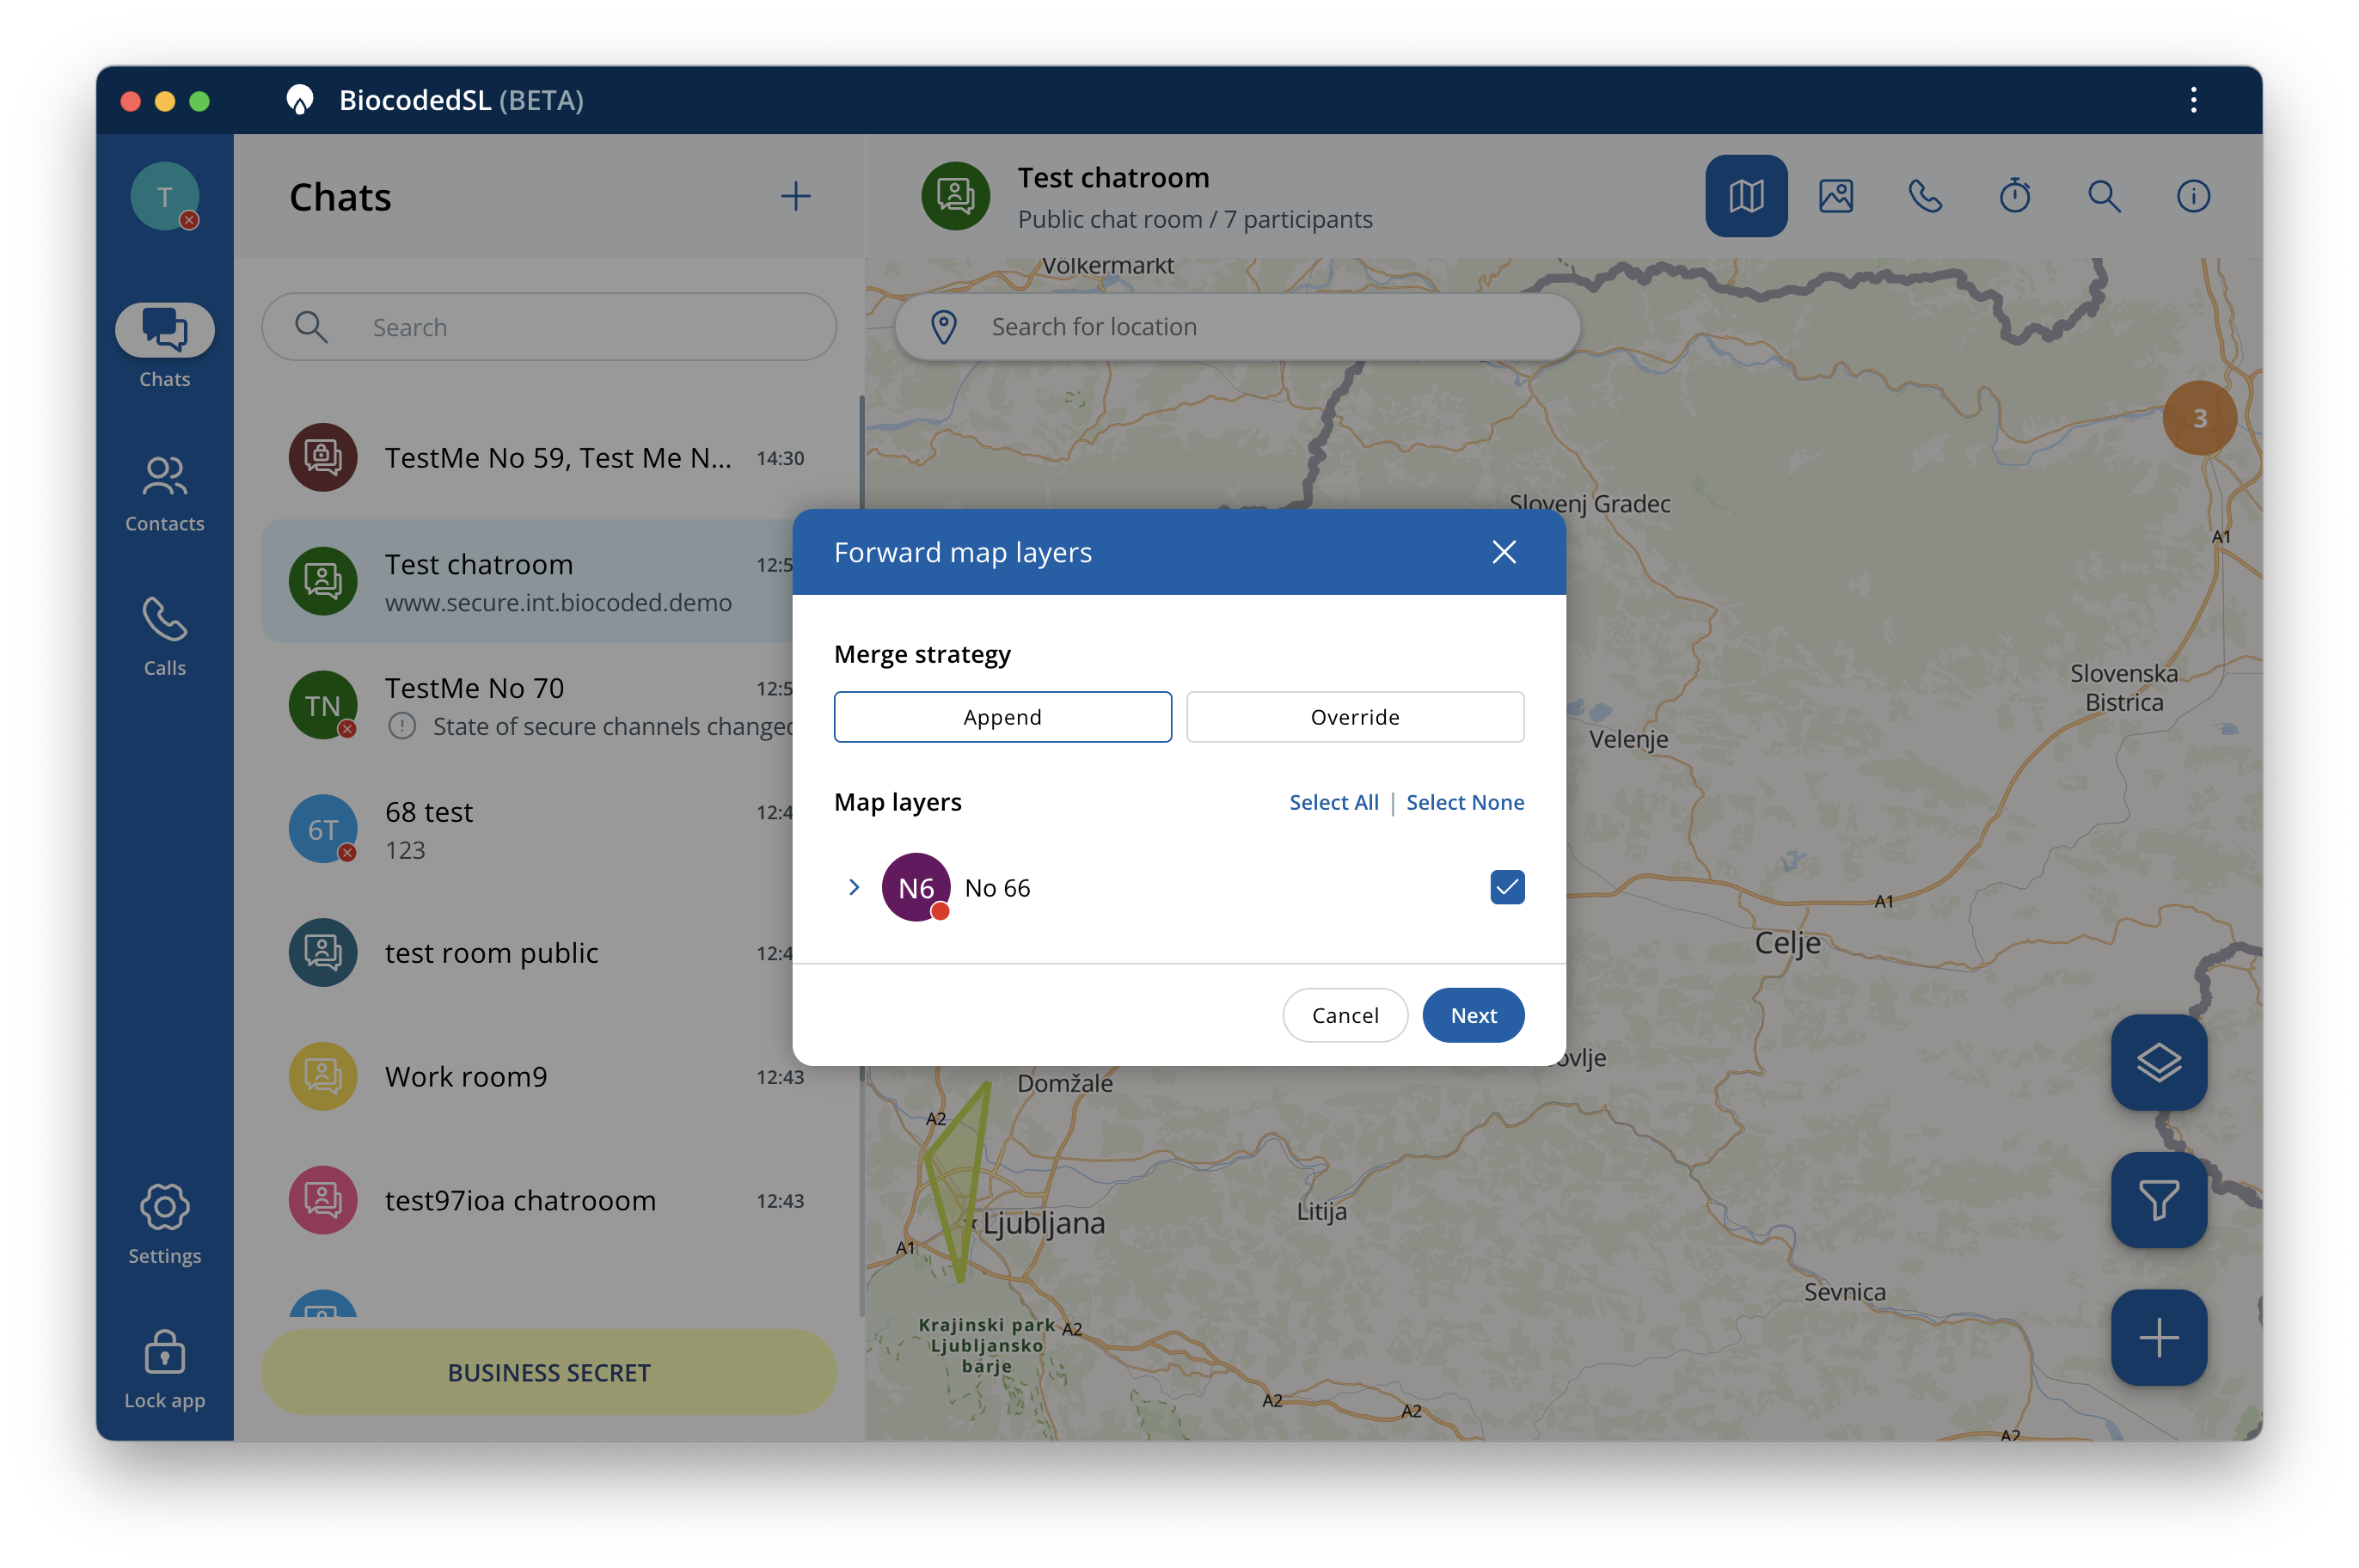
To forward map layers to another chat, select + and Forward map layers. Select the users and their map markers you wish to forward. You can choose between:
- Append - Forward & merge with existing,
- Override - Forward & replace existing.
Now press Next and select the destination chat(s). Press Forward to confirm.
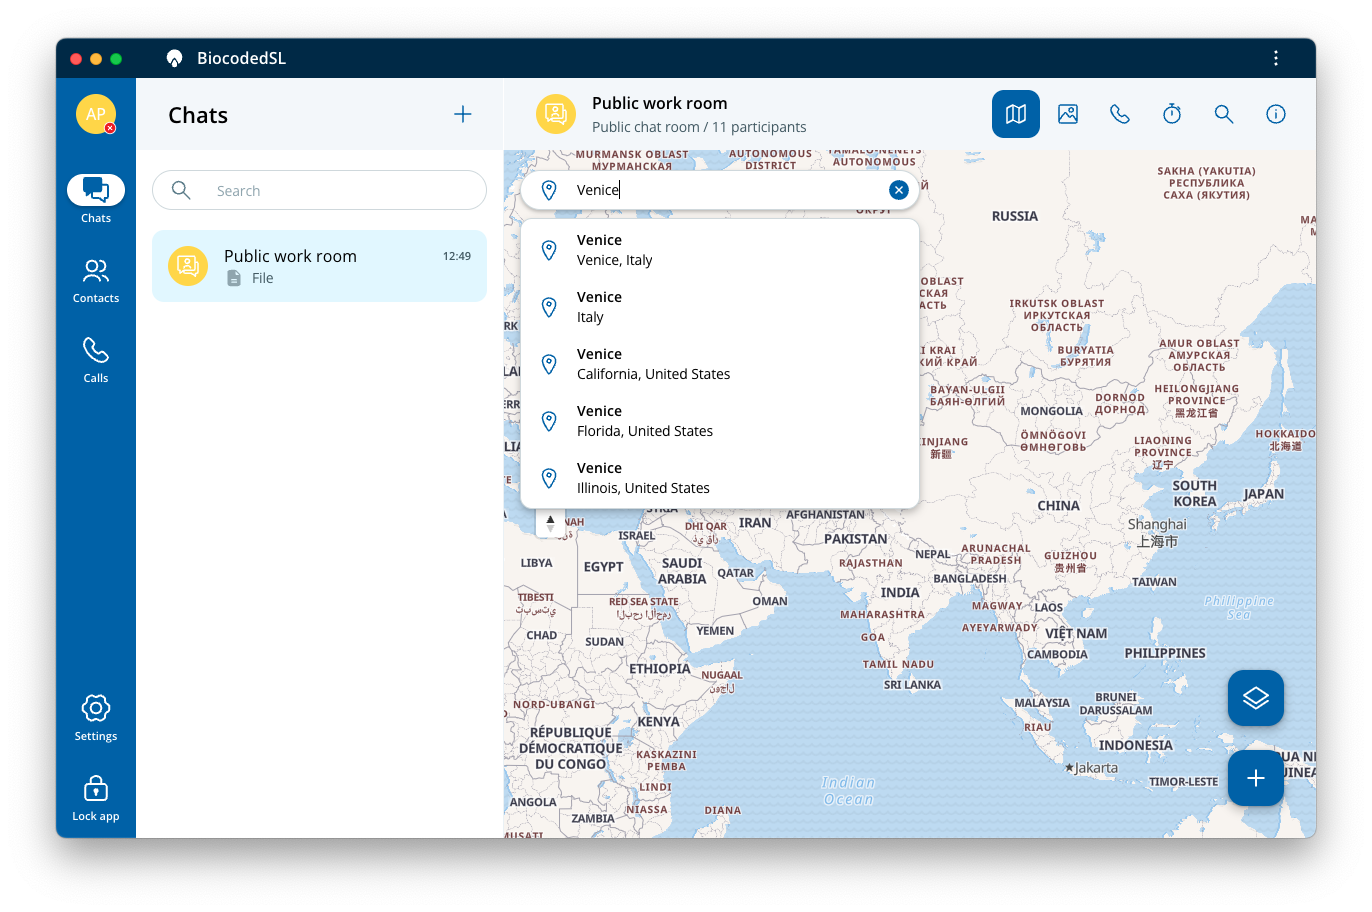
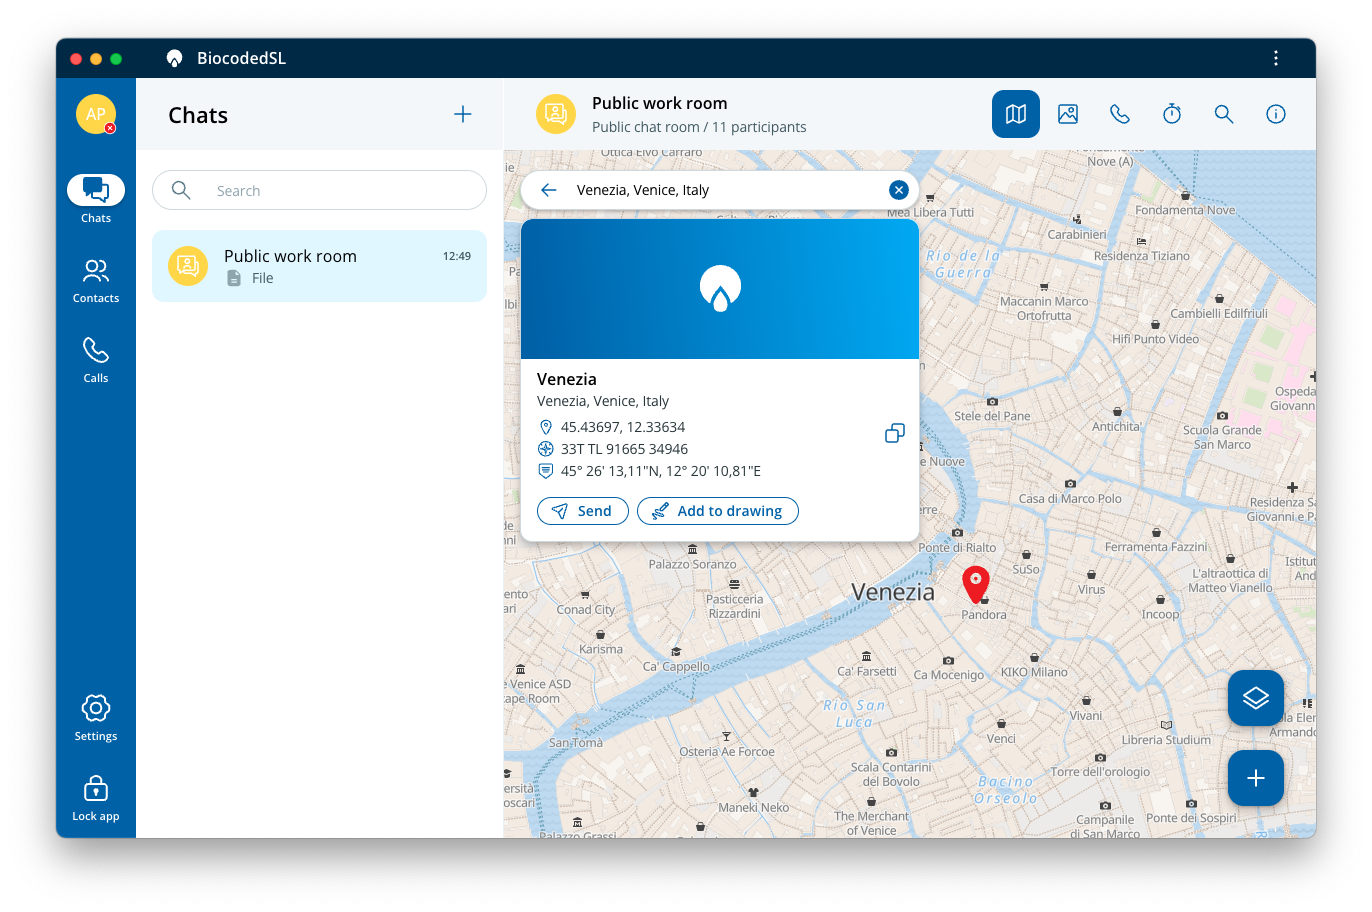
If enabled on your server, you can use the map search functionality by typing in an address, map layer marker label (assigned when editing map layers) and location coordinates (if enabled on server). A list of suggestions appears and if you click on one, it will be shown on screen along with some additional data, with the options to send to chat and to add to your map layer.
Map layers
To draw a map layer, select + and Draw map layer.
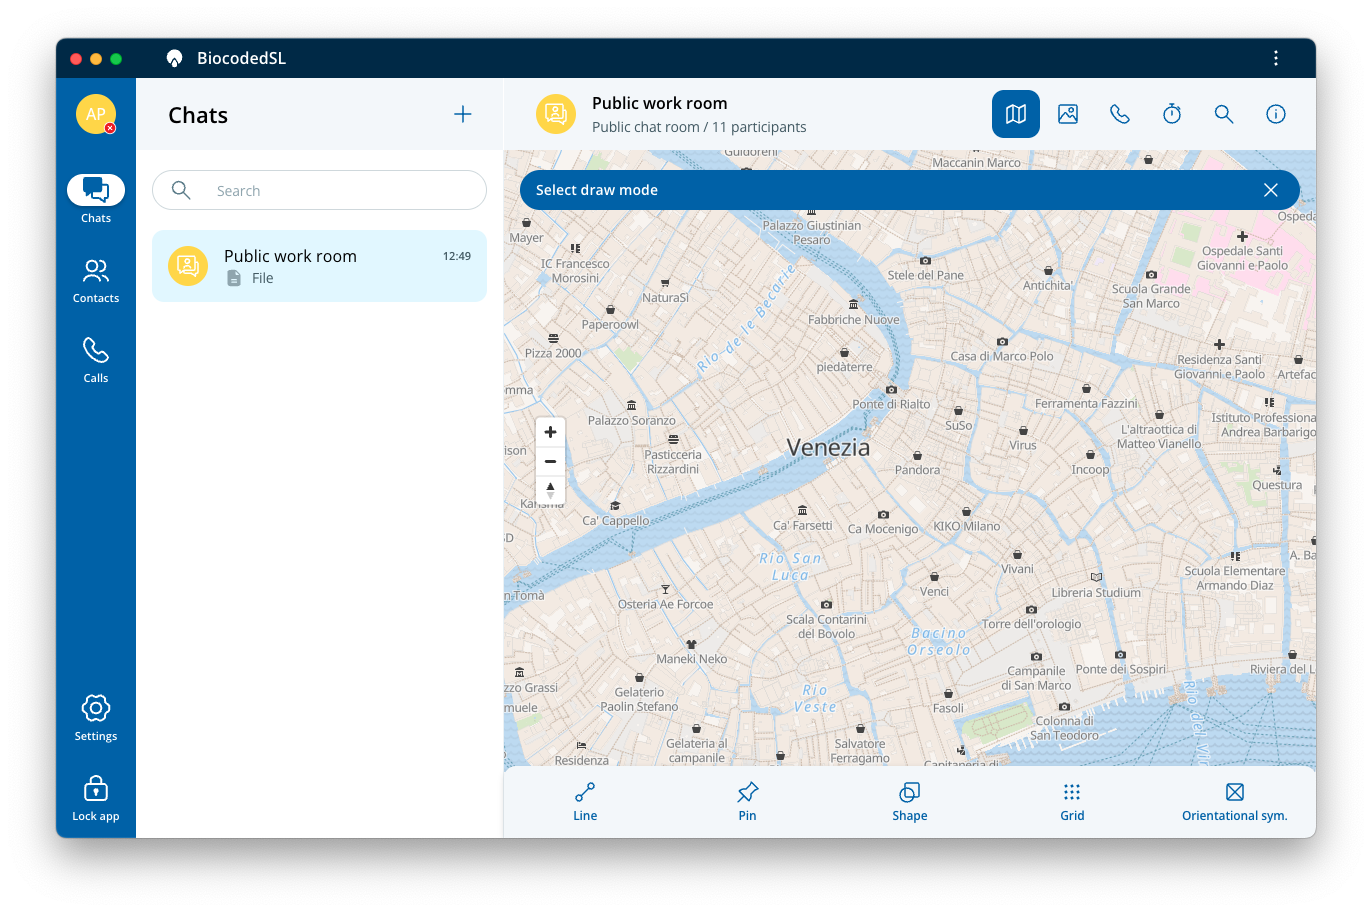
When drawing a map layer, you can choose to add different types of markers: line, shape, pin, grid and orientational symbol.
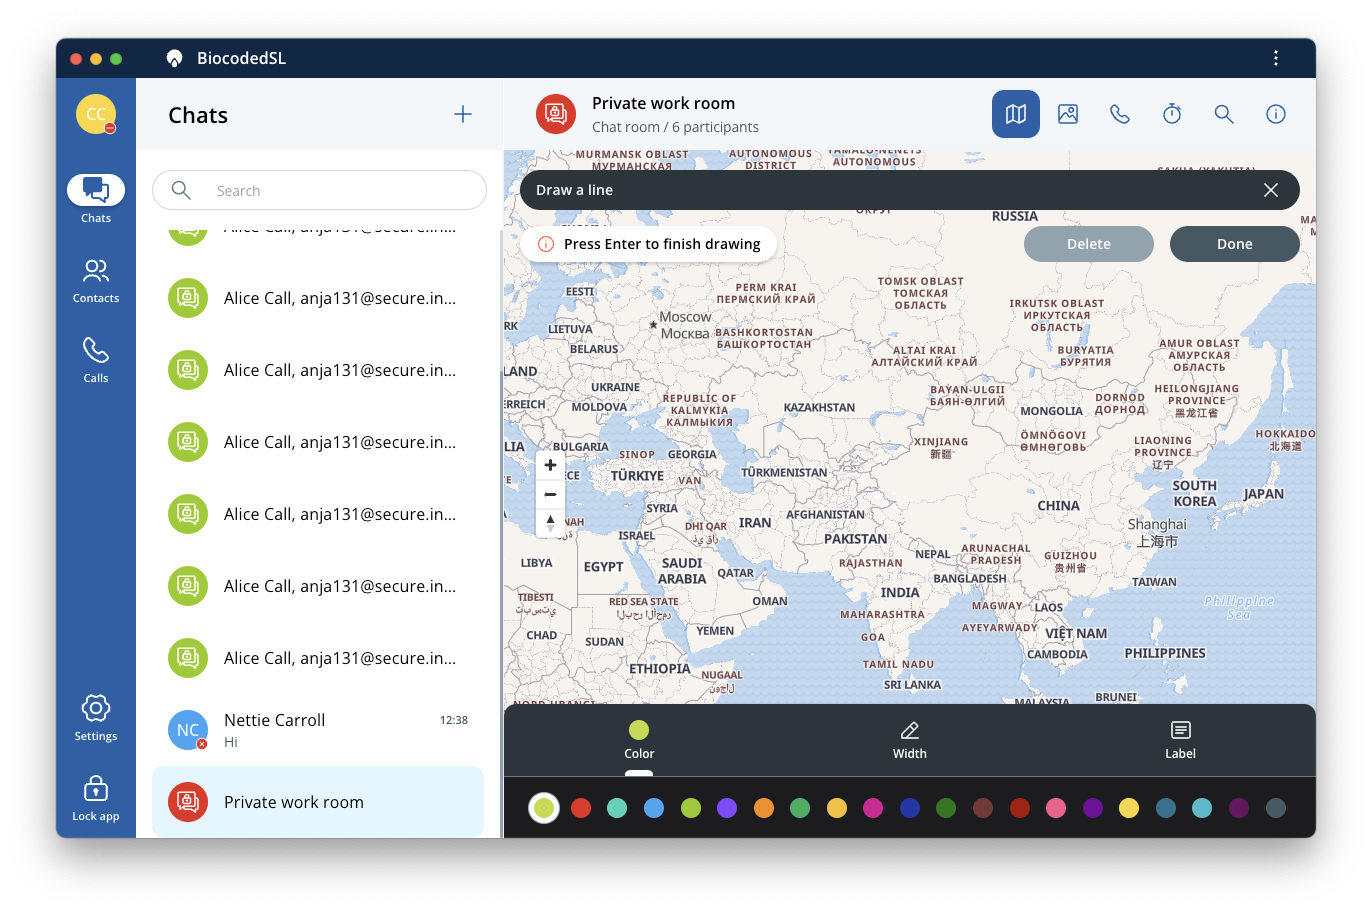
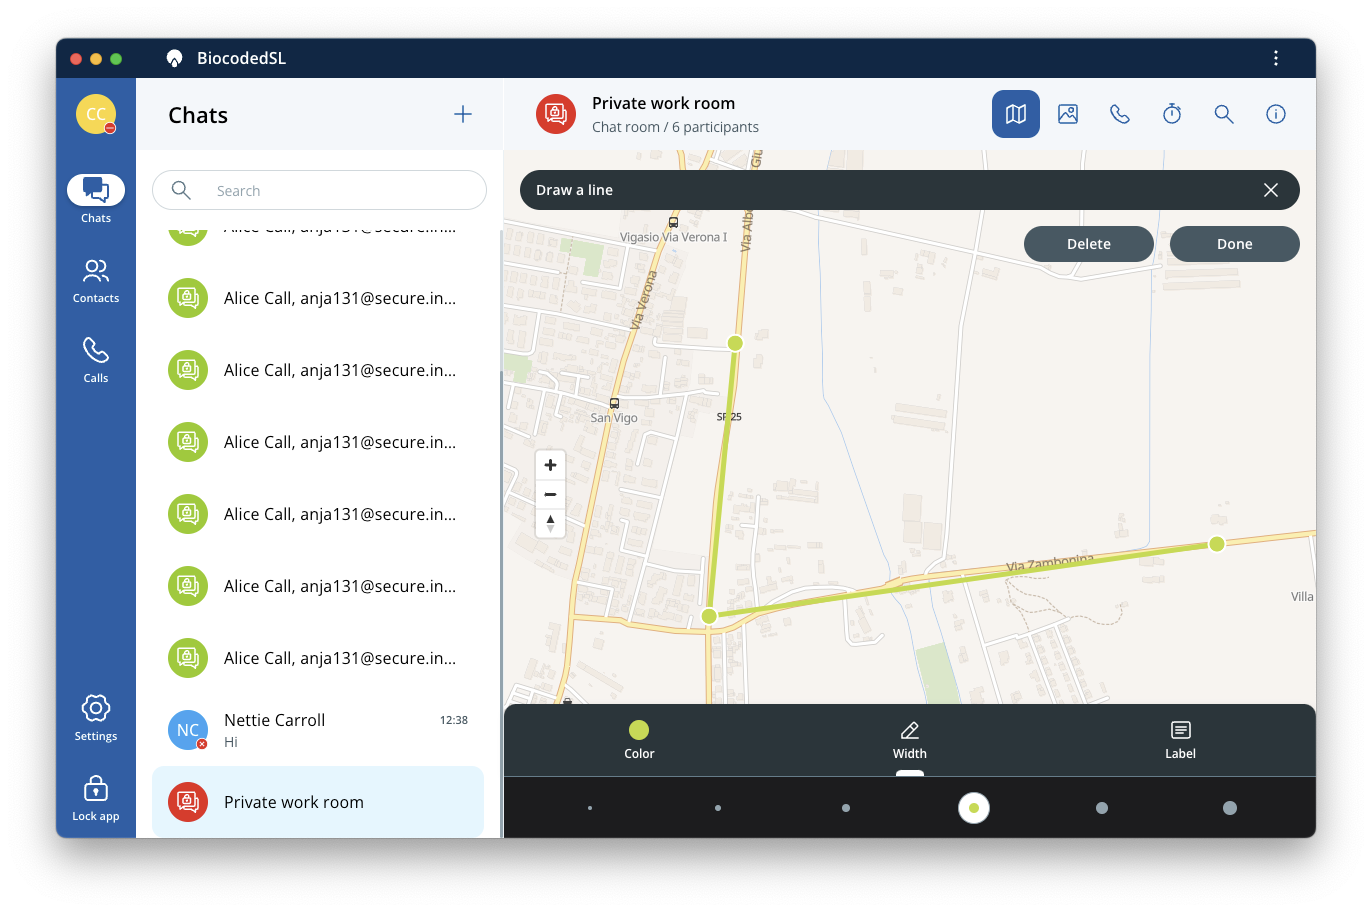
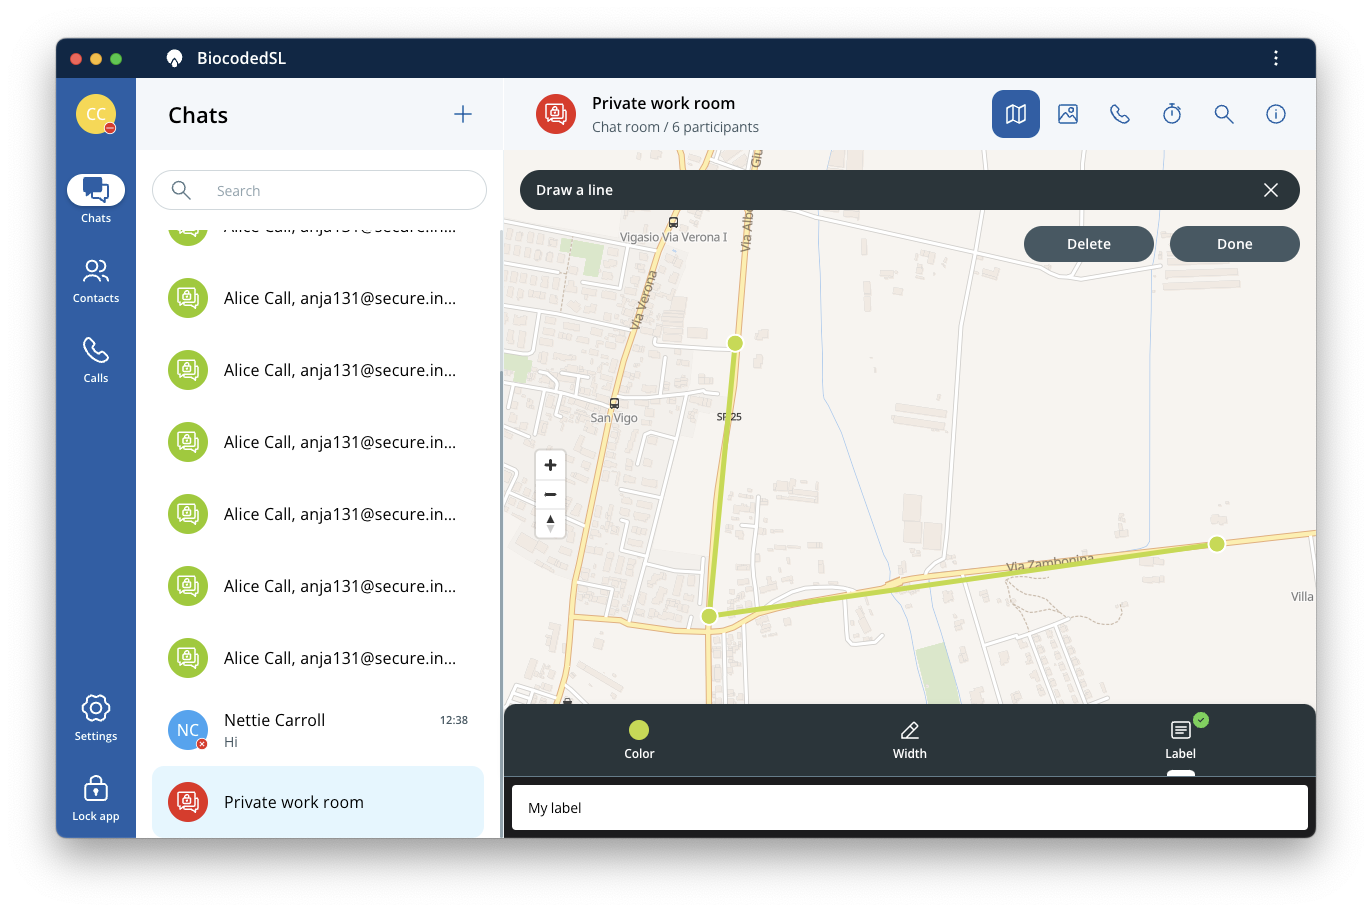
To draw a line tap on Line and add two or more points on the map. Users can select a color, line width and assign a label to be visible by other users. Press Enter on your keyboard to confirm drawn line. To delete a newly drawn line, press Delete or Done to stop drawing lines.
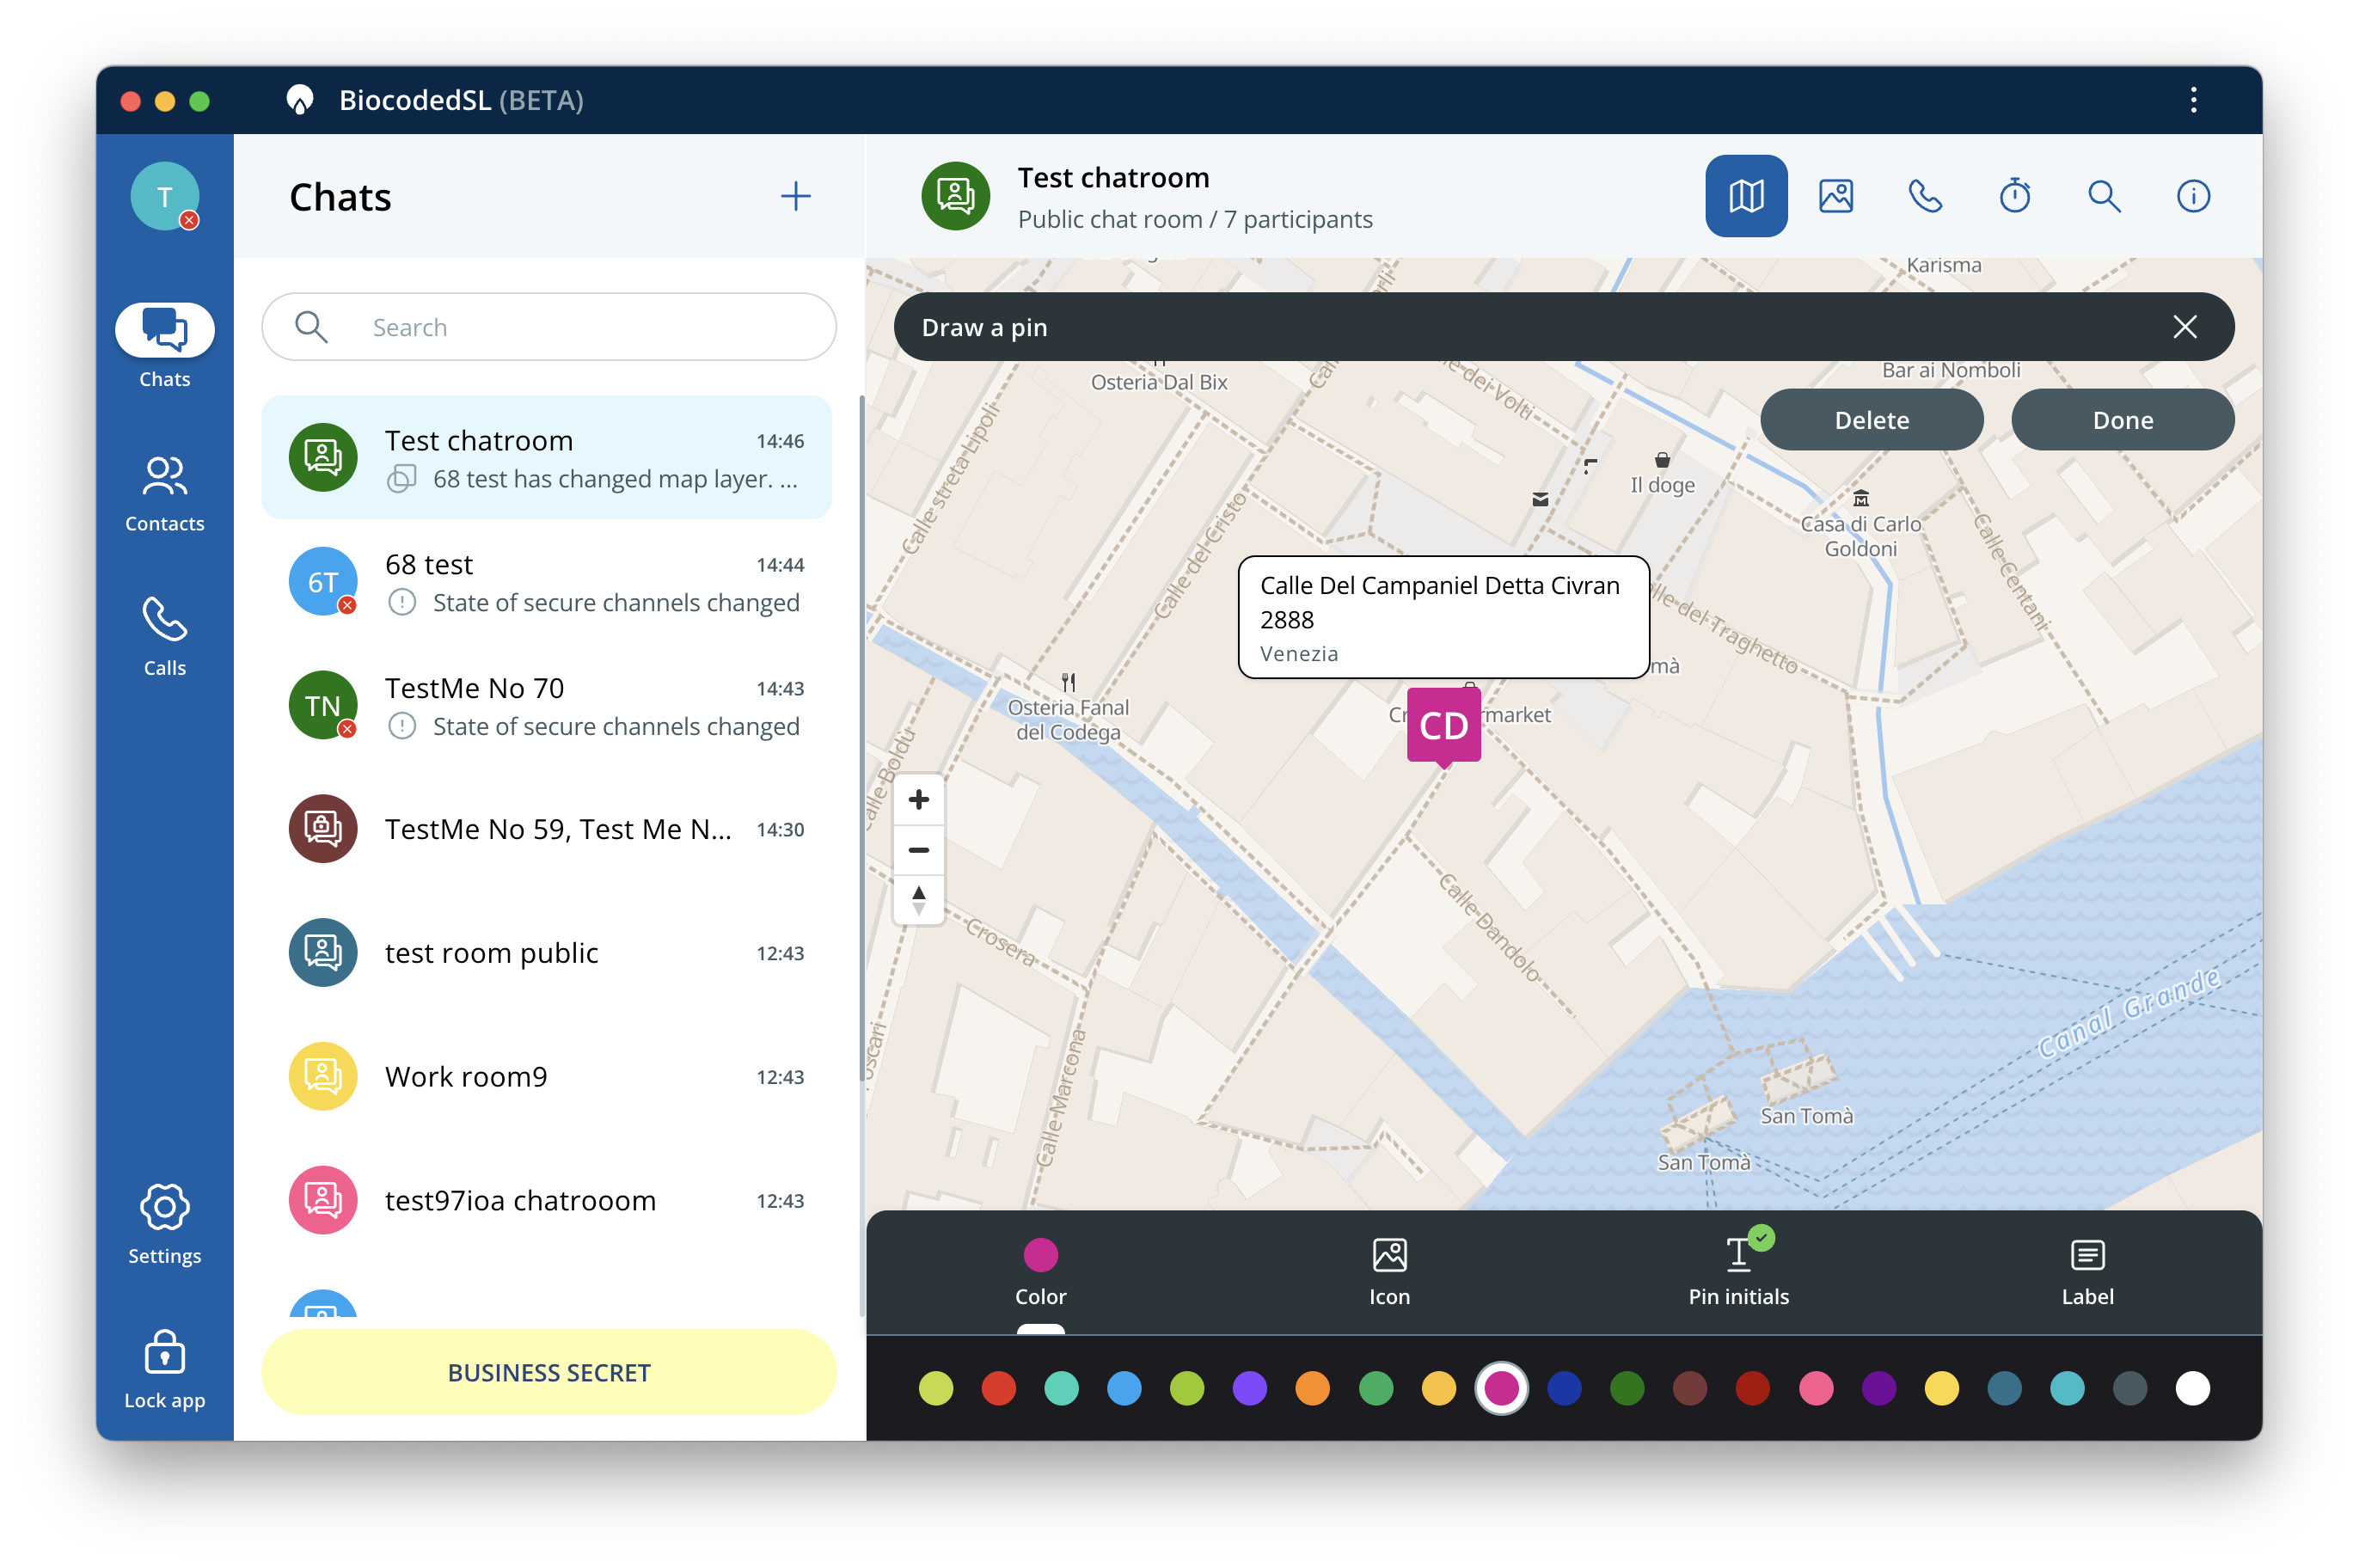
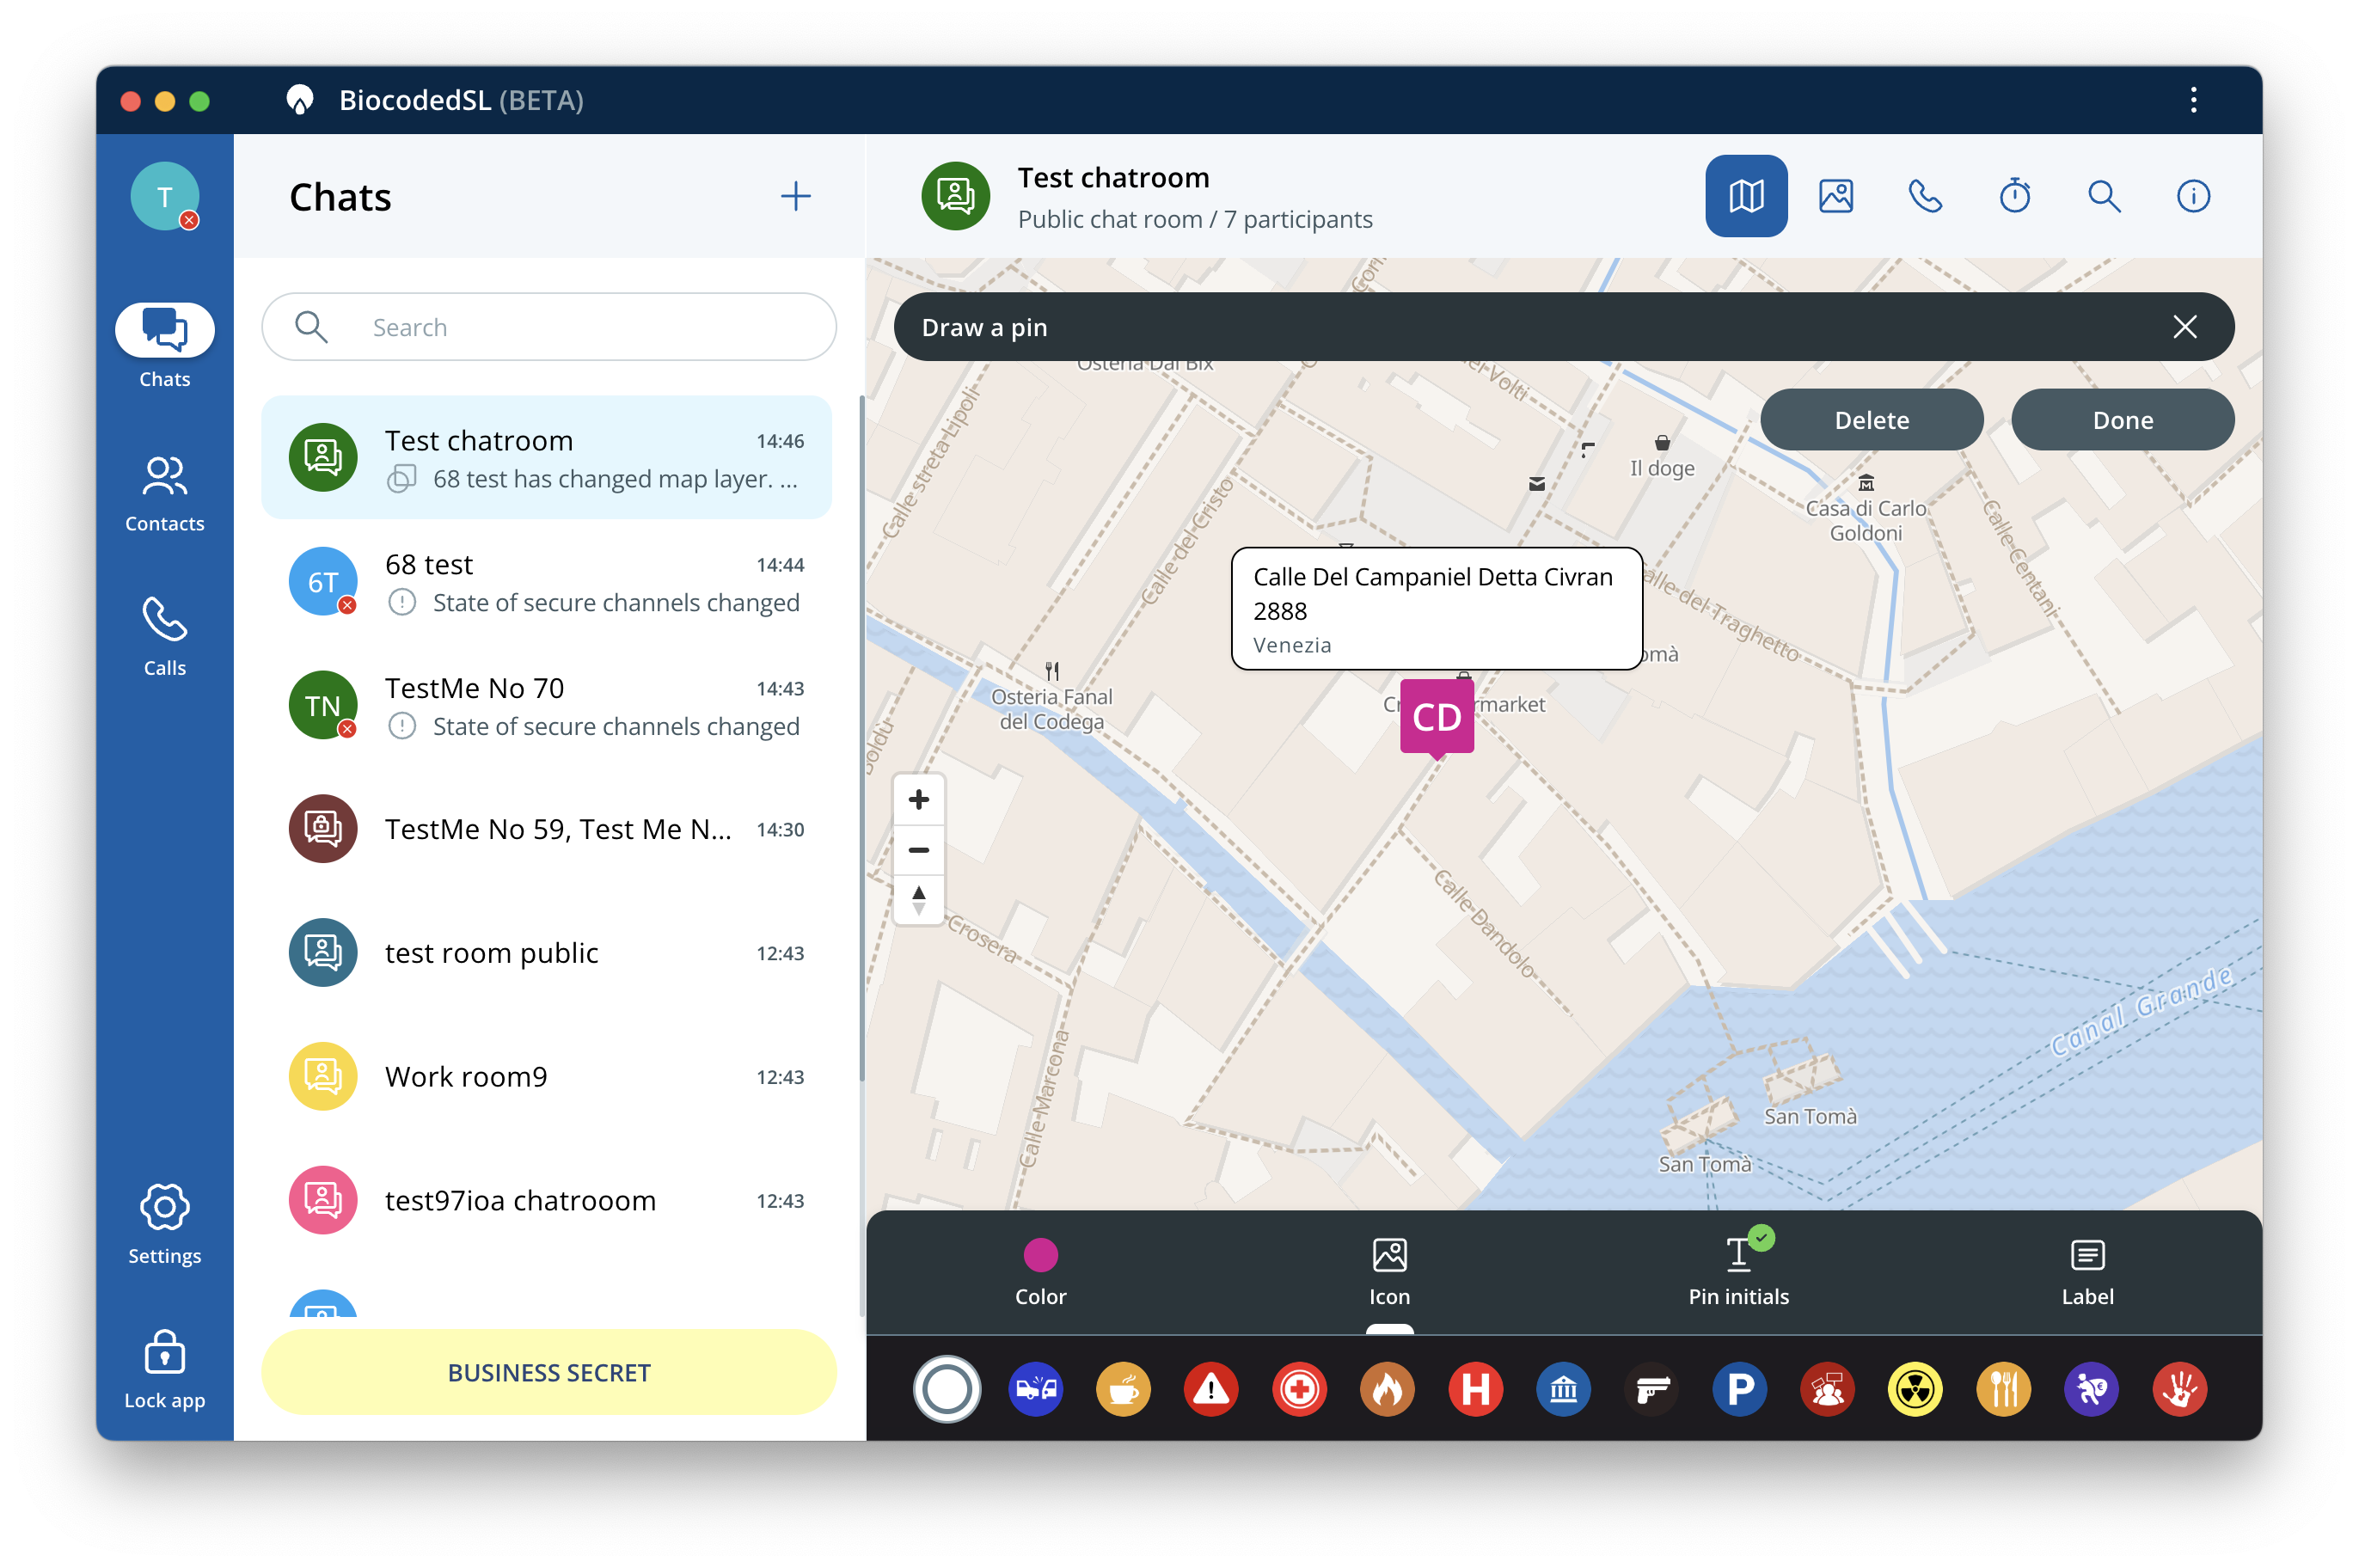
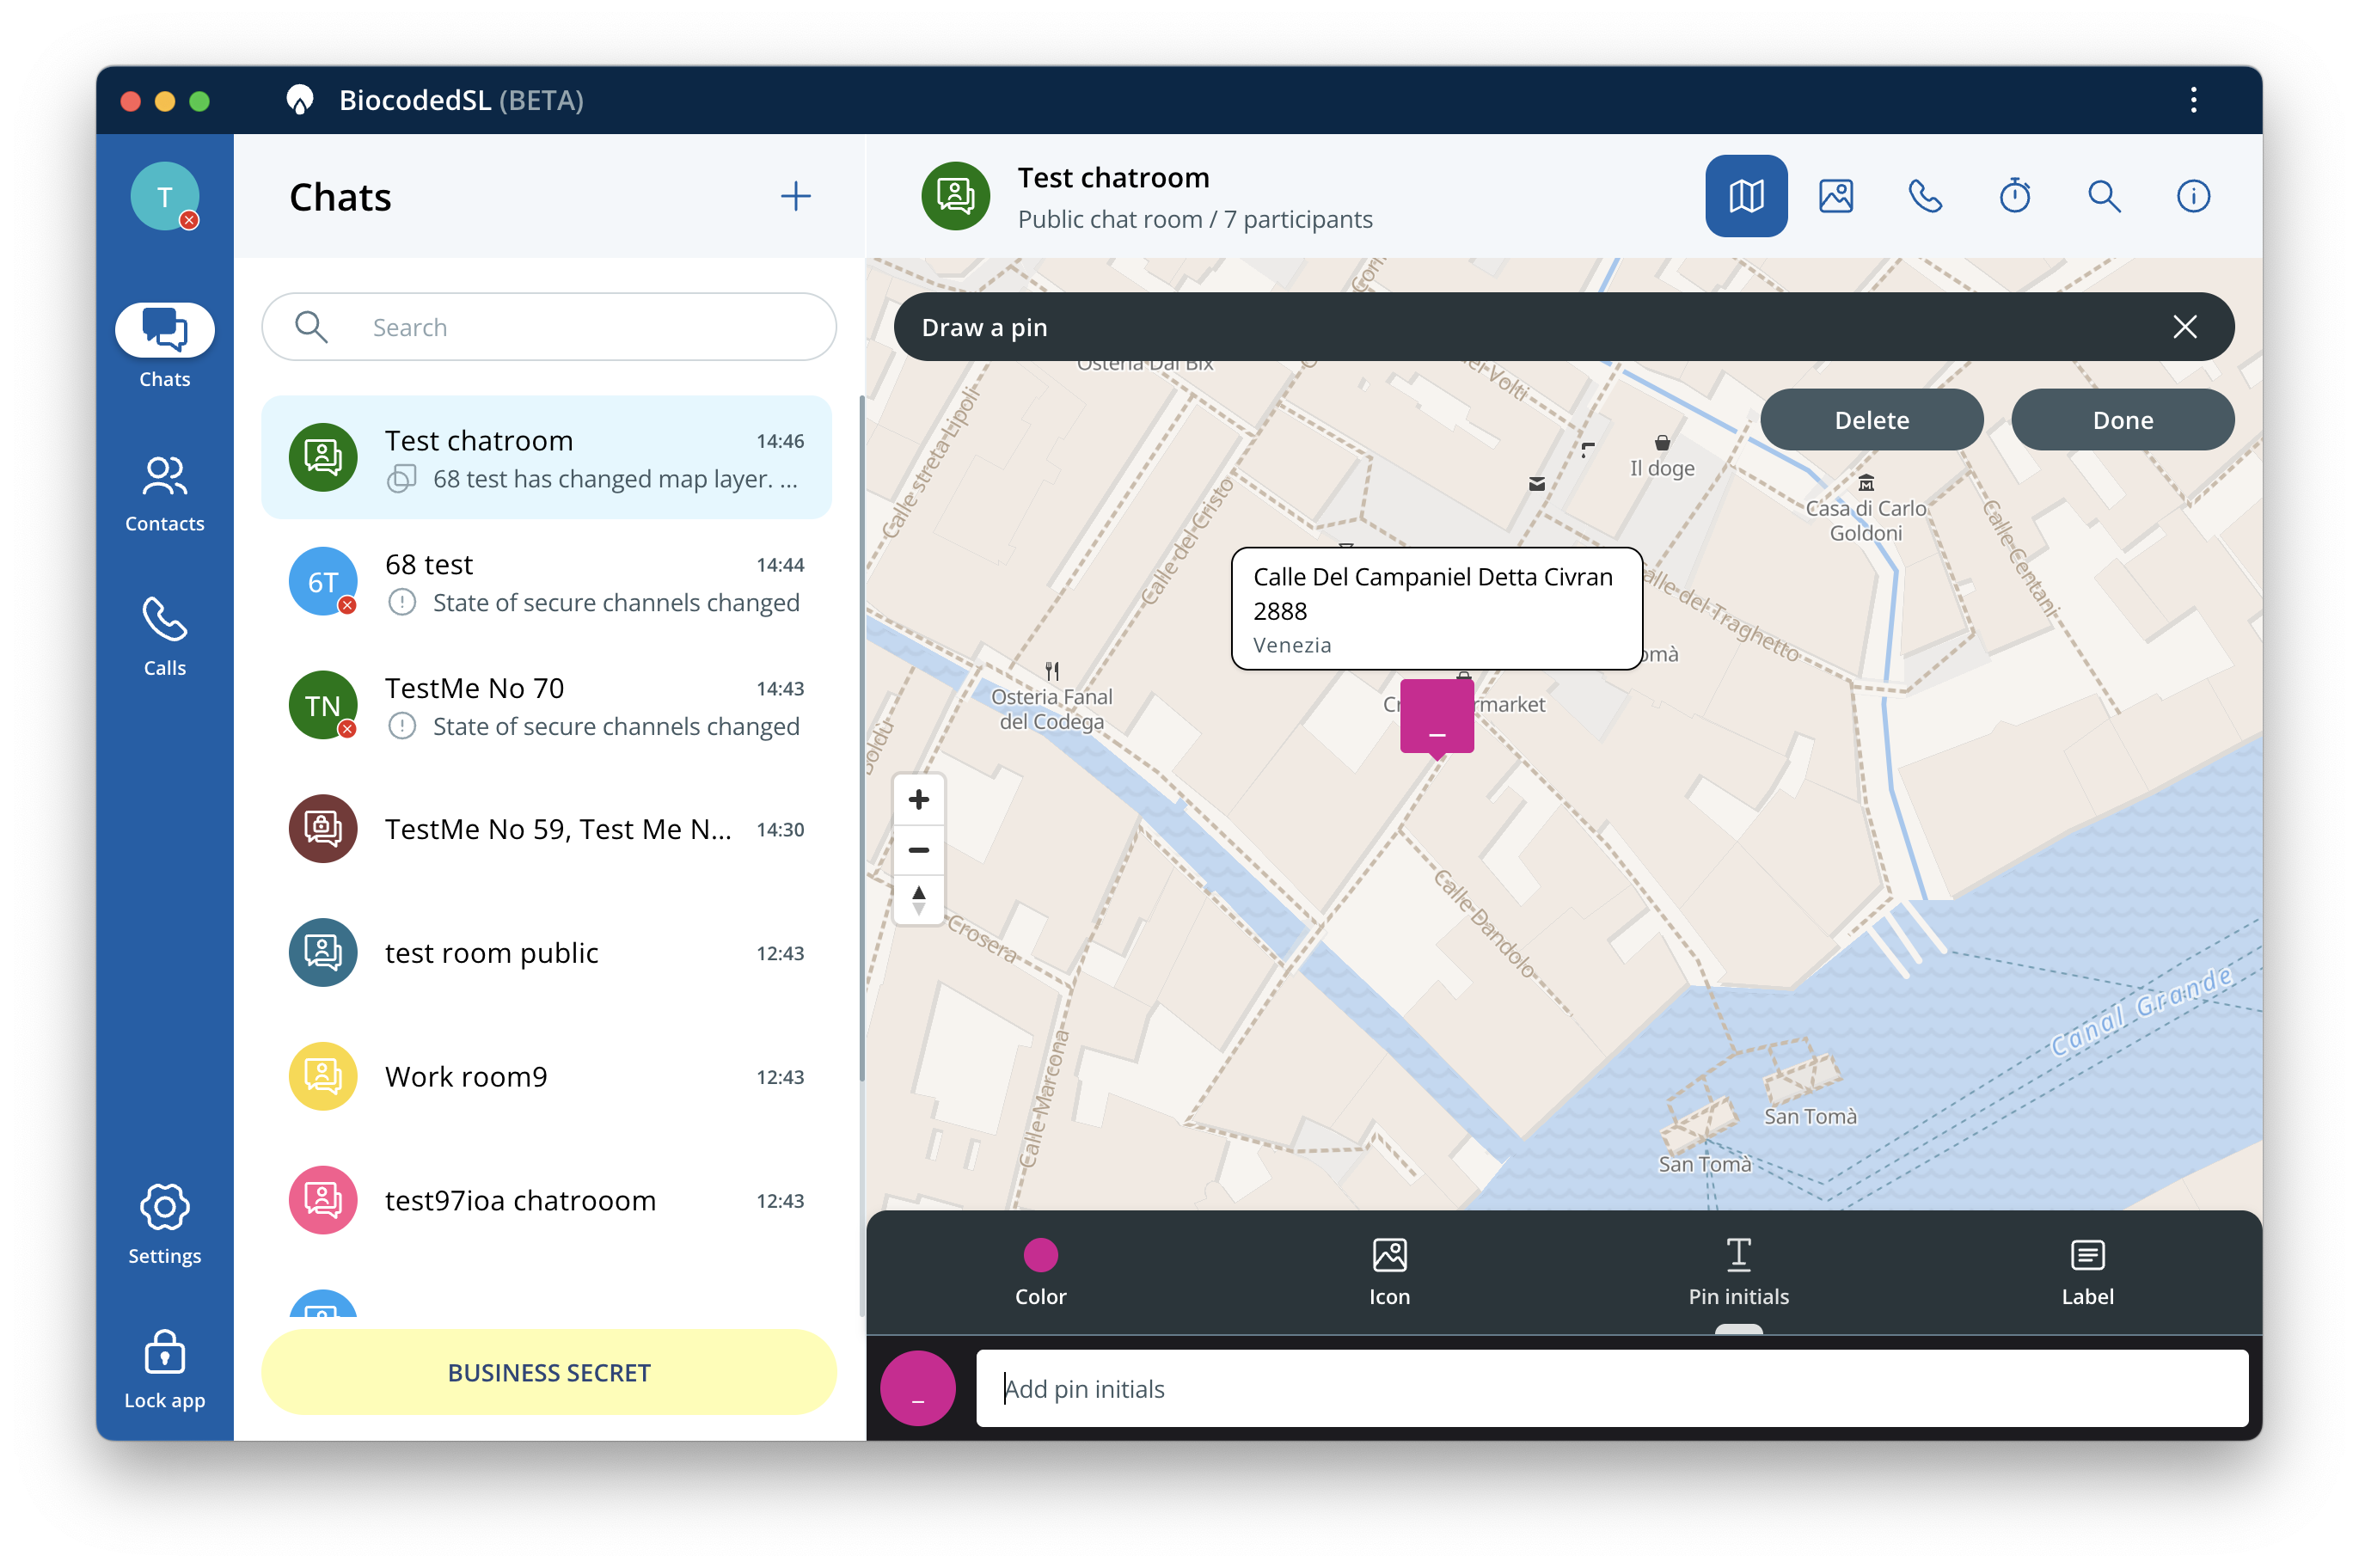
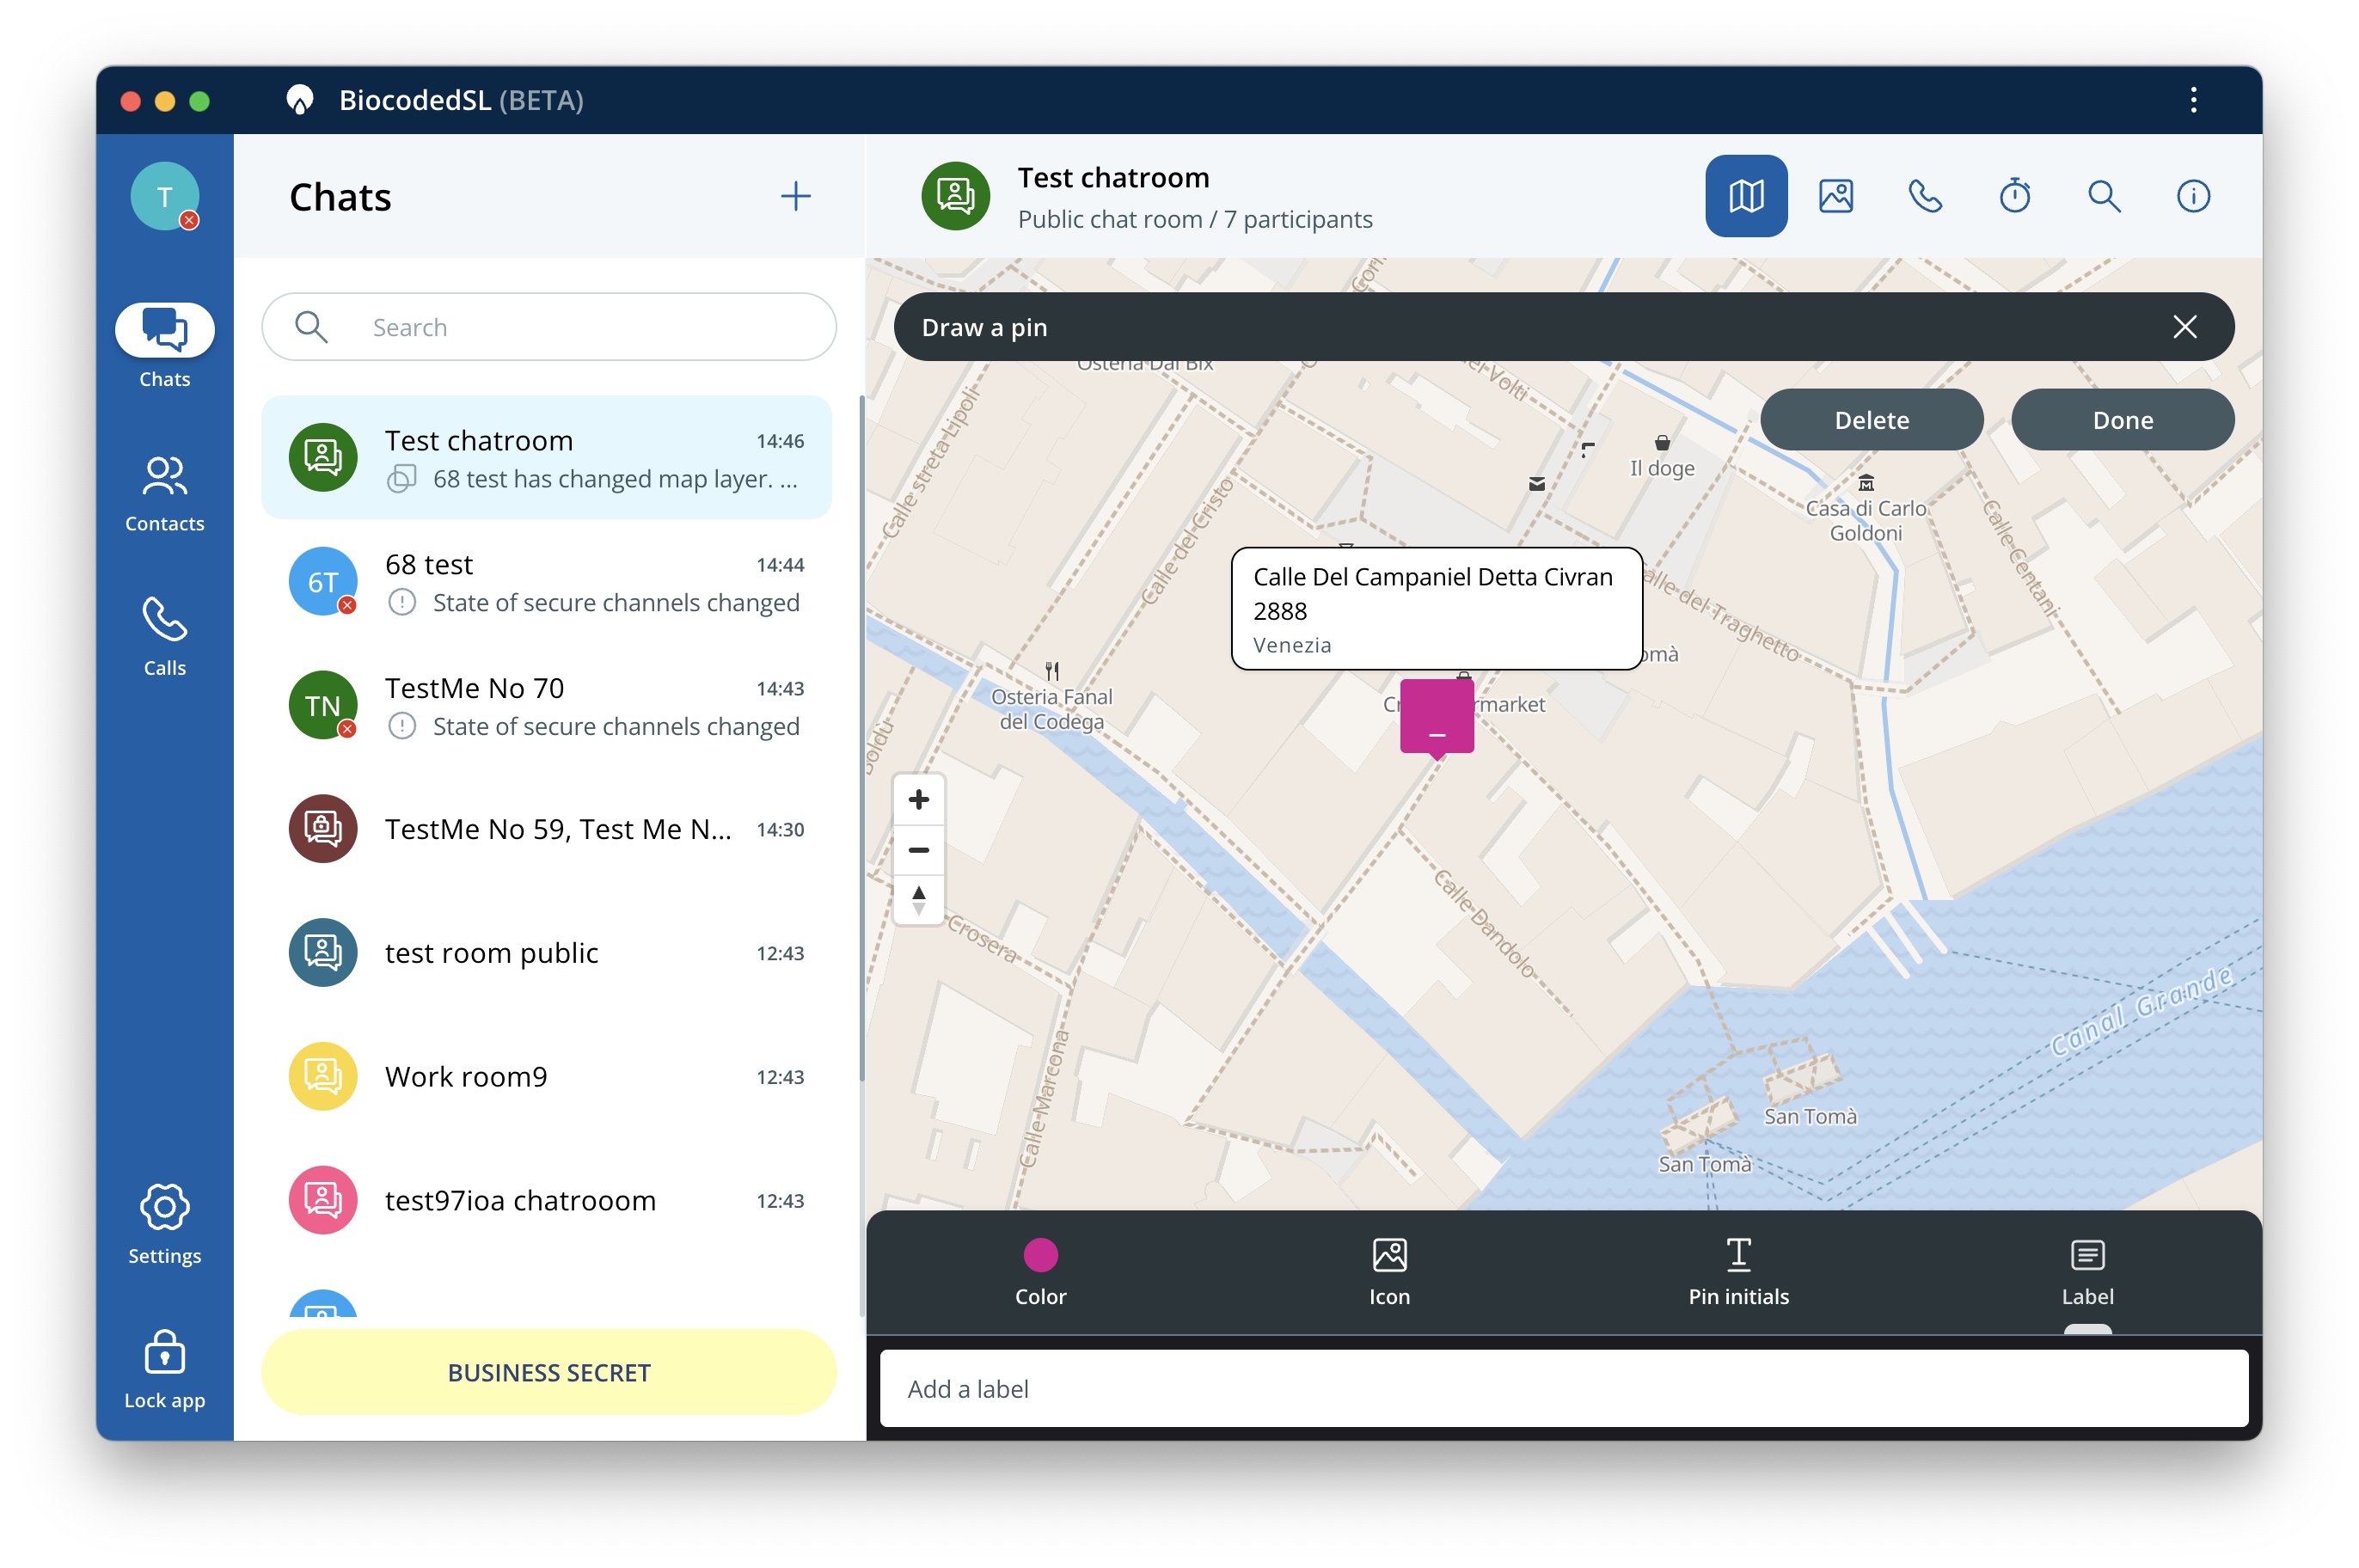
You can add a pin by selecting Pin and tapping on a location on the map. Pins can be assigned a color, icon, a pin name with two letters to be shown on map (if there is no icon assigned) and a descriptive label to be visible to other users. To delete all newly added pins, press Delete or press Done to stop drawing pins.
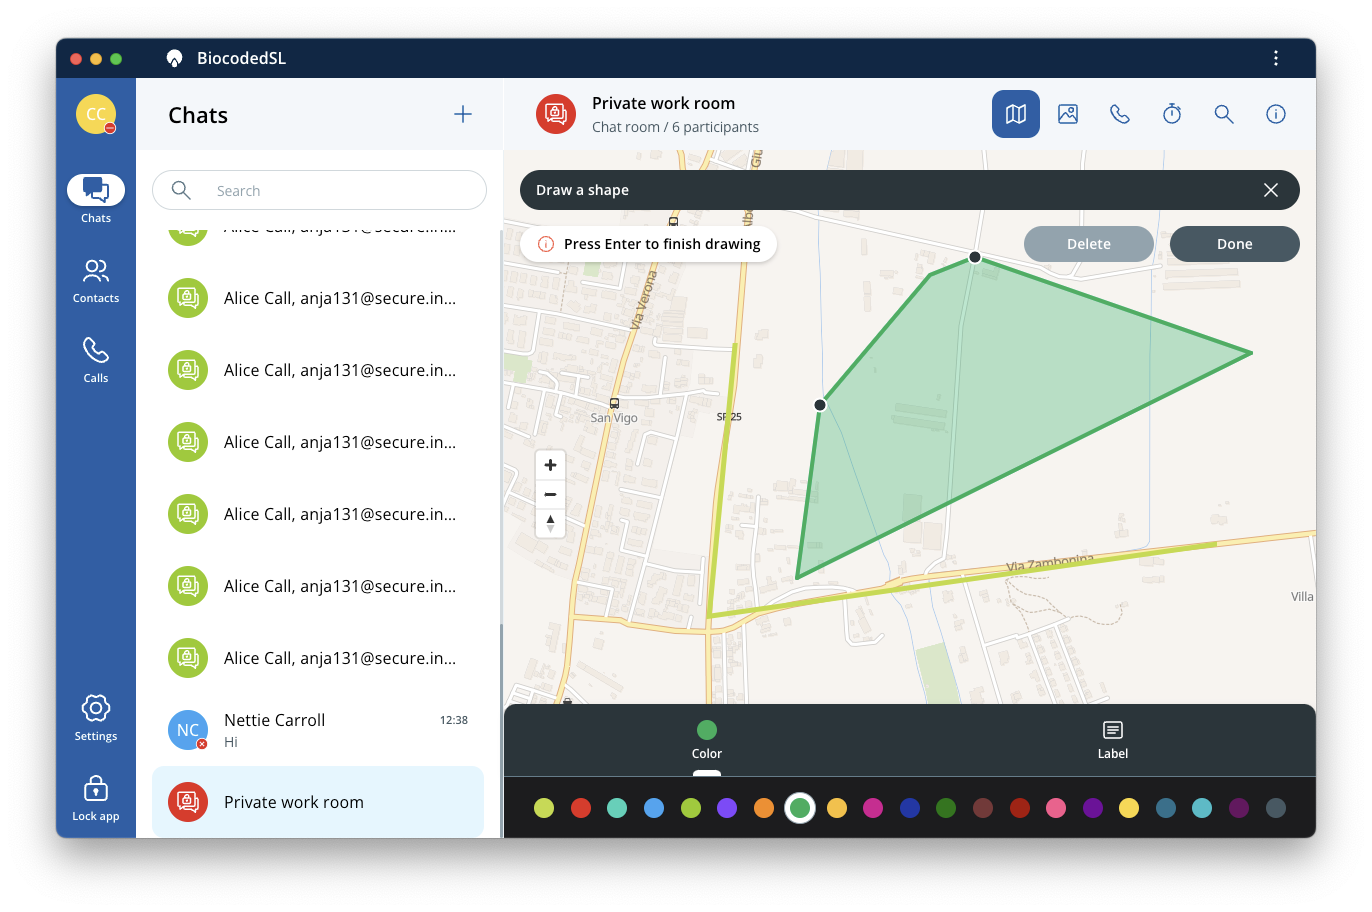
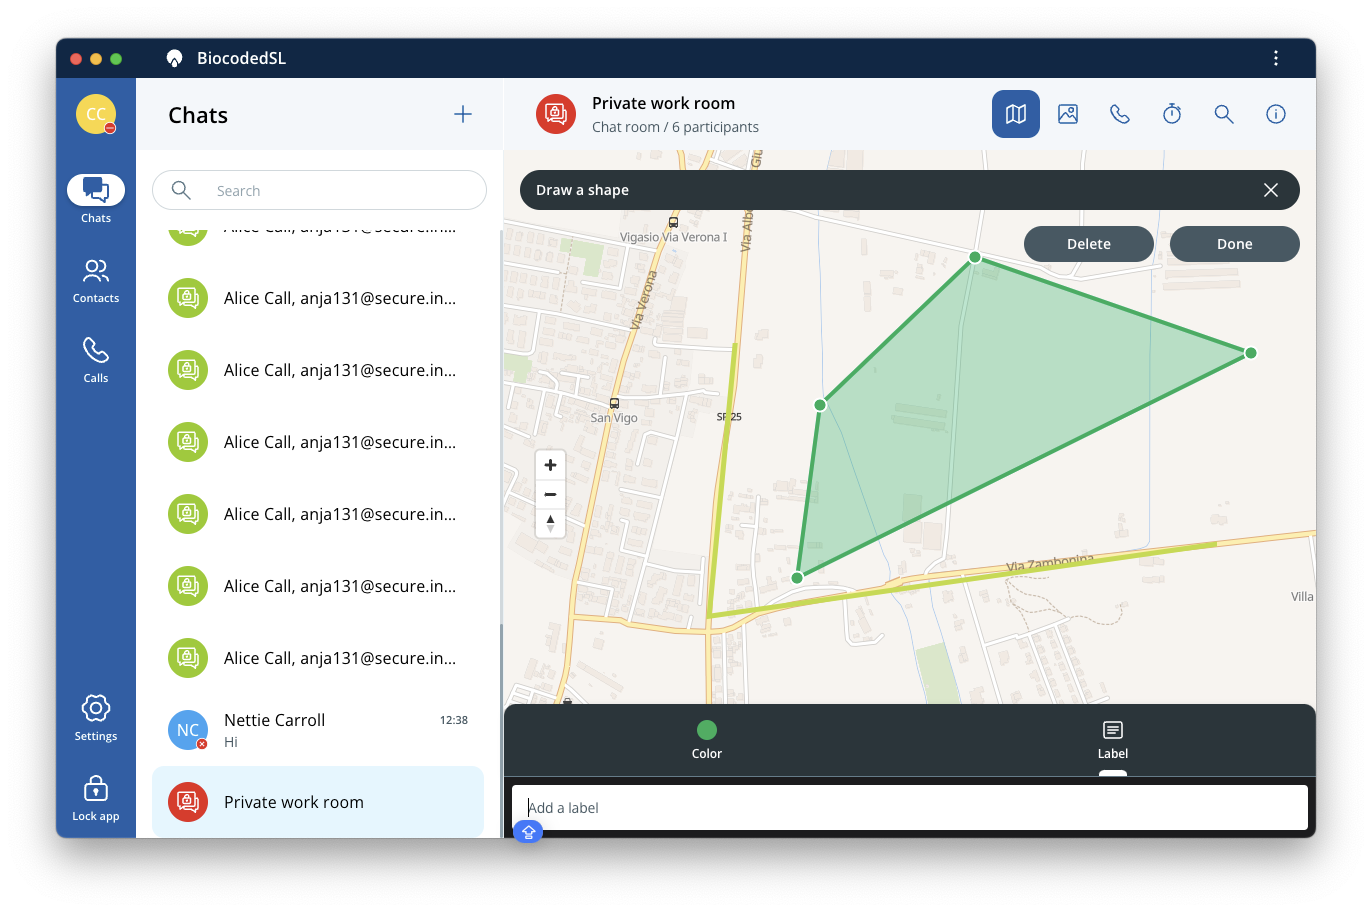
To draw a shape press on Shape, tap on map and draw three or more points which will be connected into a shape. Users can also select a color and assign a label to this shape to be visible by other users. Press Enter on your keyboard to confirm drawn line. To delete a newly drawn shape, press Delete or Done to stop drawing shapes.
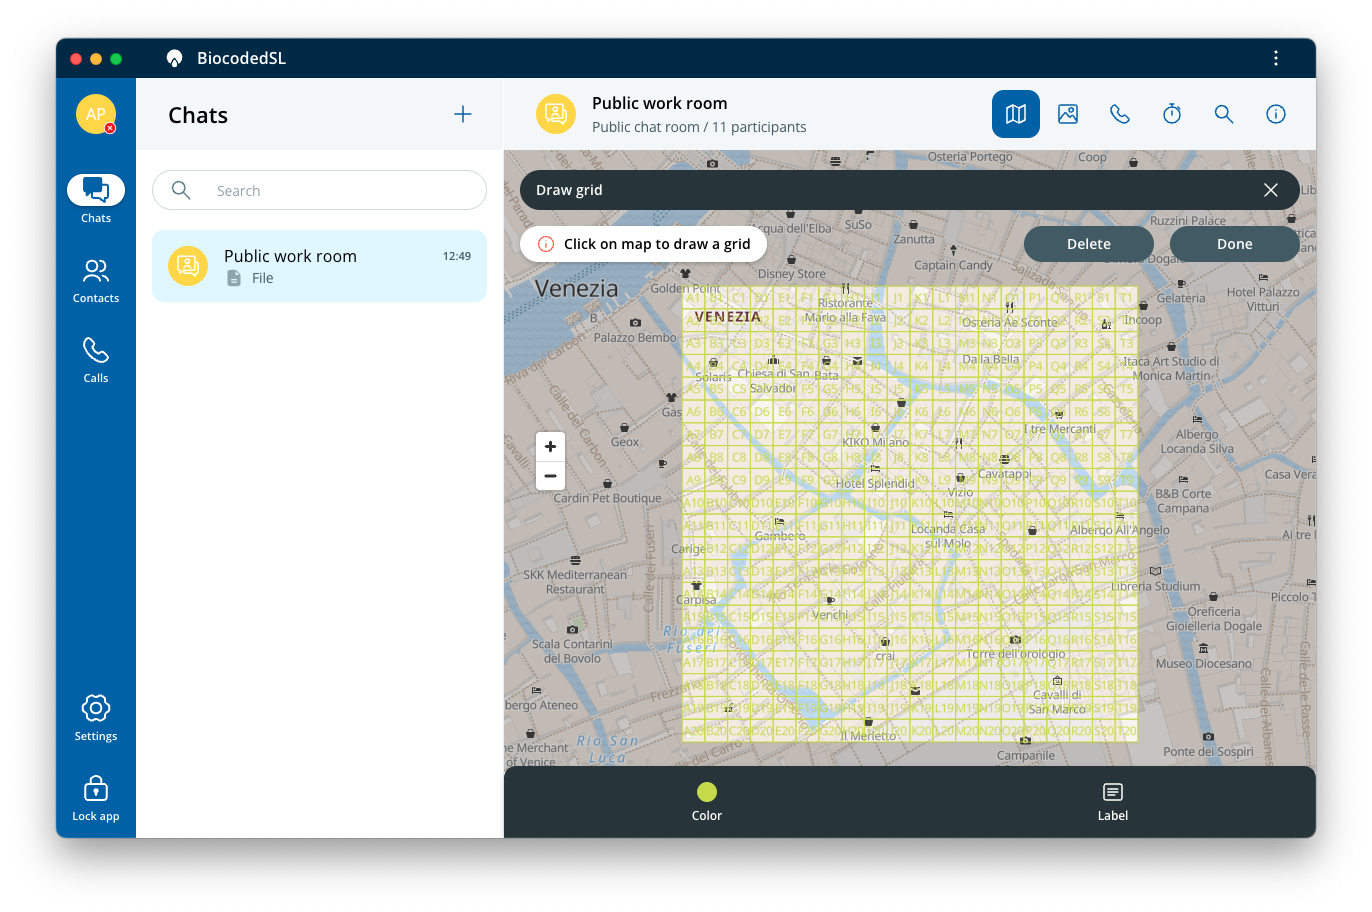
To add a grid to map, select Grid. The center square that appears is where the grid will appear upon clicking. You can also select grid color and assign a label to it.
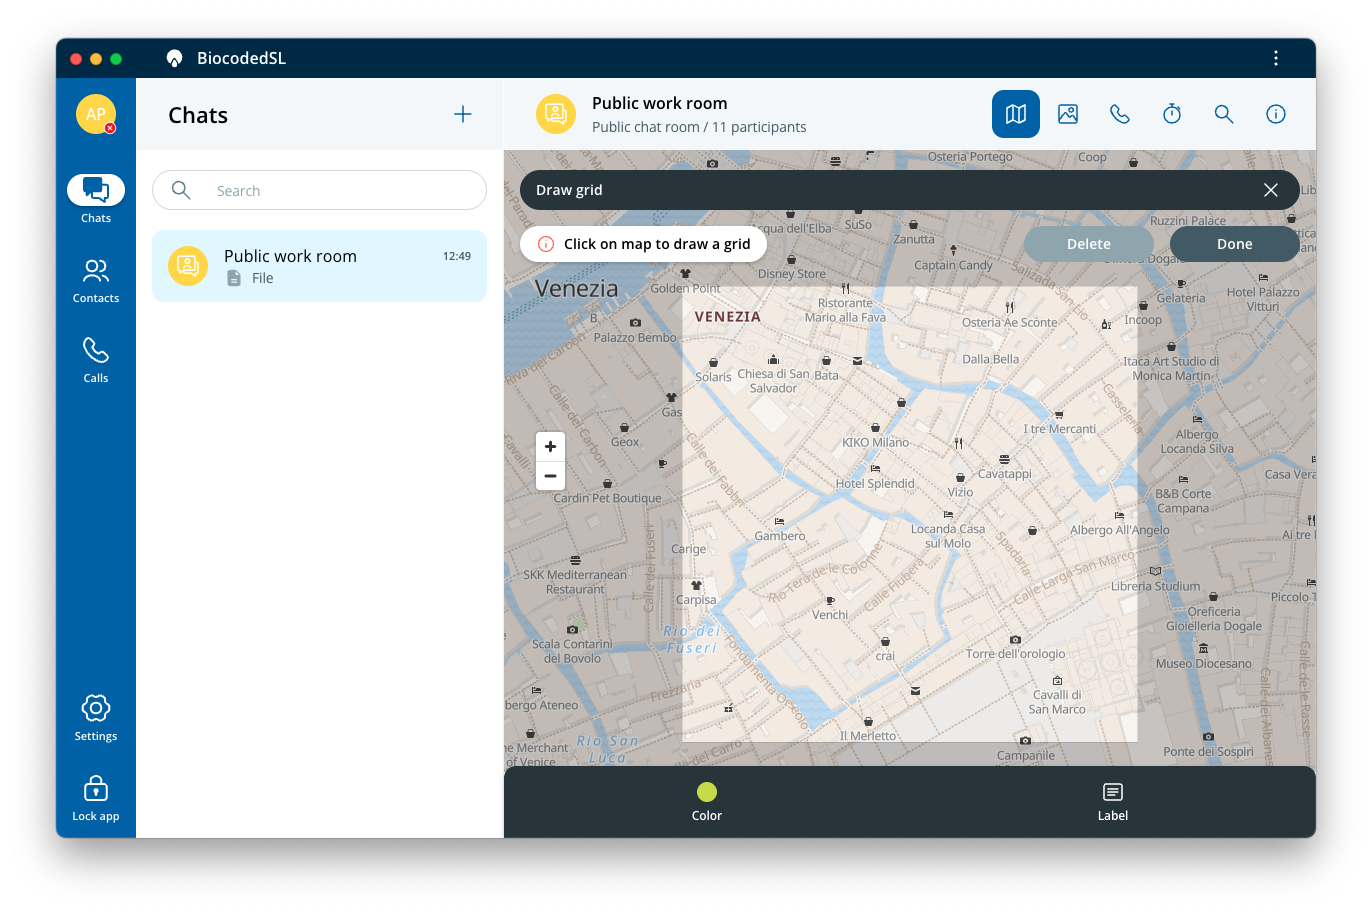
To delete all newly added grids, press Delete or press Done to stop drawing.
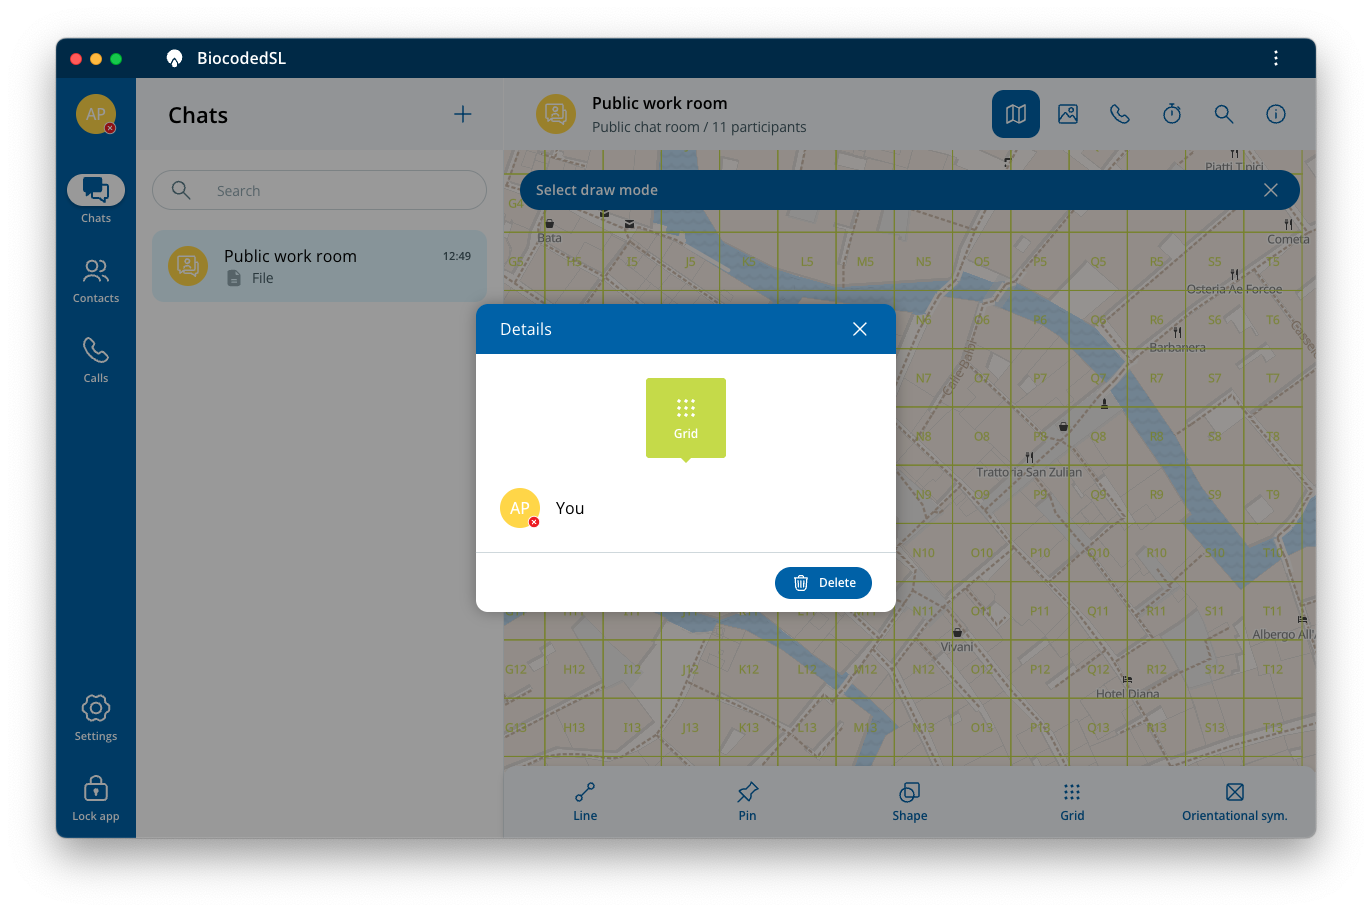
To delete a grid, click on it and select Delete.
You can add an orientational symbol by selecting Orientational sym and clicking on two points on map.
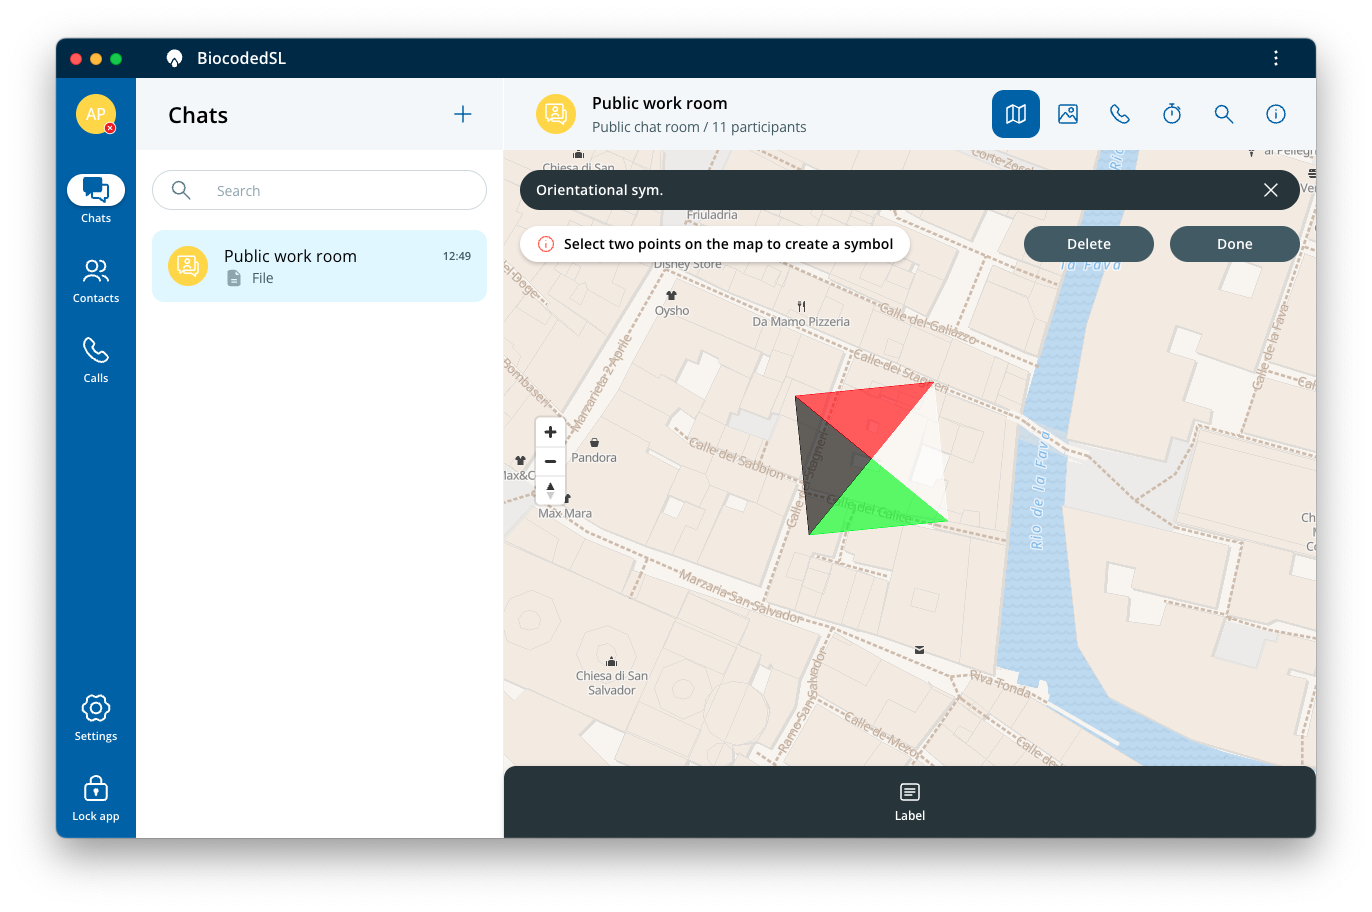
To delete a symbol while drawing, press Delete or press Done to stop drawing. To delete a symbol, click on it and select Delete.
To delete all newly drawn markers, press Clear. To confirm drawn markers for your map layer, click on Save. This will exit map layer drawing mode.
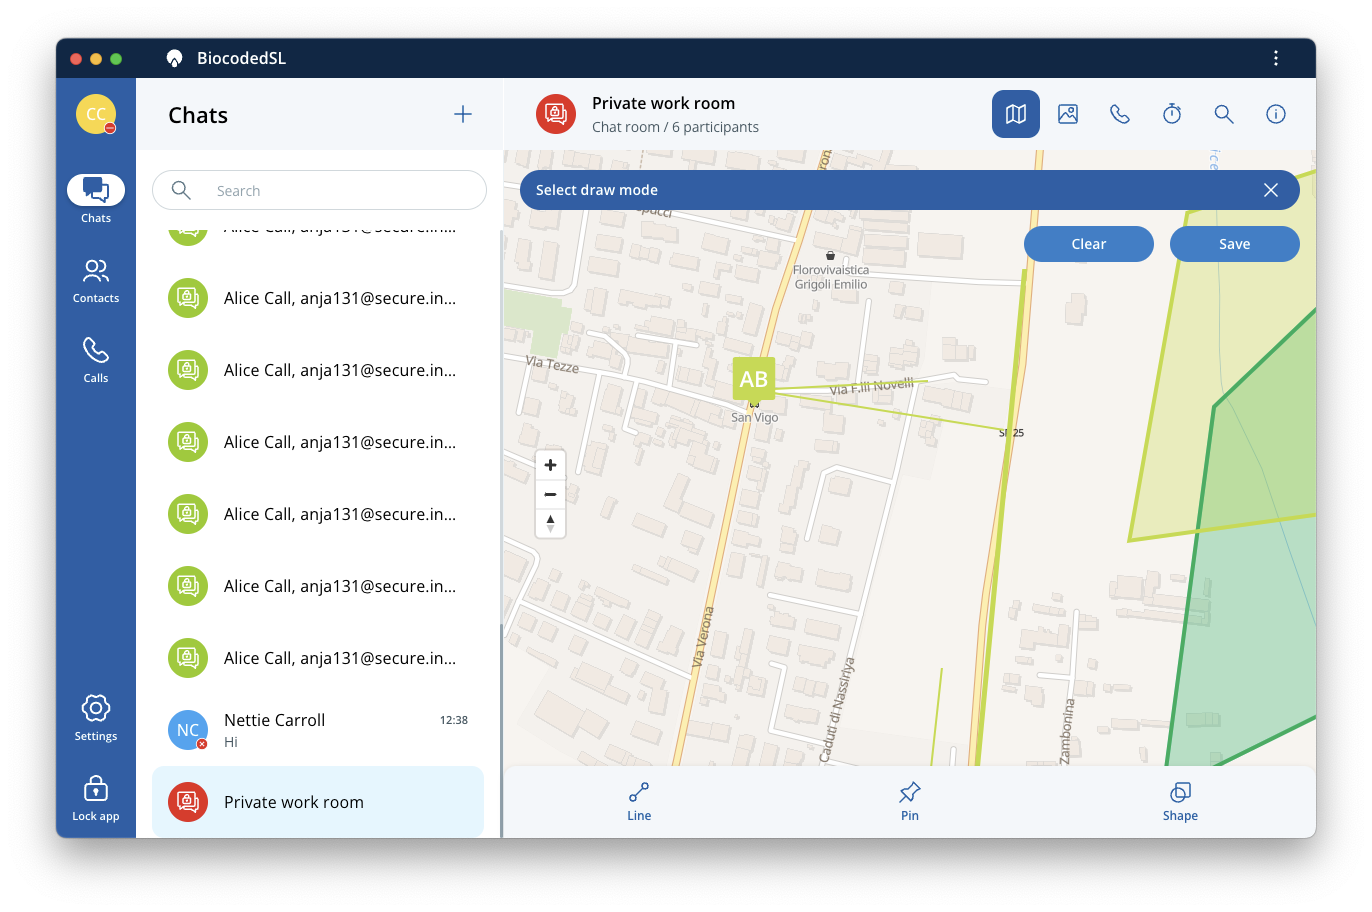
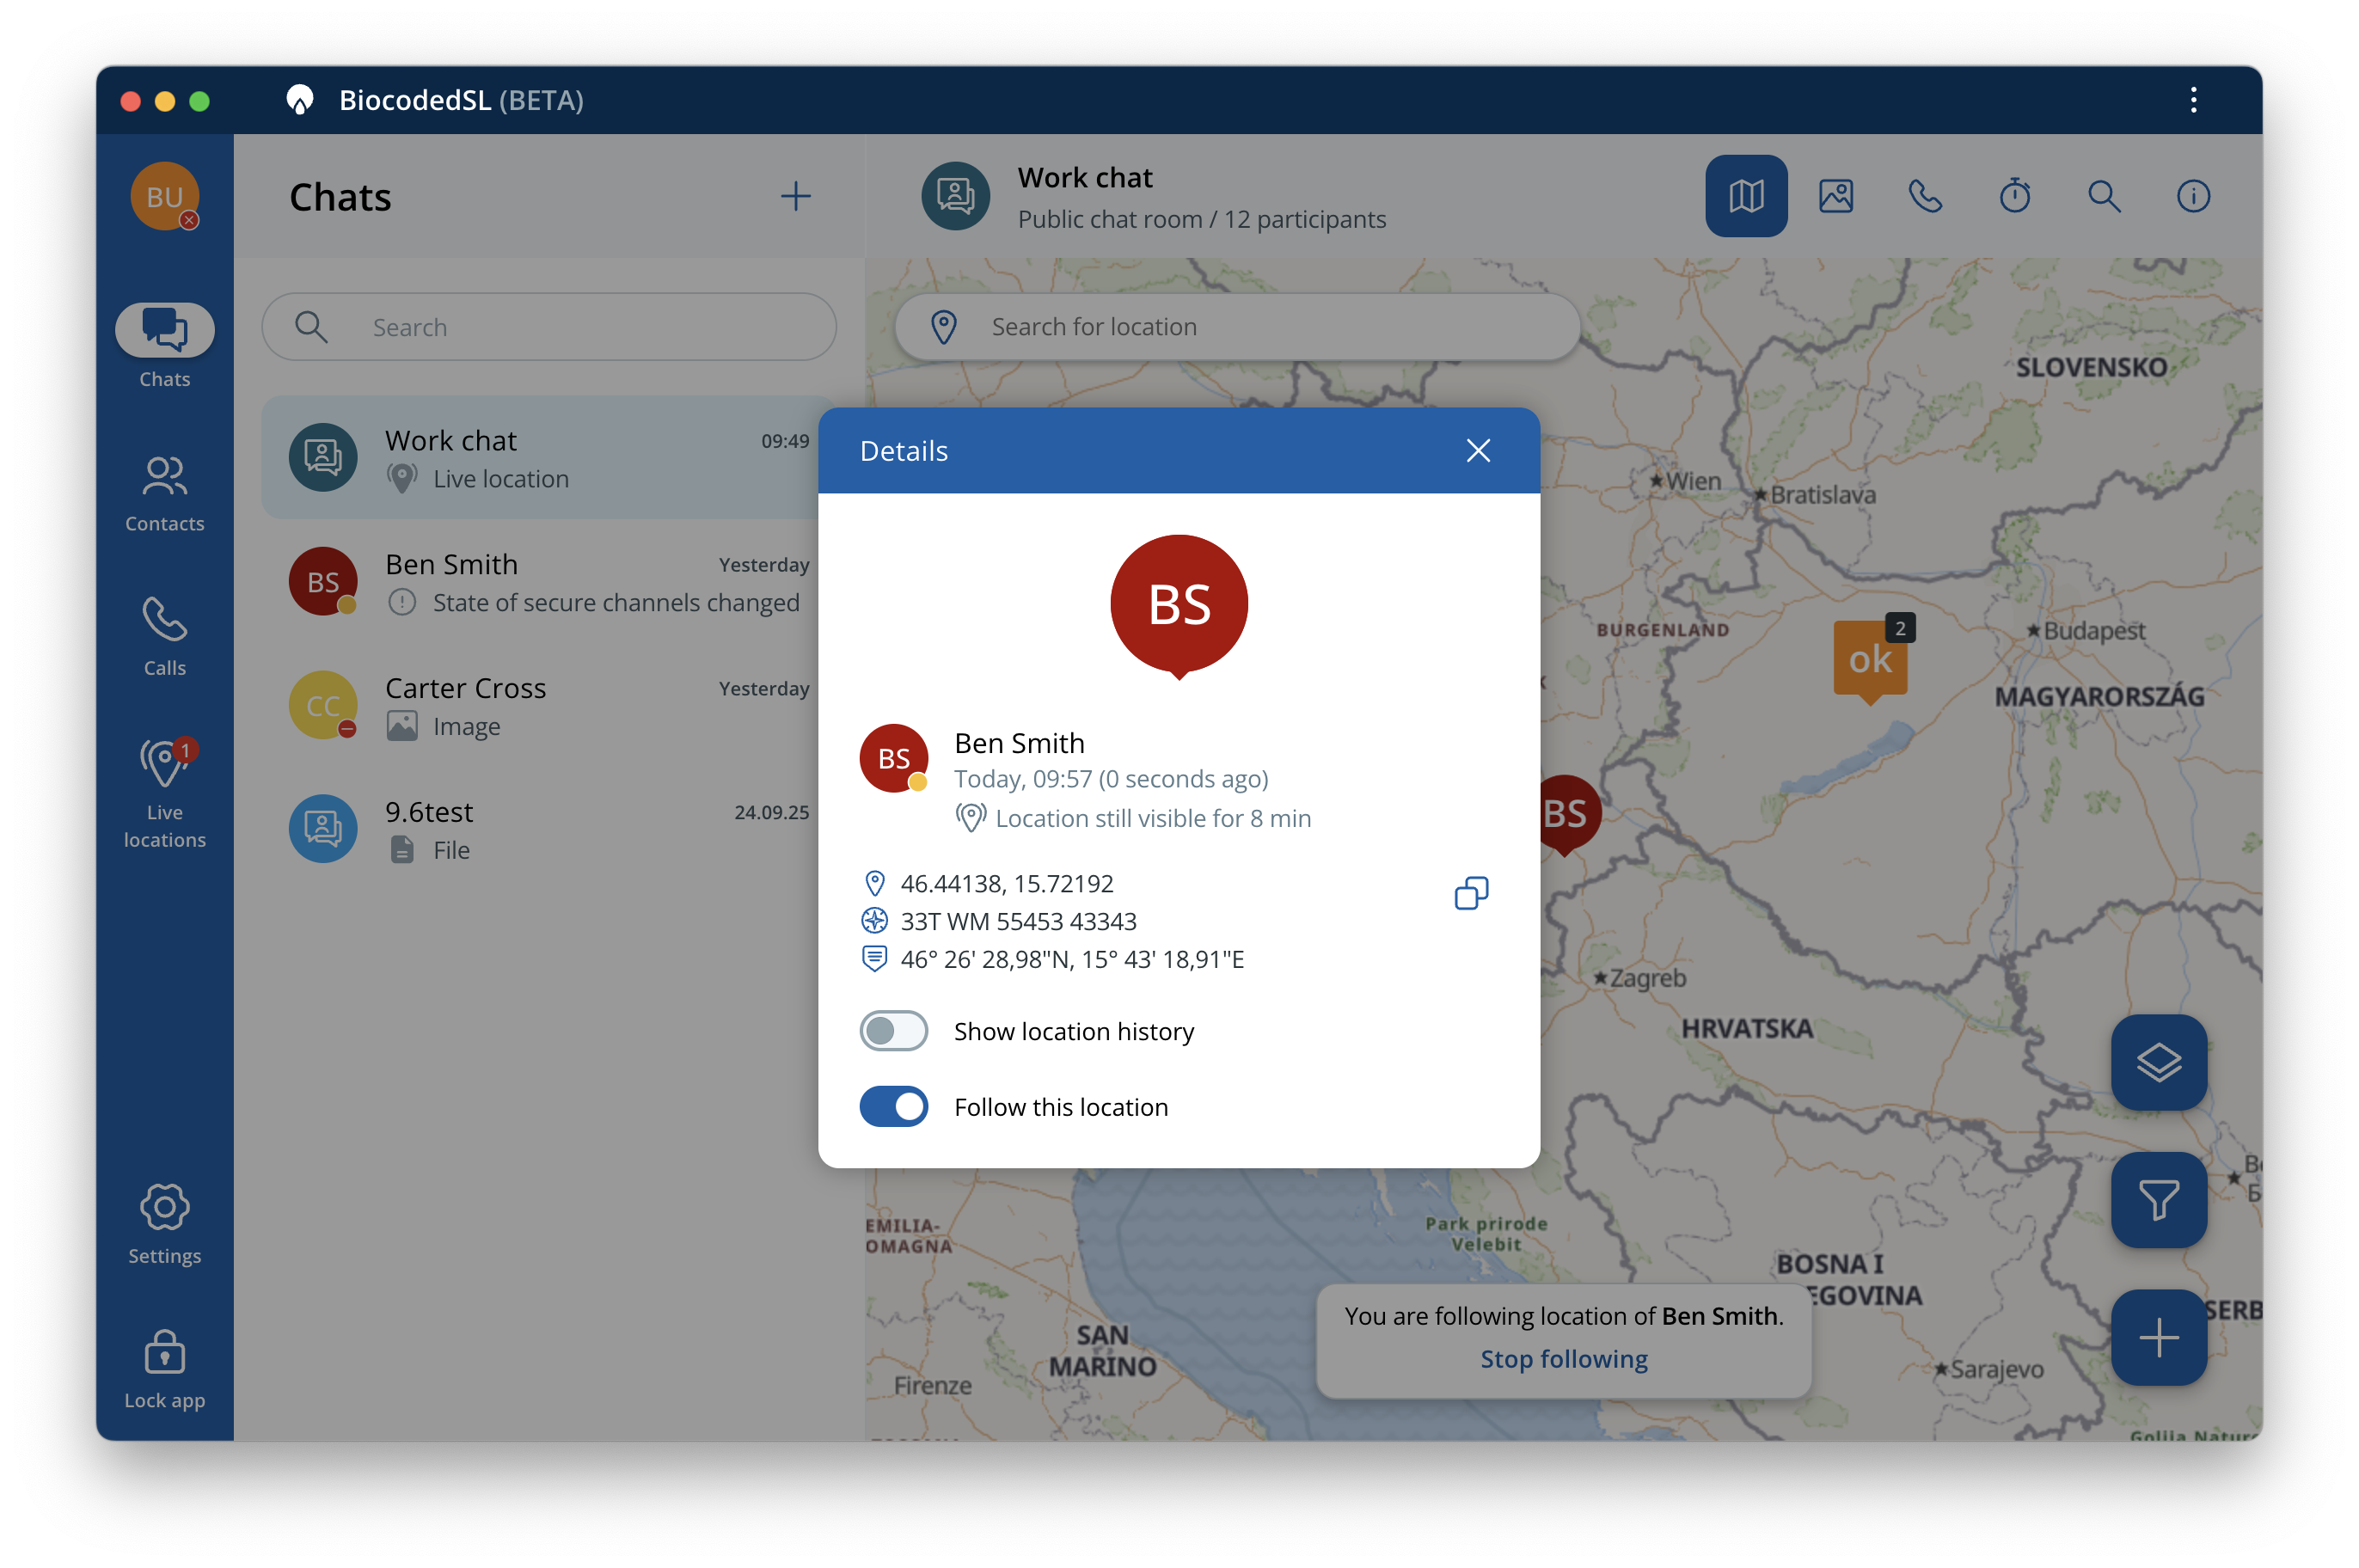
If you click on a shared pin, you will be able to view data about location pin (who shared it, when, how long it will be visible, location address and coordinates - with copy button - and pin attachments). If the shared location is live, it will be indicated with a pulsing indicator. If the live location is not current, it will be grey.
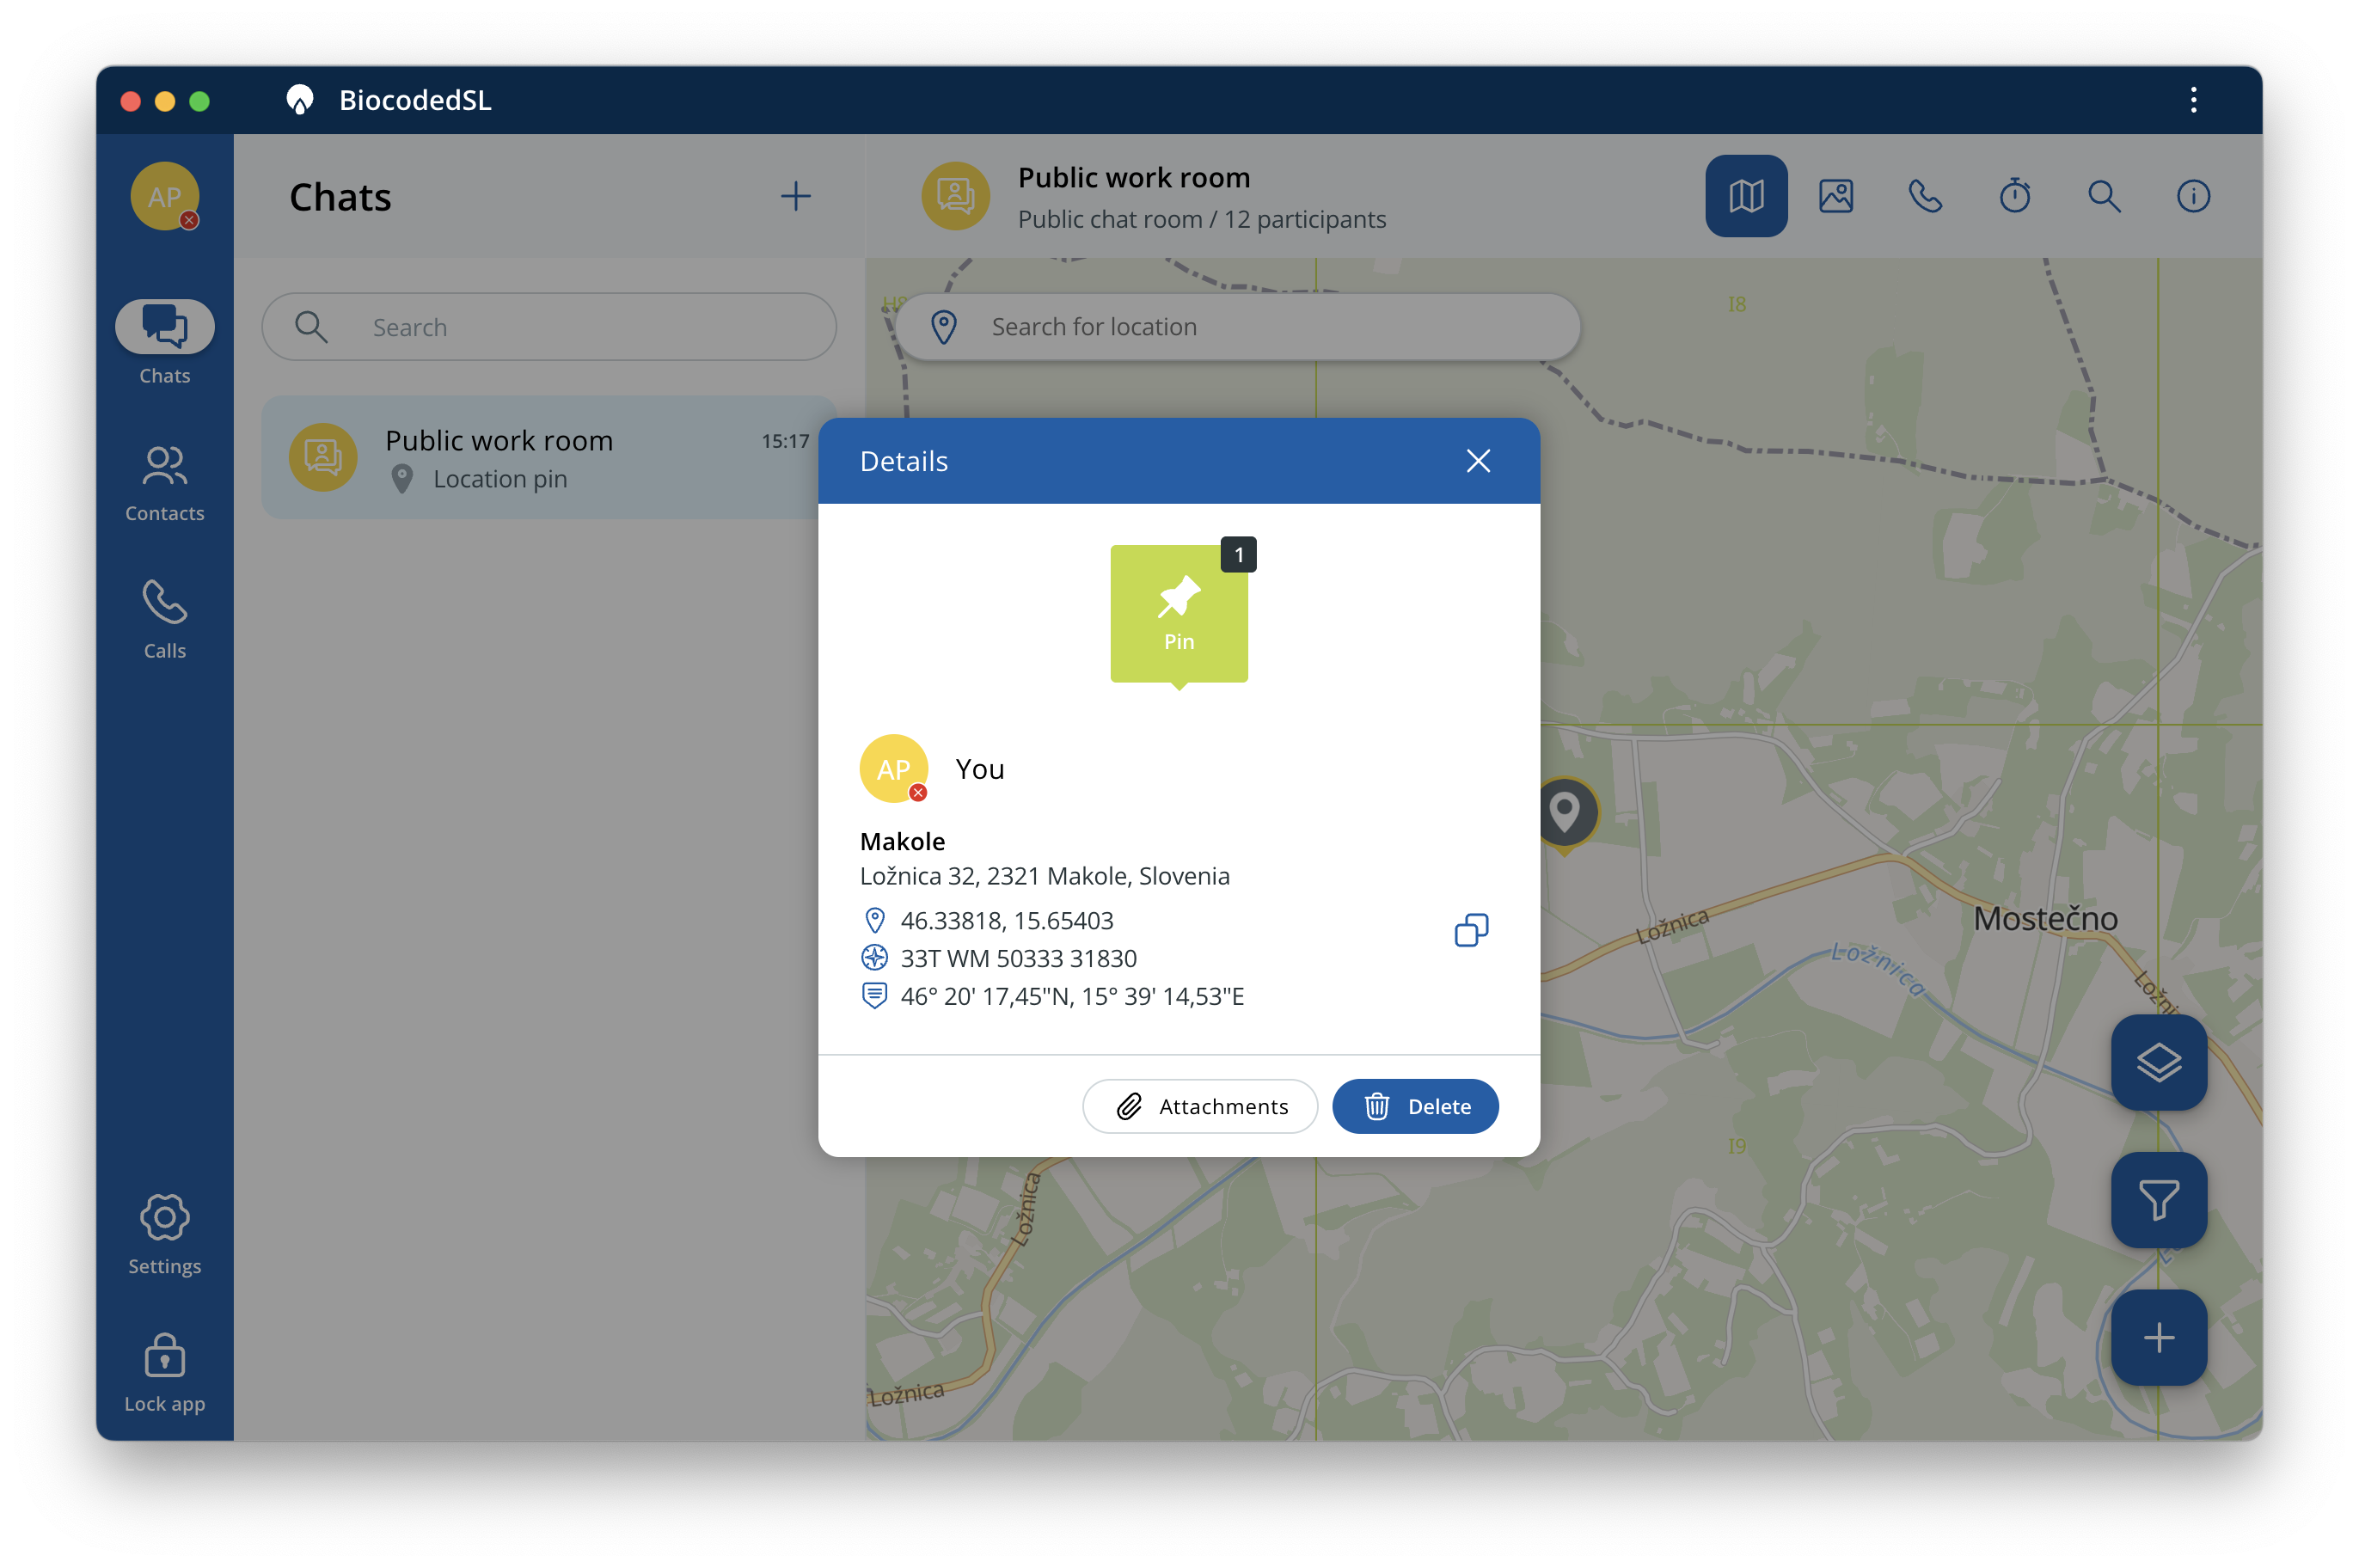
If the pin was shared by you, you will see Delete button, which removes pin from map and view pin attachments by selecting "Attachments" (only for map layer pins).
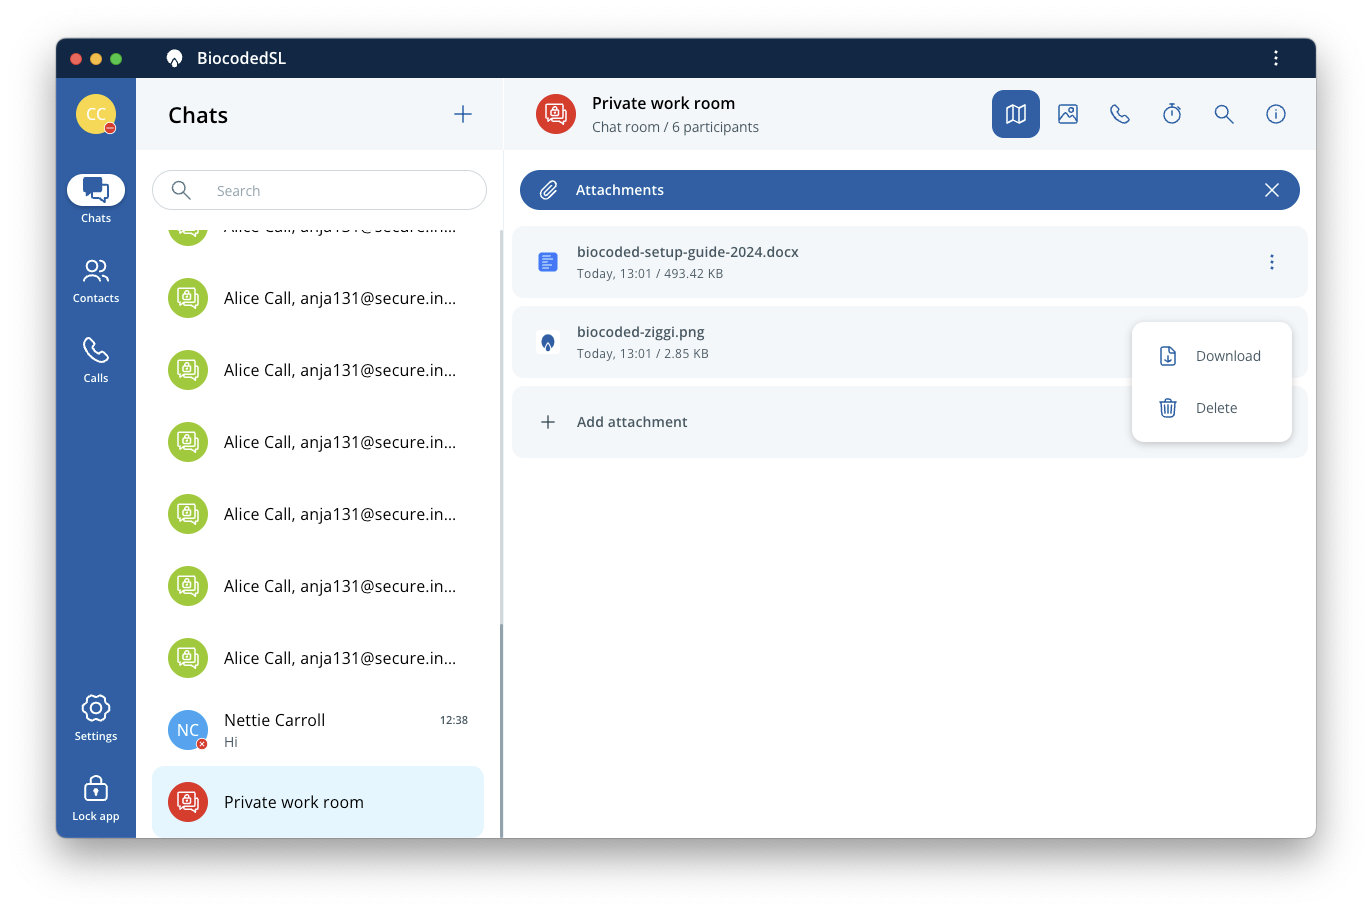
Pins that include attachments have the number of attachments next to them. You can press Add attachment to add images or files to a pin. Your attachments can be deleted by pressing on ... and Delete. You can also download attachments by pressing ... and Download. You can close the attachments view by pressing on X.
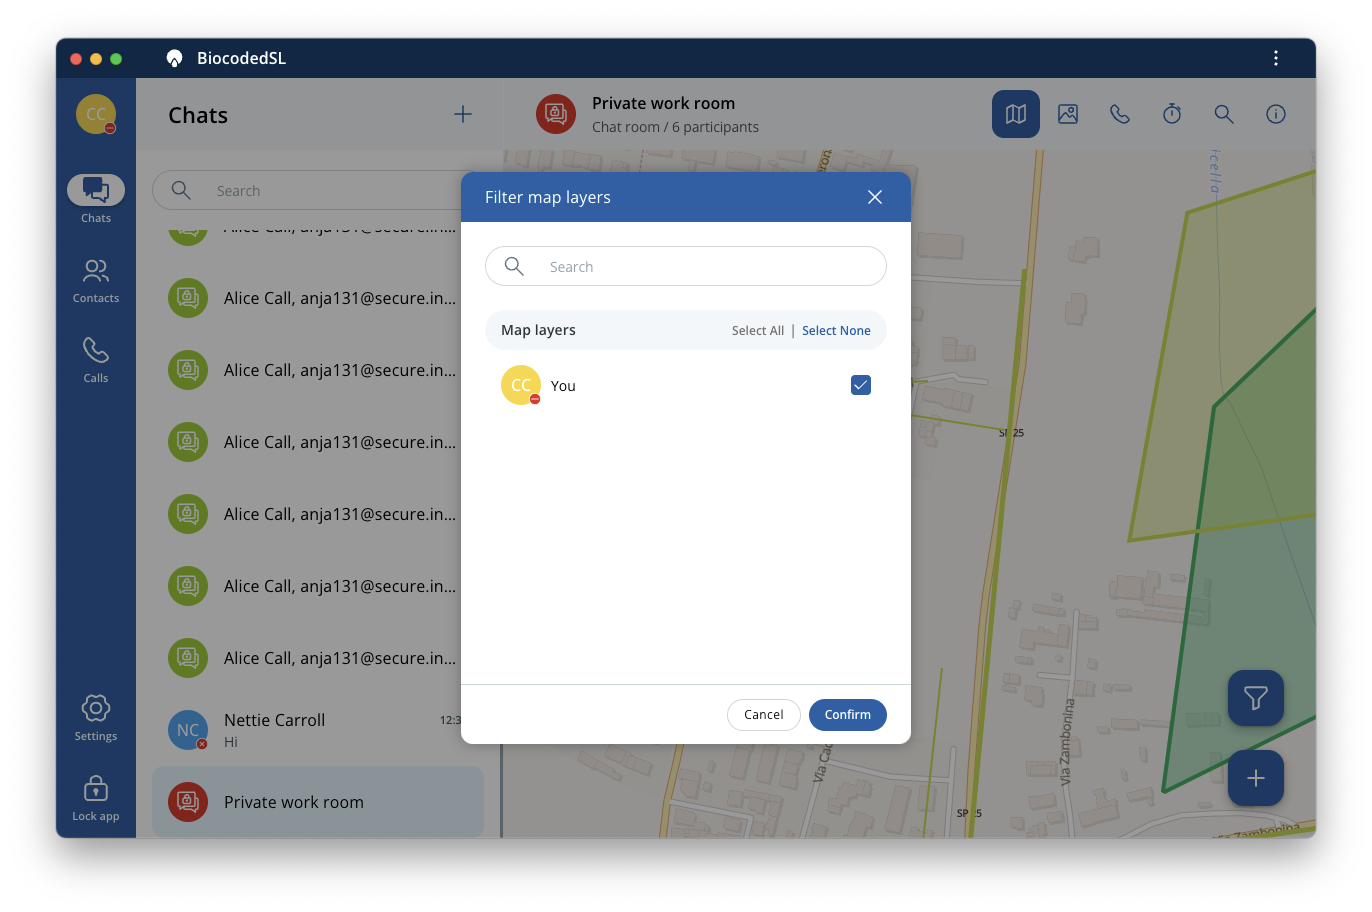
When viewing the map, you can also filter it by pressing fiter icon and toggling users that you wish to show on map. When you confirm your choice by pressing on Filter, only the selected user's map layers will be visible on map. To filter by marker types (shapes), tap on user's name and select map shapes you wish to show.
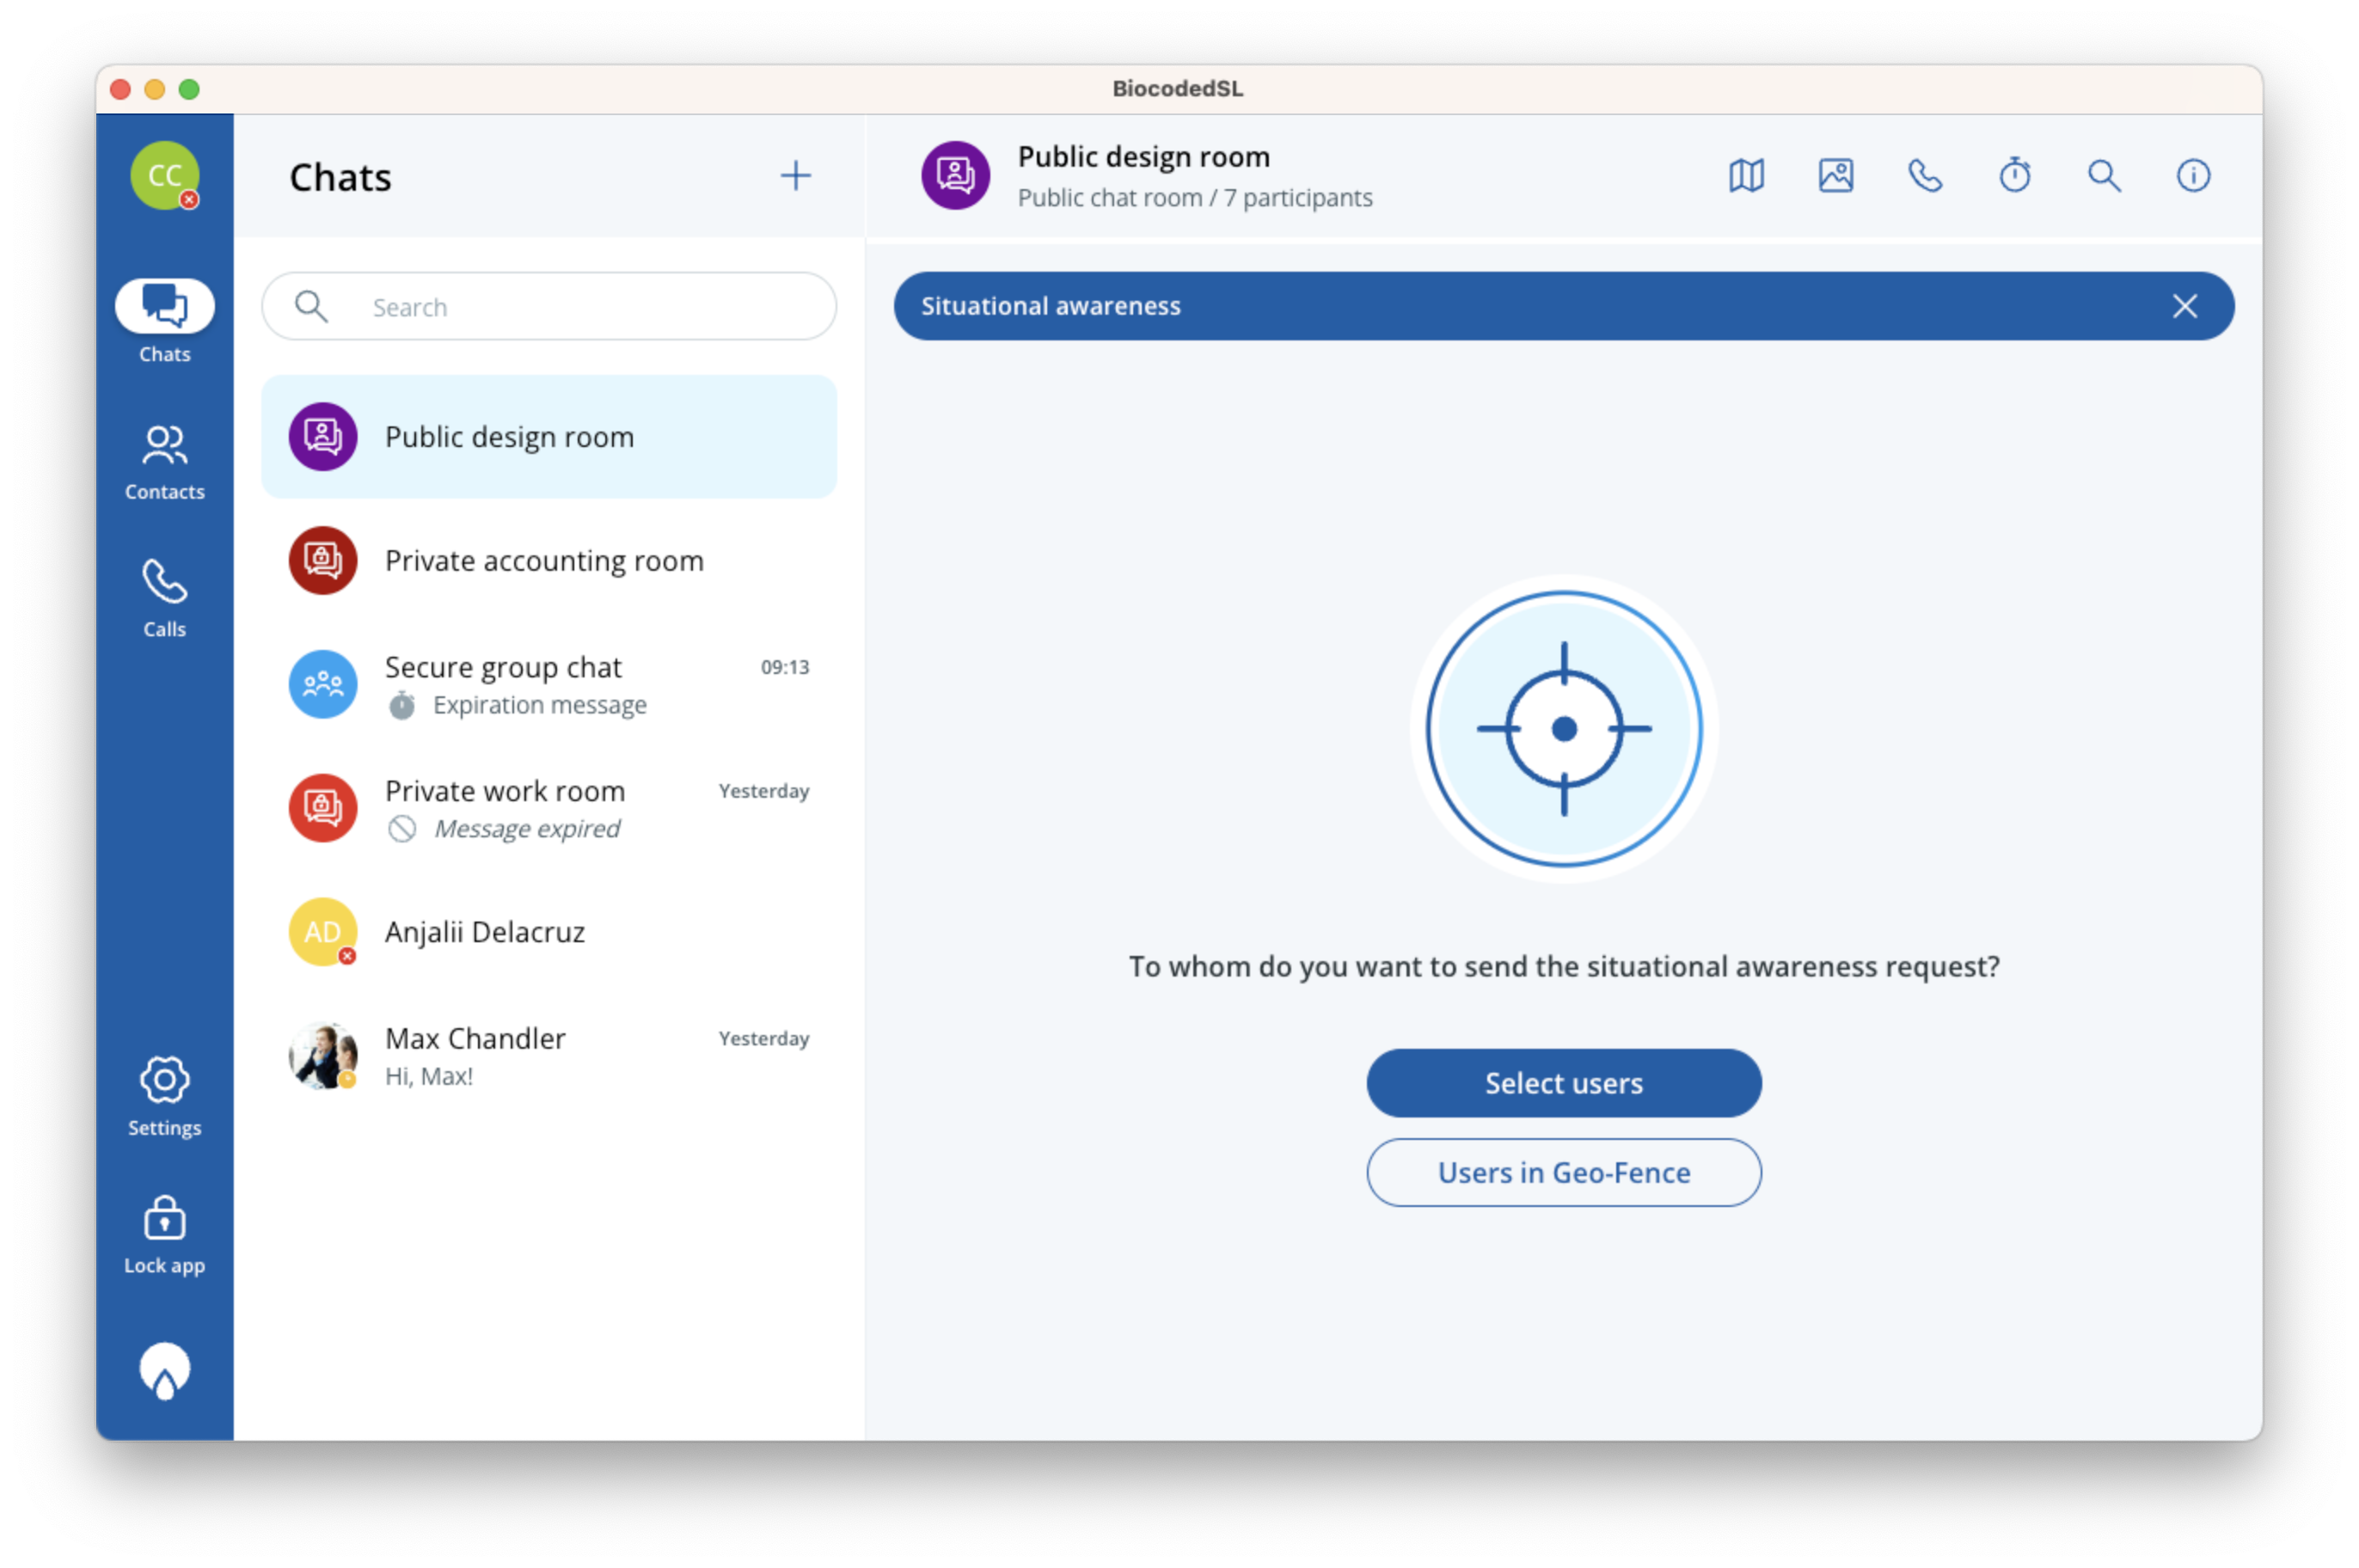
Situational awareness
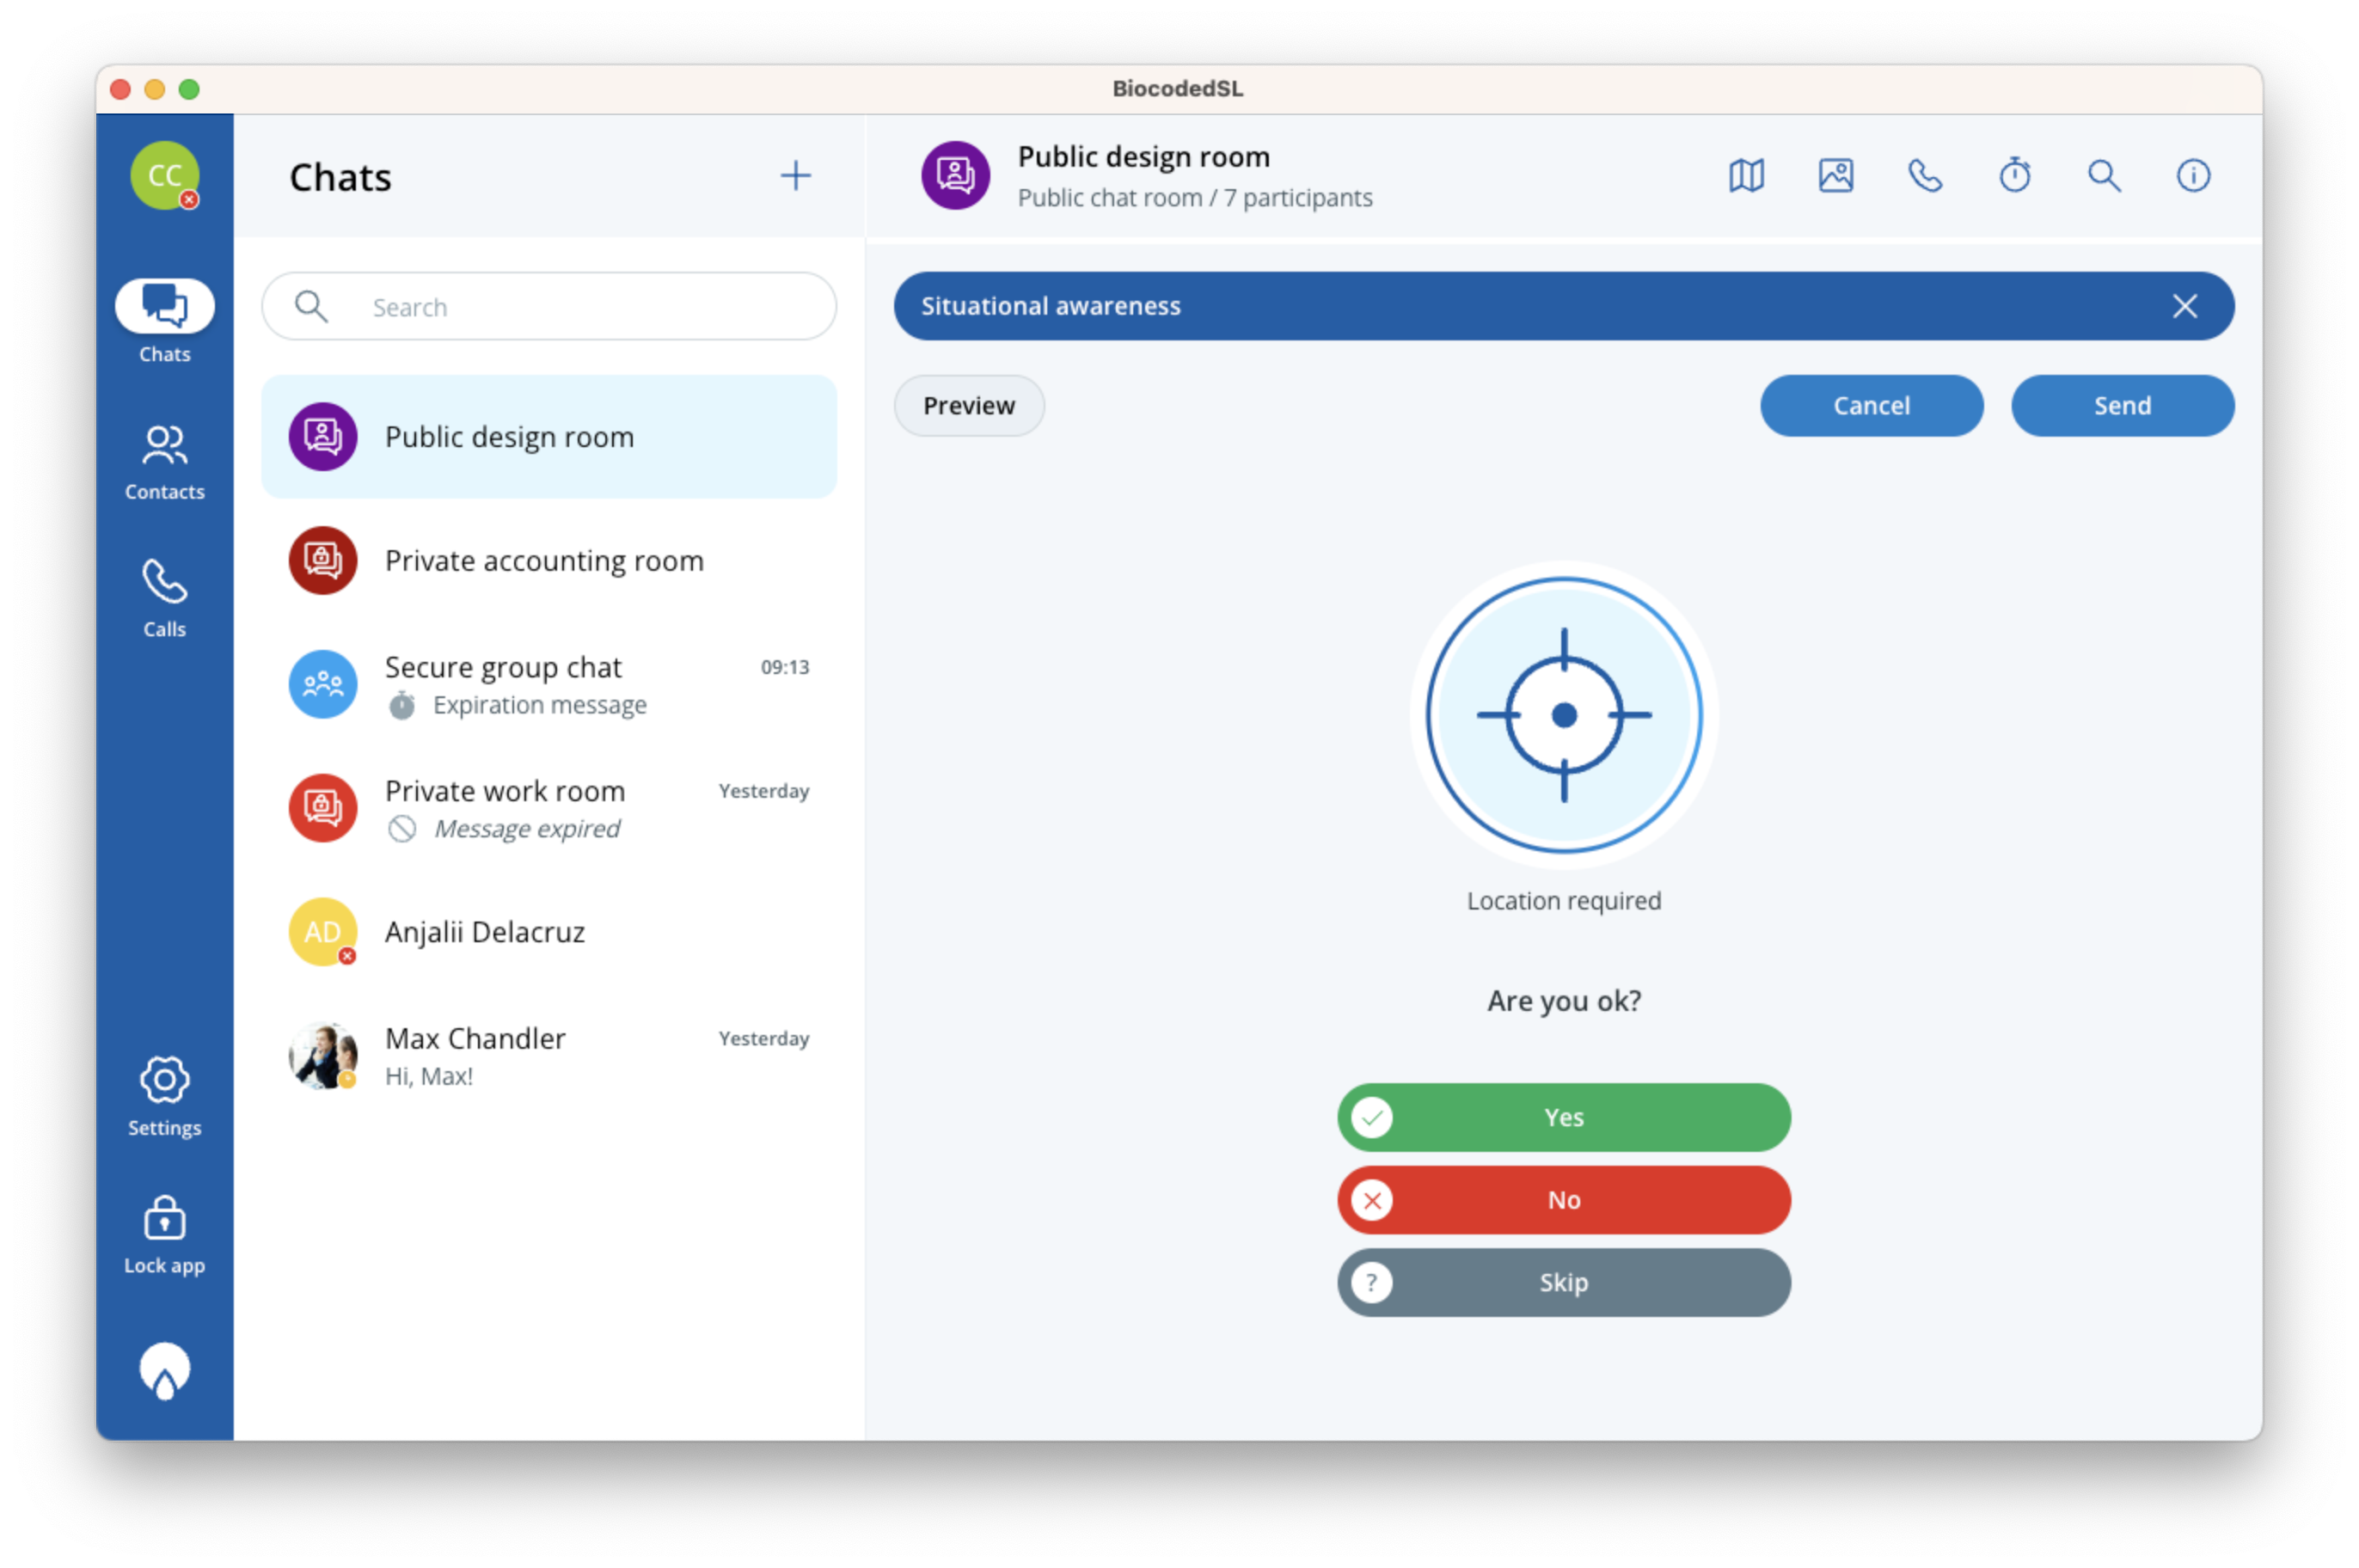
If you are the admin of a chatroom, you can also send a situational awareness request to selected participants of chat (target icon) or users in selected Geo-Fence. You do this by selecting the target icon.
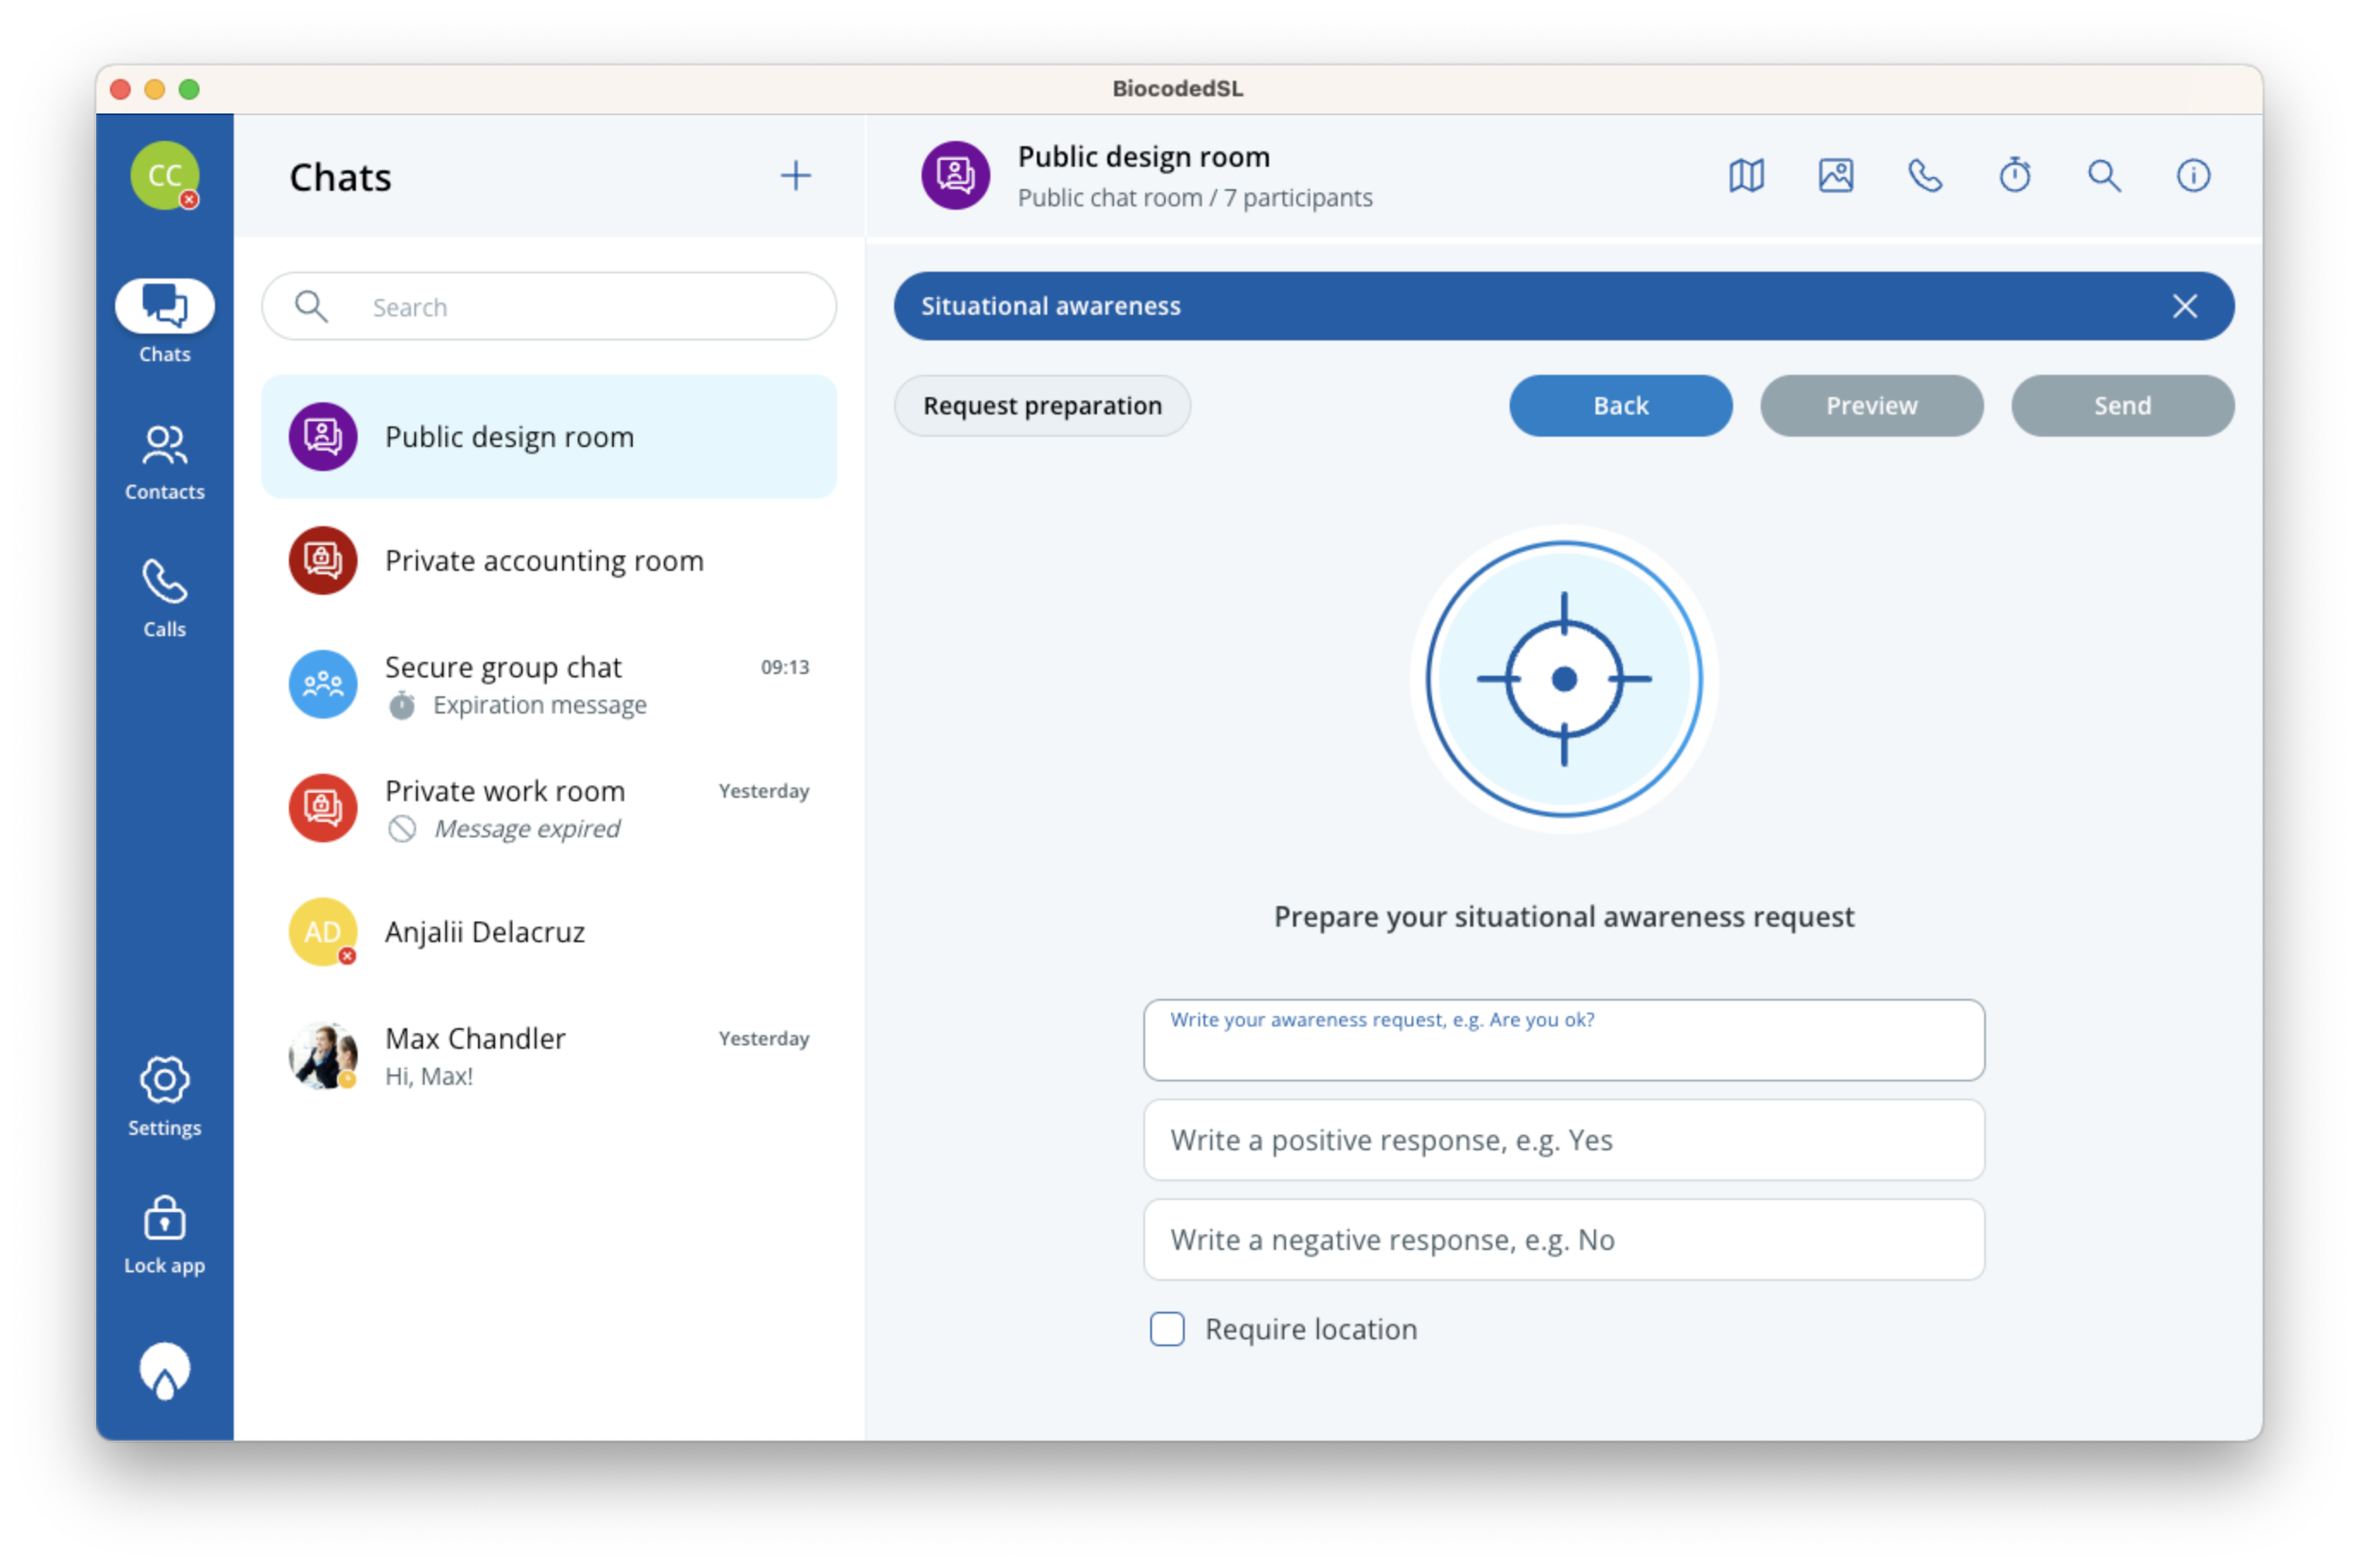
This consists of a question with two possible answers and can also optionally require a location to be shared by the user answering the request.
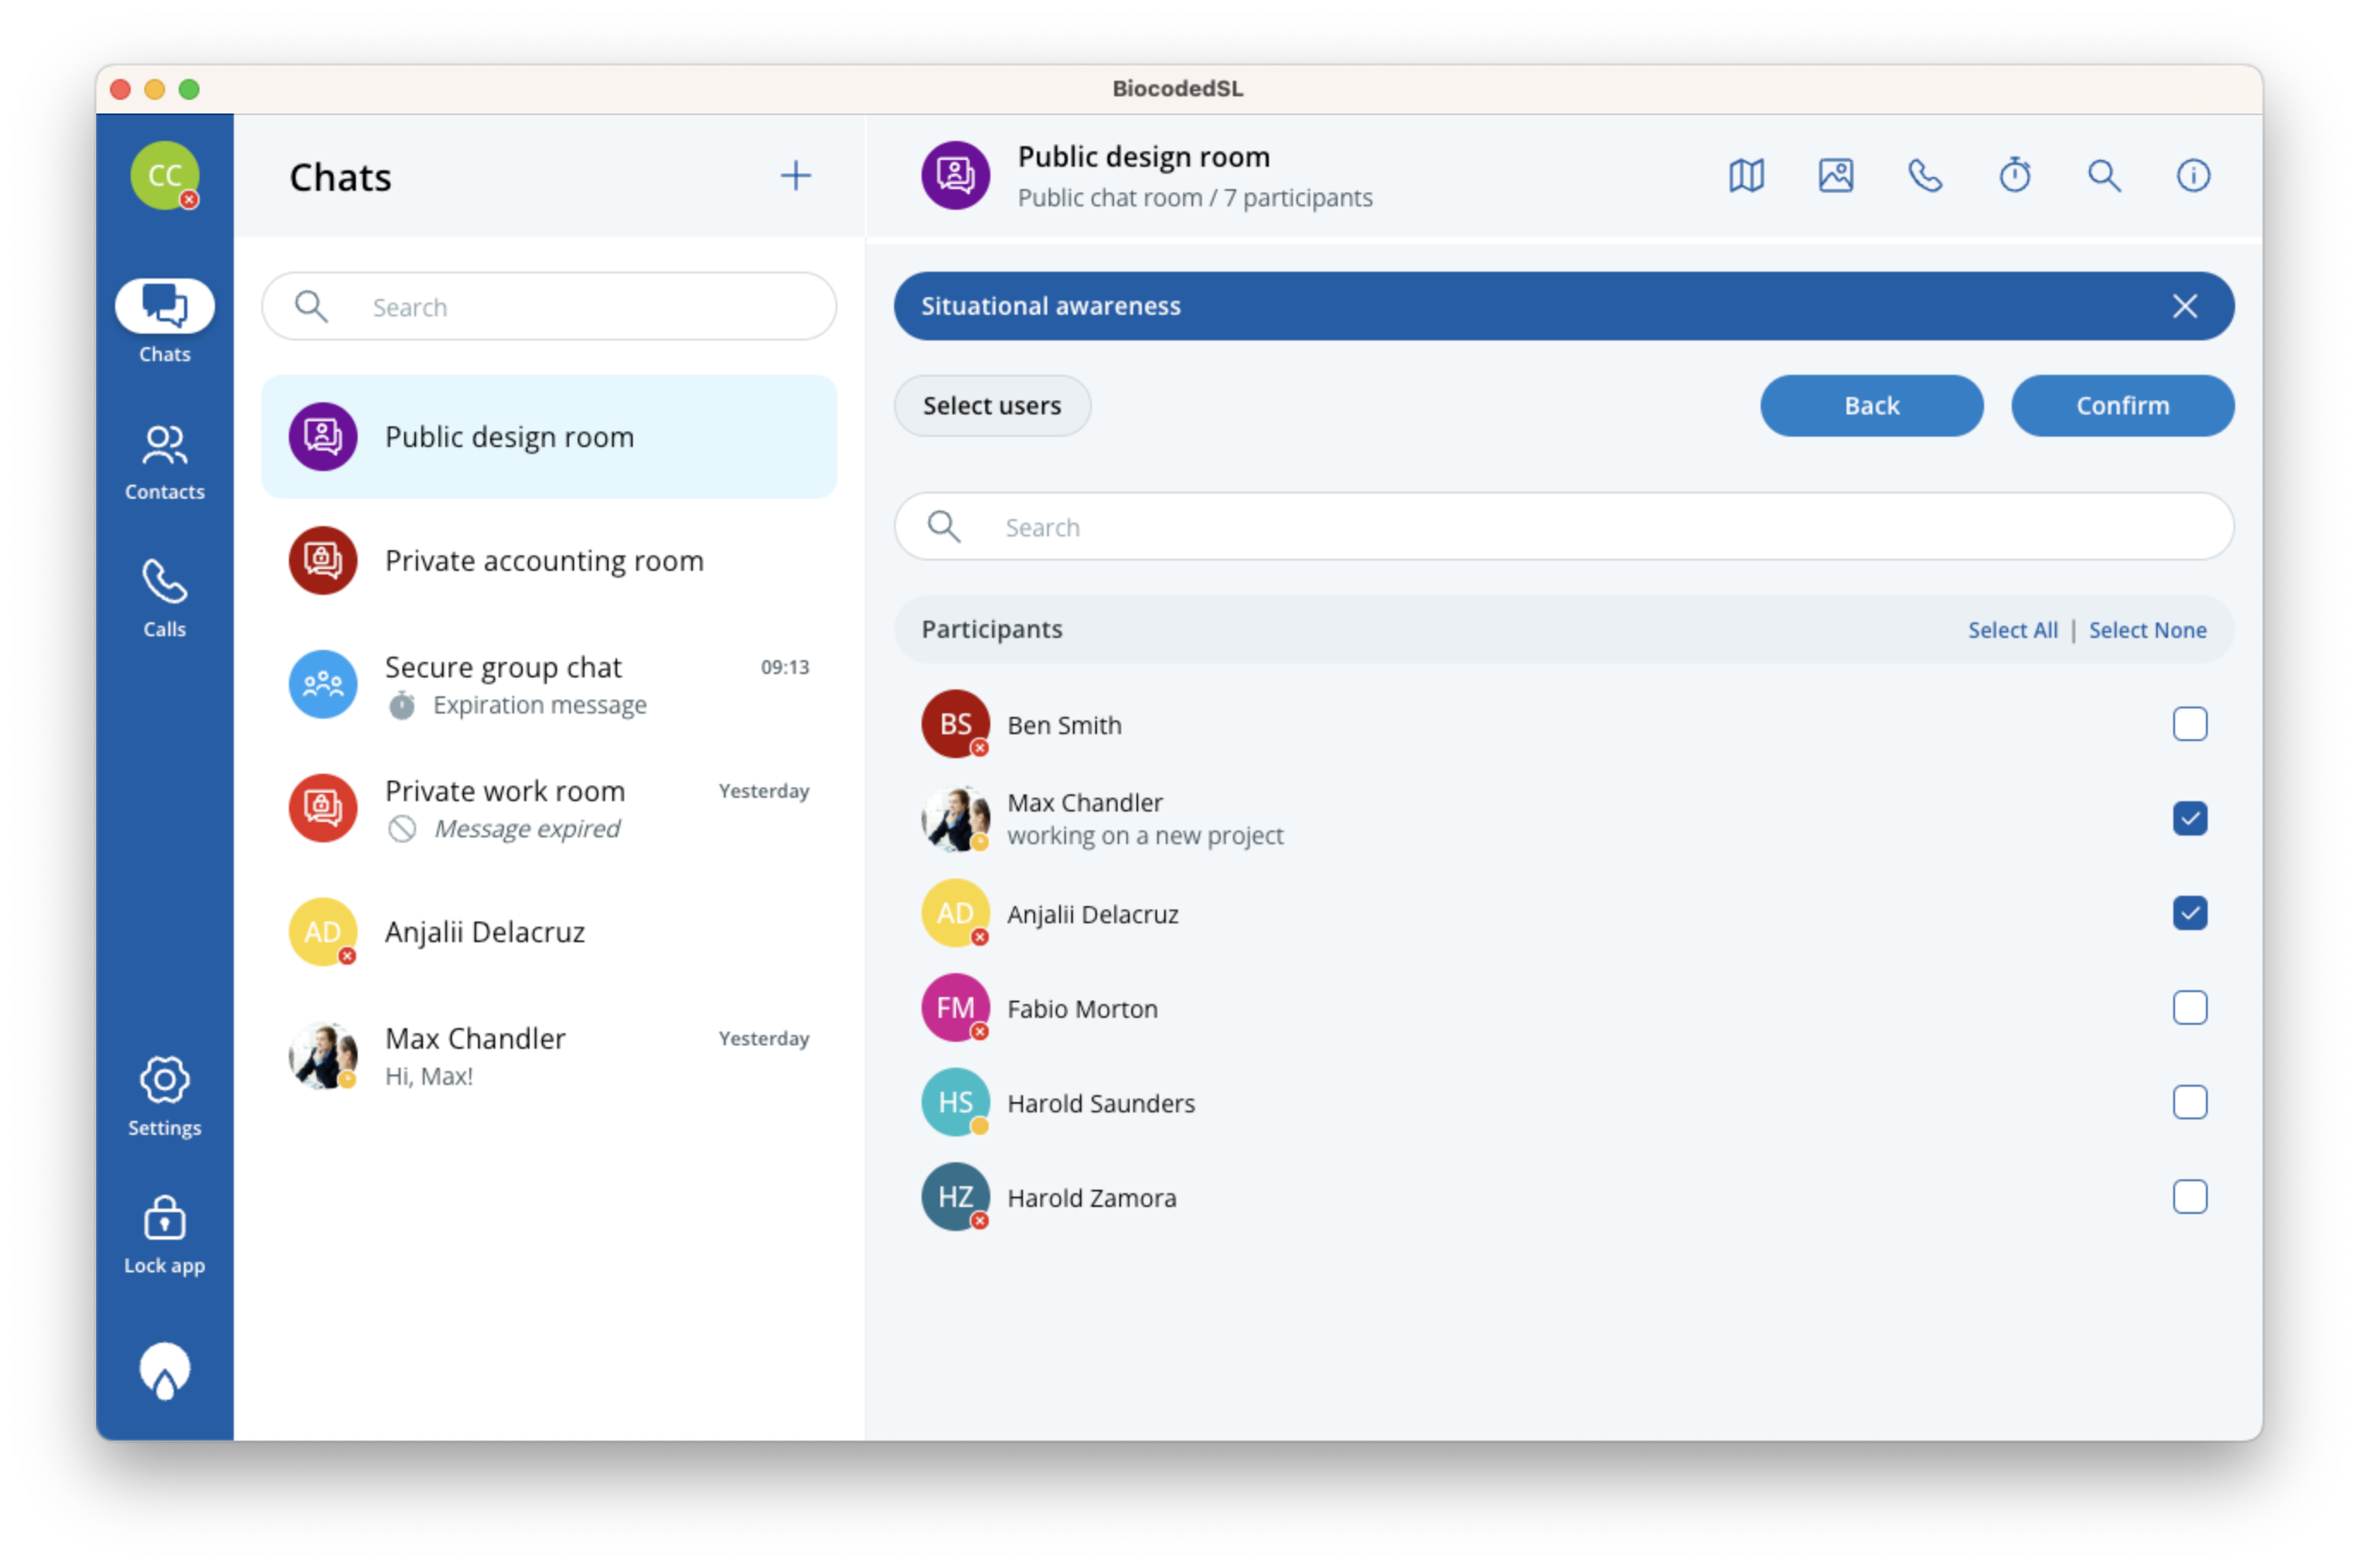
You also have the option to preview your request.
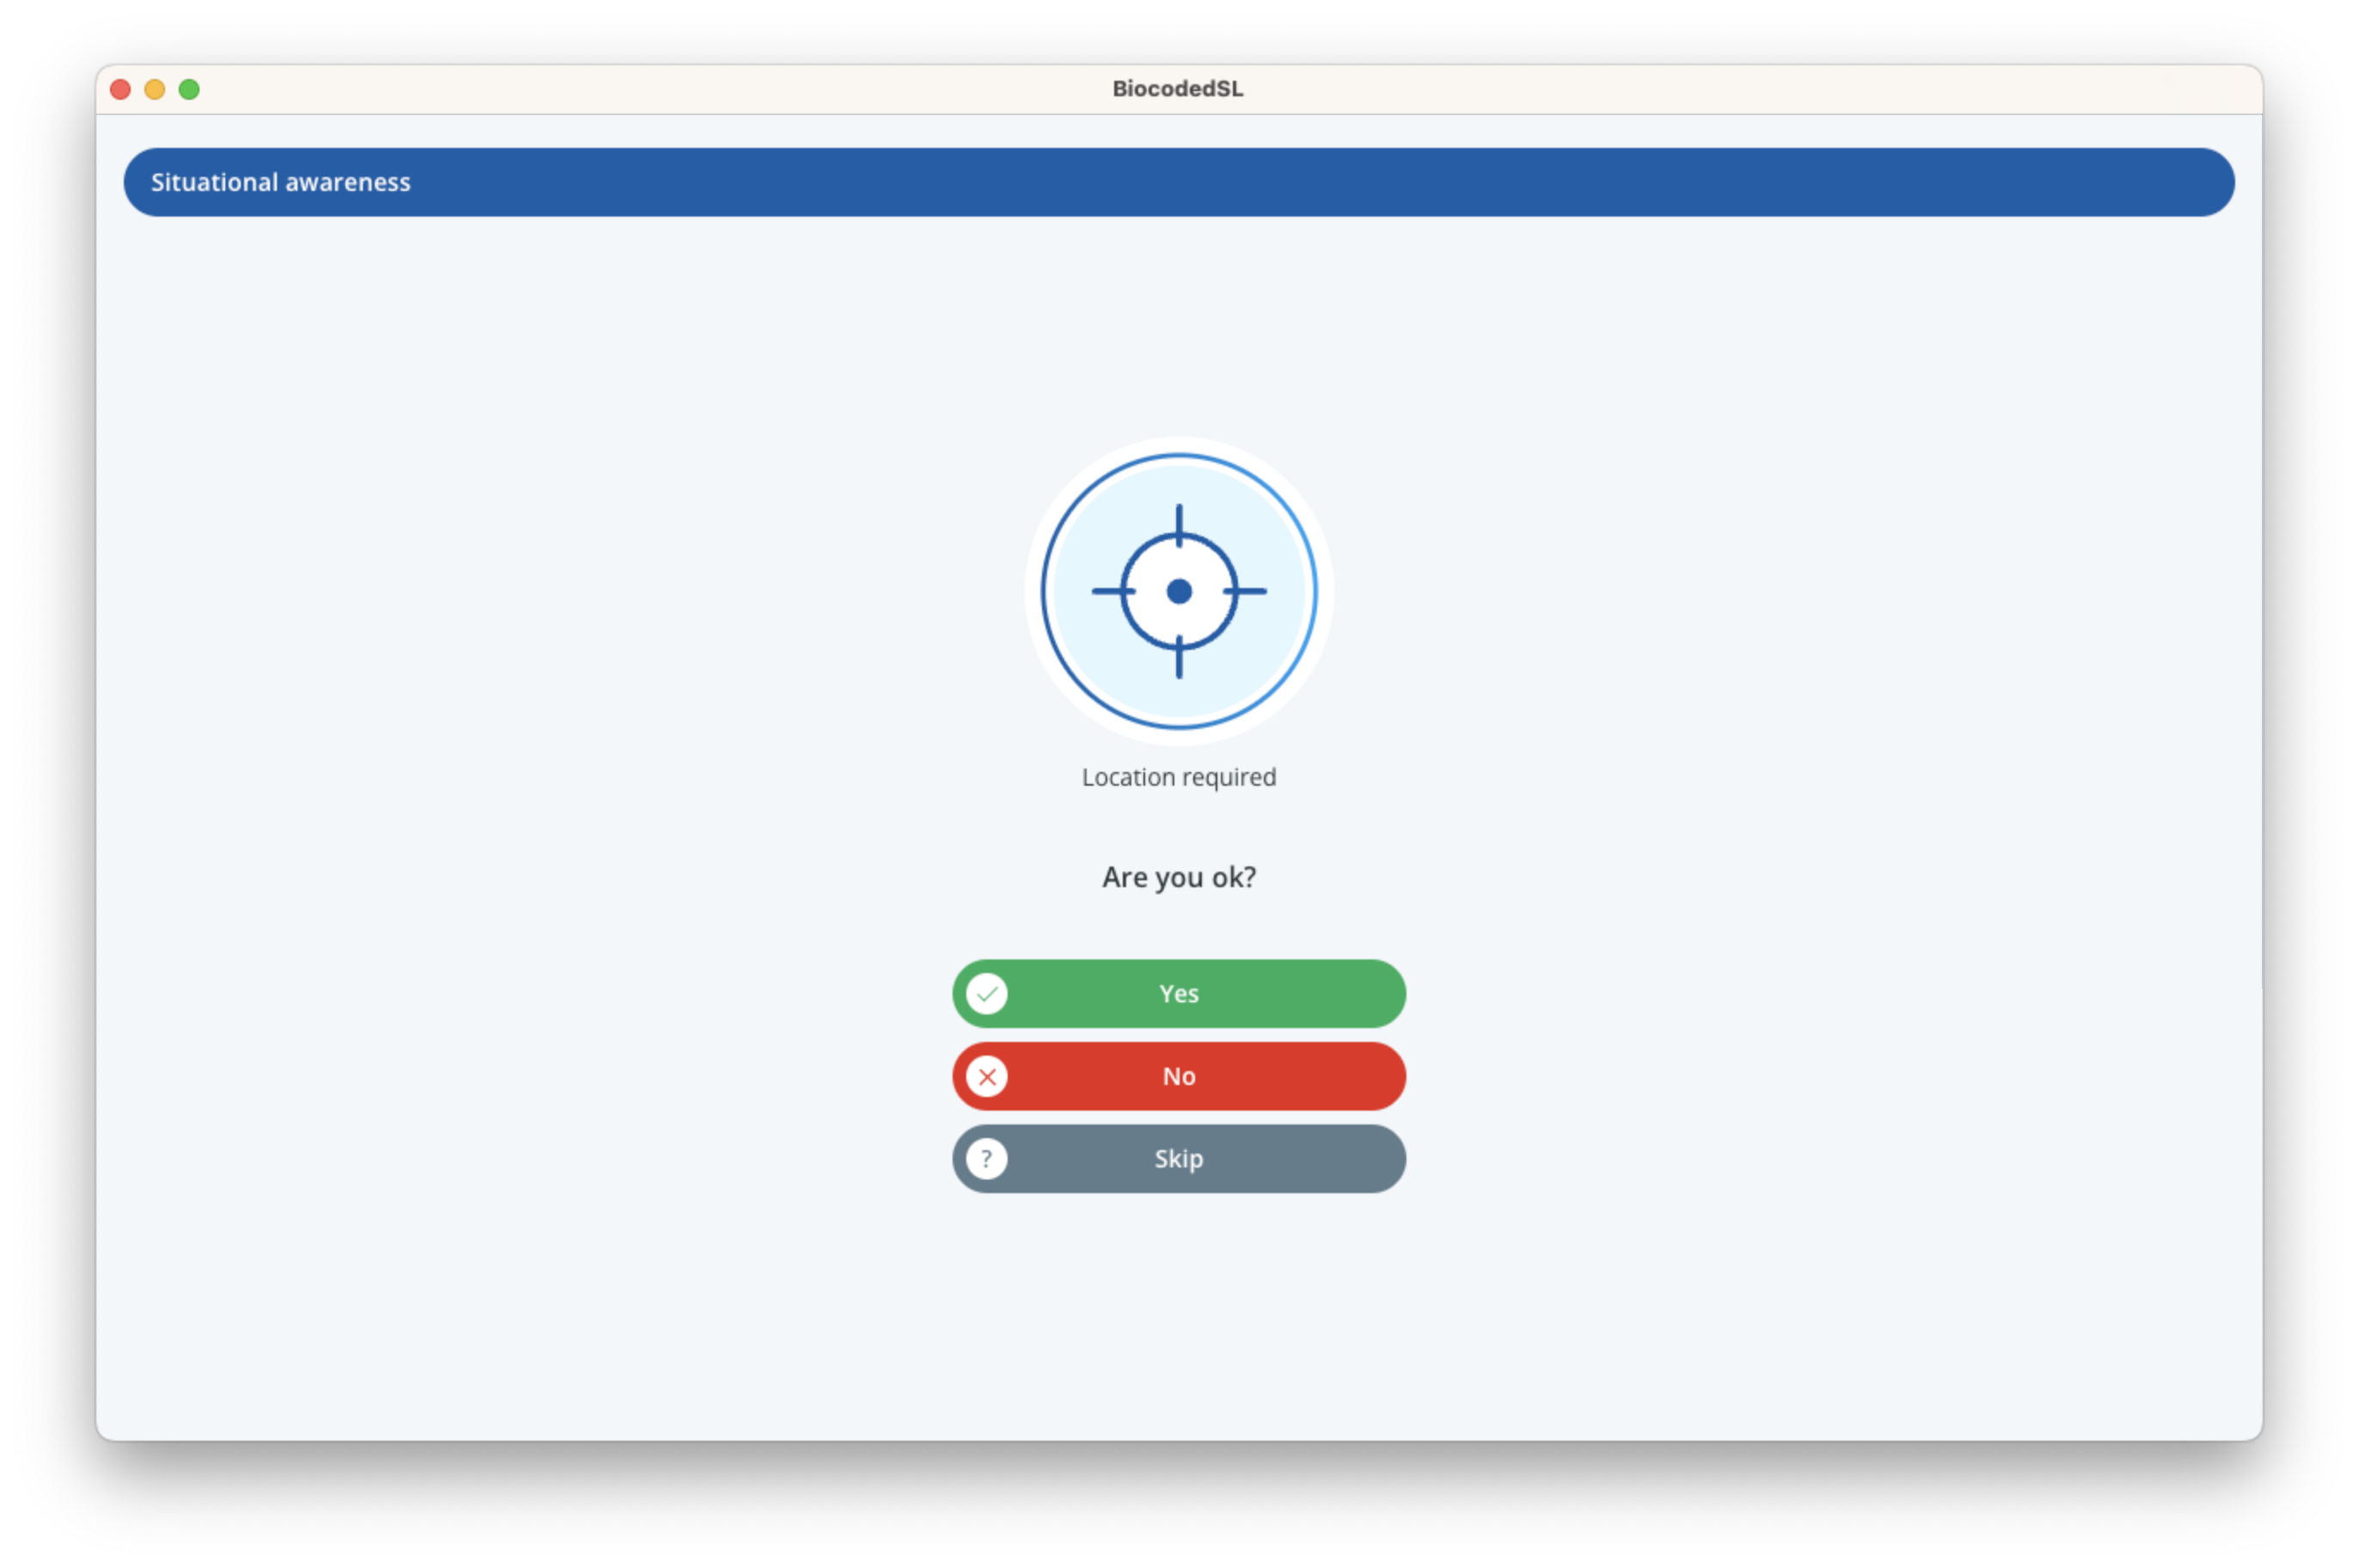
Received requests are sent to users and they can answer or skip.
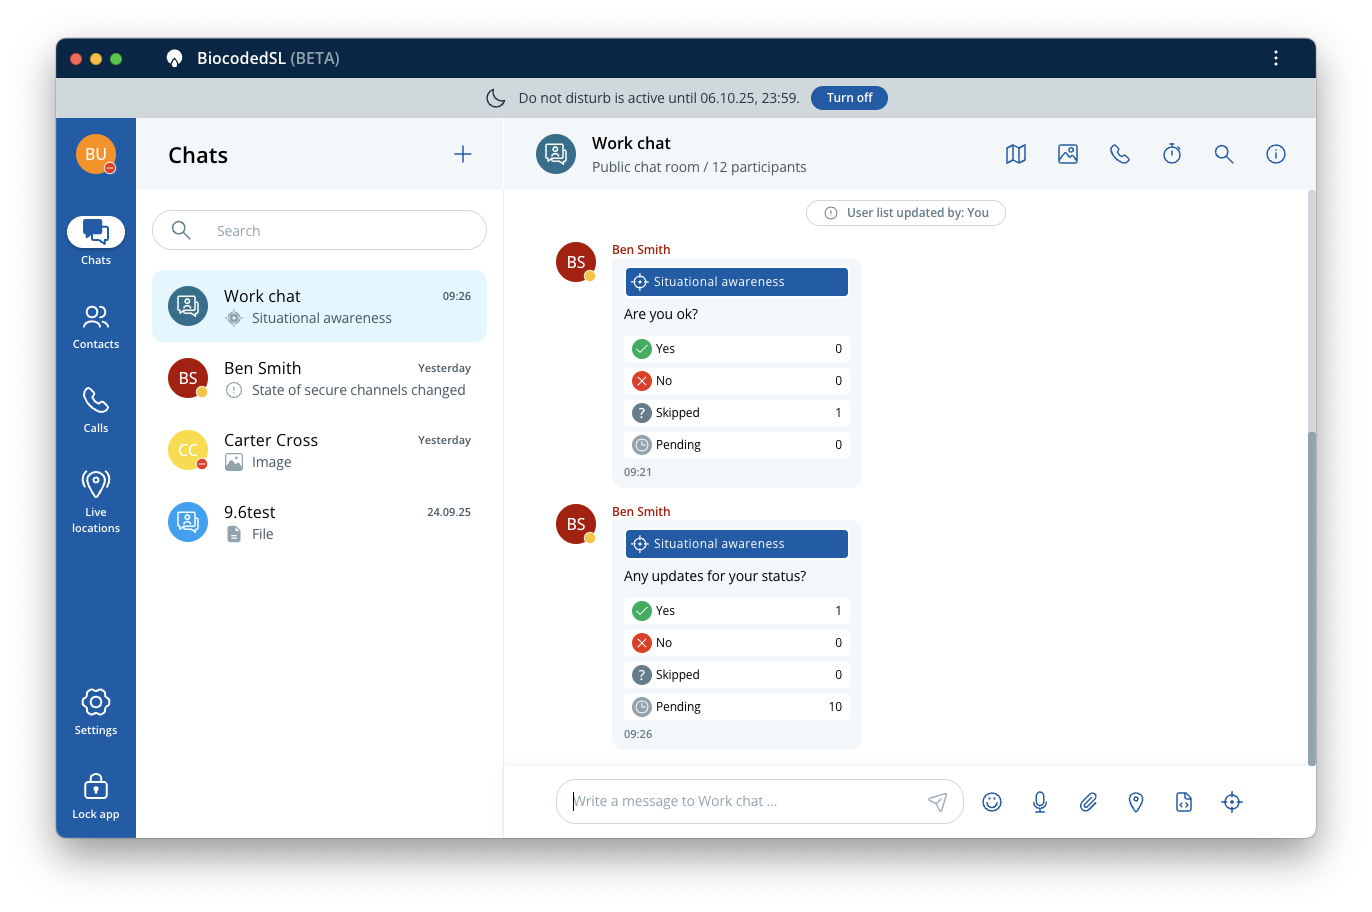
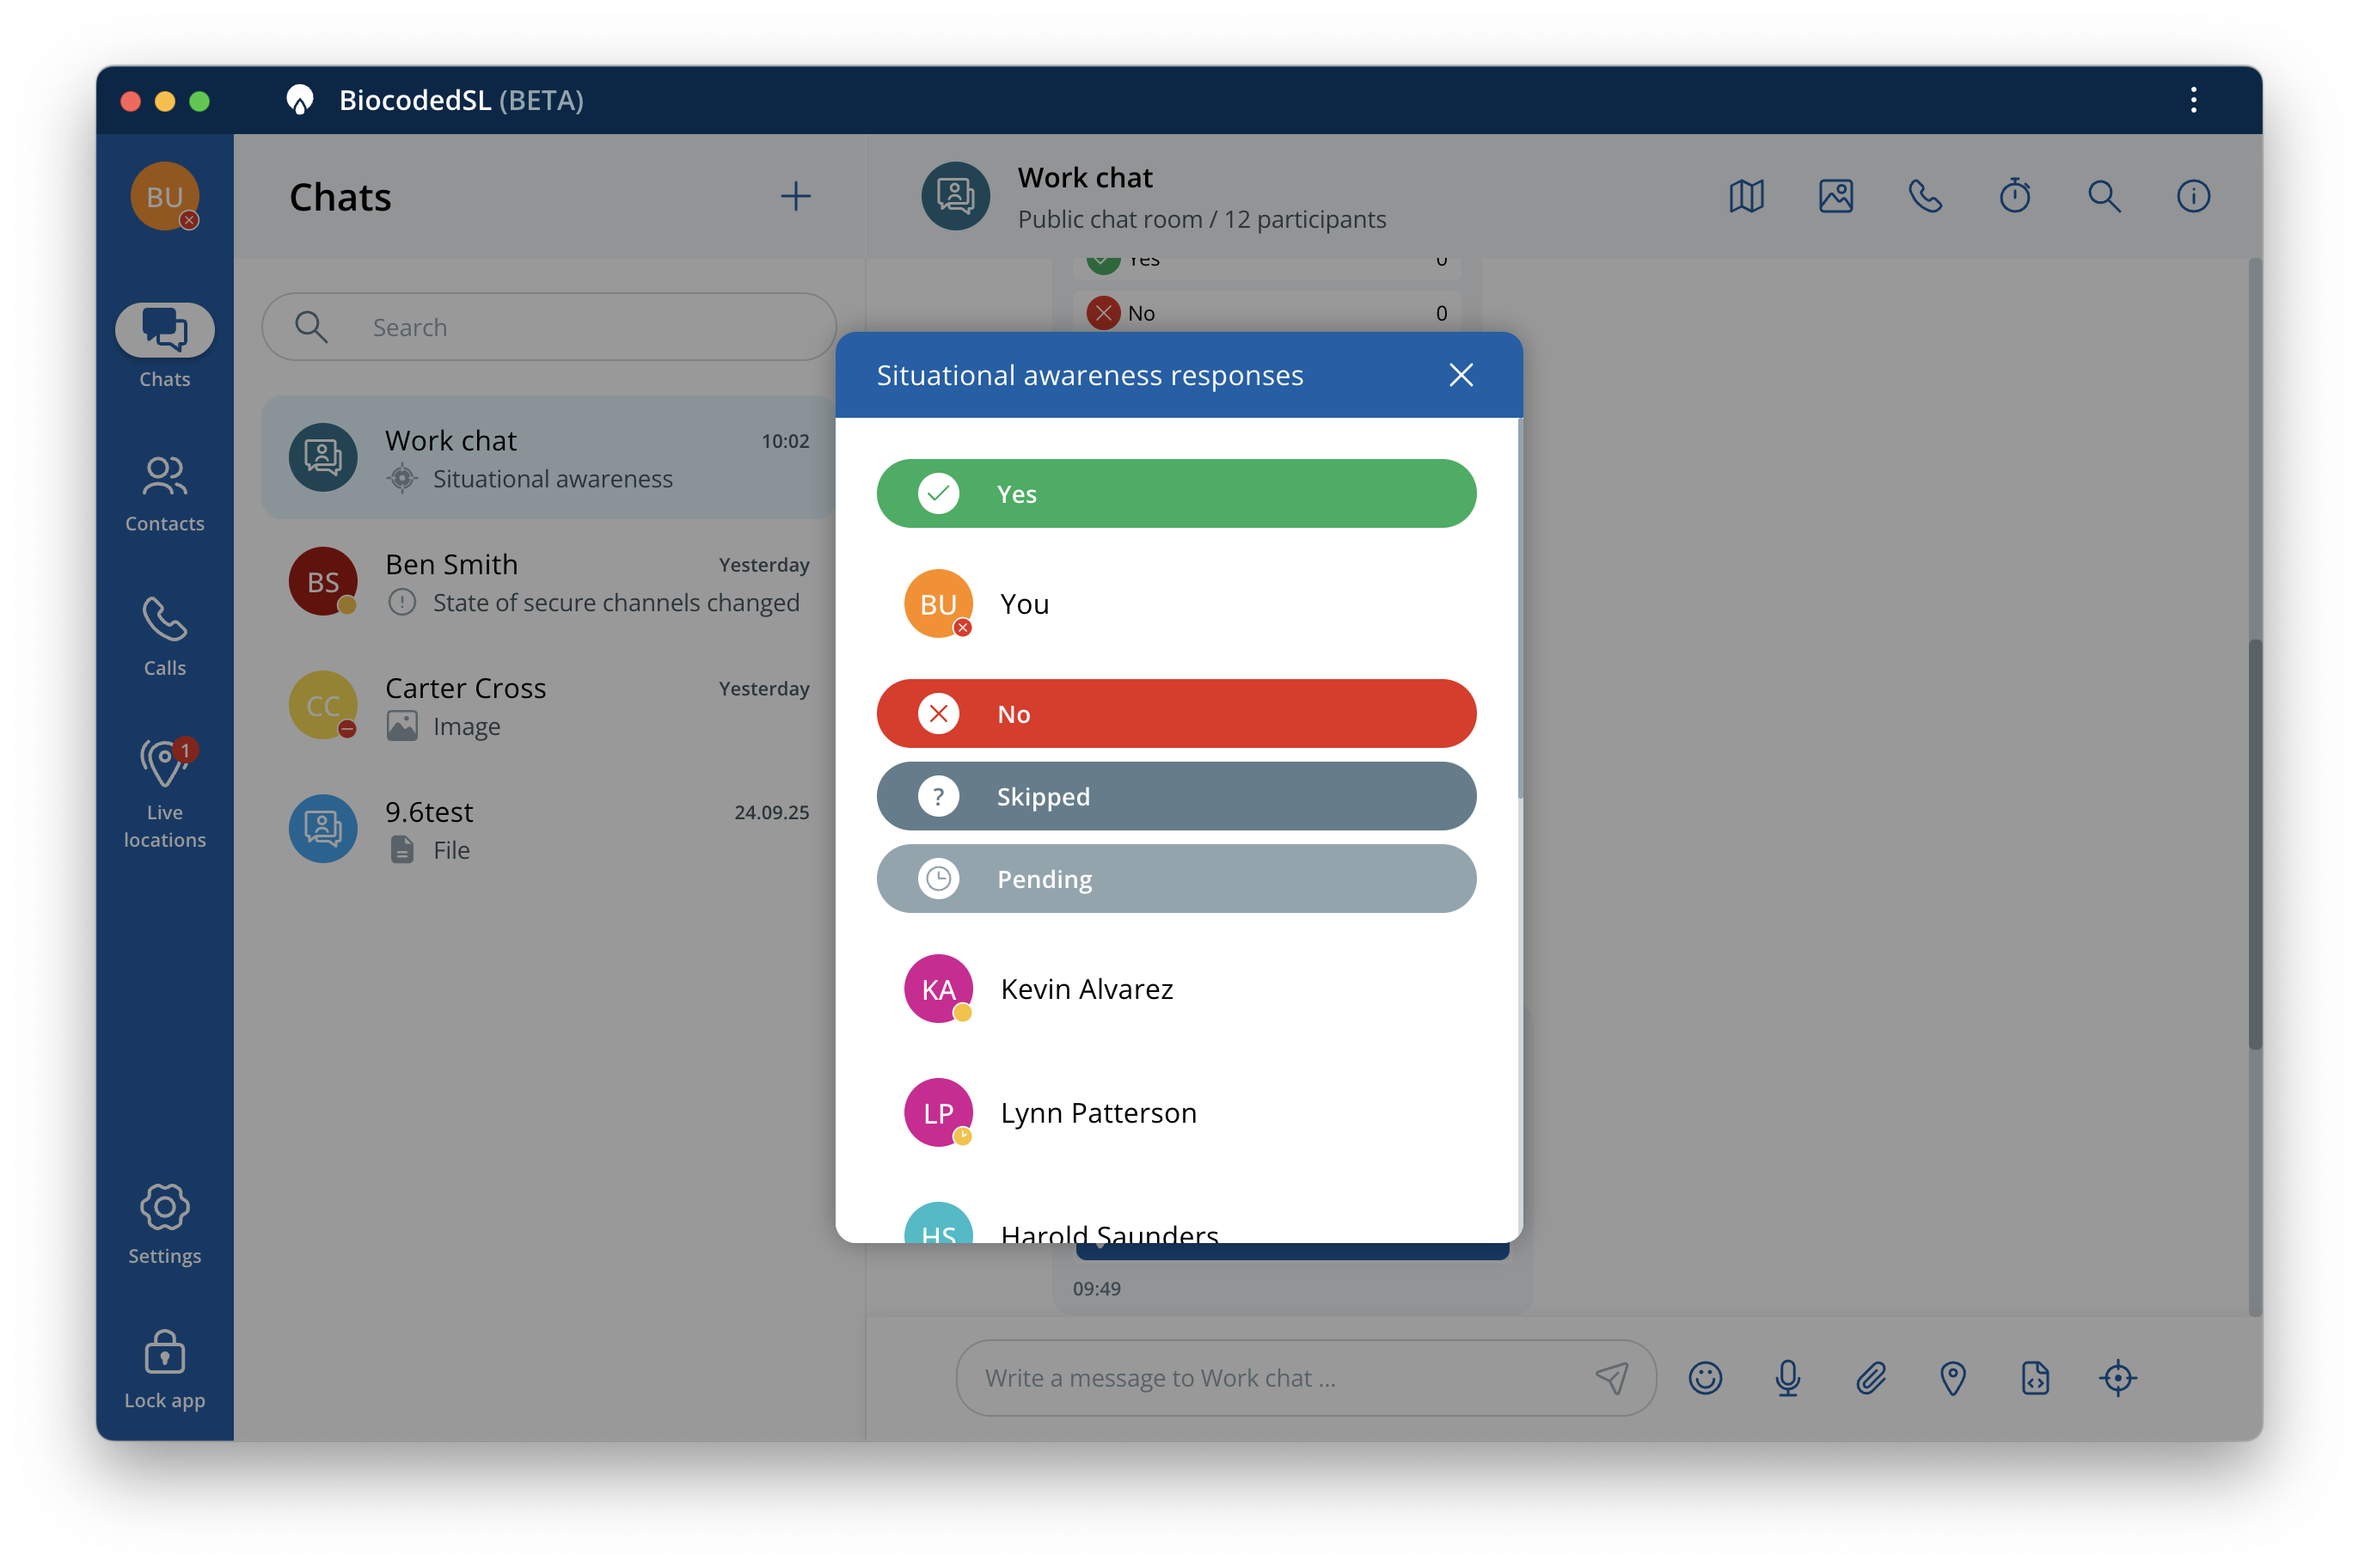
All answers from participants (including location data, if provided) are displayed when request message is clicked.
Viewing messages
You can view received and sent media messages by clicking on them, which (for images, videos and evidence) shows their preview, or (in the case of files) offers file download, or (for voice messages) plays them. Location related messages open map and situational awareness messages show their answers or show map (for those that require location).
Sending a message with expiration
By pressing on  in the chat window, you can select how long your messages will be available. Once expired, the content of said messages will no longer be accessible.
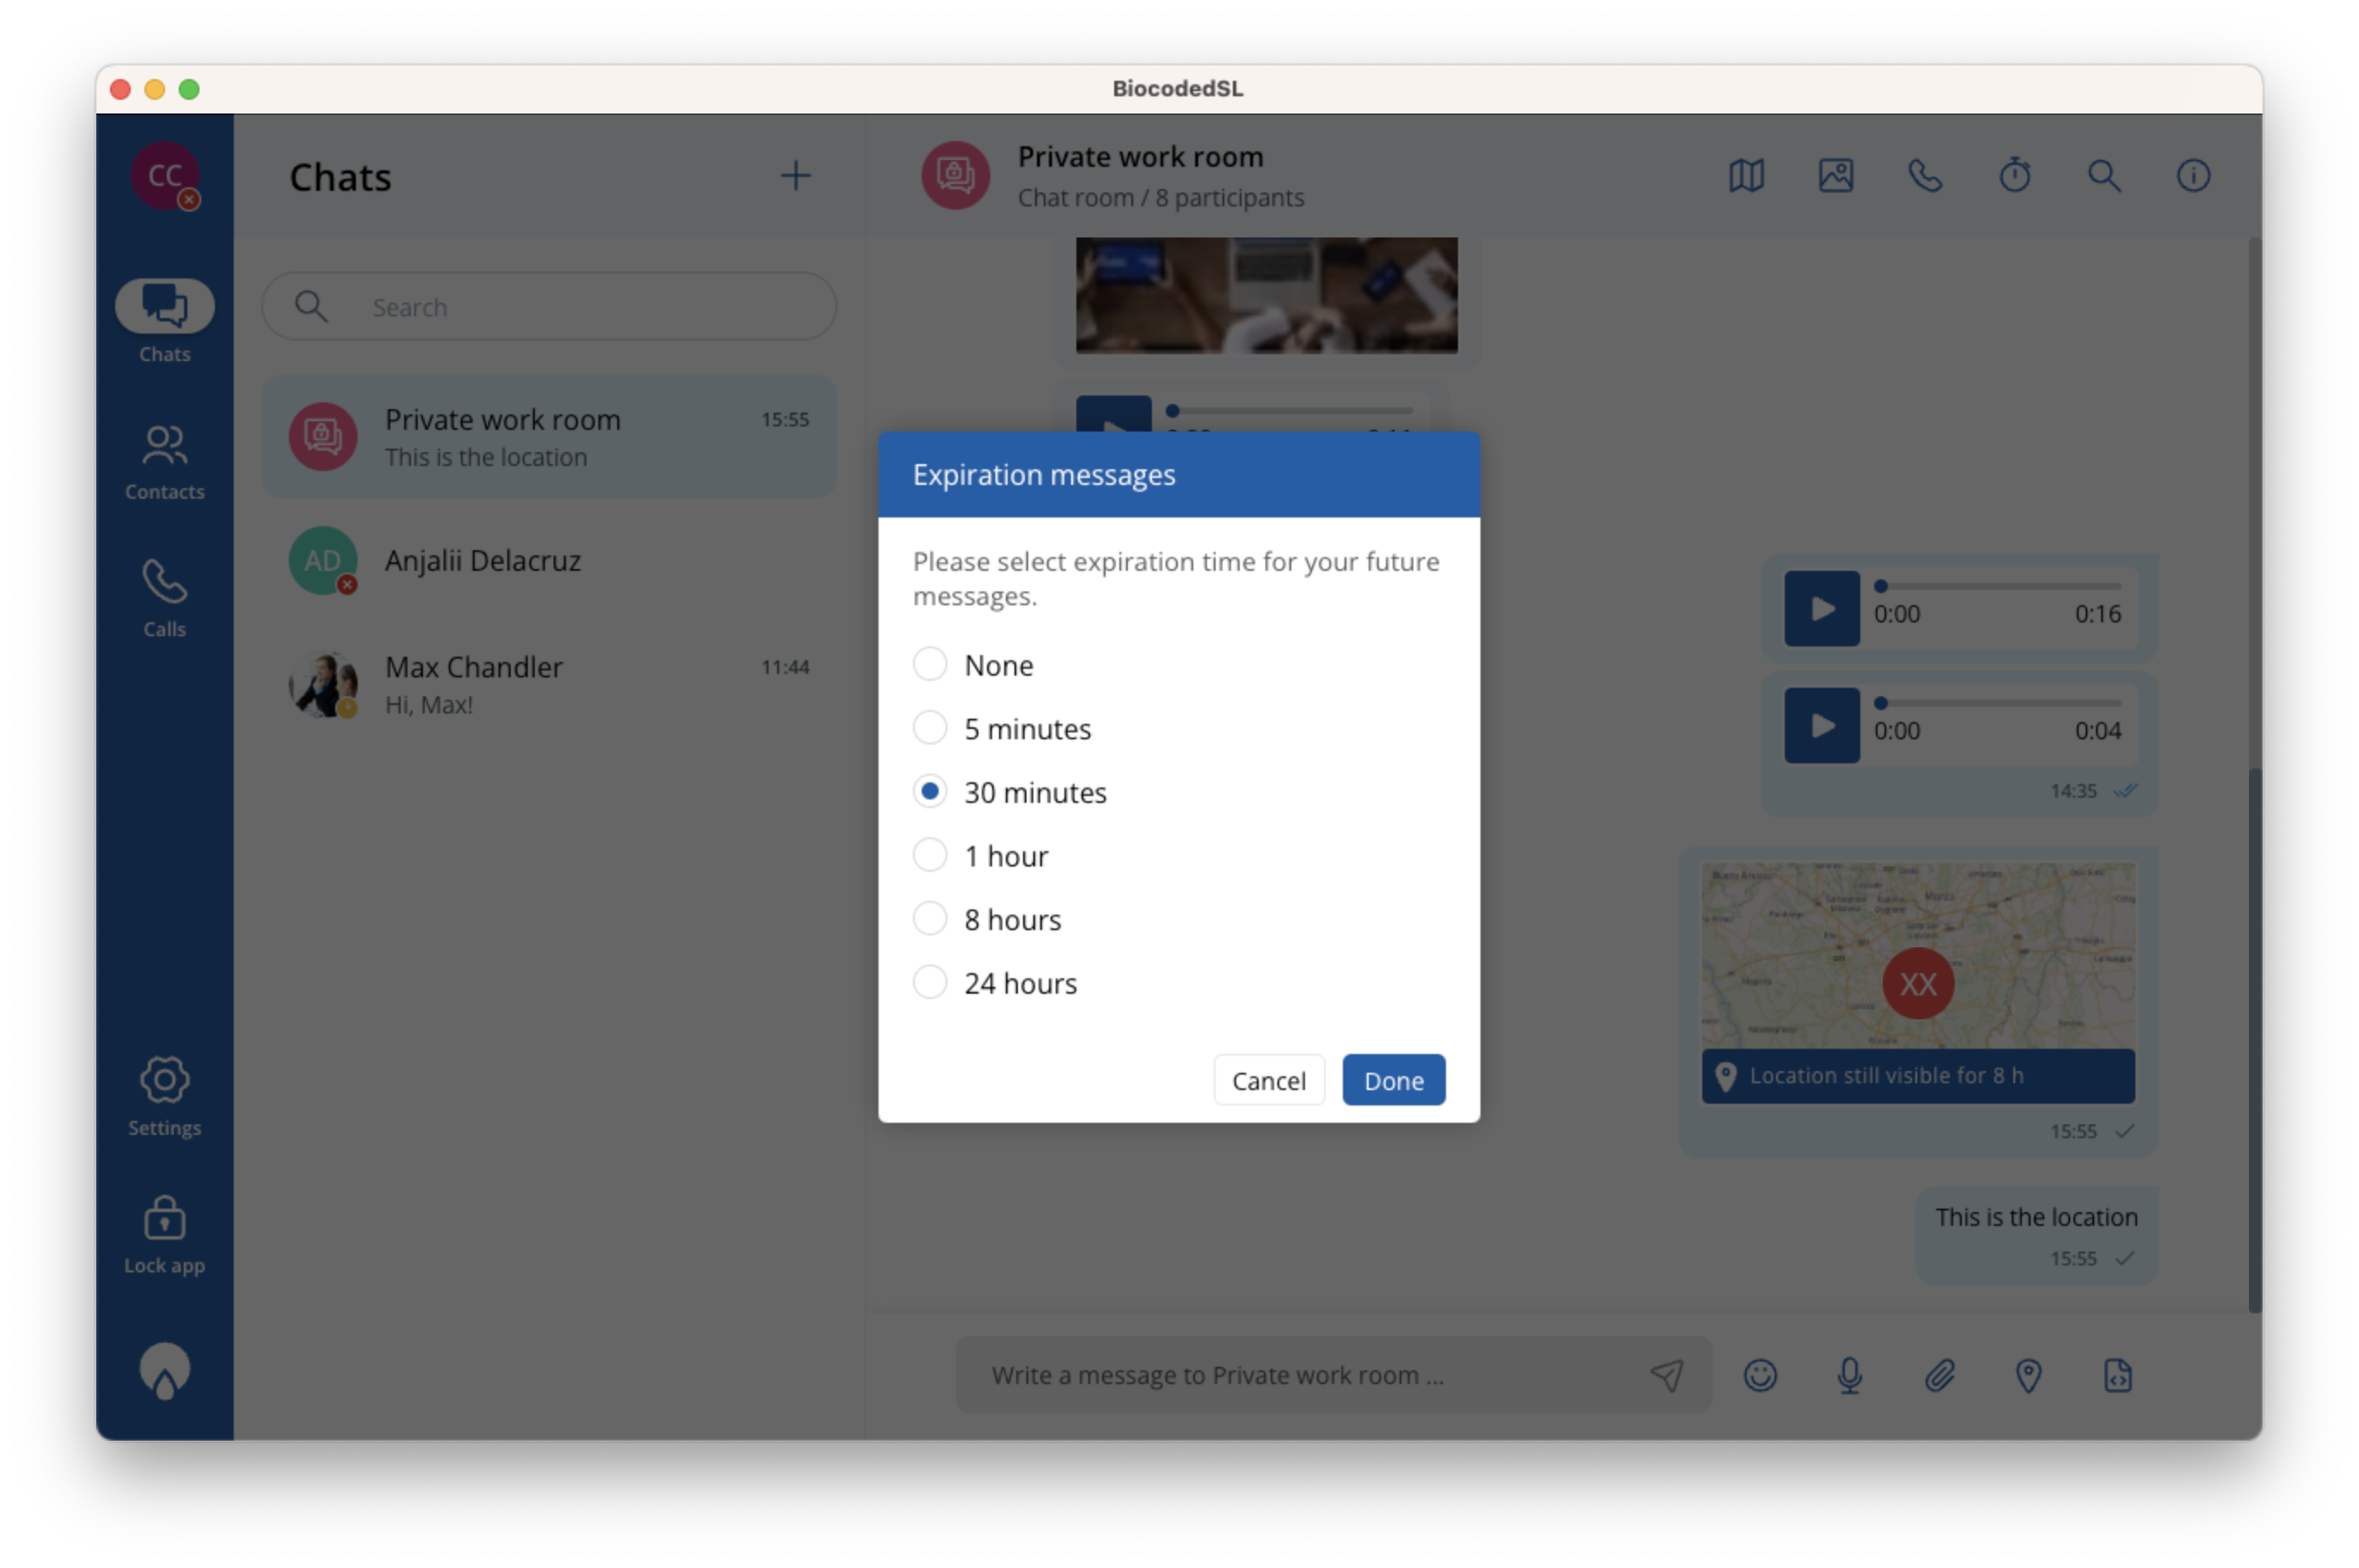
If time limited messages are enabled, the time limited message icon will change to  , which can be used to deactivate the time limitation.
Messages that are going to expire are marked with a time indicator  and a timestamp. If the message has not been seen yet, the timestamp will represent the time at which the message was sent. If the message has been seen, the timestamp will show the time remaining to view the message.
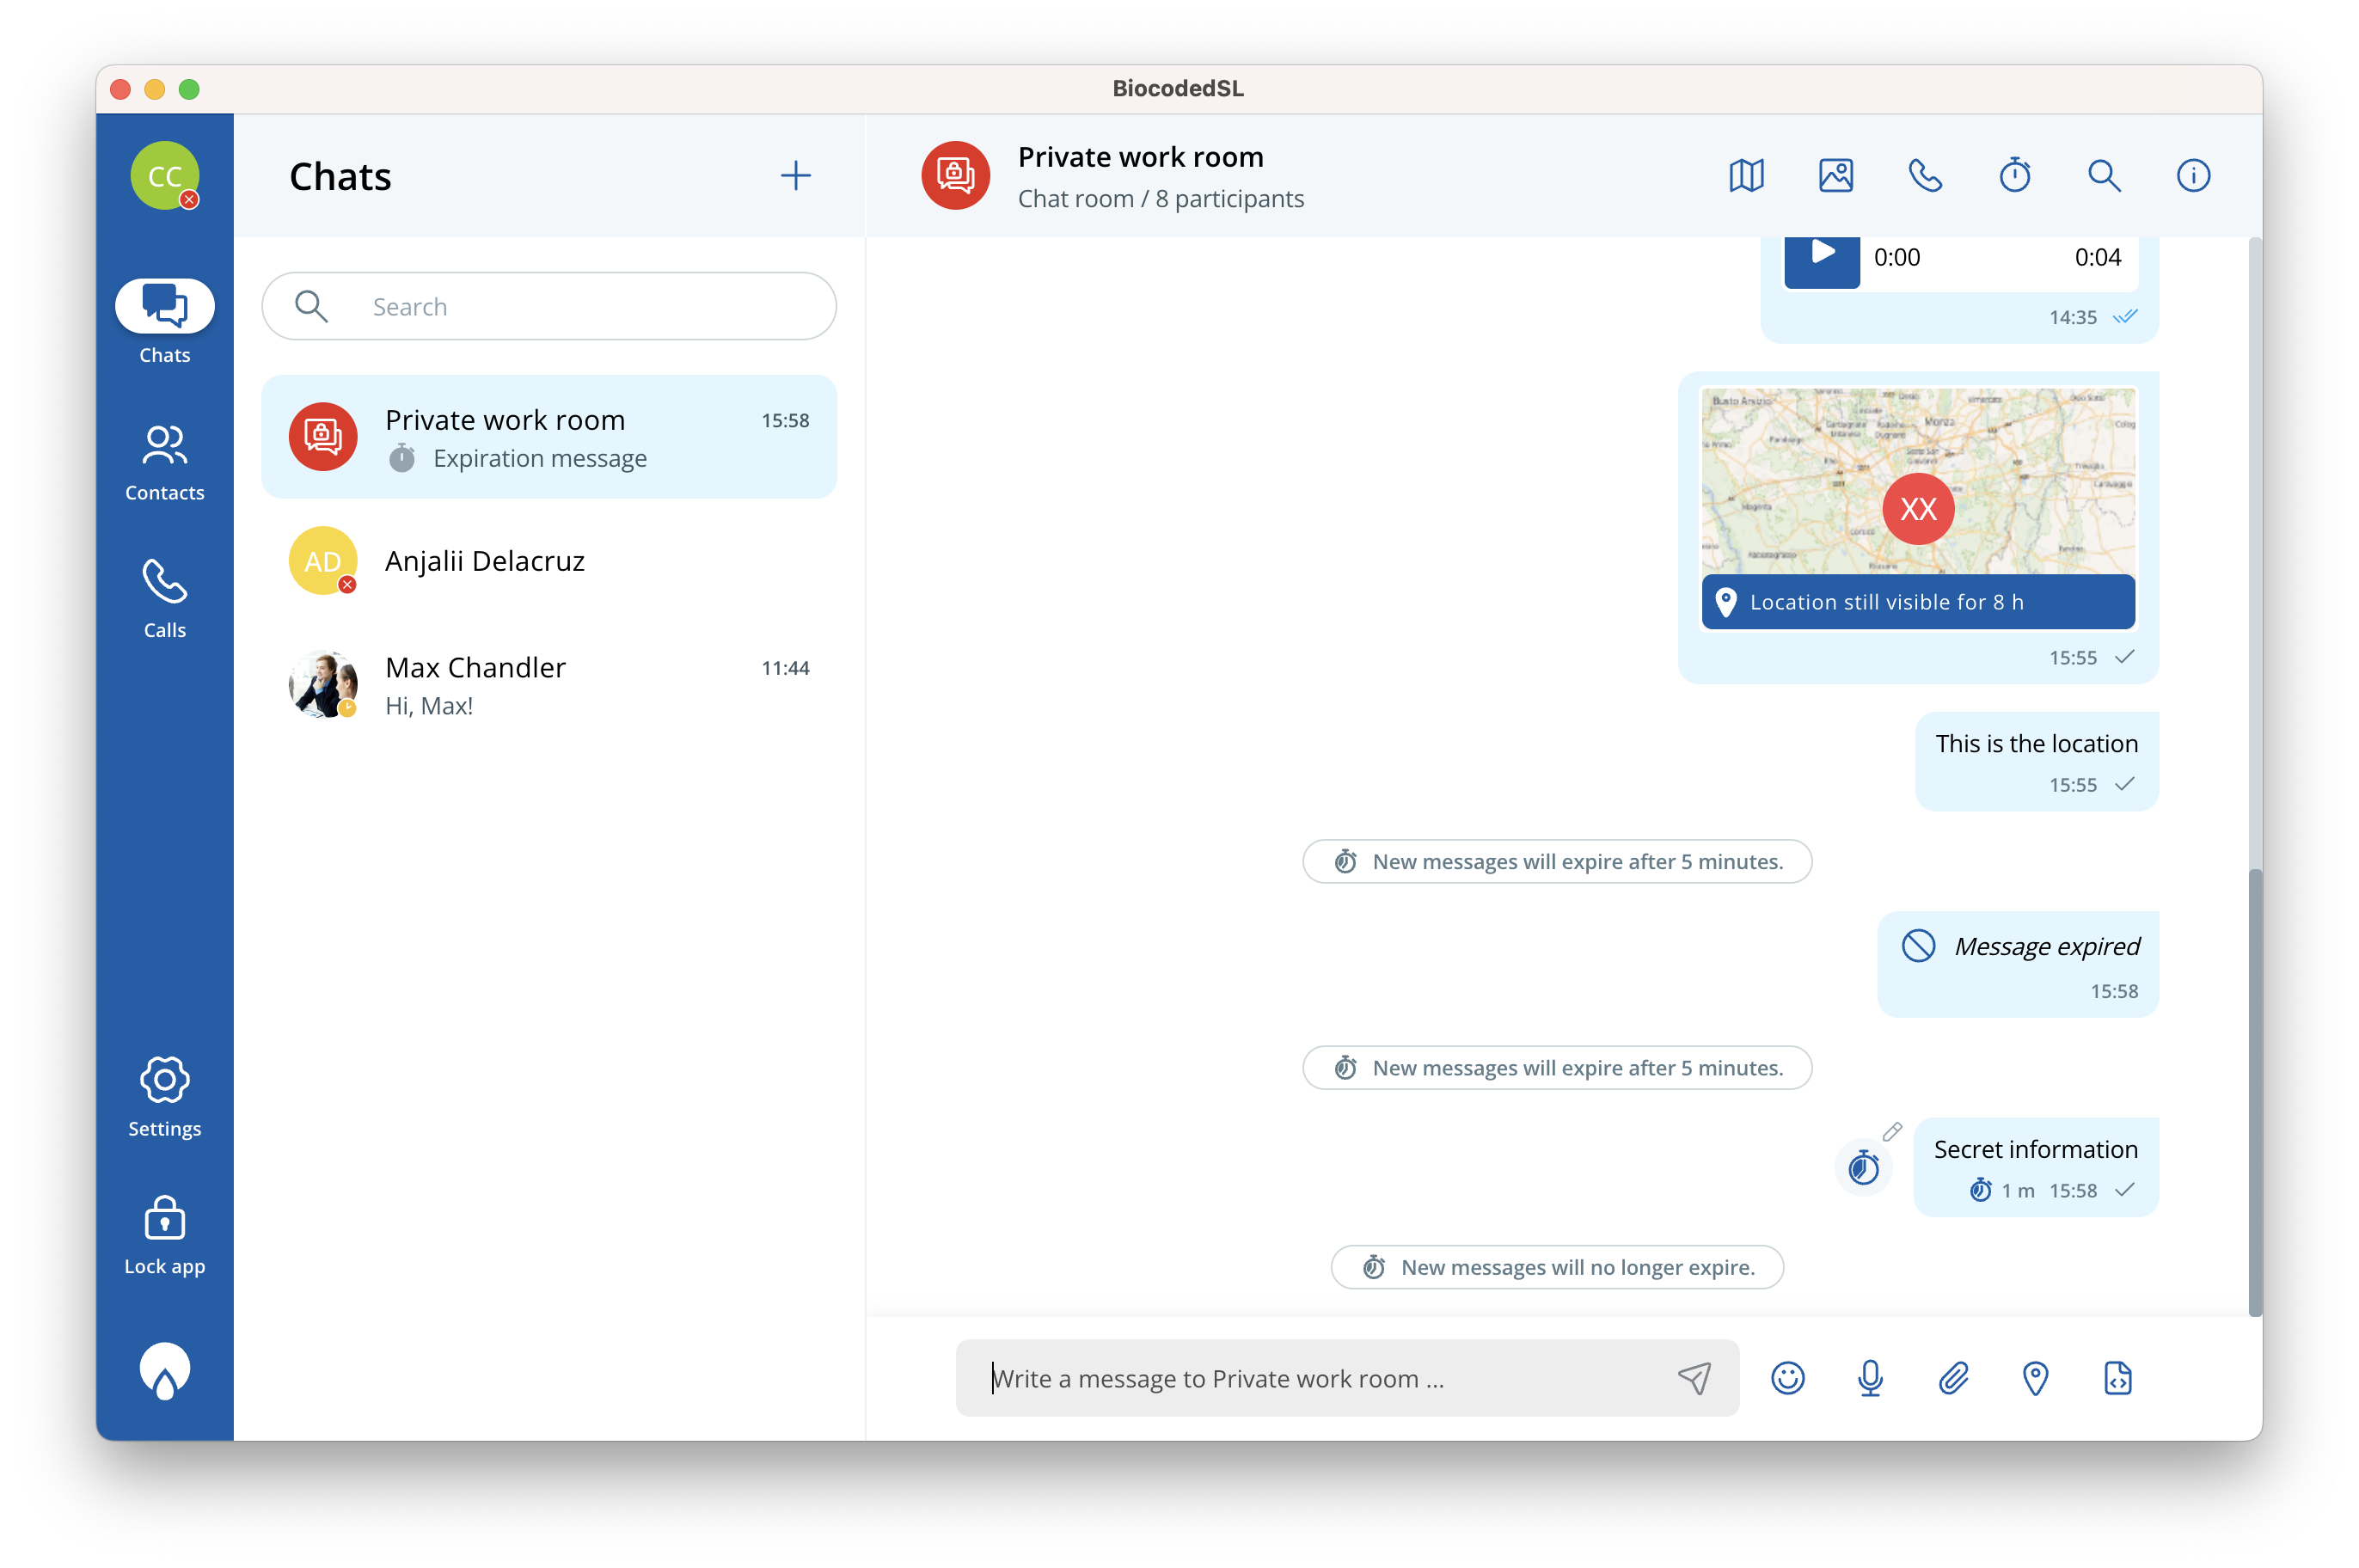
Before a message expires, an additional expire button will be visible, which will expire the message for you ahead of time. Others will still be able to view the message until it's original expiration time passes or until you delete the message for all participants of chat.
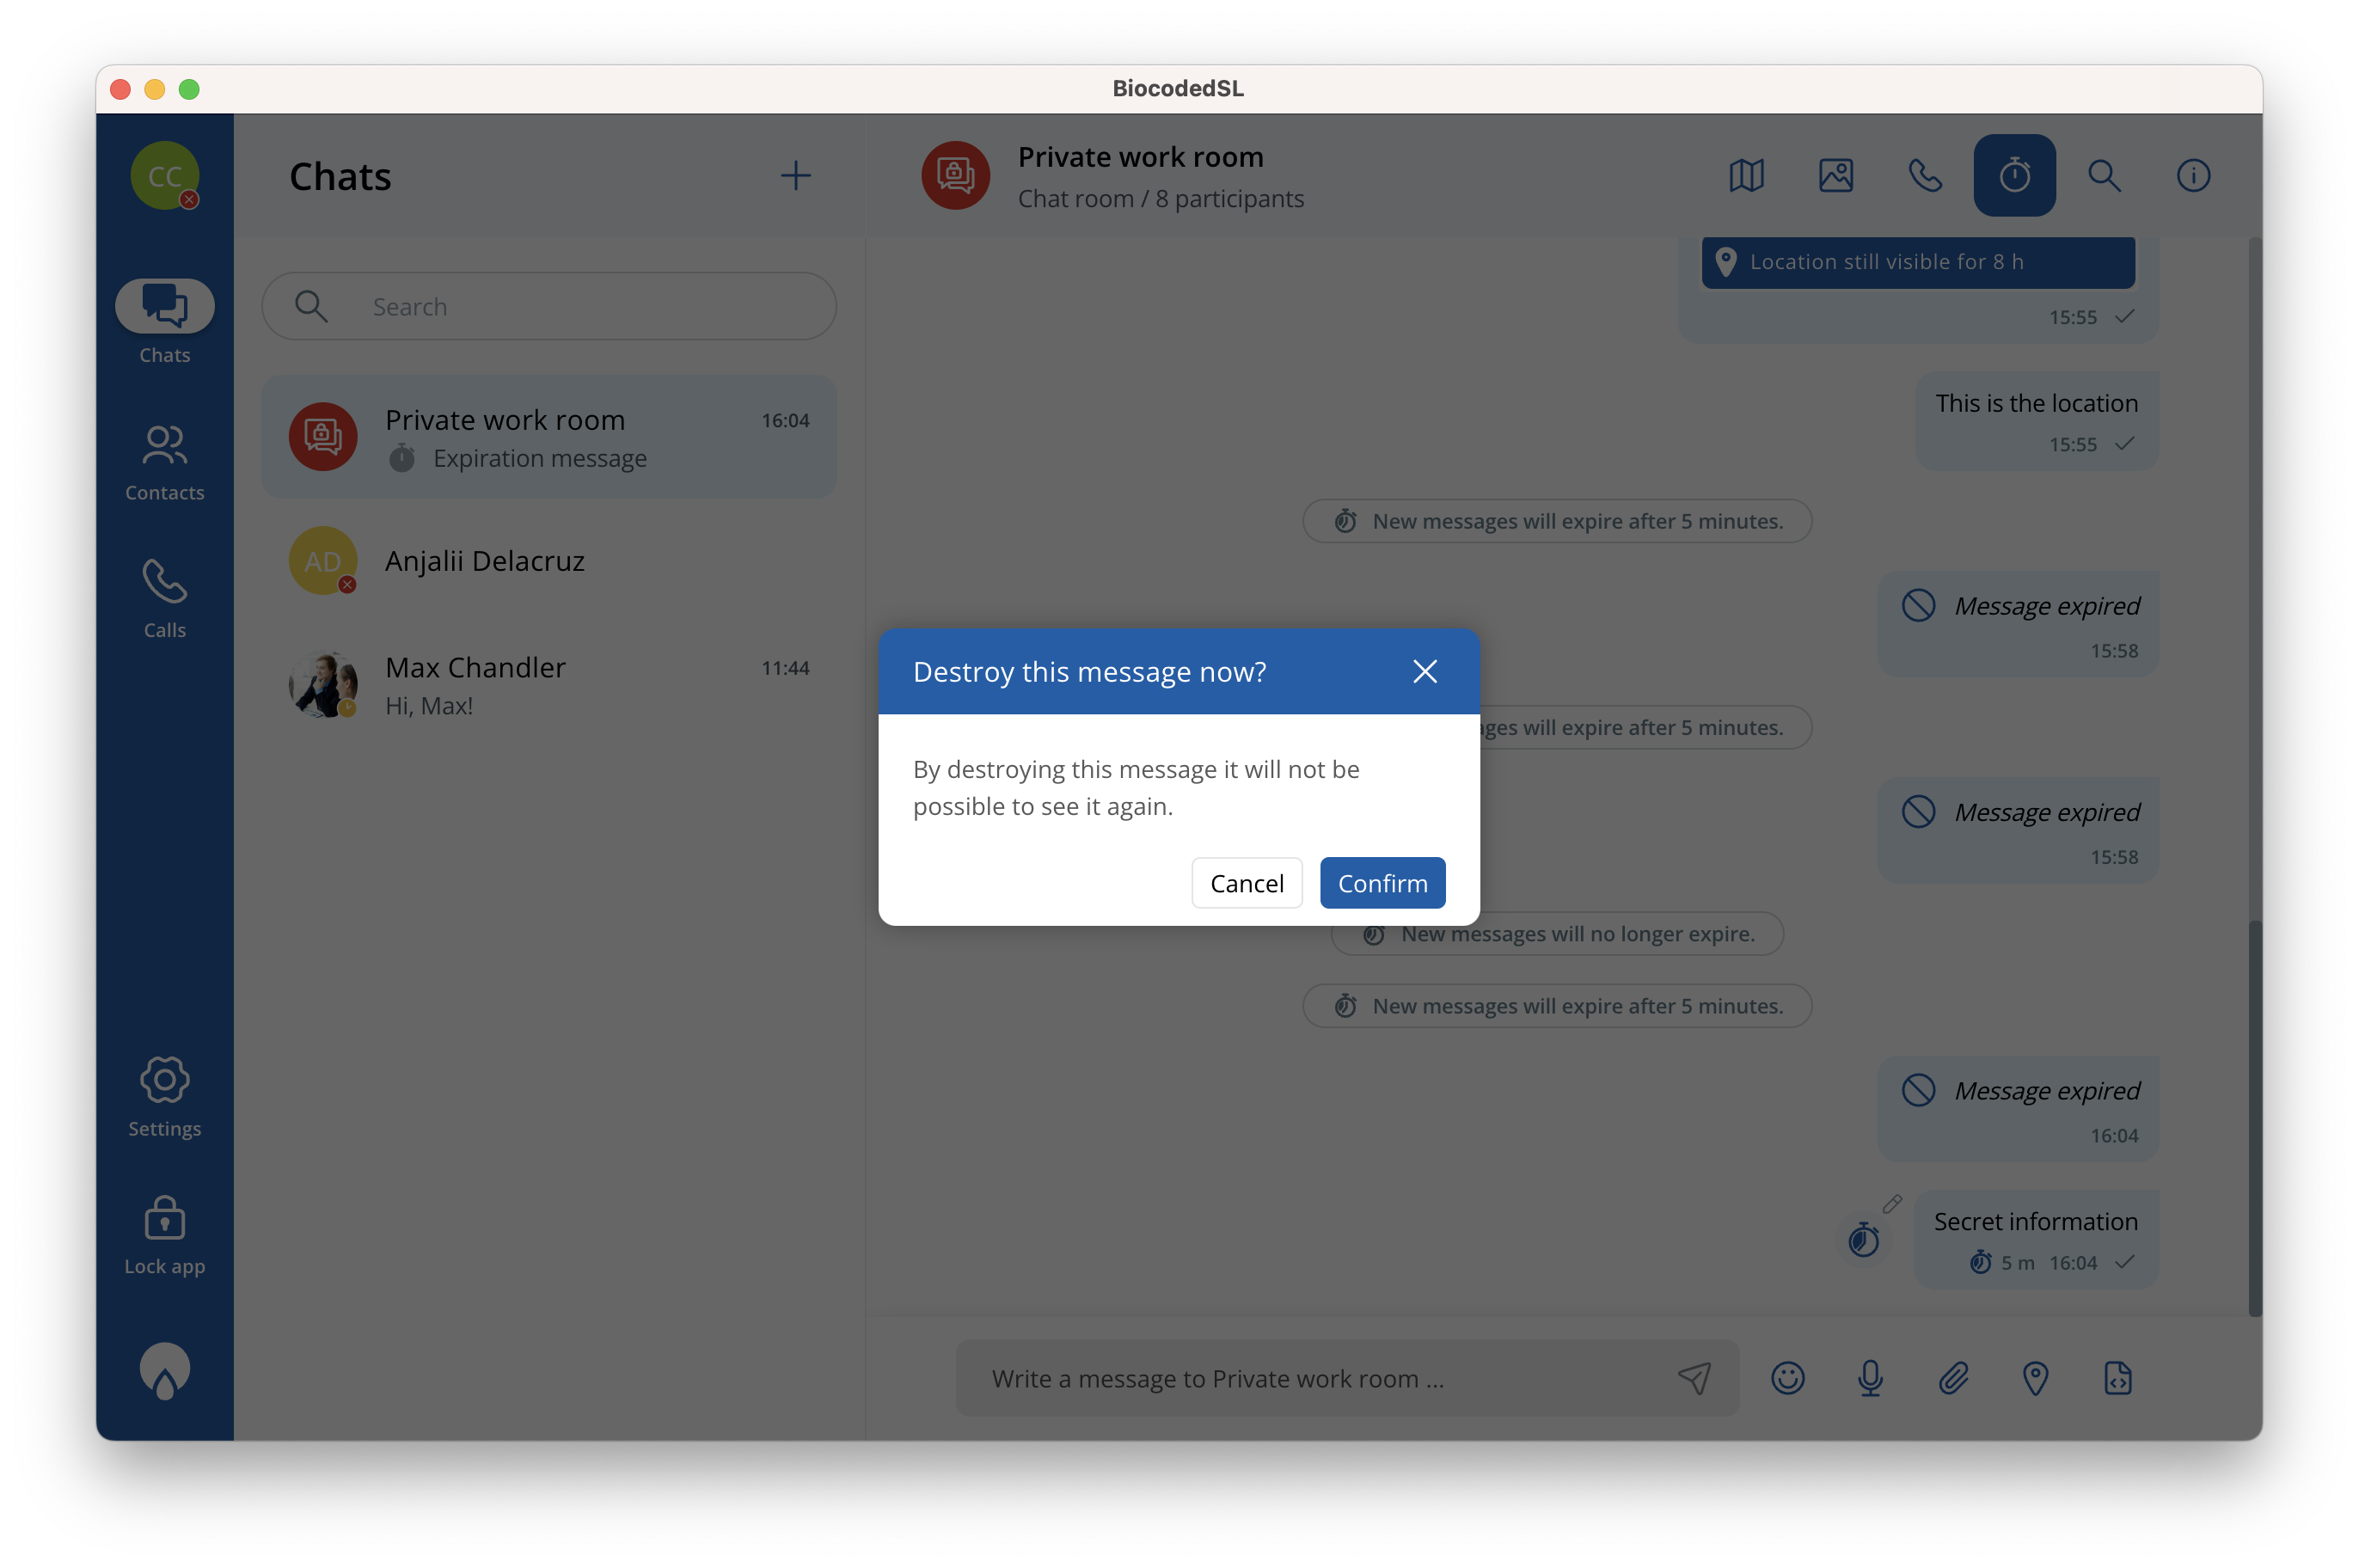
Once the message has expired, it's content is replaced with "message expired".
Chat options
Chat options are listed next to the chat title:
-
Map - display shared locations from chat and add new ones,
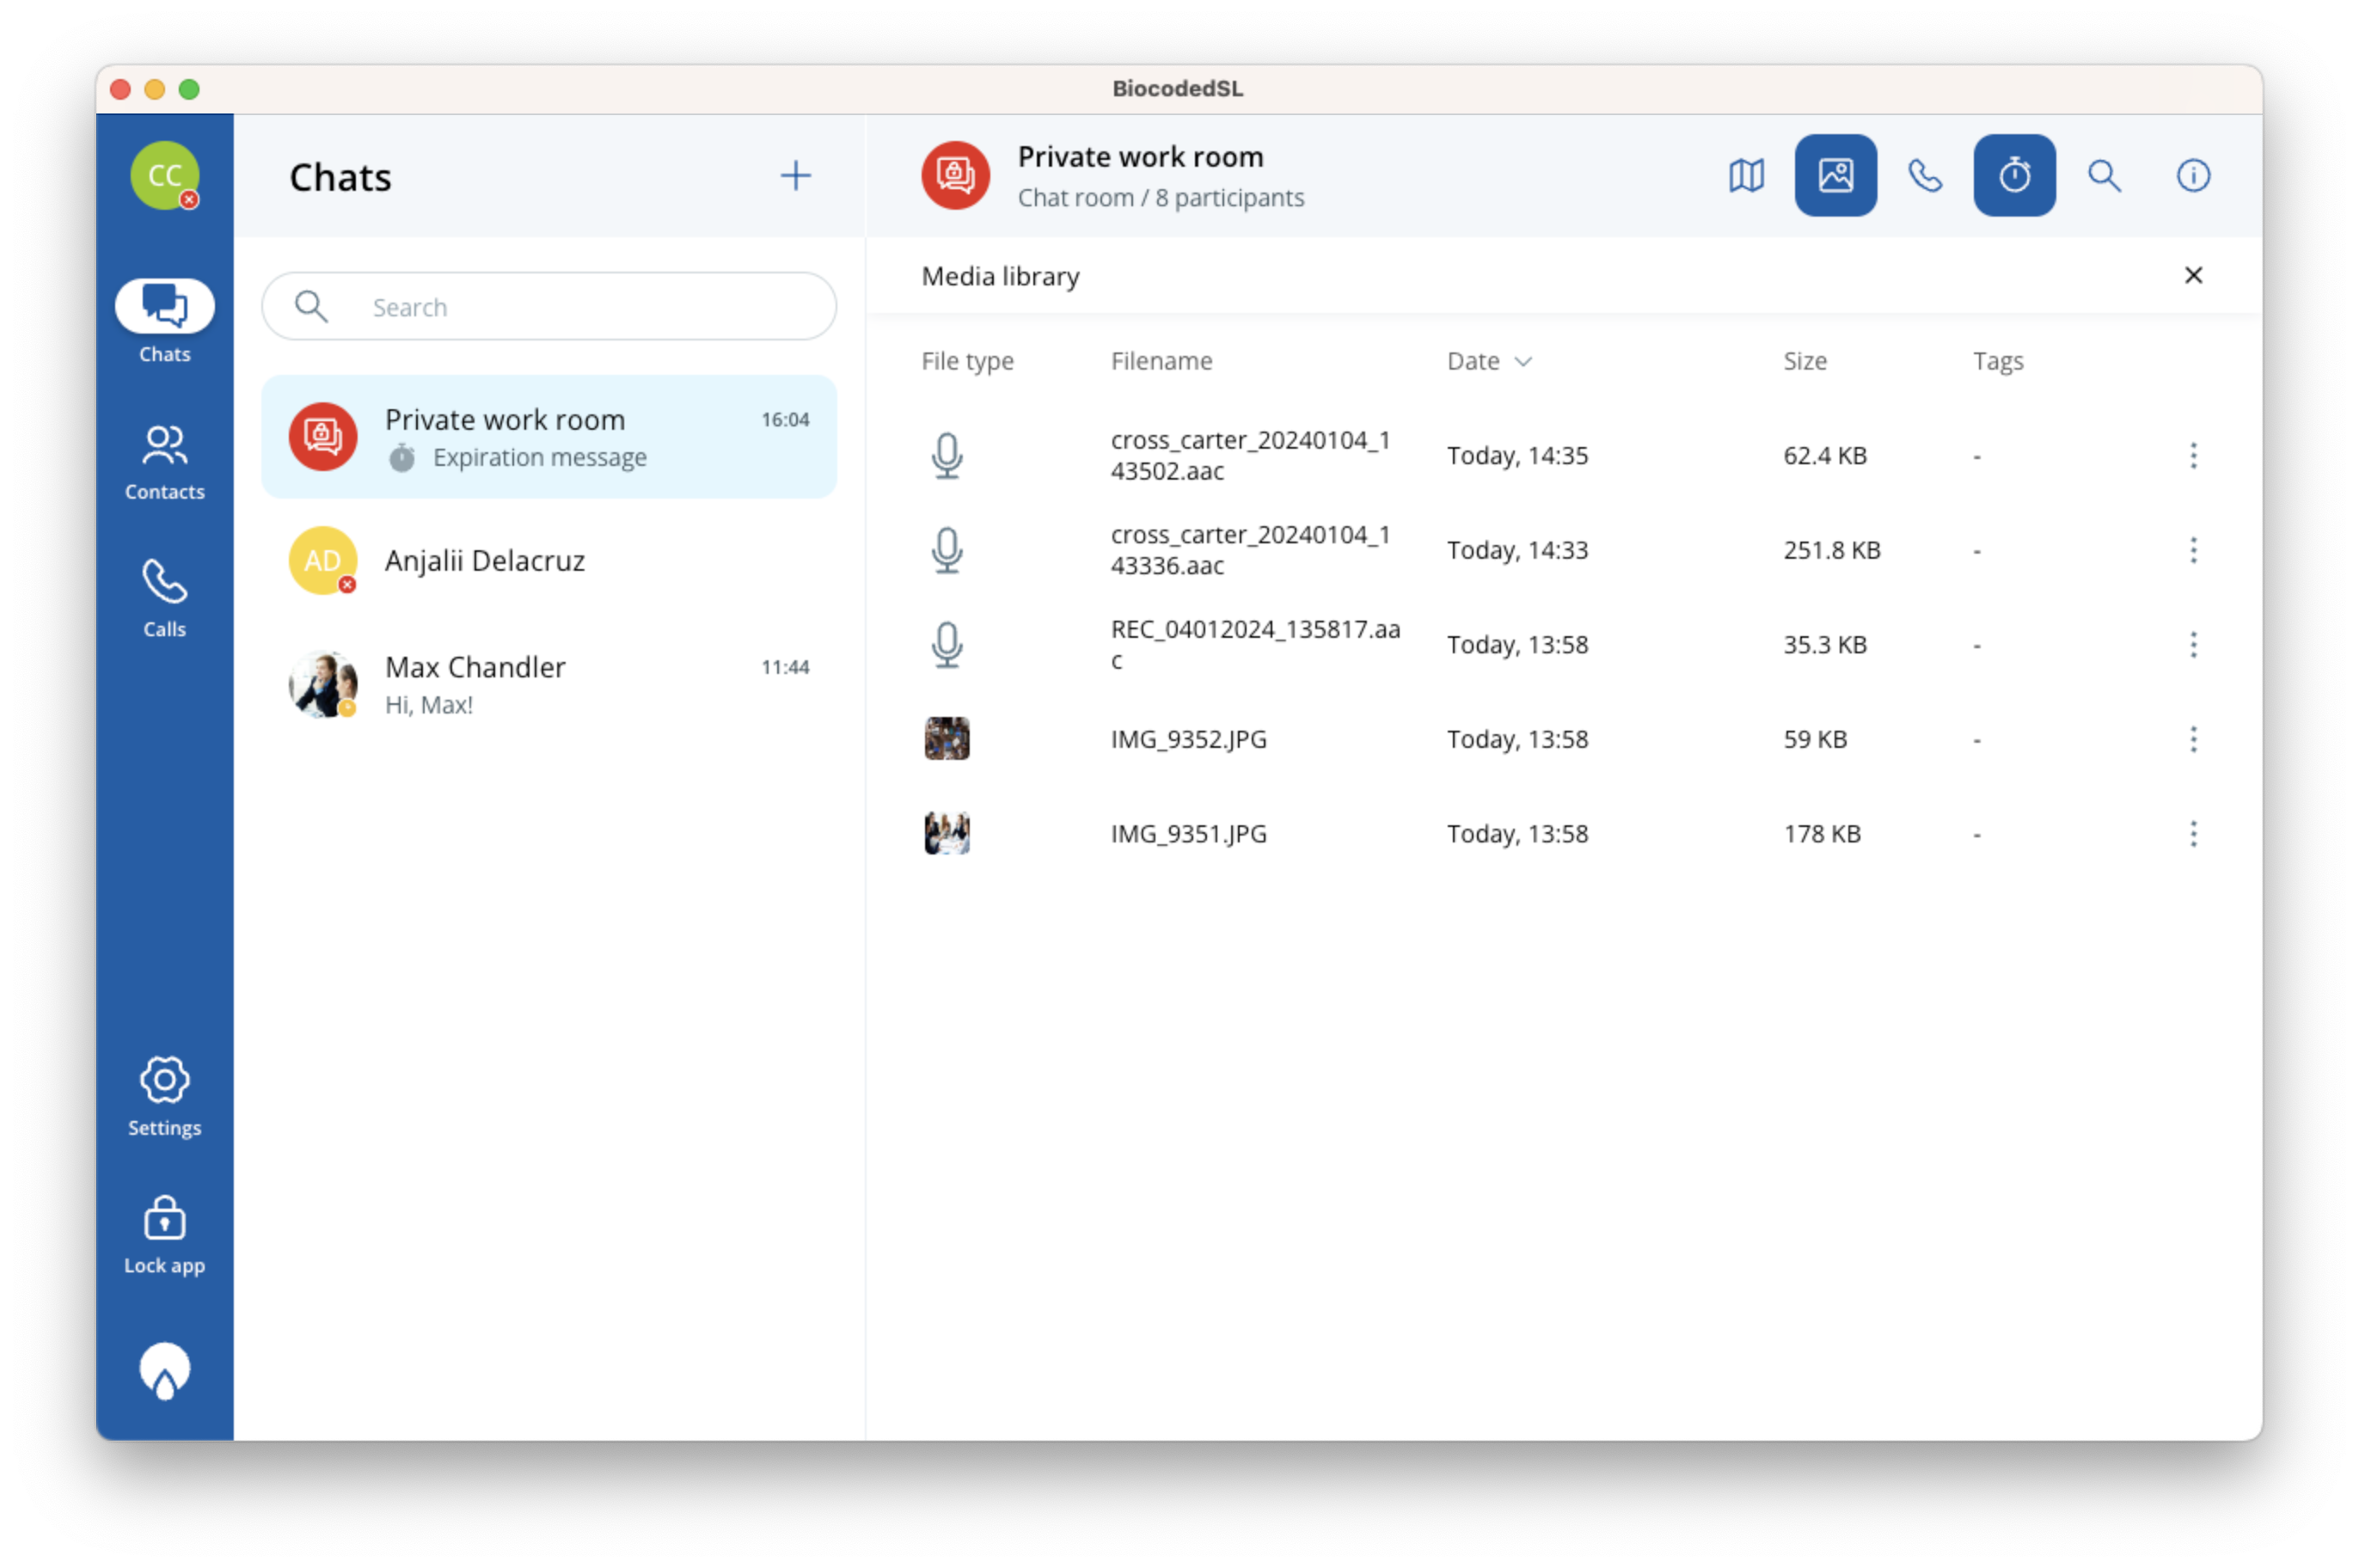
-
Media - a list of exchanged multimedia files and links,
-
Call - start or join a call with participants of chat,
-
Expiration - turn message expiration on or off,
-
Search - search for messages in chat. Messages containing your search term will be highlighted. You can jump between messages by pressing the arrow buttons next to your search term.
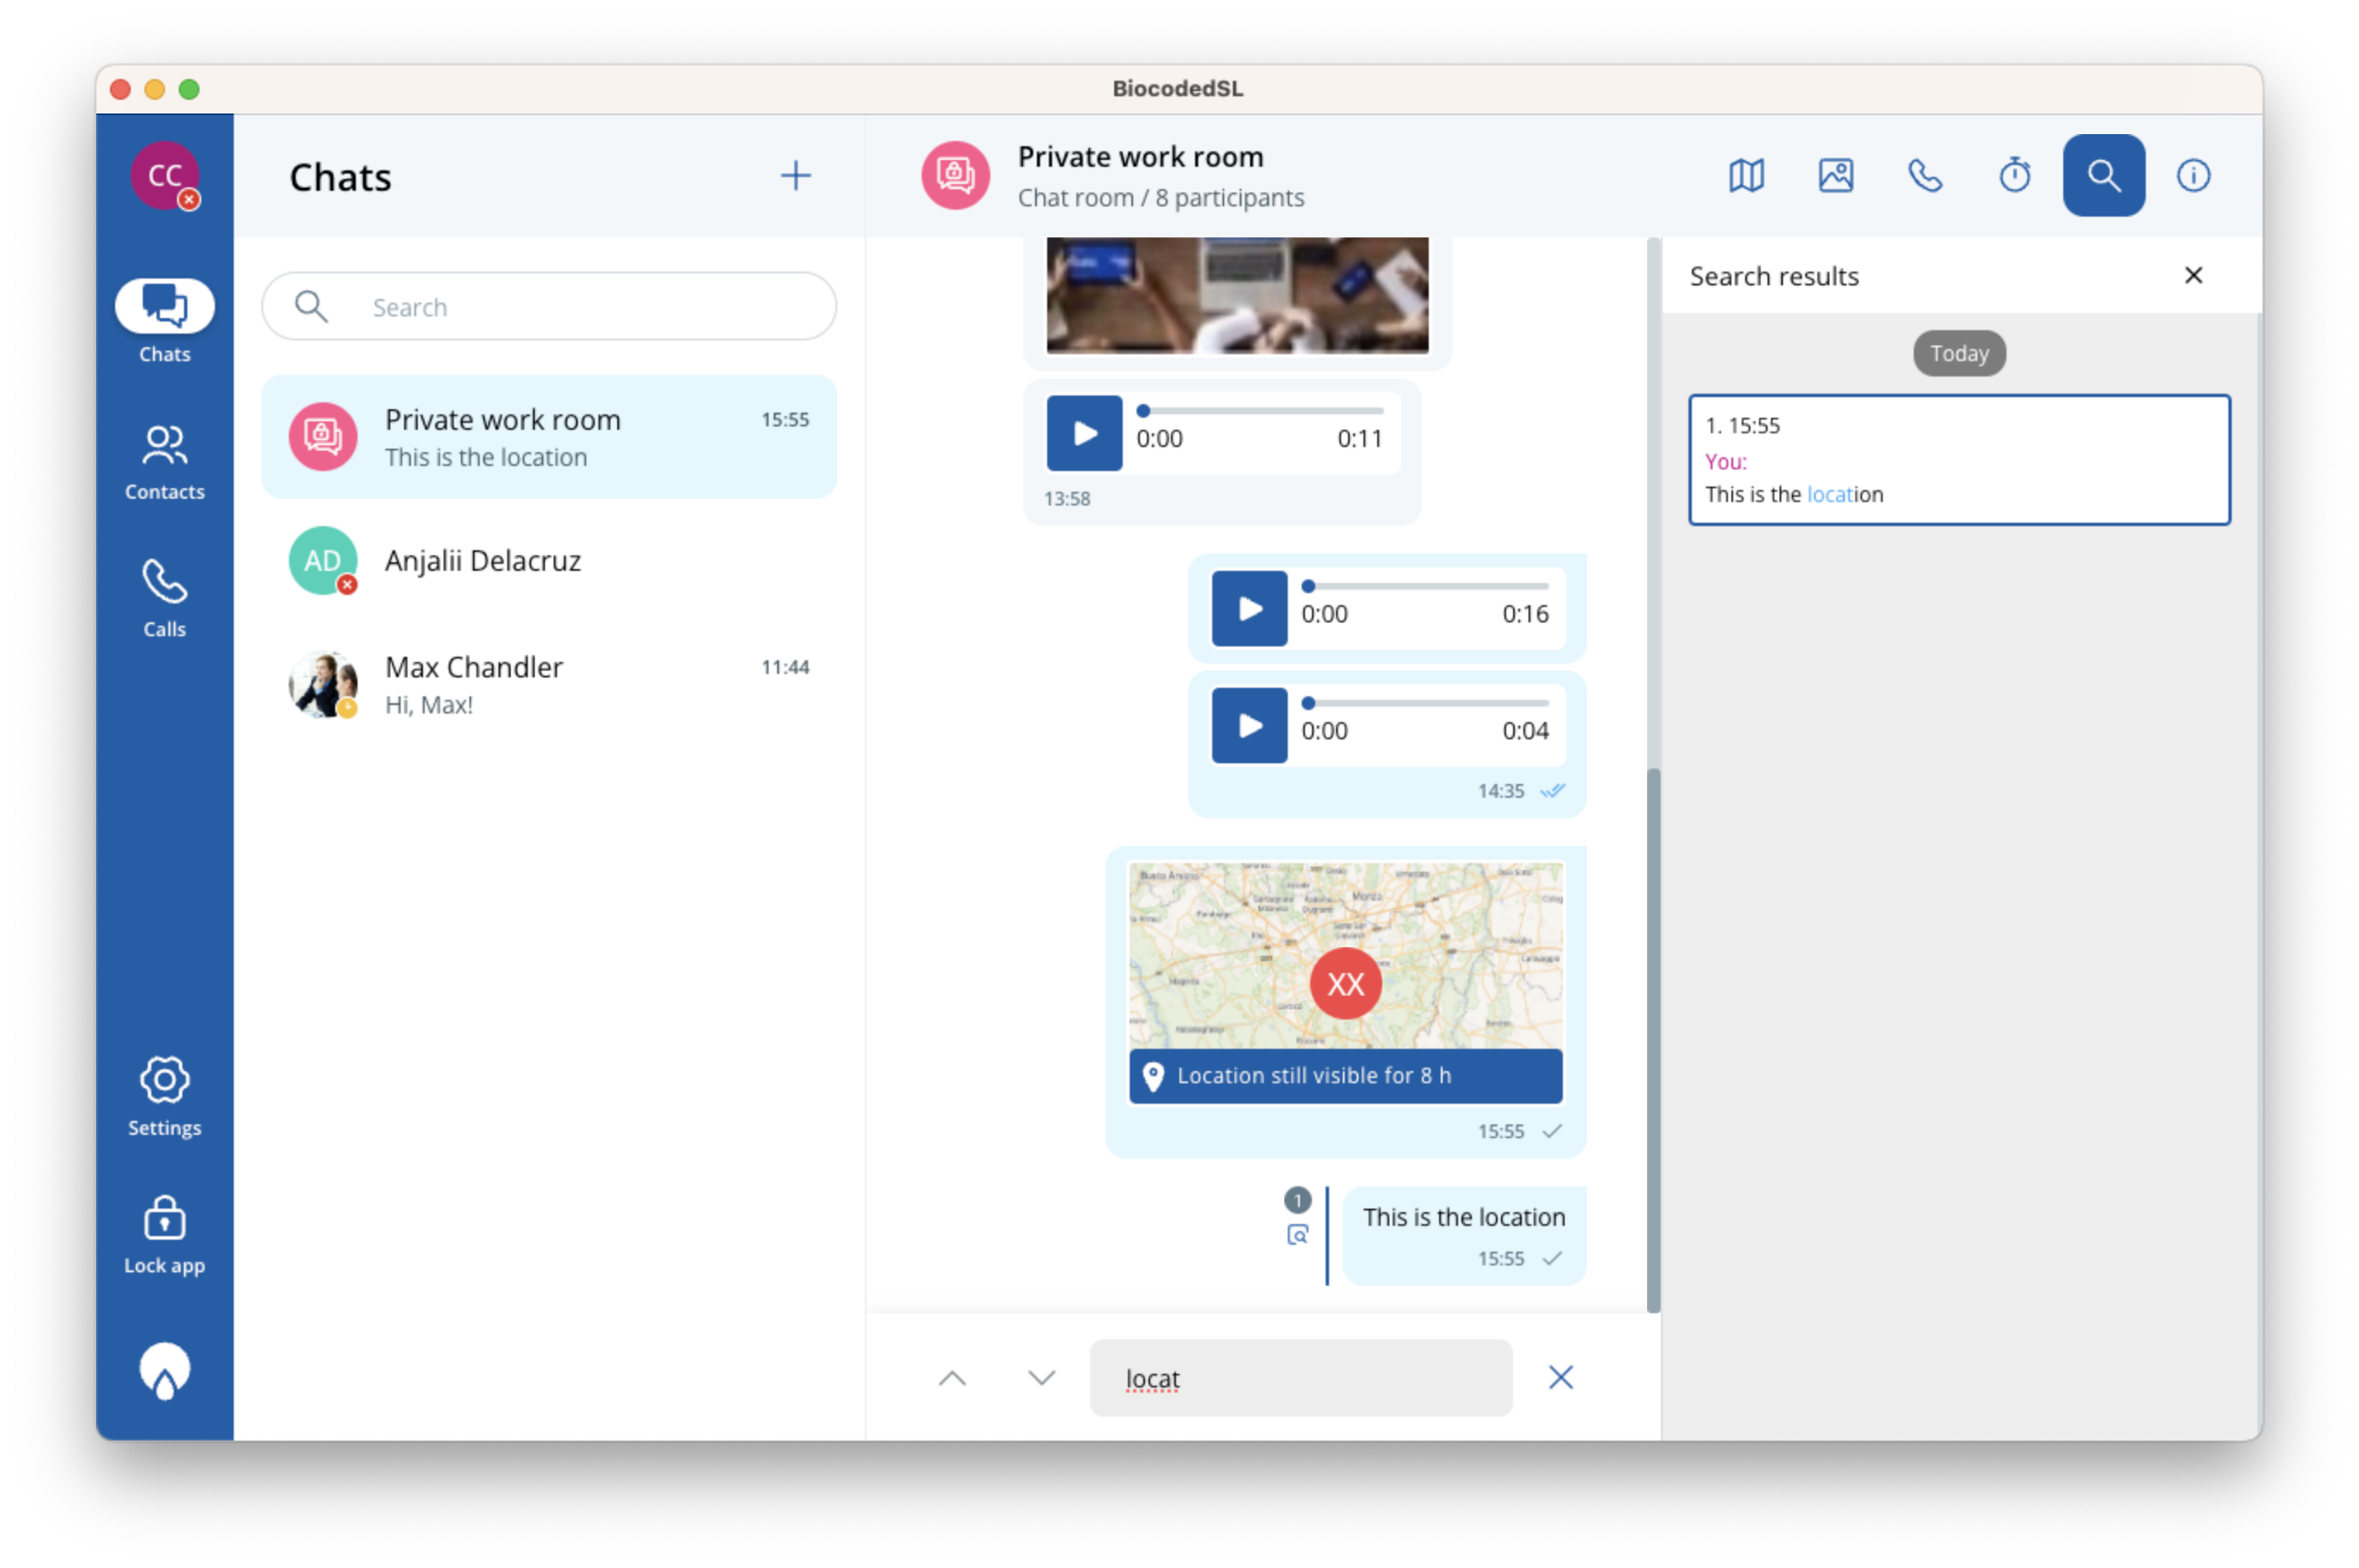
- Info - details of the chat and some additional options (described further)
Chat details
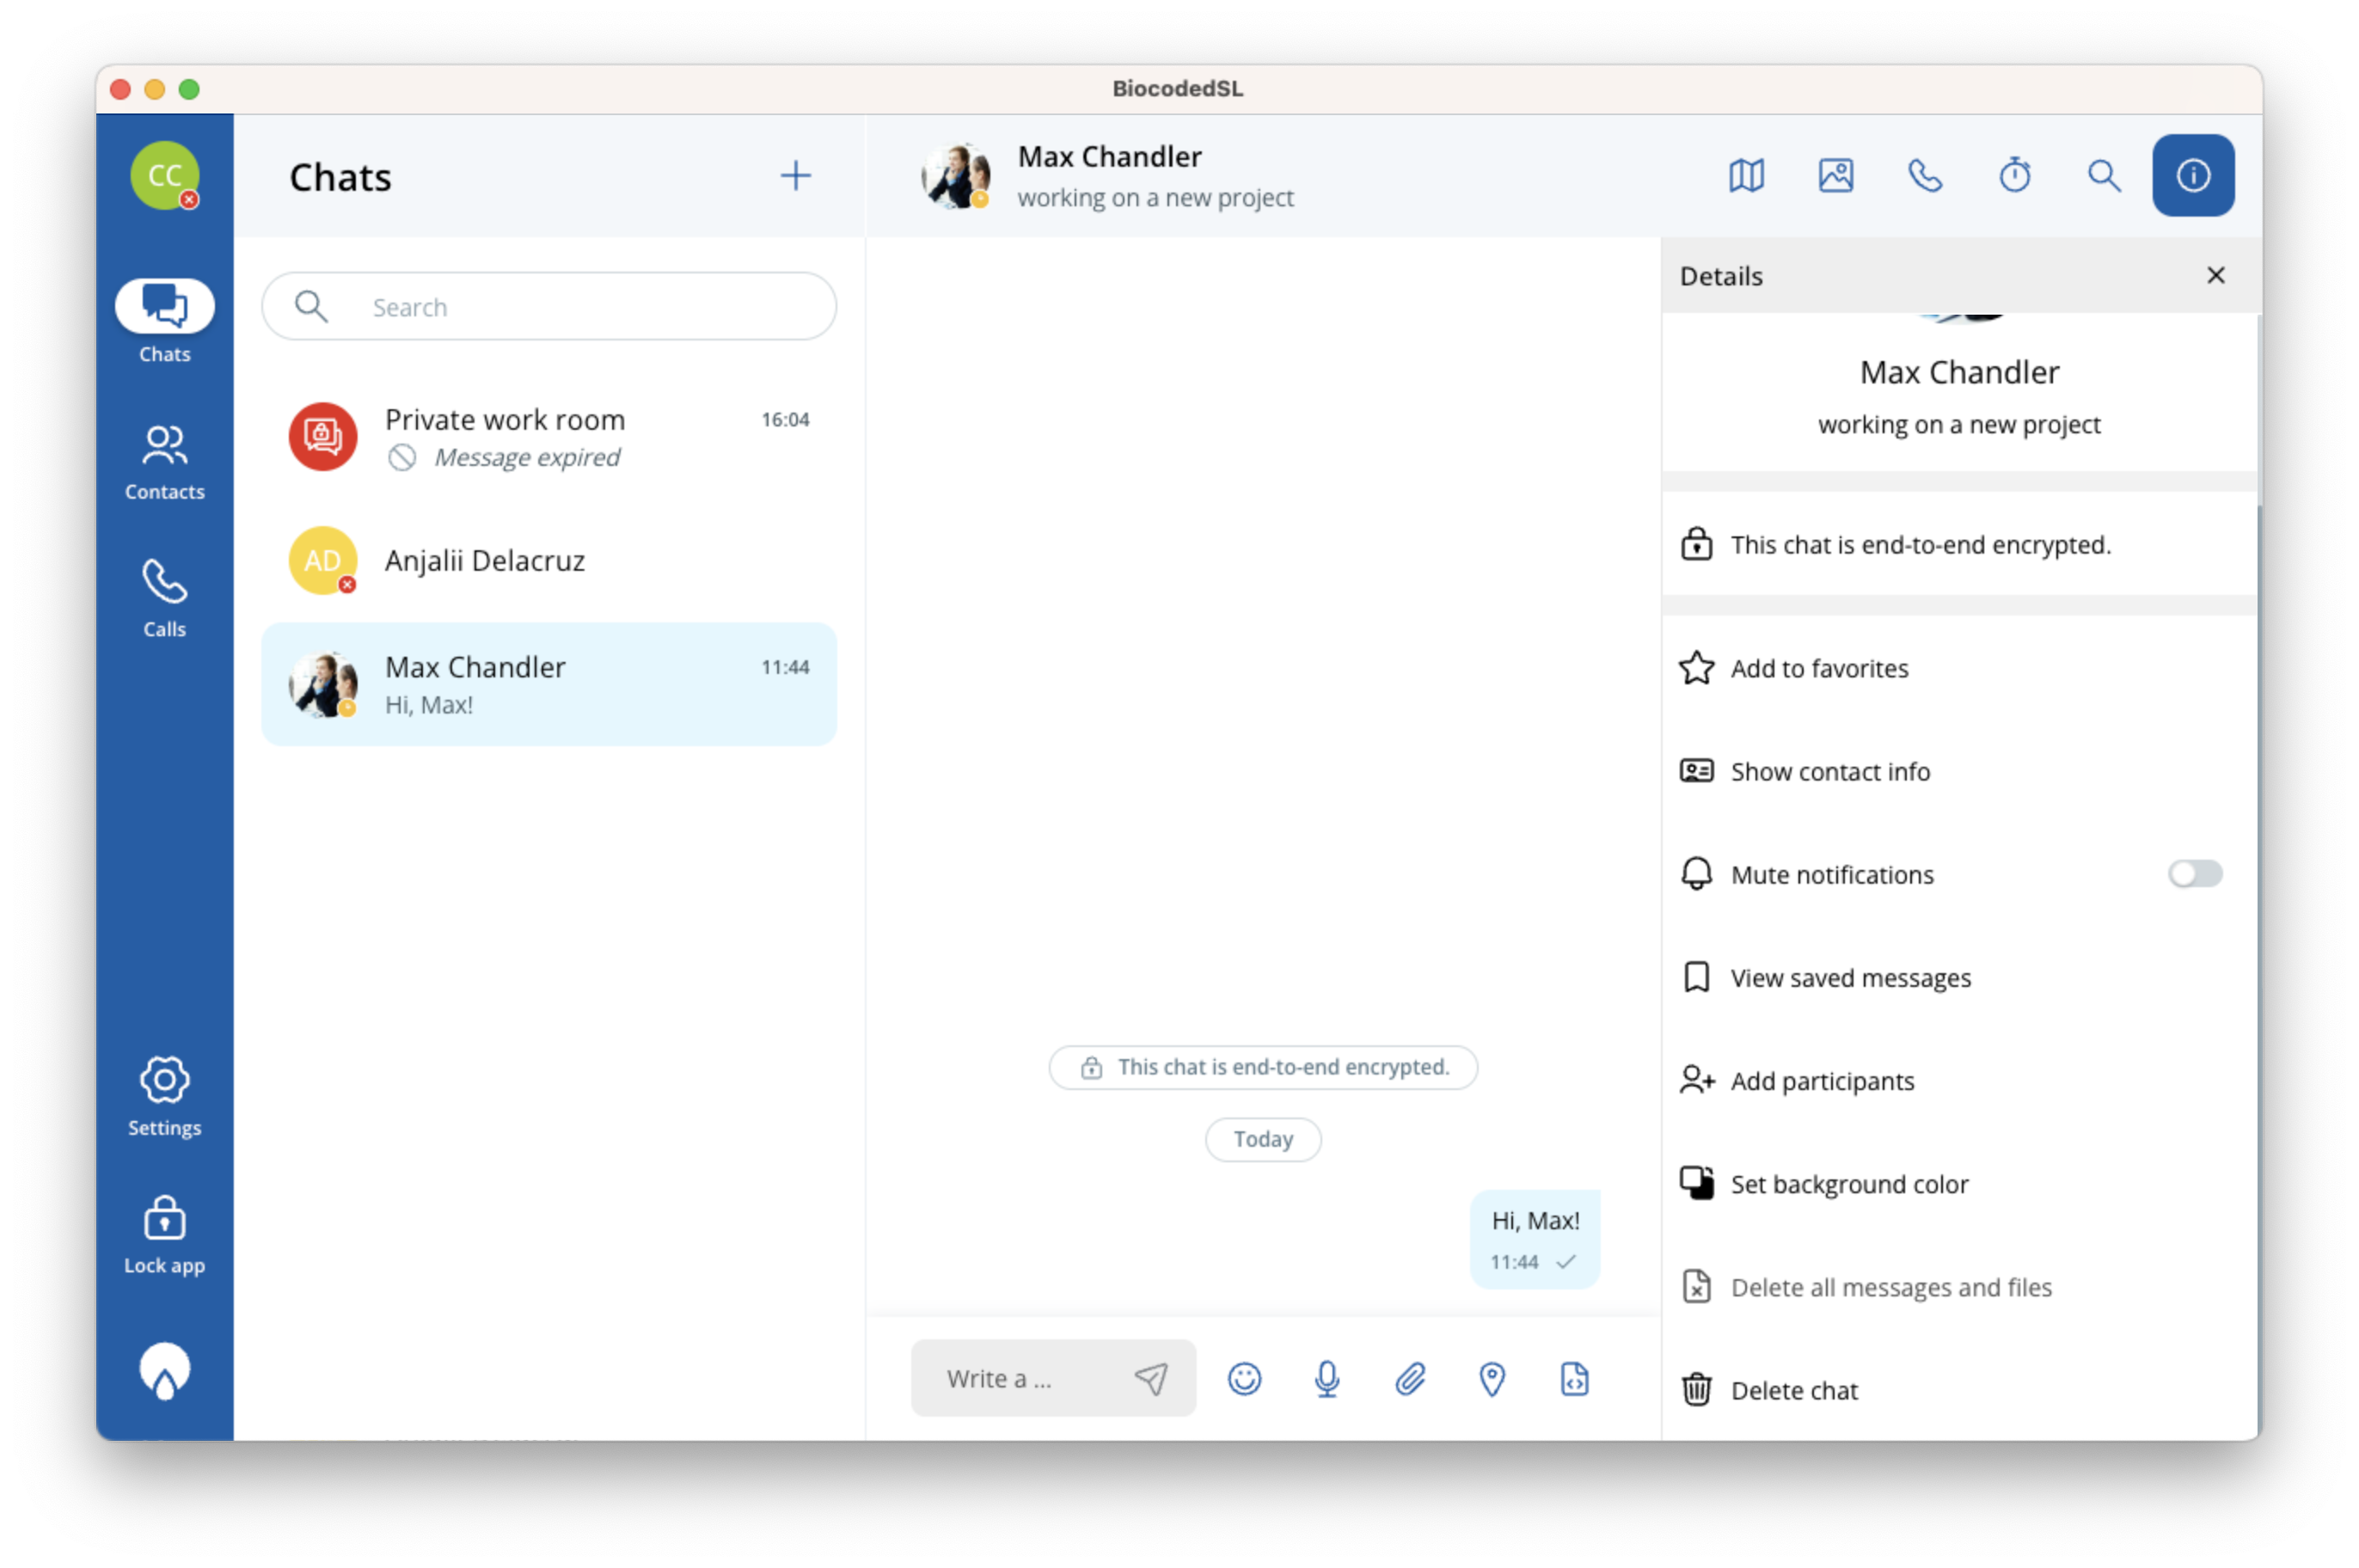
Options differ for single chats, group chats, private chat rooms and public chat rooms.
Private chat details
- ADD TO FAVOURITES: for fast access to selected contacts, which are displayed in a special section above others,
- SHOW CONTACT INFO: displays contact info,
- MUTE NOTIFICATIONS: if you turn off notifications, you will no longer be notified of new messages in this chat,
- VIEW SAVED MESSAGES: contains a list of saved messages for this chat,
- ADD PARTICIPANTS: start a new group chat by adding a contact to your current 1-1 conversation,
- SET BACKGROUND COLOR: set a custom background colour for this chat,
- DELETE ALL MESSAGES & FILES: deletes all exchanged data from this chat on your device,
- DELETE CHAT: deletes the chat and all exchanged data from your device.
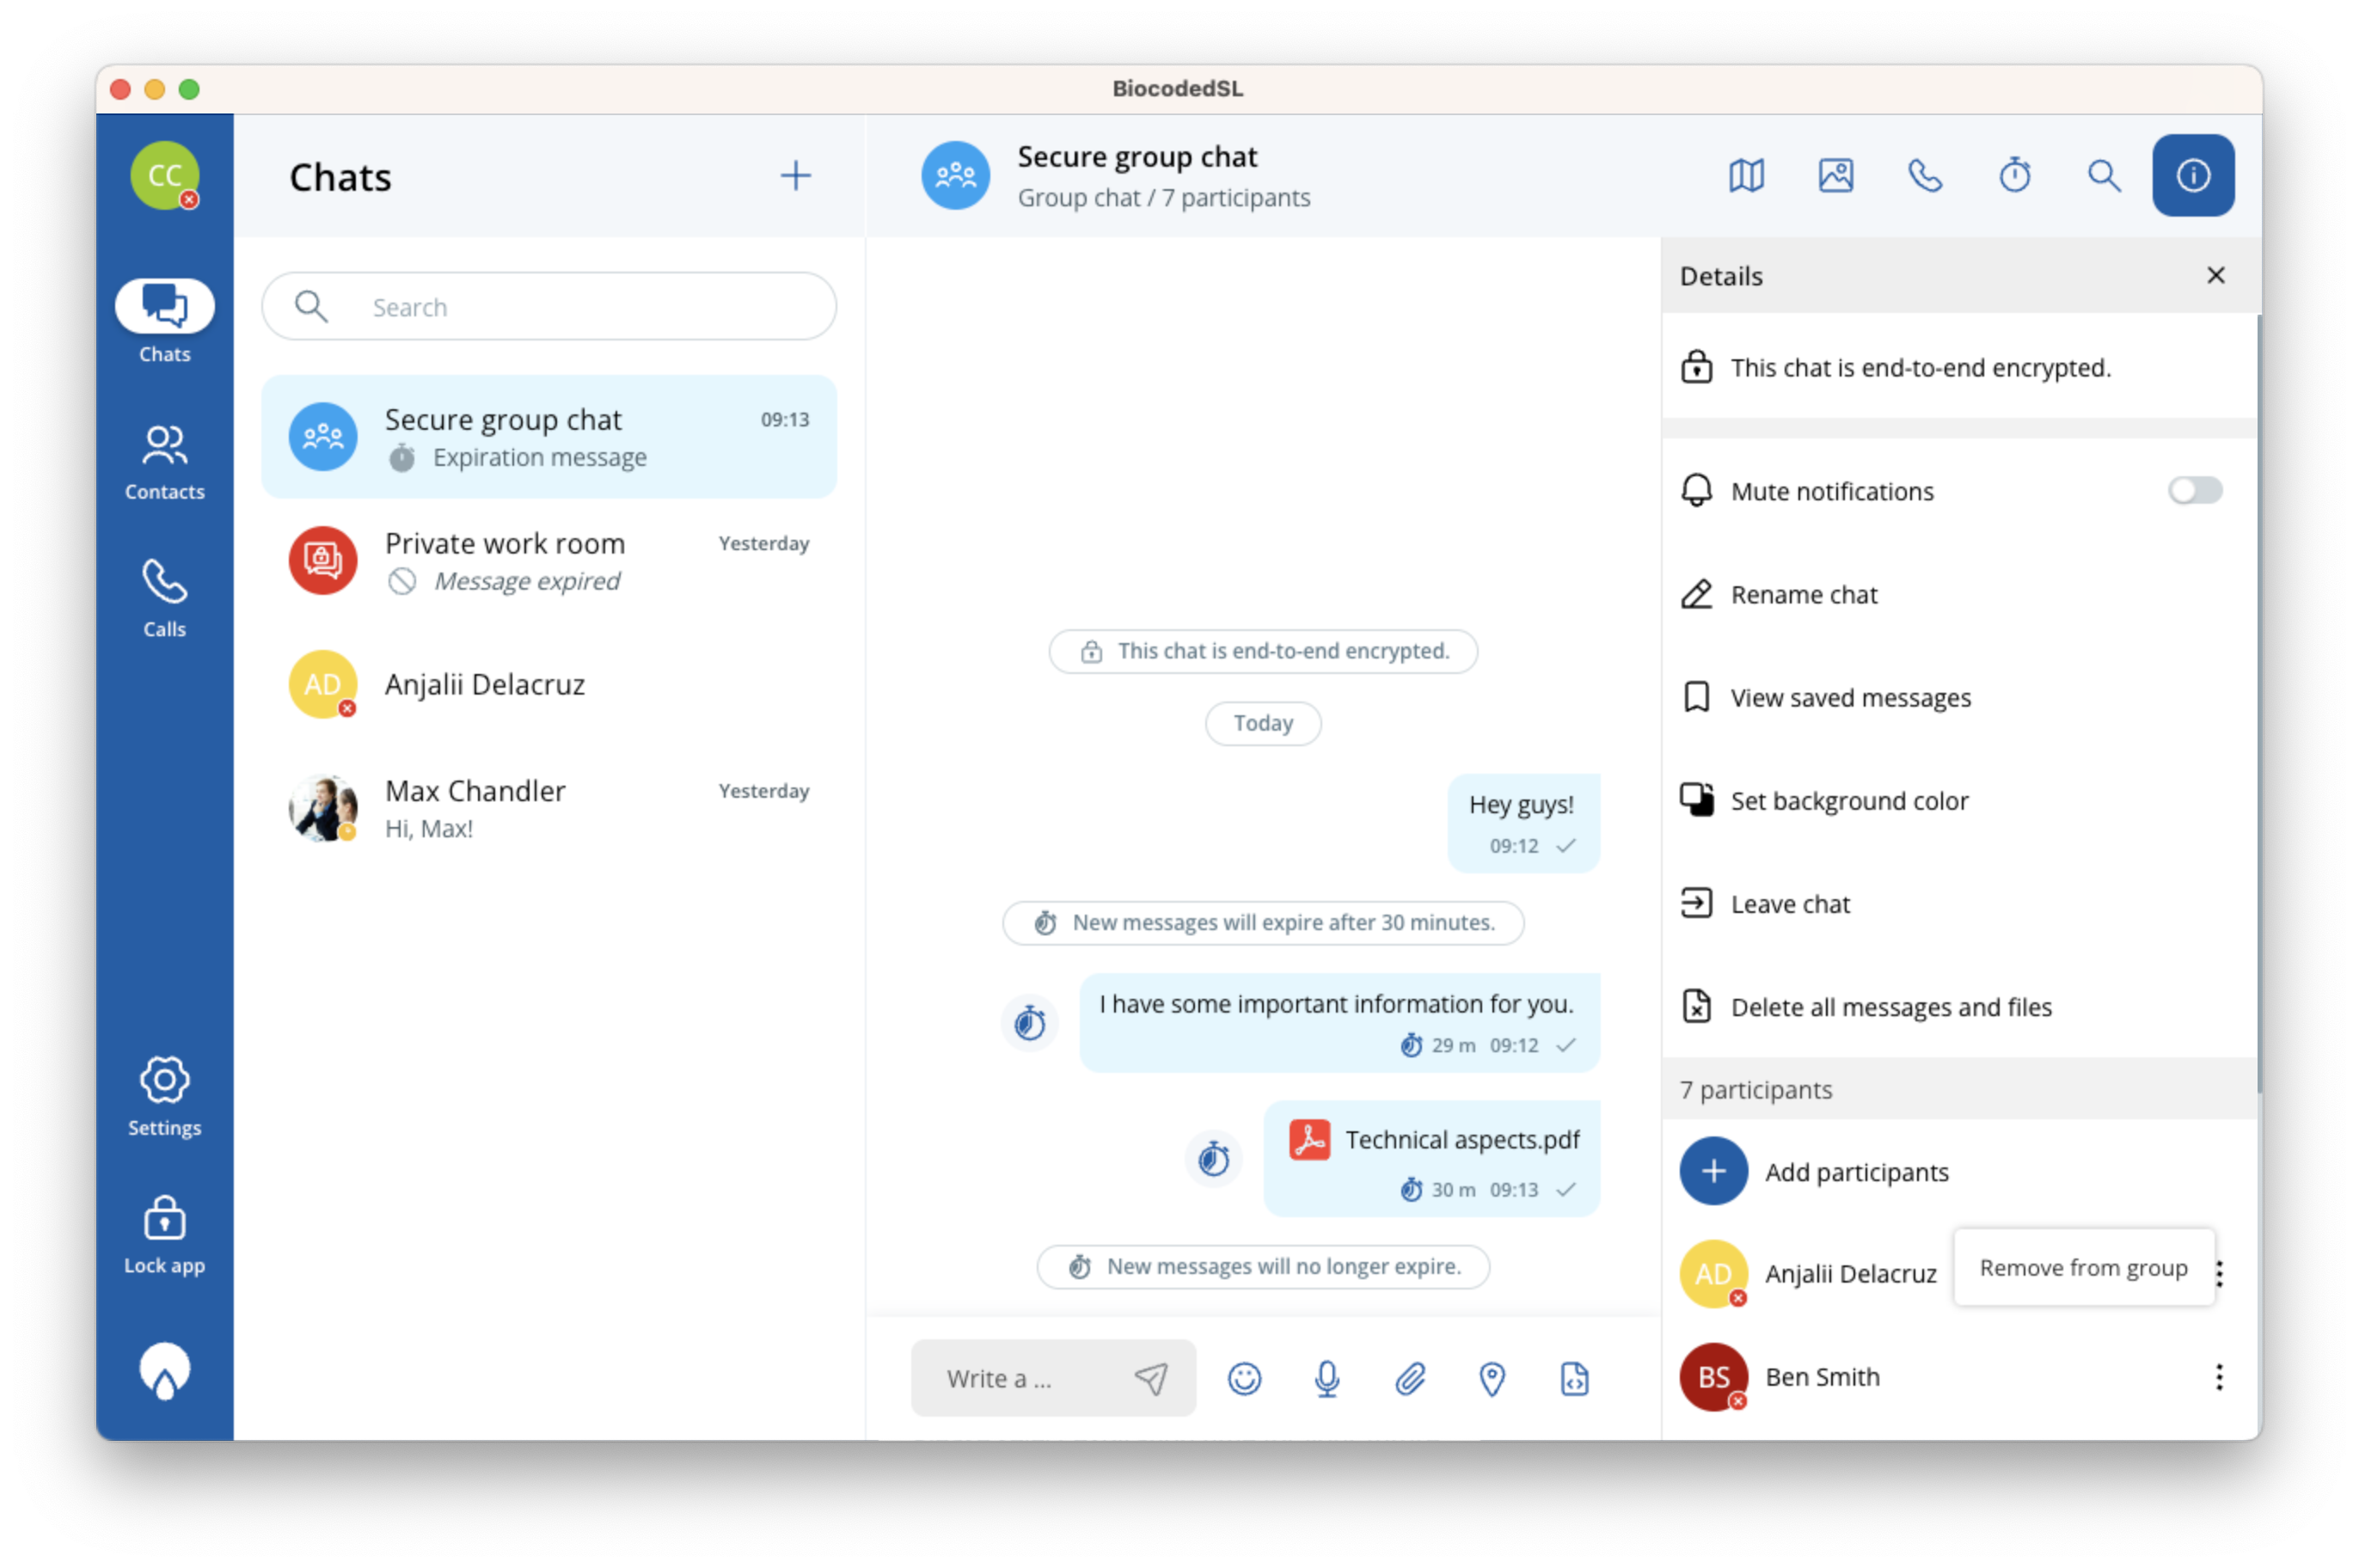
Group chat details
- MUTE NOTIFICATIONS: if you turn off notifications, you will no longer be notified of new messages in this chat,
- RENAME CHAT,
- VIEW SAVED MESSAGES: contains a list of saved messages for this chat,
- SET BACKGROUND COLOR: set a custom background colour for this chat,
- LEAVE CHAT: removes you from the group chat and you will no longer be notified of new messages.
- DELETE ALL MESSAGES & FILES: deletes all exchanged data from this chat on your device,
- ADD PARTICIPANT: add more people to your group chat,
- Participants list.
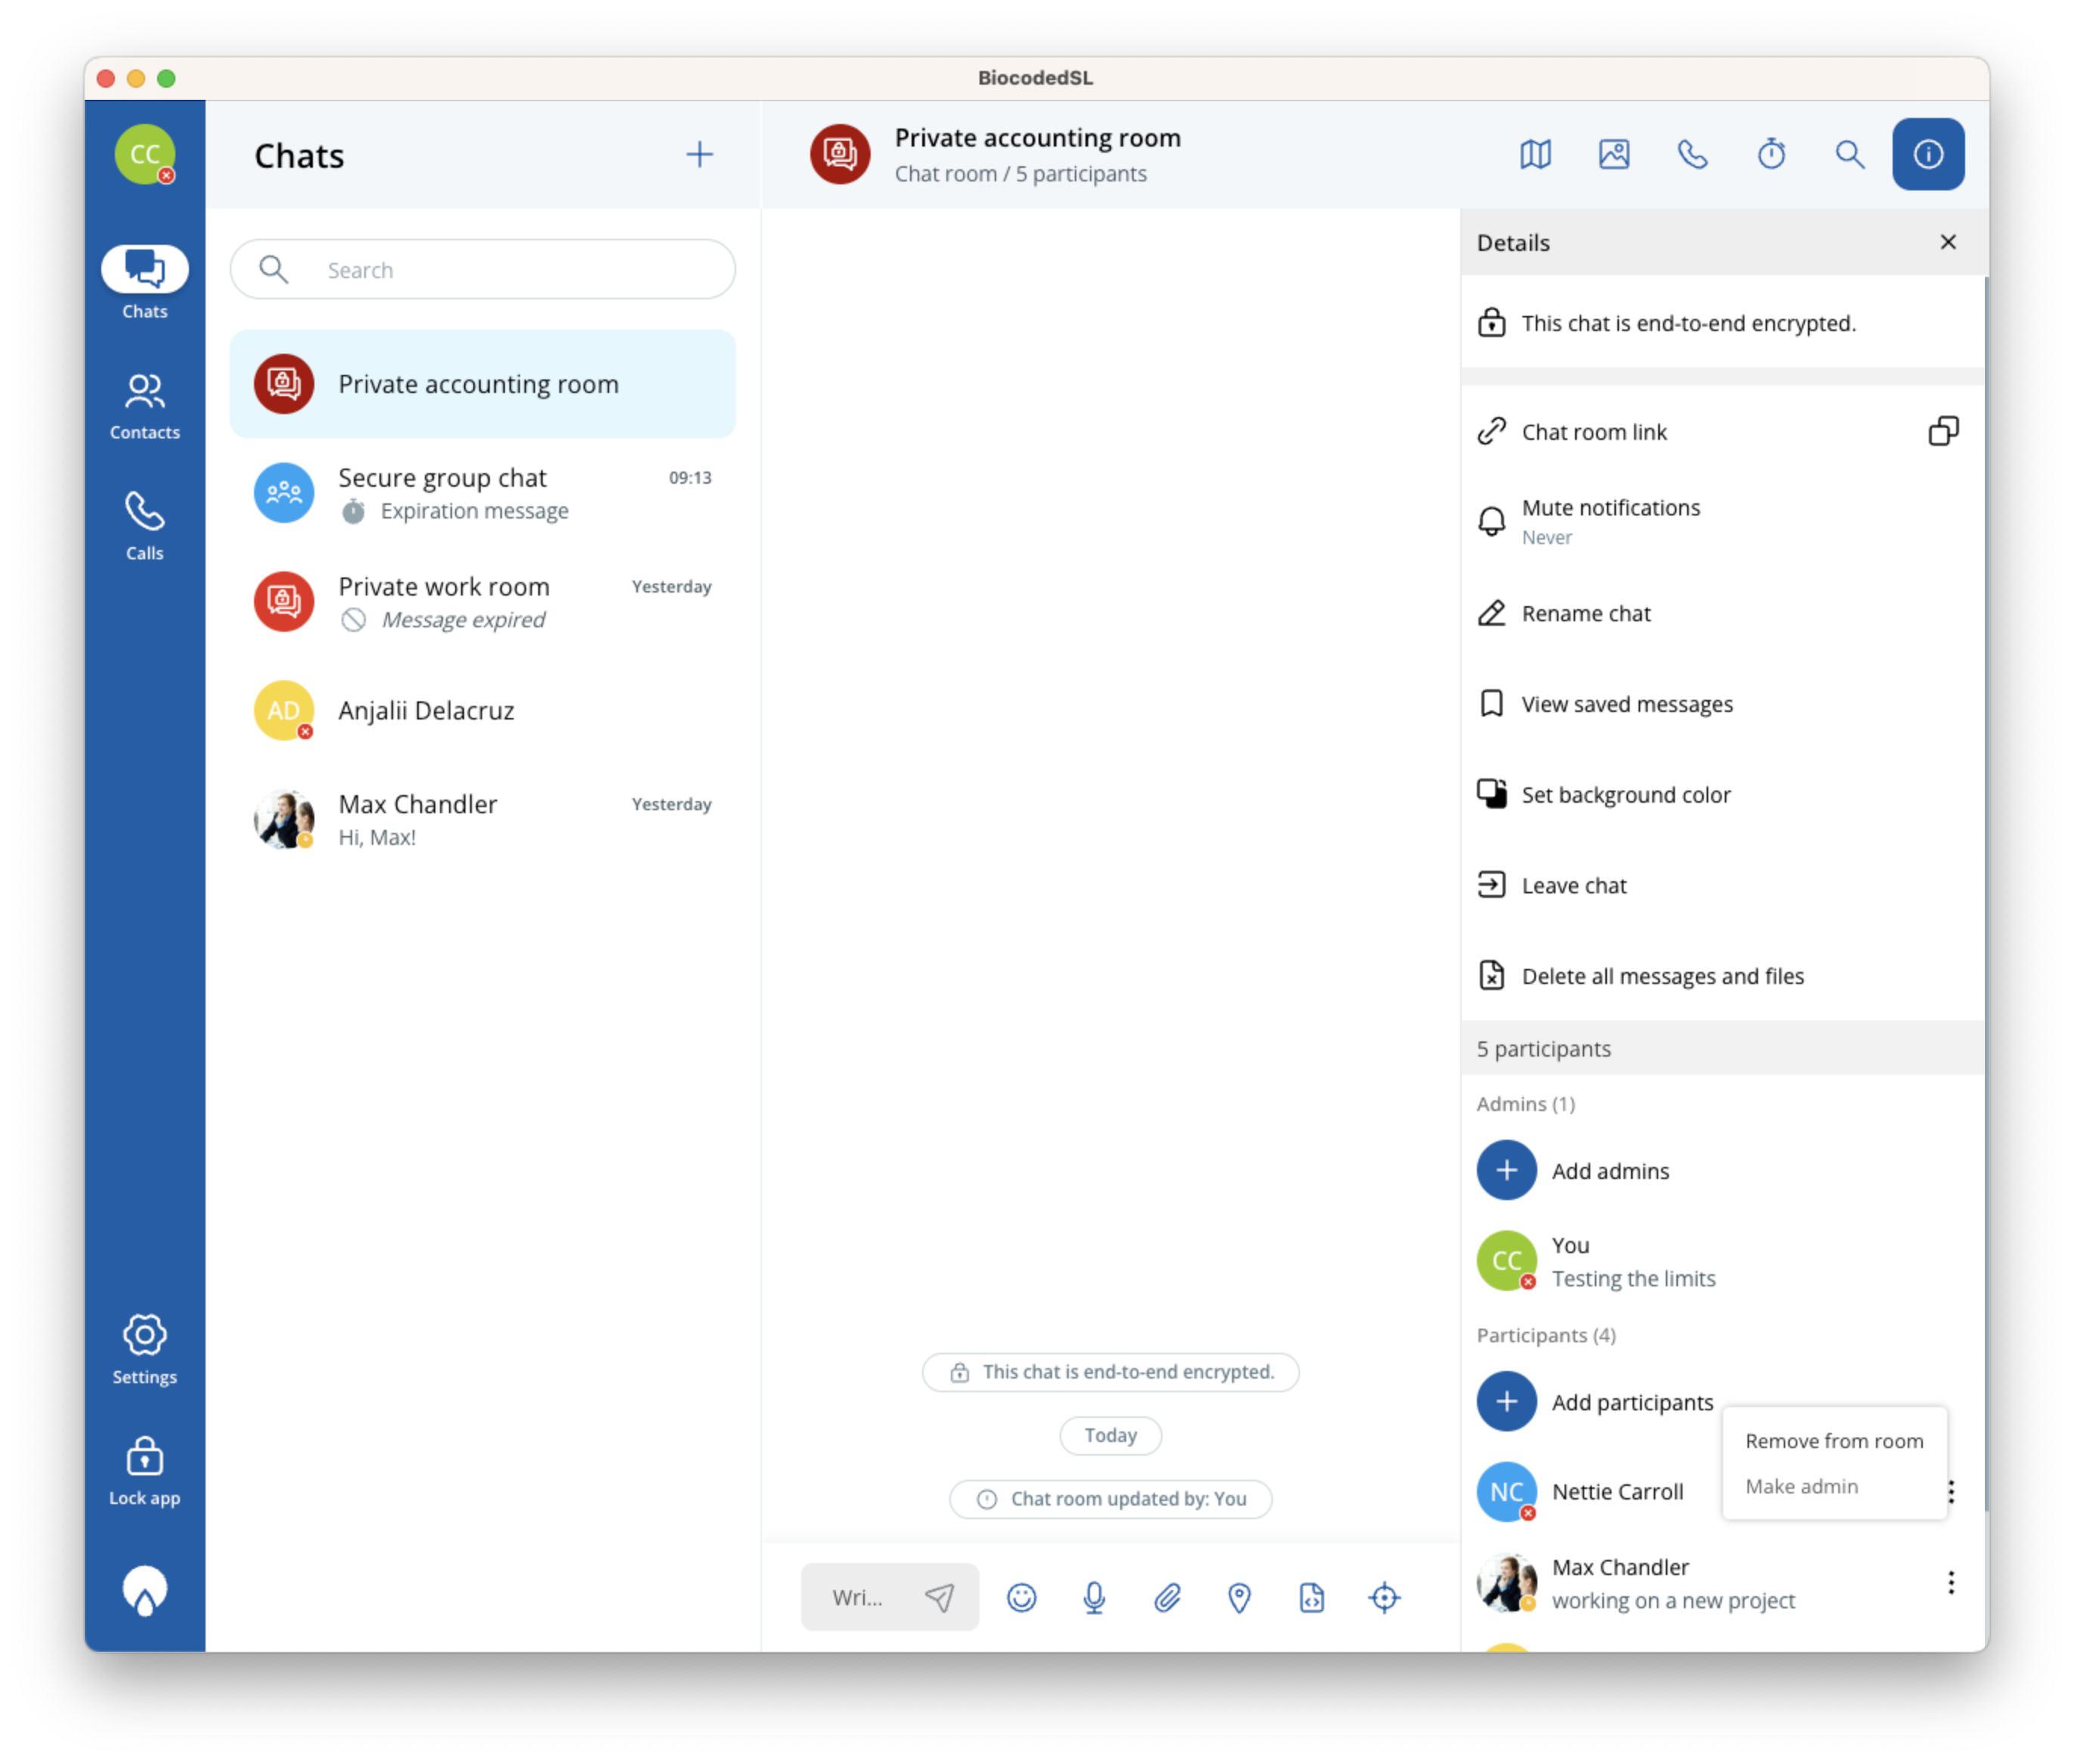
Private chat room details
- CHAT ROOM LINK: copies the link for this chat room, so you can send it to any Biocoded contact and they can join by tapping on the link,
- RESYNC CHAT HISTORY: sends a chat resync message to selected participants, which includes the contents of chat in a selected time period. Select the time period of chat contents to sync to selected chat participants. Press "Start resync" to send request. Recipient can choose to Sync, Reject or View details about chat history being shared,
- MUTE NOTIFICATIONS: if enabled, you will no longer be notified of new messages in this chat room for a selected time period,
- RENAME CHAT,
- SET BACKGROUND COLOR: set a custom background colour for this chat,
- DELETE ALL MESSAGES & FILES: deletes all exchanged data from this chat on your device,
- EXIT ROOM: removes you from the chat room and you will no longer be notified of new messages,
- ADD PARTICIPANT: add more people to your group chat,
- Participants list.
Public chat room details
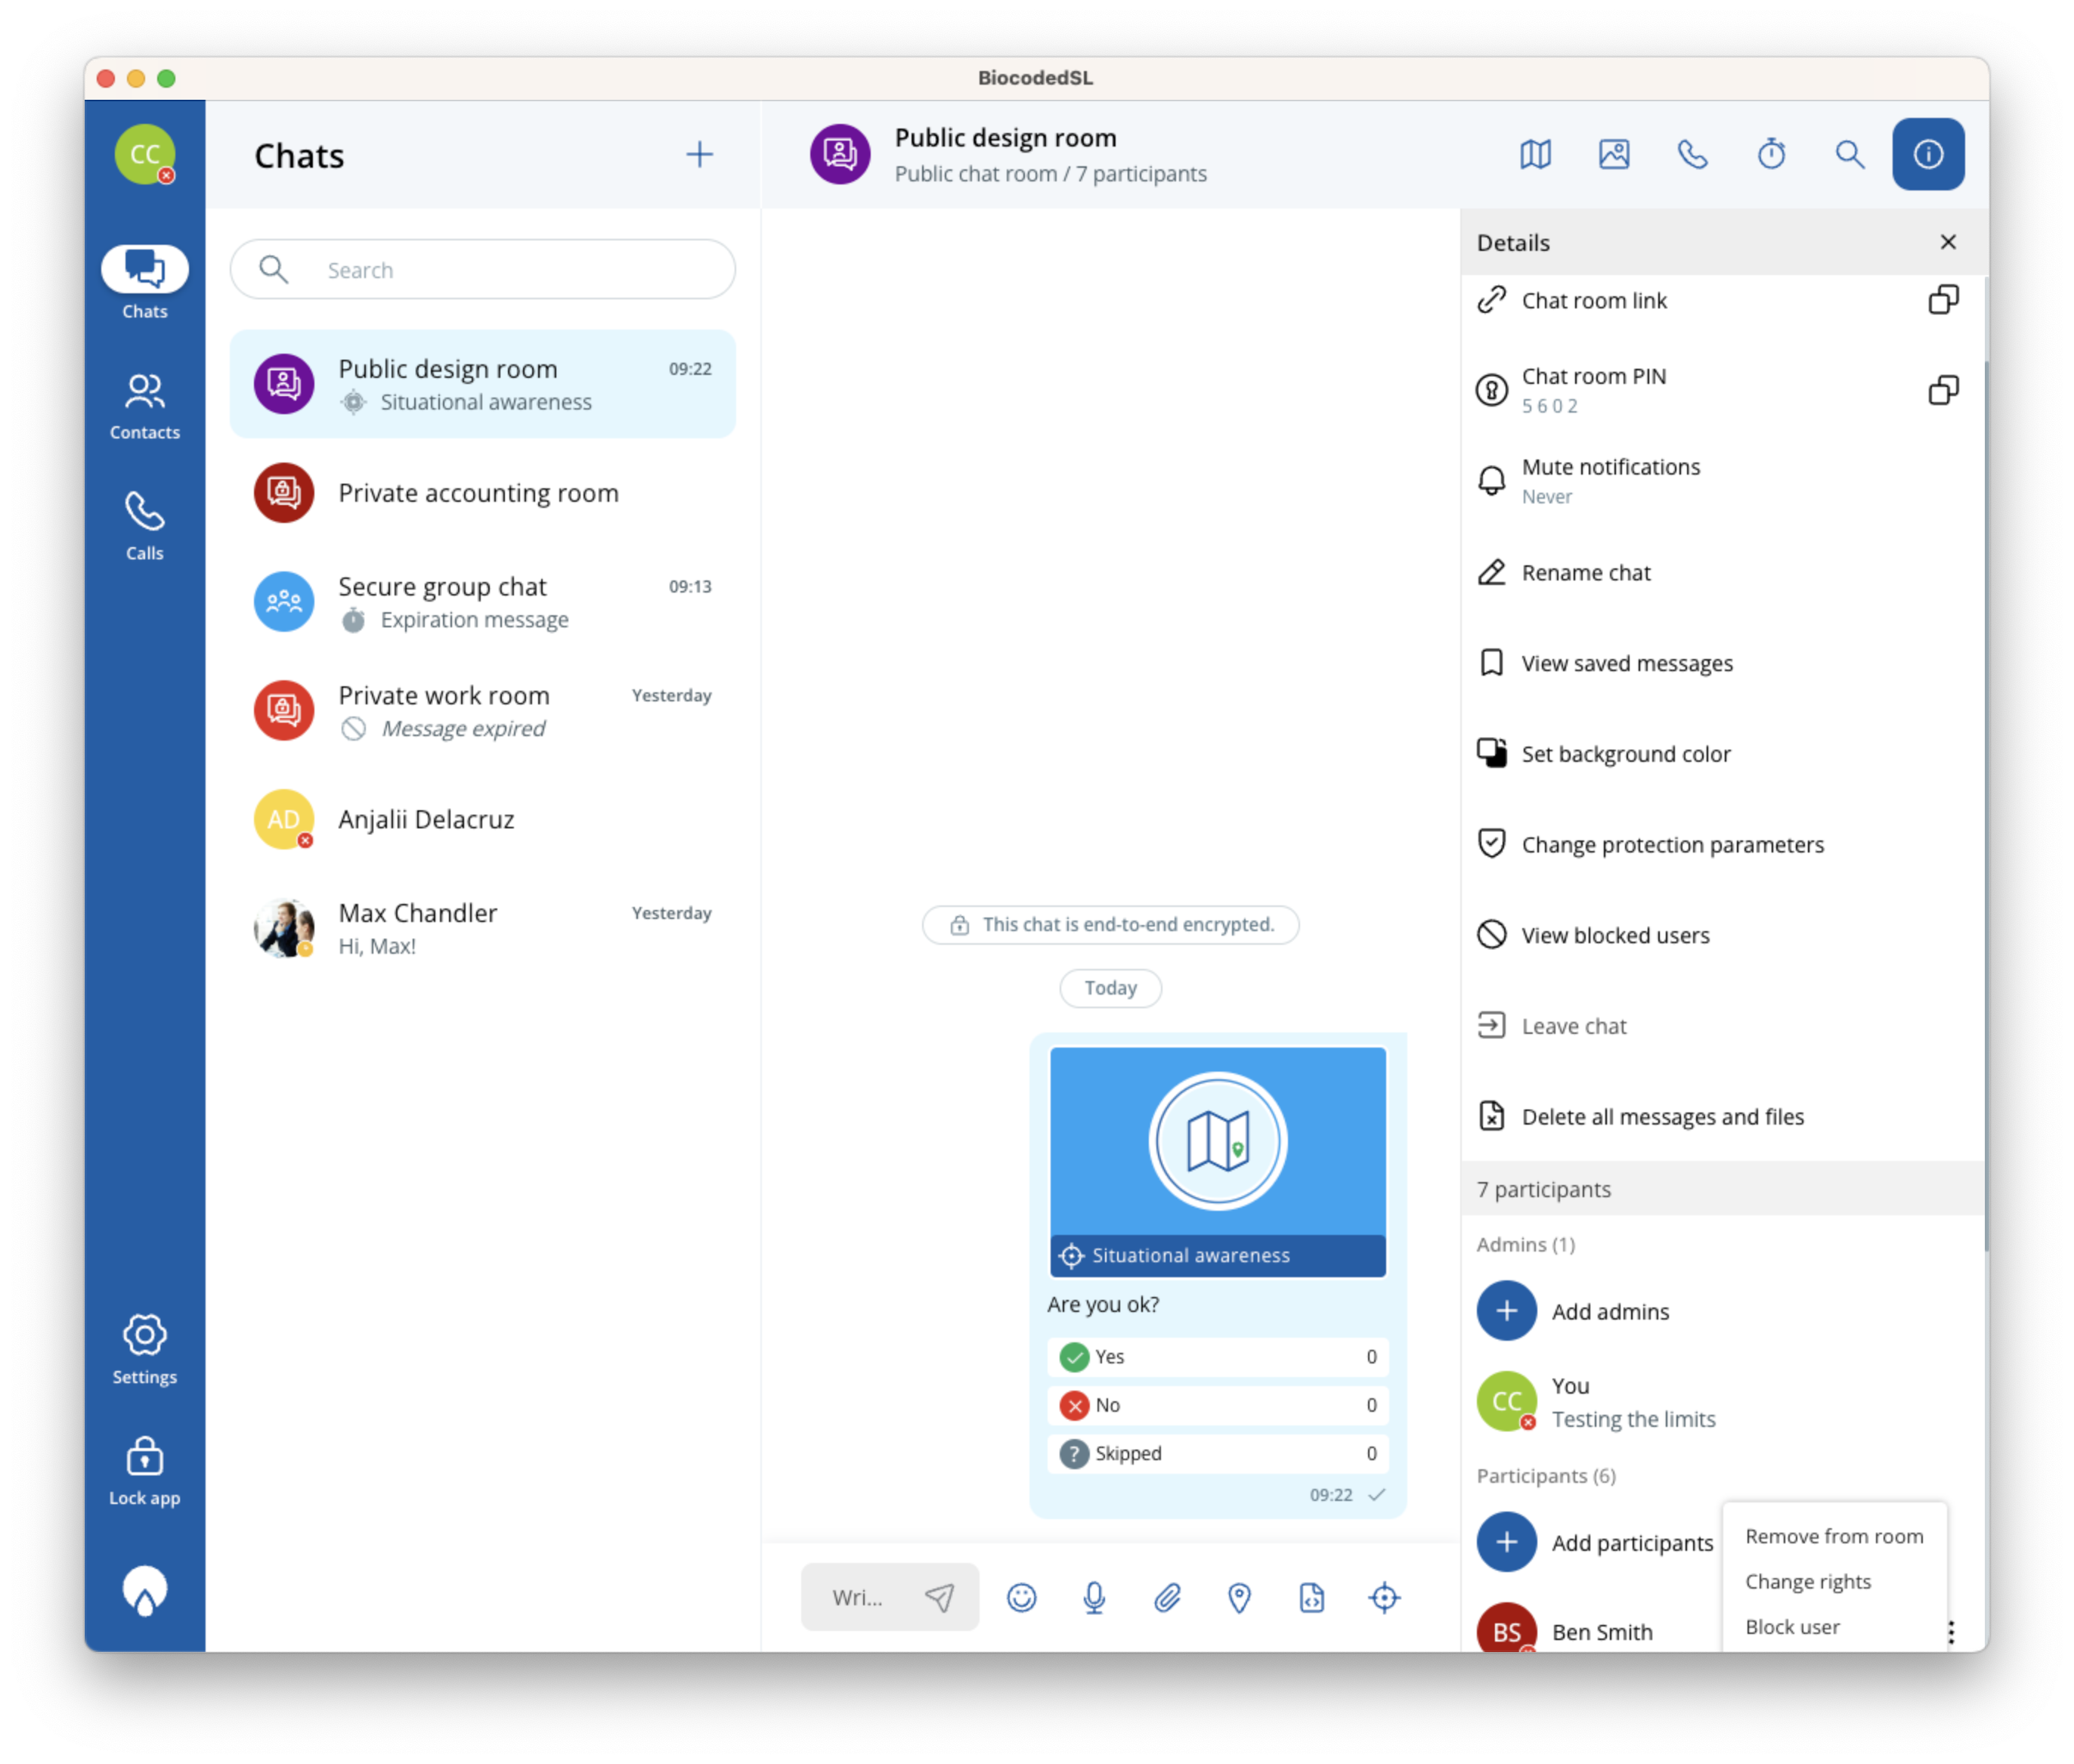
- CHAT ROOM LINK: copies the link for this chat room, so you can send it to any Biocoded contact and they can join by tapping on the link.
- CHAT ROOM PIN: optional PIN required to enter room,
- MUTE NOTIFICATIONS: if enabled, you will no longer be notified of new messages in this chat room for a selected time period,
- RENAME CHAT,
- VIEW SAVED MESSAGES: contains a list of saved messages for this chat,
- SET BACKGROUND COLOR: set a custom background colour for this chat,
- CHANGE PROTECTION PARAMETERS: change the parameters set when creating chat room,
- VIEW BLOCKED USERS: a list of users blocked from chat room with the option to unblock,
- DELETE ALL MESSAGES & FILES: deletes all exchanged data from this chat on your device,
- EXIT ROOM: removes you from the chat room and you will no longer be notified of new messages,
- ADD PARTICIPANT: add more people to your group chat,
- Participants list.
Chat room roles
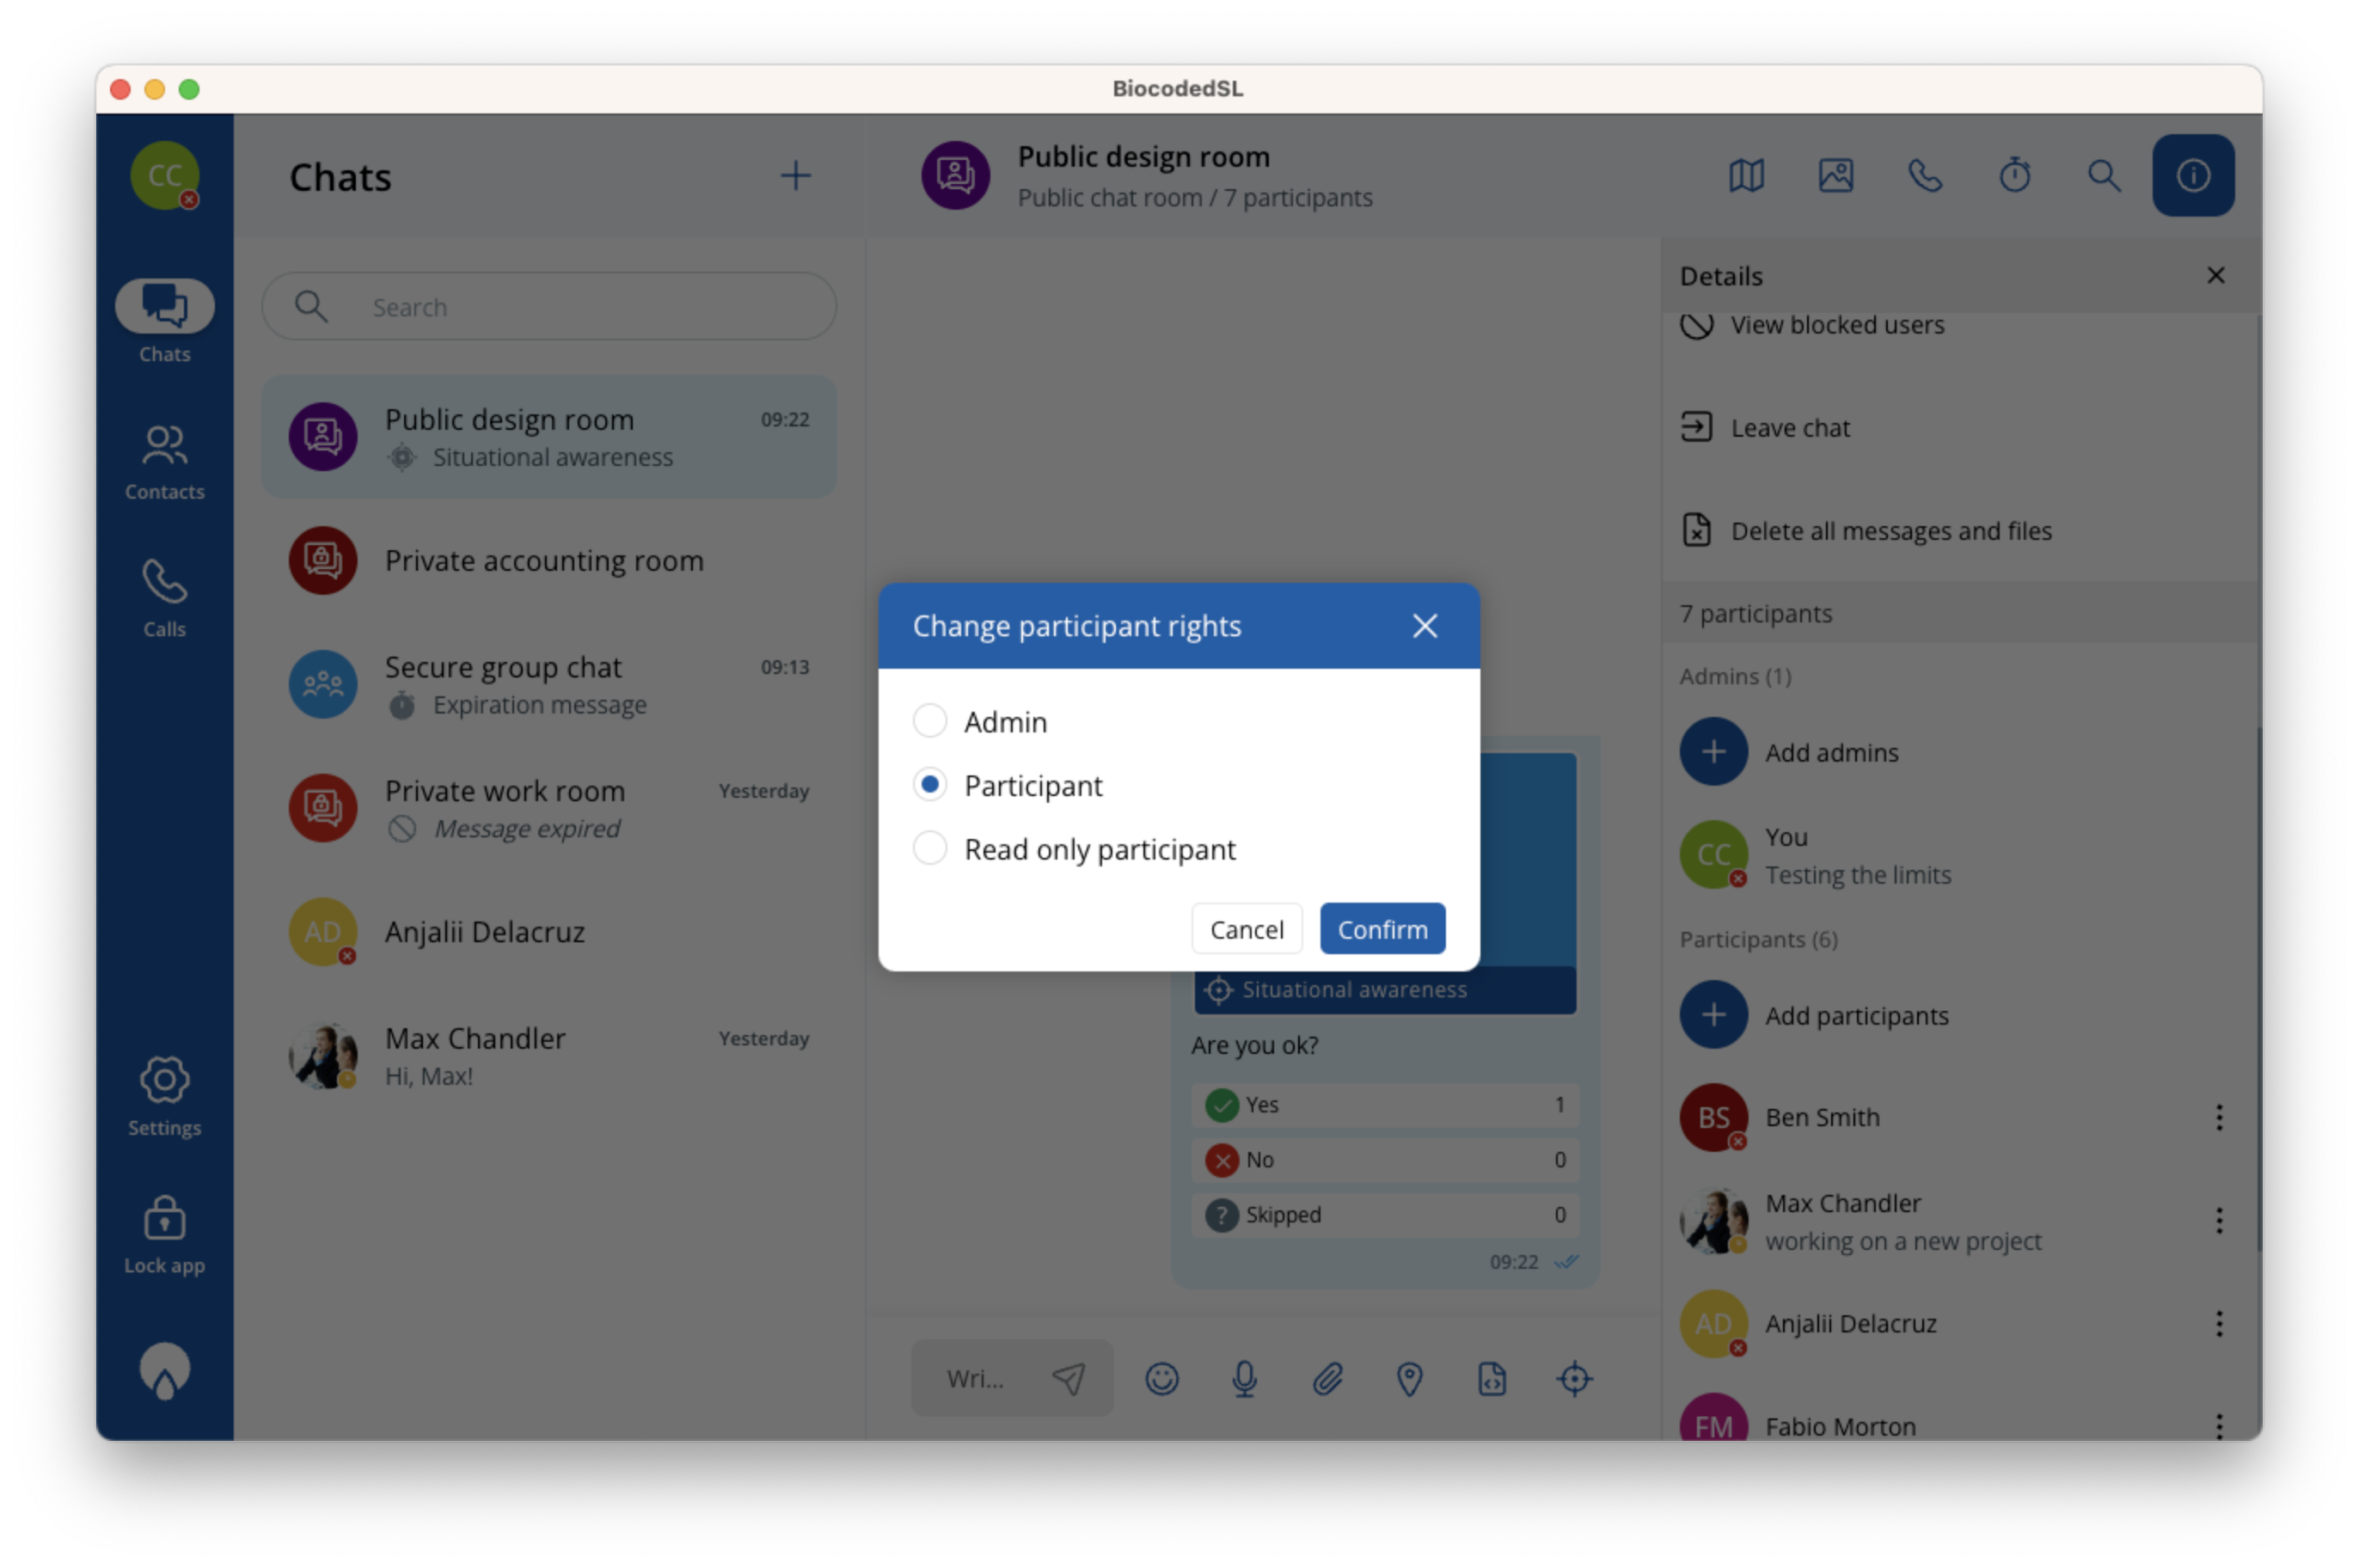
If you are the admin of a chat room, you can change what other participants are able to do in this room by changing their roles. If you click on ... next to a participant's name, you can:
- Remove from room: Remove the participant from this room,
- Change rights: Change the role of a participant to user, admin or read only,
- Block contact: Block the participant from this room, which disables their ability to join by link, but also disables other admins from adding them back to the chat room.
Admins can add and remove participants and change the participants roles, and read only mode disables the user's message input and they can only view the messages sent to this room, but not send any themselves.
Message options
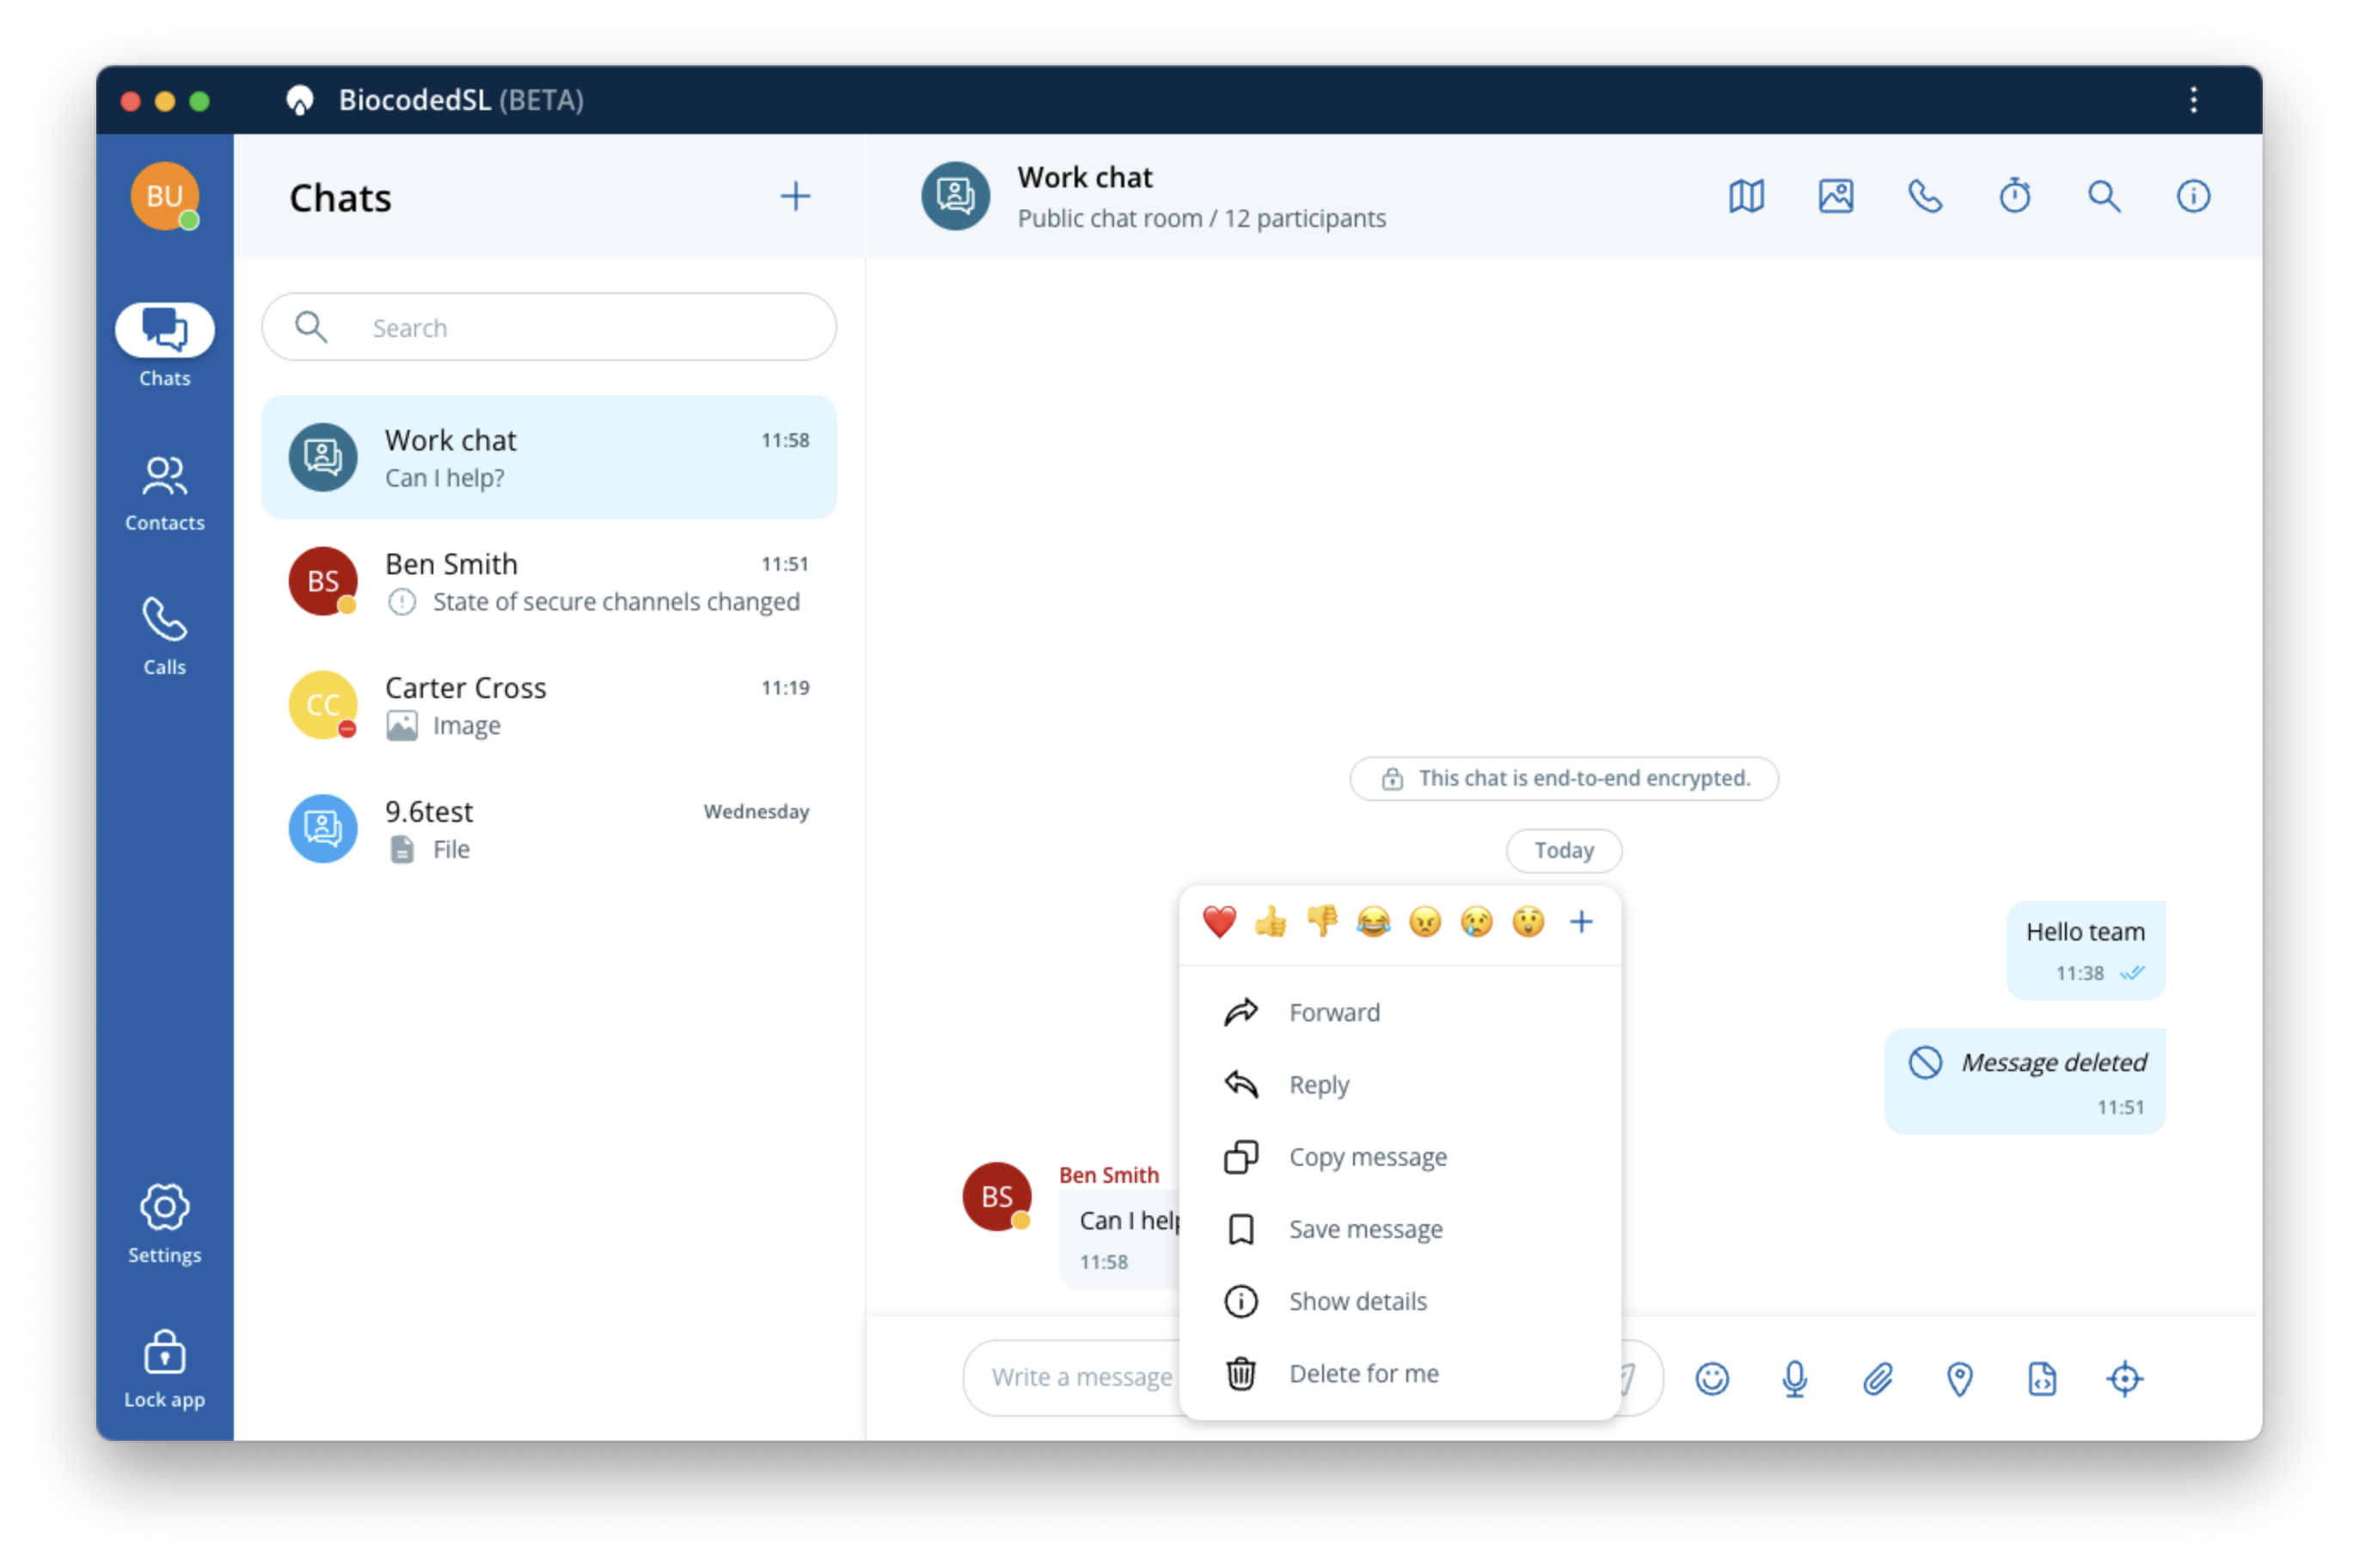
Right clicking a message in chat opens the message context menu containing the following options:
-
React to the message by selecting an emoji from the list or search for a custom one of your choosing by pressing +,
-
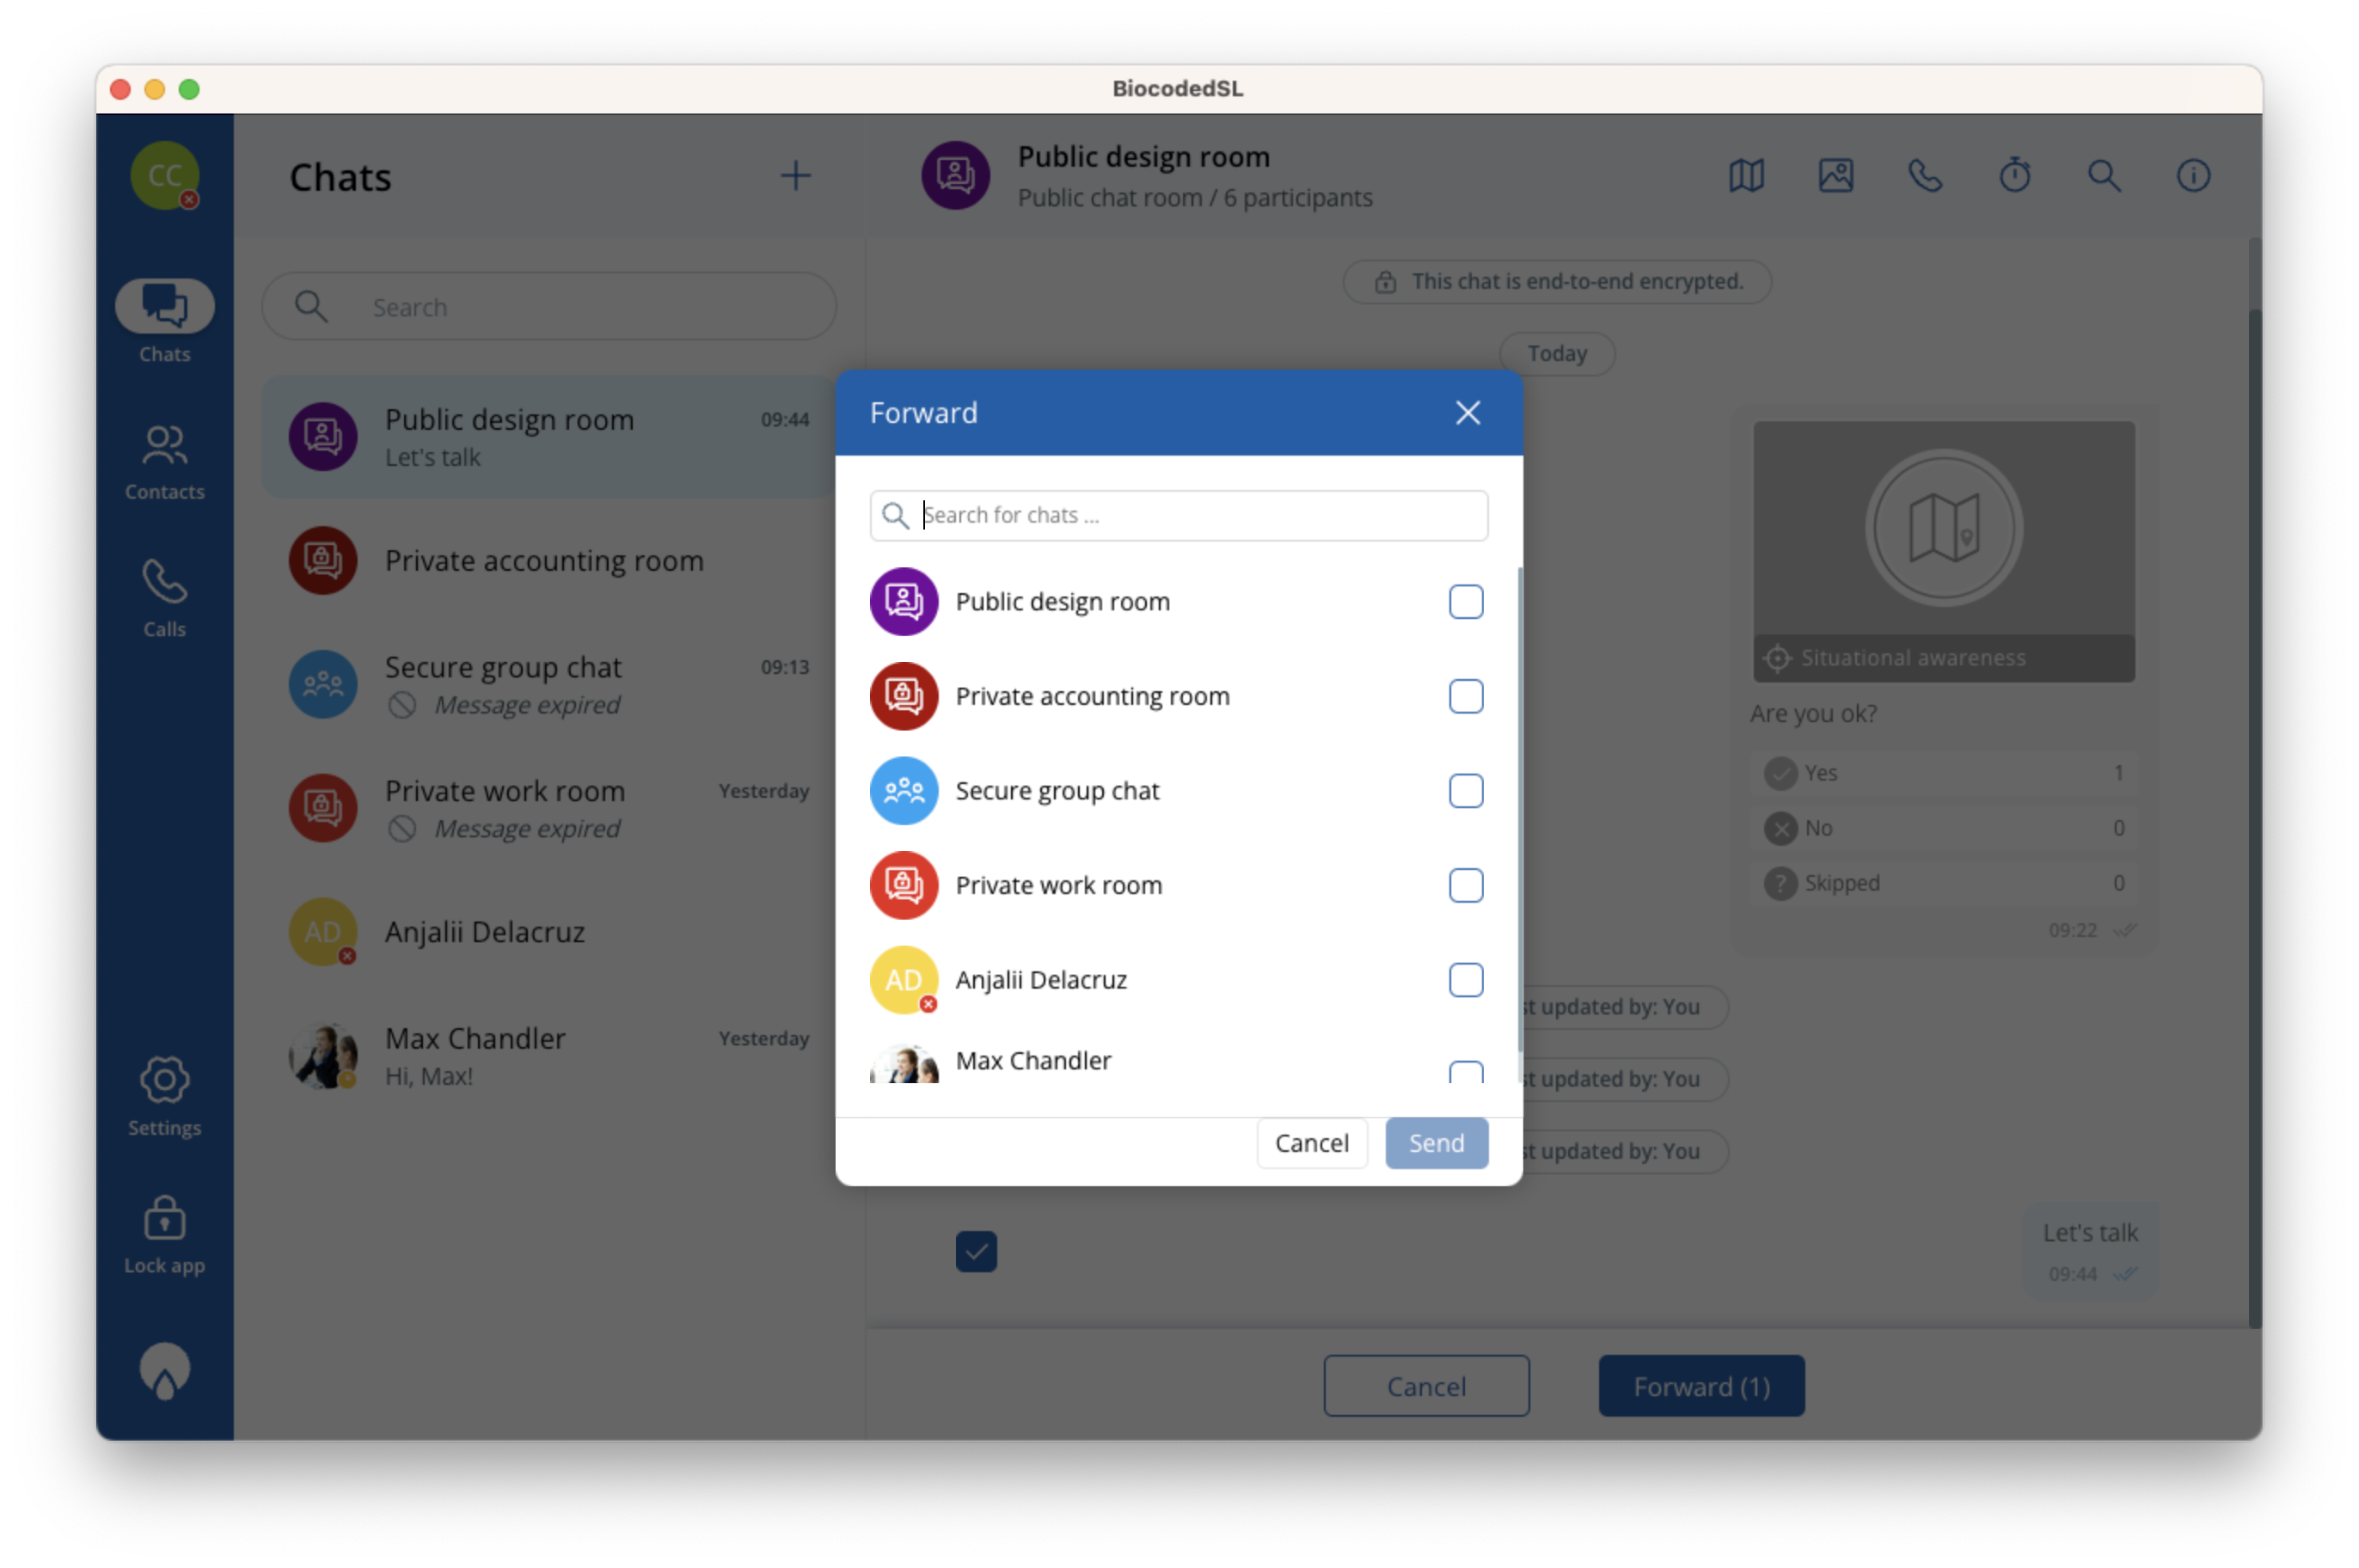
Forward the message to a contact or to a group chat or chat room,
-
Reply to this message and include a citation of it in your message,
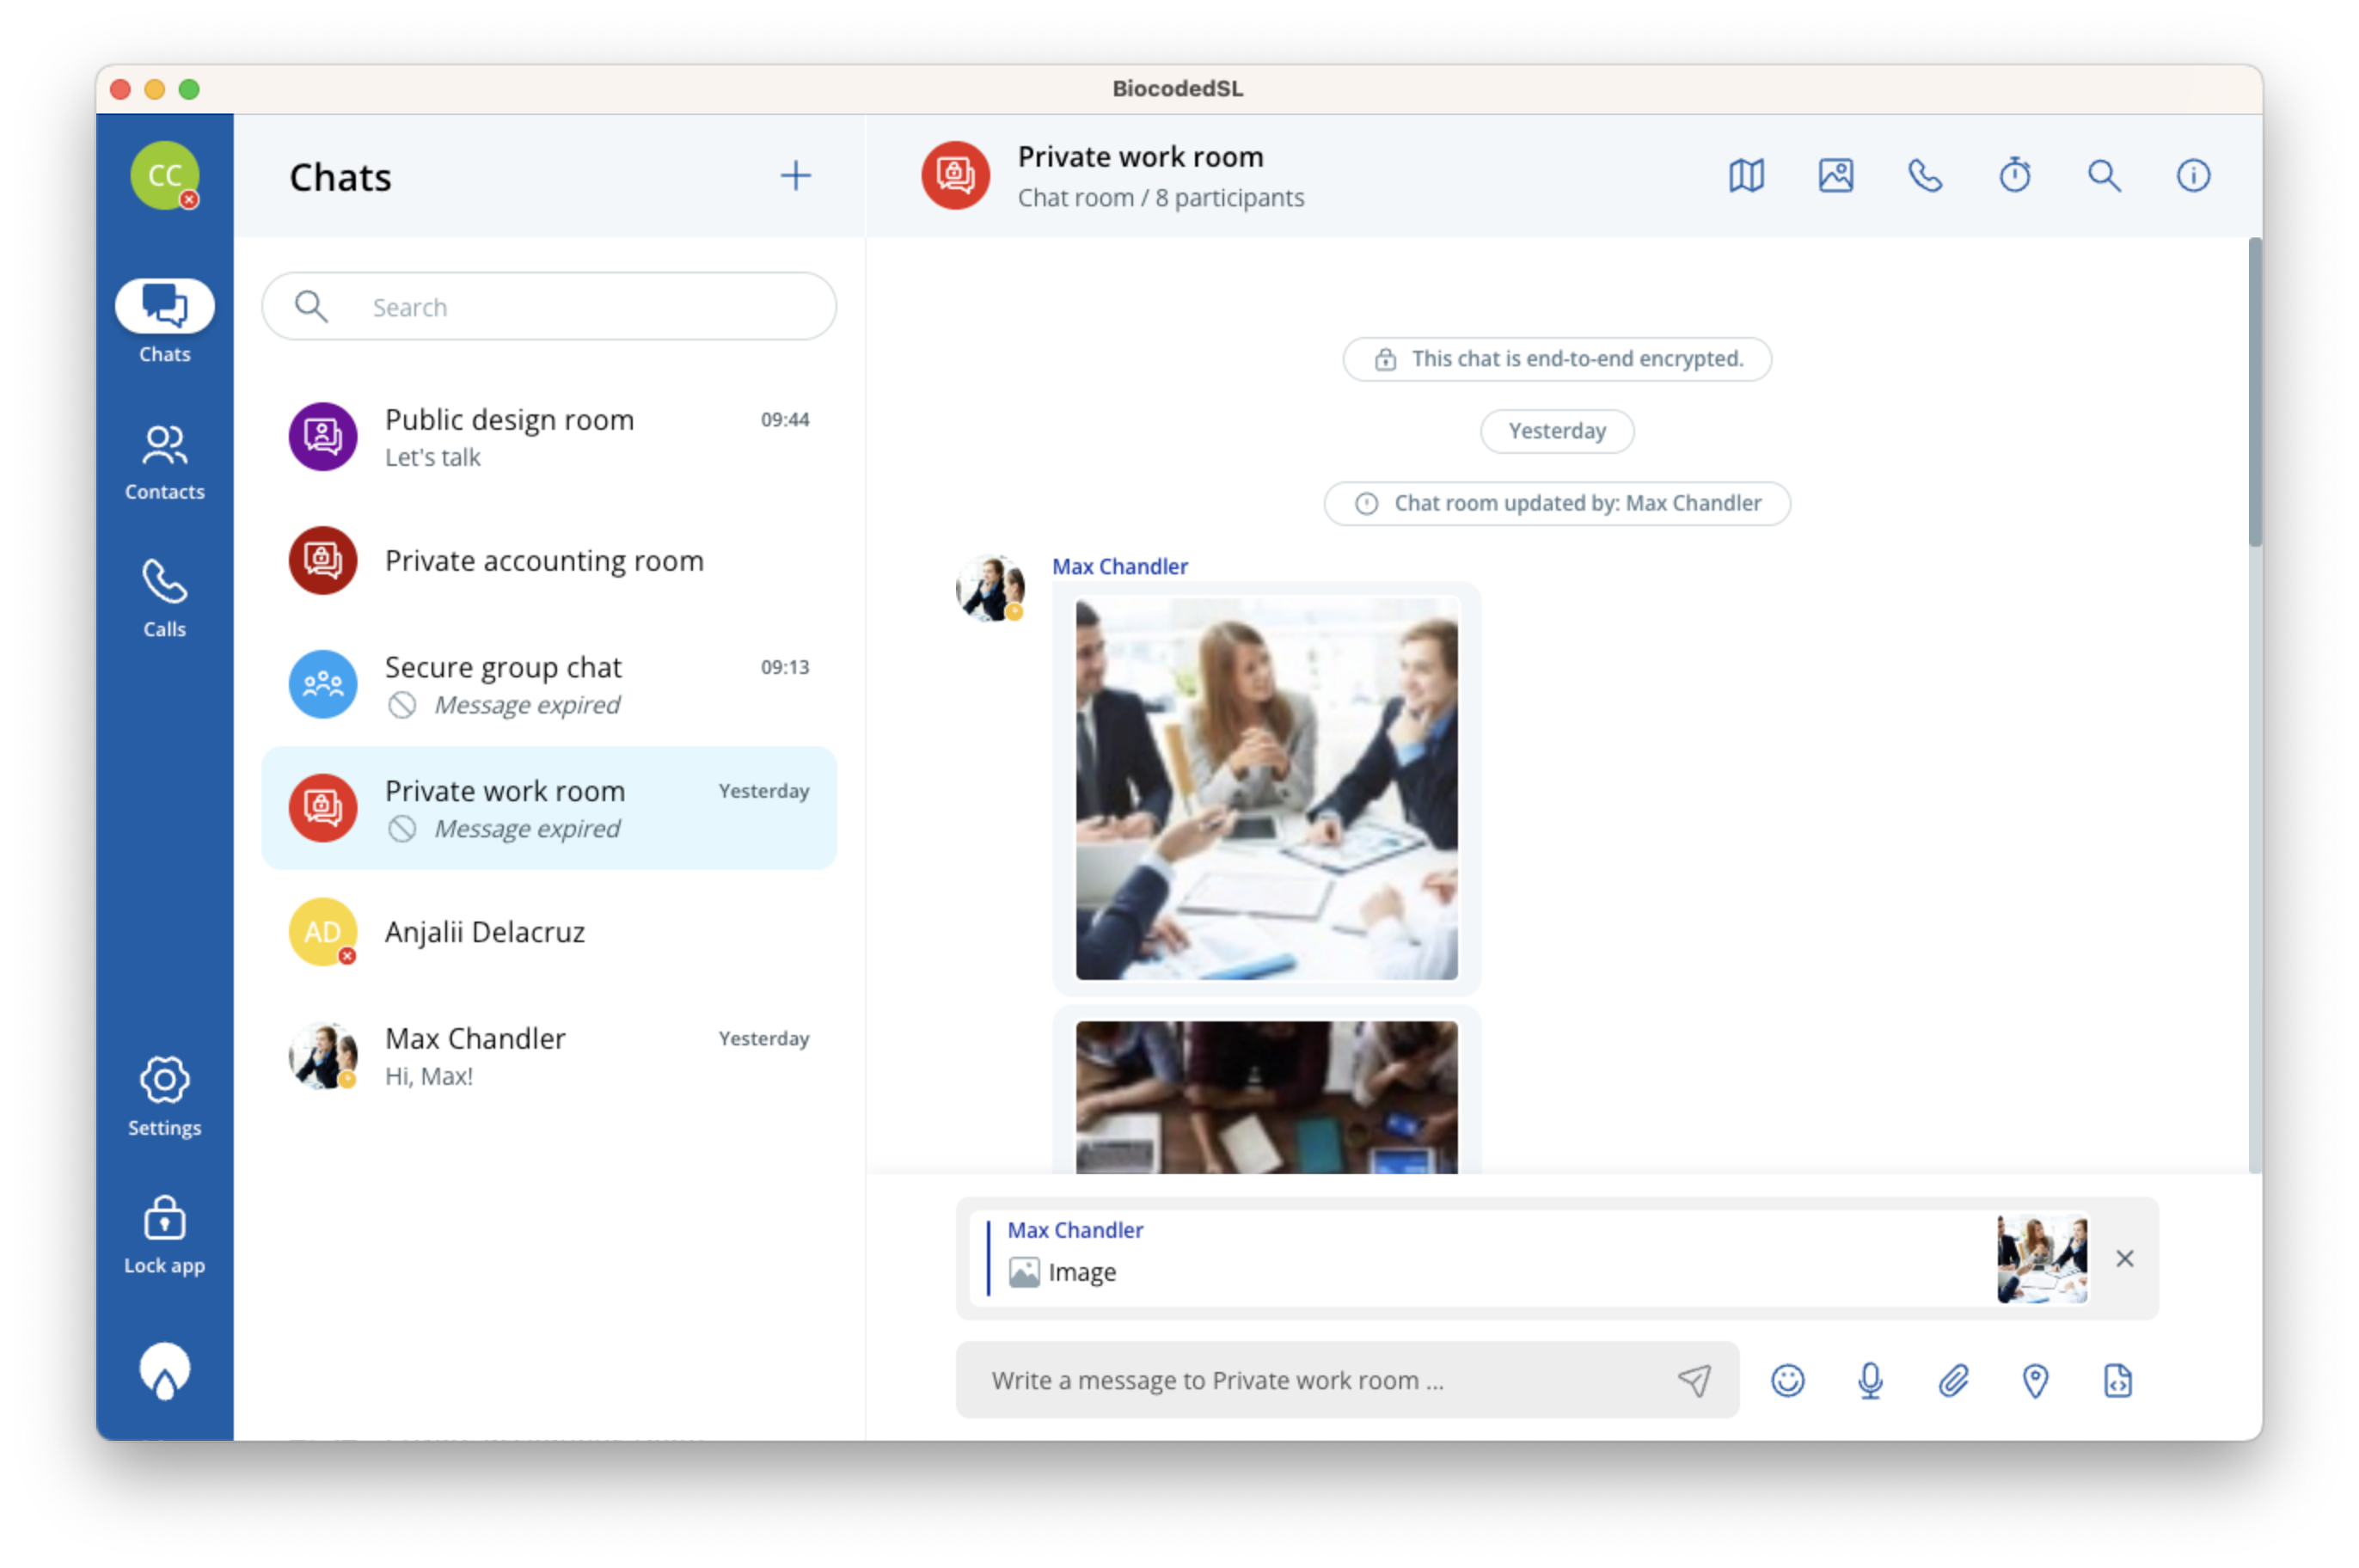
-
Edit text - allows you to edit the text of your sent message
-
Copy message - copies the contents of this message,
-
Save message - adds the message to your saved messages list, viewable from chat info,
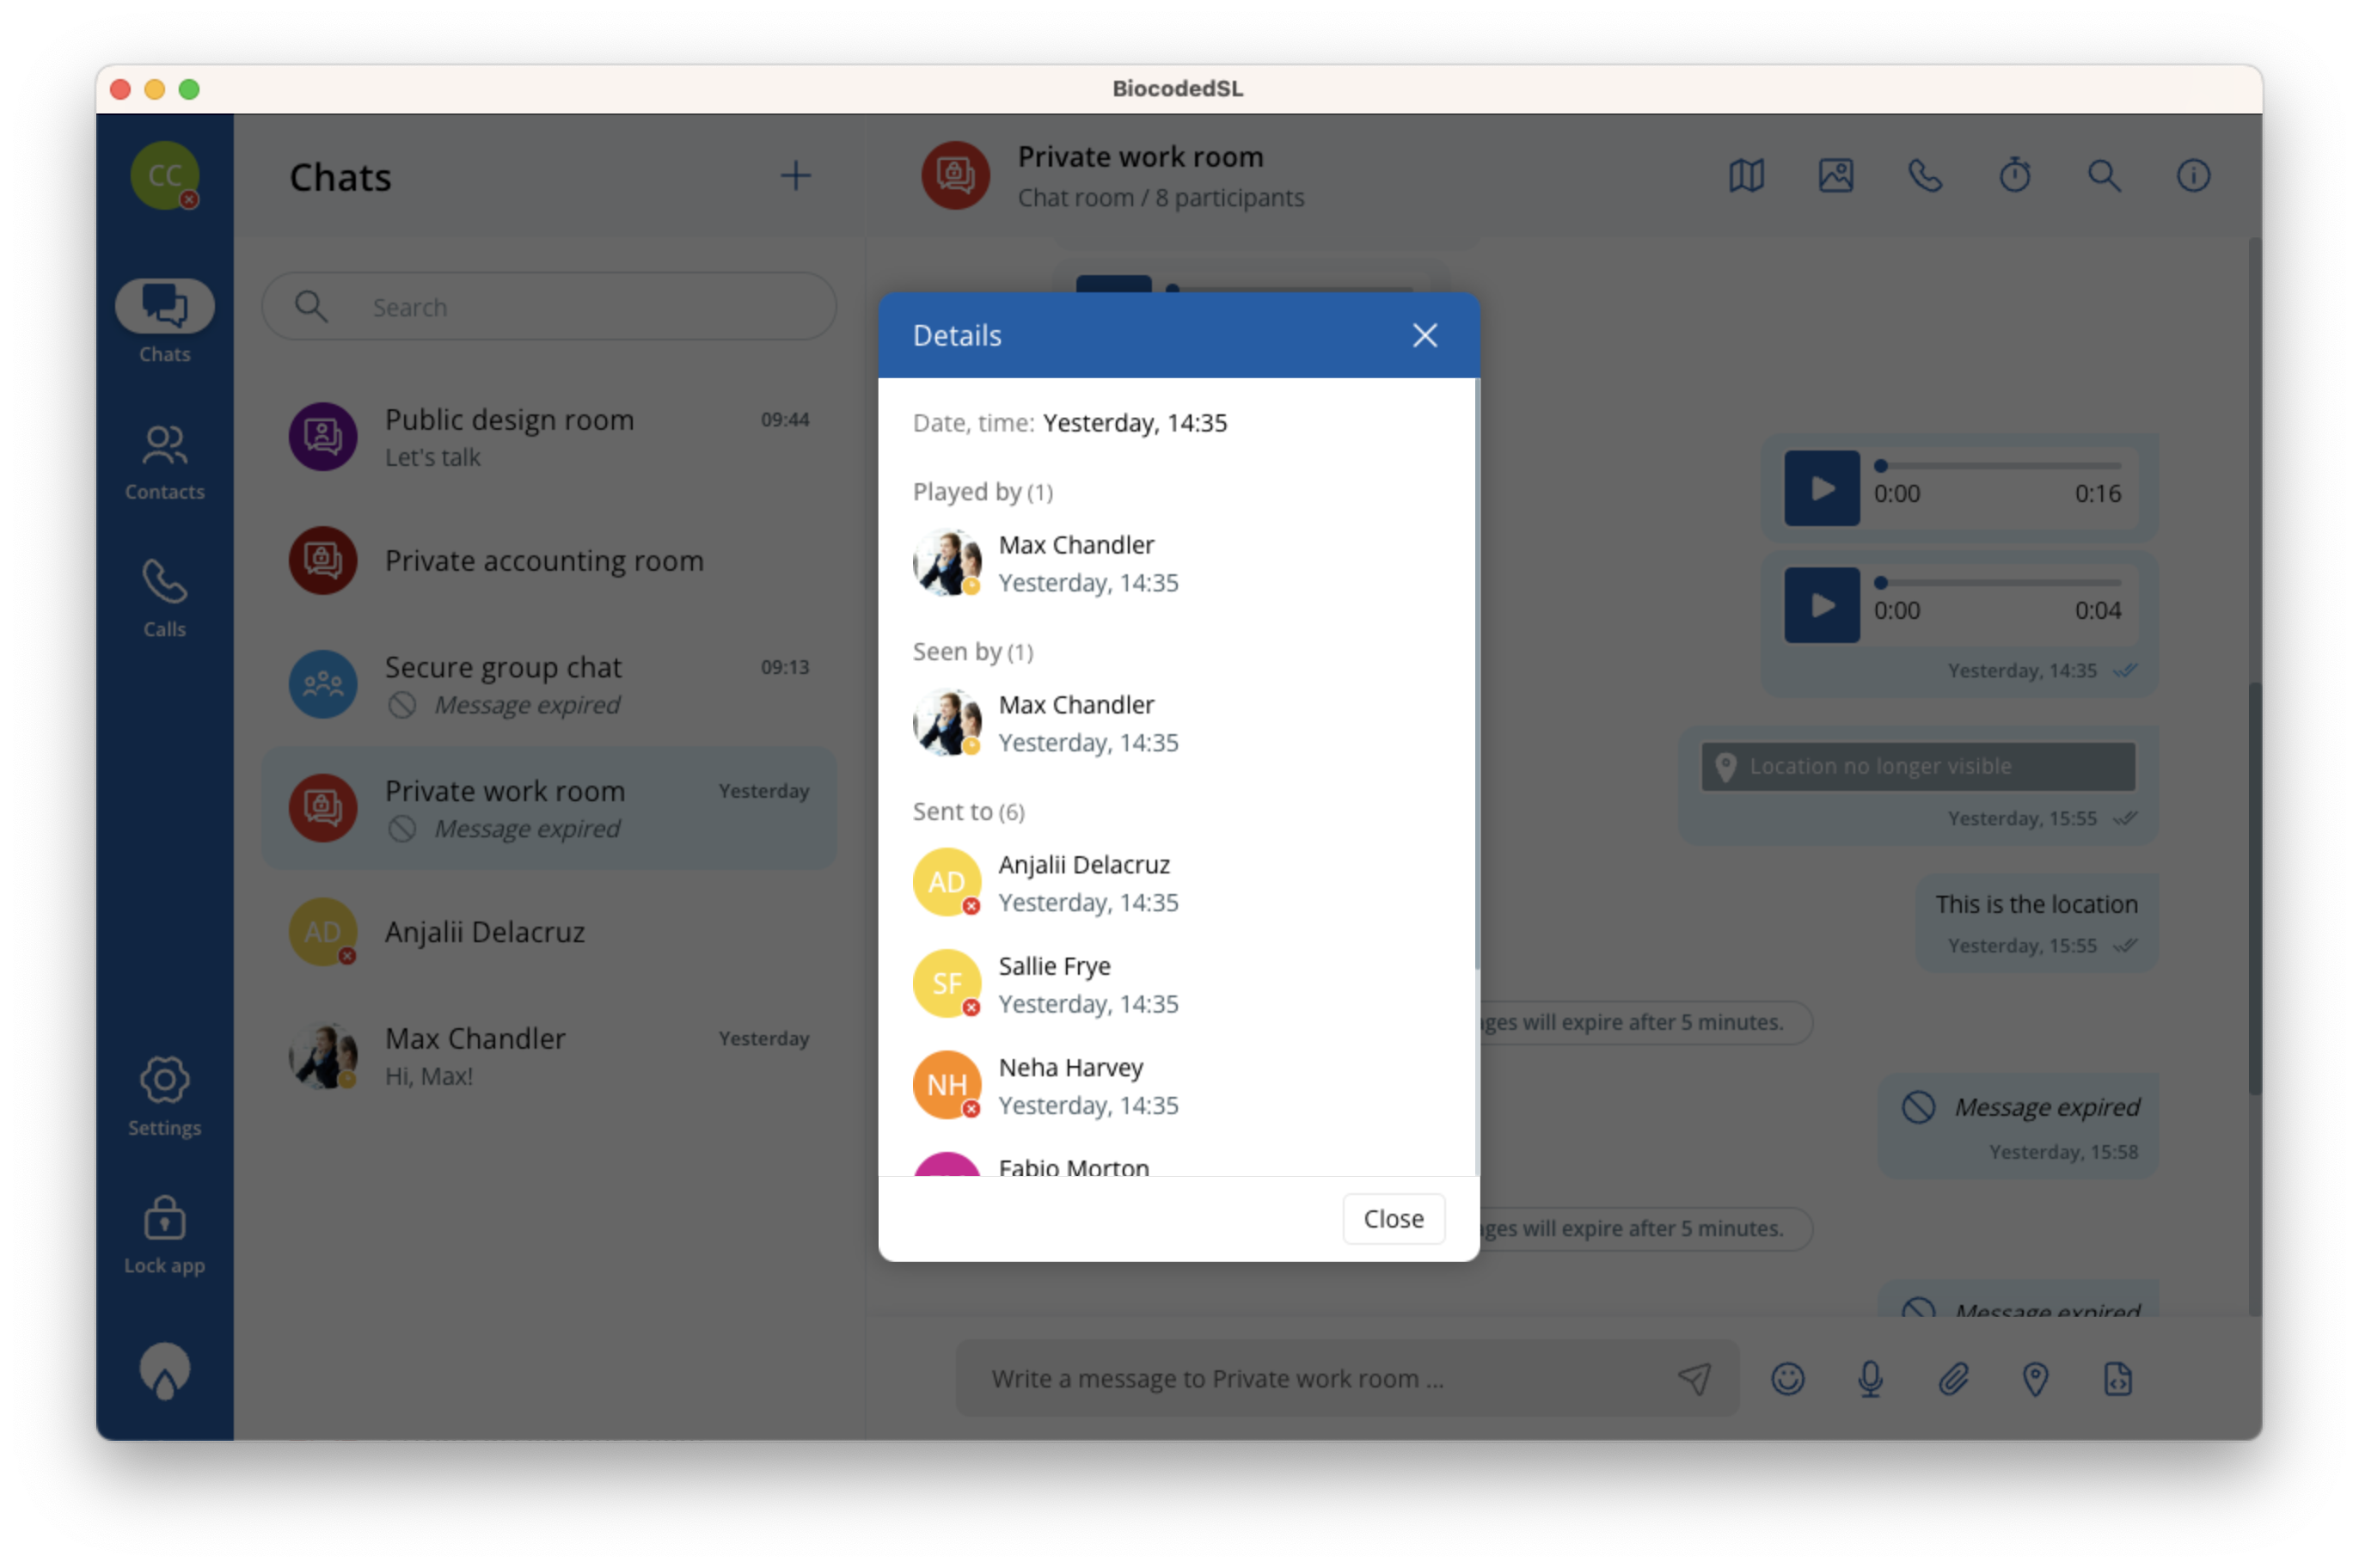
-
Show details (only on sent messages) - shows who has received and seen this message.
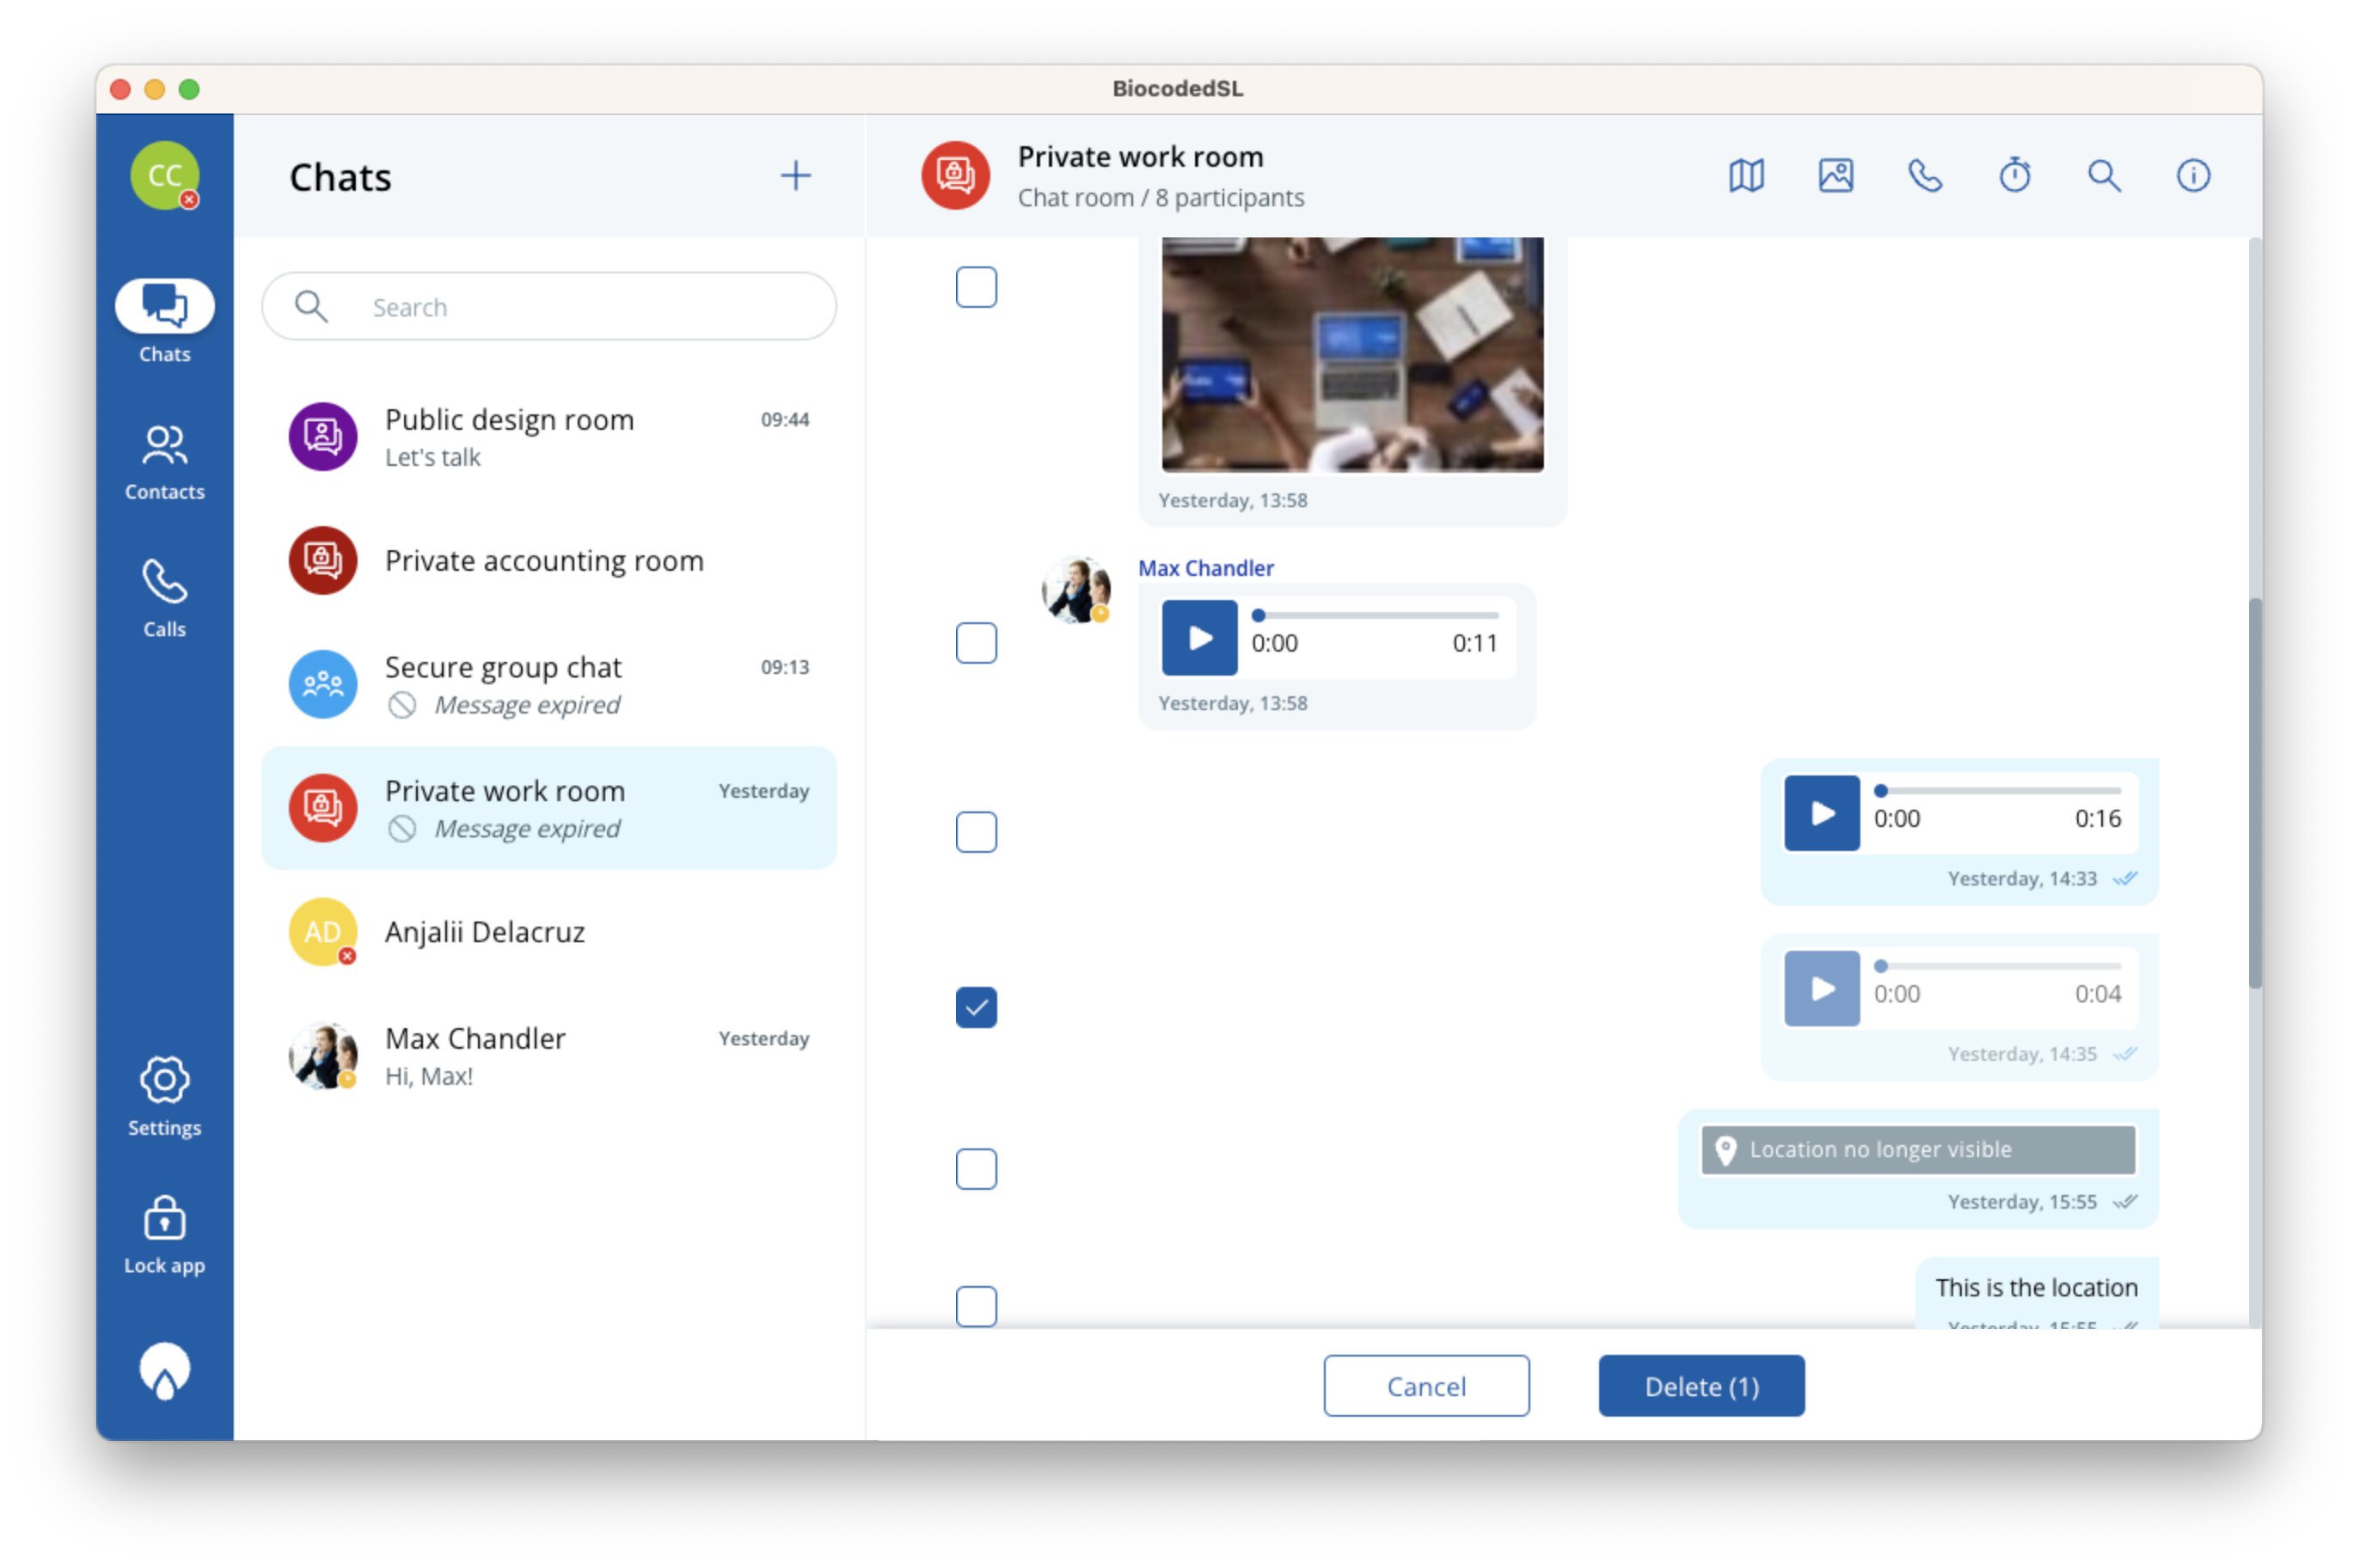
-
Delete for me - select the messages you want to delete on your device and tap "Delete",
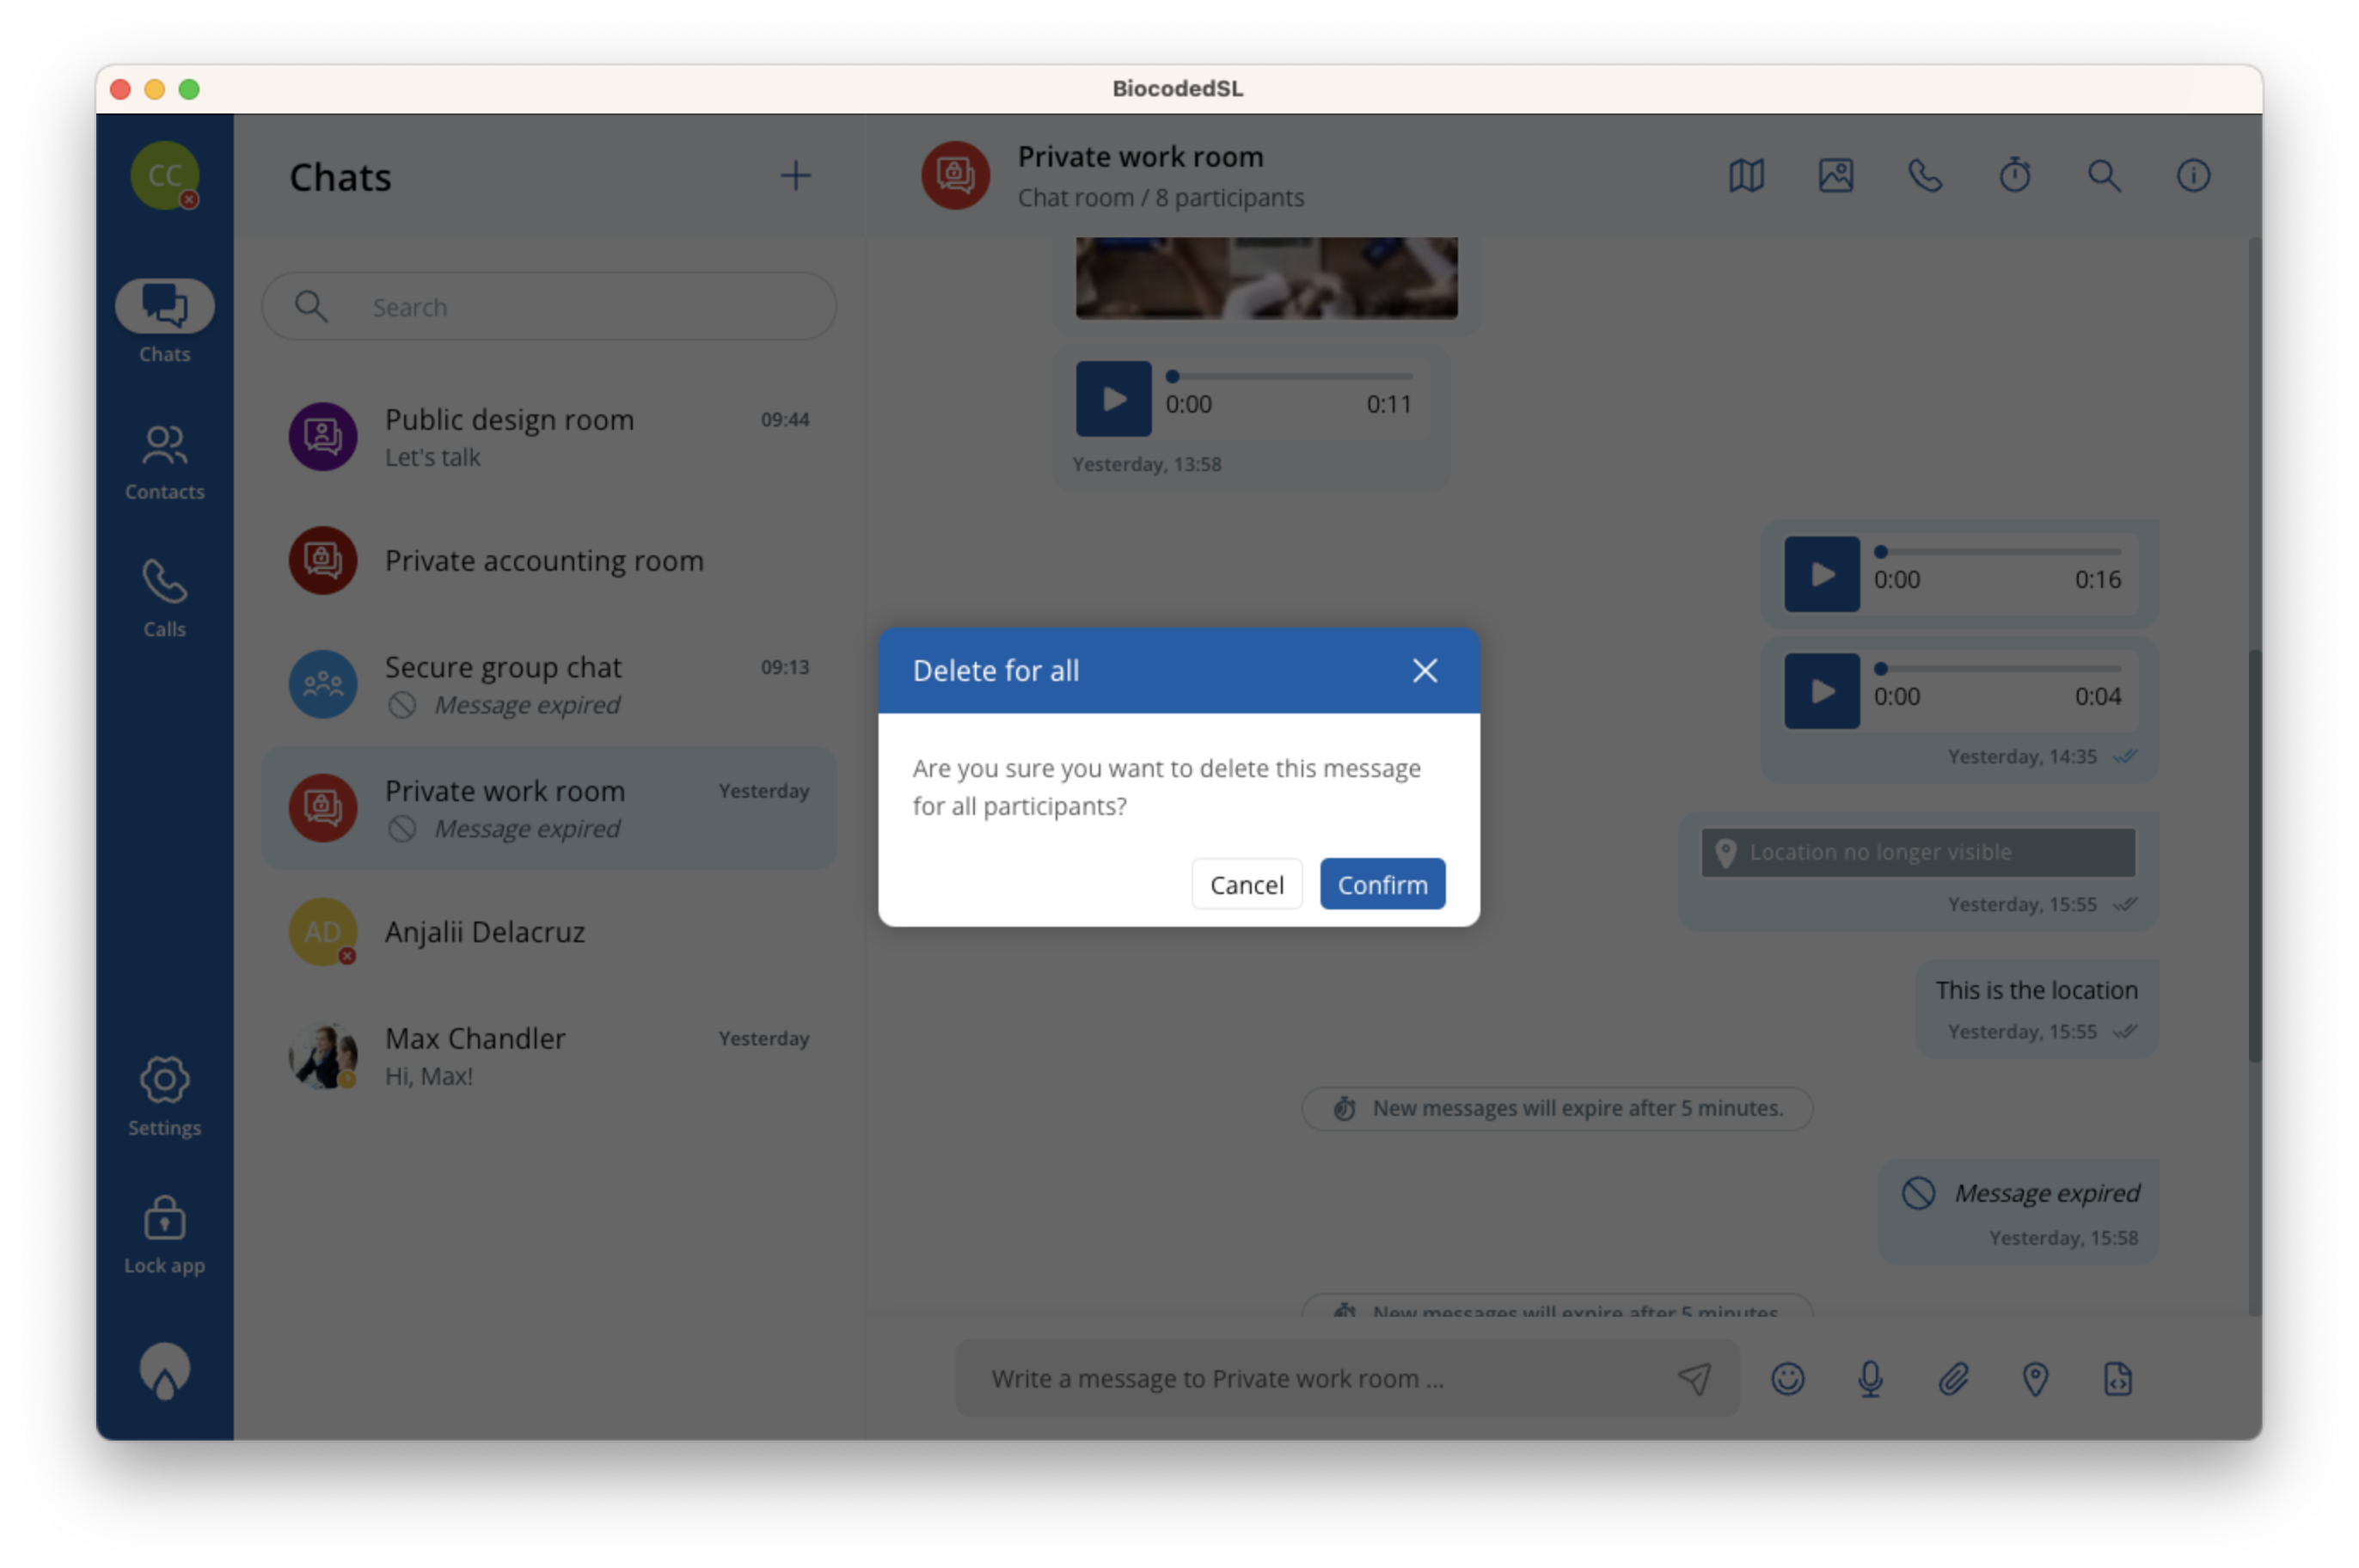
-
Delete for all - deletes the contents of this message for all participants of chat.
Chat list options
When you open Chats tab, you can right click on a chat and view the shortcuts to chat options.
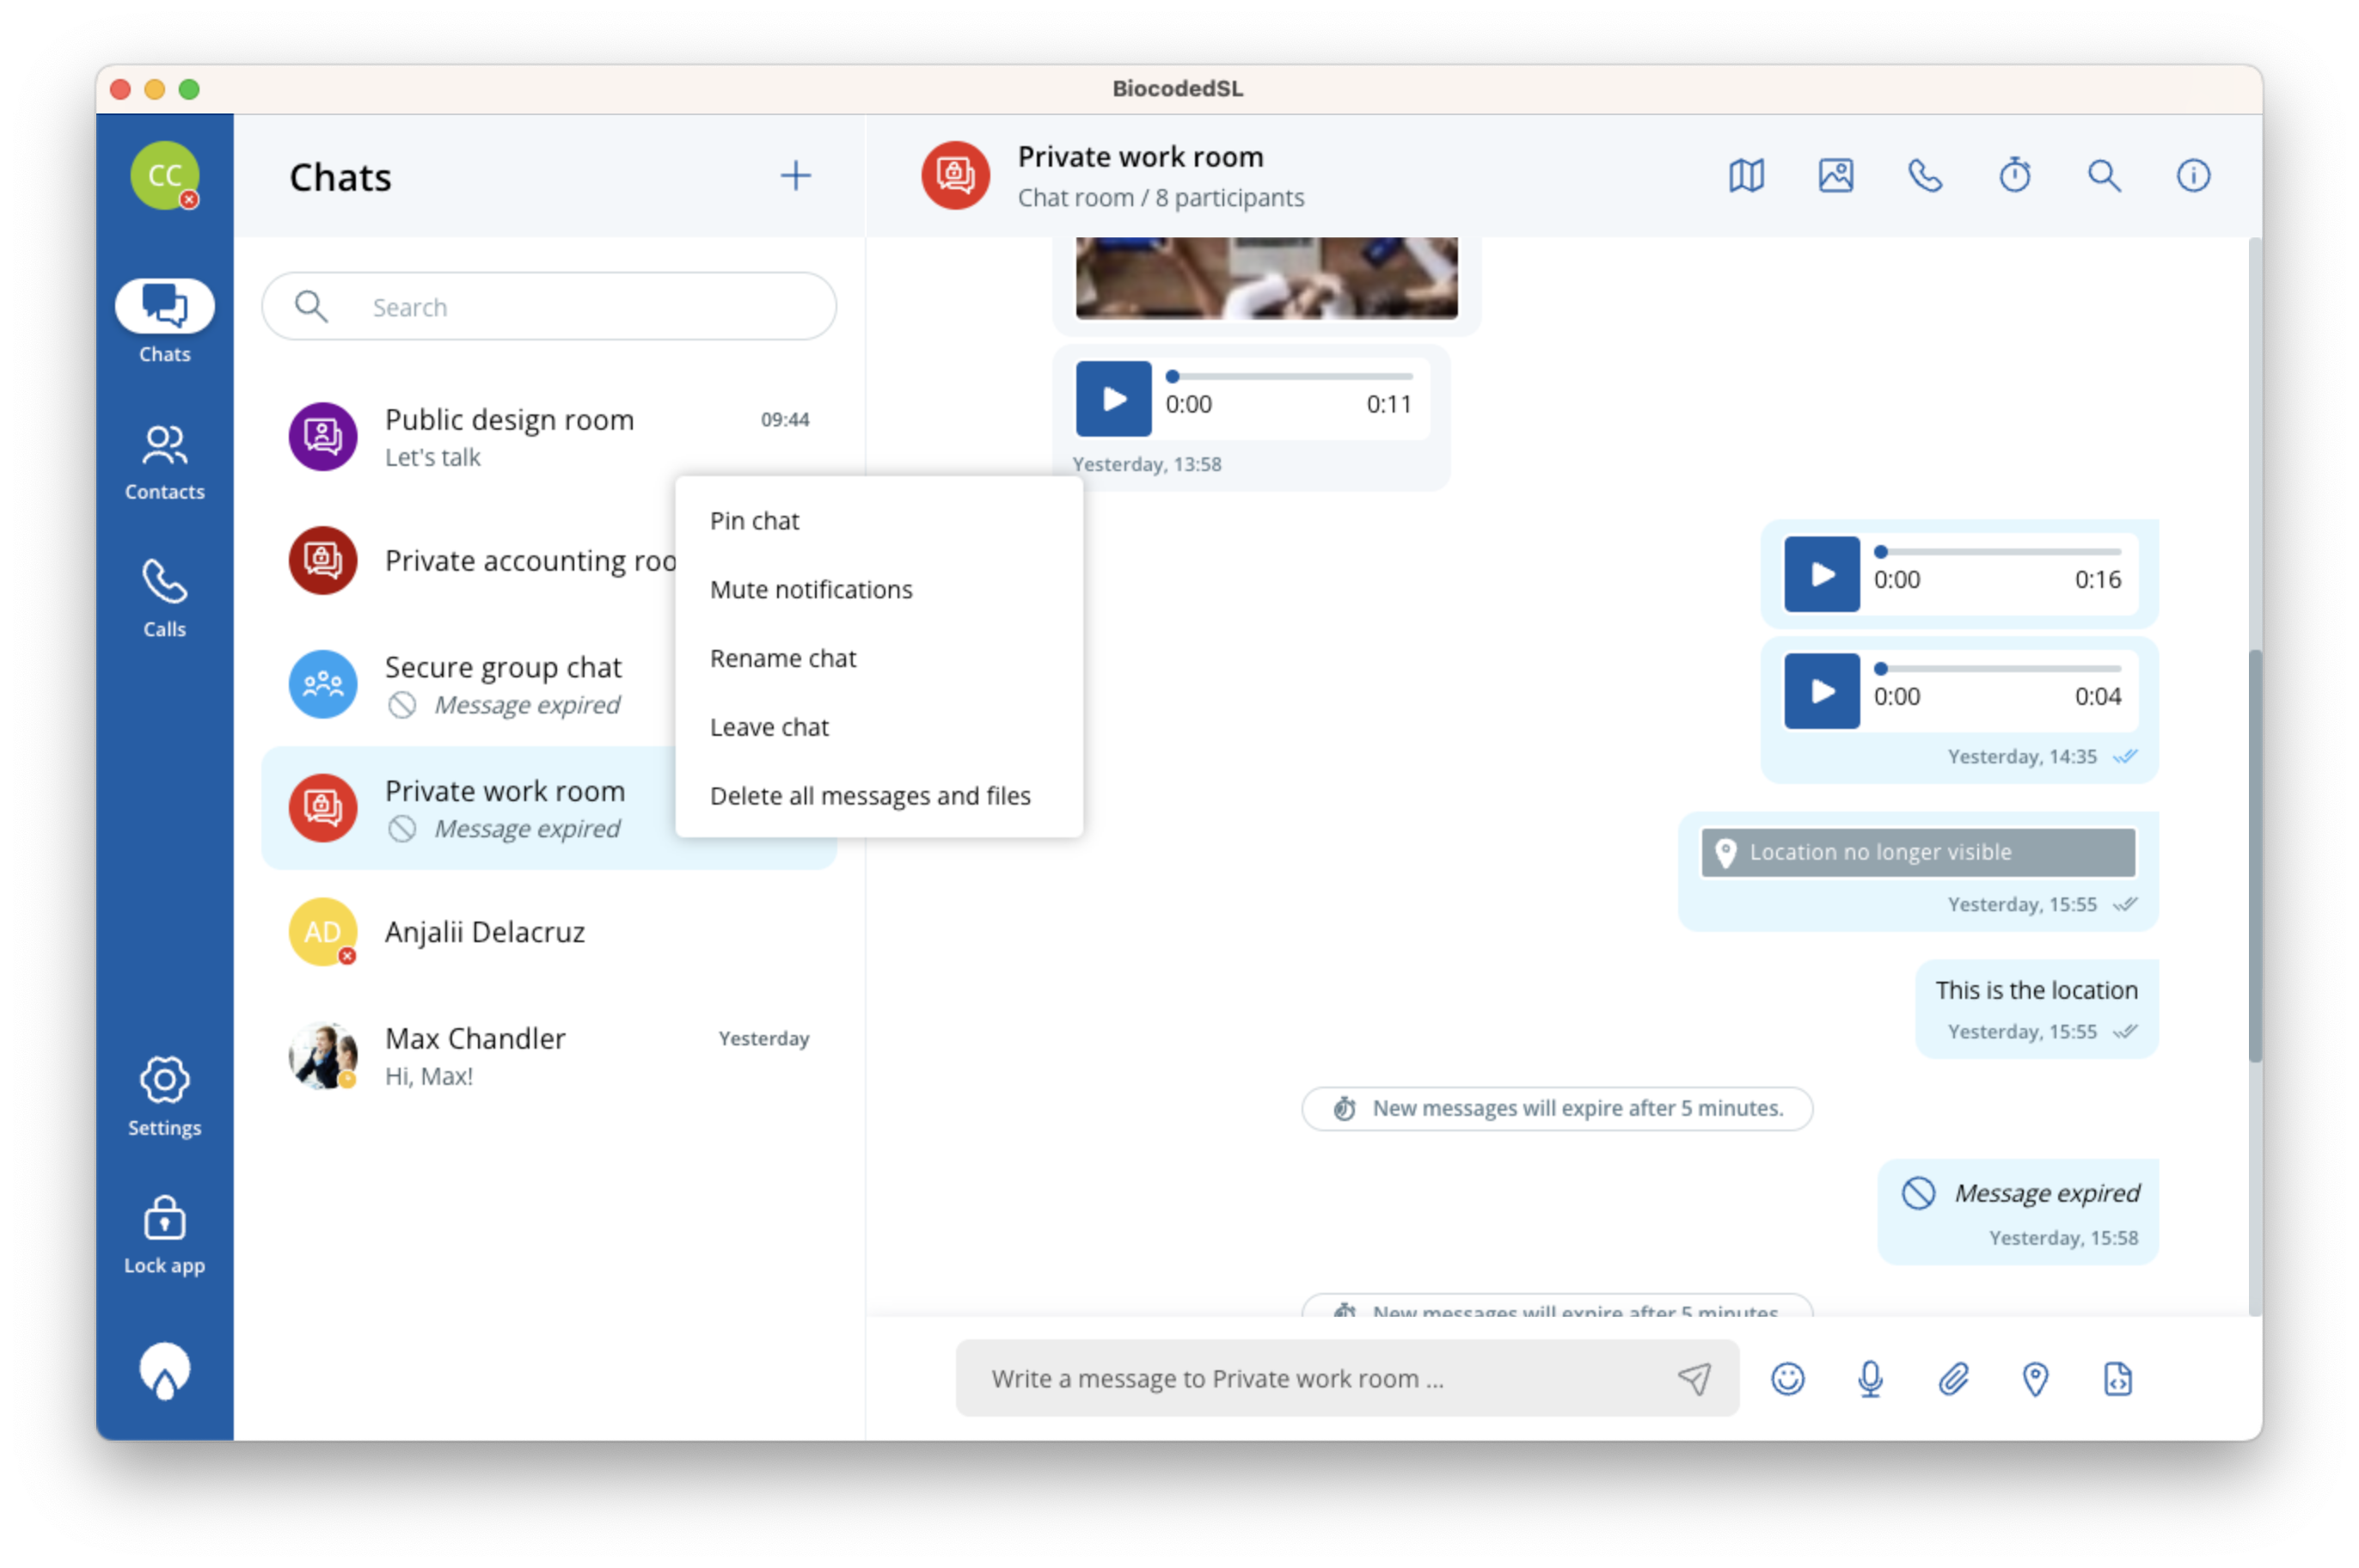
You have the option to:
- Pin chat to top of chats list,
- Mute notifications,
- Rename chat,
- Leave chat,
- Delete all messages and files.
Each chat can have indicators for:
- unread messages,
- when sharing your live location,
- when you are mentioned in chat,
- if chat has notifications muted.
Settings
Open settings from the side bar and you can choose between the following options:
- Account,
- General,
- Privacy,
- Messages,
- Maps,
- Calls,
- Contacts,
- Notifications & Sounds,
- App Lock,
- Advanced,
- Backup,
- Client guide (access to official online client user guide),
- About.
Account
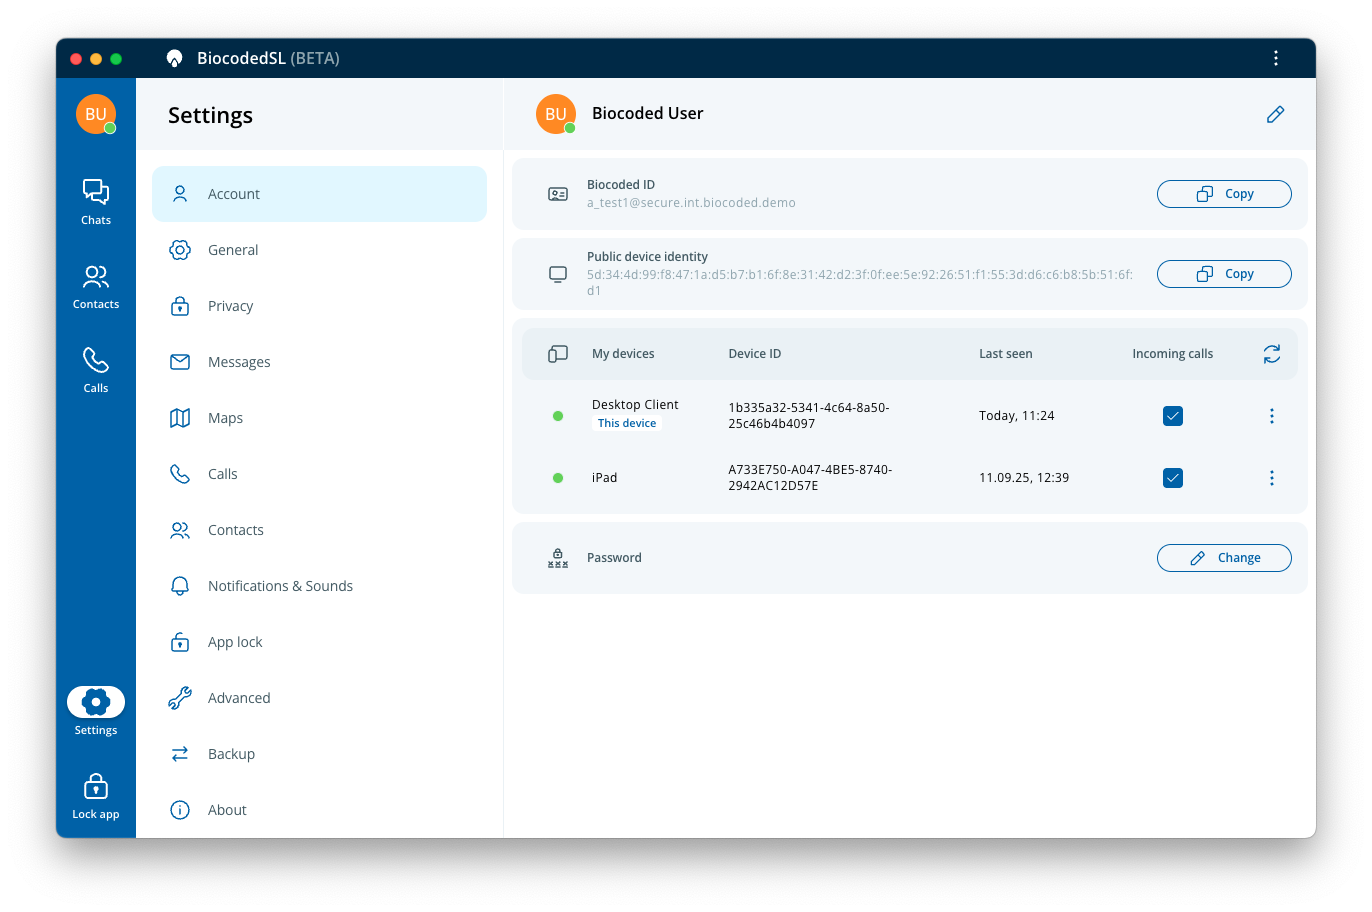
-
Biocoded ID - Your unique ID by which other users can add you to their contacts list. You can copy it by using "Copy" button.
-
Public device identity - Uniquely generated ID connected to your device and account. You can copy it by using "Copy" button.
-
My devices - Provides an overview of connected devices and their states. After clickin ..., you can also rename and wipe or log out devices or refresh the list by pressing Refresh icon button.
-
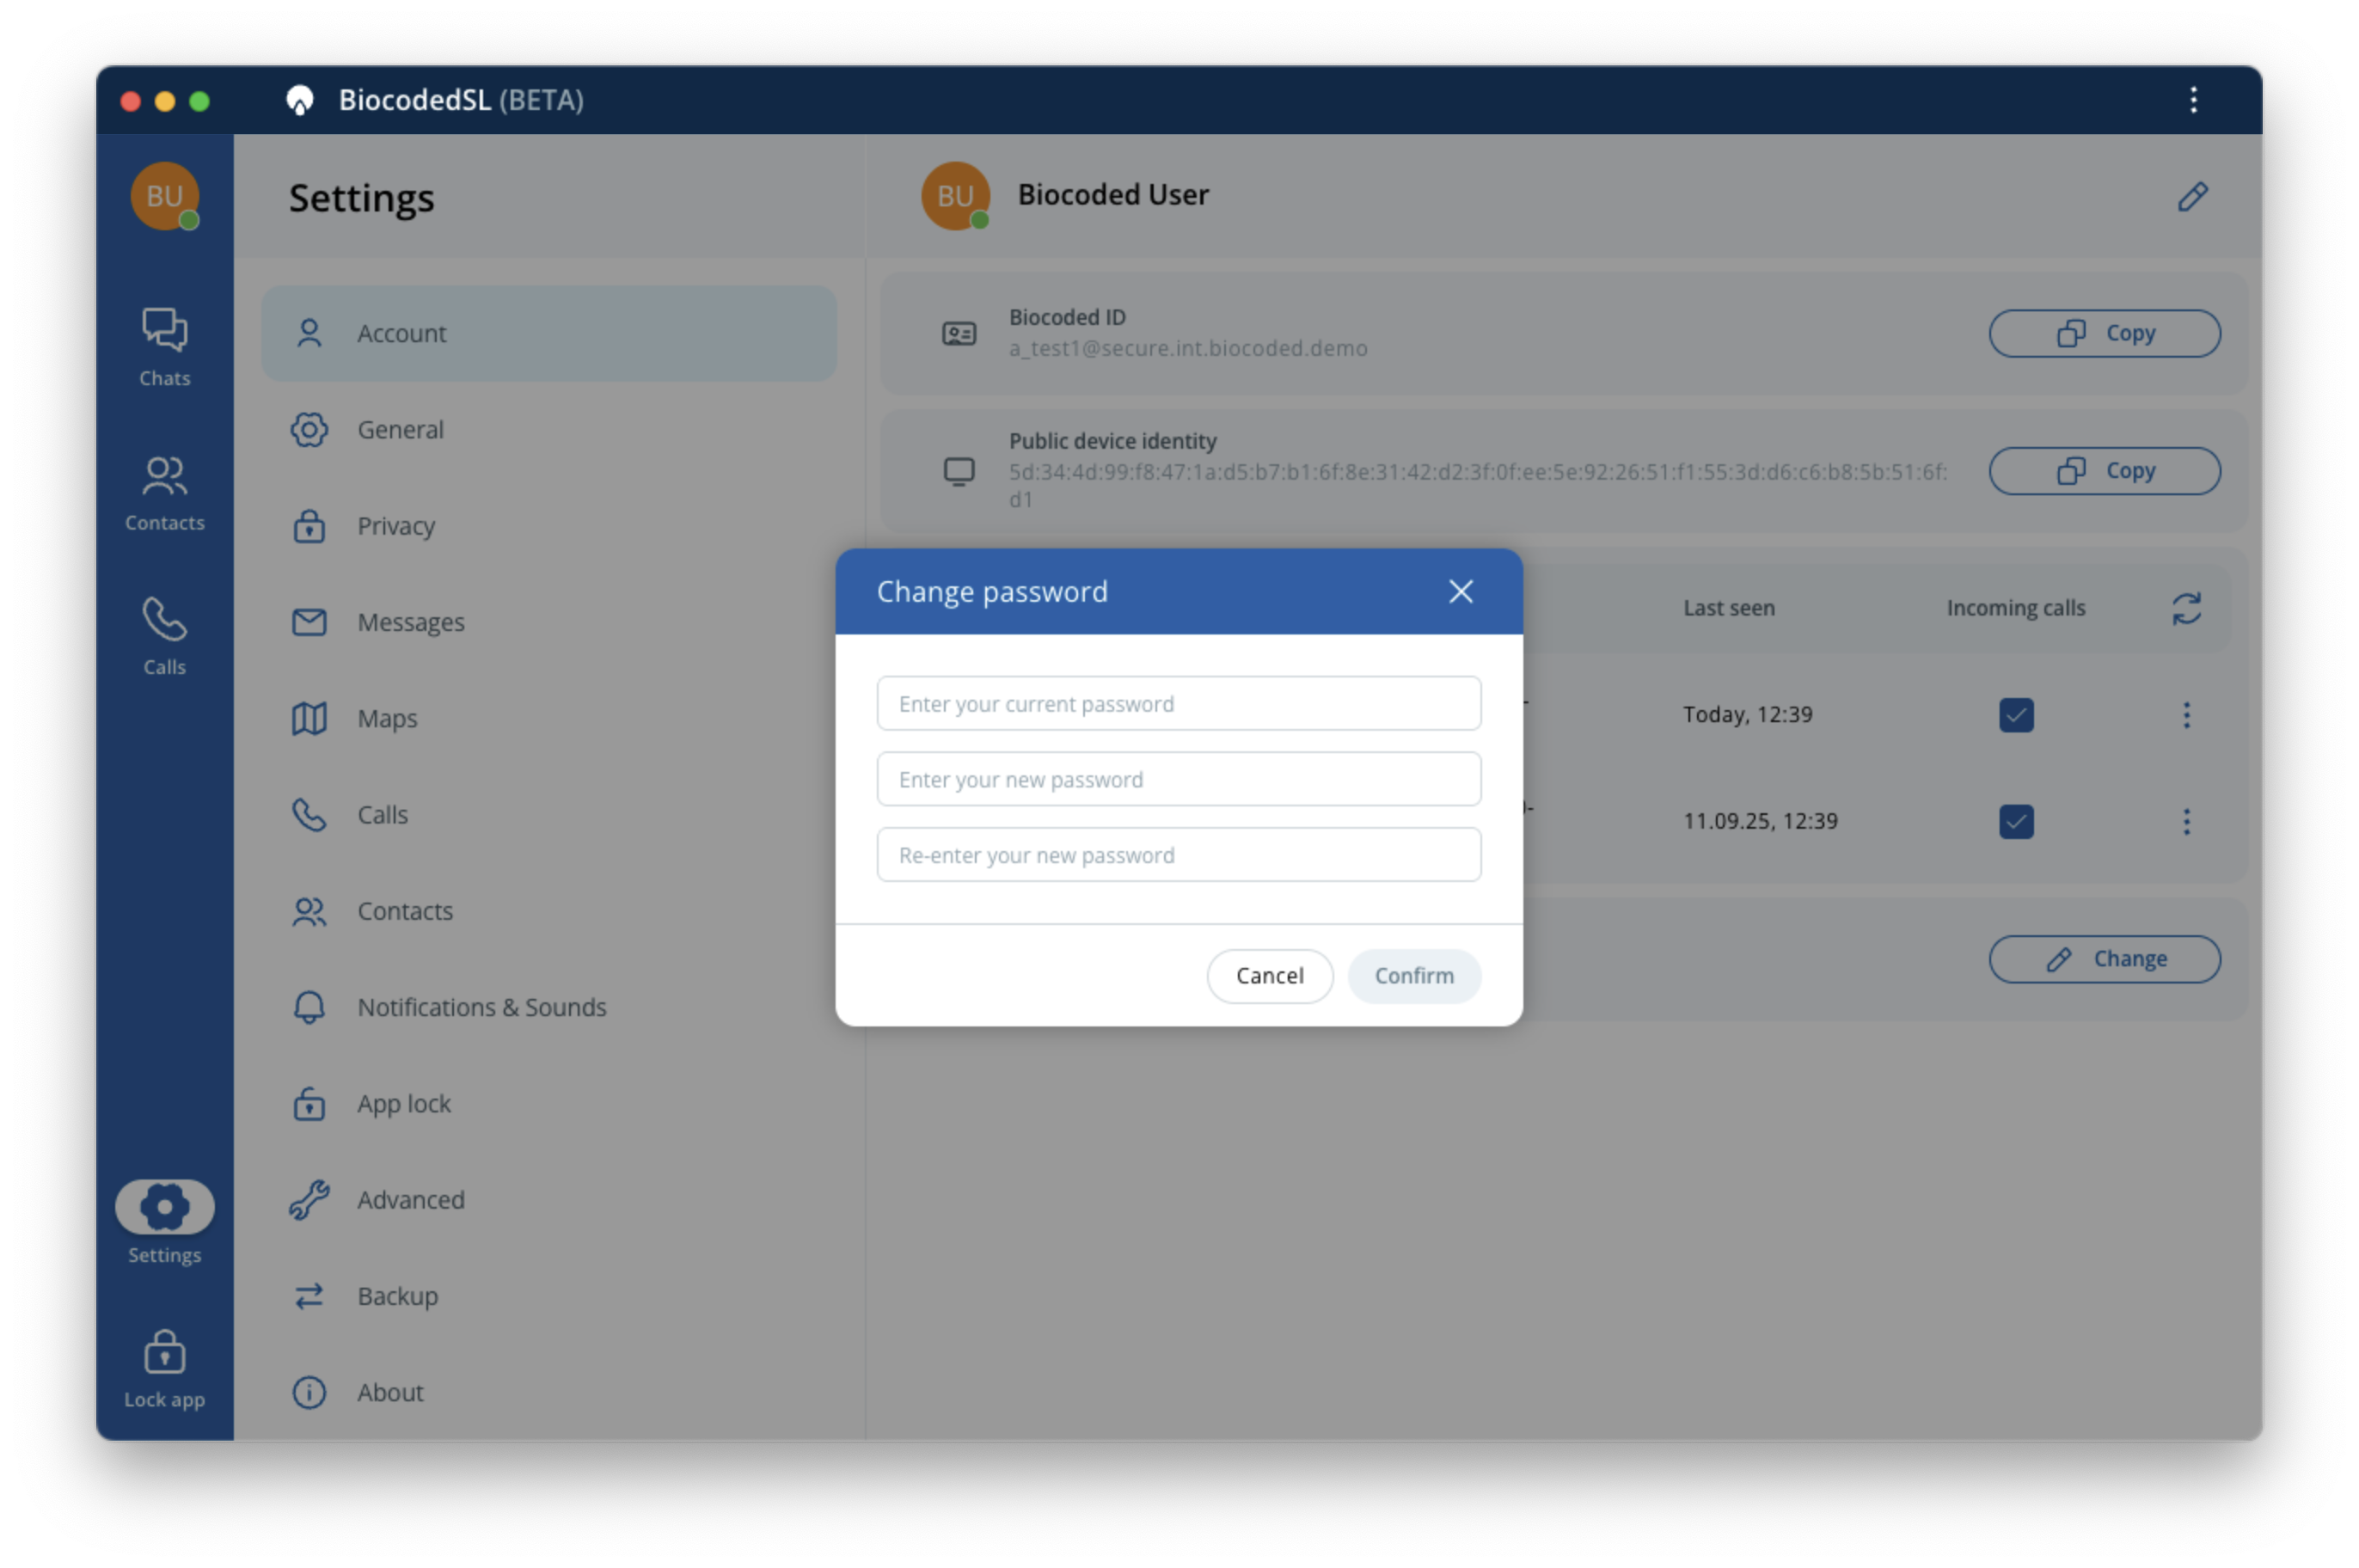
Password - You can perform a password change by pressing Change.
- LOGIN ON ANOTHER DEVICE - Select View to generate a QR code you can log in with on a new device. Select "Manual steps" to show data for manual login. Code expires in 5 minutes.
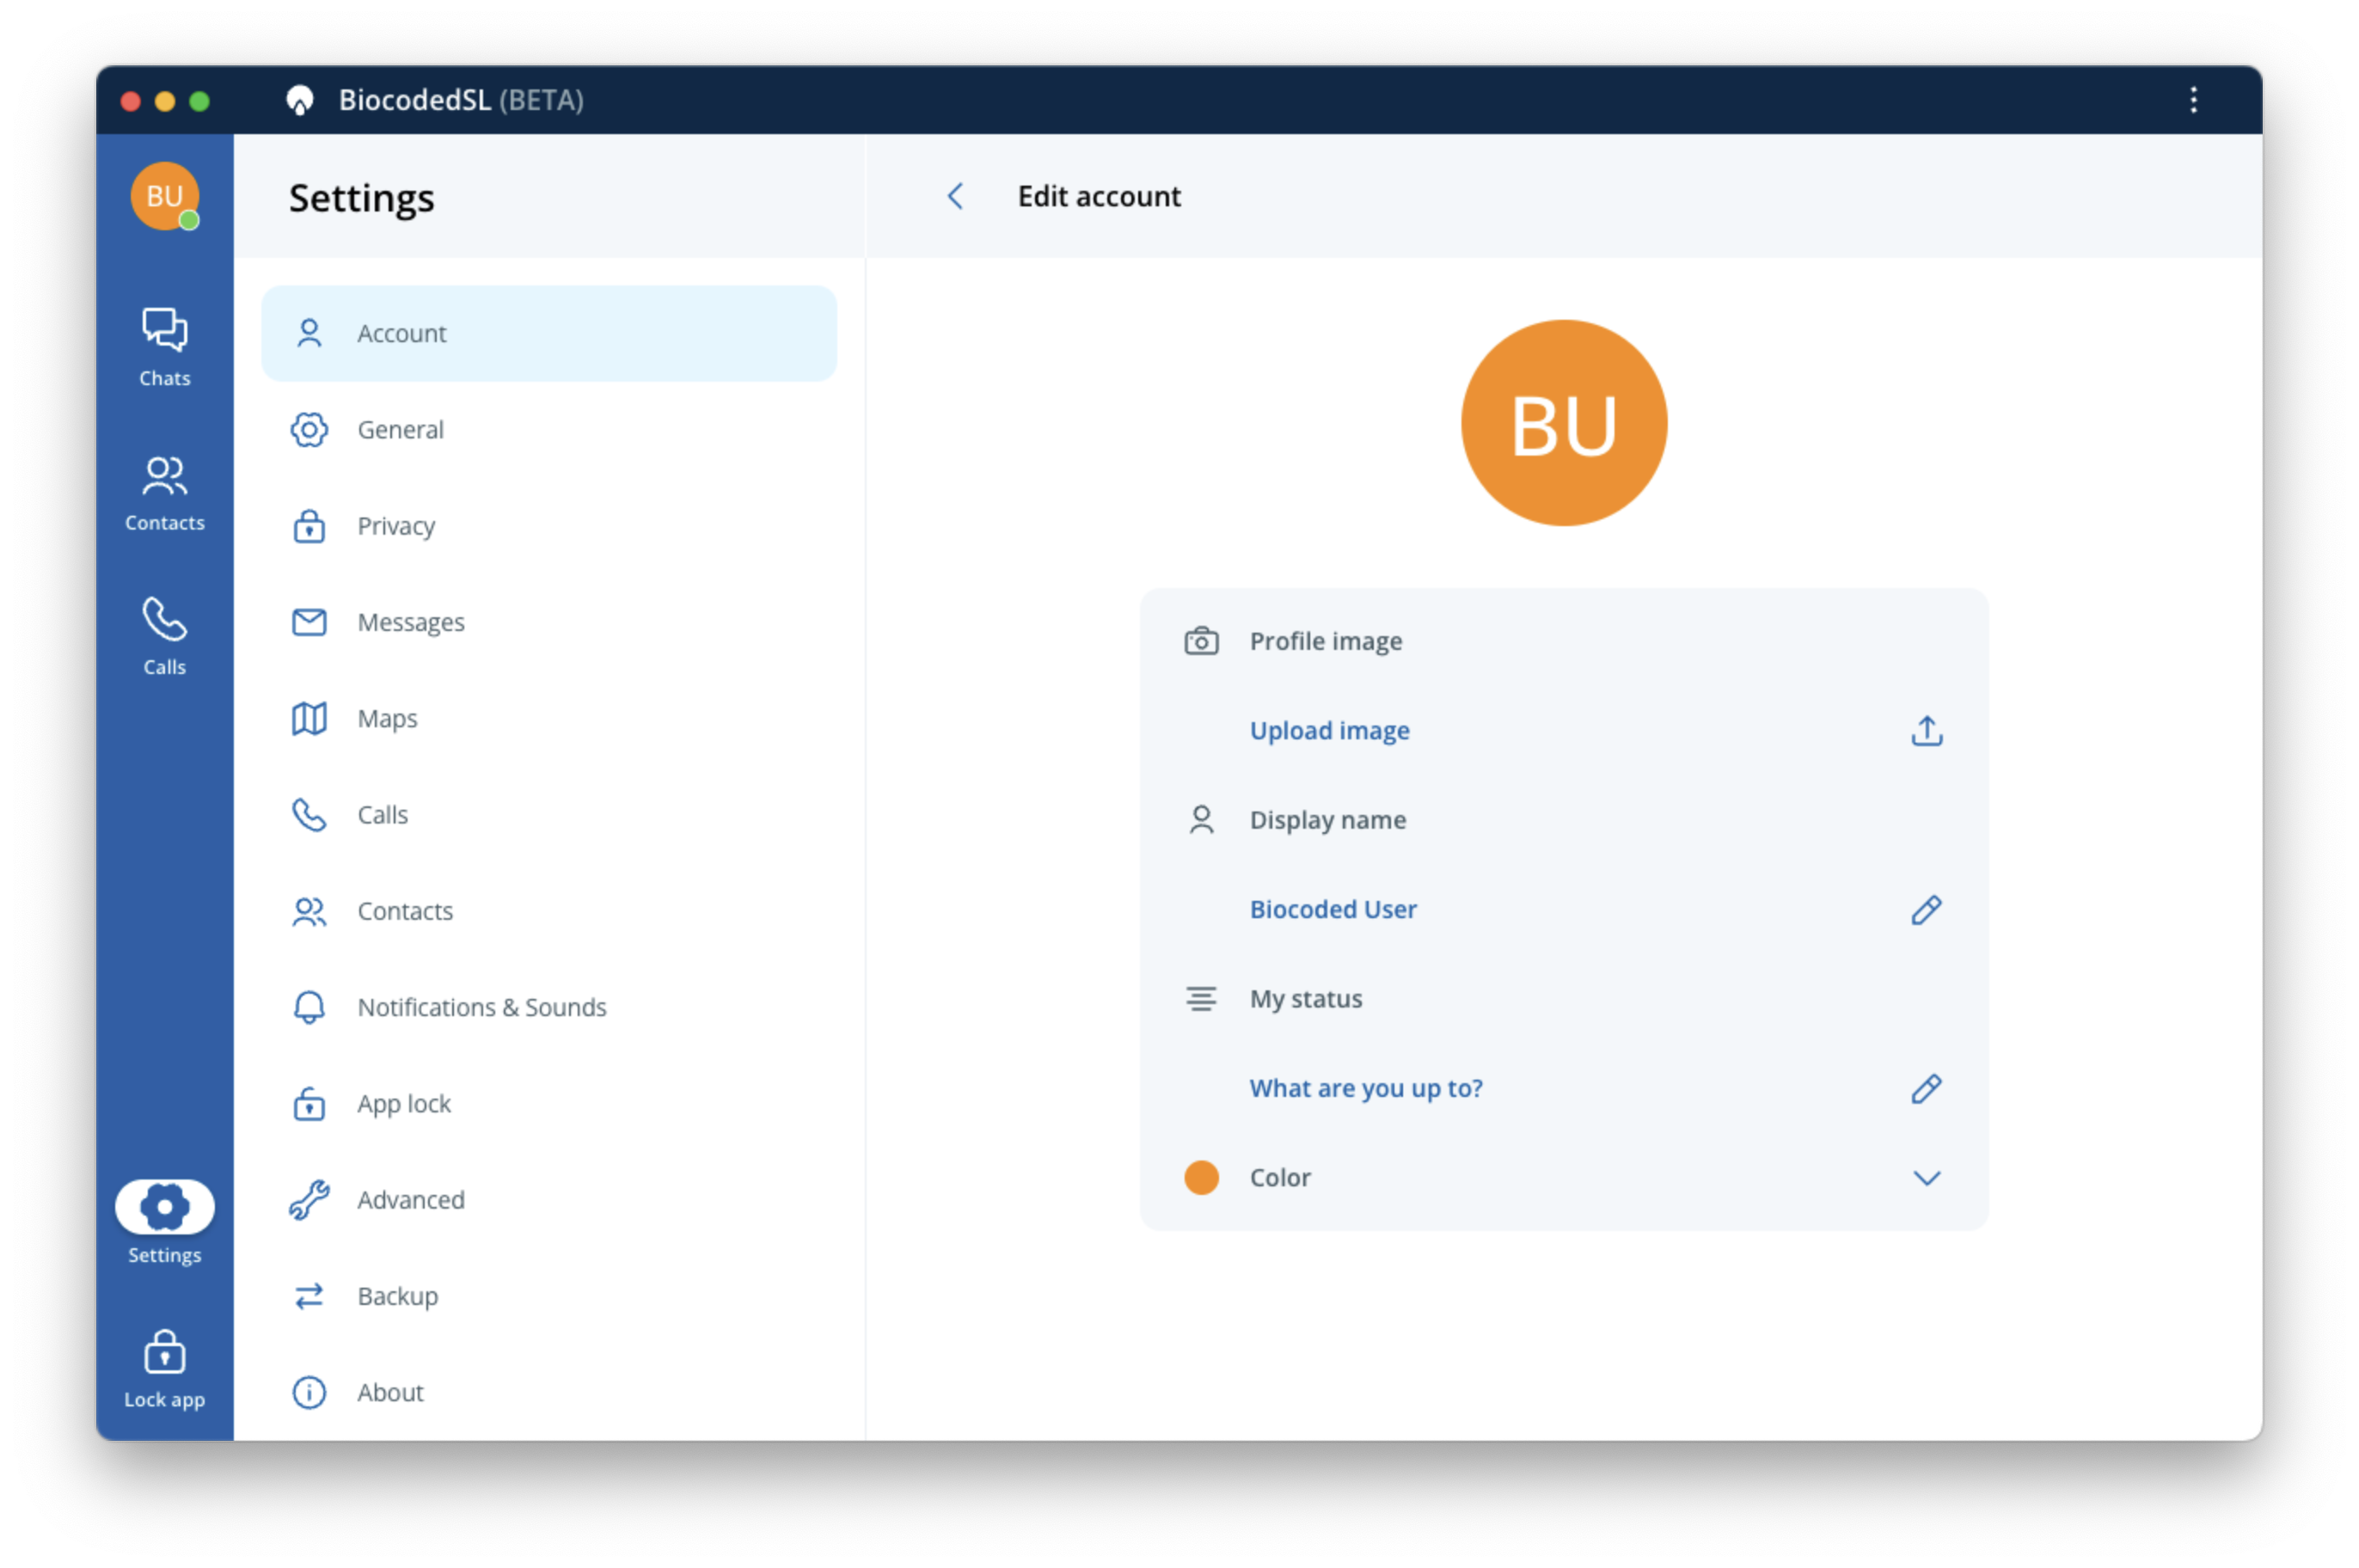
Click on  Here you can change the name and last name used for your account, edit your user status, change your profile image and color.
General
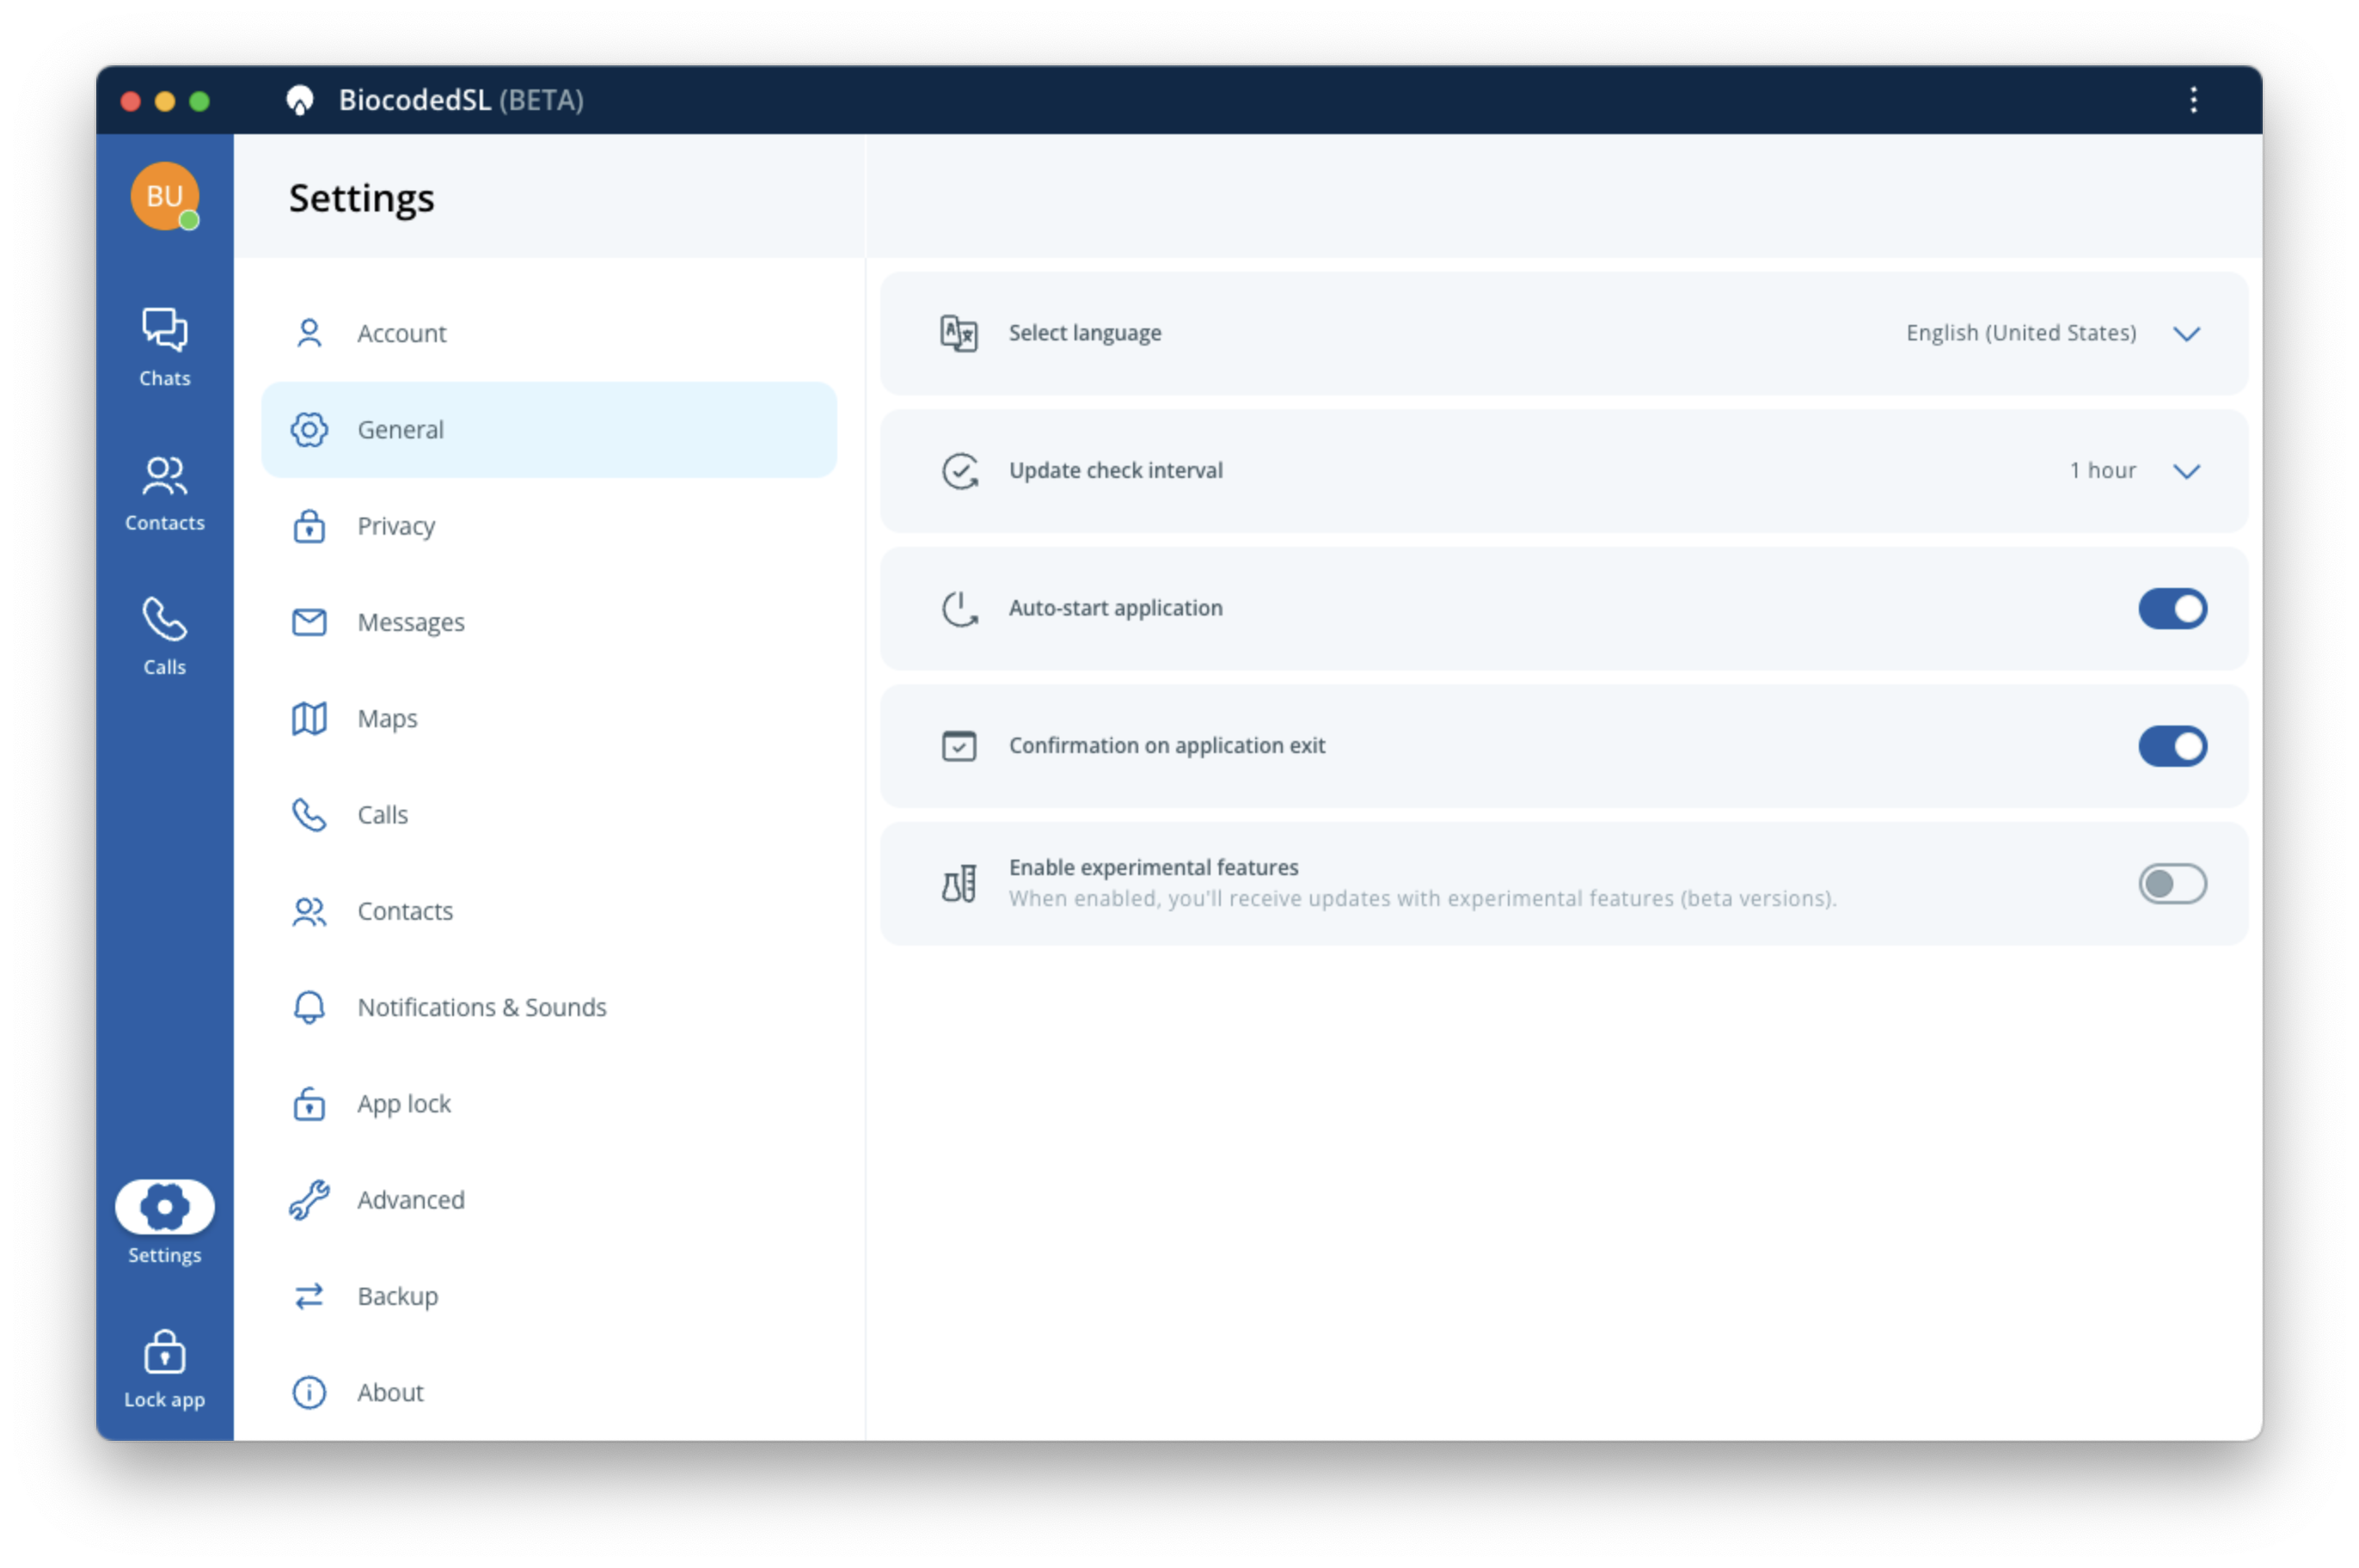
- Select language - select the language for your application,
- Update check interval - select the time interval after which Biocoded checks for updates,
- Auto-start application - choose to automatically start Biocoded after booting up your computer,
- Confirmation on application exit - app will ask for confirmation when you try to exit it.
- Enable experimental features - when enabled, you will receive updates with experimental (beta) features.
Privacy
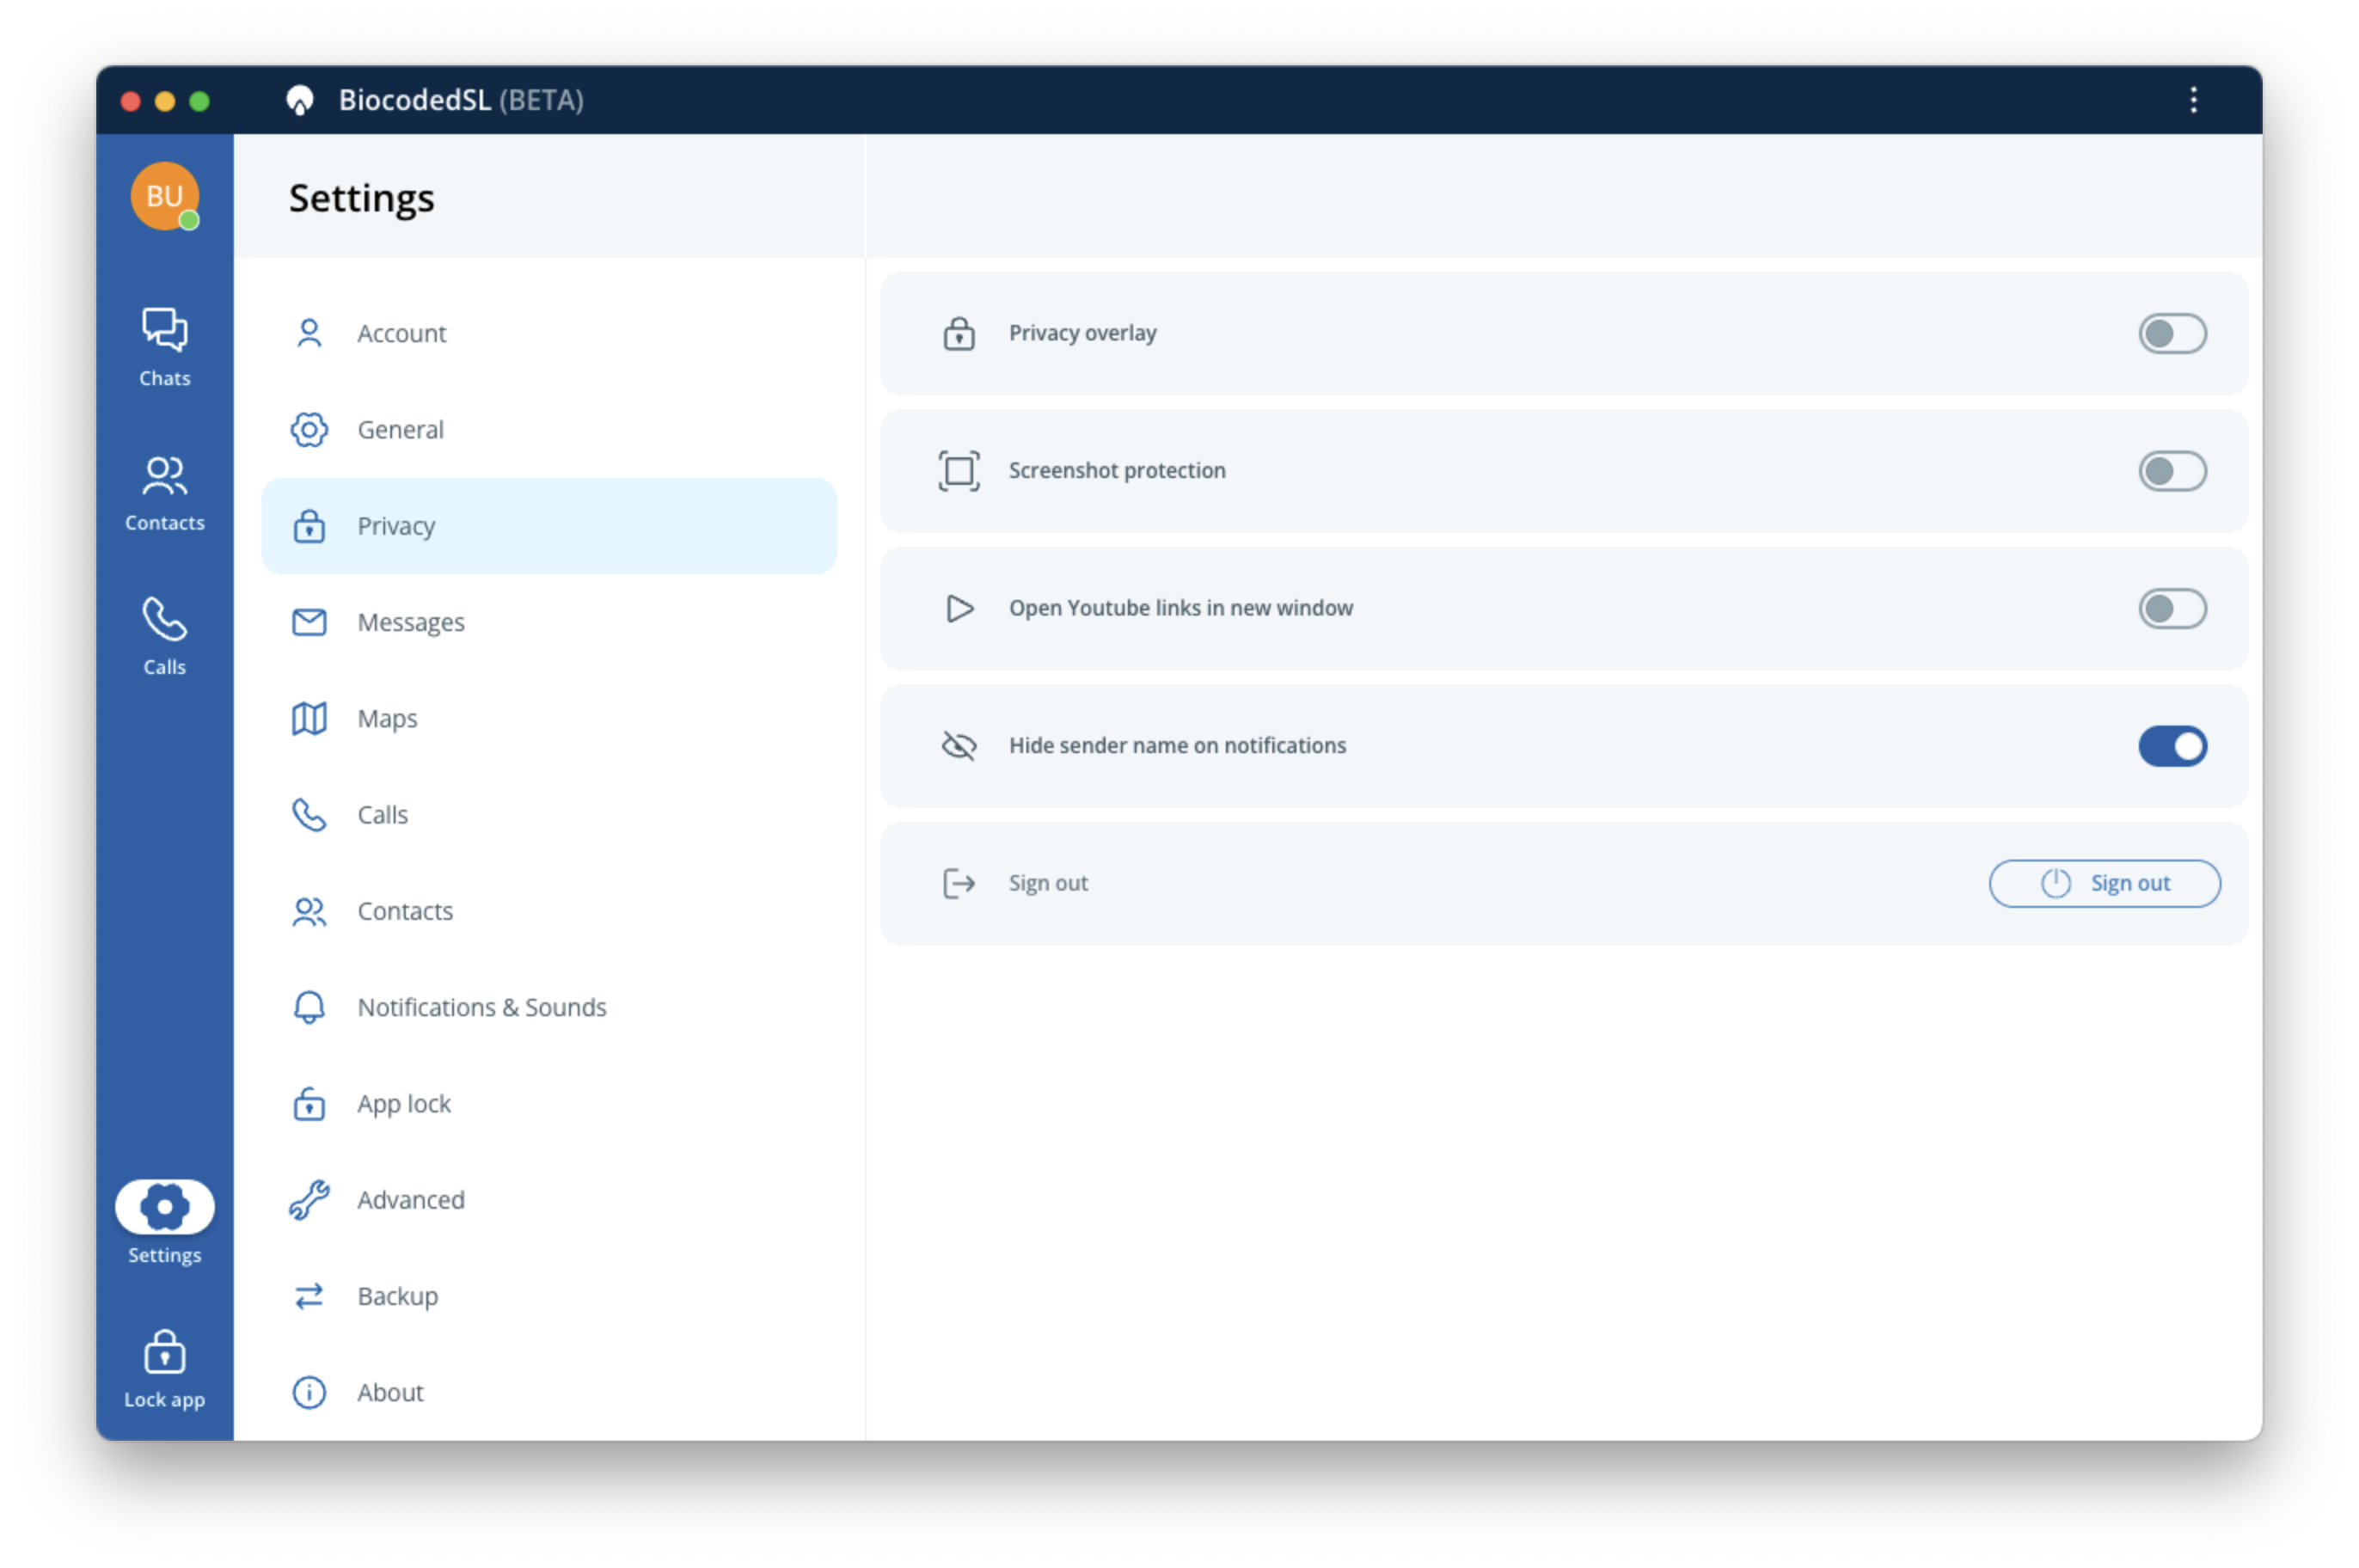
- Privacy overlay - Additionally shield your Biocoded desktop application from unwanted eyes by keeping the privacy overlay enabled. This blurs your app window when it is not in focus.
- Screenshot protection - Disable screenshots of Biocoded's application window by keeping screenshot protection turned on. When you try to make a screenshot, nothing within the app widow is visible.
- Open Youtube links in new window
- Hide sender name on system notifications
- Sign out - logs you out from your account on this device, but leaves all data for when you wish to log back in,
Note
To log in again, you will have to enter your account password!
Messages
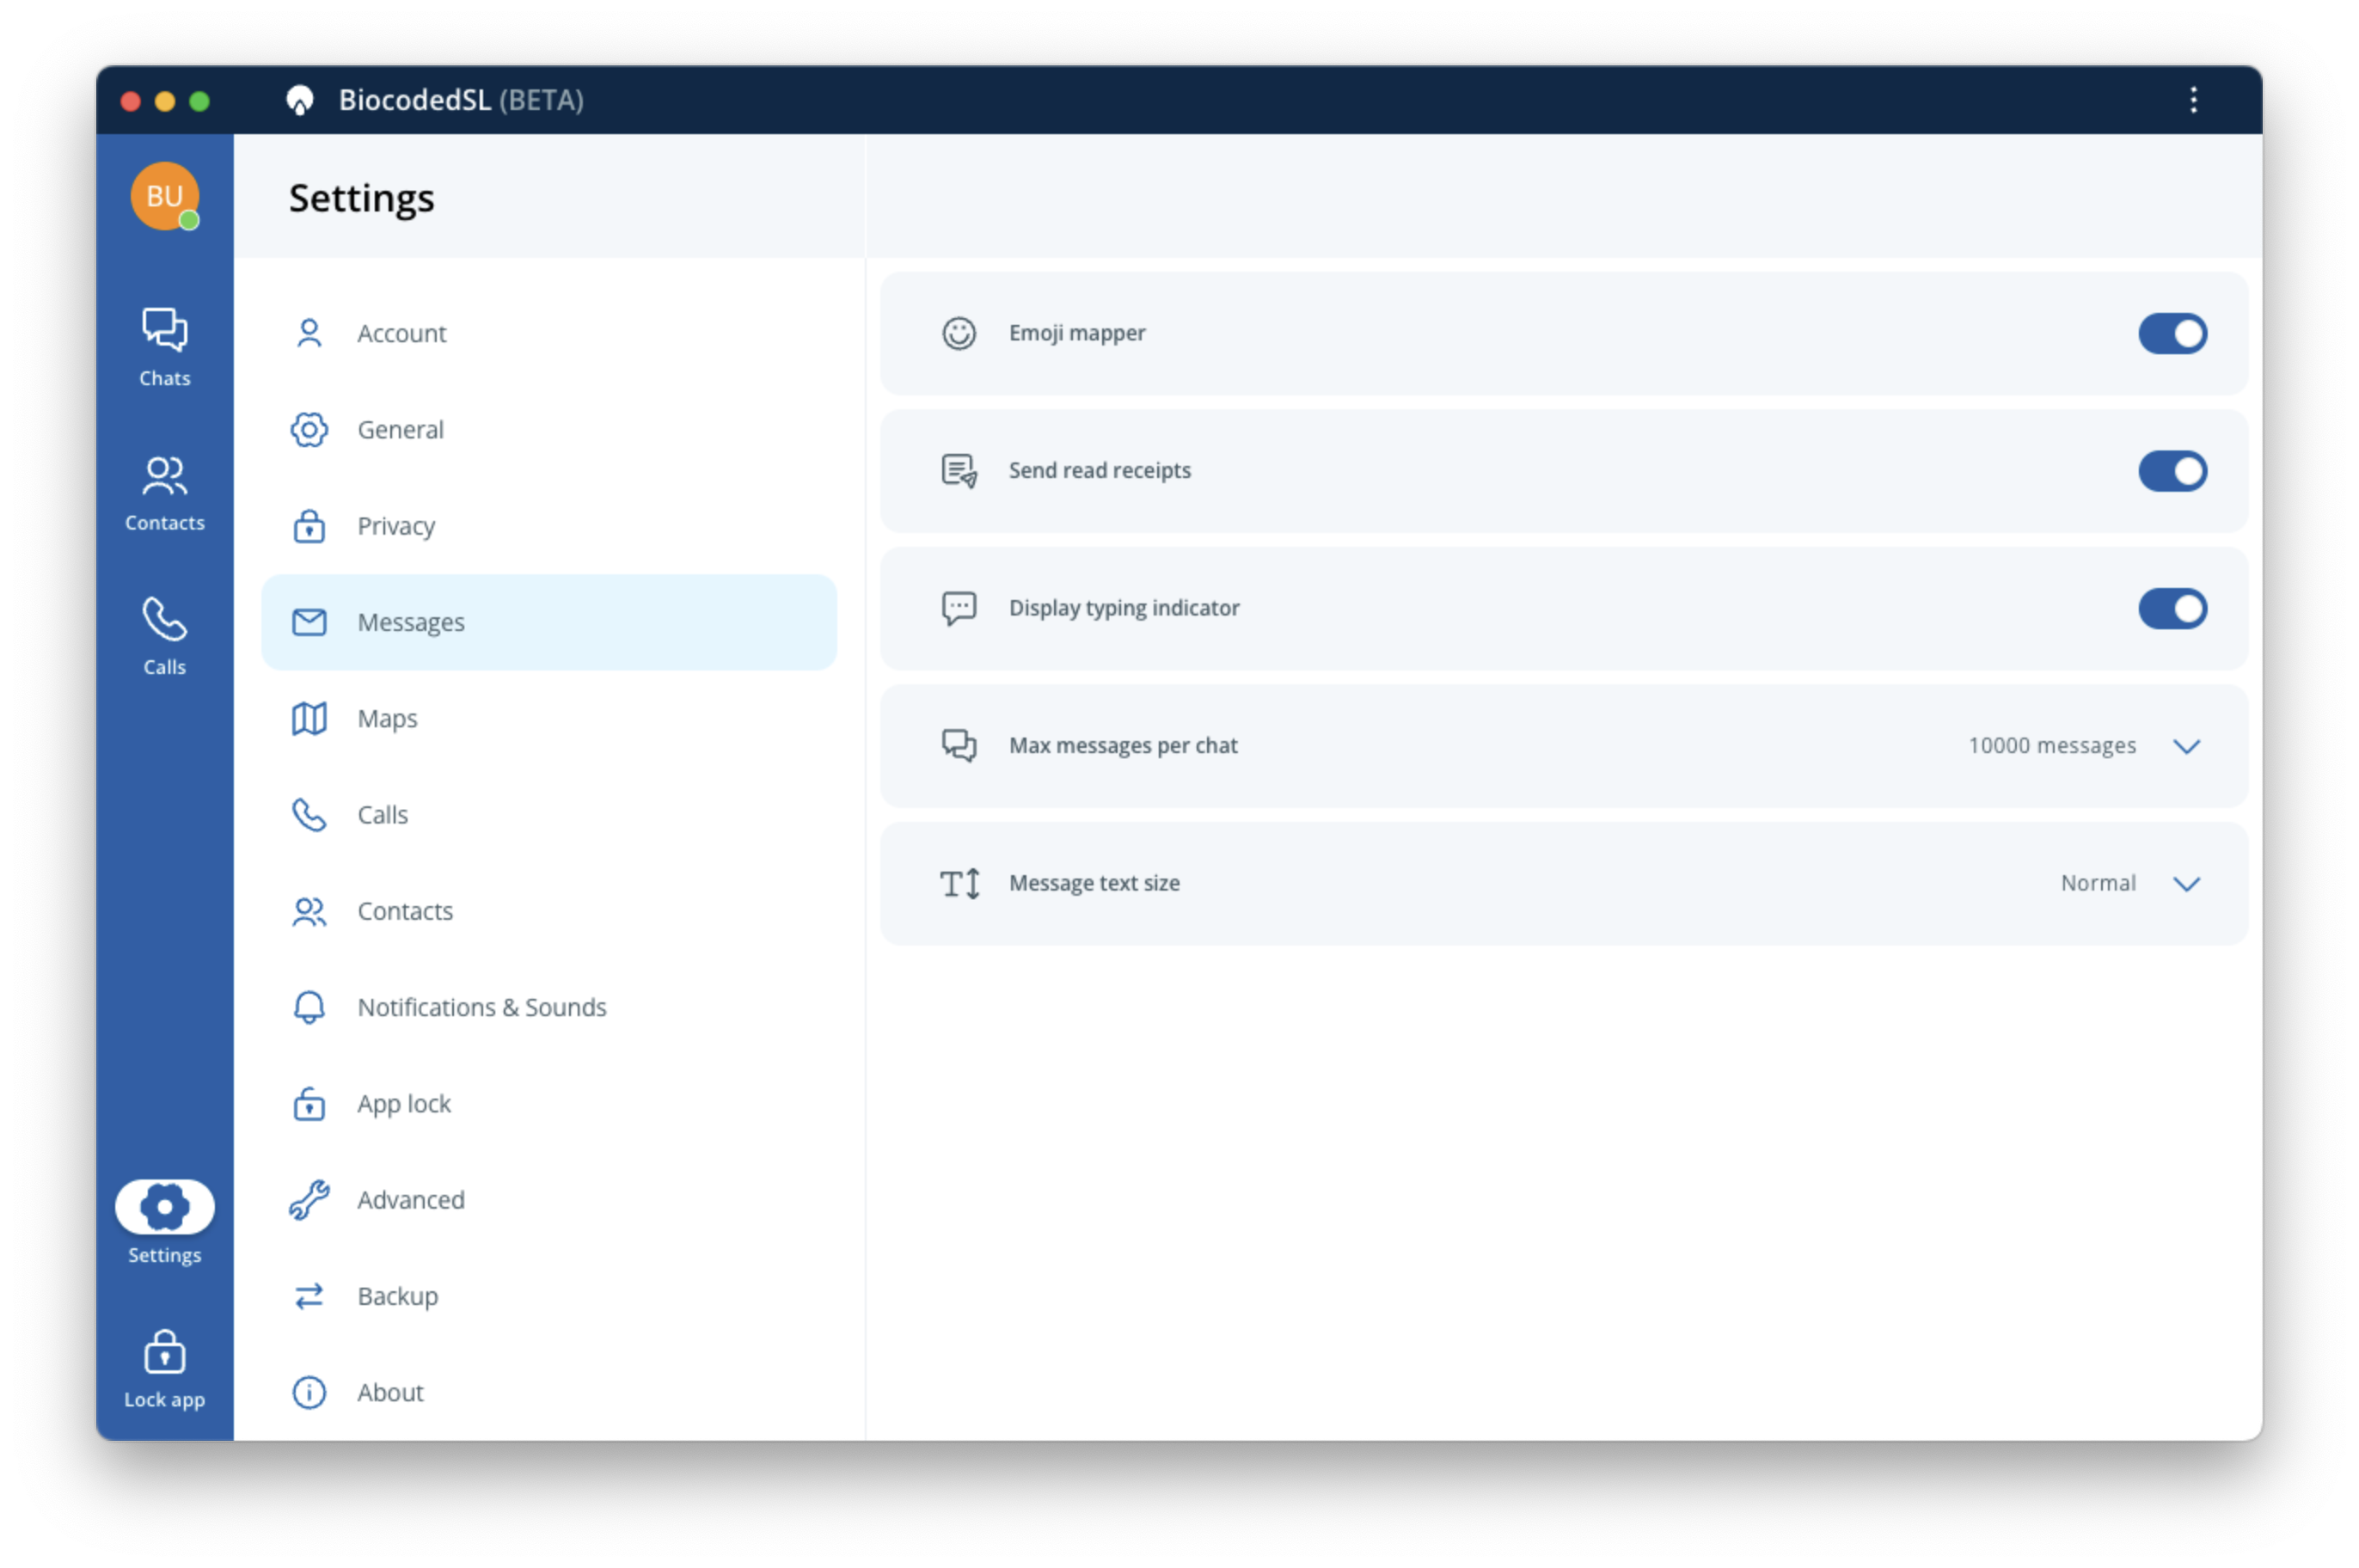
- Emoji mapper - when enabled, commonly typed sequences will be converted into Emojis.
- Send read receipts - you can choose if you wish to send read receipts for received messages.
- Display typing indicator - show an indicator to let people know when I am typing in chat.
- Max messages per chat - define the data retention policy on your application (the number of messages kept per chat).
- Message text size - select your preferred size for incoming messages.
Maps
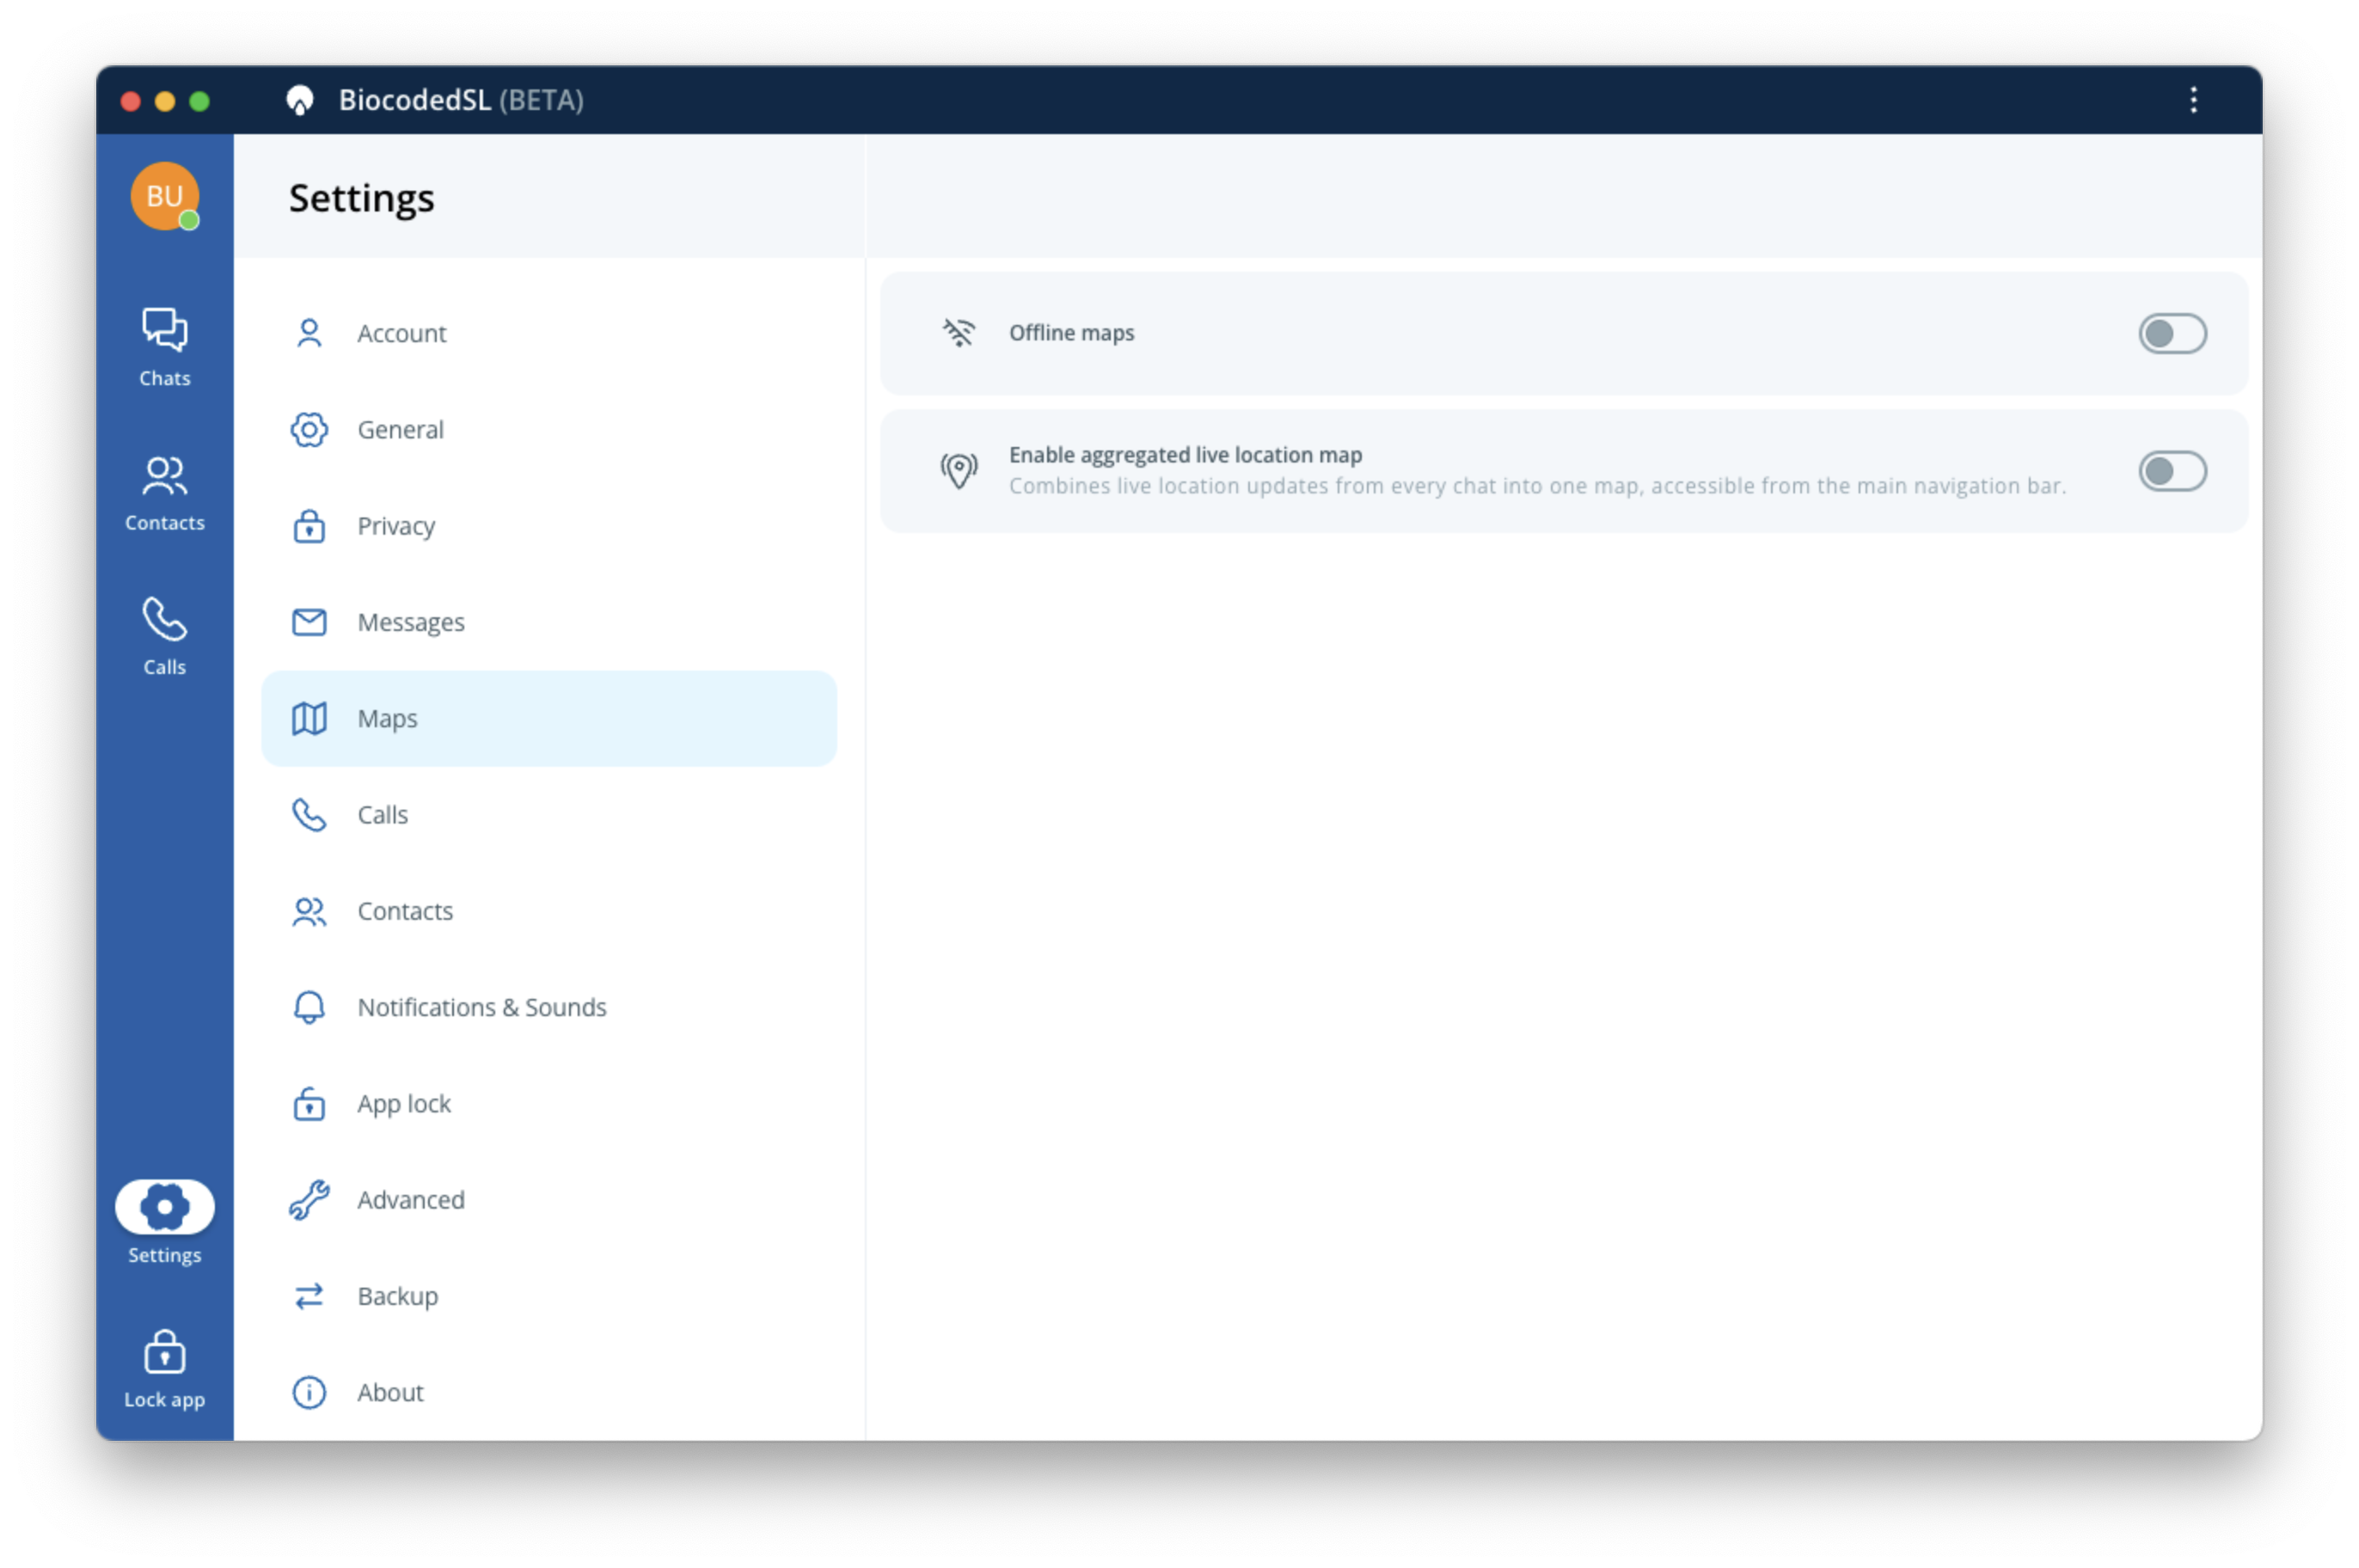
- Offline maps - turn on and upload a map file to be used when there is no internet connection available.
- Enable aggregated live location map - combines shared live locations from every chat into one map, accessible from main navigation bar on the left side of app screen.
Calls
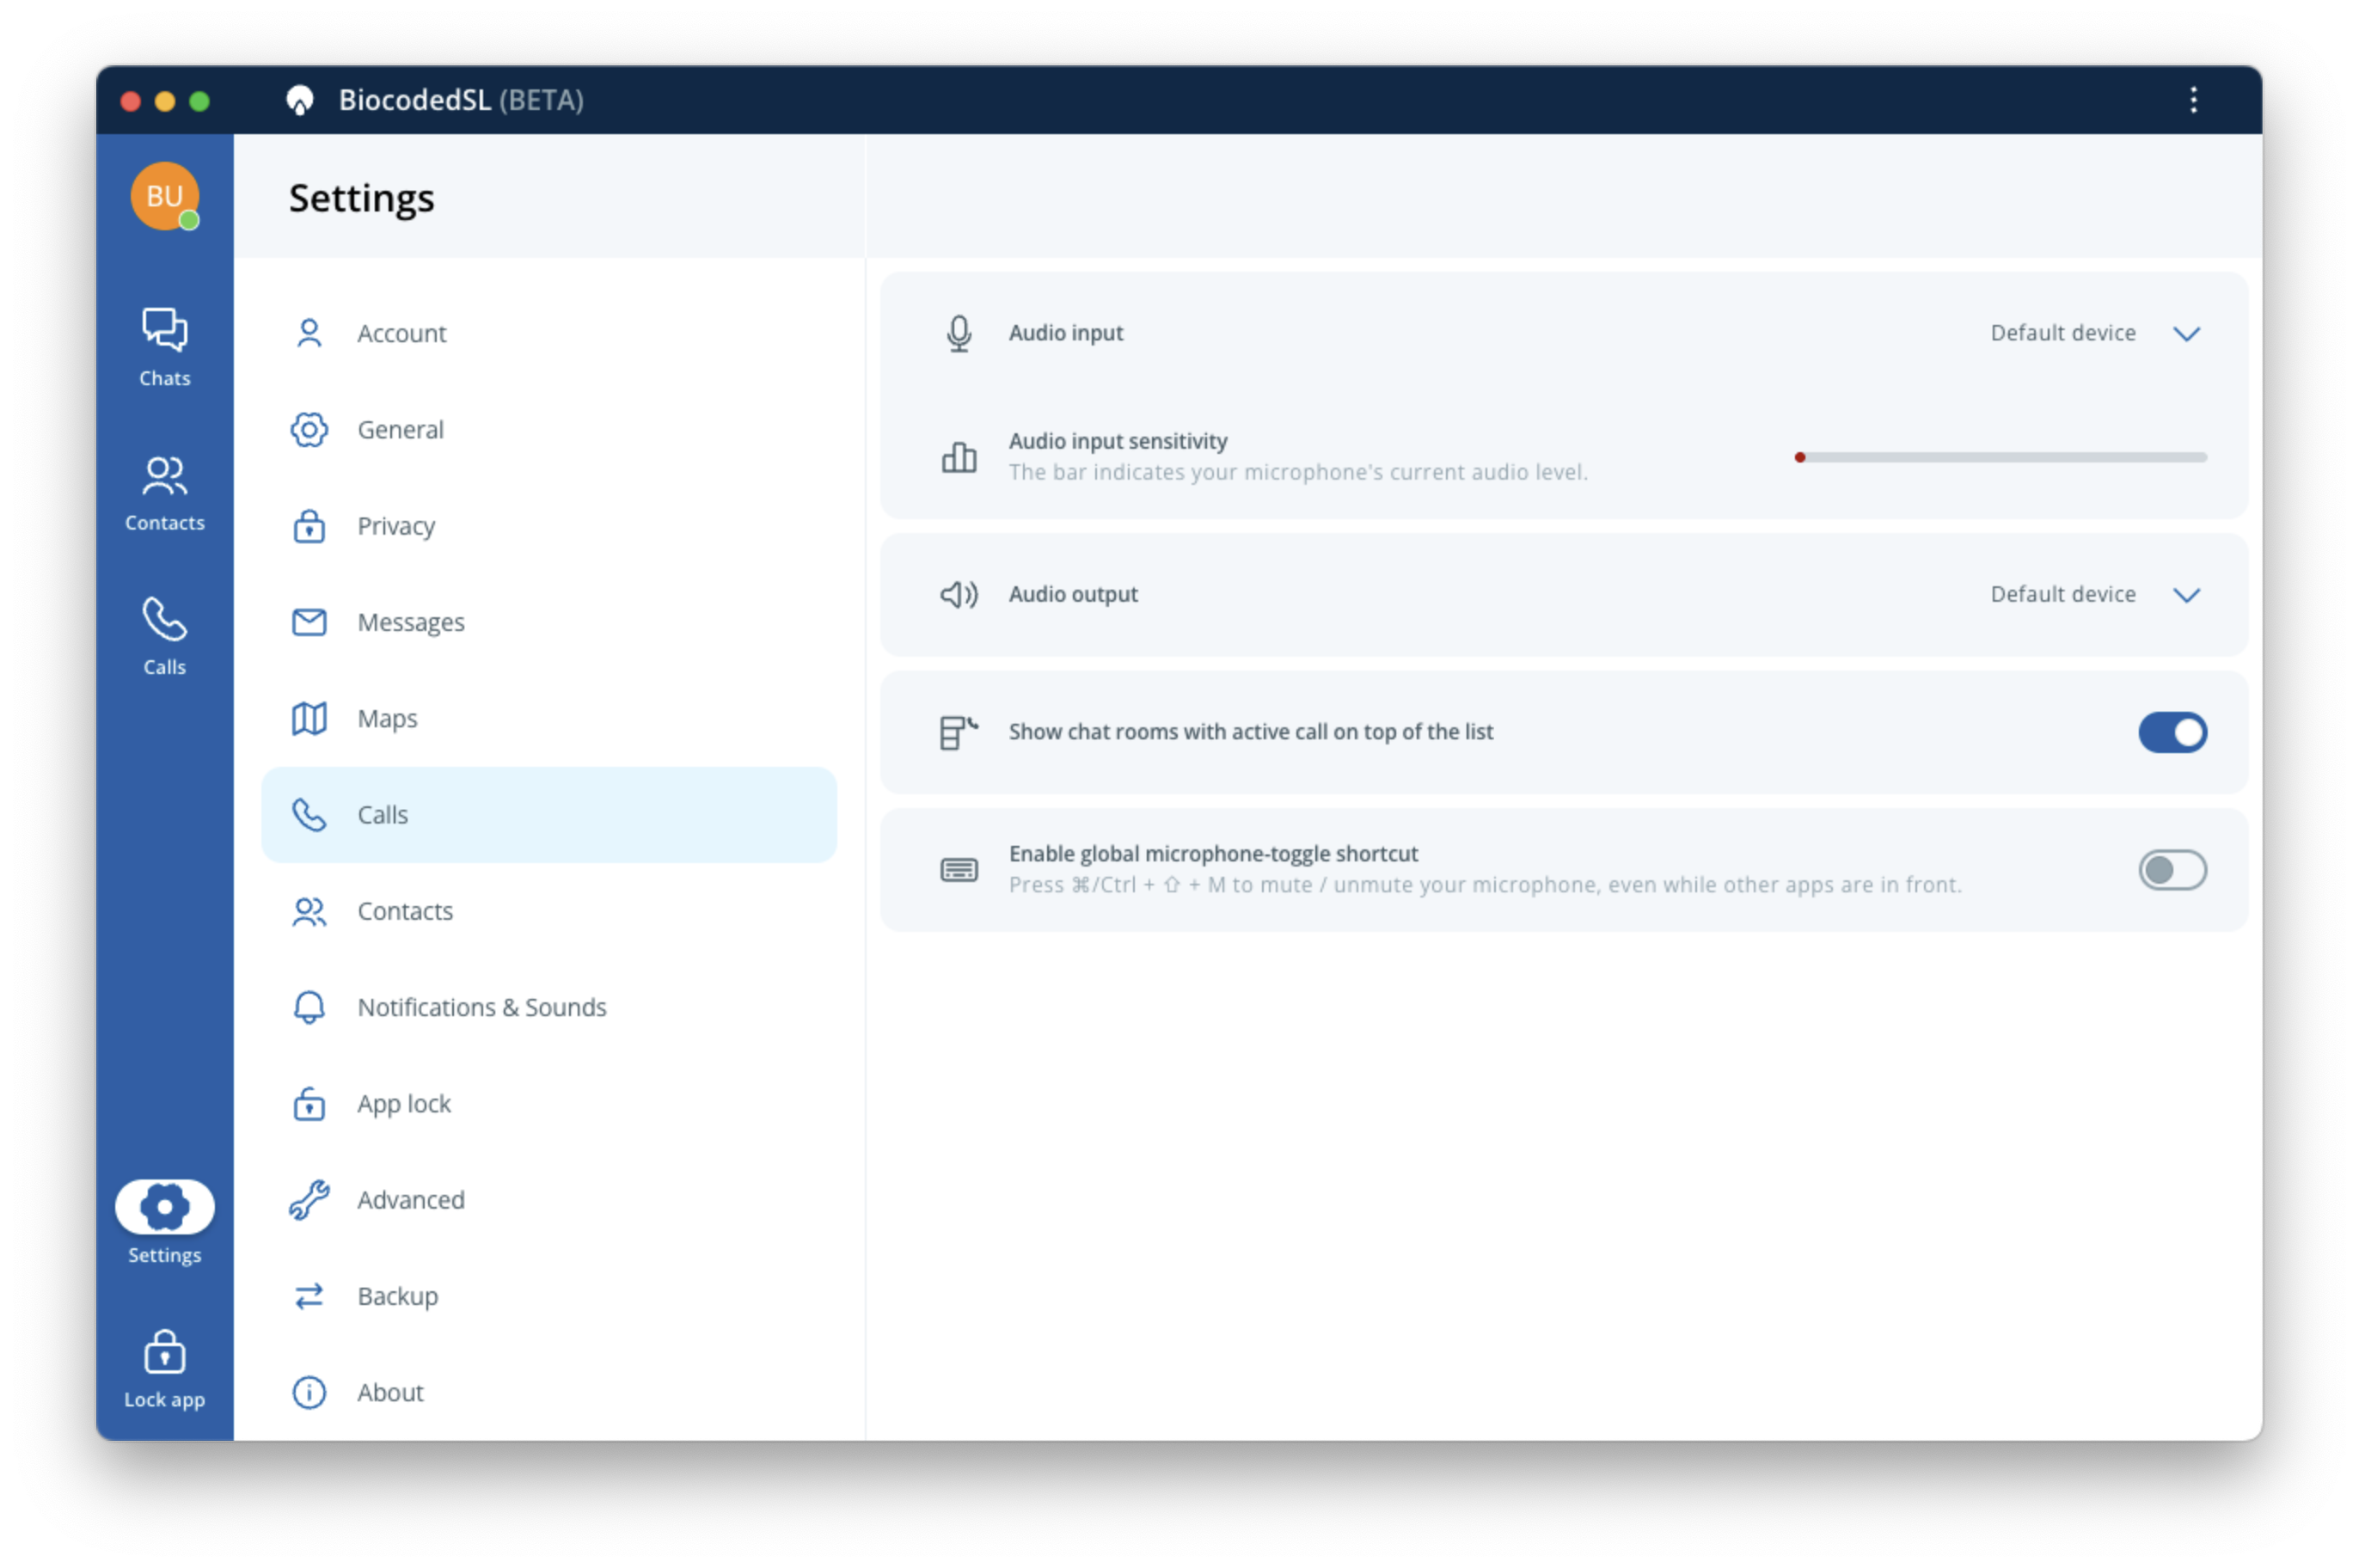
- Audio input - select the input device for your calls,
- Audio input sensitivity - indicates your microphone's detected audio levels at current time.
- Audio output - select the output device for your calls,
- Show chat rooms with active call on top of the list.
- Enable global microphone-toggle shortcut - Press Cmd/Ctrl + Shift + M to mute / unmute your microphone, even while other apps are in front.
Contacts
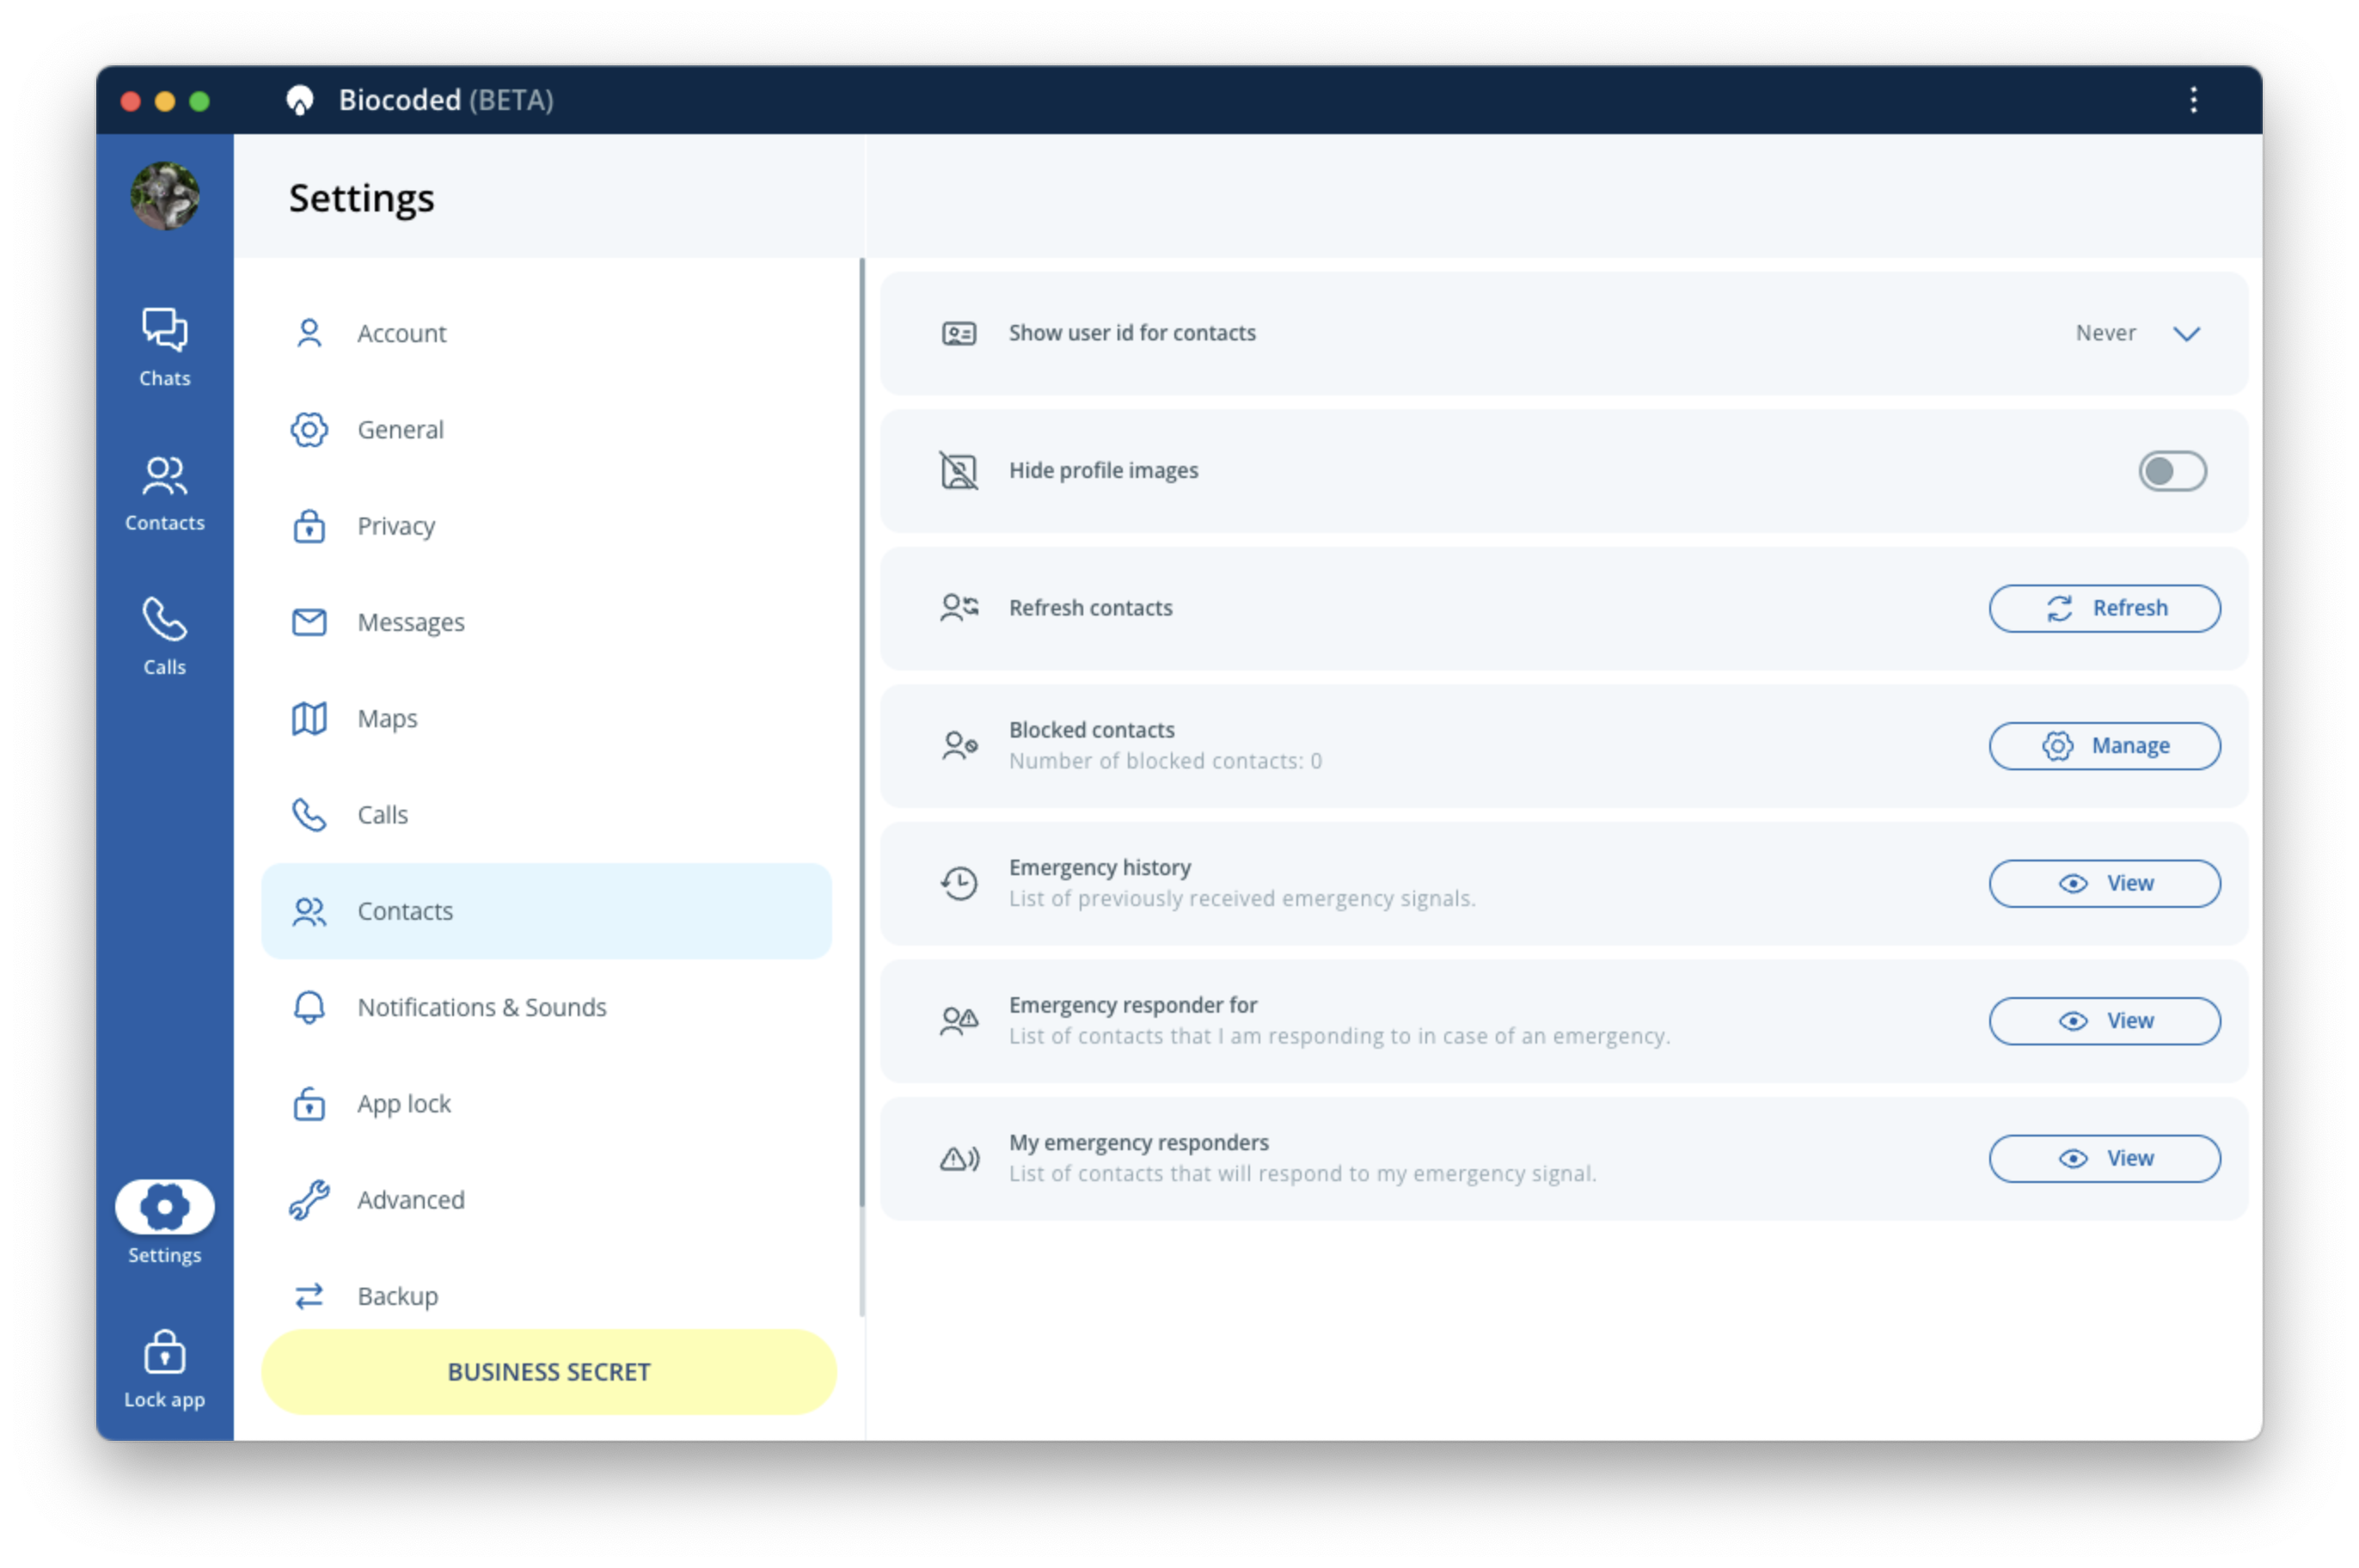
- Show user ID's for contacts - you can choose to show Biocoded IDs next to contact's names in list. You can choose to show them for all contacts, only for external contacts (from different servers) or they can stay hidden (default setting),
- Hide profile images - show or hide user's personal profile images. They are shown by default,
- Refresh contacts - synchronize your Biocoded contacts manually with our server.
- Blocked contacts - displays blocked contacts and allows unblock.
- Emergency history - list of previously received emergency signals.
- Emergency responder for - list of contacts that I am responding to in case of an emergency.
- My emergency responders - list of contacts that will respond to my emergency signal.
Notifications & Sounds
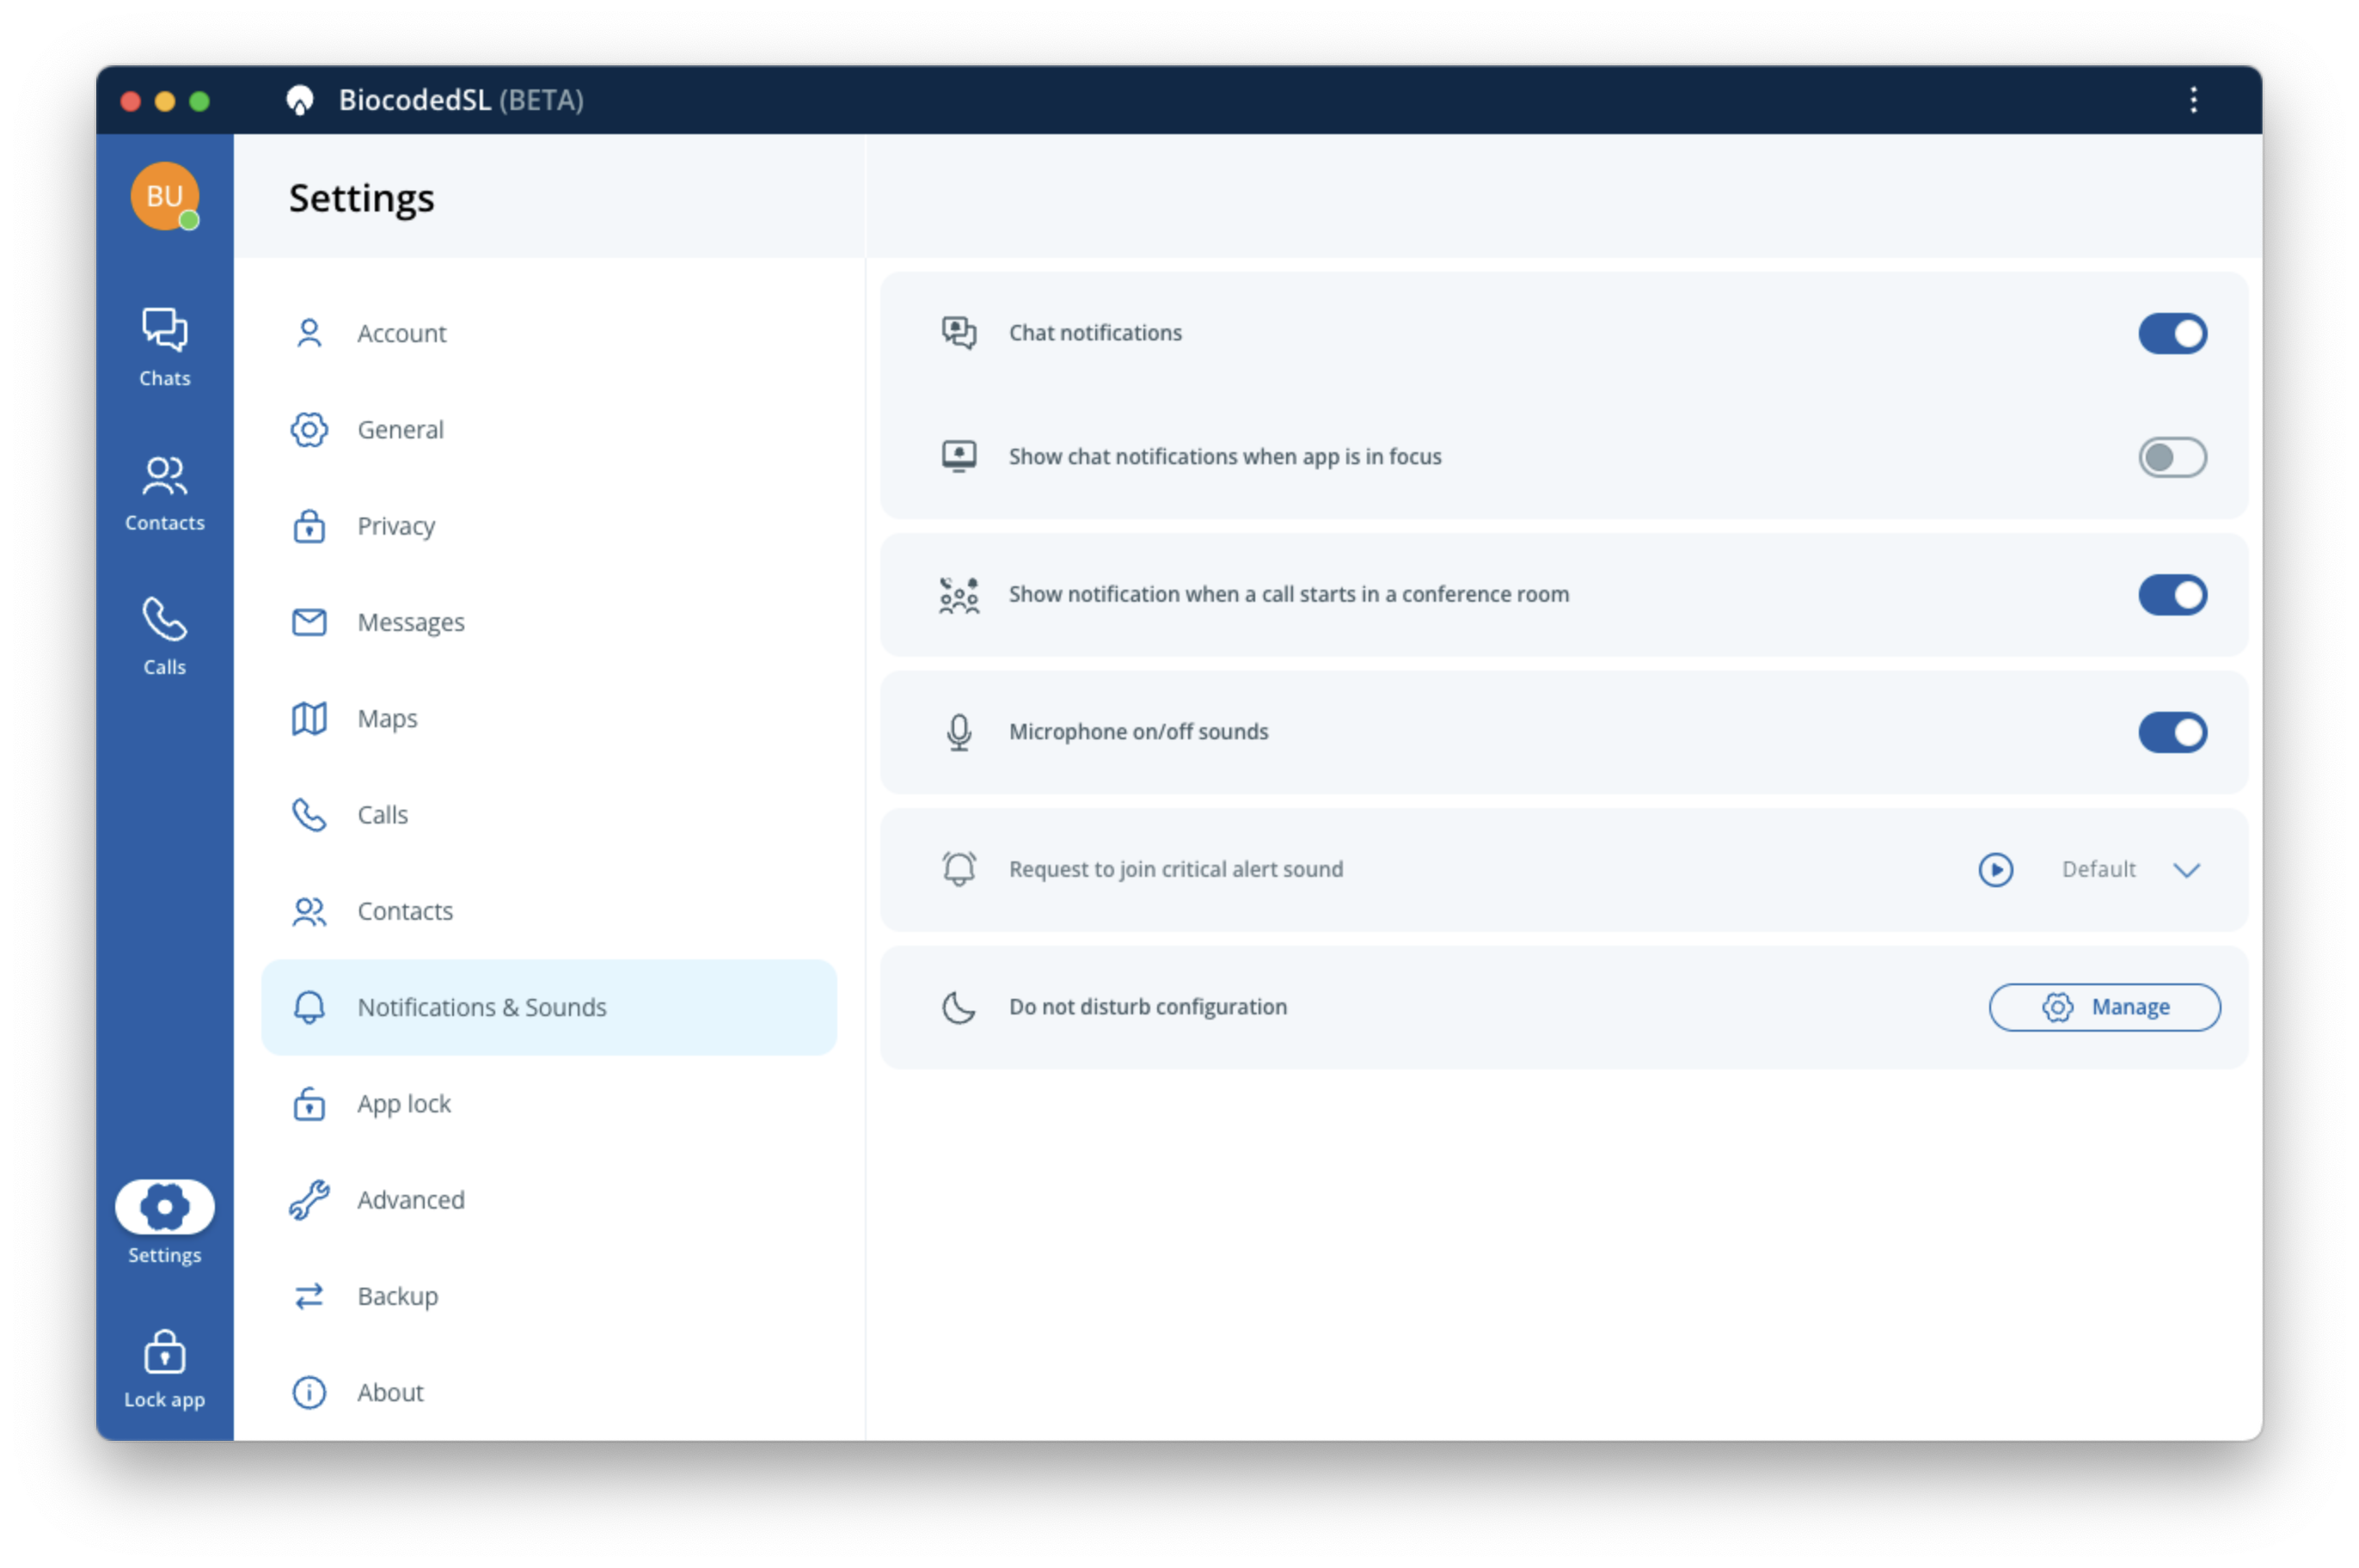
- Chat notifications - mute new message notifications by disabling this option.
- Show chat notifications when app is in focus - mute new message notifications when app is in focus by disabling this option.
- Show notification when a call starts in a conference room
- Microphone on/off sounds - produce a beep sound whenever a participant in chat room call mutes or unmutes their microphone.
- Request to join critical alert sound - select the notification sound for requests to join calls.
- Do not disturb configuration - press "Manage" to edit settings for "Do not disturb" mode.
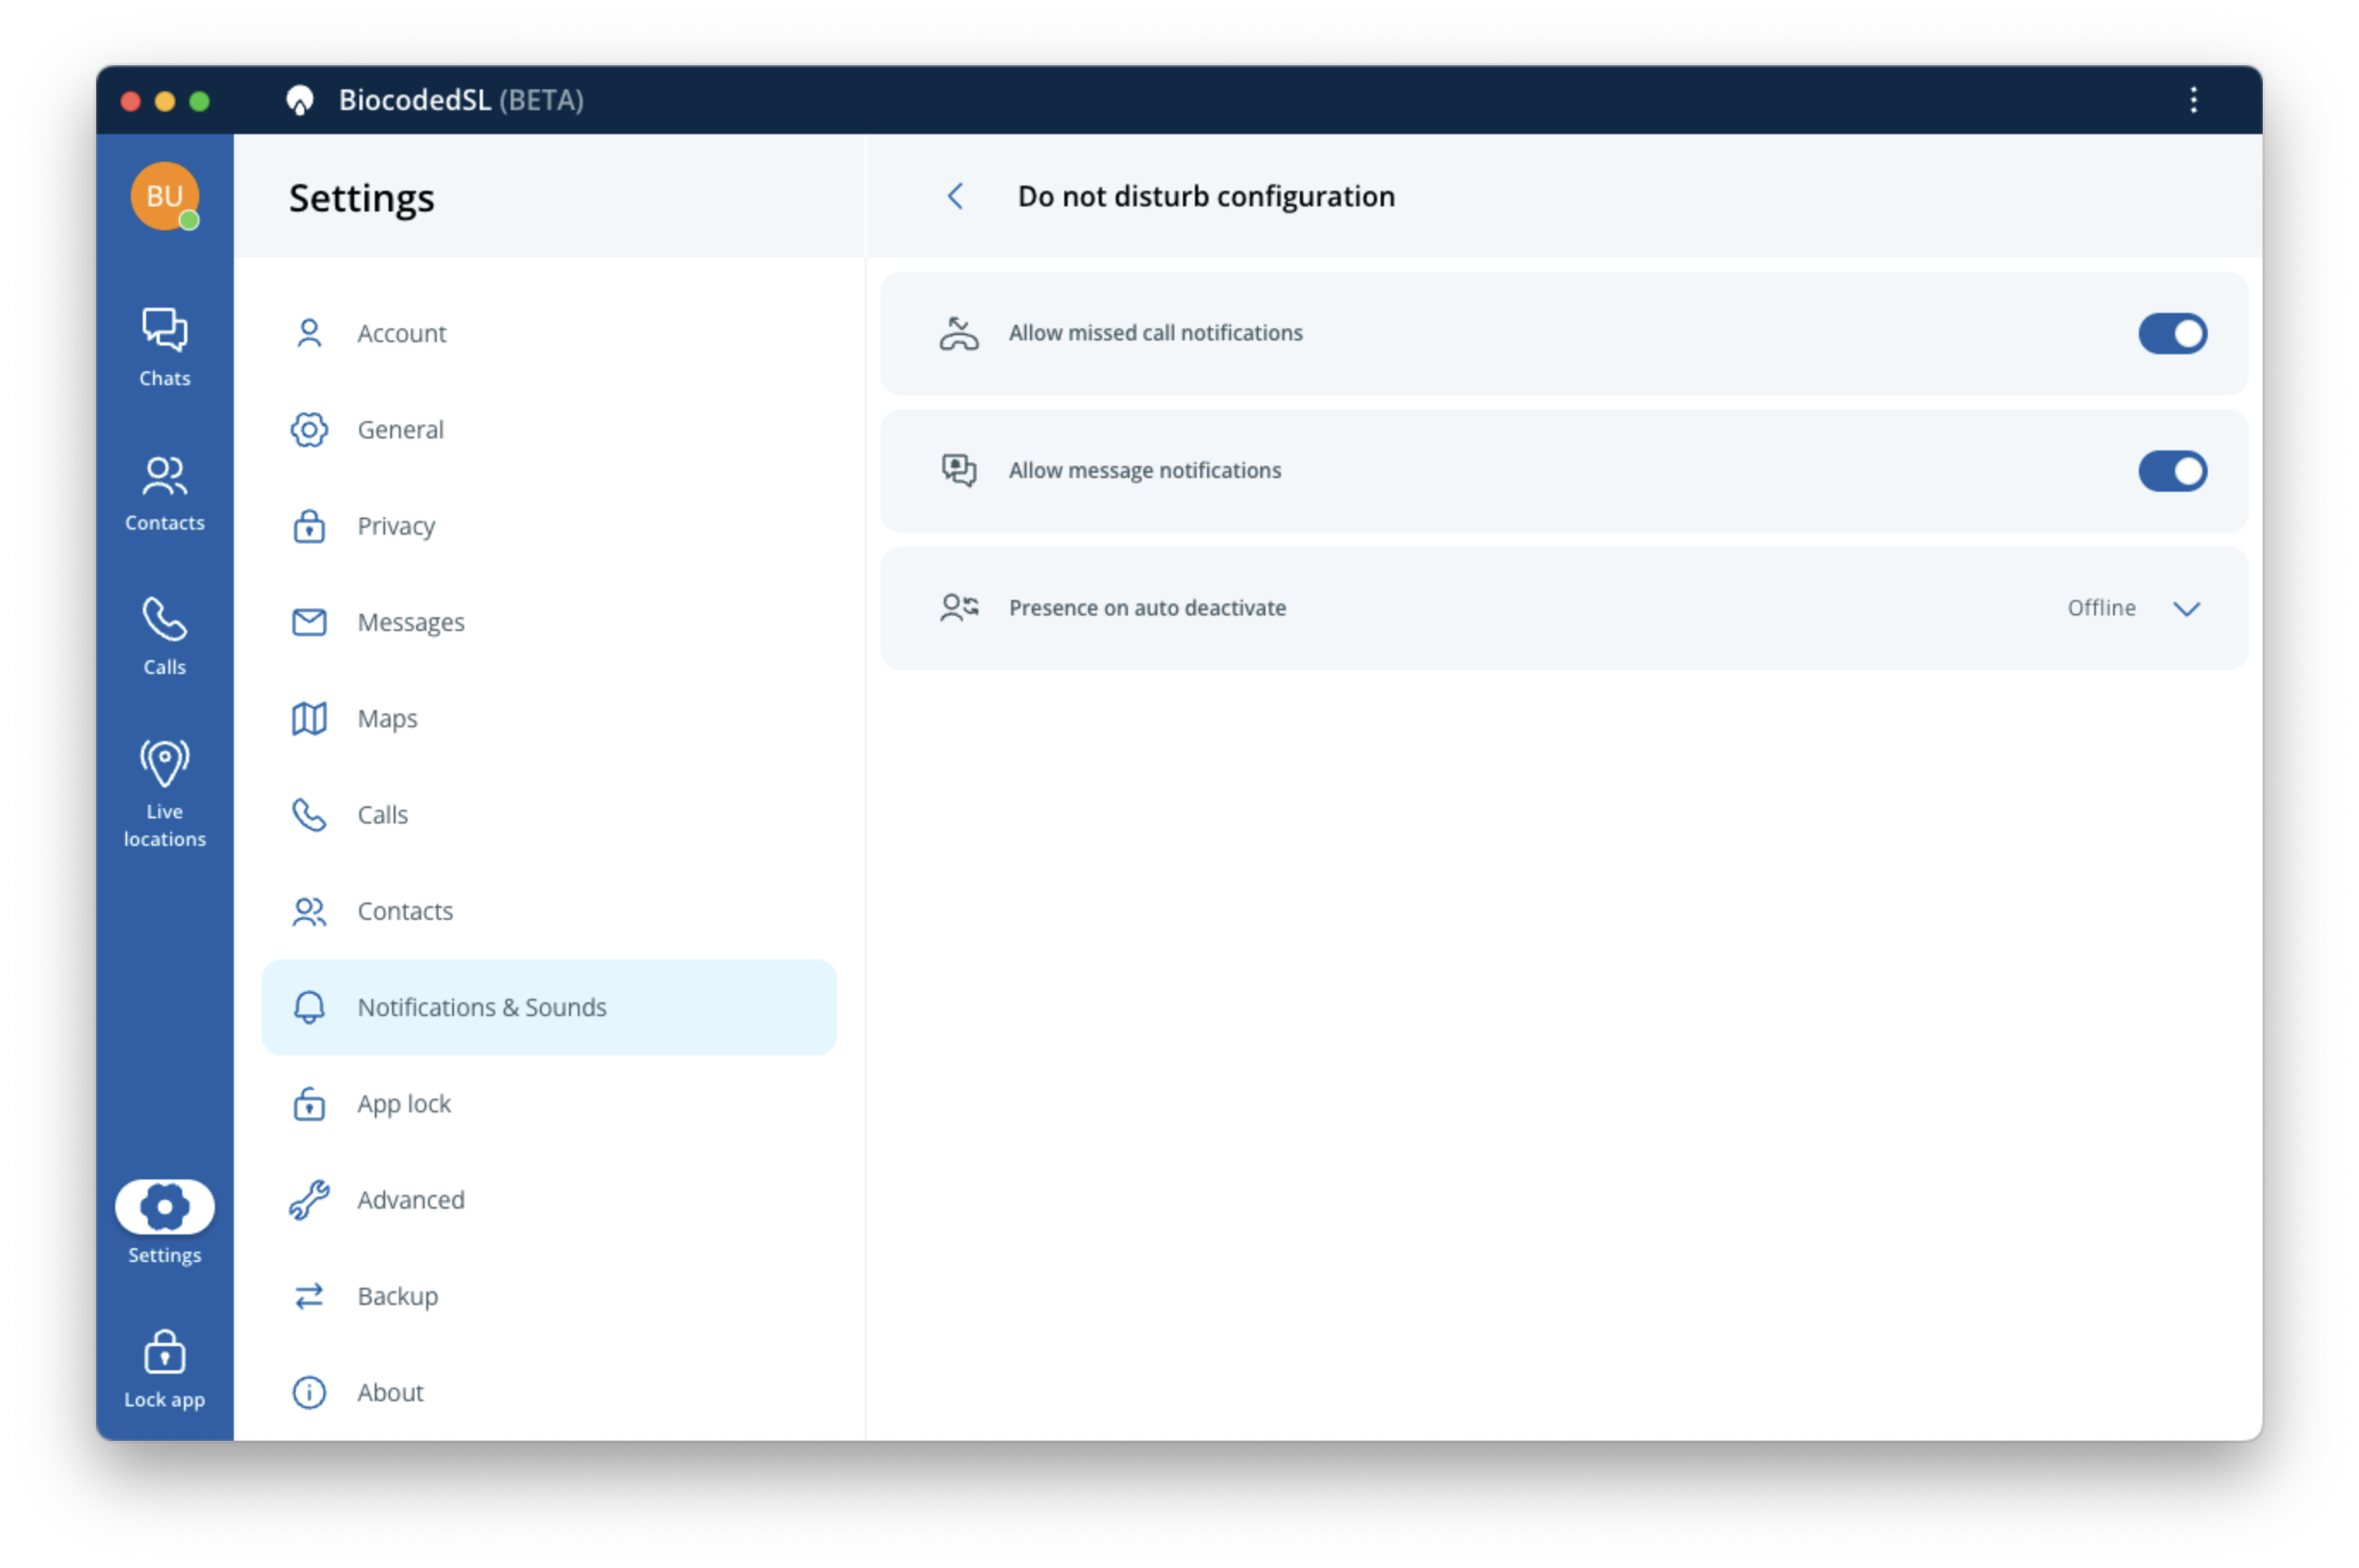
The settings for "Do not disturb" mode will be applied when "Do not disturb" status is selected. You can choose to allow notifications for missed calls or for messages. You can also choose a status to set after scheduled "Do not disturb" mode is turned off.
App lock
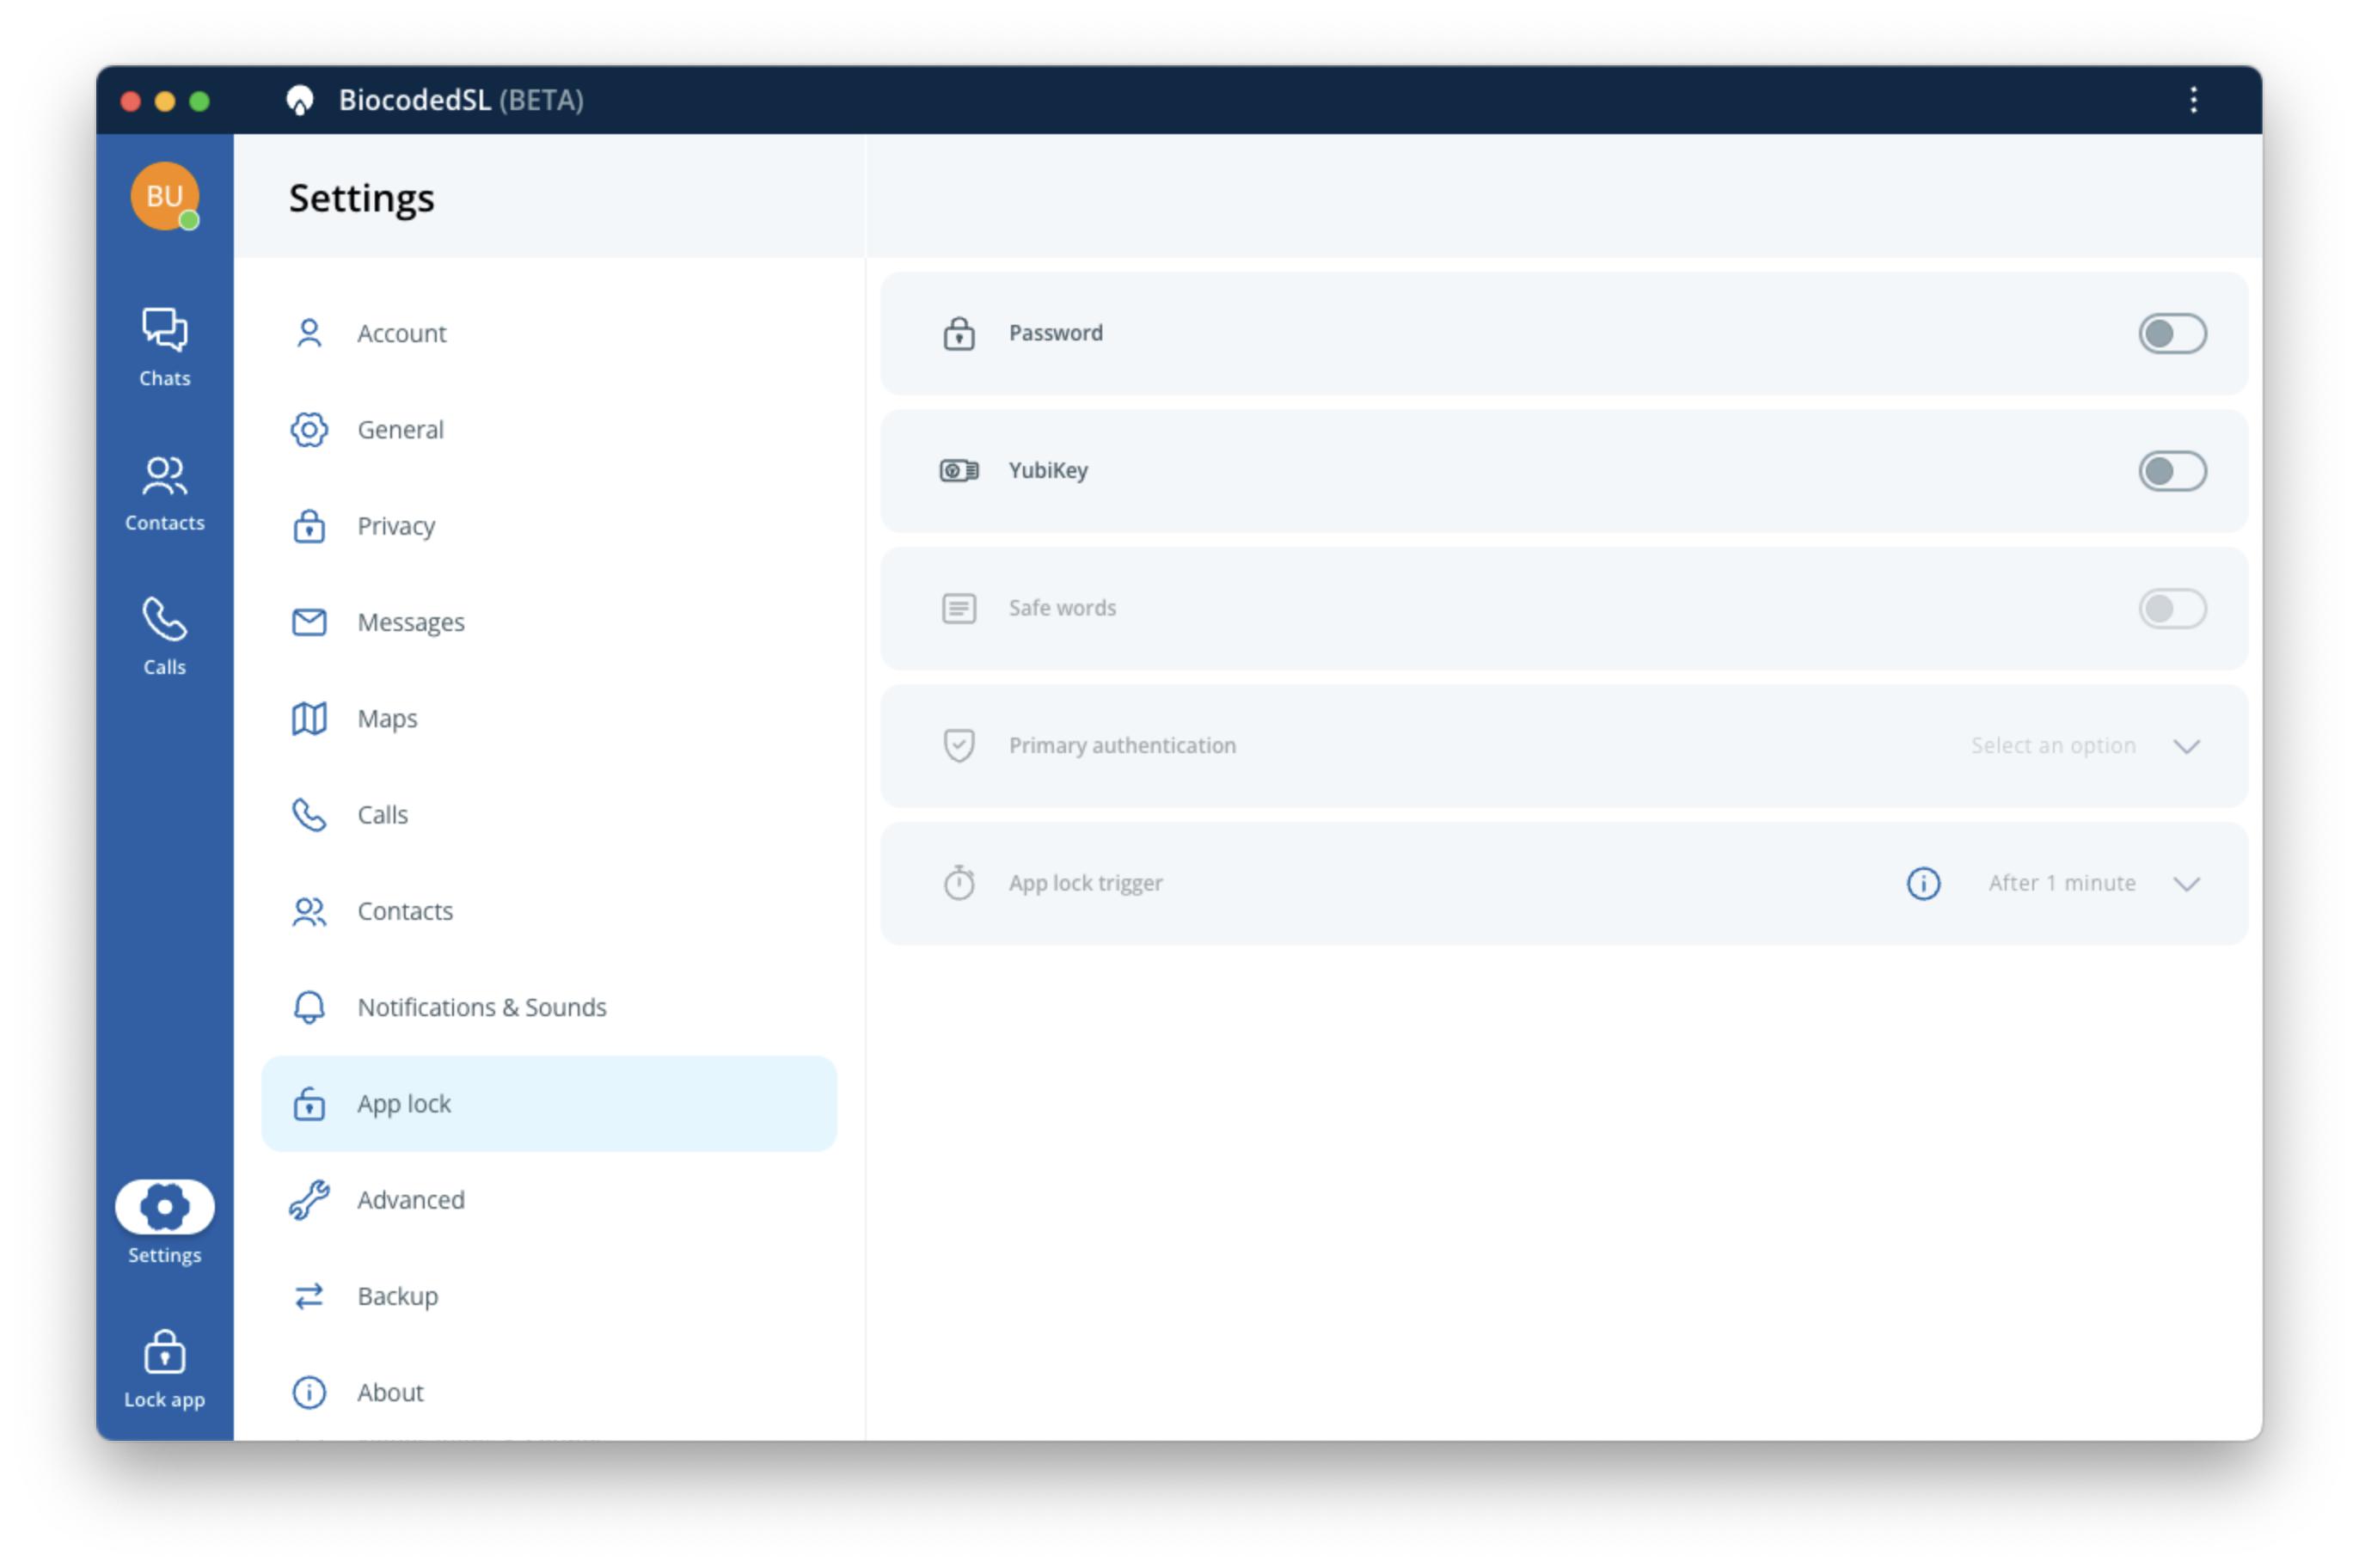
Choose another level of protection for your secure communication application. The available authentication options are:
-
Password: you can unlock your app by setting a password. Codes can not be overly simplistic, as this defeats the purpose of app lock.
-
Yubikey: if you have a Yubikey set up, you can enter the device's PIN and then scan it to unlock your app. If you have a Yubikey, but you have not set it's PIN yet, you can download Yubikey manager, where you can generate a certificate for your key and set a PIN (see Yubikey Setup Guide).
-
Safe words: a list of words are generated for you to write down on a piece of paper or to print and store in a safe place. You can enter these words to unlock your app.
-
Primary authentication: When you have turned on at least one authentication method, you can select which one to use primarily and if app locking should be automatic. To disable one option, you will need to confirm your choice by authenticating with your primary method.
-
App lock trigger: If you select an option different than "Never", the timer starts running after app window comes out of focus and locks it after the selected time period. This can be changed if at least one app lock option is turned on.
Note
A maximum retry limit enforces application lockdown upon repeated failed attempts to unlock your device, resolvable only by server administrators.
Advanced
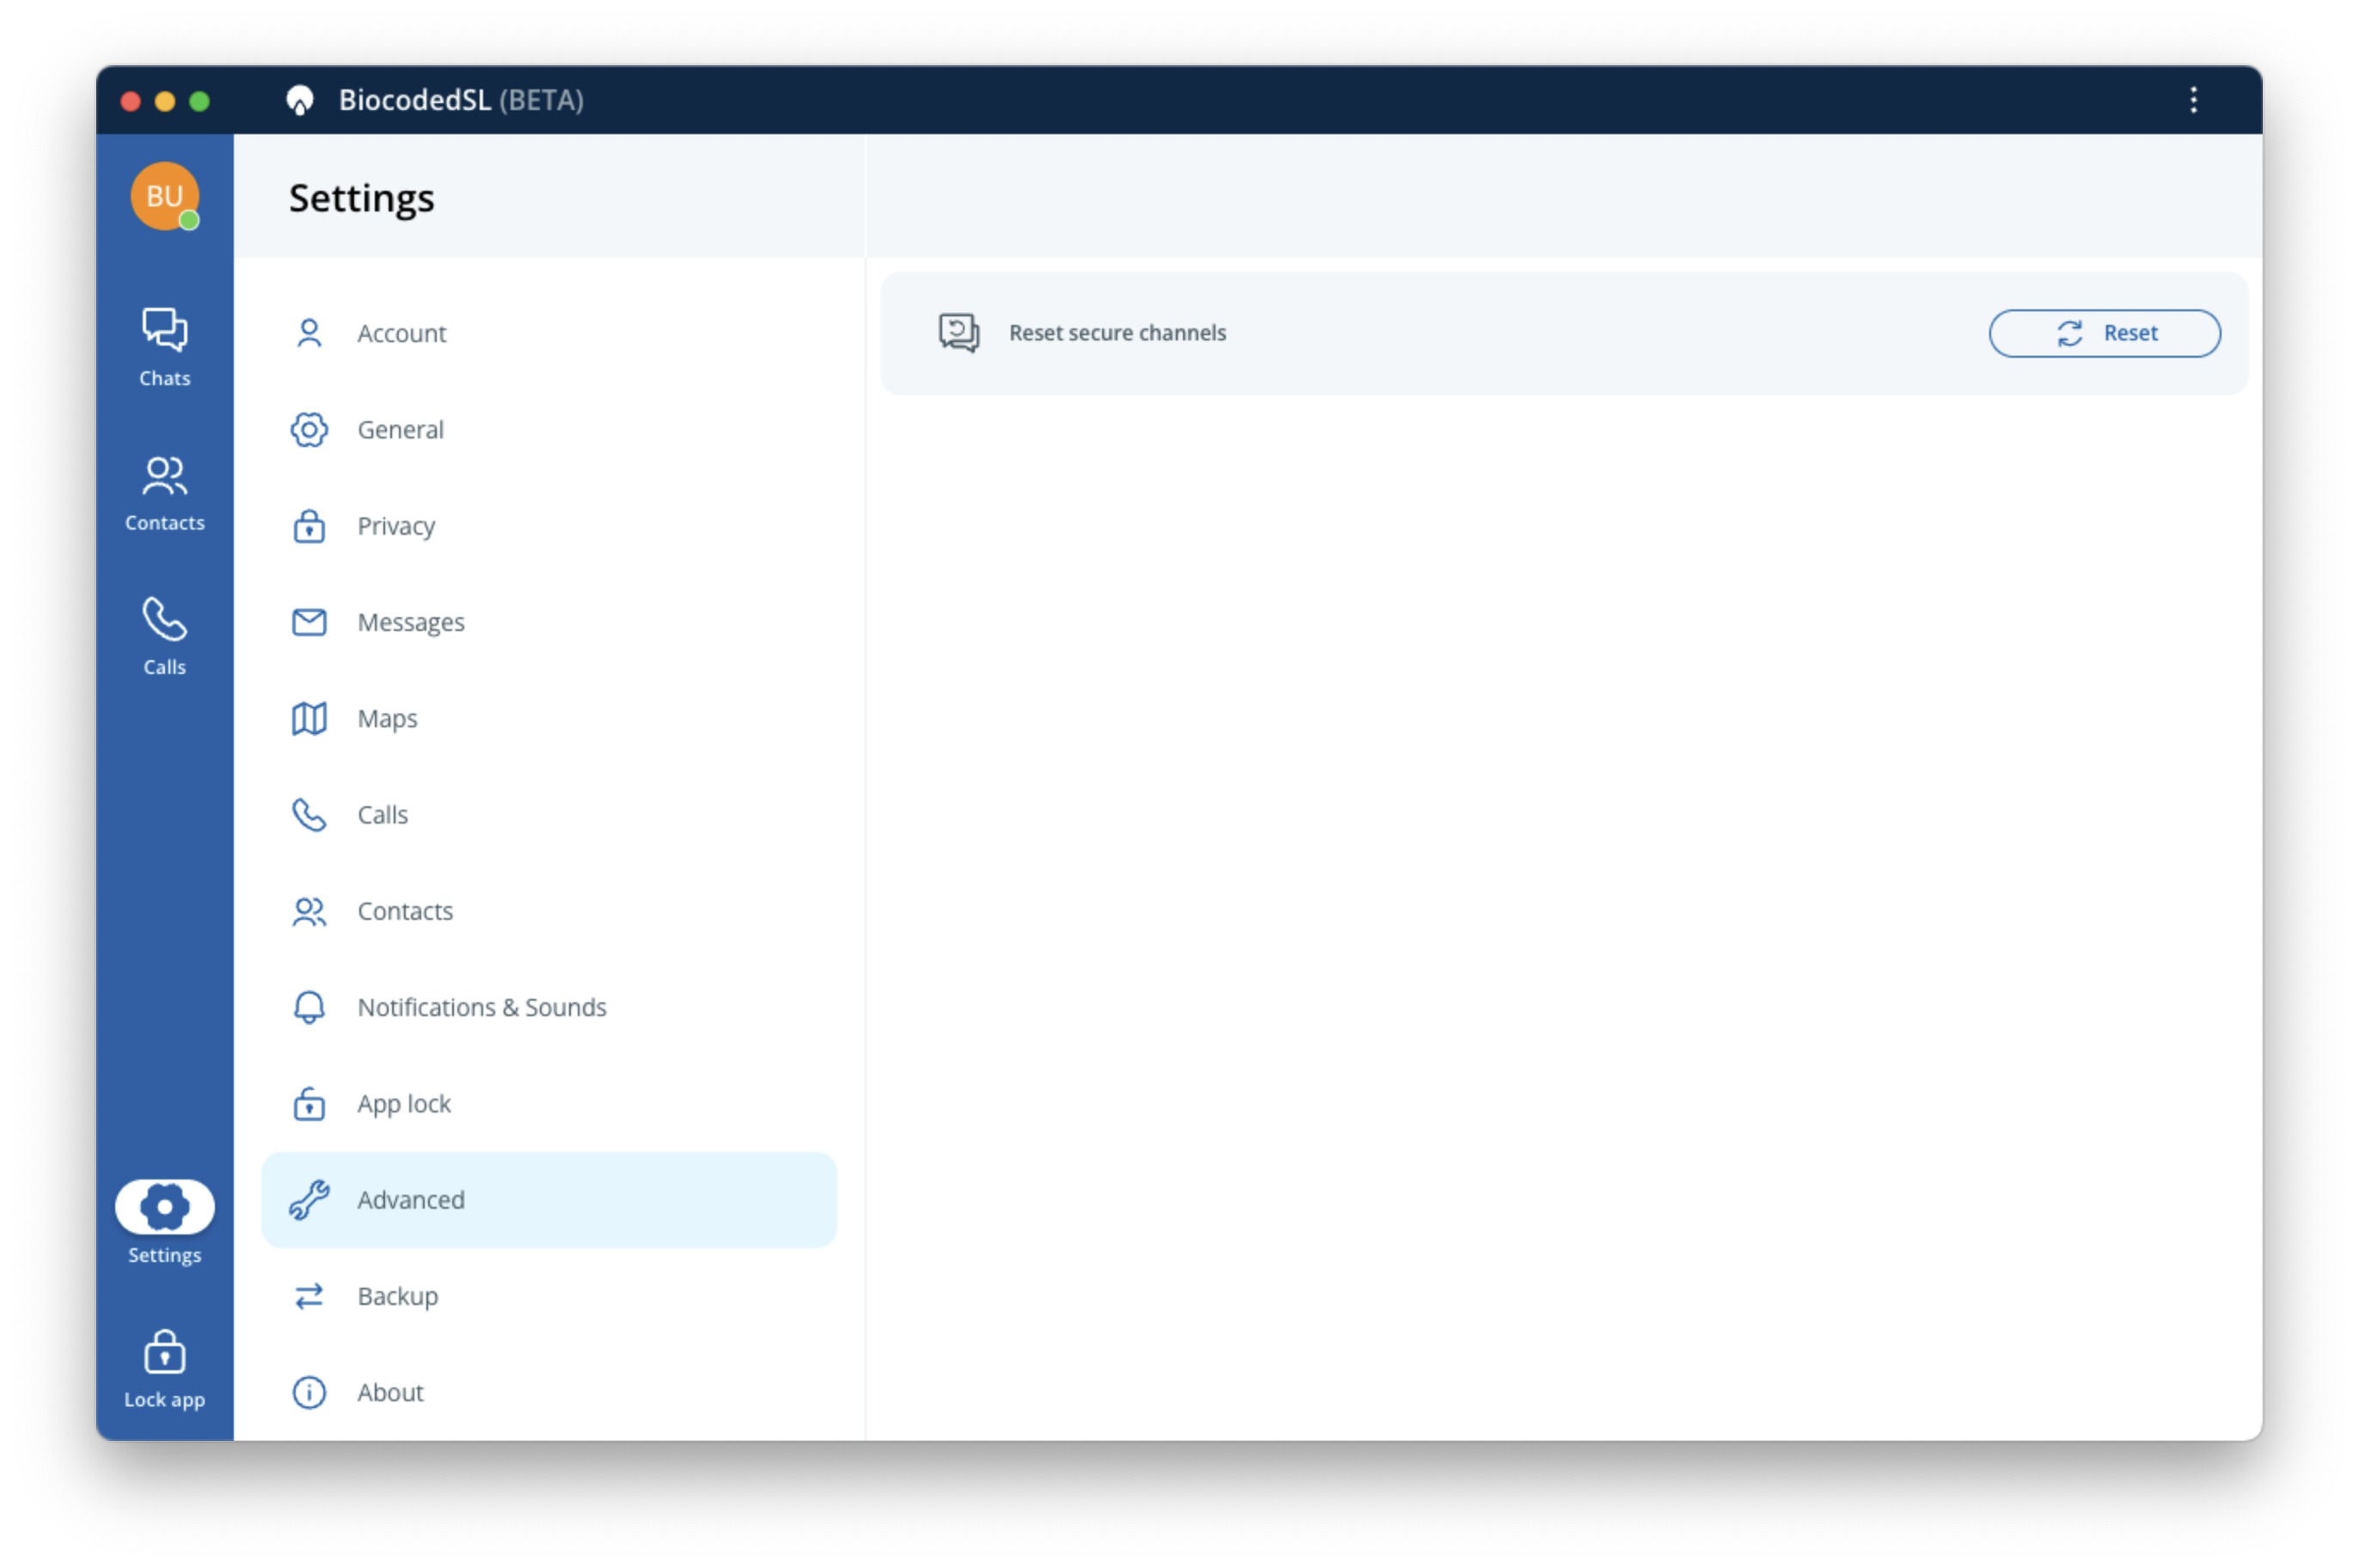
- Reset secure channels - reset all existing communication channels.
Backup
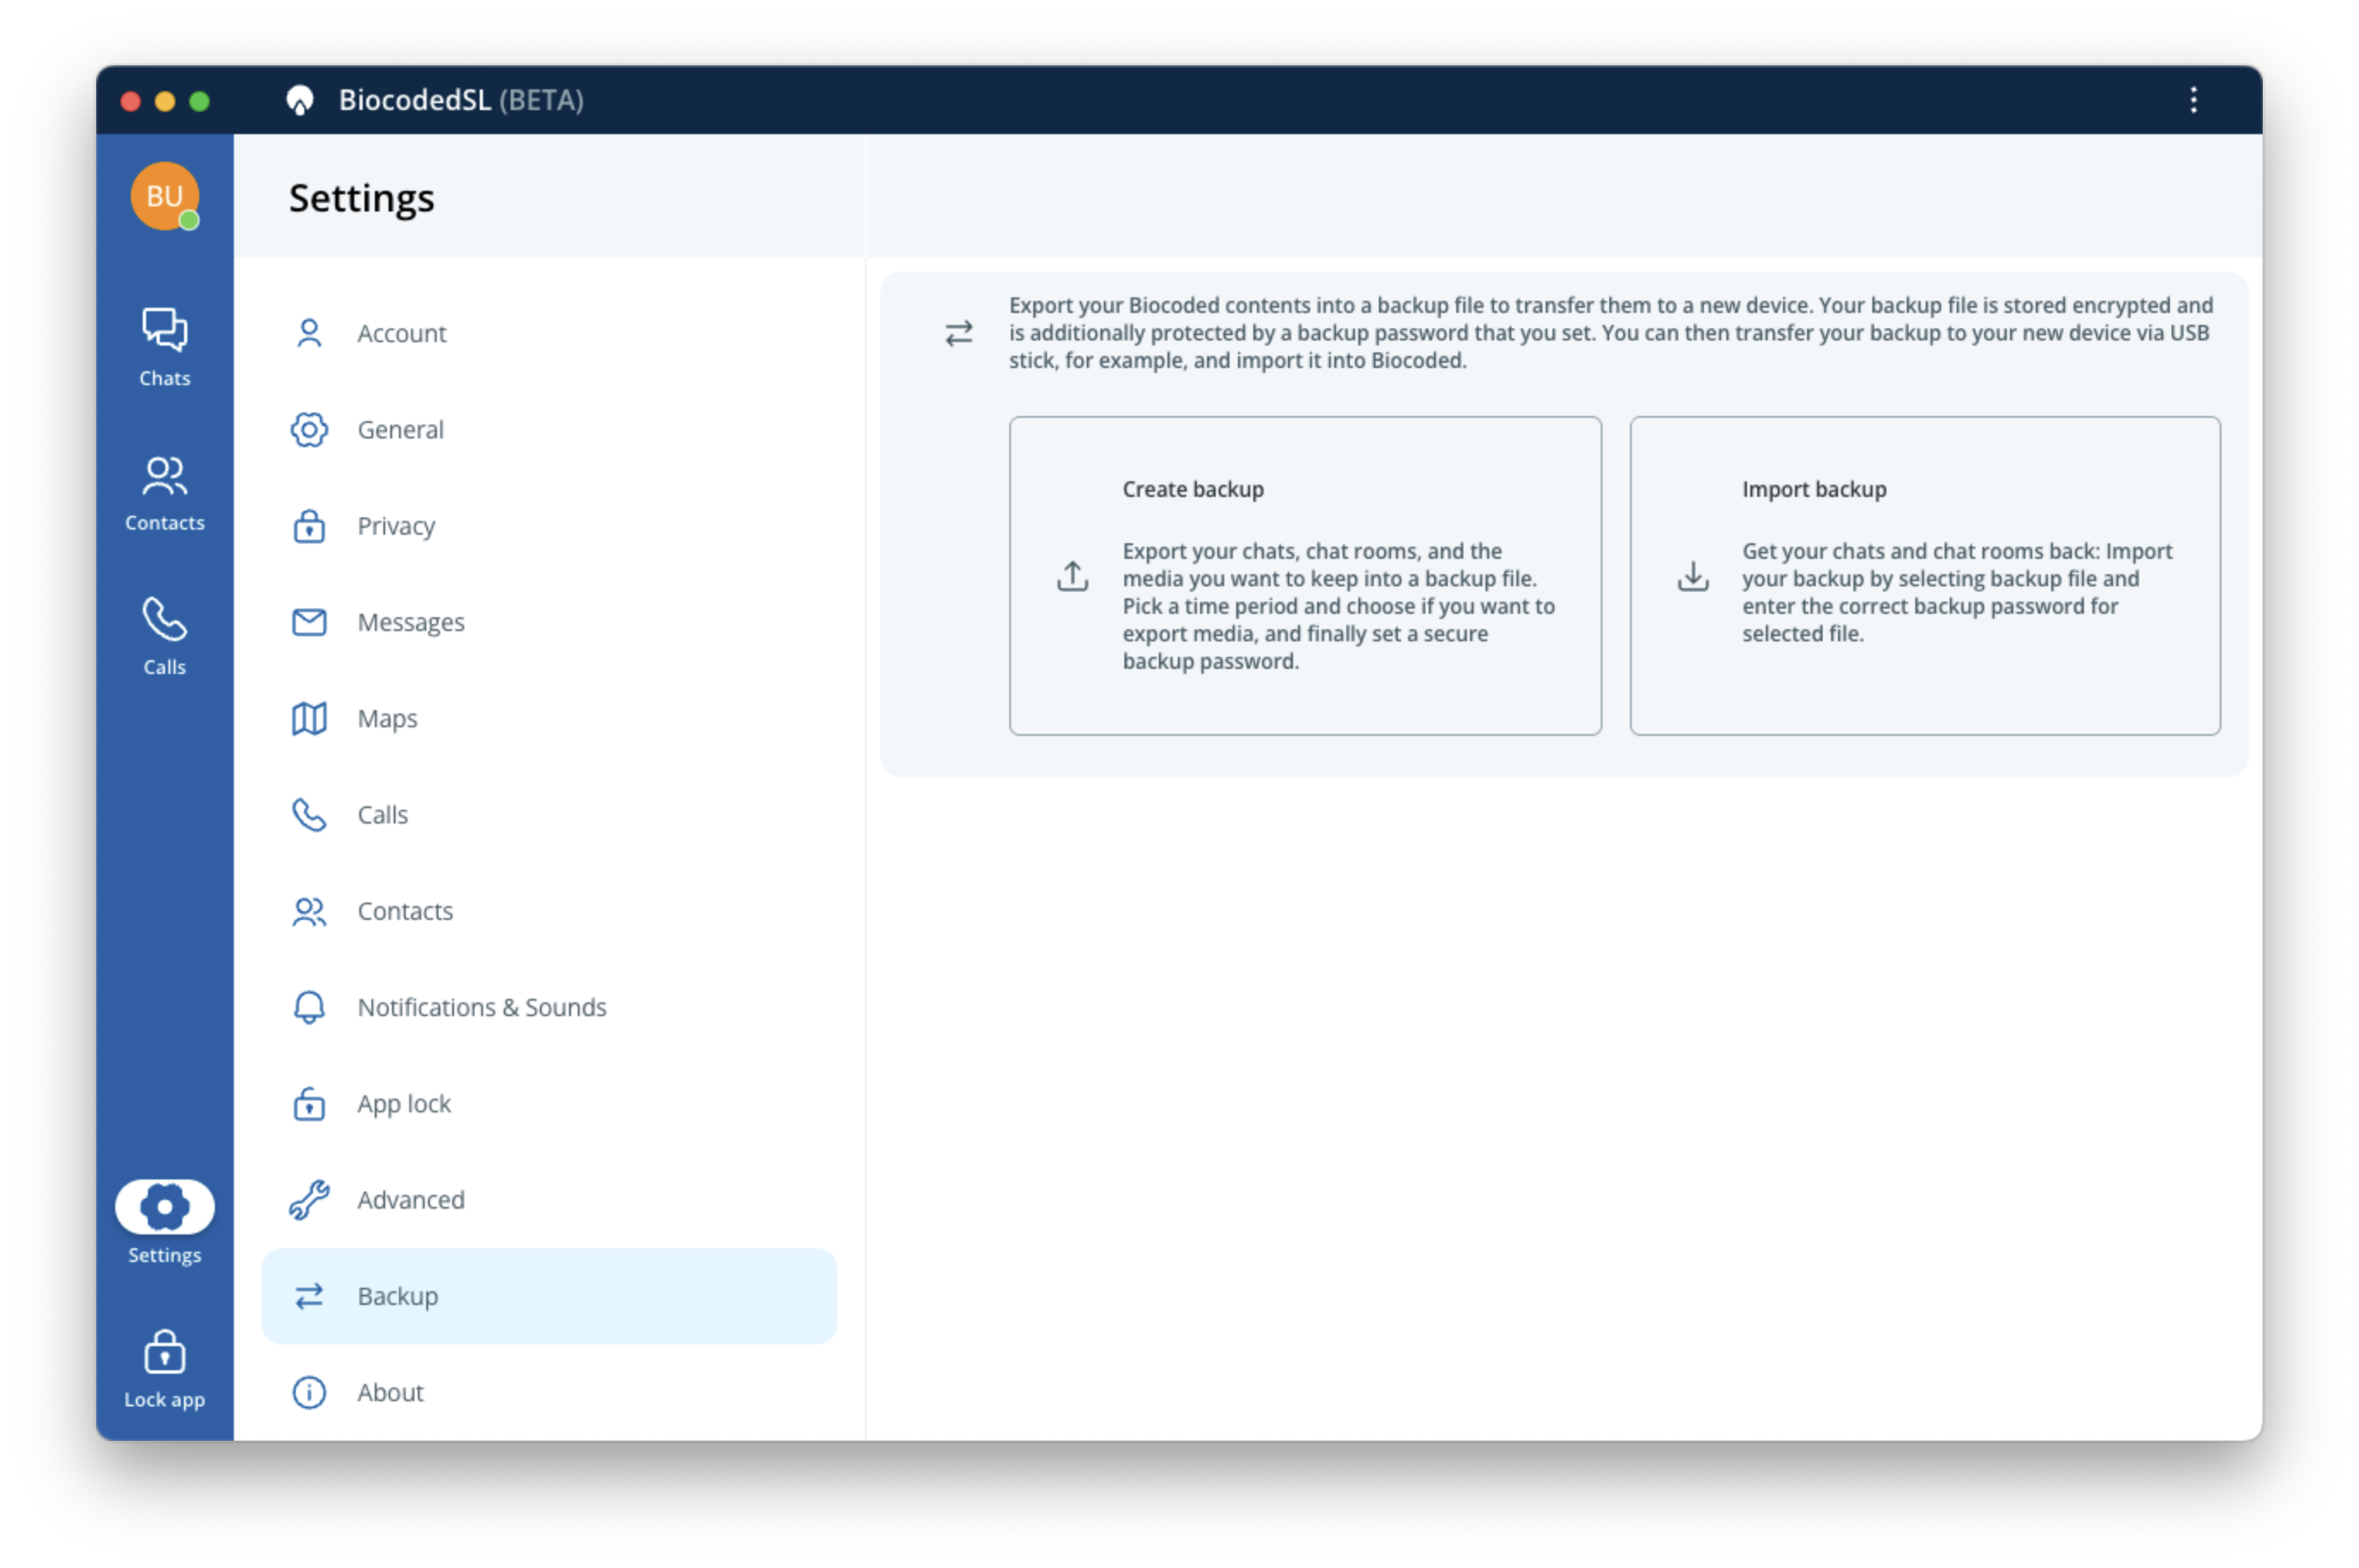
Here you can export your Biocoded contents into a backup file to transfer to a new device or import a previously created backup file from another device. The file is stored encrypted and protected by a password you set. You can transfer the file via USB or send it through Biocoded.
Note
Backup files are linked to and specific to your account data.
About
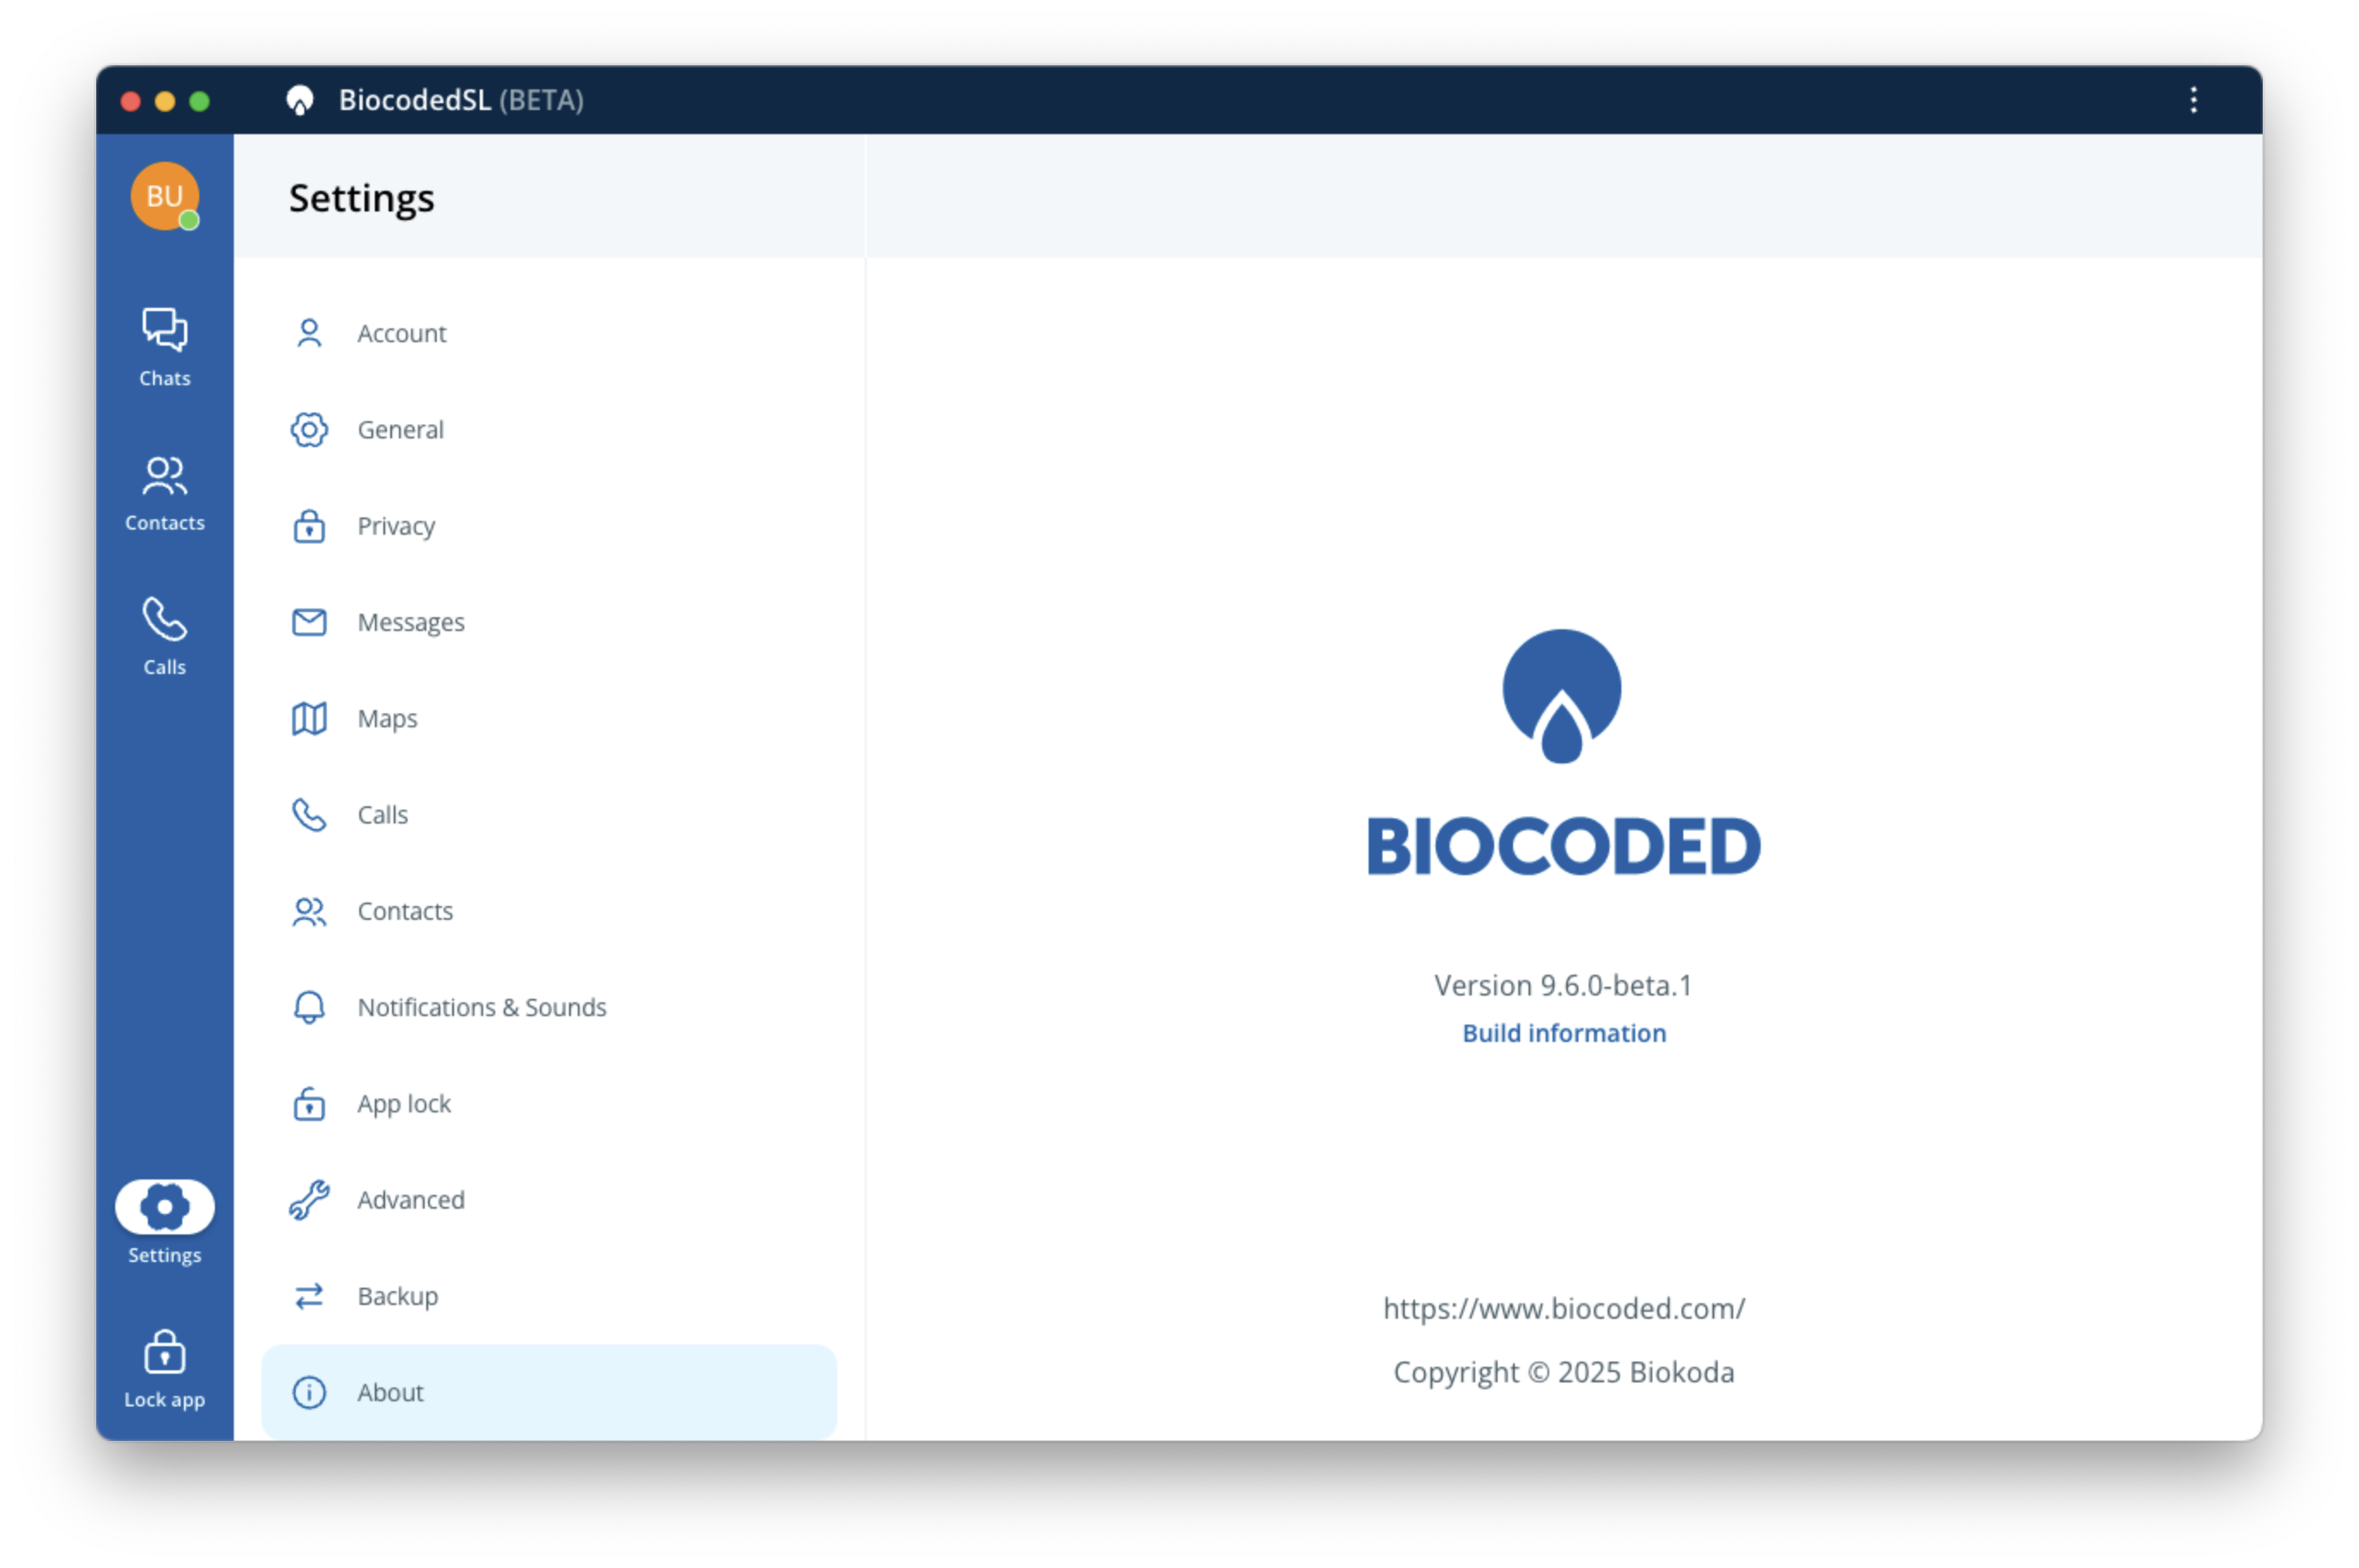
View app version and build information.
Offline mode
When internet connection is lost, Biocoded indicates this by showing a banner. During this time you are unable to send or receive any data from our server.
If App lock with PIN or with Yubikey is turned on, you can turn on Offline mode. Go to Settings, App lock. Tap the switch next to Offline mode. Confirm with your authentication method. Now if you have no internet connection, you can unlock Biocoded with one of your app lock authentication methods & enter Offline mode. You can now view your chats and files without an internet connection.
App options
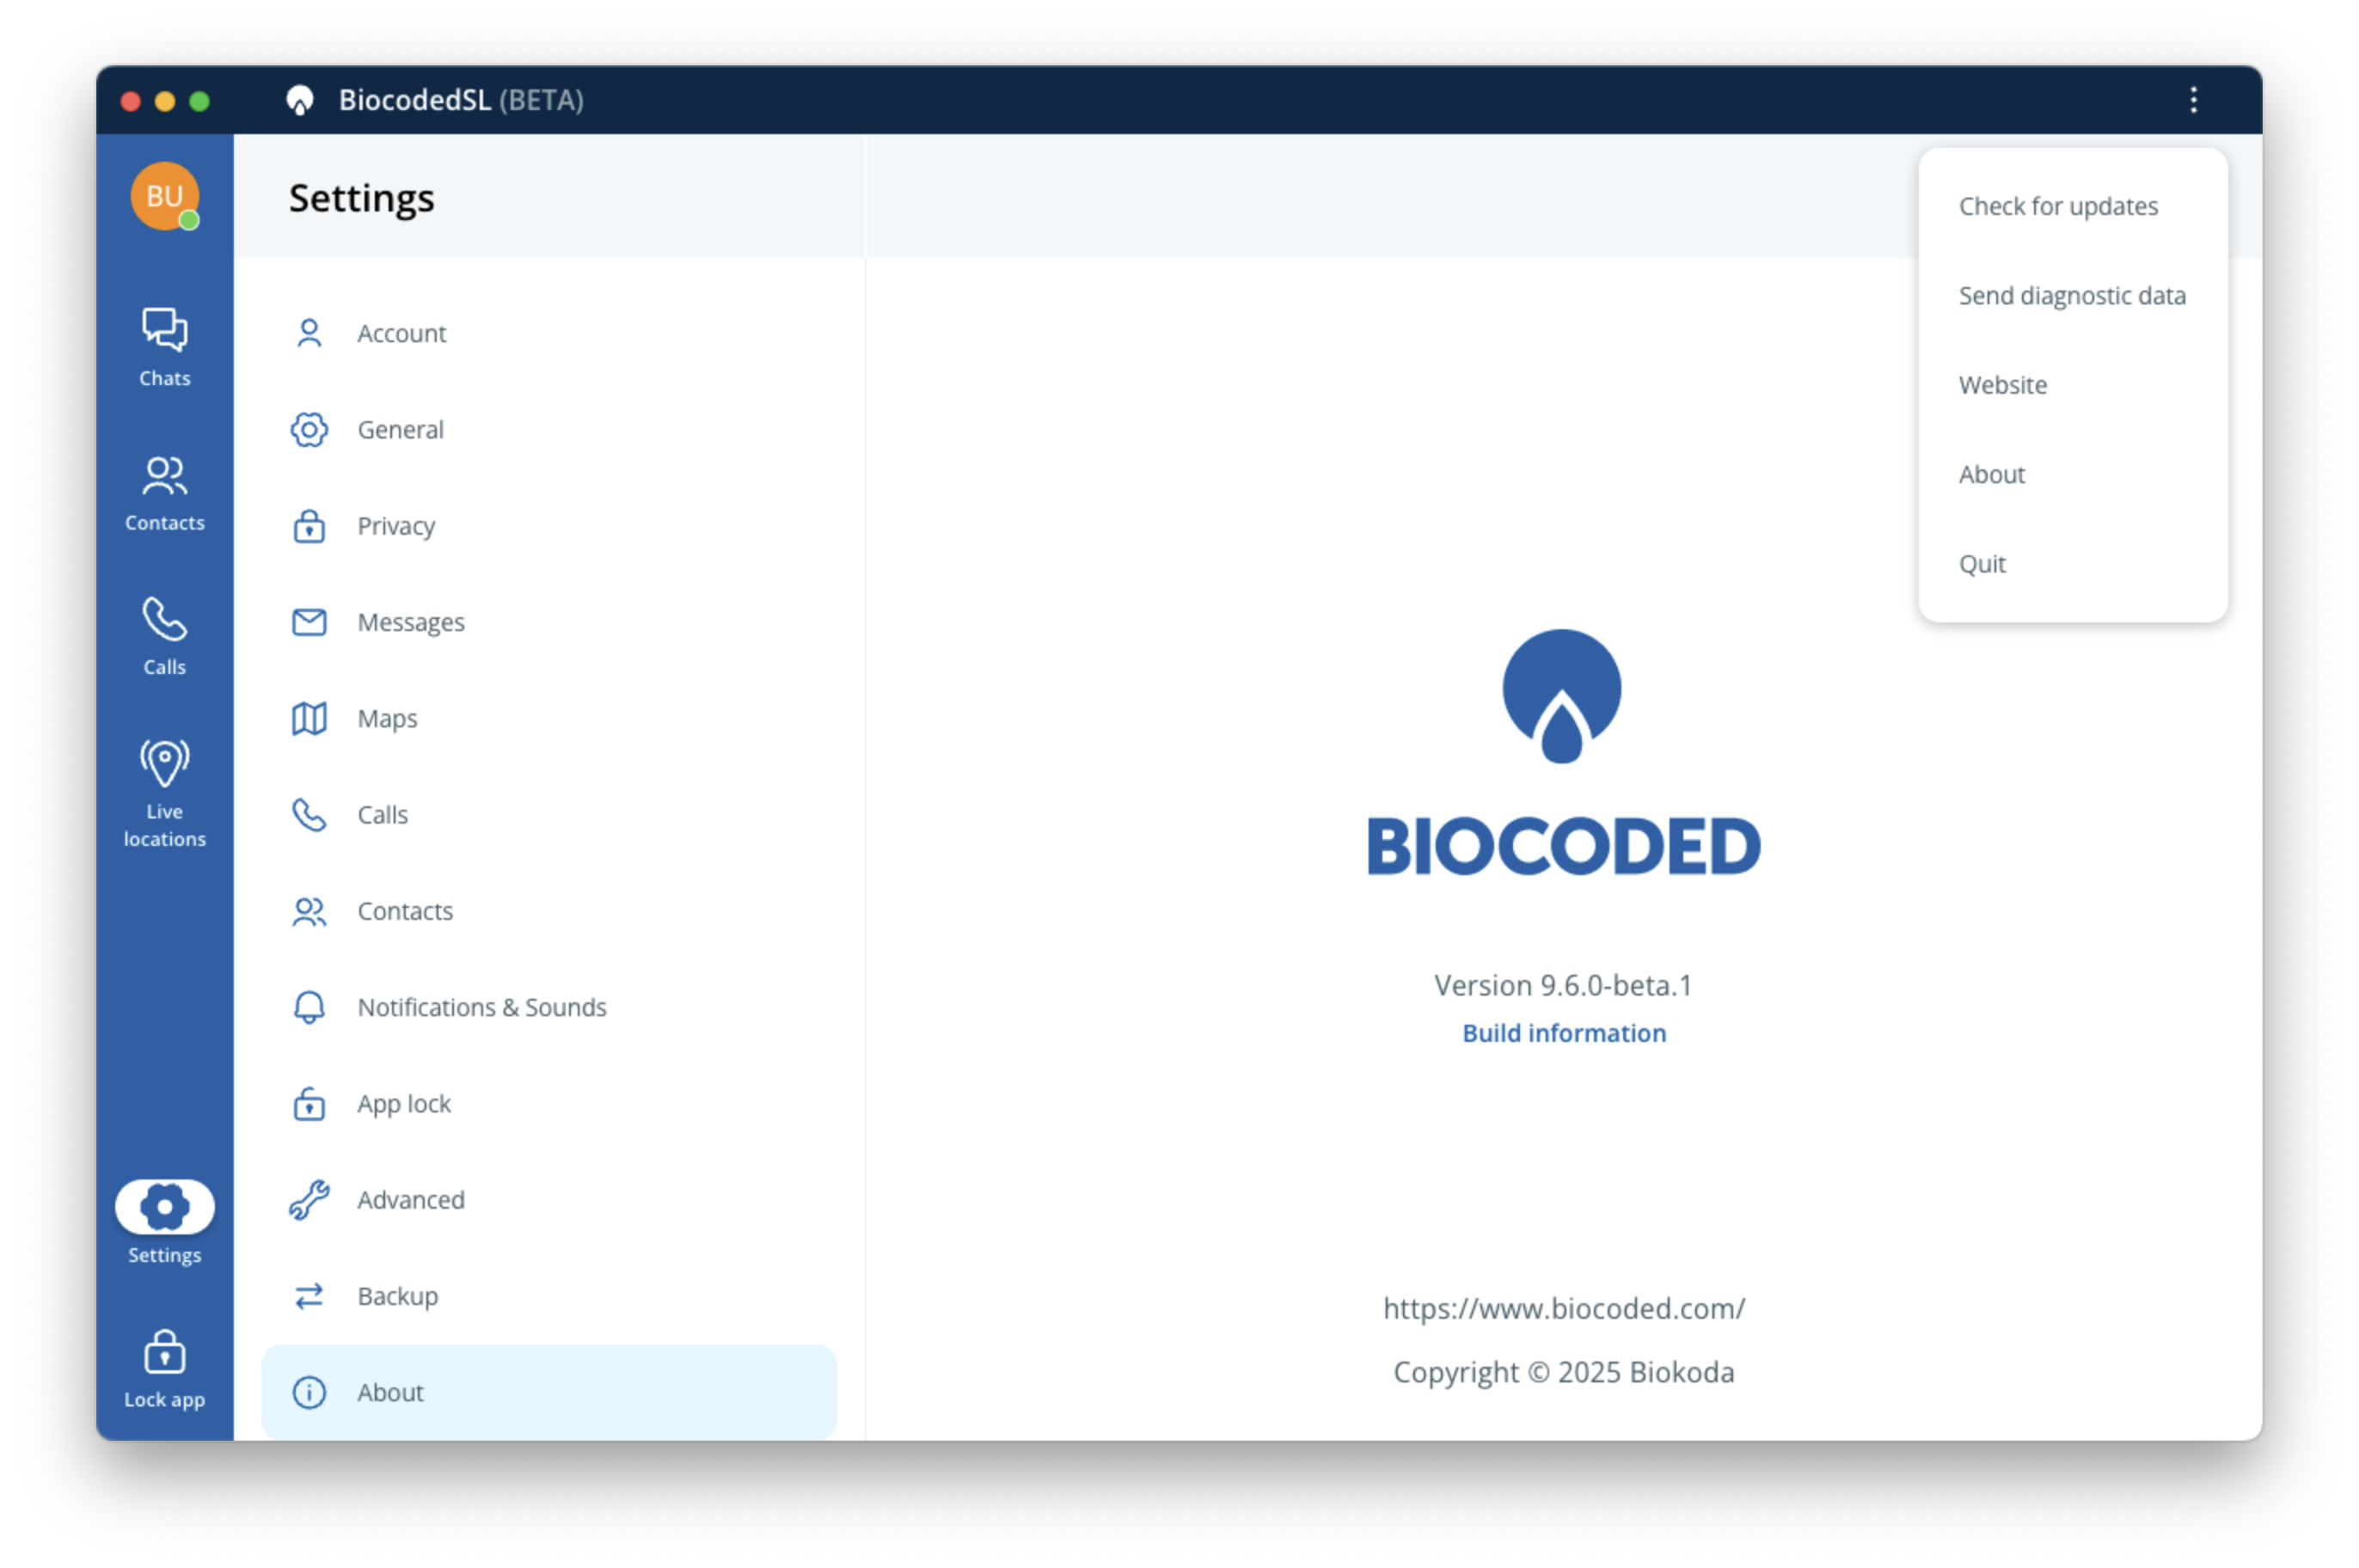
Press ... on top right of app window to show app options menu. Here you can:
- Check for updates,
- Send diagnostic data - sends your device's diagnostic data to our server.
- Website - visit our website at biocoded.com (https://www.biocoded.com/),
- About - shows about page in settings including app version and build information.
- Quit - close app and stop receiving messages and calls.
Sign out
To log out of Biocoded select Settings, Privacy and then "Sign out".
Emergencies
Users on desktop can also receive emergencies, depending on server settings which can be changed in Biocoded Admin portal. Responders can view past and current emergency signals broadcasted by users.
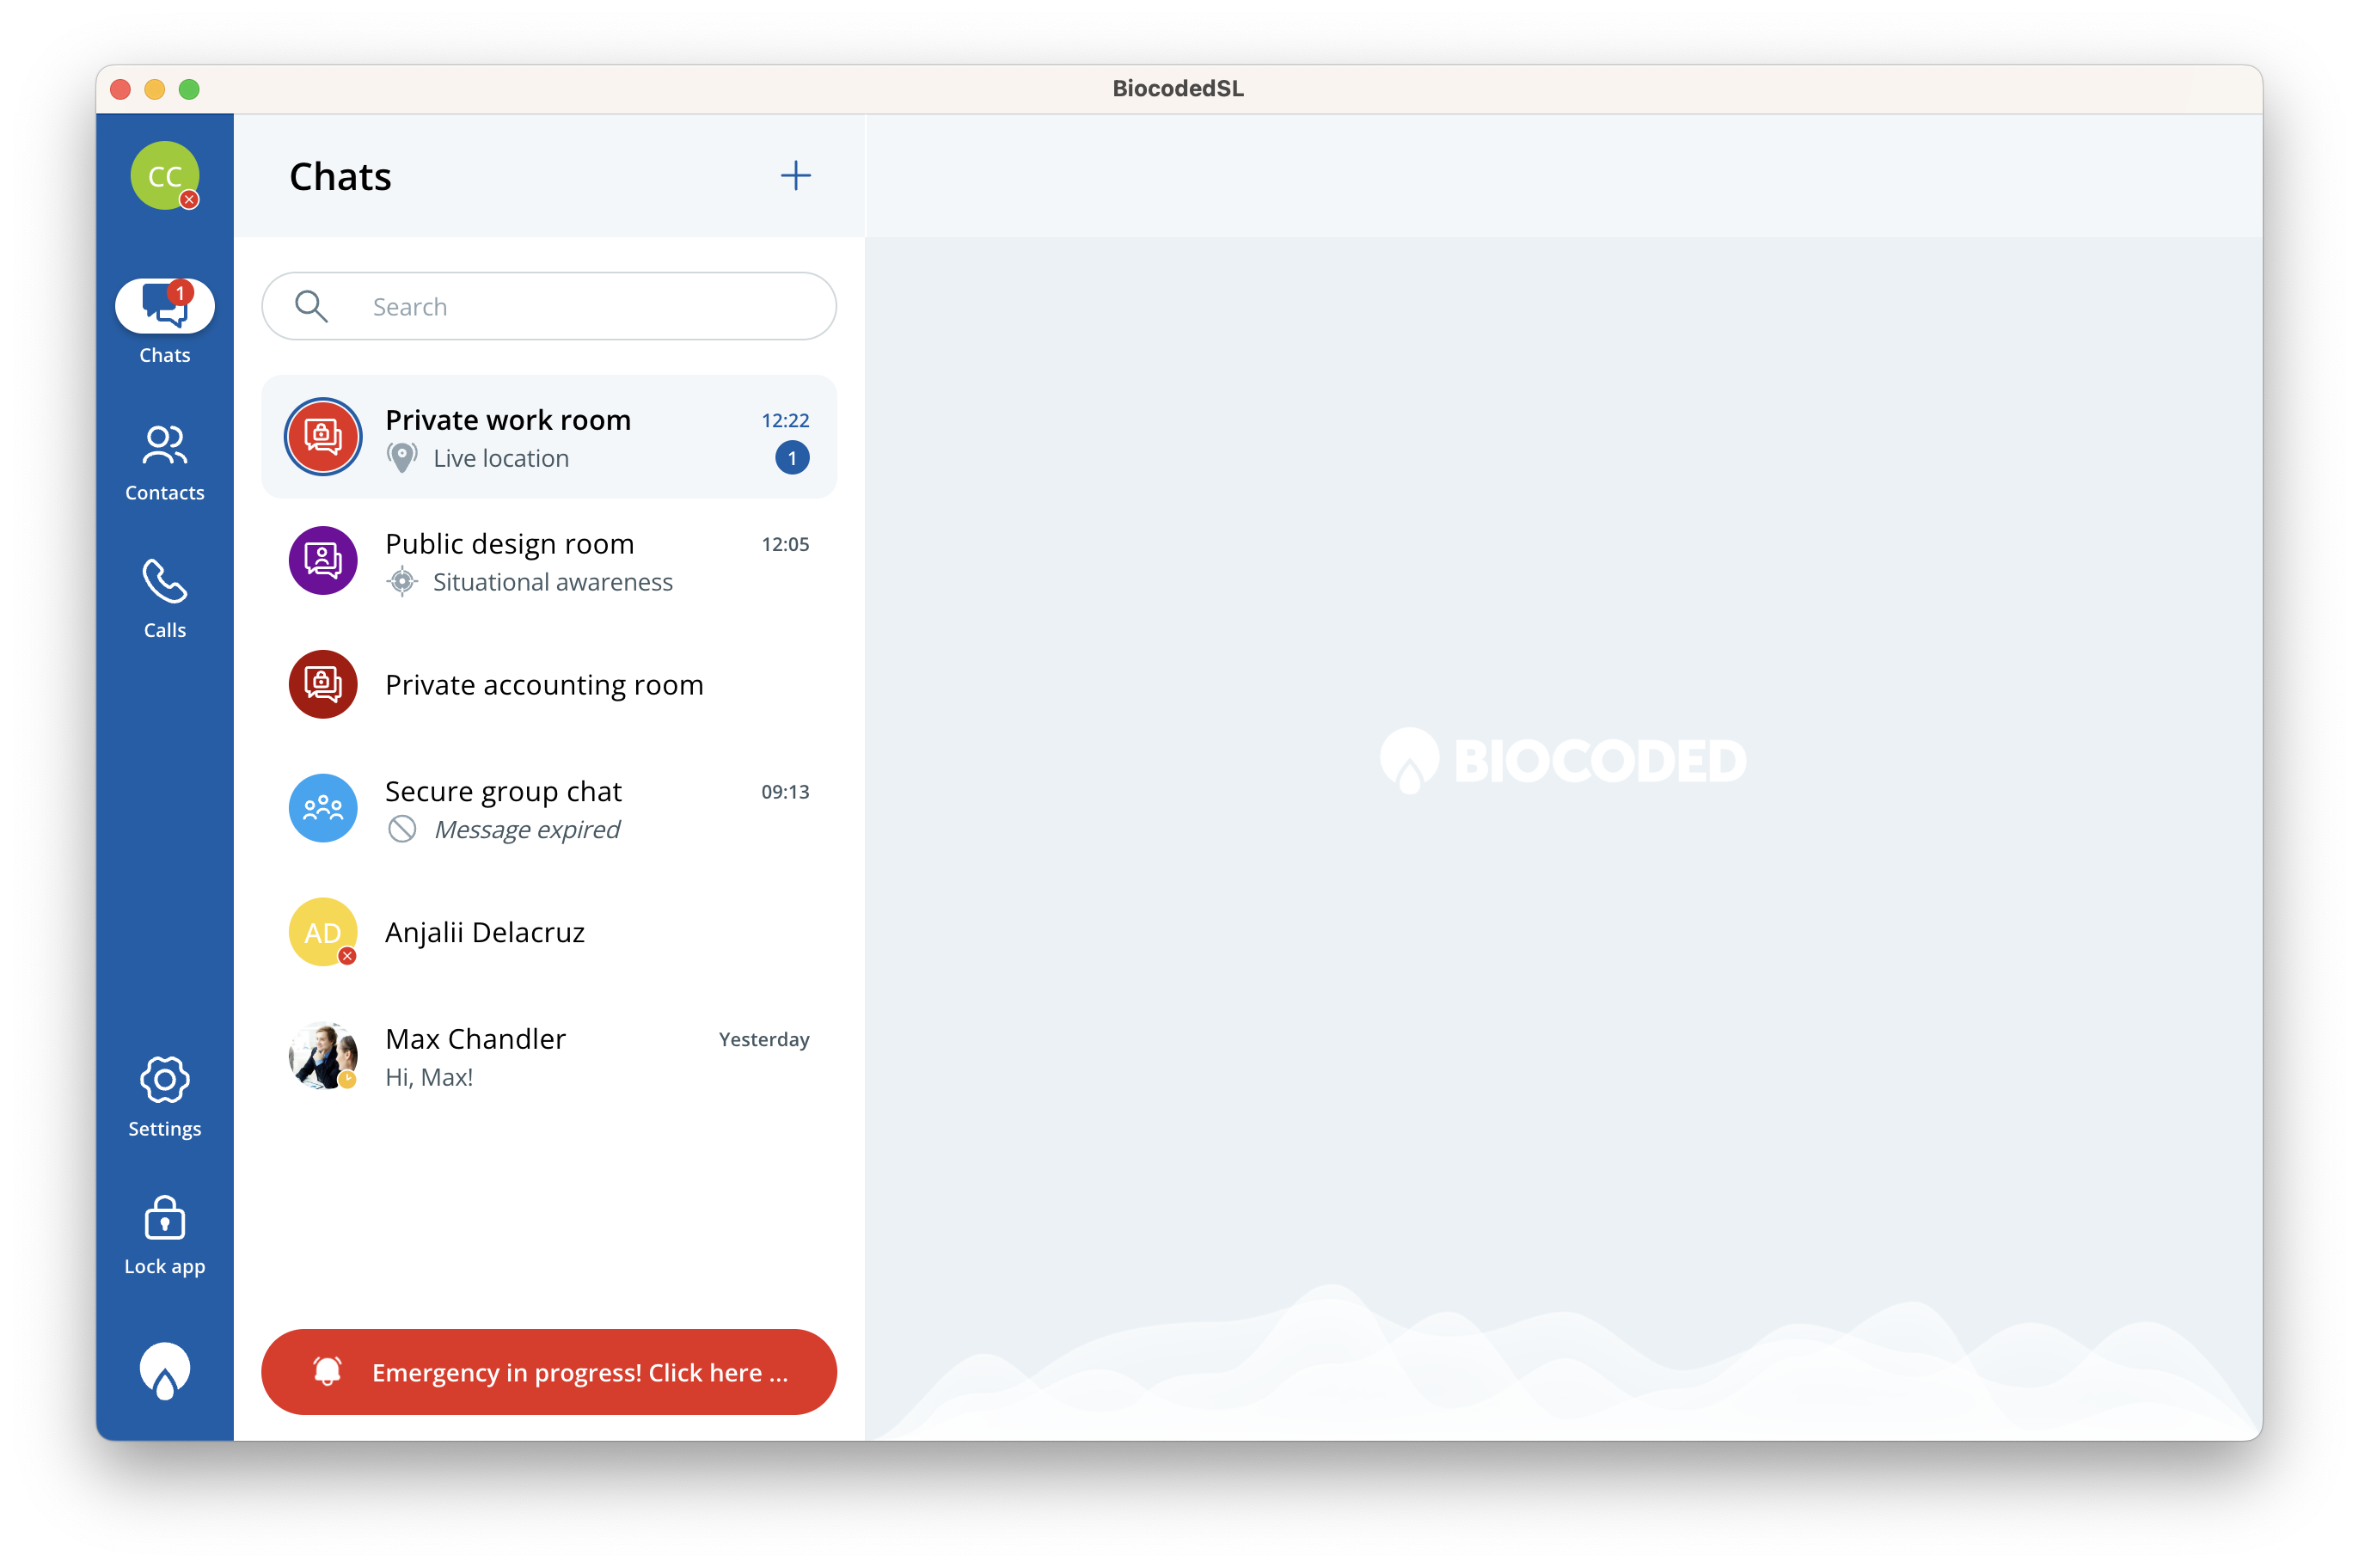
Emergency contacts or responders can view active emergencies by tapping on "Emergency in progess" banner shown on screen, which shows a map and a list of emergencies.
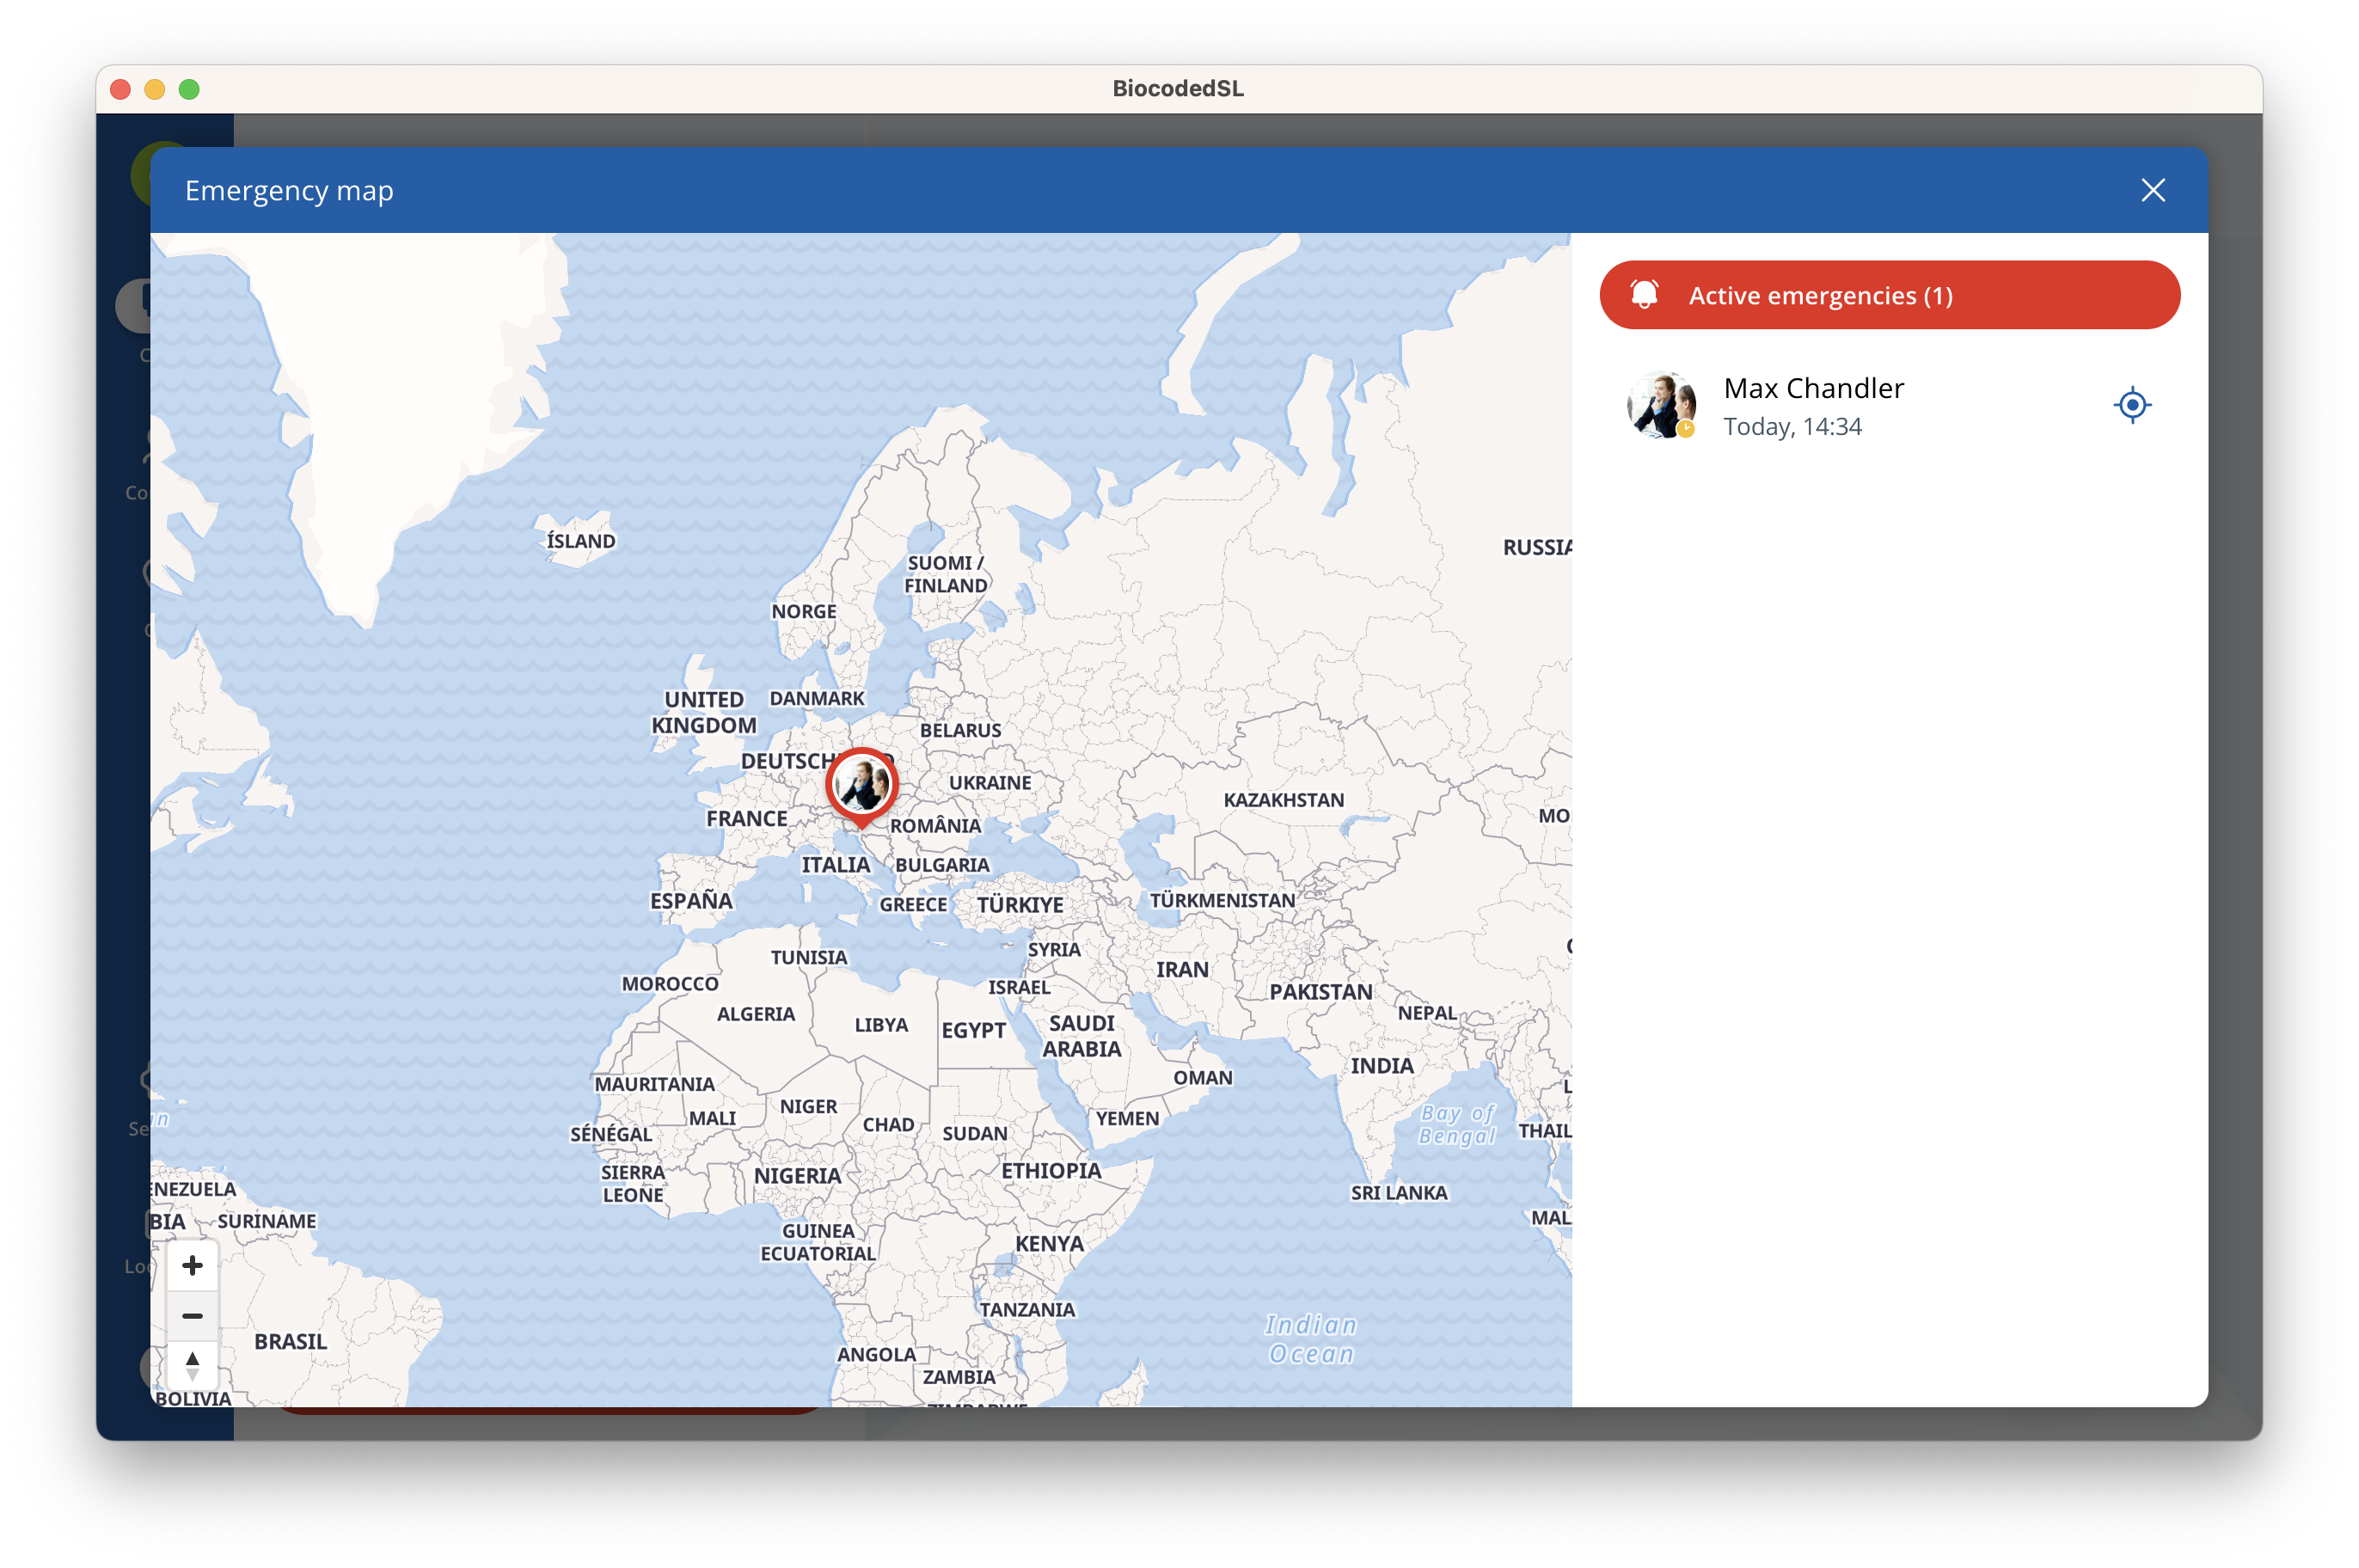
Past emergencies can be viewed by tapping on Inactive emergencies banner, which will be shown on a map.
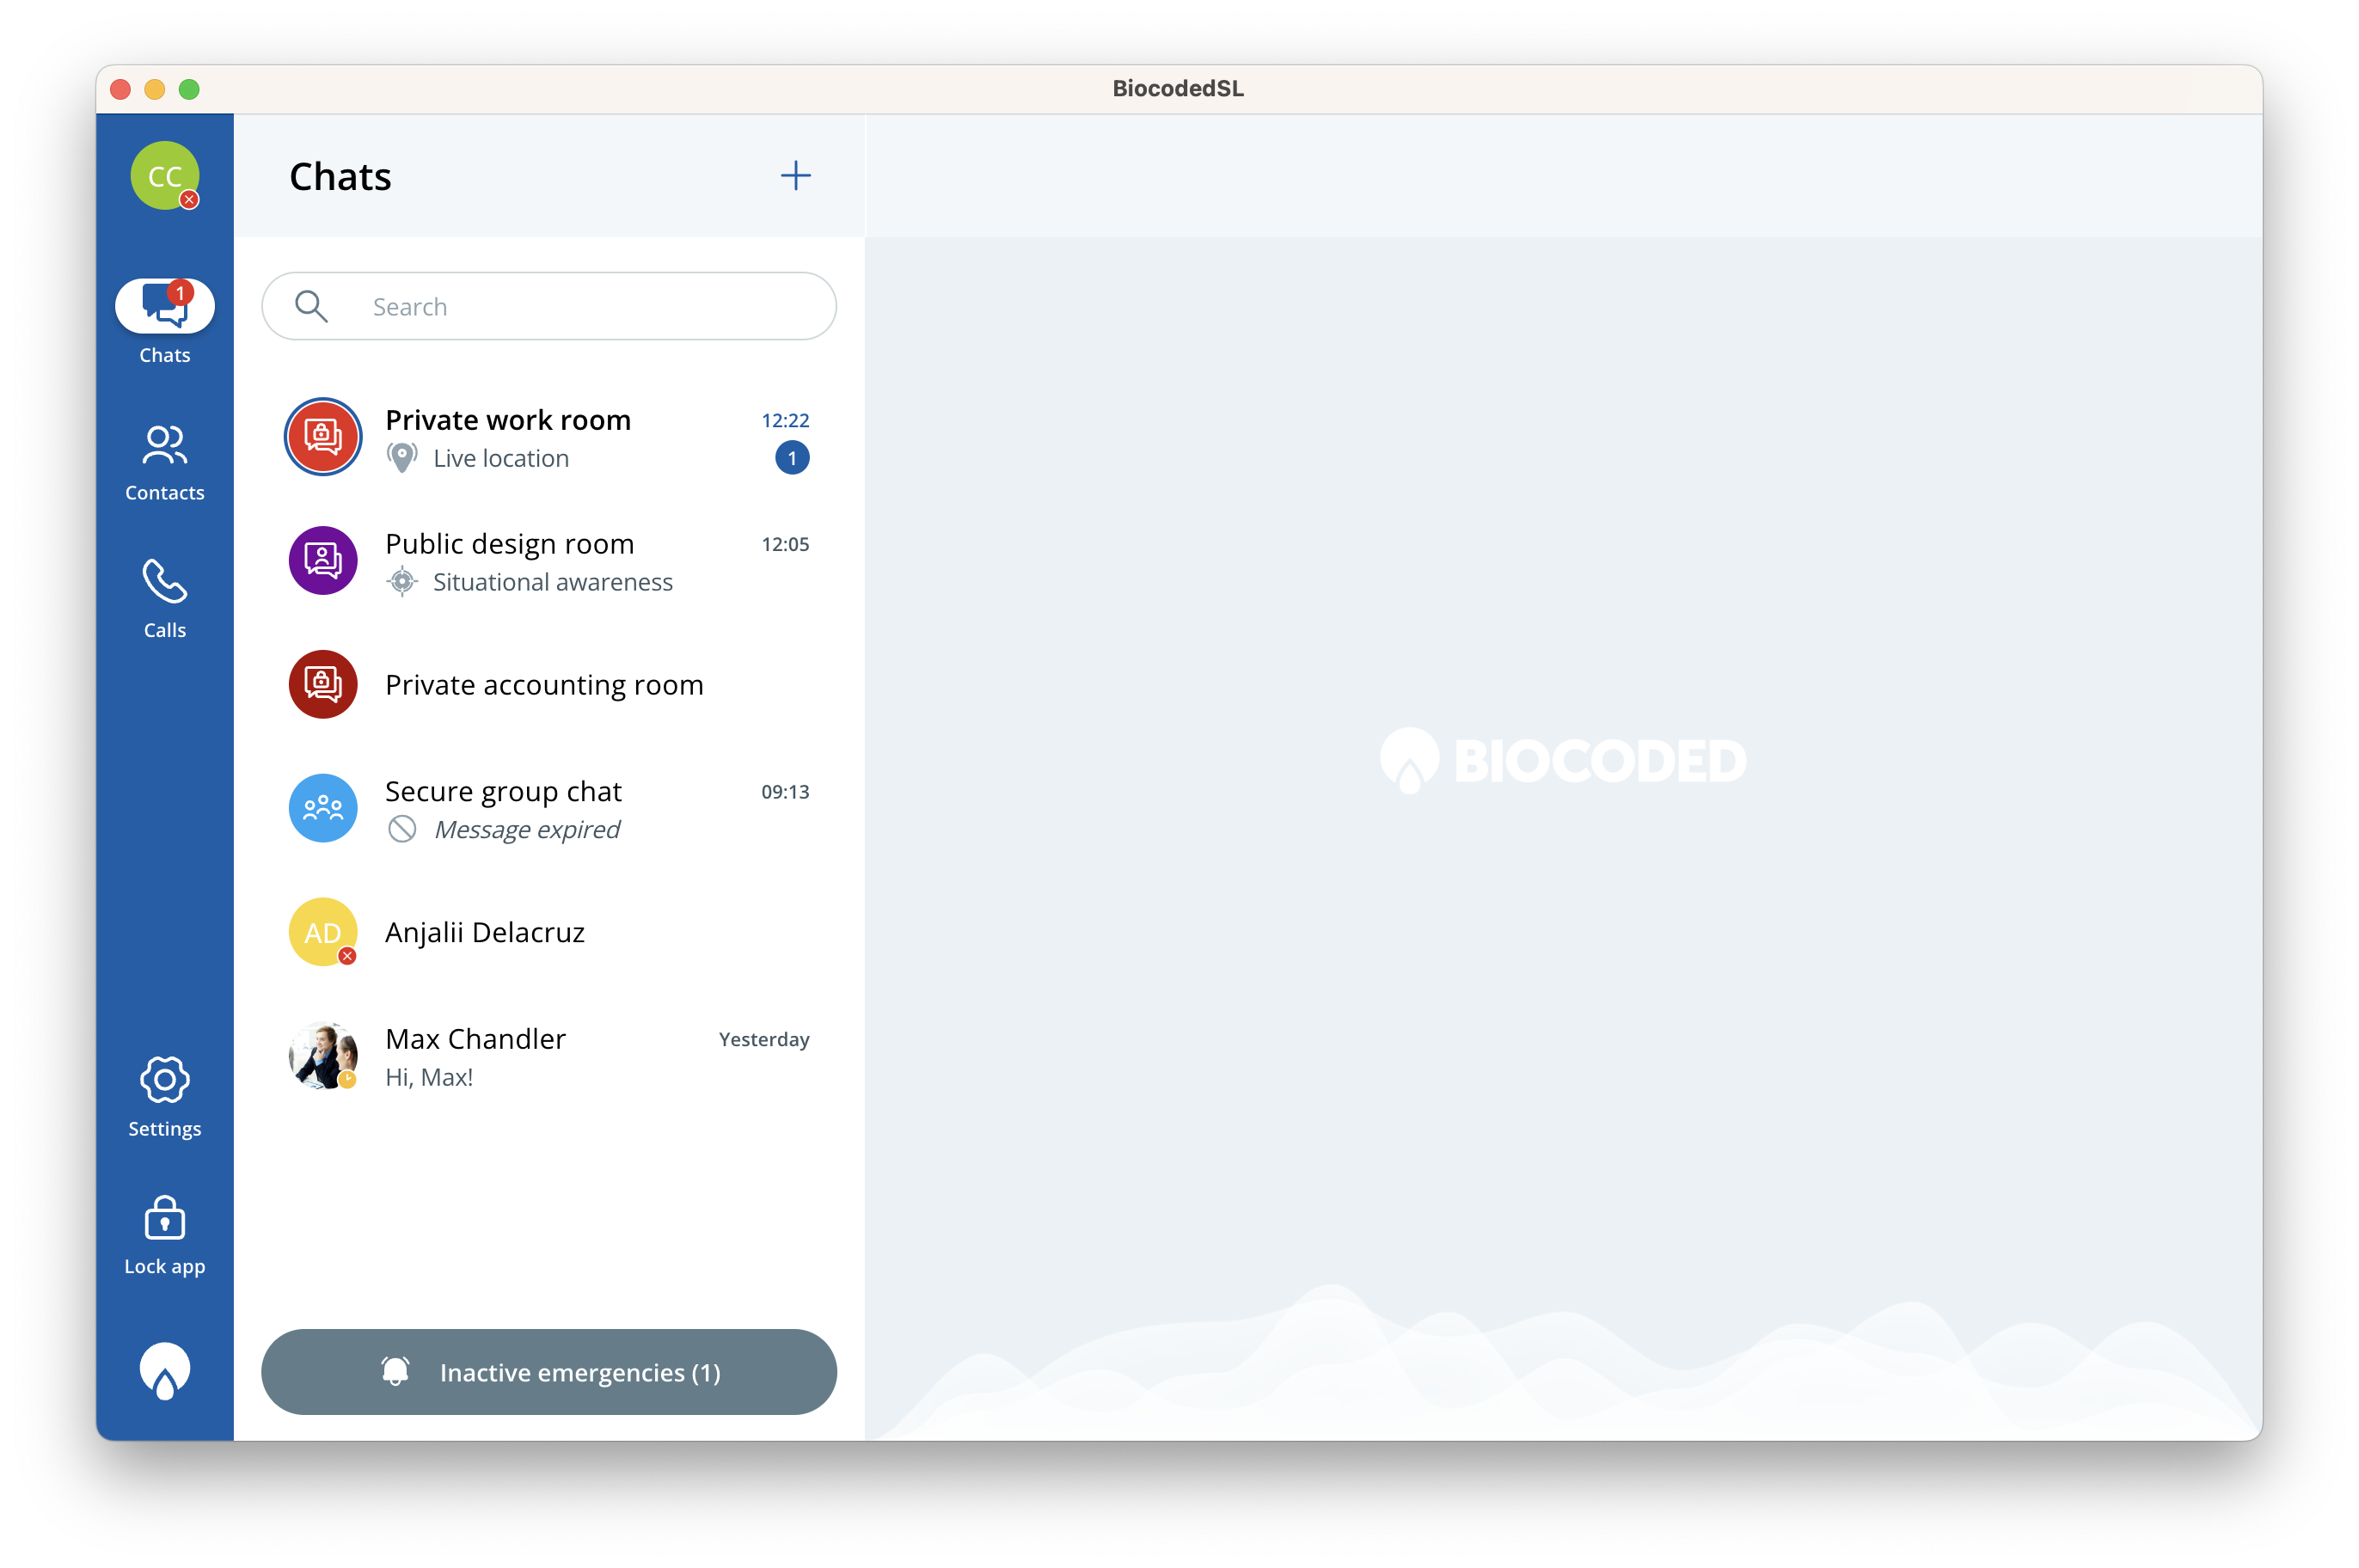
An Emergency overview map will appear showing a list of people who have triggered emergencies. You will also be able to view their emergency location and the video they sent during the emergency.
Do not disturb mode
Turn on "Do not disturb" mode by selecting your user avatar in top left part of app window and select "Do not distub". This will mute notifications for missed calls or for messages, based on your settings accessible from Settings / Notifications & Sounds/ Do not disturb.
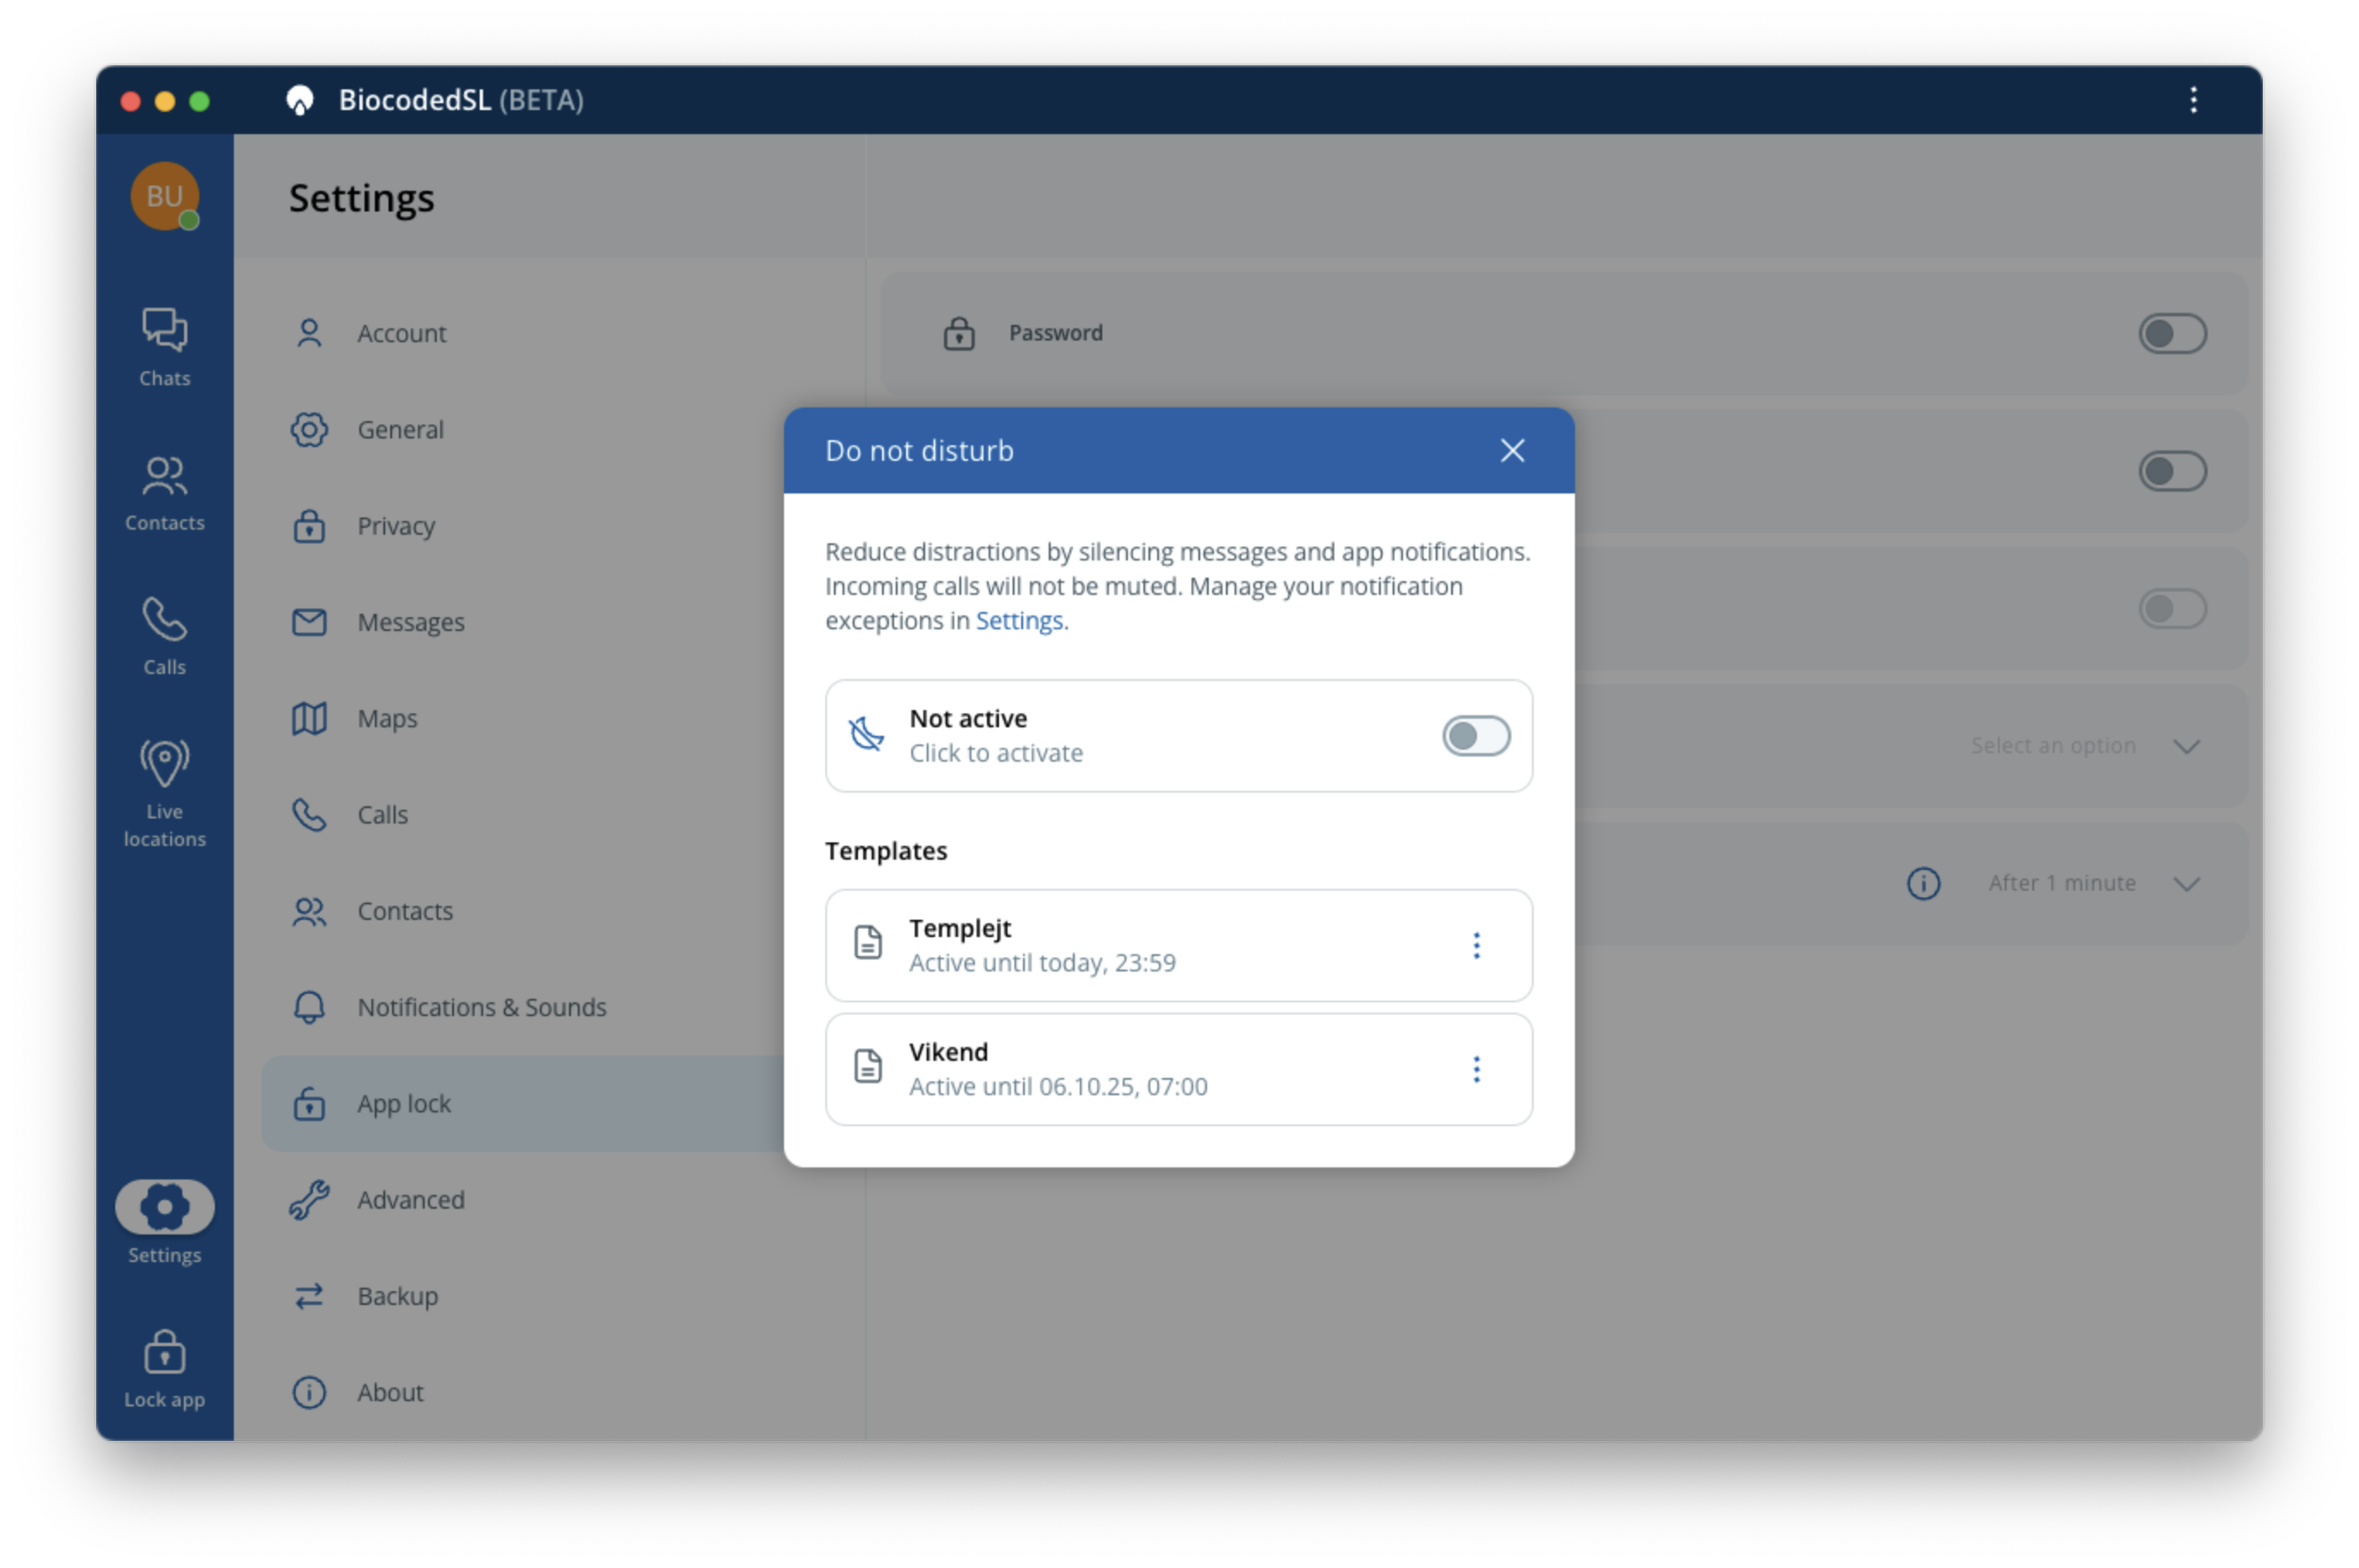
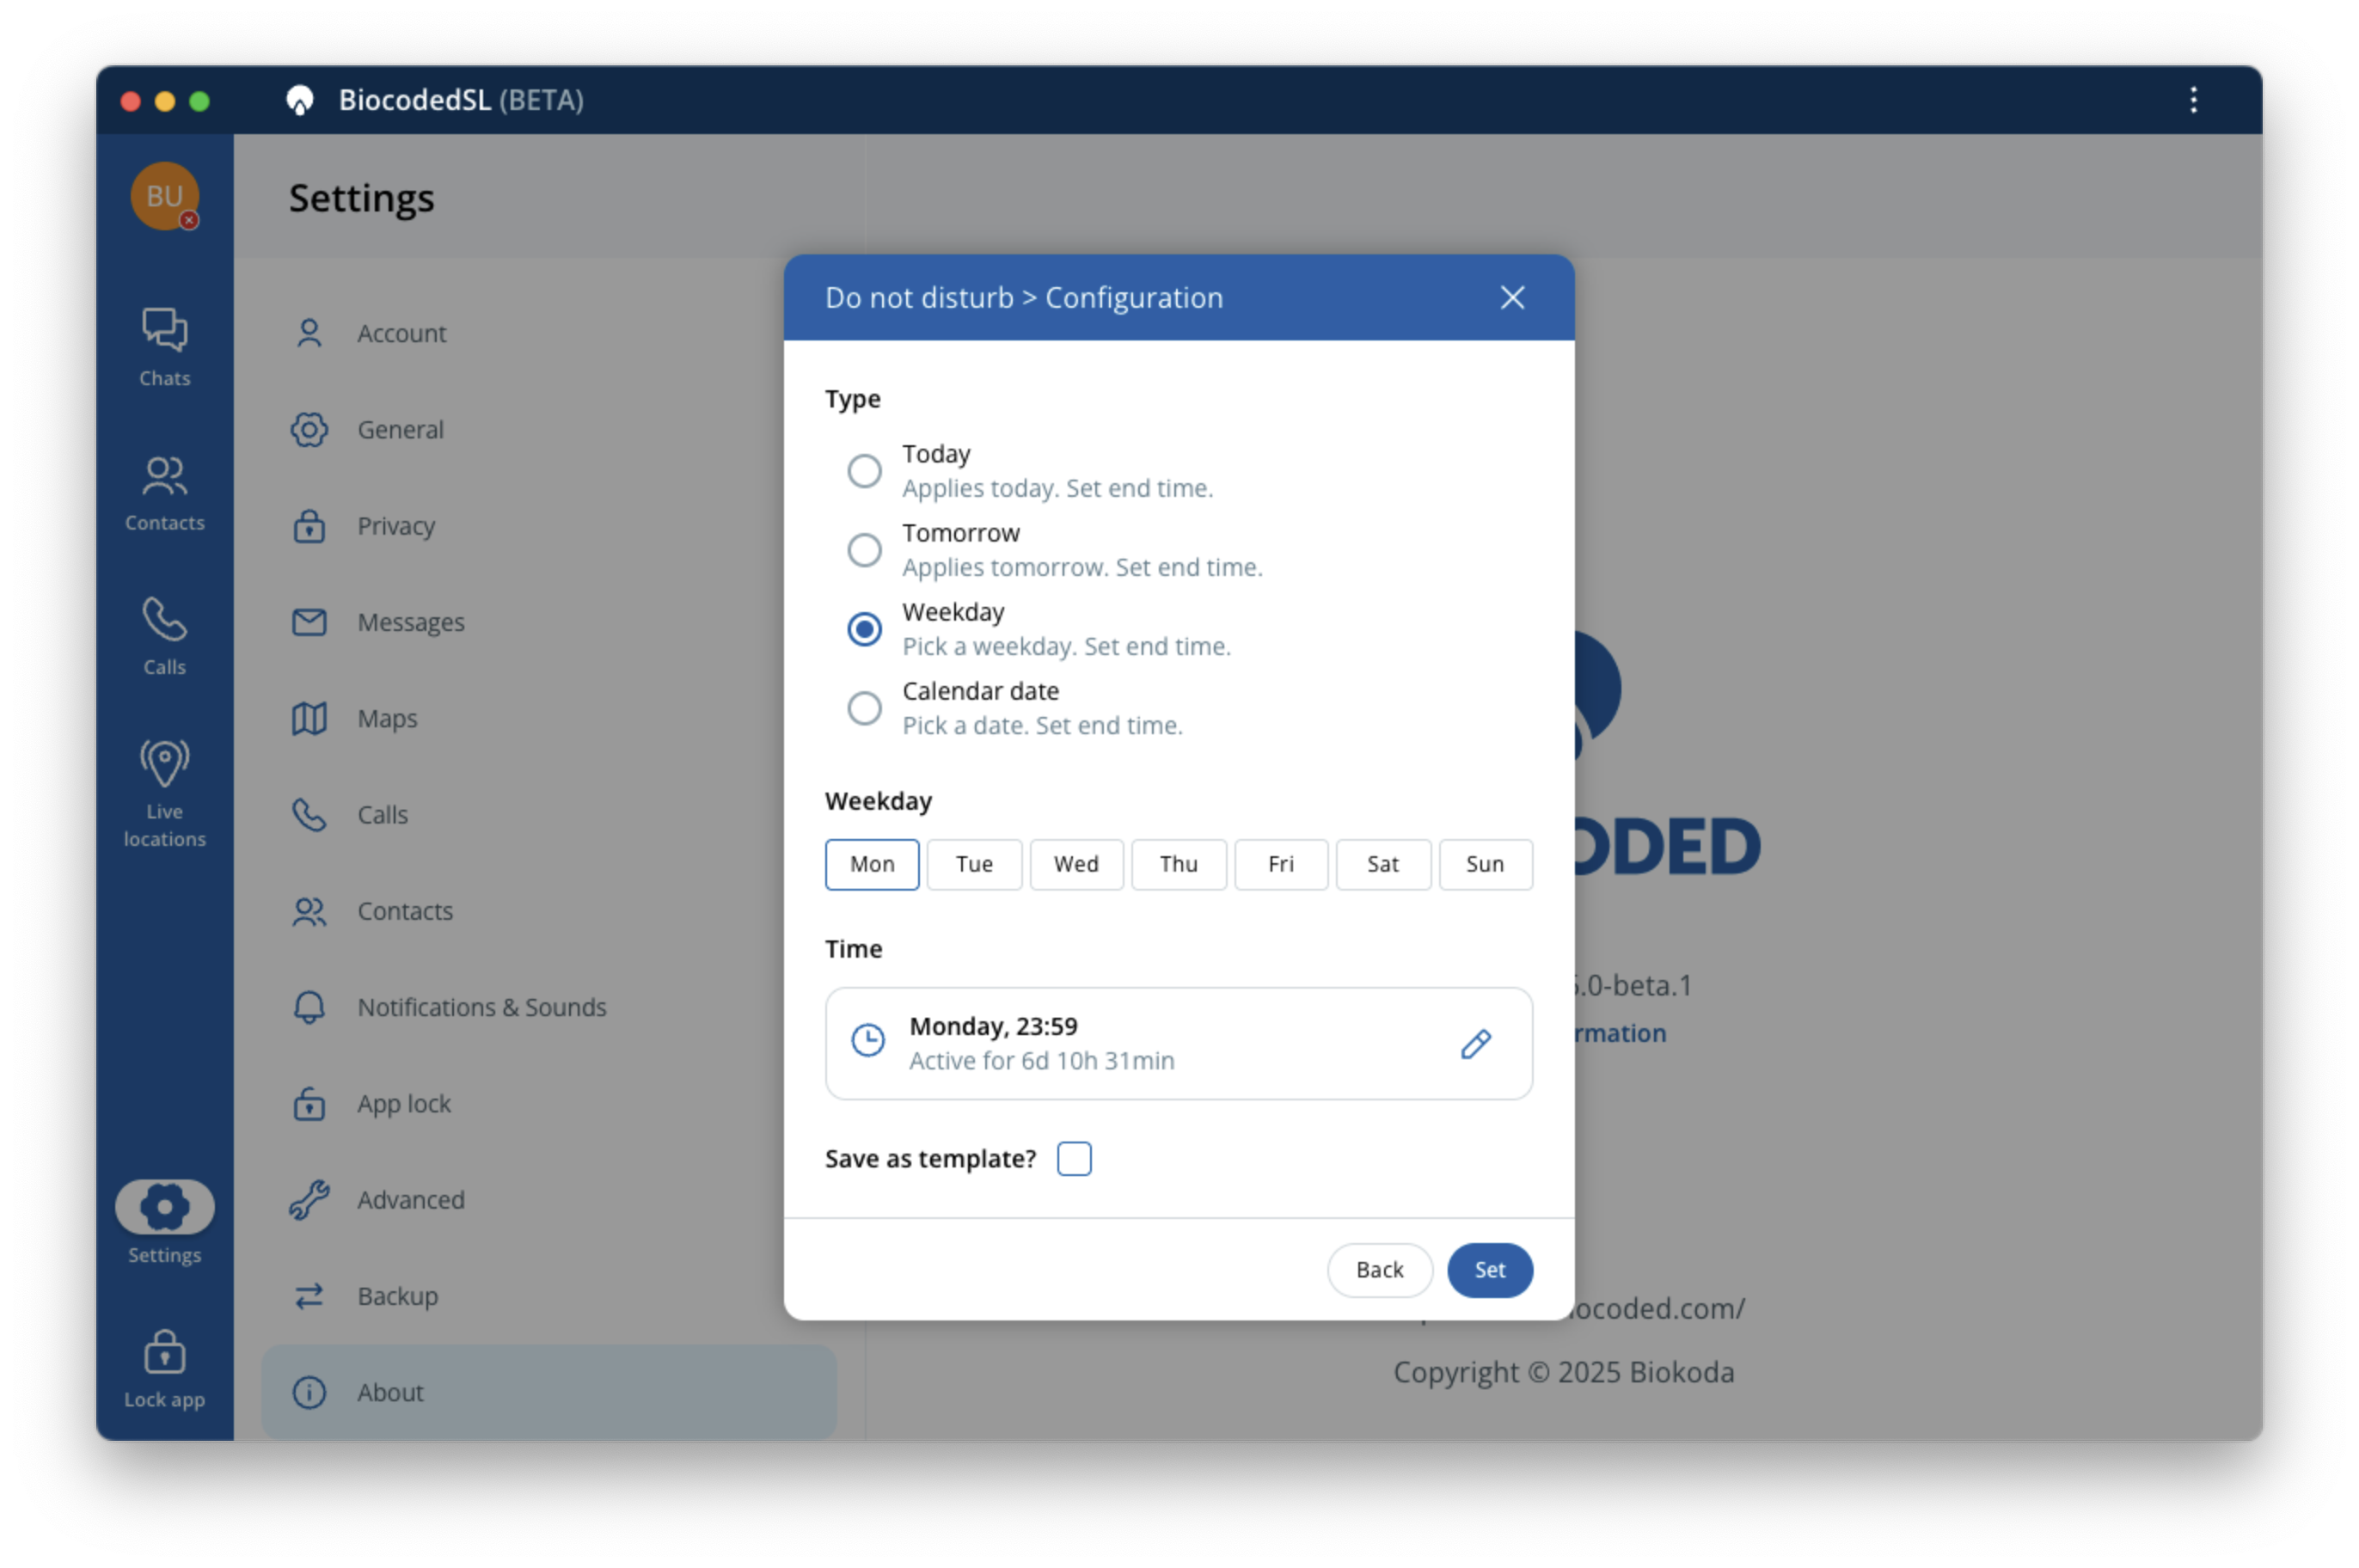
Select the time period for when "Do not disturb" mode will be turned on. You can also save your settings as a template for later use, shown on previous screen. Templates can be activated, edited or deleted later.
To turn off "Do not disturb" mode, you can click on "Turn off" on the top bar which shows up when "Do not disturb" mode is turned on or by clicking on your user avatar in top left part of app window and first selecting "Do not distub" and then clicking on the displayed switch. Changing your user status will also deactivate "Do not disturb" mode.